RSS
 

Posts Tagged ‘Ball’

Panono buyer saves the brand, will continue making its 360° ball camera

07 Jul
Panono’s high-res 360° camera lives to shoot another day.

That didn’t take long. Just a few days after announcing that the company would be bought, ending an ‘amazing but also exhausting journey,’ the Panono brand has been well and truly saved. In fact, the Swiss private equity investor who bought the company intends to continue ‘all services […] without any disruption.’

All of this happened with the last few days, marking (hopefully) the end of a tumultuous journey that began with a successful Indiegogo crowd-funding campaign and seemingly ended when Panono declared bankruptcy after delivering only about 400 cameras to backers, leaving many supporters angry and out of luck. Until Wednesday of this week, that is.

Enter Swiss-based private equity investor Bryanston Group AG, the new owner of all Panono’s assets, trademarks, patents and employees.

In a press release published Wednesday, July 5th and sent to DPReview yesterday, the investor announced that Panono GmbH will restart its business operations as Professional360 GmbH in Berlin. The company will continue all of Panono’s current services ‘without disruption,’ and is even planning to release new products and software services.

If all goes according to plan, Professional360 will establish itself as, ‘a global leader in the professional 360-degree camera market.’

Which, of course, leaves us with one very pressing question: what about all of those Panono backers left in the lurch by the company’s bankruptcy? According to a company spokesperson, Bryanston Group is actively working on a solution to that pesky problem.

“While all legal liabilities remain with the old Panono GmbH and its management,” reads the statement. “We as Professional360 GmbH feel morally obliged to find a solution that all early supporters of the Panono technology will be able to enjoy the camera as soon as possible after so many years of waiting. We are working on this and will release new information on this topic shortly.”

So it would seem Panono has been saved, and all of the backers who first supported the ‘world’s highest resolution 360° camera’ may still get a chance to vent their frustration by throwing their very own ball camera at a wall.

Press Release

Swiss private equity investor saves Panono brand, platform and product by taking over all assets and employees – all services continue without any disruption

Panono’s high-resolution 360-degree camera and services will be provided by Professional360 GmbH in the future

BERLIN, JULY 05, 2017. The Berlin-based technology company Panono GmbH, the manufacturer of 360-degree cameras and software, is insolvent as of 1 July 2017. All legal and commercial matters, obligation and disputes will be managed by Prof. Dr Torsten Martini of Leonhardt Rattunde who has been appointed as the company’s Insolvency Administrator.

Bryanston Group AG, a Swiss-based private equity investor has acquired the assets, trademarks and patents of Panono GmbH and will restart its business operations under the new holding company Professional360 GmbH in Berlin.

Professional360 GmbH will continue Panono’s technological leadership by offering the world’s highest resolution 360-degree camera under the Panono brand.

A spokesperson for the company said, “As the new management, we place great confidence in Panono’s groundbreaking technology. Our vision is to be a global leader in the professional 360- degree camera market. We will continue creating and innovating the best 360-degree cameras together with a state-of-the-art platform for our users.

In fact, we are planning to release new products and software services within the next months already. The transition from Panono GmbH to Professional360 GmbH will not be affecting the current users, as the brand and the website will not change, and we will continue to operate the existing platform. Finally, while all legal liabilities remain with the old Panono GmbH and its management, we as Professional360 GmbH feel morally obliged to find a solution that all early supporters of the Panono technology will be able to enjoy the camera as soon as possible after so many years of waiting. We are working on this and will release new information on this topic shortly.”

About Professional360 GmbH

Professional360 GmbH was founded in 2017 and is a holding company for the Panono brand, web shop, assets and employees, headquartered in Berlin. For further information please visit https://www.panono.com/en or send an email to info@panono.com.

About Panono GmbH

Panono GmbH was founded in 2012 and gained public attention in its early years, especially through its successful crowdfunding campaigns and the eye-catching spherical design of its cameras. The core business of the company was the development and distribution of high-resolution 360-degree cameras, which produce a high-resolution panorama of their surroundings using their own software solutions.

About Leonhardt Rattunde

Leonhardt Rattunde is one of the leading law firms specialised in Insolvency law in Germany. Besides its services in Insolvency Proceedings, the firm also offers turnaround management, court services, contract law and Notary Public services Berlin, Erfurt, Kiel and Cologne. Leonhardt Rattunde employs around 30 lawyers in Germany, 10 of which are Insolvency Administrators and 5 are Public Notaries.

About Bryanston Group AG

Bryanston Group is a Swiss-based global management consulting, technology and investment company. The firm’s investment angle combines an active approach with specific sector focuses where they are able to add value. Bryanston deploys its capital mainly along three verticals, which are Industrial Technology, Clean-tech and Emerging Markets middle-class. For further information please visit http://www.bryanston.ch

Articles: Digital Photography Review (dpreview.com)

 
Comments Off on Panono buyer saves the brand, will continue making its 360° ball camera

Posted in Uncategorized


Novoflex ClassicBall ball heads can be mounted upside-down for level panoramas

28 Apr

Novoflex has launched a trio of new Classicball tripod ball heads that can be mounted upside-down for producing level panoramas. The new lineup is comprised of the CB 2, CB 3 II and CB 5 II models, each able to accommodate cameras and gear weighing up to 5kg/11lbs, 8kg/17lbs and 12kg/26lbs, respectively. All three models feature a leveling bubble built into the base of the mount.

According to Novoflex, all three new Classicball models are compatible with all ‘common’ tripods, and each can be used with optional quick-release accessories. A lever on the side of the ball head clamps the camera into position; users can also adjust the friction using the blue 5-stop friction dial. Each model features a trio of 90-degree openings for positioning the camera fully backward, forward, and to the side. The ball head’s design allows for 360-degree rotation, including in reversed (upside-down) mode, which itself supports optional L-bracket, plate and quick-release accessories.

The new Classicball models are available on Novoflex’s website now for $ 495 (CB 2), $ 475 (CB 3 II) and $ 692 (CB 5 II).

Via: DIY Photography

Articles: Digital Photography Review (dpreview.com)
 
Comments Off on Novoflex ClassicBall ball heads can be mounted upside-down for level panoramas

Posted in Uncategorized


How to Create Glass Ball Landscapes – 6 Techniques

29 Dec

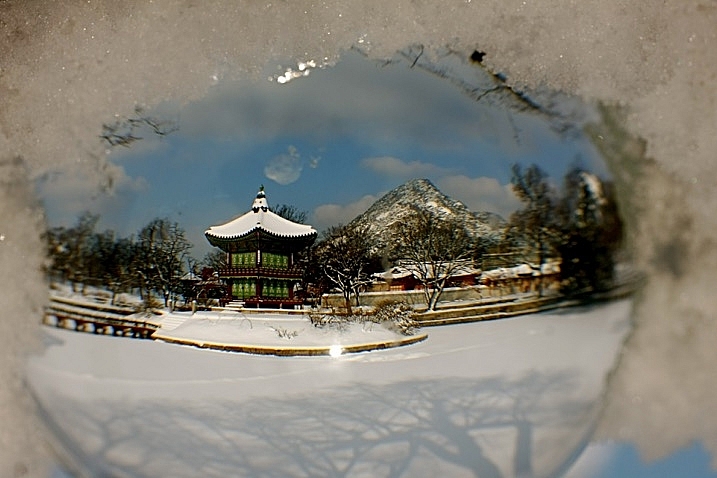
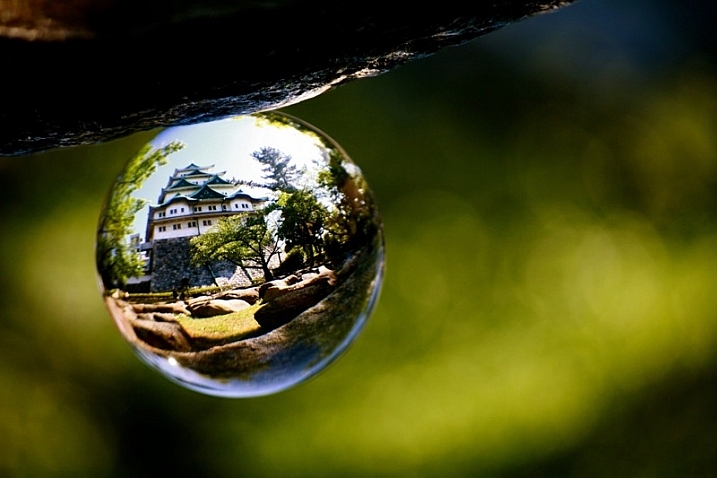
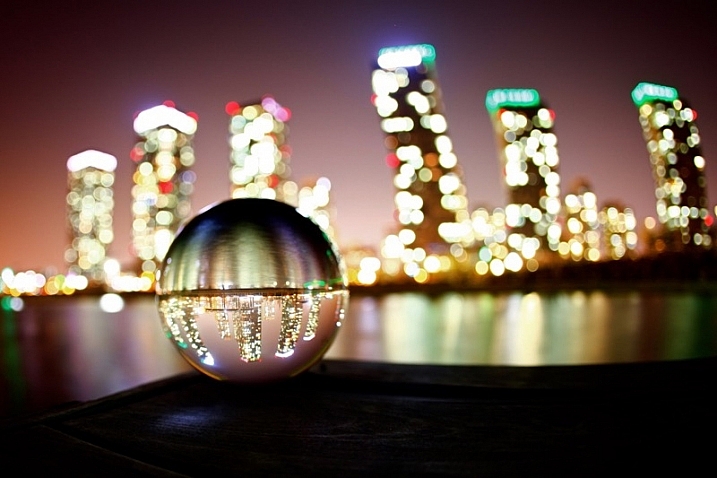
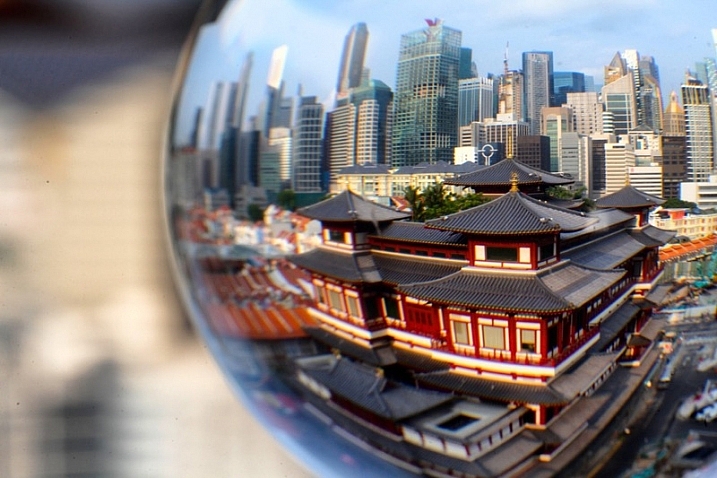
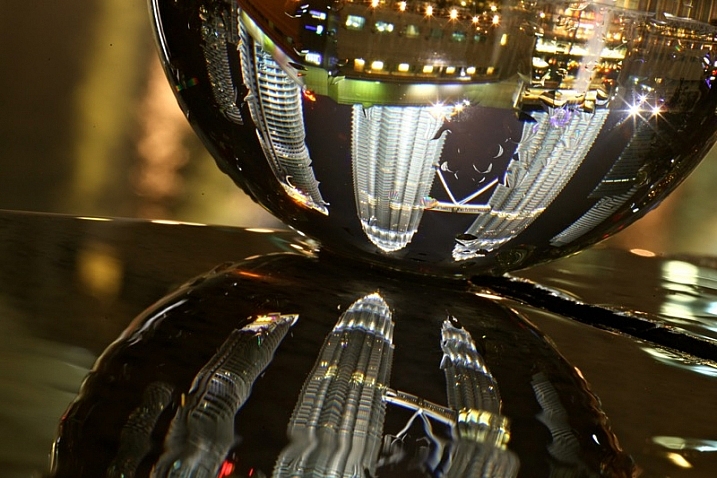
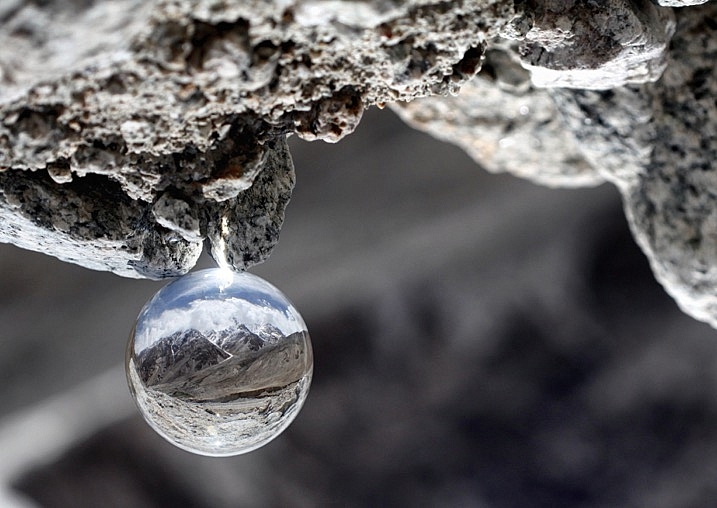
In photography, creative inspiration can often come from trying something new and photographing a scene with that technique. Creating glass ball landscapes is one example of this, as it allows you to capture a fish-eye like scene, using a telephoto lens. The glass ball creates a mystique, as many people associate looking into a crystal ball with seeing into the future. However, visions inside a glass ball are easy to achieve with a few simple steps!

How to take landscape photos with a glass ball

img_8070-copy

In order to get good landscape photos with the glass ball, you’ll need to apply some basic rules, an understanding of the science at work also helps. If you read my previous article on crystal ball photography you will already be familiar with the 7 steps you can follow to take this type of image. Here’s a quick recap:

  1. Choose a scene that you’d normally shoot with a wide angle lens.
  2. Photograph this scene with the sun behind you, lighting up the scene you wish to shoot.
  3. Place the ball somewhere it won’t fall.
  4. Compose your scene with the glass ball in it.
  5. Ensure the horizon lines inside the ball and in the background match.
  6. Focus the camera on the scene inside the ball, which is best achieved using live-view and manual focus.
  7. Use an aperture of around f/4 as this will keep the ball sharp and the background blurred.
  8. Take the photograph, and repeat if you’re not happy with the sharpness inside the ball.
  9. Rotate your image in post-processing so the scene in the ball isn’t upside down. In some cases, you can skip this step.

Alternative glass ball landscapes, and how to compose them

It’s easy to get it in your mind that every scene or situation needs a crystal ball photo. This is not the case and careful consideration needs to be taken when selecting the photograph you’ll take. The most important thing to do is find a compelling subject that shows prominently inside the glass ball. Once you have this basic parameter established below are some differing ways you can compose your glass ball landscape photograph.

1 – The classic composition

Glass ball landscapes use the rule of thirds. This classic composition shows the entire ball and was shot at 100mm.

Glass ball landscape using the rule of thirds. This classic composition shows the entire ball and was shot at 100mm.

In this type of composition the ball fills the majority of the frame, with the entire edge of the ball visible. This will lead to glass ball landscapes that have an immediate impact and areas to the side of the ball that are blurred out and minimalist in nature. This type of image is most easily taken with a macro or telephoto lens with an aperture of f/4 to create the nice bokeh around the ball.

2- Get in close

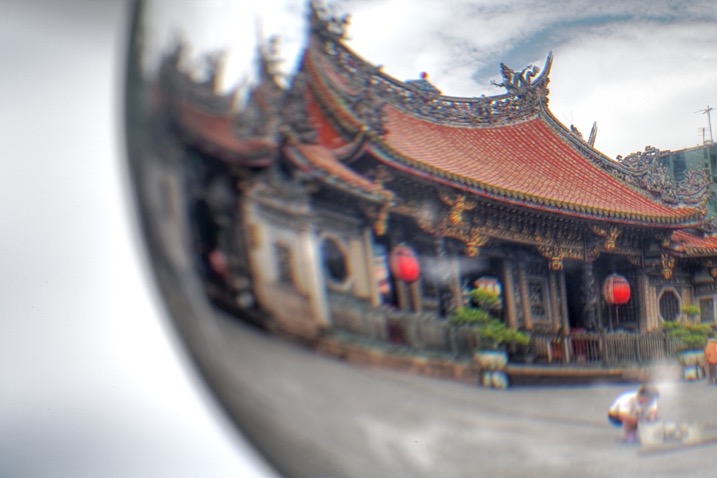
Getting closer to the glass ball will emphasize the scene within the ball, this also entails framing that cuts some of the edges of the ball away. A centered composition with both the top and bottom part of the ball can work here, this has the advantage that top and bottom parts of the scene cannot be easily deduced. The other composition follows the rule of thirds, with the edge of the ball showing in the left or right third of the image.

glass ball landscape photography

A closer crop focuses the eye more on the image in the ball.

3 – Give the ball a bit of space

There are many ways to photograph the glass ball, and using a wide-angle lens with this technique can be very effective. In this case, you want the background scene to be minimalist, with the ball becoming an accent in the scene. The scene will not likely be rotated during post-processing, so compose to the scene in the background. In this type of the photo, the ball and the landscape scene should form a balanced composition.

A wider angle of 20mm is used here. The ball is an accent within this frame.

A wider angle of 20mm is used here. The ball is an accent within this frame.

4 – Take it to the high life

Glass ball landscape photographs

Gaining access to the rooftop provided a great vantage point.

As with all landscape photos, a high vantage point for glass ball images works well. Gaining access to a high building overlooking a city, or climbing a hill are both good options. Once at your high vantage point find a good position to place the ball, so you can see the landscape inside it. You need to ensure the ball will not fall, be very careful with its positioning.

5 – Don’t forget the view from the floor

Apartment buildings in Busan, South Korea. This photo shows a glass ball being held by hand.

The view looking up can be just as good as the view looking down.

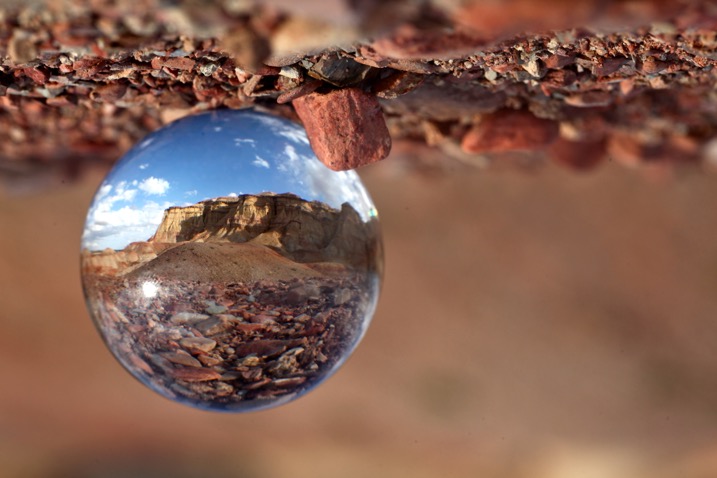
Deserts and canyons make for great locations to photograph with the ball. In this photo the ball is place on the ground, the stones in the foreground add a nice element to this photo.

In this photo the ball was placed on the ground, the stones in the foreground add a nice element to this photo.

Placing the ball at street level doesn’t always work, as half the scene will be taken up by the ground. That said there are several situations that really work well with the ball on the ground.

  • The ball is ever so slightly higher than the rest of the scene, so it might be at the top of an undulation.
  • There is a reflection in the scene from a marble surface or a puddle.
  • The ground is an appealing element of the photo because it’s a leaf bed for example.

6 – The human element

A friend holding the ball in position is an alternative to putting the ball on the ground.

A friend holding the ball in position is an alternative to putting the ball on the ground.

The glass ball landscapes are not always best suited to having people in them. The blurred background may look less appealing with a human shape included in it. There are a couple of ways to humanize your image, though, while still maintaining a minimal feel.

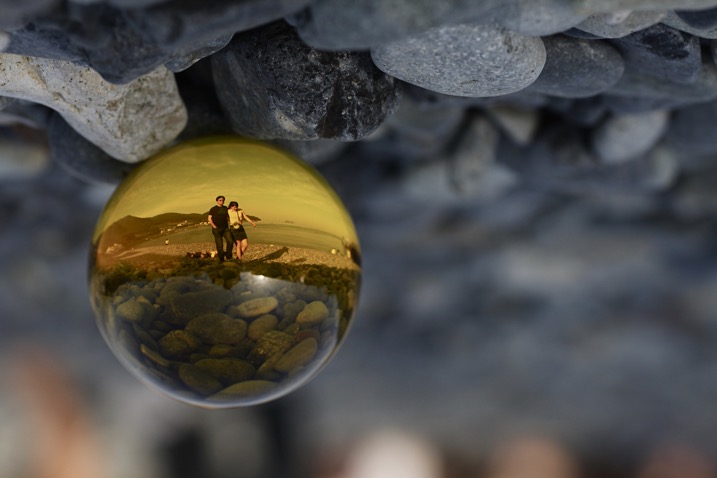
  • You eclipse the people inside the ball. Use a long telephoto lens, compression will cause people to appear inside the ball. The background will be clean without the shapes of people in it (as below).
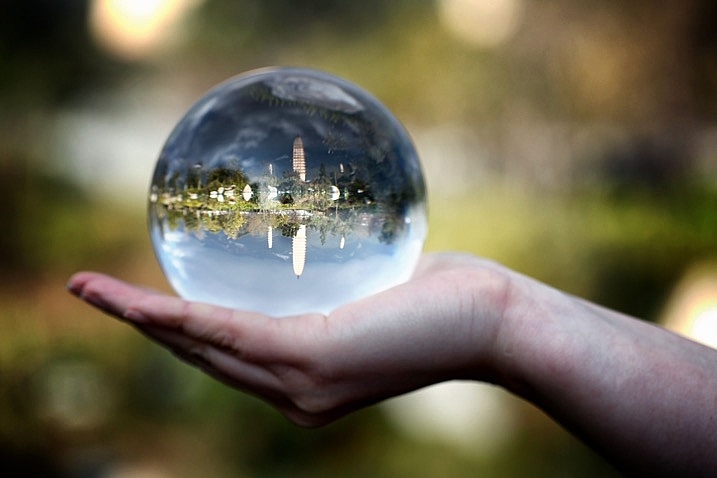
  • You take the photo, and someone else is holding the ball. The hand is the human element of this photo, with the landscape still inside the ball (as above).
glass ball landscape photography

Photographing people inside the ball is tricky, but not impossible.

Where to try this technique

The places you’d visit for regular landscapes will also work for glass ball landscapes. The rooftops of tall buildings in cities work very well or a worm’s eye view from street level can be just as good. The beach or the desert are excellent options due to the minimalist nature of those locations.

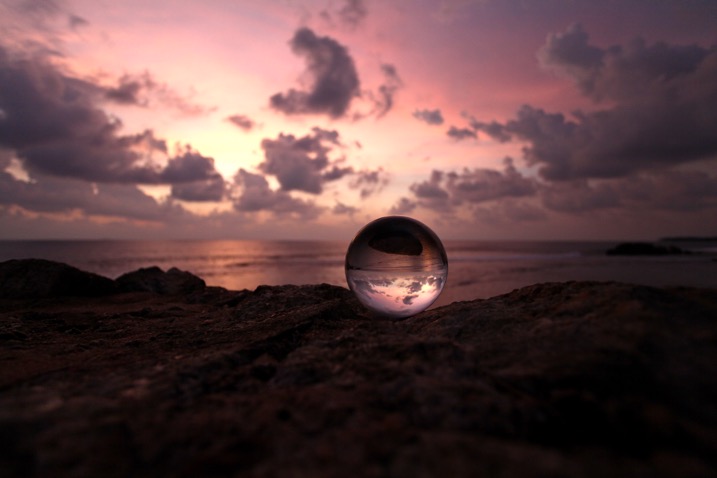
Sunset photos at the beach with the glass ball are one of the classics in this genre of photography. Mountains and forests make for good locations as well. A lone tree can be a nice subject, as can lines of tree trunks inside the glass ball. Up in the mountains, you can easily fill the scene inside the ball with a large peak jutting up into the landscape.

The snow globe is a well known souvenir gift, which the glass ball can replicate.

The snow globe is a well-known souvenir gift, which the glass ball can replicate.

Getting out with the glass ball

In my last article on refraction I linked to a site selling an 80mm glass ball, this is a great option though it can be heavy to carry. You can also use a smaller ball for many situations, and when you are carrying a heavy bag of camera gear this is a good idea.

Once you have a glass ball it’s best to dive in and see what works best for you. I’d love to see more examples of your work, it was great to see so many pictures last time. One final tip, be careful in the sunlight with the ball. The glass ball acts as a magnifying glass with the sun’s rays and can burn you, or your property.

googletag.cmd.push(function() {
tablet_slots.push( googletag.defineSlot( “/1005424/_dPSv4_tab-all-article-bottom_(300×250)”, [300, 250], “pb-ad-78623” ).addService( googletag.pubads() ) ); } );

googletag.cmd.push(function() {
mobile_slots.push( googletag.defineSlot( “/1005424/_dPSv4_mob-all-article-bottom_(300×250)”, [300, 250], “pb-ad-78158” ).addService( googletag.pubads() ) ); } );

The post How to Create Glass Ball Landscapes – 6 Techniques by Simon Bond appeared first on Digital Photography School.


Digital Photography School

 
Comments Off on How to Create Glass Ball Landscapes – 6 Techniques

Posted in Photography


Mobile Remix: Cement Mixer Disco Ball Turns Streets into Night Clubs

16 Dec

[ By WebUrbanist in Art & Installation & Sound. ]

cementitious

Cladding a cement mixer in pixelated mirror squares, a French artist has created a giant glittering disco ball on wheels able to turn vacant lots and construction sites into instant party zones.

disco-party-ball

Benedetto Bufalino often adds fun to the mix when working with interactive and installation pieces (unusual sports courts and strange phone booth conversions), for instance, but rarely in quite such a dramatic way.

Parked for a time next to a building site in Lyon and given its own spotlight, the artist’s remixed mixer spins up and casts light in all directions. The idea driving the project is simple: bring together locals and passing pedestrians to mix and meet in the resulting rays.

cement-mixer

cement-mixed

Of course, it doesn’t hurt that the entire setup is mobile — for guerrilla party throwers, the mixer can set up shop then move if complaints mount or authorities arrive. Or it can simply cruise slowly down the street, making for a truly and permanently portable party.

mixer-under-construction

mixer-in-garage

mixer-by-day

Meanwhile, when not at work hosting parties, the vehicle can carry and pour concrete as usual — like many urban residents, it is a worker by day but a partier by night.

Share on Facebook


[ By WebUrbanist in Art & Installation & Sound. ]

[ WebUrbanist | Archives | Galleries | Privacy | TOS ]


WebUrbanist

 
Comments Off on Mobile Remix: Cement Mixer Disco Ball Turns Streets into Night Clubs

Posted in Creativity


7 Tips for Doing Crystal Ball Refraction Photography

15 Nov

You’ve have heard of reflections in photography, but have you have tried refraction? When used well, refraction creates compelling images that will leave your audience both wowed and curious. I’ve been approached many times by strangers who are curious about how I photograph with a glass ball. Once you’ve mastered this type of photograph you’ll likely get the same audience. Here are some tips to help you do crystal ball refraction photography.

Doing Crystal Ball Refraction Photography - house inside glass ball

The subject shows prominently in the ball, and around the ball is bokeh.

So what is refraction?

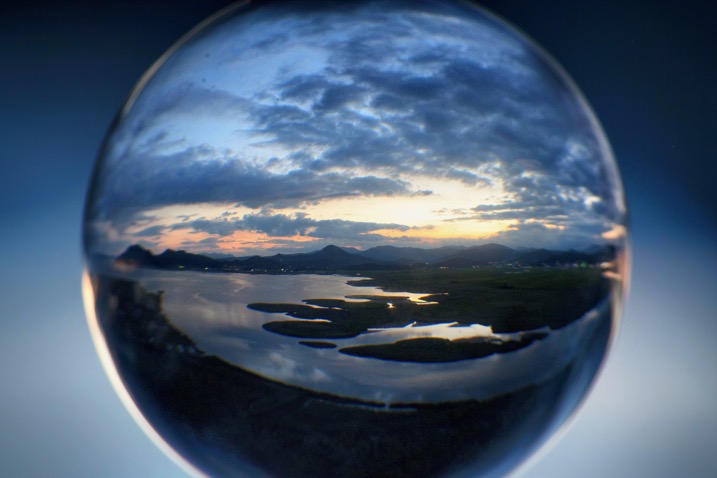
Refraction happens when light passes through an object of denser mass, such as water or glass. When this occurs, light is bent, and there is a distortion. When refraction occurs with a transparent spherical object something magical happens. An inverted image of the scene behind the ball is seen. The lens elements in your camera actually work this way as well. You can use a glass ball as an extra lens element, one you can move around your scene.

Doing Crystal Ball Refraction Photography

How to do refraction photography

Now you know what refraction is, it’s time to learn how to apply it to your photography. If you follow the guide below you won’t go far wrong with this type of photography.

#1 – Dealing with the upside down image

There are instances where it works to have an upside down image in the background or inside the ball. If you want to avoid this, the best way to deal with an upside down background is to blur it out using bokeh. An alternative to blurring out the background is to use reflection since the reflected image will be the right way up inside the ball.

Doing Crystal Ball Refraction Photography - The image inside the ball will be upside down.

The image inside the ball will be upside down.

#2 – Get above your subject

You should get the ball off the ground so it’s level with the subject you’re photographing. A centered subject in the ball will have less distortion and more impact in the frame. There are always exceptions, of course, as leaf beds or puddles work well when the ball is placed right in them.

#3 – Fill the glass ball with your subject

You have to get close to your subject, or it (they) will appear very small inside the ball. The best advice I can give here is to see if your scene would fill a wide angle lens. If so you’re gold.

Doing Crystal Ball Refraction Photography

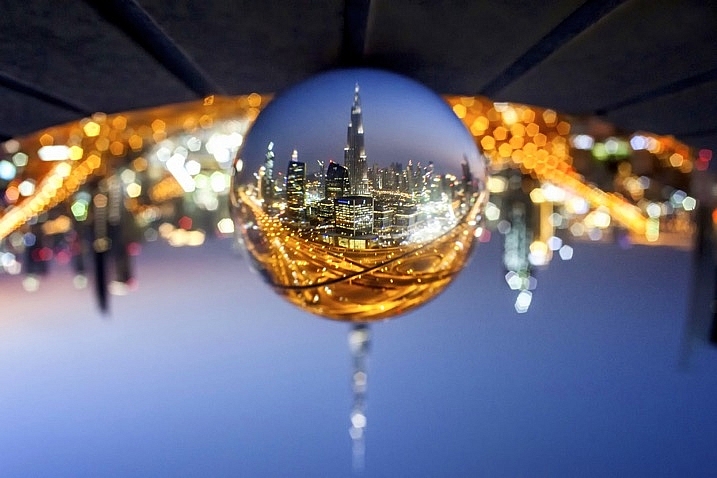
In this photo, the cityscape is captured inside the ball, and a closer framing was employed.

#4 – Choose the correct lens

The best option here is to use a macro lens or a telephoto lens with macro capability. The macro lens will allow you to get close to the ball, making it easier to create bokeh around the ball. Using a wider angle lens can also work if your scene allows it.

#5 – Choose the correct aperture

You need to get the correct aperture for your scene. An aperture that’s too small won’t blur out the background. One that’s too large will make it hard to get a sharp image inside the ball. I would choose an aperture of around f/4, it depends on the scene you are photographing, though.

Doing Crystal Ball Refraction Photography

One of the best ways of dealing with the upside down image is to use reflection in the photo.

#6 – Find a safe place to position the ball

This is very important, especially if you are photographing from a high vantage point. The ball needs to sit on a flat surface, finding a crevice to sit the ball on is better. Once you have placed the ball ensure it isn’t going to fall and keep your hands near it during this time.

If there is no place to rest the ball you can ask a friend if they’ll hold the ball for you. You need to be especially careful on a windy day, a strong gust of wind can move the ball if it’s not in a secure position.

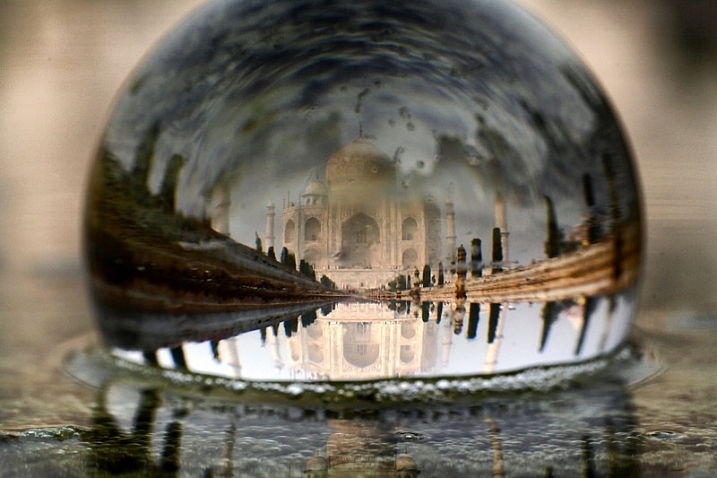
In this photo of the Taj Mahal there is reflection in the background, and this reflected image is in fact upside down.

In this photo of the Taj Mahal, there is a reflection in the background, and this reflected image is in fact upside down.

#7 – Lighting the subject in front of the ball

You should have a well-lit subject in any kind of photo, but it’s even more important with refraction photographs. A strongly lit subject will shine through the ball with less reflection appearing on the ball. Look to photograph when the sun is behind you or during blue hour shooting towards lit buildings.

Refraction photography versus a standard landscape

A lot of locations that suit refraction photography with a glass ball will also be good for regular landscapes. The question is why photograph a refraction photo when you could take a wide-angle shot of the same scene? Let’s take a look at some of the pros and cons of crystal ball refraction photography.

Pros of refraction

  • A glass ball is cheaper than a lens and allows you to create a fish-eye like effect.
  • You can move the ball to different positions in your scene.
  • Using a large aperture in conjunction with the ball to create bokeh, is great for minimalism.
  • Scenes created with a crystal ball often have a more artistic feel.
  • The ball creates a natural frame for your photo.
Images that work well as a wide angle photo also work well inside a crystal ball.

Scenes that are well suited for a wide-angle photo also often work well inside a crystal ball.

Cons of refraction

  • The larger glass balls are heavy to carry, in an already heavy camera bag.
  • You need a macro lens, something a landscape photographer may not normally carry.
  • Distortion on the edge of the ball.
  • It’s difficult to get a sharp image inside the ball.
  • The image in the ball is upside down.
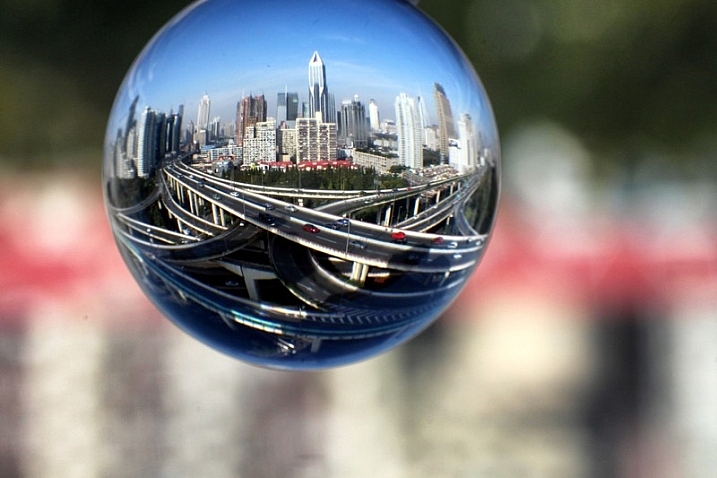
This is a wide angle photo of a famous road junction in Shanghai.

This is a wide angle photo of a famous road junction in Shanghai.

The choice of taking a glass ball is yours to make, I highly recommend experimenting with it, though.  The pros really outweigh the cons, and following the tips in this article will help. You may also find weight an issue, so I recommend scouting a location before shooting with the ball. Then return for a second visit with just the equipment you need to take the photo, this will reduce the weight somewhat.

Experiment with the ball

The first thing you’ll need of course is a crystal ball, you can buy them easily through amazon for 27$ . While you wait you can try filling a wine glass with water, you’ll get the refraction effect this way too.

Now you’re ready to get started, so head to a local landmark and start experimenting. The list of subjects is really endless; you can start with a lone tree, a church, or a cityscape scene. If you have any photos that show refraction please add them to the comments below, it would be great to see them.

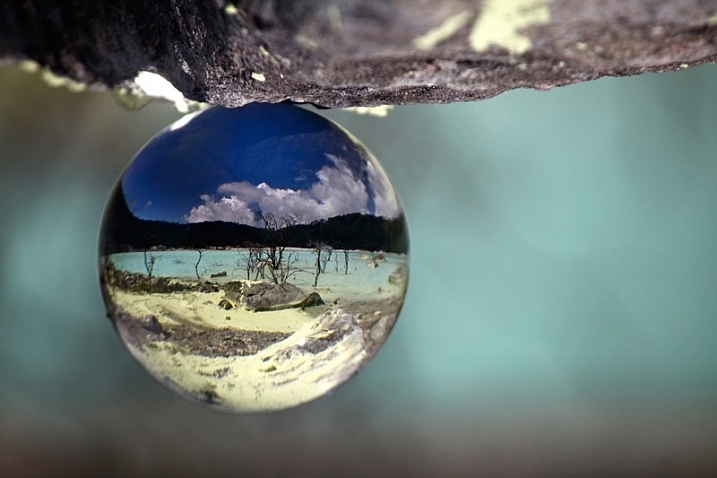
Natural landscape look great inside the ball. This is a volcanic lake found in Indonesia.

Natural landscapes look great inside the ball. This is a volcanic lake found in Indonesia.

googletag.cmd.push(function() {
tablet_slots.push( googletag.defineSlot( “/1005424/_dPSv4_tab-all-article-bottom_(300×250)”, [300, 250], “pb-ad-78623” ).addService( googletag.pubads() ) ); } );

googletag.cmd.push(function() {
mobile_slots.push( googletag.defineSlot( “/1005424/_dPSv4_mob-all-article-bottom_(300×250)”, [300, 250], “pb-ad-78158” ).addService( googletag.pubads() ) ); } );

The post 7 Tips for Doing Crystal Ball Refraction Photography by Simon Bond appeared first on Digital Photography School.


Digital Photography School

 
Comments Off on 7 Tips for Doing Crystal Ball Refraction Photography

Posted in Photography


The 3Pod P3COR Tripod and SH-PG Ball Head Review

06 Mar

In one of my previous articles, while reviewing the Nitz Strap heavy-duty camera strap, I mentioned that straps fall into the category of accessories most of us photographers hate to spend money on. We know that we need them, and we know that we usually get what we pay for, but our minds don’t connect the piece of hardware that doesn’t technically take the image we’re capturing, and the image itself.

Tripods seem to fall in that category as well. We know that a sturdier tripod can lead to a sharper, clearer image, yet we cringe at the thought of dropping $ 200, or more, on one. My first tripod was a wobbly Velbon50 that I picked up for $ 10 at a local garage sale. It helped me along through my first landscape images, but I didn’t actually think about the fact that my images could suffer from using unsturdy equipment.

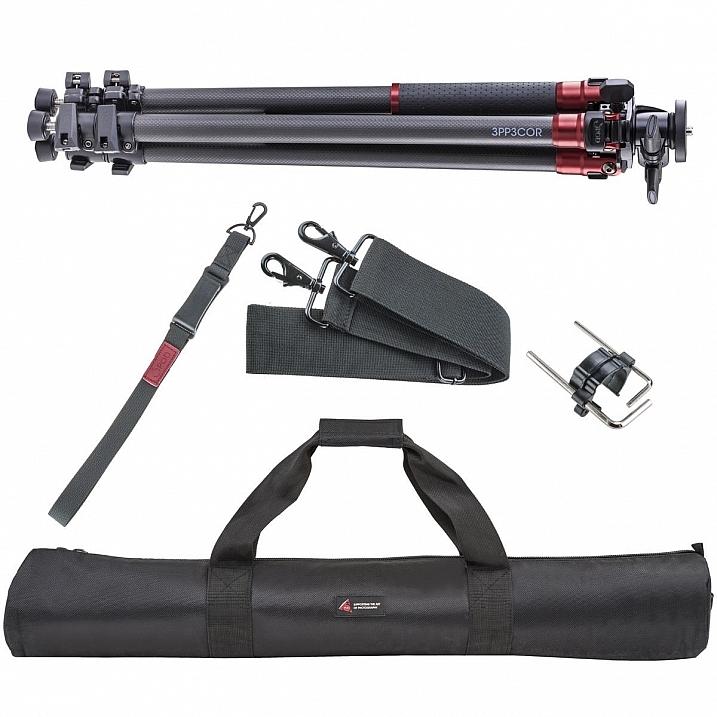
3pp3cor_12

Image courtesy Adorama and 3Pod

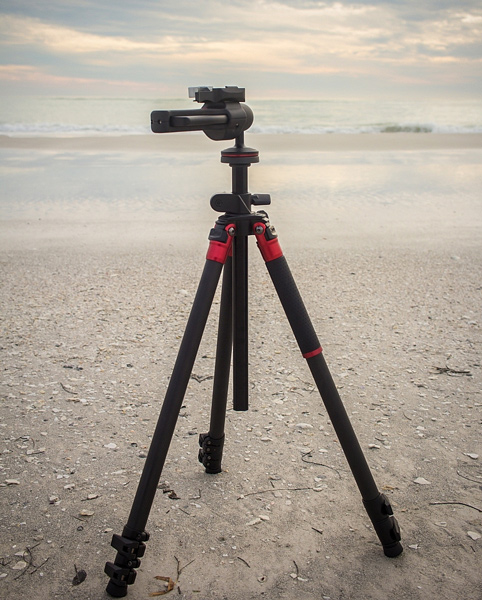
Of course, the images from less sturdy tripods can be perfectly acceptable, and you can make the argument that there are some excellent tripod setups to be had for $ 100 or less. But, once you’ve used a beast of a piece of hardware, such as the 3Pod Orbit 3 Carbon Fiber setup I’ll be discussing here (see photo above), it’s really hard to go back, and makes you wonder why you didn’t buy something this solid in the first place.

When I received my tripod (Orbit 3 Section Carbon Fiber, P3COR) and head (Pistol Grip Ballhead, SH-PG) from 3Pod, the first thing I noticed was the heft. Pulling the tripod itself out of the box, I got the feeling I was handling a piece of military equipment – tough and rugged.

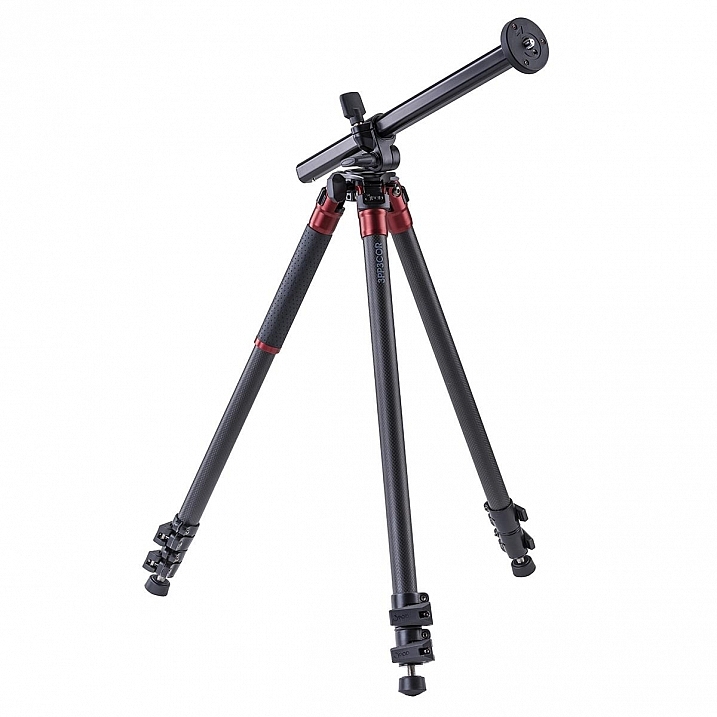
3pp3cor

Image courtesy Adorama and 3Pod

The tripod weighs in at 4.25 lbs. (1.9kg), while the head was a considerable 1.85 lbs. (0.84kg) so it’s clear from the beginning, this isn’t a nimble photographer’s setup. The P3COR is meant to be an absolute oak, to mount heavy camera and lens combinations on top of, without so much as a wobble. Carbon fiber is the material choice (lighter and sturdy, but more costly) for this tripod, as opposed to the usual aluminum setup.

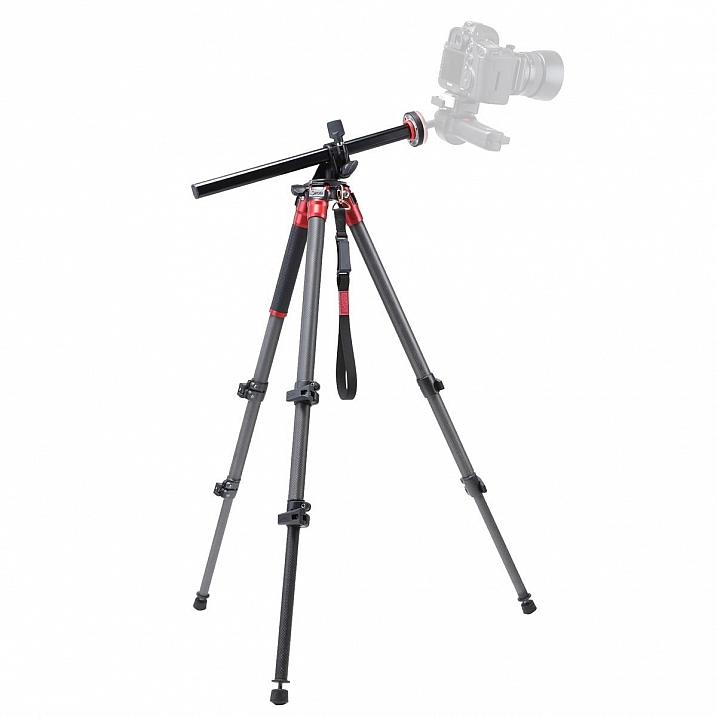
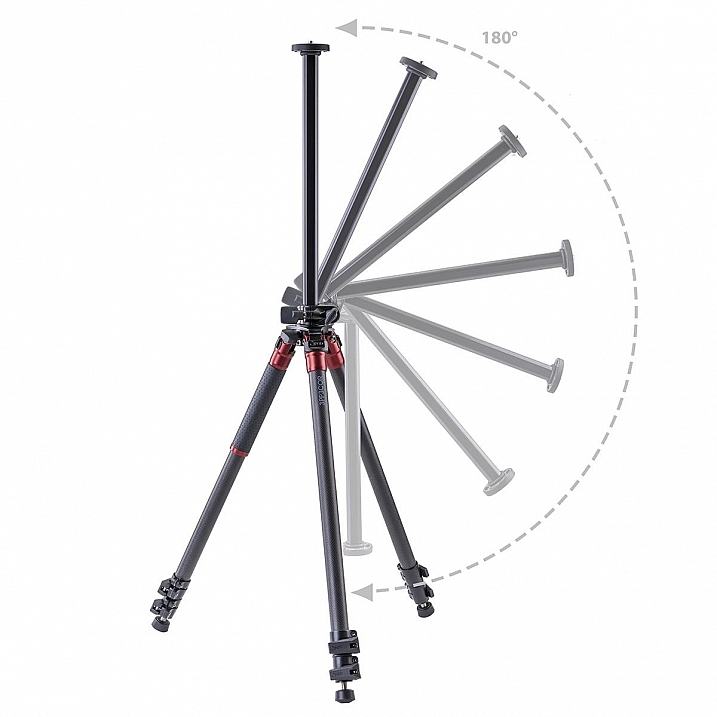
3pp3cor_2 3pp3cor_4

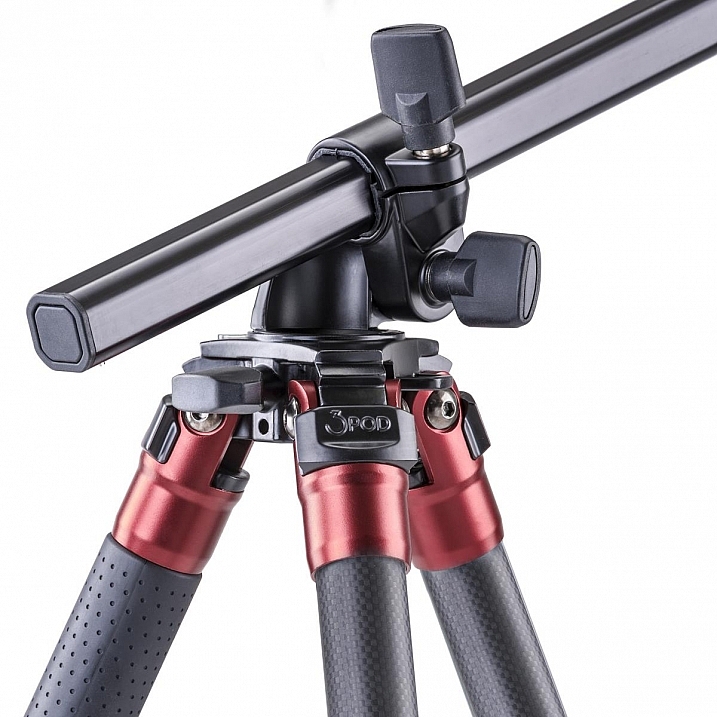
The tripod features the Orbit Overhead Shot System, which means the vertically-adjustable center column, and its accompanying standard direct-mount plate, can be pivoted at almost any angle (see photos above, images courtesy Adorama and 3Pod), allowing for some interesting composition possibilities.

013016__myshot-600

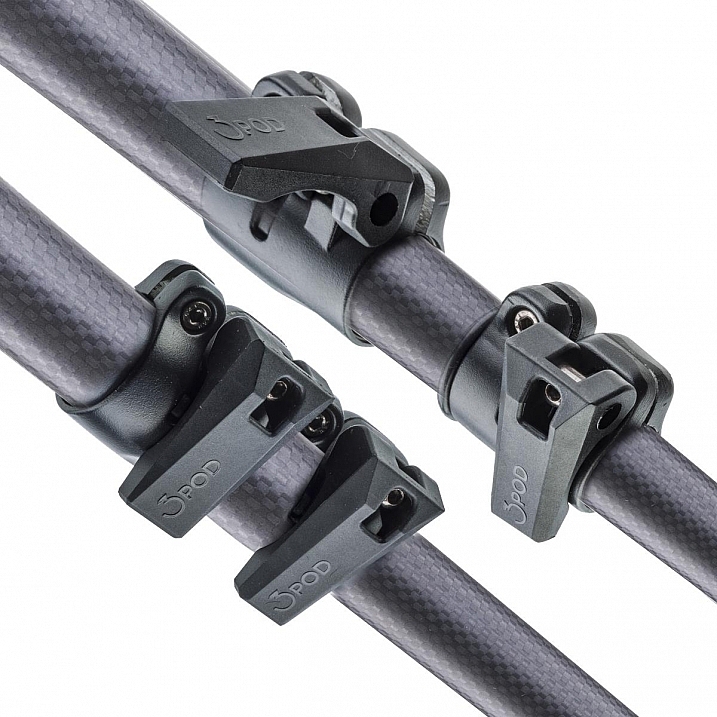
The three carbon fiber legs are rated to hold 18 lbs. (8.16kg), and the unit can be extended to a maximum usable height of just over 69 inches (1.75m), while collapsing to a very manageable 28.5 inches (0.72m). The legs use a standard flip lock, for raising and lowering, and they work very well. The locks aren’t too simple to disengage, but don’t take a ton of strength either, making them easy to manage while giving you peace of mind.

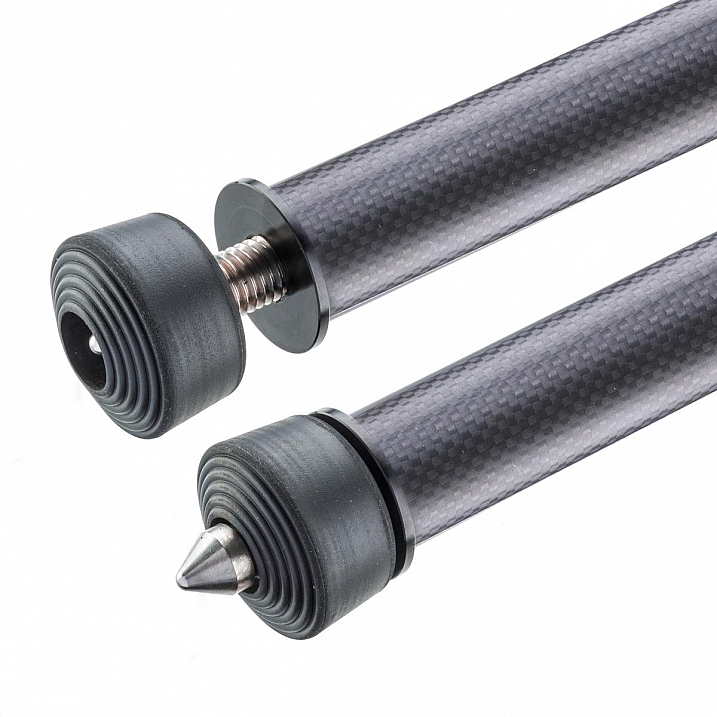
The screw mount itself is reversible from 3/8″ to a 1/4″  variety, by flipping the mount block upside down. I found the mount easy to remove and lock, and my Canon 60D felt very sturdy when locked into the mount. Coverable foot spikes allow you to ensure stability in any situation, from dirt, rocks and sand, to smooth indoor floors, without worrying about damaging any sensitive surfaces.

3pp3cor_6

Attractive appearance (Image courtesy Adorama and 3Pod)

With appearances having absolutely no impact on the functionality of a tripod, it must be said that this particular 3Pod model is beautiful, with metallic red color accents, against dark carbon fiber pieces. An attention-getter at the local beach, let me tell you!

013016__myshot-3-cropped

013016__myshot-4

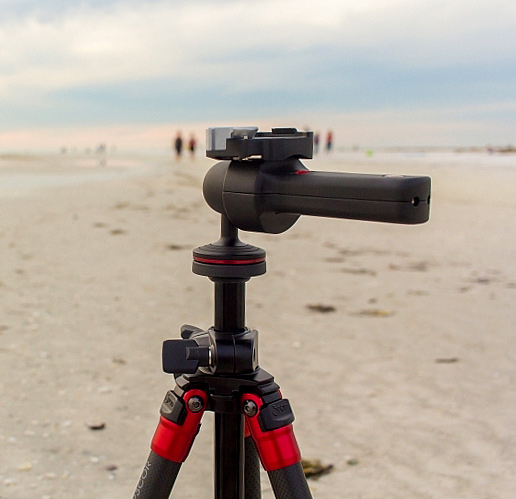
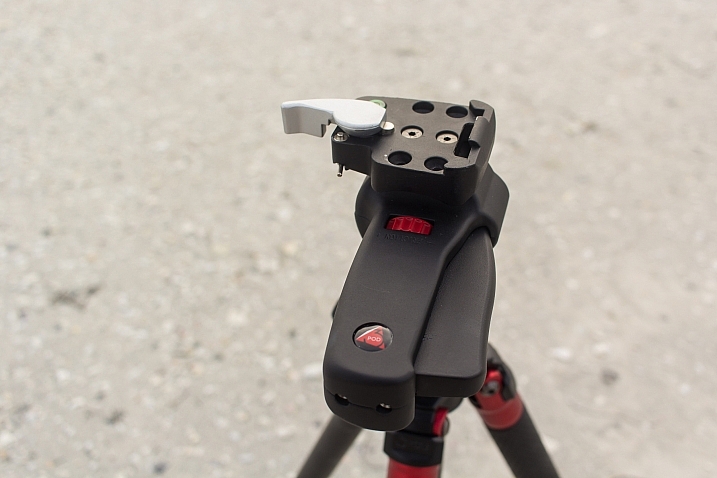
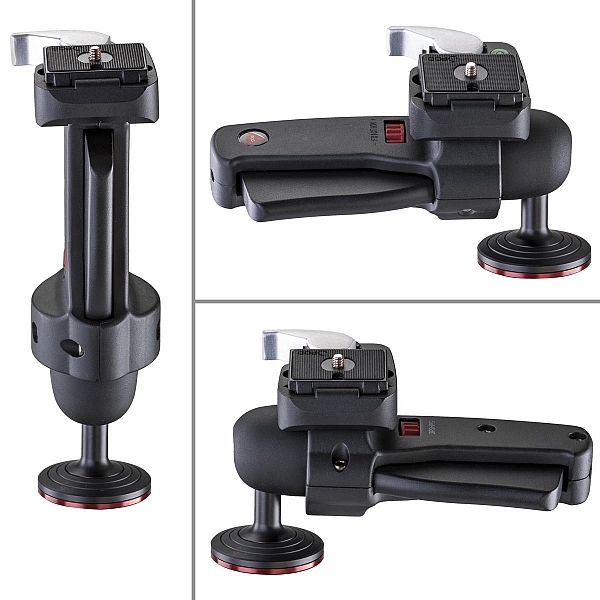
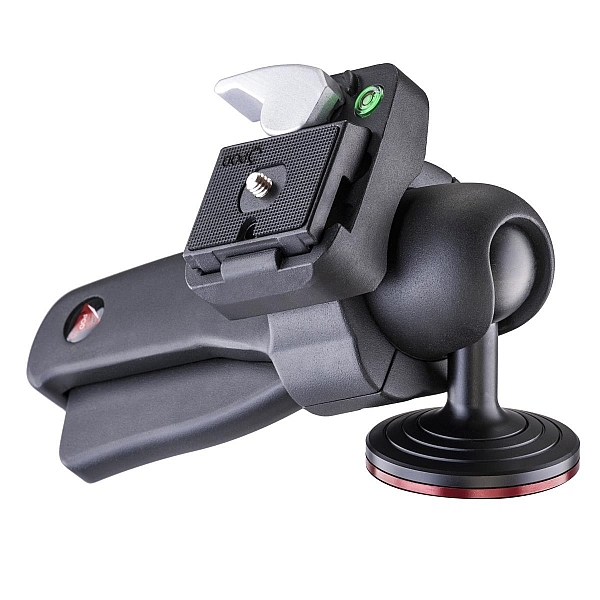
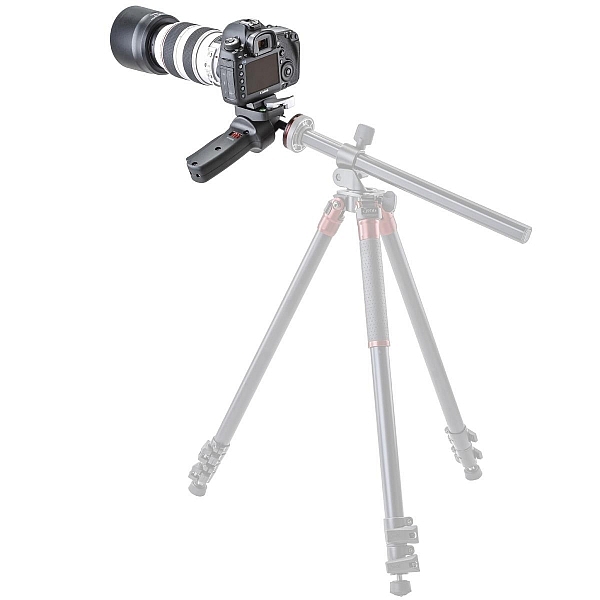
This was my first experience with a pistol-grip type tripod head, and let’s just say I’m sold on the concept. The 3Pod SH-PG is a delight to use. No more hassling with various screws on various planes of movement to get the perfect horizontal and vertical positions; simply squeeze the trigger on this unit, adjust to the desired angle, and release. The position is set in stone, and you’re free to concentrate on your primary focus, taking a great picture.

The advantage of this setup, is the ability to compose your image with one hand, freeing up the other to operate the camera itself. The mount is situated directly on the ball, and can be moved to allow for several configurations, including left-handed, right-handed, and traditional joystick orientation (see example photos below). A thumb-operated dial on the grip allows for modifying tension within the handle; lighter camera setups can use less tension, for more precise adjustments.

3pshpg_11

Image courtesy Adorama and 3Pod

3pshpg_04

Image courtesy Adorama and 3Pod

The rotation of the ball head is a full 360 degrees, with -20 to 90 degrees of tilt. The head features the expected quick-release plate, and a bubble level, separate from the tripod body. The head itself weighs in at 1.85 lbs. (0.84kg), and supports up to 11 pounds (4.99kg) of camera body and lenses, although it feels as if it would support more weight.

I tested the head and tripod legs at a couple of different locations, as well as indoors. I was pleased at how well the unit gripped all surfaces. The legs predictably sank and settled perfectly into beach sand, as well as a grassier area just inland. I place the tripod in a rather sandy/muddy situation as well, and again, found the support for my camera to be very sturdy. Finally, covering the adjustable leg spikes allowed me to use the tripod indoors in a carpeted area, with no worry of damage to the fibres.

3pp3cor_10

Carbon fiber legs with flip lock mechanisms (Image courtesy Adorama and 3Pod)

3pp3cor_11

Spikes and covers on the legs (Image courtesy Adorama and 3Pod)

I was met with the usual high winds on the beachfront, and found I was able to capture standard shots, as well as long exposures without any issue. Images were crisp and clear. As solid and hefty as the unit is, I was able to collapse it down to its smallest size, and carry it over my shoulder with my 60D still attached, for the long walk back to the parking lot, fairly easily.

This particular setup will set you back $ 249.95 USD for the tripod and $ 39.95 USD for the pistol-grip head. Many photographers won’t scoff at a $ 300 USD entry price for a very solid piece of hardware, but some beginners/enthusiasts may not feel such a price is doable for their first tripod. As we discussed in the beginning of this article, some accessories have qualities that reflect their price point, and we see that here with 3Pod’s offerings.

3pshpg_1

Image courtesy Adorama and 3Pod

At the end of my review period, I boxed up the 3Pod with a bit of a heavy heart, as I had no desire to send it back. For me as a photographer with a focus on landscape and nature, the Orbit 3 and pistol grip head are the perfect combination, and I can see how owning this particular setup will make my photography immensely easier, and therefore more enjoyable and satisfying. Which means one thing – I’ve got a new spot in my budget for a purchase this year.

Have you used 3Pod tripods and heads before? What has your experience been? Sound off below and let us know how these quality pieces of hardware have helped your photography.

Editor’s note: these products were loaned to our author by Adorama at no cost, but in no way influence Tim’s review and opinion of this tripod and head combination.

googletag.cmd.push(function() {
tablet_slots.push( googletag.defineSlot( “/1005424/_dPSv4_tab-all-article-bottom_(300×250)”, [300, 250], “pb-ad-78623” ).addService( googletag.pubads() ) ); } );

googletag.cmd.push(function() {
mobile_slots.push( googletag.defineSlot( “/1005424/_dPSv4_mob-all-article-bottom_(300×250)”, [300, 250], “pb-ad-78158” ).addService( googletag.pubads() ) ); } );

The post The 3Pod P3COR Tripod and SH-PG Ball Head Review by Tim Gilbreath appeared first on Digital Photography School.


Digital Photography School

 
Comments Off on The 3Pod P3COR Tripod and SH-PG Ball Head Review

Posted in Photography


Escape Artist: Giant Ball Rolls Down Streets, ‘Round Corners

24 Aug

[ By WebUrbanist in Art & Installation & Sound. ]

redballroll

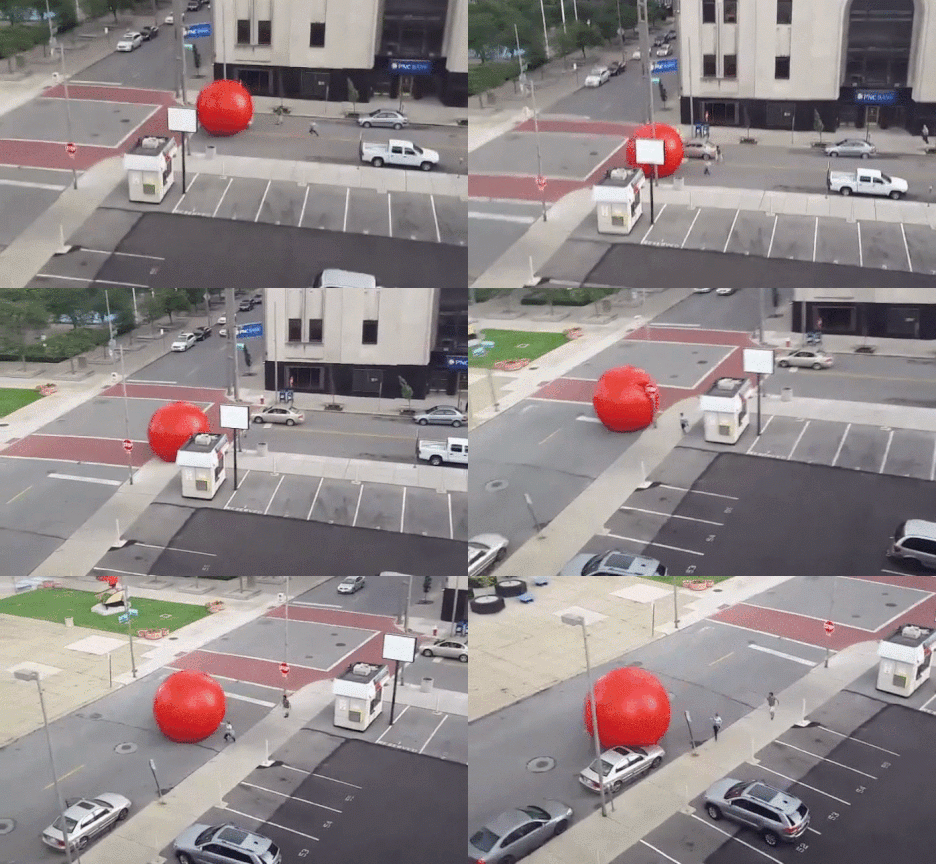
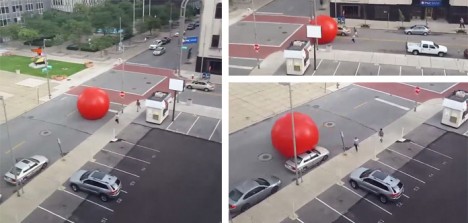
Wind and rain conspired to set loose a gigantic inflatable piece of installation art, turning it into a kind of impromptu performance piece for drivers and bystanders as one (very big) red balloon rolled by. In some regards, the resulting viral sensation has taken on a life of its own, extending the reach of the sculpture far beyond its target audience.

caught

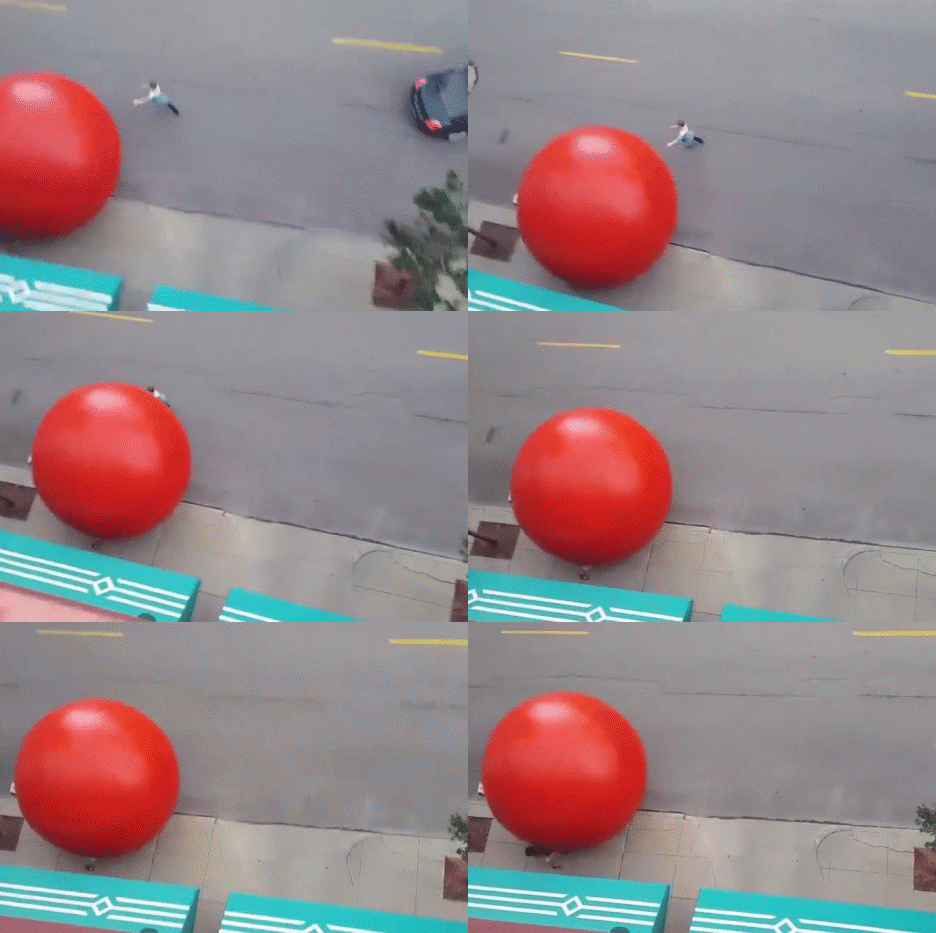
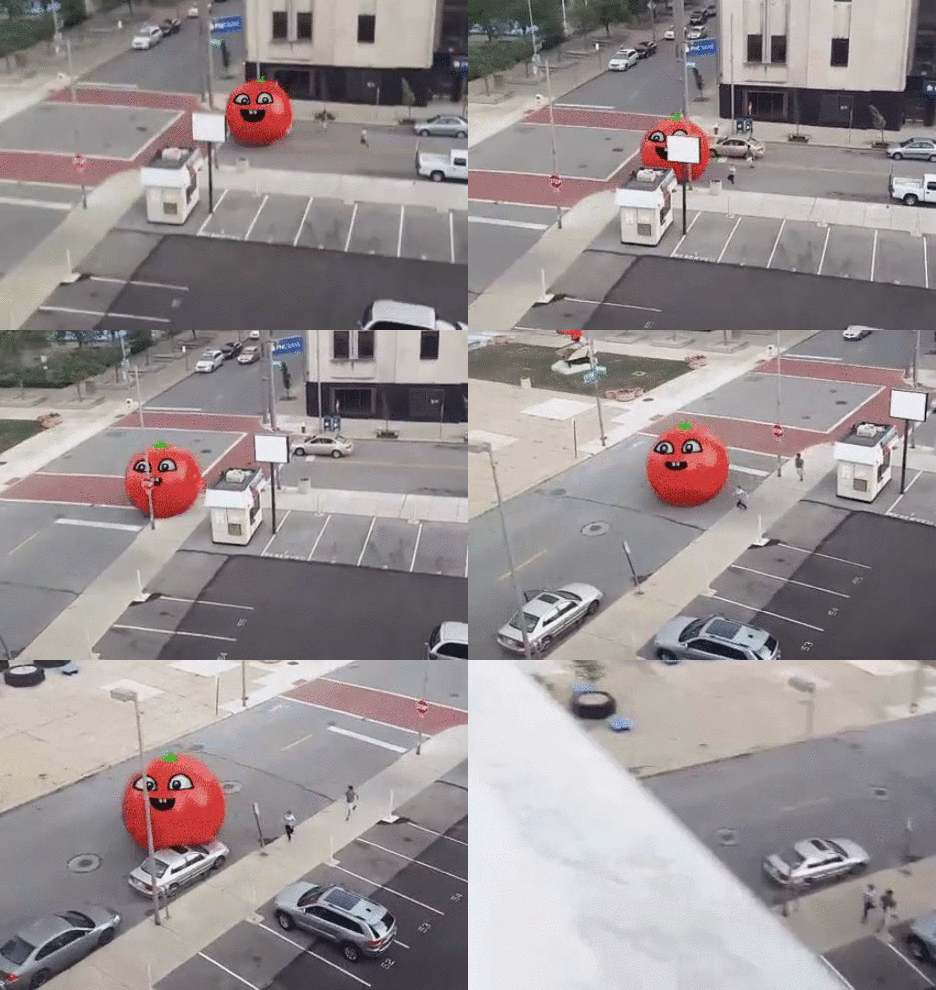
Designed to be a source of urban interaction, the RedBall was in the process of being wedged between two downtown businesses before being redirected by forces of nature. Museum staff, installation participants and a handful of bystanders chased the recently-liberated sphere down the streets, eventually catching, deflating and returning it to the installation site. Instagram user jeremy419 happened to catch much of the action from atop a nearby building. Meanwhile, a hacked version of video puts a fresh tomato-style spin on this unexpectedly interactive work of  art.

freshtomatoe

The museum’s director of communications, Kelly Garrow, recapped the sequence of events for reporters: “It started pouring rain, so the ball was wet and slippery. The wind picked up, and it popped up and just started going. You can see in the video that’s going viral that it rolled about halfway down a block and then mysteriously took a left-hand turn. It made its way partially down the street before people caught up with it.

red ball escape

Despite its size (15 feet in diameter), the ball weighs only 250 pounds, minimizing its potential for damage to one bent street sign – quite tame compared to rounded corporate art sculpture set loose in Fight Club as part of Project Mayhem.

public ball of art

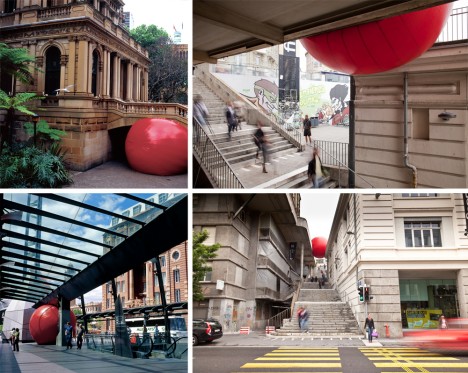
A world-traveling artwork, the ball was created by Kurt Perschke to be pressed into tight spaces and has been in play for nearly a decade without incident. Meanwhile, add this escapee to Nena’s 99 Luftballons lyrics and you get a nice rounded “100 red balloons go by.”

Share on Facebook


[ By WebUrbanist in Art & Installation & Sound. ]

[ WebUrbanist | Archives | Galleries | Privacy | TOS ]


WebUrbanist

 
Comments Off on Escape Artist: Giant Ball Rolls Down Streets, ‘Round Corners

Posted in Creativity


Gitzo introduces three new Center Ball Heads

14 Aug

Gitzo has introduced new Center Ball Heads, a lineup composed of three different-sized models aimed at professionals and advanced amateur photographers. Each offers a tungsten disulfide coating for smooth movements. Read more

Articles: Digital Photography Review (dpreview.com)
 
Comments Off on Gitzo introduces three new Center Ball Heads

Posted in Uncategorized


Manfrotto launches XPRO Ball Head

26 Jun

Manfrotto has launched the XPRO Ball Head in the UK, joining existing fluid and geared heads in the XPRO lineup. It is offered with Arca-Swiss compatible Top Lock and 200PL camera plates and features a spherical locking mechanism alongside a Triple Locking System, the latter of which stabilizes the camera’s position and keeps it from drifting via a trio of wedges. Read more

Articles: Digital Photography Review (dpreview.com)
 
Comments Off on Manfrotto launches XPRO Ball Head

Posted in Uncategorized


What goes around: 6 mid-sized ball heads put to the test

08 Apr

One of the most important parts of a tripod is the head that connects the camera to the legs. Continuing where our previous ball head roundup left off, we’ve collected six ball-type heads for review that are in the medium-to-large size class. These heads are suitable for most large cameras and lenses, with only the truly gigantic or heavy devices requiring something larger. Find out which ones earn our recommendation. Read more

Articles: Digital Photography Review (dpreview.com)
 
Comments Off on What goes around: 6 mid-sized ball heads put to the test

Posted in Uncategorized