RSS
 

Posts Tagged ‘Backyard’

Backyard Photography Challenge

02 Oct

The post Backyard Photography Challenge appeared first on Digital Photography School. It was authored by Darren Rowse.

back-yard-photography.jpg

It’s been super fun going through our old challenges from over ten years ago! While you can now share your challenge photo in our Facebook Group, or below in the comments, the idea is the same! Last week it was ten things within ten meters, this week we want you to head into your backyard, or… as Darren said below, whatever the closest thing to a backyard is that you have! Balcony? Window? Make it work, get creative, have fun! (No, don’t sneak into someone else’s backyard! haha)

Tag your photos on social with #dPSBackyardChallenge

Yesterday we posted an article about Backyard photography – today I’d like to issue a challenge – get into your backyard and see what shots you can come up with – and then share your best shot or two with us in comments below.

I know some of you don’t technically have ‘backyards’ – but feel free to photograph whatever is the closest thing to a yard for you (a balcony for instance) – be creative. You don’t just have to take a picture of your yard – focus in on something (or someone) in it. I’m expecting to see macro work, wildlife, pets, portraits and much much more!

Once you’ve gotten out there and taken some shots – pick your favorite one or two, upload them to our favorite photosharing site (like Flickr) and share a link to your shots in the comments section below.

Please only link to pictures you’ve taken for this challenge and not previous ones – that way we’re seeing your most recent work.

Also – we’d love it if you’d link to this post from your photosharing page to let your friends know what you’re doing – that’ll spread news of our little challenge and make it all the more fun!

I can’t see what everyone comes up with!

Image by ohmann alianne

The post Backyard Photography Challenge appeared first on Digital Photography School. It was authored by Darren Rowse.


Digital Photography School

 
Comments Off on Backyard Photography Challenge

Posted in Photography


10 Ideas for Photographing Nature in your Backyard

11 Oct

The post 10 Ideas for Photographing Nature in your Backyard appeared first on Digital Photography School. It was authored by Karen Quist.

Have you noticed how many photographers are fascinated with nature? Even if we specialize in another genre, few of us can resist a gorgeous flower or a branch of autumn leaves.

One of the best things about photographing nature is that it is so accessible. You don’t need to travel far to find it, because it’s all around you. You may take it for granted because you see it every day, but your own backyard is a treasure trove. Every hour of every day and every season brings something new.

lavender flowers photographing nature in your backyard

Summer lavender | 1/200 sec | f/3.5 | ISO 100

The term “backyard” needn’t be taken literally here. If you don’t have a backyard, you’ll find plenty of nature to photograph just by wandering the streets or public parks and gardens.

Tech details: All of the photographs in this article were shot on my Canon 5D Mark III. Unless otherwise stated, I have used my Canon 100mm f/2.8 macro lens. I have included details of ISO, aperture, and shutter speed settings.

1. Flowers and leaves

Flowers and leaves are often the first things that come to mind when we look for subjects in our own backyards. They offer an endless variety of colors, shapes, and textures for you to photograph. You could create a collection based on a single color scheme, or try to find as many different leaf or flower shapes as possible.

orchid nature photo

Cymbidium orchid | Canon 5D Mark III | Canon 100mm f/2.8 Macro | 1/100 sec | f/4 | ISO 640

photographing nature in your backyard

Violet leaves | Canon 5D Mark III | Canon 100mm f/2.8L IS Macro | 1/30 sec | f/8 | ISO 800

photographing nature in your backyard

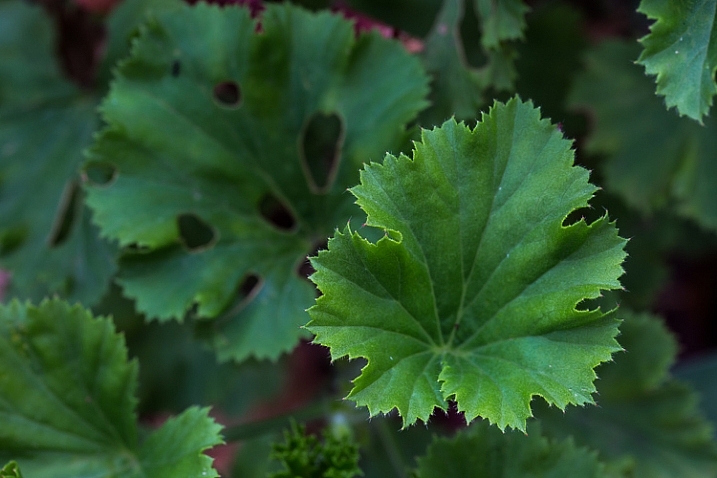
Geranium leaves | Canon 5D Mark III | Canon 100mm f/2.8L IS Macro | 1/40 sec | f/8 | ISO 320

You should also experiment with different lighting and conditions. I love backlighting for leaves and flowers, as it creates a luminous, almost three-dimensional effect, and you can see details such as veins. Some shapes look better with strong, directional light, and I love how colors are enhanced by water droplets.

photographing nature in your backyard daffodils

Erlicheer daffodils | Canon 5D Mark III | Canon 100mm f/2.8L IS Macro | 1/640 sec | f/4 | ISO 100

photographing nature in your backyard daffodils

The same flower shot with the sun at my back | Canon 5D Mark III | Canon 100mm f/2.8L IS Macro | 1/800 sec | f/4 | ISO 100

photographing nature in your backyard backlit leaf

Backlighting a leaf reveals details you wouldn’t see if you lit it directly | Canon 5D Mark III | Canon 100mm f/2.8L IS Macro | 1/250 sec | f/4 | ISO 100

Flowers are seasonal, and in temperate zones, spring and summer offer the widest variety. There are still flowers to be found in winter, although you may need to look harder. Don’t forget that weeds, such as dandelions, are also beautiful! Autumn provides the greatest color spectrum in leaves.

photographing nature in your backyard

Liquidambar leaves photographed en masse | Canon 5D Mark III | Canon 100mm f/2.8L IS Macro | 1/80 sec | f/4 | ISO 640

photographing nature in your backyard

A single leaf isolated against a dark background | Canon 5D Mark III | Canon 100mm f/2.8L IS Macro | 1/30 sec | f/4 | ISO 640

2. Fruit, berries, and seed pods

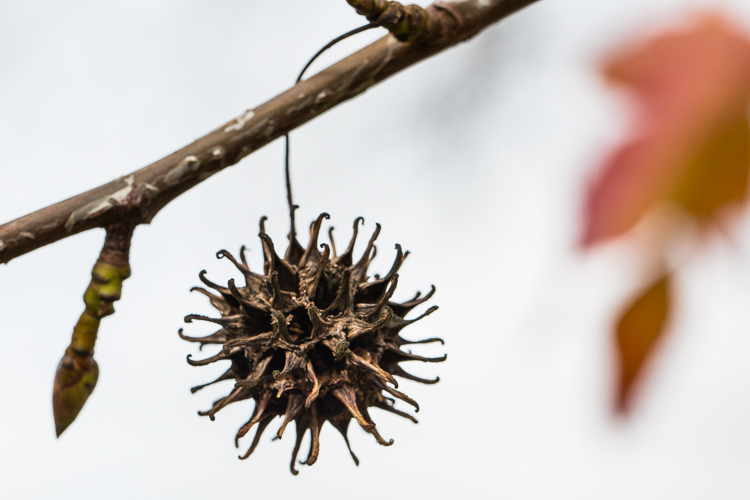
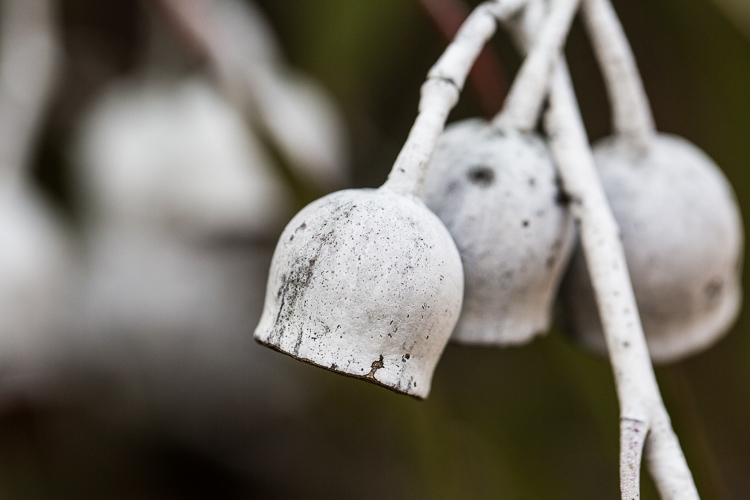
When the summer flowers disappear, fruits and berries are nature’s way of providing for birds and animals throughout the colder months. Many berries and seed pods ripen towards the end of autumn, bringing color to the winter garden. Citrus trees bear fruit in winter, and persimmon trees lose their leaves to reveal branches of shiny orange fruits. Think also of acorns, pine cones, and nuts.

photographing nature in your backyard kumquat

Kumquat | Canon 5D Mark III | Canon 100mm f/2.8L IS Macro | 1/50 sec | f/4.5 | ISO 2500

photographing nature in your backyard

Canon 5D Mark III | Canon 100mm f/2.8L IS Macro | 1/500 sec | f/8 | ISO 800

photographing nature in your backyard

Canon 5D Mark III | Canon 100mm f/2.8L IS Macro | 1/1250 sec | f/5 | ISO 500

photographing nature in your backyard rosehip

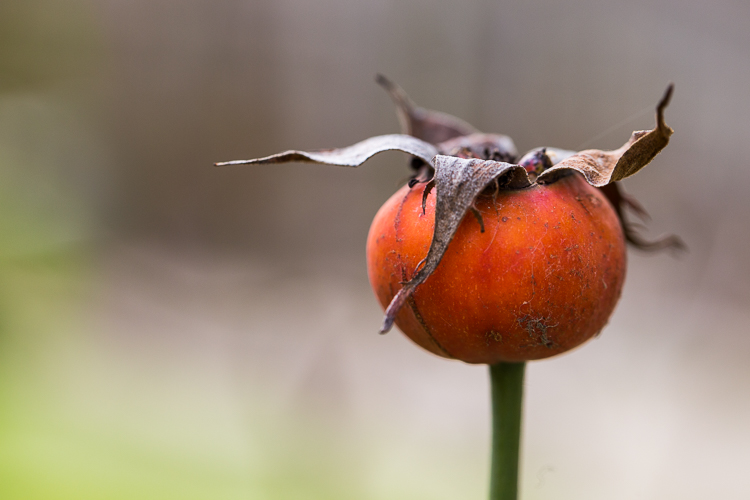
Orange rosehip | Canon 5D Mark III | Canon 100mm f/2.8L IS Macro | 1/160 sec | f/5 | ISO 500

photographing nature in your backyard berries

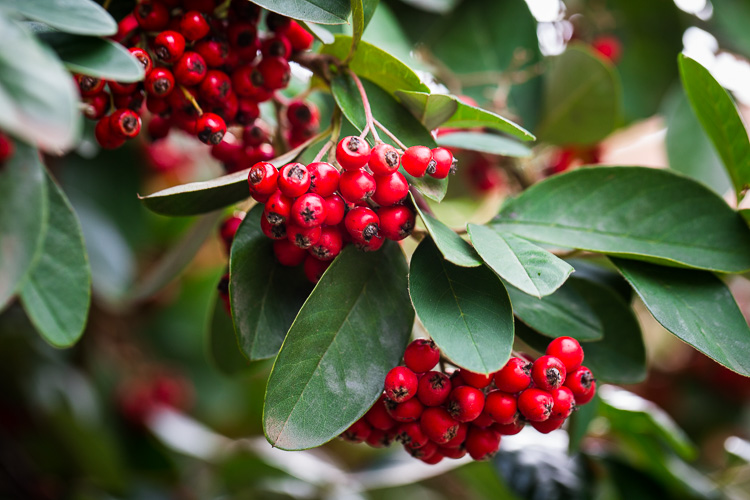
Bunches of red berries | Canon 5D Mark III | Canon 100mm f/2.8L IS Macro | 1/100 sec | f/5 | ISO 500

3. After the rain

Raindrops are fascinating through the lens. Try photographing them from various angles and in different lighting.

When photographing a single droplet, or a string of them, isolate them by keeping the background uncluttered. You can do this by creating distance between the droplets and the background, and by using a wide aperture to ensure the background is blurred. Notice also how water sits in nice round droplets on some types of leaves, but on others it disperses.

photographing nature in your backyard arthropodium leaves

Arthropodium leaves after the rain | Canon 5D Mark III | Canon 100mm f/2.8L IS Macro | 1/80 sec | f/4.5 | ISO 800

photographing nature in your backyard raindrops

Raindrops hang from the slats on the back of a garden chair | Canon 5D Mark III | Canon 100mm f/2.8L IS Macro | 1/125 sec | f/4 | ISO 1000

photographing nature in your backyard

Canon 5D Mark III | Canon 100mm f/2.8L IS Macro | 1/125 sec | f/4 | ISO 640

photographing nature in your backyard raindrops

Canon 5D Mark III | Canon 100mm f/2.8L IS Macro | 1/125 sec | f/4 | ISO 1000

4. Mushrooms, toadstools, and fungi

These are abundant in autumn and winter, but some species pop up throughout the year after rain. Look in damp, mossy places, on the sides of trees, and in log piles for them.

My personal favorites are the red toadstools with white speckles. They are evocative of fairy tales and magic, and their colors are a nature photographer’s dream!

photographing nature in your backyard toadstool

Toadstool | Canon 5D Mark III | Canon 100mm f/2.8L IS Macro | 1/250 sec | f/6.3 | ISO 1000

photographing nature in your backyard

Canon 5D Mark III | Canon 100mm f/2.8L IS Macro | 1/160 sec | f/6.3 | ISO 1000

But don’t ignore the tiny, dull-colored mushrooms and fungi. The mushrooms in the photo below were growing in a crevice on the side of my herb garden. You can see by the scale of the woodgrain how tiny they were. From above, they were nondescript, but when I laid on the ground beneath them and shot into the backlight, they became translucent and I could see their delicate structure.

photographing nature in your backyard

These tiny mushrooms were no bigger than the fingernail on my pinky finger! | Canon 5D Mark III | Canon 100mm f/2.8L IS Macro | 1/160 sec | f/8 | ISO 800

5. Look up; look down

We have a gigantic tree in our backyard. It was probably planted when our house was first built in the 1920s, and its canopy is as big as the house itself. One of my favorite things to do in the warmer months is to put a picnic rug on the lawn and lie on my back gazing up into the tree’s branches. It is free therapy!

Watching the leaves change from bright spring green through to darker green in summer, the first blush of color in autumn, through to a rich claret just before they drop, never ceases to delight me. I have photographed it time and time again through the seasons. Even lying on the ground with my 35mm lens, I can only capture a small portion of the canopy.

photographing nature in your backyard tree

Sigma 35mm ART lens | 1/60 sec | f/11 | ISO 160

photographing nature in your backyard tree

Sigma 35mm f/1.4 lens | 1/100 sec | f/11 | ISO 160

If you are lucky enough to have trees in your garden, try standing or lying directly underneath them and shooting up into the branches. Notice how the light changes from early morning throughout the day into late afternoon and evening. Branches, whether they are naked or covered with leaves, contrast beautifully against a blue sky. They are also stunning at sunrise and sunset and on moonlit nights.

photographing nature in your backyard tree

Sigma 35mm f/1.4 lens | 1/200 sec | f/11 | ISO 200

If you don’t have any trees, look for interesting cloud formations to photograph. You can create a collection of skies to use as Photoshop overlays, which can add interest to other outdoor photos such as portraits. Look for vertical cloud formations, fat white fluffy clouds, and those lovely soft colors around the edge of the clouds at dusk and dawn.

You can also turn your attention downward. On the ground are a million microcosms among the moss, the lawn, between the paving stones, and in the fallen bark and leaves. You won’t see them until you get down to ground level, so lie flat on your tummy and peer into another world.

photographing nature in your backyard moss

The moss on a tree trunk | Canon 5D Mark III | Canon 100mm f/2.8L IS Macro | 1/40 sec | f/4 | ISO 640

6. Black and white beauty

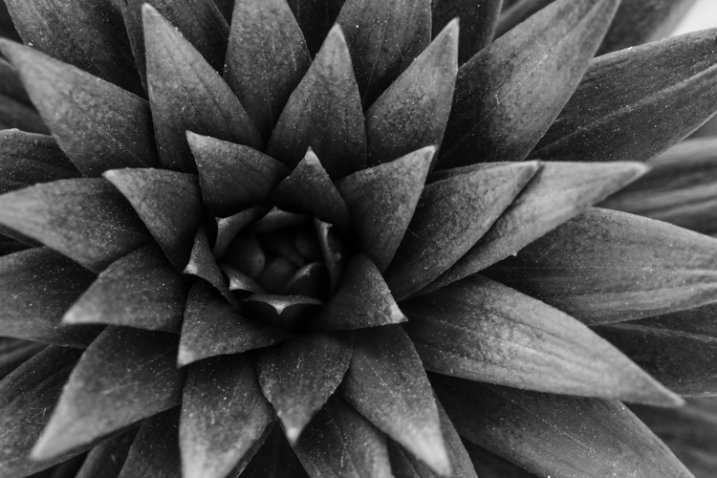
We tend to think of color photography when we think of nature, but don’t dismiss the idea of black and white images. Nature provides sculptural shapes and contrasting textures that make great black and white subjects. If you have succulents or cacti in your garden, they are often more interesting in black and white than they are in color (except on those rare occasions when they flower). Ditto with white flowers against a dark background. Smooth pebbles, rough bark, snail shells, acorns, and pine cones all look fabulous in black and white. Try strong, directional lighting and a high contrast edit.

photographing nature in your backyard

When I converted this file to black and white in Lightroom, I played with the sliders in the B&W panel. The photo on the left has the blue slider pulled all the way down to -100 to darken the sky. On the right, the blue slider is set to zero.

photographing nature in your backyard

 Canon 5D Mark III | Canon 100mm f/2.8L IS Macro | 1/100 sec | f/8 | ISO 100

7. Experiment with sun flare and haze

Your backyard is one of the best places to experiment with effects and new techniques. Firstly, you can become familiar with how things look at various times of the day and throughout the seasons. Secondly, you don’t need to travel far, so you can respond to anything on a whim. If you spot something amazing while you’re sipping your morning coffee, you needn’t even get out of your pajamas to capture it!

The subjects in the two photographs below are both visible from my desk. Every morning last summer, I noticed how this shaft of hazy sunlight would hit the planting of succulents on a pedestal, so I knew exactly what time to capture it at its best. Also sitting at my desk, I saw how the sun caught a spray of orchids just after the rain, and I rushed outside with my camera.

photographing nature in your backyard sun flare

Canon 85mm lens | 1/800 sec | f/4 | ISO 100

photographing nature in your backyard

Shot with sun flare and no lens hood | 1/1000 sec | f/4 | ISO 100

photographing nature in your backyard

For comparison, this is the same scene shot with a lens hood to reduce flare | 1/320 sec | f/4 | ISO 100

8. Snails, bugs, and spiders

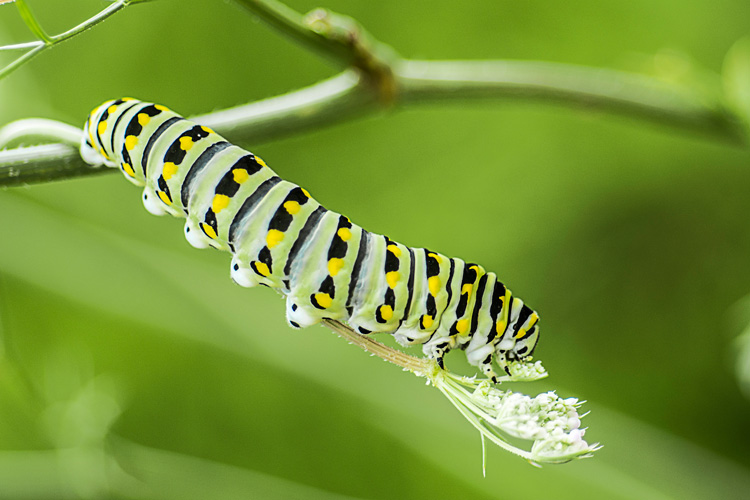
For nine months out of the year, there are a million creepy-crawlies in my backyard. This includes butterflies, cicadas, crickets, praying mantises, caterpillars, moths, bees, wasps, and spiders (I could happily do without the latter two). At the time of writing, it is winter in Melbourne, so most bugs are hiding or dormant.

9. Birds and other wildlife

I’m going to begin this section with honesty.

Confession number one: Photographing wildlife of any kind requires more patience and a longer telephoto lens than I possess.

Confession number two: I have the greatest admiration for those who do wildlife photography. I have a Pinterest board just for animal photos (I have a clear bias towards squirrels), and on 500px I follow a number of photographers, one of whom only photographs squirrels!

The kinds of animals and birds you’re likely to find in your backyard obviously depends on which part of the world you live in and how built-up your neighborhood is. You will know which kinds of critters visit your backyard and what their habits are. With that in mind, find a spot where you won’t be too conspicuous and be prepared to wait. If you’re using a long lens, you might consider working with a tripod or a monopod to avoid camera shake. Have your ISO and aperture all set to go, plus a fast shutter speed to freeze motion. If you have been watching an animal’s behavior over several days or weeks, it may be possible to focus roughly on the area you expect them to appear (for example, the birdbath).

Also read: Guide to Attracting Critters to Your Garden for Backyard Wildlife Photography

10. Portraits in nature

Nature provides us with the perfect canvas for portraiture. Look for a bank of flowers, a bed of autumn leaves, or just a green hedge. The colors in nature never seem to clash.

When photographing children and pets, in particular, I almost always prefer an outdoor location over a studio. My eldest daughter usually runs a mile when she sees the camera, but the chance to roll around with the dog in glorious leaves was clearly too much for her to resist (see the image below).

I love how the soft hues flatter my daughter’s skin tone. If you are shooting outdoors with lots of colors, such as flowers or autumn leaves, pay attention to your subject’s outfit. These portraits might have been too busy if my daughter had been wearing a patterned outfit.

photographing nature in your backyard portrait with dog

Not even teenage daughters can resist these leaves! | 1/400 sec | f/4 | ISO 320

photographing nature in your backyard portrait with dog

1/320 sec | f/4 | ISO 320

Conclusion

So there you have it: Plenty of inspiration to get outdoors and photograph nature in your own backyard. It’s time to stop reading and get out there with your camera.

Here are some additional articles that will help improve your outdoor and nature photography skills:

  • 3 Habits Every Outdoor Photographer Should Develop to Avoid Missing Shots
  • 5 Tips for Better Nature Photography
  • 27 Serene Images of the Natural World

The post 10 Ideas for Photographing Nature in your Backyard appeared first on Digital Photography School. It was authored by Karen Quist.


Digital Photography School

 
Comments Off on 10 Ideas for Photographing Nature in your Backyard

Posted in Photography


Video: Photographer Martin Henson shows the versatility of pinhole cameras from his backyard

11 Jun

UK-based photographer Martin Henson has recently published a video showcasing his pinhole photography process. An experienced film and digital photographer, Henson combined a 4×5-inch pinhole camera with Ilford FP4 film to capture a photo of flowers in his back garden. The result will show that one doesn’t need to travel far to capture beautiful images.

With his pinhole camera laying in the undergrowth and pointing toward the sky through the flowers in his garden, Henson also used an orange filter to darken the blue in the sky. The pinhole camera captures a wide field of view, so Henson must look down from above through the flowers to get a sense of how they will be arranged within the frame. After settling on the location for his camera, he must then determine the correct exposure.

When determining the correct exposure, Henson must consider that the Ilford FP4 film he’s developing is rated at ISO 200, but with the addition of the orange filter, he must compensate for an additional stop. Henson then places his light meter on top of his pinhole camera and meters at ISO 100. The reading states a 1/15s exposure at an F22 aperture. For Henson’s pinhole camera, he then had to convert this exposure time to an F216 aperture, which results in an exposure time of 6.5 seconds. Further, accounting for the reciprocity of Ilford FP4 film, the final exposure time is 12 seconds.

As you can see in the video above, after making his captures, Henson then slid the dark slide back in and developed the image. As he states, his video shows that the pinhole camera is a versatile photographic tool. It can be placed in positions and allow for compositions that would be ‘virtually impossible with a normal camera.’

The finished image, Chaos, is up for auction on eBay. There’s much more to learn about pinhole photography and analog photography in general. Henson has additional excellent resources. You can visit his large format photography forum and his black and white photography forum. He has recently published another pair of videos about pinhole photography on his YouTube channel, which can be seen above.

Articles: Digital Photography Review (dpreview.com)

 
Comments Off on Video: Photographer Martin Henson shows the versatility of pinhole cameras from his backyard

Posted in Uncategorized


Tips for Doing a Backyard Photo Safari

09 Jun

The post Tips for Doing a Backyard Photo Safari appeared first on Digital Photography School. It was authored by Simon Ringsmuth.

dps-tips-for-doing-a-backyard-photo-safari

Have you ever thought about taking a trip to the other side of the world to get beautiful shots of exotic locations? You certainly can, and traveling is one of the best things you can do to take your photo skills to the next level. If flying across the world isn’t an option, what about stepping out of your door? A backyard photo safari is just a few meters away instead of a thousand miles, and you can take some beautiful photos without expensive gear too.

backyard photo safari dandelion
Nikon D7100, 50mm, f/2.8, 1/2000 second, ISO 100

While you could just drop what you are doing and head outside right now, it helps to do a bit of planning first. If you keep a few tips and techniques in mind, it will save you some frustration and give you a few ways to approach your very own backyard photo safari that will help produce the best possible results.

Timing is everything

Familiar places can take on dramatically different appearances depending on the time of day. It’s not just about the quality of light but the type of things you are likely to find – especially in your backyard. In the morning, plants are covered in dew, and bugs and insects are seizing the day. You might also find familiar sights shrouded in fog. Revisit the same patch of earth in the evening, and the scene will be dramatically different.

backyard photo safari frog
Nikon D750, 50mm, f/8, 1/90 second, ISO 800. This frog wasn’t just in my backyard. It was on my back door! I shot this after the sun went down after a rainy day.

You already know your own backyard well, but have you ever gone out in the early hours of the morning, or as the sun was setting, or even late at night? It’s not the same place at all. You will quickly notice things that you just don’t see during the day. Familiar objects take on a whole new appearance when photographed in the early morning or late at night.

You can even take great shots after the sun goes down by using a long shutter speed.

backyard photo safari night stars
Fuji X100F, 23mm, f/8, 15 seconds, ISO 1250. I took this from my back porch very early on fall morning. It was only a few feet away from where I shot the photo of the frog!

It’s not just time of day that matters, but the time of year as well. Revisiting familiar places, even your own backyard, throughout the year can reveal amazing photo opportunities that were hiding right before your very eyes.

Act fast though! When you see an interesting picture idea, take the shot. Waiting even one day can change everything and suddenly your beautiful photo is nothing more than dust in the wind.

backyard photo safari leaf on ground
Nikon D7100, 50mm, f/2.8, 1/1000 second, ISO 100. I saw a photo opportunity on a Saturday morning right as the sun came up, so I ran outside barefoot to get the shot. The very next day, the leaves had all blown away!

Spring, summer, winter, fall – everything changes throughout the year, and this has a profound effect on the photos you can take in your yard.

Rich greens in spring, deep colors in summer, browns and yellow in the fall, and shades of gray in the winter.

Even if you think you’ve seen it all, try revisiting familiar spots in your own yard at different times of the year. The result may surprise you and give you some interesting photo ideas.

Tips for Doing a Backyard Photo Safari
Nikon D7100, 85mm, f/4, 1/30 second, ISO 800. Composite of several shots of a lunar eclipse I took from my back yard over the course of two hours.

Look at the light

No matter the time of day or season of the year, it’s essential to look for where the light is coming from.

Then think about how you can use the light to make a more interesting or compelling composition.

Most objects look great with standard front-lighting – that is, with the main source of light positioned behind you, the photographer. You might need to scoot around or shift your position to make this happen, but your photos will be better off for your efforts.

backyard photo safari sunflower
Nikon D200, 50mm, f/2.4, 1/80 second, ISO 100. This sunflower was right by my back porch, with the sun positioned behind my shoulder so the flower was evenly lit.

Backlighting is a fun technique to use also, especially on a backyard photo safari where you get fun and interesting colors. This involves placing the main source of light behind your subject, which can create really fun effects and make ordinary objects take on a whole new appearance.

It’s loads of fun if you have flowers. Even ordinary, run-of-the-mill flora that you probably have in your own yard.

backyard photo safari crocus
Nikon D7100, 50mm, f/2, 1/3000 second, ISO 100. These crocuses show up for a few days every spring, and each year I enjoy taking their picture. I didn’t plant them, but I sure enjoy having them while they bloom for a few days. I used backlighting to make it seem like they were glowing.

It’s not all about sunlight either. There are other sources of light that you can keep in mind when looking for photo opportunities right where you live.

Streetlights can cast an eerie, moody glow over everyday streets and sidewalks. Passing cars can make really fun motion trails. You can even create amazing artwork right in your yard with nothing more than a tripod and a flashlight – all it takes is a little creativity!

backyard photo safari foggy morning
Nikon D200, 50mm, f/16, 15 second, ISO 200. This is looking down the street from my driveway on a calm, foggy morning.

Adjust your angle of view

Most of the time, we see the world around us, especially our own domicile, from the same point of view. Our eye-level remains roughly the same throughout the day, altering between three to five feet off the ground, depending on whether we are standing or sitting. To really find some interesting photo opportunities, particularly in your backyard, try getting low to the ground. Really low. A whole new world awaits you if you have eyes to see it.

backyard photo safari Indian Paintbrush
Nikon D750, 85mm, f/1.8, 1/200 second, ISO 125. I had to position my camera very low to the ground to get this shot, but it was worth the effort.

Lots of interesting things start to show up when you change the angle from which you see the world around you. Even familiar settings can be transformed with a simple change in perspective. While you could get some really good shots by getting up high and shooting with a ladder, I find that it’s a lot more fun to literally crawl around on my hands and knees when looking for photos in my backyard.

backyard photo safari toys on ground
Nikon D200, 50mm, f/1.8, 1/3000 second, ISO 400. I put a few of my kids’ toys on the ground, laid down on my stomach, and photographed them in my own backyard. This picture isn’t going to win any awards, but I had fun taking it.

It might not be the most glamorous or flattering photographic pursuit, but photography can be a messy hobby. And if you’re more worried about how you look when taking pictures instead of the pictures you are taking, it might be time to reevaluate your priorities!

backyard photo safari bubble on grass
Nikon D7100, 50mm, f/1.8, 1/1500 second, ISO 280. My kids were blowing bubbles in the front yard. I had to practically lay on the ground to get this shot but the result was worth it.

Look for wildlife

I live in a small town in middle America. The most exotic animal I’m likely to see on any given day is what we call a Texas Speed Bump. (Think of what happens when an armadillo crossing the road meets a pickup truck.) It might seem like any attempt to take wildlife photos on a backyard photo safari would be an exercise in futility. However, while you might not have lions, giraffes, or gazelles out your front door, you probably have more interesting animals than you realize. You just have to look for them.

backyard photo safari spider and grasshopper
Nikon D750, 50mm, f/8, 1/180 second, ISO 5600. Shot with a +4 close-up filter. This was right outside my garage door. Cue the Lion King song “The Circle of Life”

Bugs, insects, worms, and other multi-legged creatures might give you the willies, but they can be fascinating photography subjects. The same goes for bees, butterflies, or anything with wings.

If you look closely and have a bit of patience, you can find all sorts of wildlife right where you live.

backyard photo safari wasp
Nikon D7100, 50mm, f/4, 1/125 second, ISO 400. Shot with +10 close-up filter. This wasp was hanging out on the lid of my trash can on a chilly autumn morning.

I’m no entomologist or zoologist, and when I’m out in my backyard looking for photo opportunities, I don’t even know what most of the animals are that I’m photographing. If it’s interesting to look at, and if the lighting is good, then I’ll take a picture. Sure I get a little grossed out from time to time, but I get some really cool images too.

backyard photo safari cottonwood borer
Nikon D200, 50mm, f/1.8, 1/750 second, ISO 200. I don’t know what this thing is, but it was hanging out in a pine tree in my front yard and it made for a really interesting photo.

You don’t just have to think small when taking pictures of animals on a backyard photo safari. Rabbits, squirrels, snakes, and birds – you probably have lots of animals come through your property that would be fun to photograph. The trick is to keep your eyes open, and it helps to have the tiniest sense of adventure too.

You don’t have to just look for small things either. Always keep your camera ready in case something larger comes your way! It might not be especially exciting, but it’s fun to get shots of everyday wildlife like rabbits, squirrels, birds, or other critters that call your backyard home.

backyard photo safari cardinal
Nikon D500, 200mm, f/2.8, 1/400 second, ISO 1600. A little patience was all it took to capture this photo of a male cardinal on my backyard fence.

Every now and then, you might see something a bit more exotic too. When those moments strike, it can be supremely rewarding to attempt a shot. Even if you don’t get the photo, you will at least have a fun story to tell.

backyard photo safari snake in grass
Nikon D200, 50mm, f/4, 1/160 second, ISO 200. My wife saw this snake slithering across our front yard, so I grabbed my camera and a broom. After I got a few photos I gently encouraged it to vacate the premises.

Get a set of close-up filters

One of the best things you can do if you’re looking for a way to get great shots of the world around you is to buy a set of close-up filters. When you think of going on a wildlife safari, you might imagine huge camera rigs and giant telephoto lenses. Close-up filters are the opposite: they let you get very close.

Close-up filters are extremely inexpensive and screw on to the front of your camera lens. They take a bit of patience to learn, so make sure to plan some time to get acquainted with how to get the best results in order to avoid frustration when the moment strikes. Once you get the hang of it, close-up filters make even the most ordinary backyard subjects appear majestic and even otherworldy. In other words, they’re perfect for a backyard photo safari.

backyard photo safari mushroom
Nikon D7100, 50mm, f/11, 1/200 second, ISO 400. Shot with a +4 close-up filter.

Flowers, mushrooms, berries, leaves, sticks, even blades of grass take on a whole new appearance when shot up close.

These stationary objects work really well for macro shots because they allow you to try different focal lengths and experiment with manual focus.

When you’re ready for something a bit more challenging, you can combine close-up filters with bugs and insects. This involves a lot more skill, practice, and patience (as well as mastering the back-button focus technique, which I recommend for best results) but you will never look at your own yard the same way again.

backyard photo safari bee
Nikon D500, 50mm, f/5.6, 1/250 second, ISO 360, shot with +4 close-up filter. It took nearly a hundred shots over two days to get this image of a bee in my back yard, but it was worth the effort.

If you can find a bug that is relatively slow-moving, you can combine all the techniques in this article to get some really amazing shots. For this final image, I went out in the evening, looked at the angle of the sun, adjusted my own point of view accordingly, and used a close-up filter. I’m not even sure what kind of bug or insect this is, but I really like the photo.

backyard photo safari insect on tree
Nikon D750, 50mm, f/1.8, 1/100 second, ISO 900. Shot with a +4 close-up filter.

Conclusion

This list is really just scratching the surface of what’s possible when you go on a backyard photo safari. You don’t need a lot of expensive equipment, and you don’t need to hire a tour guide. These few simple tips will be enough to get you started, and then it’s up to you. How far will your creativity and sense of exploration take you when you’re right in your own yard? It could be a lot farther than you think.

Share your tips, tricks, and backyard safari photos in the comments below!

The post Tips for Doing a Backyard Photo Safari appeared first on Digital Photography School. It was authored by Simon Ringsmuth.


Digital Photography School

 
Comments Off on Tips for Doing a Backyard Photo Safari

Posted in Photography


Video: How one photographer turned his backyard shed into a camera and darkroom

29 Apr

Photographer and DIY camera extraordinaire Brendan Barry has used his time in lockdown to create a camera and darkroom out of a shed in his yard.

Throughout the above 22-minute video, Barry summarizes the build process, showing what was required to turn his compact shed into an all-in-one photo room and the process required to capture the image and make the resulting prints. As you might expect from such an ambitious project, it took a good bit of time to get everything sorted out and even more time to dial in the capture and printing process.

A close-up screenshot from the video showing off the massive 1016mm (40″) F5.4 aerial reconnaissance lens used in the build.

‘In [the video] I talk through the build and operation of the shed camera, bring together a number of the processes I experiment with and shares some of the materials and approaches I use in my practice,’ says Barry in an email to DPReview. Barry specifically notes he used ‘RA4 colour reversal, B&W paper negs contacted to positives and shooting with direct positive paper, both with normal chemistry and with caffenol’ to capture and make prints of the images captured with the ridiculous rig.

While this is technically possible to do at home, it will require plenty of power tools, spare wood you might have sitting around, a generous amount of gaff tape and an insanely large lens (a 1016mm [40”] F5.4 aerial reconnaissance lens in Barry’s case).

We’ve featured Barry’s previous projects before, including his 101 Park Avenue skyscraper camera, his shipping container camera and his guide to turning any room in your home into a camera. This shed project might not be his most grandiose project to date, but it certainly required a healthy dose of elbow grease and equal amounts of patience.

You can find more of Barry’s work on his website and keep up with his latest endeavors on his Instagram profile.

Articles: Digital Photography Review (dpreview.com)

 
Comments Off on Video: How one photographer turned his backyard shed into a camera and darkroom

Posted in Uncategorized


Video: Taking natural light portraits in a backyard shed

11 Aug

Photographer Irene Rudnyk has published a new video demonstrating how she captured portraits in her backyard using a garden shed and natural light. The process was fairly simple, involving a backdrop, large circular reflector, and two-step ladder, the total cost of which was minimal, camera gear aside.

The portraits were captured using a Mamiya 645 camera with a Mamiya 80mm F1.9 lens and Porta 400 film, as well as on digital using a Canon 5D Mark III with a Canon 85mm F1.2 lens. Two of the portraits captured during the photoshoot are available on Rudnyk’s Instagram account. Rudnyk’s other work can be found on 500px.

Articles: Digital Photography Review (dpreview.com)

 
Comments Off on Video: Taking natural light portraits in a backyard shed

Posted in Uncategorized


Prefab Office Pods: 14 Studios & Workspaces Made For Your Backyard

30 Aug

[ By SA Rogers in Architecture & Offices & Commercial. ]

backyard studio sett 1

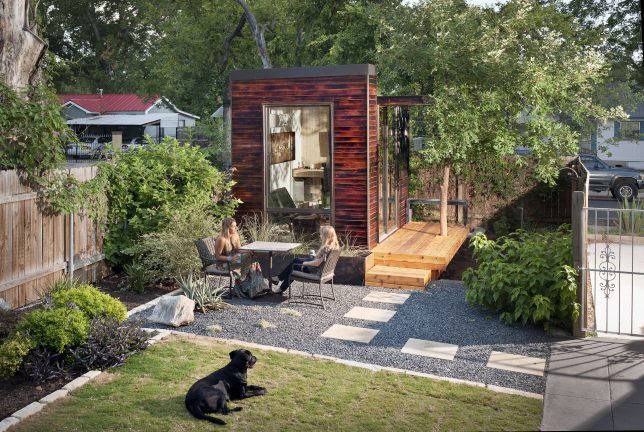
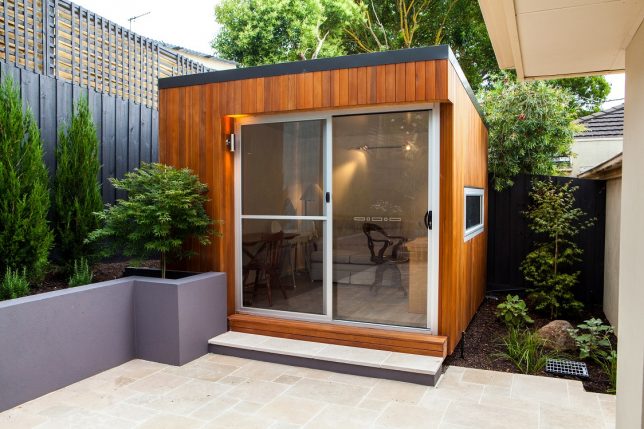
A backyard refuge to work, practice, paint or meditate separates you from the activities inside your home and gives you prime views of your backyard, garden or urban rooftop space. Adding a freestanding room can be as simple as having a fully-assembled prefab volume plunked right onto your property, and you can often customize them your ideal interior configurations, windows, built-in furniture and surfaces. Order one of these ready-to-go options, or use them as inspiration to build your own.

Prefabs by InOutside

inoutside 1

inoutside 2

inoutside 3

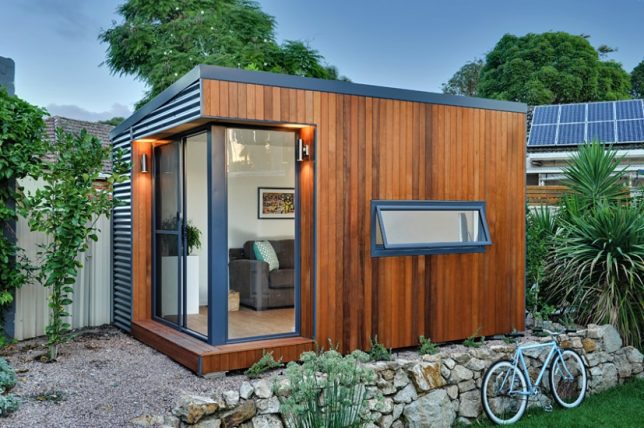
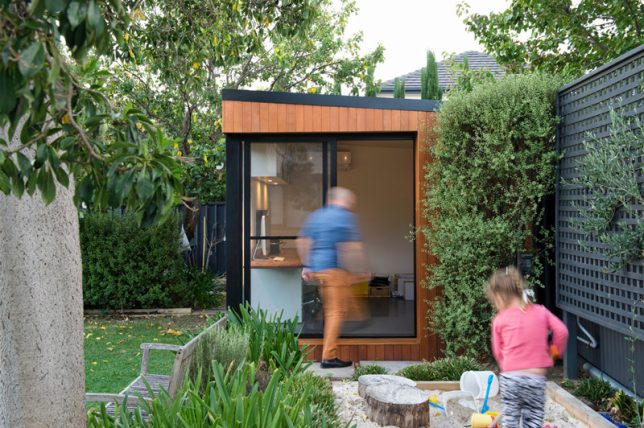
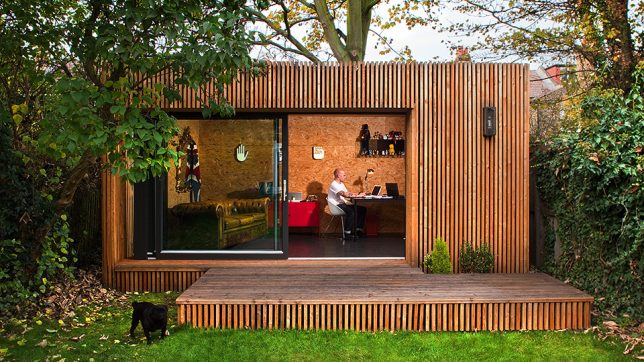
A wood-clad cube with one corner entirely consisting of glass, the ‘Cooba’ by InOutside is a prefab modern room that’s ready to be dropped into your backyard as a studio, office or guest space. It starts at just over $ 15K (AUS) and when there’s easy access to the site, it can be delivered pre-assembled, requiring no concrete foundation or special equipment.

House Arc by Bellomo Architects

house arc

house arc 2

housearc 3

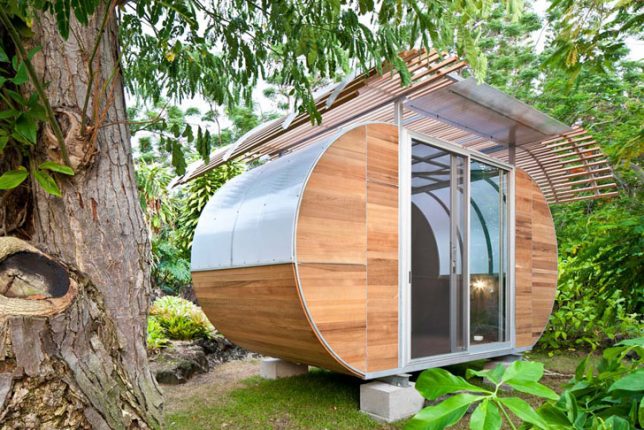
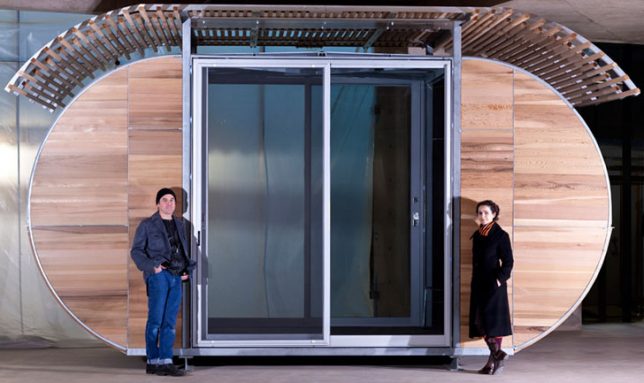
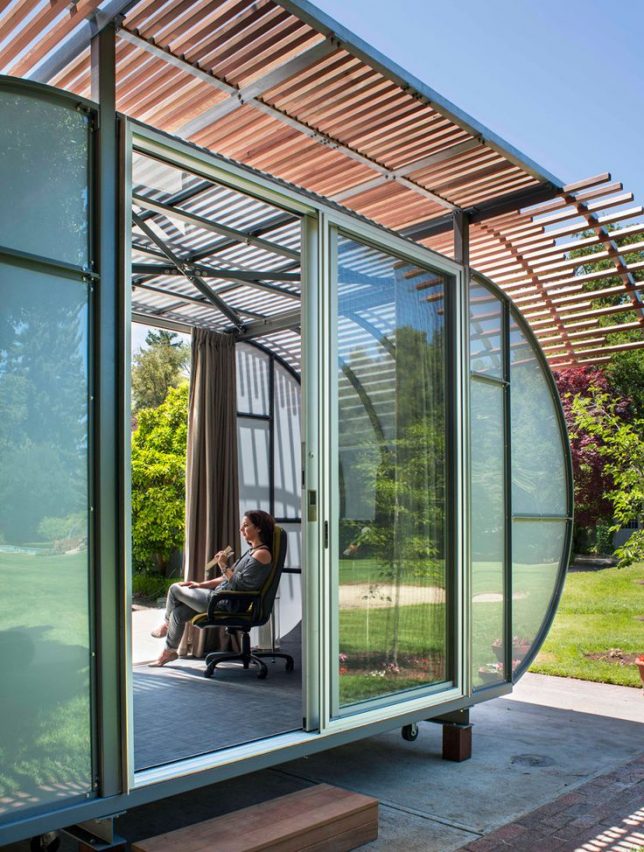
A modular system of bent steel tubes serves as the basis of ‘House Arc’, an unusually shaped rehab designed with environmental sensitivity in mind. It’s got a lattice screen roof providing a bit of shade and interest, rounded ends , translucent panels to let in light, and sliding glass doors. It’s made to be fully off-the-grid, can be flat-packed and shipped in a box that’s barely larger than that of a typical IKEA bed frame, and weighs 3000 pounds when complete.

Modular Library Studio by 3rd Space

backyard library

backyard library 2

backyard library 3
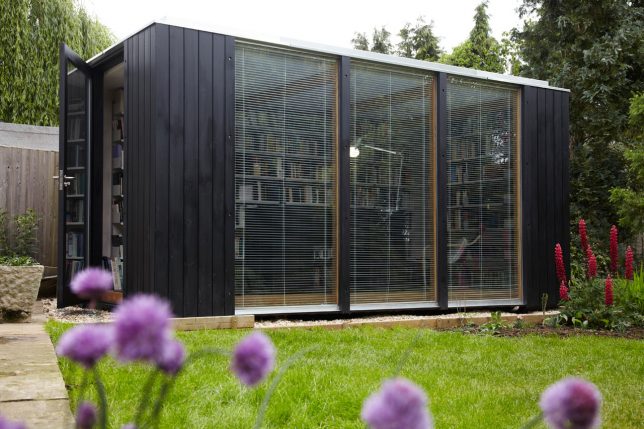
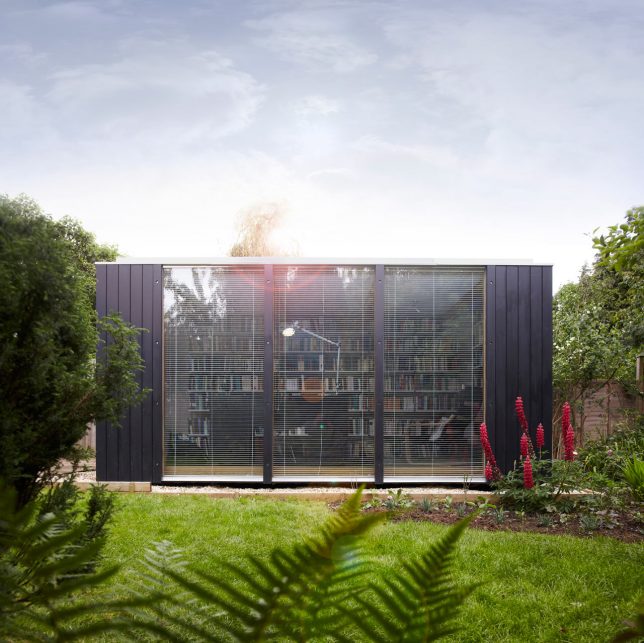
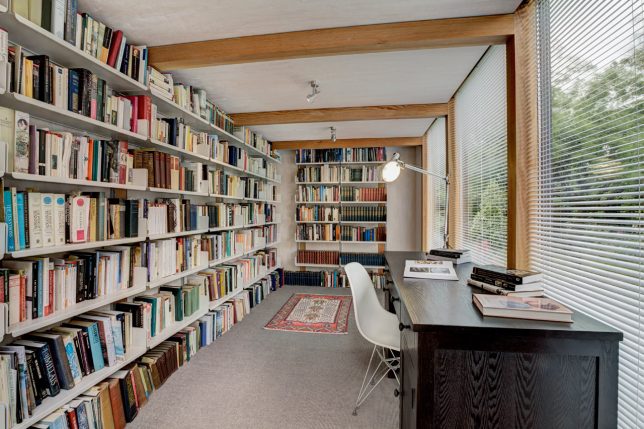
Is this the coolest backyard room of all time? 3rd Space didn’t just add an office to the garden of a literature professor in Oxfordshire – they gave her an entire private library, with floor-to-ceiling windows and walls lined with books. The prefab system can really be used for anything, but the custom shelving really makes this unit special.

Green Roof Garden Studio by Eco Space

ecospace 1

ecospace 2

ecospace 3

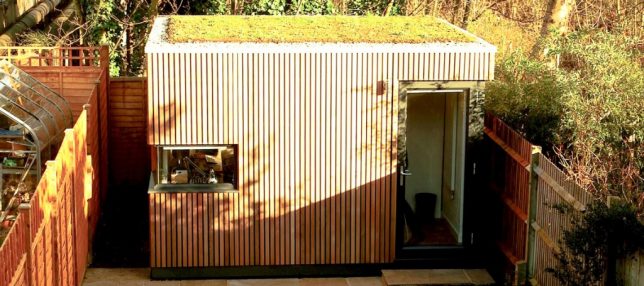
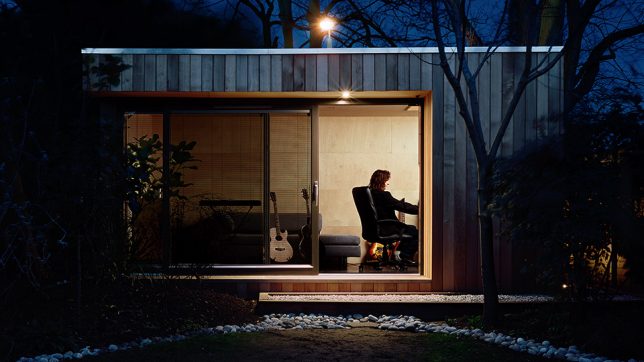
Vertical slats and optional green roofs add a whole lot of charm to Ecospace studios and their smaller models, including the medium-sized MidiPod. Based in the UK, Ecospace offers a sustainable and affordable alternative to a fixed addition. These studios are flexible and modular so they can be tailored, reconfigured or extended. The WorkPod is the smallest of all, built for a single user with a typical installation time of just 5 days.

The LoftCube

loftcube

loftcube 2

loftcube 3

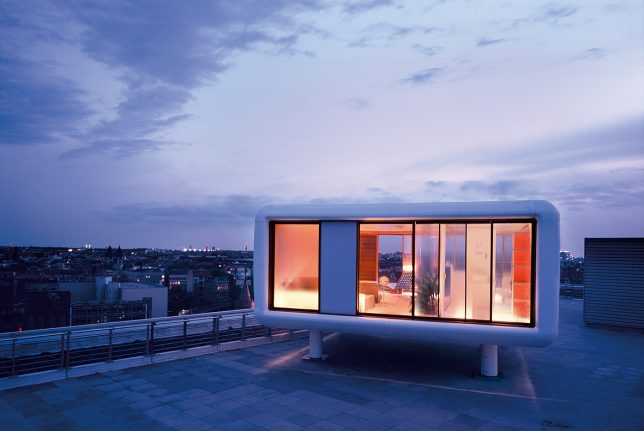
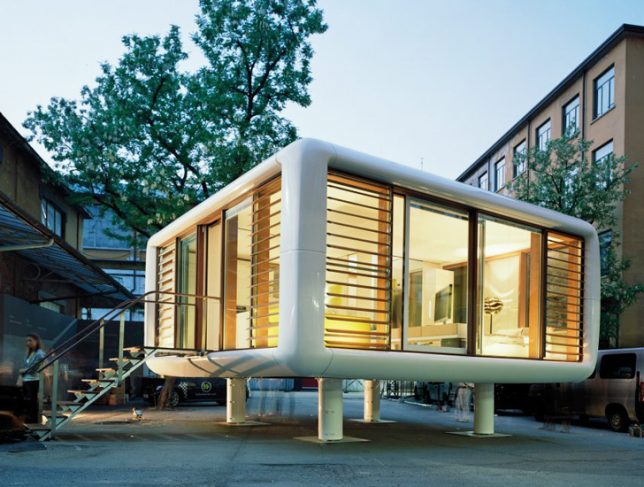
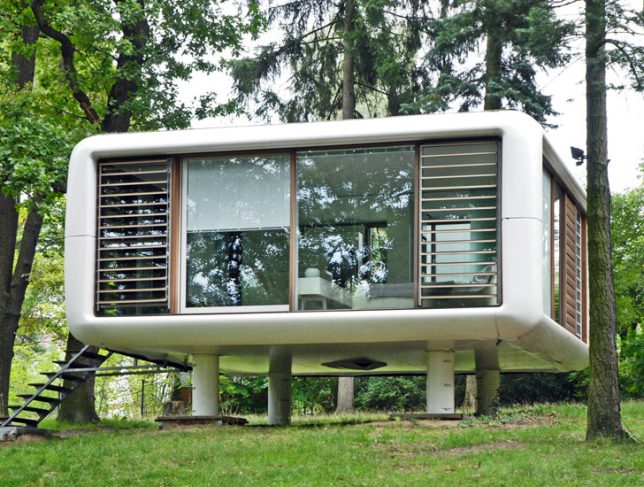
No backyard to work with? How about a roof? The Loft Cube functions like a ready-to-go rooftop extension and ranges in size from a modest 365 square foot volume, which requires no building permits in its home nation of Belgium, to a volume that’s plenty large enough to live in at over 900 square feet. You can even stack the cubes on top of each other to create a larger dwelling.

Next Page – Click Below to Read More:
Prefab Office Pods 14 Studios Workspaces Made For Your Backyard

Share on Facebook


[ By SA Rogers in Architecture & Offices & Commercial. ]

[ WebUrbanist | Archives | Galleries | Privacy | TOS ]


WebUrbanist

 
Comments Off on Prefab Office Pods: 14 Studios & Workspaces Made For Your Backyard

Posted in Creativity


10 Ideas for Photographing Nature in your Backyard

17 Jul

Have you noticed how many photographers are fascinated with the natural world? Even if we specialise in another genre, few of us can resist a gorgeous flower, or a branch of autumn leaves.

One of the best things about photographing nature is that it is so accessible. You needn’t travel far to find it, because it’s all around you. You may take it for granted because you see it every day, but your own backyard is treasure trove. Every hour of every day and every season, bring something new.
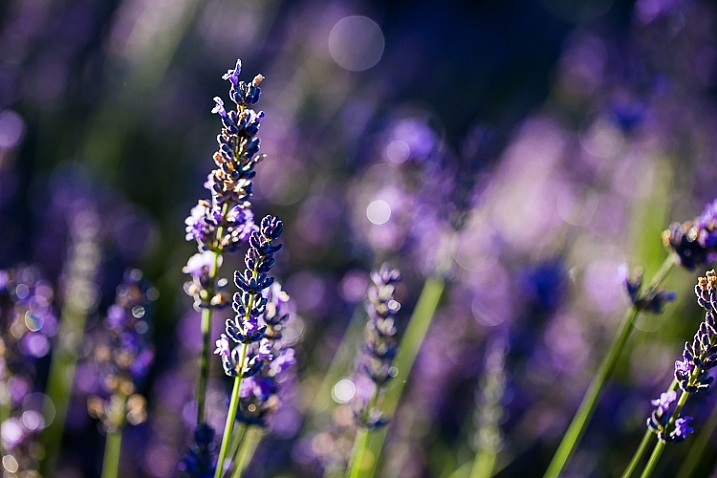
image showing photographing nature in your backyard

Summer lavender: ISO 100, f/3.5, 1/200th

Backyard needn’t be taken literally here. If you don’t have a backyard, you’ll find plenty of nature to photograph just by wandering the streets or public parks and gardens.

Tech details: All of the photographs in this article were shot on my Canon 5D Mark III. Unless otherwise stated, I have used my Canon macro 100mm f/2.8 lens. I have included details of ISO, aperture and shutter speed settings.

#1 – Flowers and leaves

Flowers and leaves are often the first things that come to mind when we look for subjects in our own backyards. They offer an endless variety of colours, shapes and textures for you to photograph. You could create a collection based on a single colour scheme, or try to find as many different leaf or flower shapes as possible.
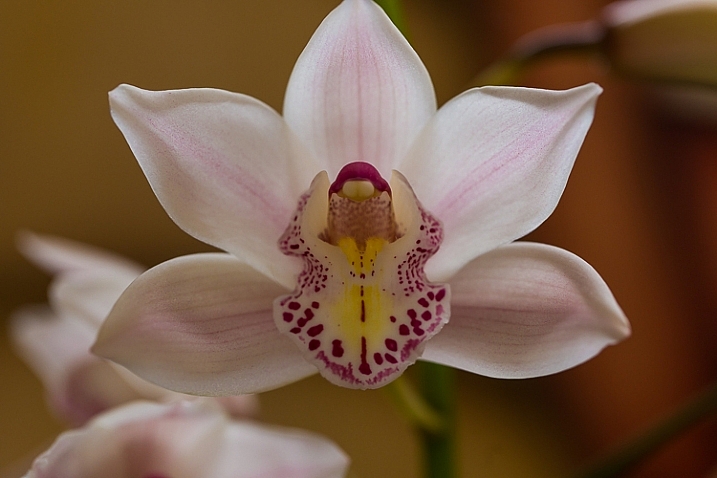
iso 640, f4, 1/100 sec

Cymbidium orchid: ISO 640, f/4, 1/100th
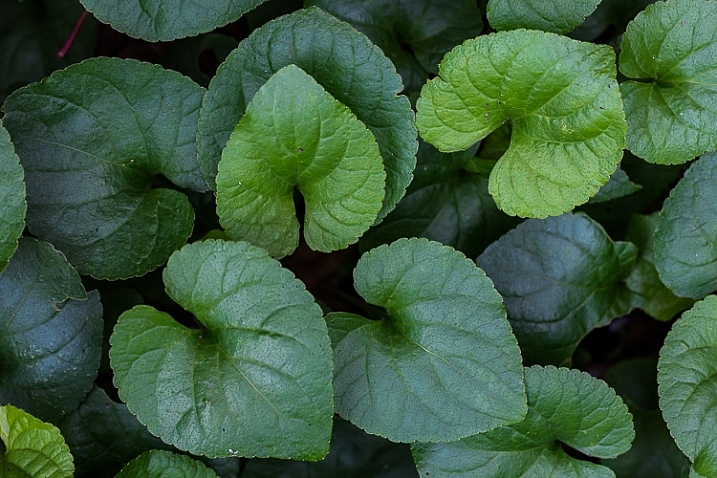
image showing photographing nature in your backyard

Violet leaves: ISO 800, f/8, 1/30th

image showing photographing nature in your backyard

Geranium leaves: ISO 320, f/8, 1/40th

Experiment with different lighting and conditions. I love backlighting for leaves and flowers, as it creates a luminous, almost three-dimensional effect, and you can see details such as veins. Some shapes look better with strong, directional light, and I love how colours are enhanced in the wet.
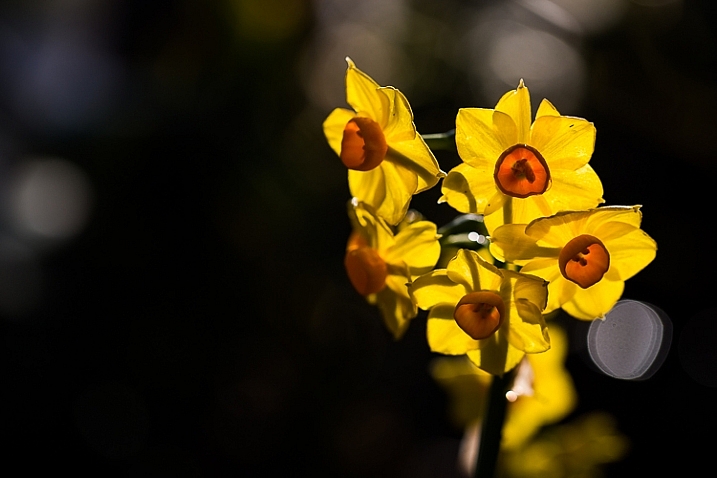
image showing photographing nature in your backyard

Erlicheer daffodils BACKLIT: ISO 100, f/4, 1/640th
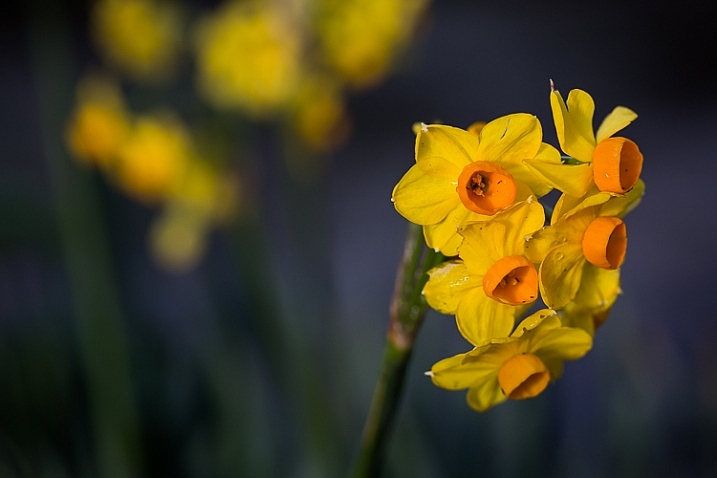
image showing photographing nature in your backyard

The same flower shot with the sun on my back: ISO 100, f/4, 1/800th
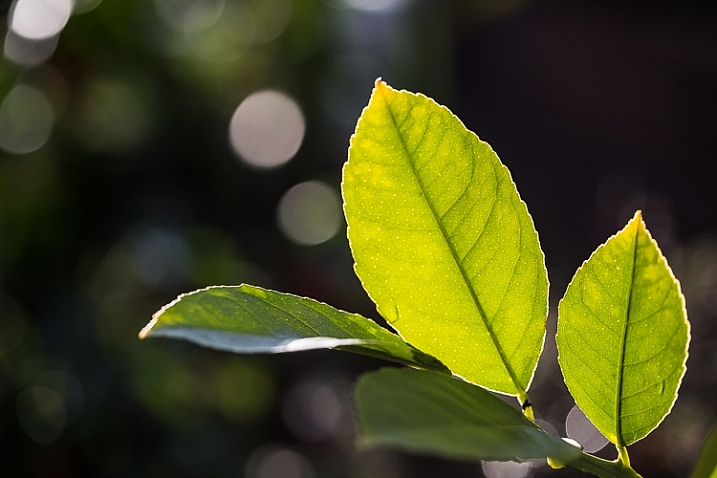
image showing photographing nature in your backyard

Backlighting a leaf reveals details you wouldn’t see if you lit it directly : ISO 100 f/4, 1/250th

Flowers are seasonal, and in temperate zones, spring and summer offer the widest variety. There are still flowers to be found in winter, although you may need to look harder. Don’t forget that weeds, such as dandelions ,are also beautiful! Autumn (fall) provides the greatest colour spectrum in leaves.
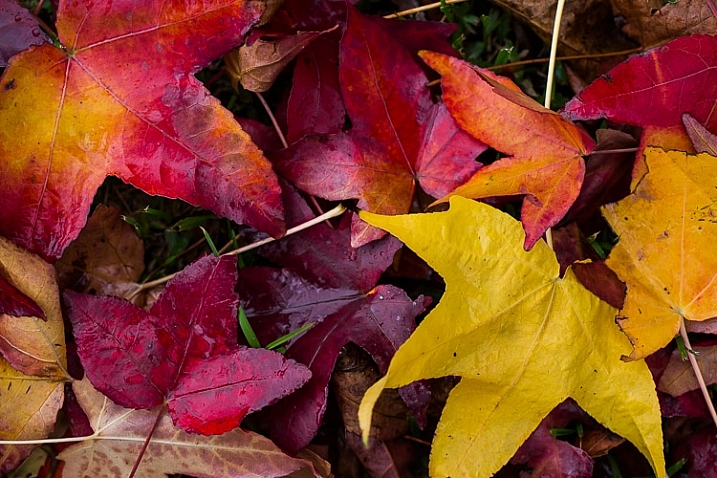
image showing photographing nature in your backyard

Liquidamber leaves photographed en masse: ISO 640, f/4, 1/80th
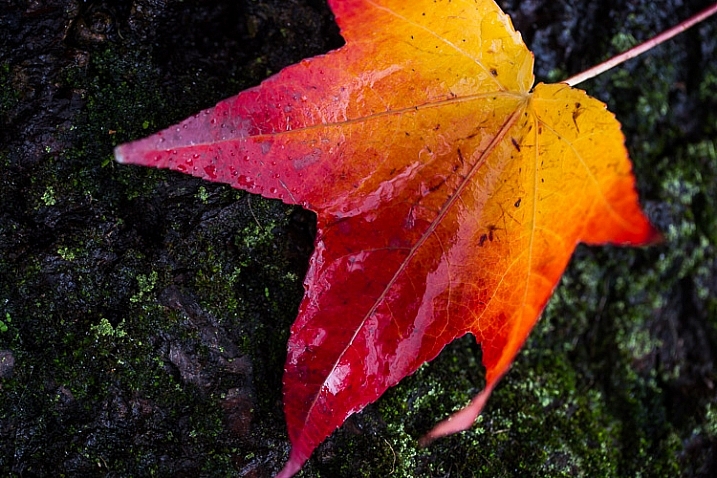
image showing photographing nature in your backyard

A single leaf isolated against a dark background: ISO 640, f/4, 1/30sec

#2 – Fruit, berries and seed pods

When the summer flowers disappear, fruits and berries are nature’s way of providing for birds and animals throughout the colder months. Many berries and seed pods ripen towards the end of autumn, bringing colour to the winter garden. Citrus trees bear fruit in winter, and persimmon trees lose their leaves to reveal branches of shiny orange fruits. Think also of acorns, pine cones, and nuts.
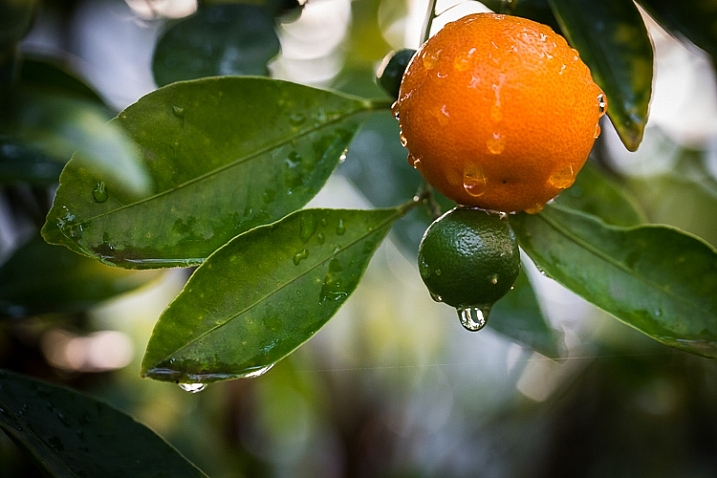
image showing photographing nature in your backyard

Kumquat: ISO 2500, f/4.5, 1/50 sec

photgraphing nature in your backyard

ISO 800, f/8.0, 1/500th.

photgraphing nature in your backyard-4

ISO 500, f/5.0, 1/1250th.

photgraphing nature in your backyard-3

Orange rosehip: ISO 500, f/5.0, 1/160th
photgraphing nature in your backyard-2

Bunches of red berries: ISO 500, f/5.0, 1/100th.

#3 – After the rain

Raindrops are fascinating through the lens. Try photographing them from various angles, and in different lighting. When photographing a single droplet, or a string of them, isolate them by keeping the background uncluttered. You can do this by creating distance between the droplets and the background, and using a wide aperture to ensure it is blurred. Notice also how water sits in nice round droplets on some types of leaves, but on others it disperses.
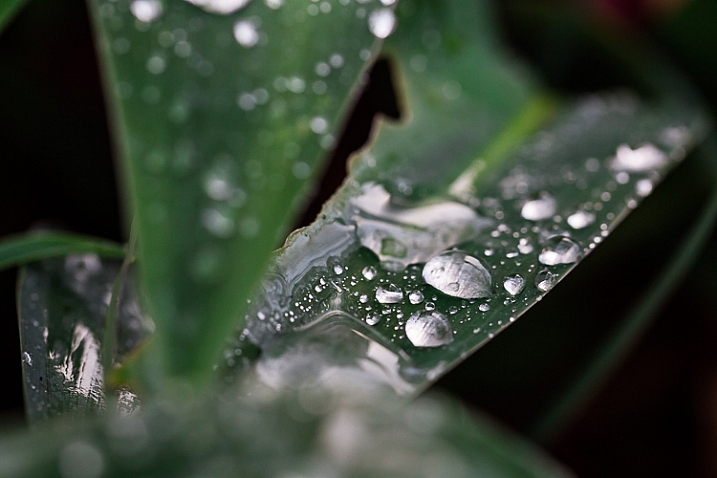
image showing photographing nature in your backyard

Arthrododium leaves after rain: ISO 800, f/4.5, 1/80 sec
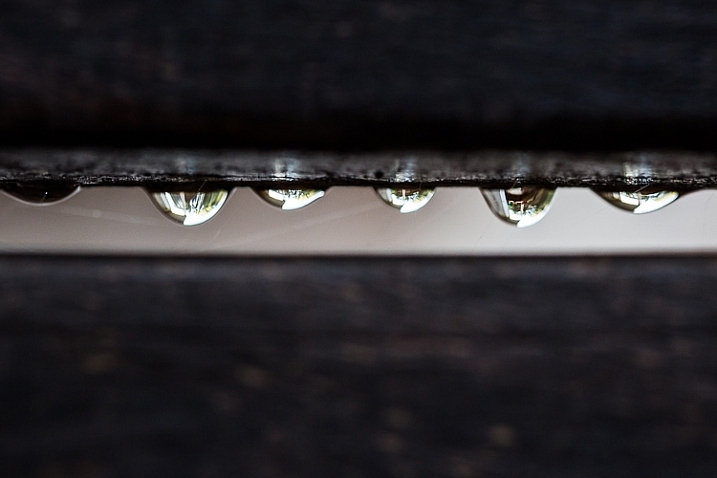
image showing photographing nature in your backyard

Raindrops hang from the slats on the back of a garden chair: ISO 1000, f/4, 1/125 sec
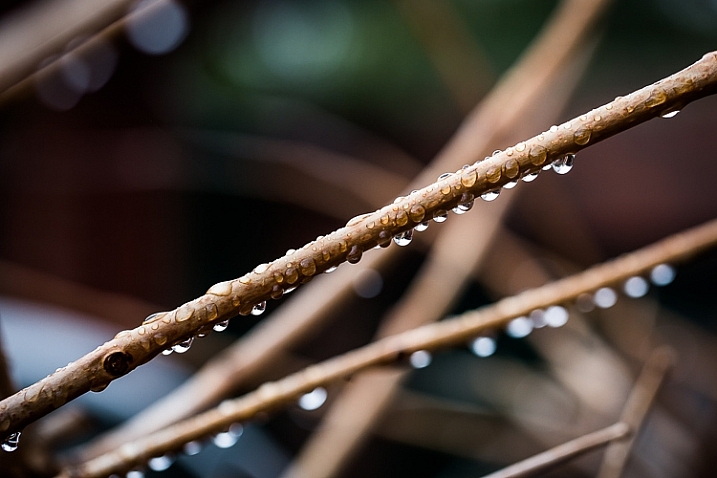
image showing photographing nature in your backyard

ISO 640, f/4, 1/125 sec

image showing photographing nature in your backyard

ISO 1000, f/4, 1/125 sec

#4 – Mushrooms, toadstools and fungi

These are abundant in autumn and winter, but some species pop up throughout the year after rain. Look in damp, mossy places, on the sides of trees and log piles for them.

My personal favourites are the red toadstools with white speckles. They are evocative of fairy tales and magic, and their colours are a nature photographer’s dream!
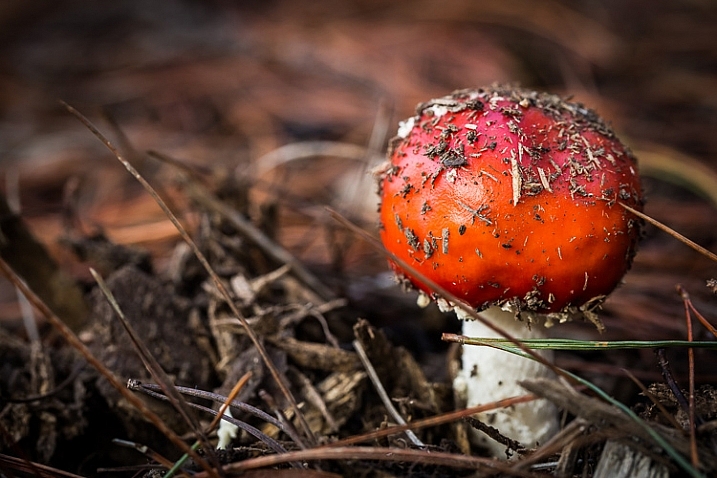
image showing photographing nature in your backyard

Toadstool: ISO 1000, f/6.3, 1/250 sec
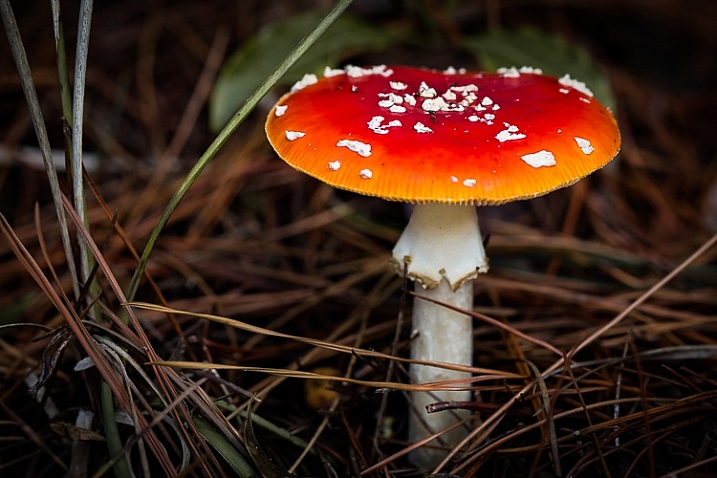
image showing photographing nature in your backyard

ISO 1000, f/6.3, 1/160 sec

Don’t ignore the tiny, dull-coloured mushrooms and fungi. The ones in the photo below were growing in a crevice in the side of my herb garden. You can see by the scale of the woodgrain how tiny they were. From above, they were nondescript, but when I lay on the ground beneath them and shot into the backlight, they became translucent and I could see their delicate structure.
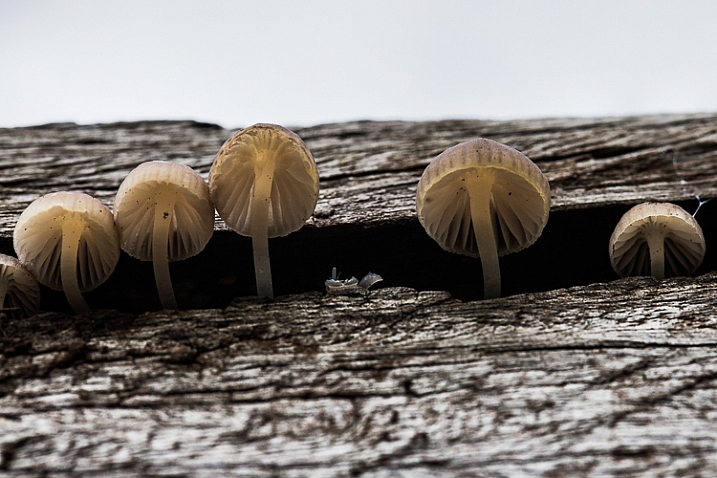
image showing photographing nature in your backyard

These tiny mushrooms were no bigger than the fingernail on my pinky finger! ISO 800, f/8, 1/160 sec

#5 – Look up . . . look down

We have a ginormous tree in our backyard. It was probably planted when our house was first built in the 1920s, and its canopy is as big as the footprint of the house. One of my favourite things to do in the warmer months is to put a picnic rug on the lawn, and lie on my back gazing up into its branches. It is free therapy!

Watching the leaves change from bright spring green through to darker green in summer, the first blush of colour in autumn, through to rich claret just before they drop, never ceases to delight me. I have photographed it time and time again through the seasons. Even lying on the ground with my 35mm lens, I can only capture a small portion of the canopy.
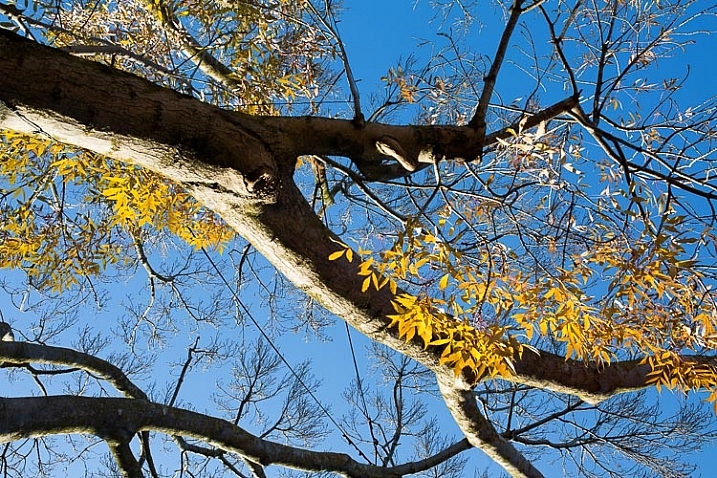
image showing photographing nature in your backyard

Sigma 35mm Art lens, ISO 160 f/11, 1/60 sec
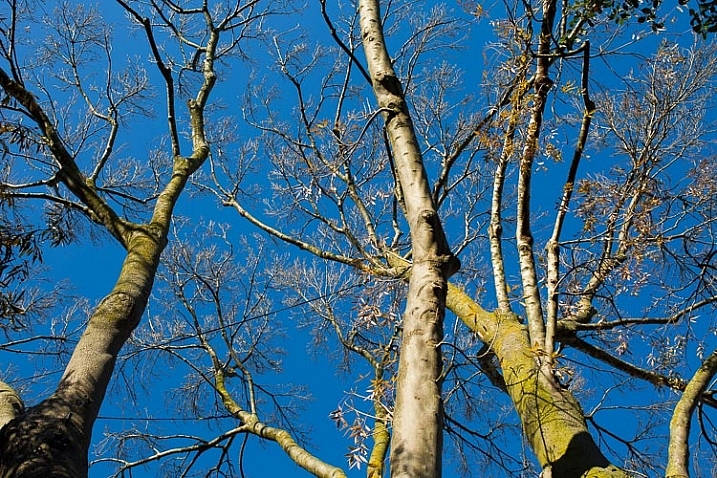
image showing photographing nature in your backyard

Sigma Art lens 35mm, ISO 160, f/11, 1/100 sec

If you are lucky enough to have trees in your garden, try standing or lying directly underneath them and shooting up into the branches. Notice how the light changes from early morning, throughout the day into late afternoon and evening. Branches, whether they are naked or covered with leaves, contrast beautifully against a blue sky. They are equally stunning at sunrise and sunset, and on a moonlit night.
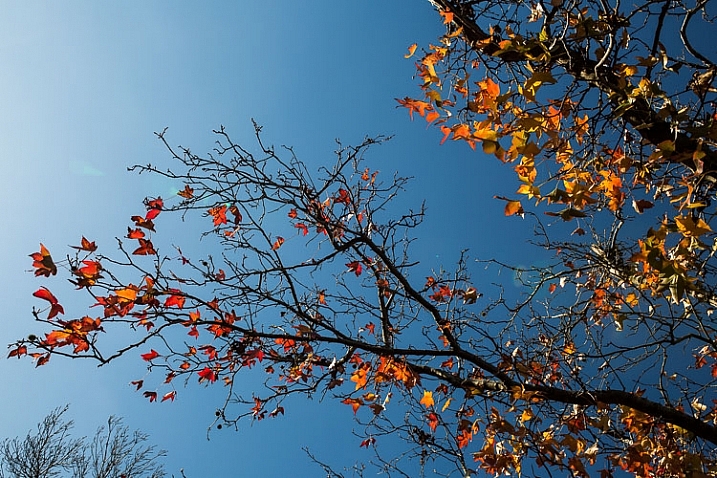
image showing photographing nature in your backyard

Sigma Art lens 35mm: ISO 200, f/11, 1/200

If you haven’t any trees, look for interesting cloud formations to photograph. You can create a collection of skies to use as Photoshop overlays, to add interest to other outdoor photos such as portraits. Look for vertical cloud formations, fat white fluffy ones, and those lovely soft colours around the edge of the clouds at dusk and dawn.

Down on the ground are a million microcosms in the moss, the lawn, between the paving stones, and the fallen bark and leaves. You won’t see them until you get down to ground level, so lie flat on your tummy and peer into another world.
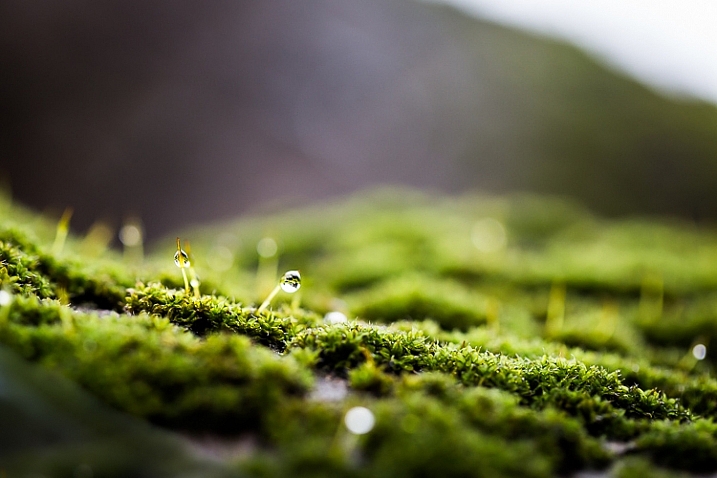
image showing photographing nature in your backyard

Macro world: the moss on a tree trunk. ISO 640, f/4, 1/40 sec

#6 – Black and white beauty

We tend to think of colour photography when we think of nature, but don’t dismiss the idea of black and white. Nature provides sculptural shapes and contrasting textures that make great black and white subjects. If you have succulents or cacti in your garden, they are often more interesting in black and white than they are in colour (except on those rare occasions when they flower). Ditto with white flowers against a dark background. Smooth pebbles, rough bark, snail shells, acorns and pine cones all look fabulous in black and white. Try strong, directional lighting, and a high contrast edit.
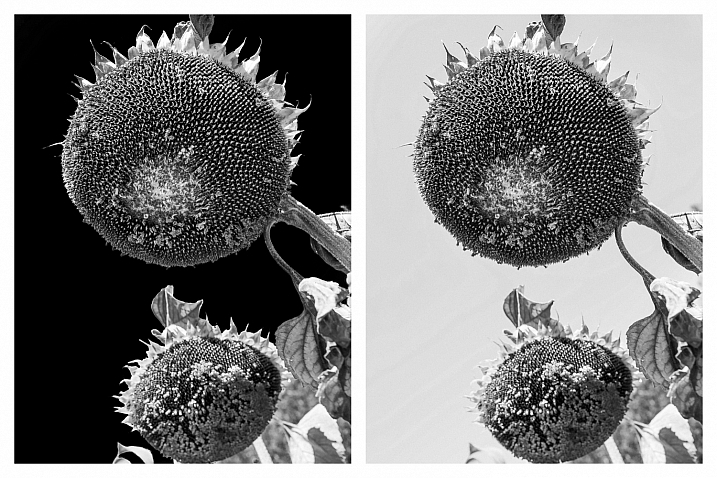
image showing photographing nature in your backyard

When I converted this file to B&W in Lightroom, I played with the sliders in the HSL panel. The photo on the left has the blue slider pulled all the way down to -100 to darken the blue sky. On the right, the blue slider is set to zero.
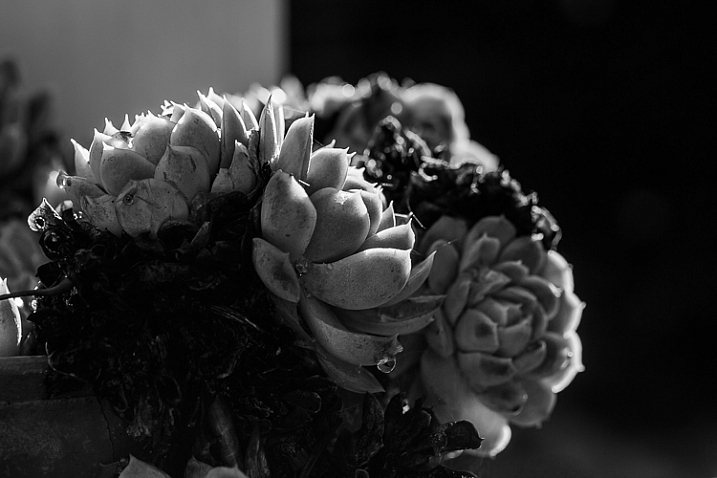
image showing photographing nature in your backyard

ISO 100, f/8, 1/100th. Converted to B&W in Lightroom.

#7 – Experiment with sun flare and haze

Your backyard is one of the best places to experiment with effects and new techniques. Firstly, you become familiar with how things look at various times of the day, and throughout the seasons. Secondly, you don’t need to travel far, so you can respond to anything on a whim. If you spot something amazing while you’re sipping on your morning coffee, you needn’t even get out of your pyjamas to capture it!

The subjects in the two photographs below are both visible from my desk. Every morning last summer, I noticed how this shaft of hazy sunlight would hit the planting of succulents on the pedestal, so I knew exactly what time to capture it at its best. Also sitting at my desk, I saw how the sun caught this spray of orchids just after the rain, and I rushed outside with my camera.
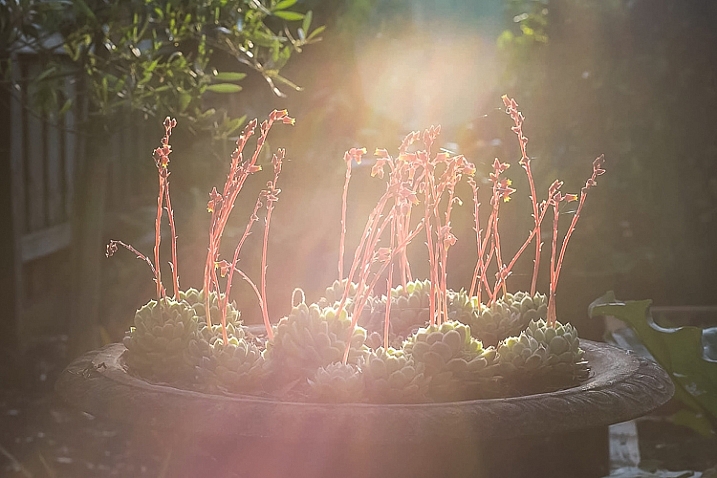
image showing photographing nature in your backyard

Canon 85mm lens, ISO 100, f/4, 1/800th.
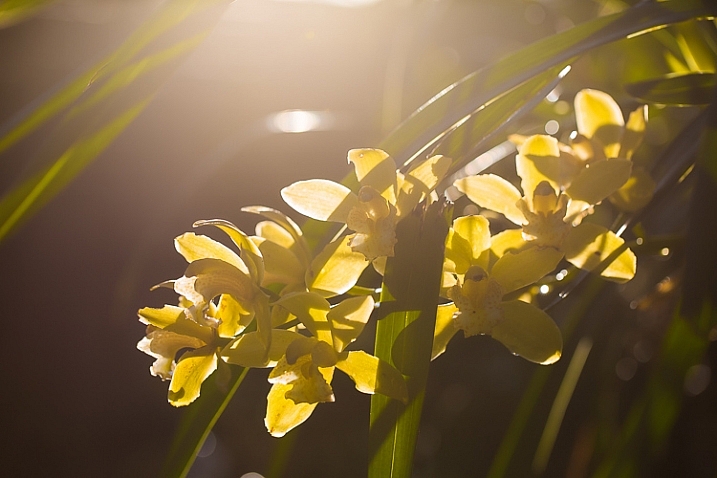
image showing photographing nature in your backyard

Shot with sun flare and no lens hood: ISO 100, f/4, 1/1000 sec
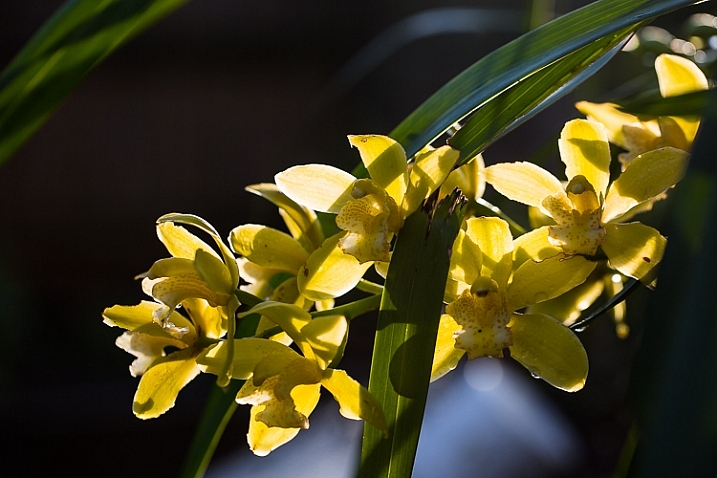
image showing photographing nature in your backyard

For comparison, this is the same scene shot with a lens hood to cut flare: ISO 100, f/4, 1/320sec

#8 – Snails, bugs and spiders

For nine months of the year, there are a million creepy-crawlies in my backyard. Butterflies, cicadas, crickets, praying mantis, caterpillars, moths, bees, wasps and spiders (I could happily do without the latter two). At the time of writing this article, it is winter in Melbourne, so most bugs are hiding or dormant.

#9 – Birds and other wildlife

I’m going to preface this paragraph with honesty. Confession #1: photographing wildlife of any kind requires more patience and a longer telephoto lens than I possess. Confession #2: I have the greatest admiration for those who do it. I have a Pinterest board just for animal photos (you’ll notice a clear bias towards squirrels) and on 500px I follow a number of photographers, one of whom only photographs squirrels!

Editor’s note: our own Will Nichols specializes in photographing squirrels.

The kinds of animals and birds you’re likely to find in your backyard obviously depends on which part of the world you live in, and how built-up your neighbourhood is. You will know which kinds of critters visit your backyard, and what their habits are. With that in mind, find a spot where you won’t be too conspicuous, and be prepared to wait. If you’re using a long lens, you might consider using a tripod or monopod to avoid camera shake. Have your ISO and aperture all set to go, with a fast shutter speed to freeze motion. If you have been watching the animal or bird’s behaviour over several days or weeks, it may be possible to focus roughly on the area you expect them to appear – for example, the birdbath.

Also read: Guide to Attracting Critters to Your Garden for Backyard Wildlife Photography

#10 – Portraits in nature

Nature provides us with the perfect canvas for portraiture. Look for a bank of flowers, a bed of autumn leaves, or just a green hedge – the colours in nature never seem to clash.

When photographing children and pets in particular, I almost always prefer an outdoor location over a studio. My eldest daughter usually runs a mile when she sees the camera, but the chance to roll around with the dog in these glorious leaves was clearly too much for her to resist.

I love how the soft hues flatter her skin tone. If you are shooting outdoors with lots of colours, such as flowers or autumn leaves, take care with your subject’s outfit. These portraits might been too busy if my daughter had been wearing a patterned outfit.
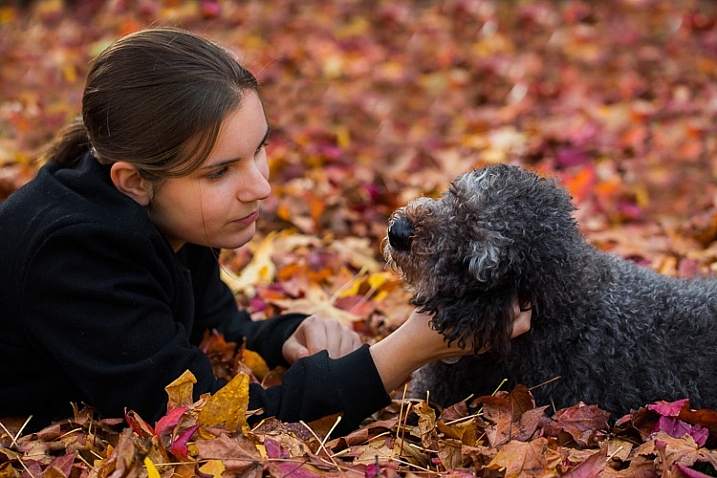
image showing photograph nature in your backyard

Not even teenage daughters can resist these leaves! ISO 320, f/4, 1/400 sec
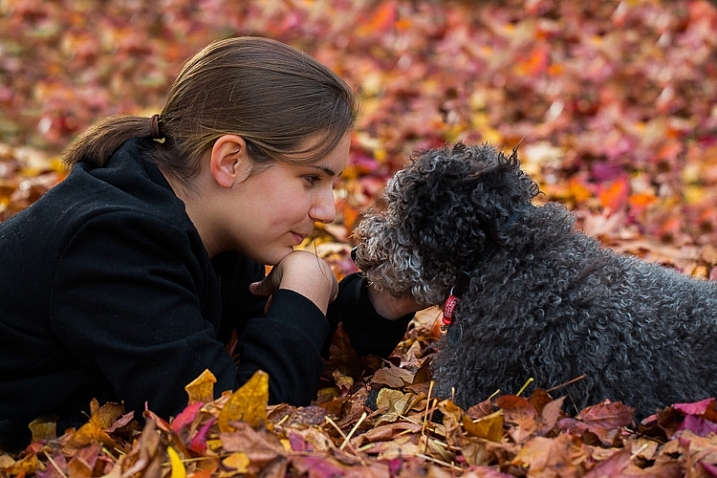
image showing photographing nature in your backyard

ISO 320, f/4, 1/320 sec

Let’s hear from you!

So there you have it – plenty of inspiration to get outdoors and photograph nature in your own backyard. It’s time to stop reading and get out there with your camera. Please share your backyard nature photographs in the comments below … especially if they involve squirrels!

This week we are doing a series of articles to help you do better nature photography. See previous articles here:

  • 3 Habits Every Outdoor Photographer Should Develop to Avoid Missing Shots
  • 5 Tips for Better Nature Photography
  • 27 Serene Images of the Natural World
  • Weekly Photography Challenge – Nature

googletag.cmd.push(function() {
tablet_slots.push( googletag.defineSlot( “/1005424/_dPSv4_tab-all-article-bottom_(300×250)”, [300, 250], “pb-ad-78623” ).addService( googletag.pubads() ) ); } );

googletag.cmd.push(function() {
mobile_slots.push( googletag.defineSlot( “/1005424/_dPSv4_mob-all-article-bottom_(300×250)”, [300, 250], “pb-ad-78158” ).addService( googletag.pubads() ) ); } );

The post 10 Ideas for Photographing Nature in your Backyard by Karen Quist appeared first on Digital Photography School.


Digital Photography School

 
Comments Off on 10 Ideas for Photographing Nature in your Backyard

Posted in Photography


Backyard Macro Photography Safari

26 May

Editor’s Note: This is part a series on macro photography this week. Look for a new one each day. The next newsletter will have them all if you miss any!

As photographers, we often have the opinion that in order to capture a great image we need to head out to an exotic location. But, what if you don’t have the time or opportunity to go to one of those places? Say you have free time some morning, and would like to go outside and capture some stunning images. You might be surprised at what you can find to photograph right in your own backyard!

If you don’t have a backyard, take a trek to a nearby park. Everywhere you look, you will find subjects to photograph in macro. Spring and summer are great seasons to go on a backyard macro photography safari. There are many advantages to such a shoot. For one, you don’t need to be up and at’em before the crack of dawn to travel – though it is beneficial to take full advantage of the early morning light. Also, keep in mind that if you are planning a Backyard Macro Safari for your weekend, you should put off mowing your grass until after your macro adventure, because your mower will likely destroy some potential subject matter in your yard.

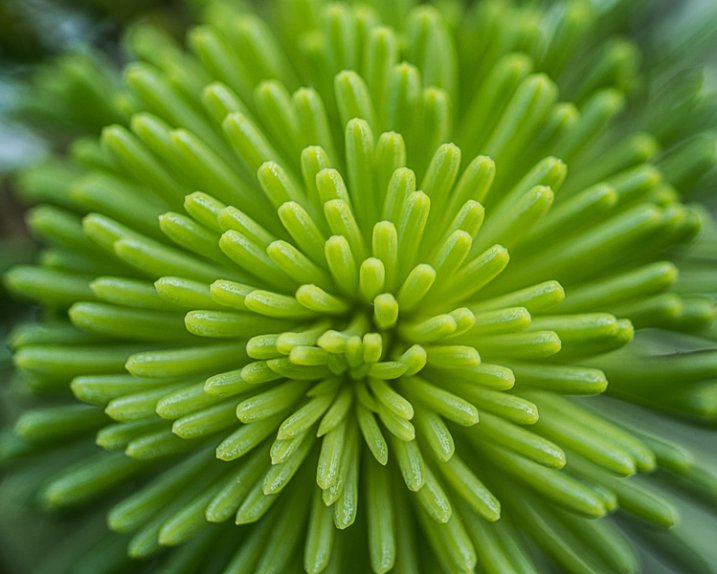
New growth on a pine tree creates a unique color burst effect.

New growth on a pine tree creates a unique color burst effect.

Necessary Equipment:

Keep it simple! Start out with your camera and macro lens on a tripod. Other equipment you might find useful includes a mat or knee pads, an off-camera flash, a reflector, and a diffuser. Another great thing about a backyard safari is, if you decide to use another piece of equipment you can just go back in the house and get it!

Tripod

As with almost every type of photography, the tripod is one of your most important pieces of equipment, for a couple of reasons. The most obvious reason is to avoid camera shake, But also, in many cases, your depth of field will be very shallow, and keeping your camera still on a tripod will help keep your subject in sharp focus. Another benefit to using a tripod is that to do so will slow you down, which is very helpful with setting up the composition and lighting of your image.

Mat or knee pads

Not every capture will be found at standing level. A mat or knee pads are great tools for helping you get to ground level conveniently and comfortably in your yard.

Off-camera flash

Sometimes you’ll find some of the most interesting subjects in the deep shadows of your yard. In these cases, using an off-camera flash will add some light to better reveal or enhance your subject.

Light Reflectors

Reflectors come in very handy when you need to add some light into the shadowy areas of your image.

Light Diffusers

If you are dealing with very harsh light, diffusers or light modifiers can soften the light.

Black and white

Converting to black and white can bring out the patterns and textures of your images.

Take time to look around

Yogi Berra once said “You can observe a lot by just looking around.” In macro photography, sometimes less is more, so slow down and seek out even the smallest detail that could create a great macro image. Try to find new angles that make even the simplest object interesting. Don’t be afraid to experiment with new techniques such as multiple exposures.

What to look for, subject-wise

There are many objects right in your own backyard that make great macro photography subjects, such as flowers and insects. But don’t just stop there! Look for repeating patterns, textures and leading lines. Water droplets and spider webs can become beautiful subjects if photographed carefully. Just as in any other form of photography, look for the color red to compose a powerful image.

14844445274_cf84722530_o

Choose your background wisely

The background is one of the most important elements of a good macro. Setup your camera at the level of your subject. This will allow you to move 360 degrees around it, and carefully choose just the right background to enhance the subject. Be aware that if the background is too busy or too light, it will draw the viewer’s eye away from the subject.

DSC_6693-Edit

The muted colors of the background causes the subject to stand out sharply.

Light

Avoid harsh lighting or flat lighting. By looking for side light, or even back-lighting, you can create more dramatic images. Adding an off-camera flash is an effective technique to enhance your subject and separate it from the background. By setting your fastest flash sync-speed, and using a small aperture, you can make your subject pop from an otherwise boring background.

Focusing

Focusing can be the most difficult component of macro photography. Here’s a little trick to help you get the focus result you are looking to achieve: First, set your lens on manual focus. Next, turn the focus ring to the minimum focus length. Now simply move your camera closer to your subject until the part of the image that you want to be sharp is in focus and take the shot.

The wind is not your friend

Windy days make it very difficult to capture sharp macro images, and even harder to compose one if your subject is swaying back and forth in the wind. Try adding a flash to freeze your subject in windy conditions. In some cases the wind can help create interesting effects, but it’s a challenge!

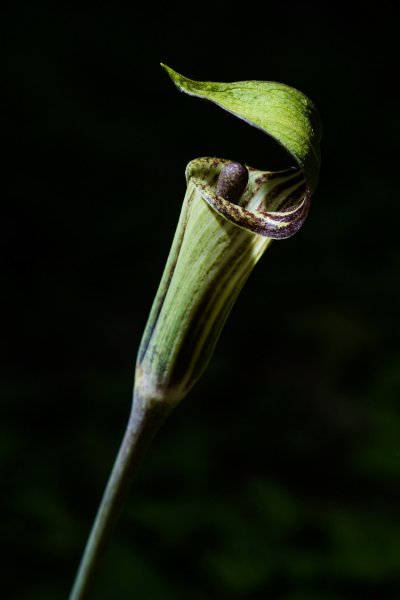
Found this in the under growth in my backyard. Because of very low light I add a off camera flash set to low power on the side. I wanted to add some light to the top so I used my hat to reflect some of the light from the flash to the top of the plant.

An off camera flash was used here to add side light to this Jack-in-the-Pulpit. A light colored hat was used as an impromptu reflector to add light to the top of the wild flower.

Conclusion

Capturing images of nature in your own backyard is rewarding and convenient. One of the best things about a Backyard Macro Safari is that you don’t have to go anywhere for the shooting experience, so if things don’t work out, you don’t have that long disappointing ride home with nothing to show for it. If it was successful, you can kick back and celebrate right away, though you may still have to face mowing the lawn! What macro images can you capture in your backyard safari?


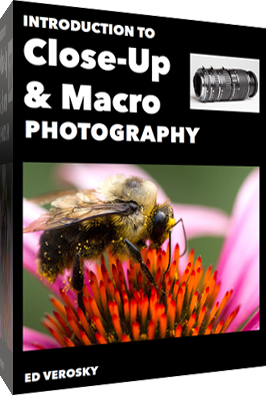
macro-coverWant to learn more about macro photography? Check out Ed Versosky’s Introduction to Close-Up & Macro Photography ebook – just $ 10 (over 30% off) this week with coupon code: DPS. You will need to enter the code to apply the discount.

googletag.cmd.push(function() {
tablet_slots.push( googletag.defineSlot( “/1005424/_dPSv4_tab-all-article-bottom_(300×250)”, [300, 250], “pb-ad-78623” ).addService( googletag.pubads() ) ); } );

googletag.cmd.push(function() {
mobile_slots.push( googletag.defineSlot( “/1005424/_dPSv4_mob-all-article-bottom_(300×250)”, [300, 250], “pb-ad-78158” ).addService( googletag.pubads() ) ); } );

The post Backyard Macro Photography Safari by Bruce Wunderlich appeared first on Digital Photography School.


Digital Photography School

 
Comments Off on Backyard Macro Photography Safari

Posted in Photography


Guide to Attracting Critters to Your Garden for Backyard Wildlife Photography

04 Jun

9783923464 5e8518e1f9 o
Wildlife photography brings with it some natural challenges. One of the greatest being that it is often difficult to have regular access to wild animals to photograph. Many of us are guilty of looking further afield for our subjects, but our own back gardens are prime locations for attracting, and photographing wildlife.

Live in the city suburbs? Doesn’t matter. Your area is likely to be bustling with bird life that you aren’t aware of yet. This guide will run you through a few of the best ways you can attract birds and animals to your garden for easier wildlife photography.

Provide Supplementary Food

Animals are suckers for food. They’re often hungry and looking for their next meal. The best way to get them to come to your garden is to provide nutritious, supplementary food. There are a variety of different methods you can use to feed wild animals.

Bird feeders are available in many different sizes and shapes. A normal tube system with various feeding holes is available from your local pet shop or garden centre. They’re inexpensive, and can be filled with many different varieties of seed. You can buy wild bird food from the same place, and get anything from mixed seeds to solely sunflower hearts. I use the latter, and to great effect.

For attracting mammals, you can get a variety of ground feeders. Squirrels, for example, love peanuts, hazelnuts and other nutty foods.
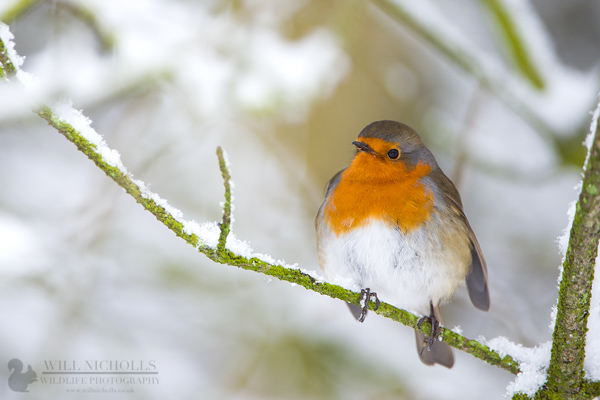
Robin in Snow

Don’t Forget the Ethics

By providing supplementary food to animals, you must not overfeed them. Fill the feeders maybe 2-3 times per week, so that they do not become dependent on you as a food source.

Make sure what you are feeding them is suitable. Ask a garden centre for advice if you need help. If using peanuts, they must be completely natural (not roasted) and unsalted!

If you decide to stop providing food, you must do so gradually. Slowly reduce the amount you are feeding over a month or so, allowing the animals to adjust naturally. Otherwise, you could end up unintentionally starving some individuals.

Getting Close for Photography

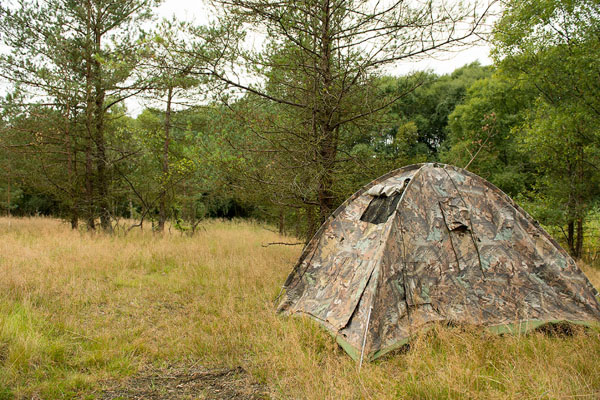
Many garden birds will allow you to sit quietly near the feeders, as they will eventually get used to you. However, if you want more freedom to move without scaring them away, get yourself a small tent hide (blind). These are available on Amazon at relatively cheap prices. A shooting blind will do the job perfectly.

Hide

Making an Area Photogenic

So by now you have the wildlife, but you still need to capture those stunning shots. A bird on a feeder isn’t the most attractive of images, but there are some neat tricks to avoid this.

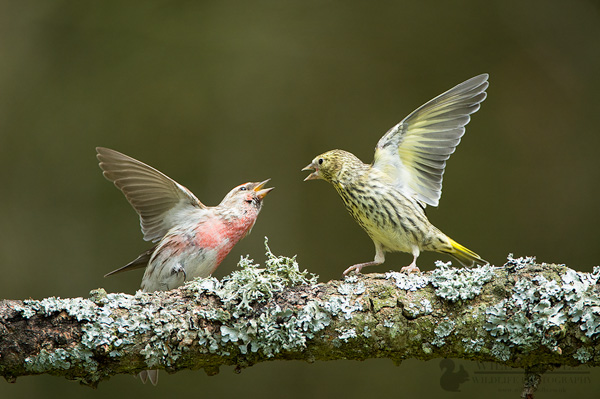
Place some gnarled twigs and sticks around the feeders. If you need to, strap them to a pole so they are held horizontally. Birds will use these as queueing platforms for the feeders, waiting their turn to feed. You can utilize this moment to capture some lovely portraits of the birds on these photogenic branches. If you’re lucky, you may even get two birds fighting for pride of place.

You should also be wary of your backgrounds. If you are photographing with a messy backdrop, it will likely come out in the image and be distracting. If there’s no choice of positioning next to something plainer, then consider hanging a dark green sheet at a distance behind your subjects. This will create a pleasing bokeh for your photographs.

Red Poll and Siskin Fight

Be Patient

The key to wildlife photography is patience. Changes won’t just happen overnight. Provide food and wait, and eventually you’ll see results. It shouldn’t take too long, but birds don’t have a radar which tells them as soon as food is available – they have to find it first!

That’s just about it. Fine-tune your feeding stations overtime, adding or subtracting elements depending on what works and what doesn’t work. Good luck!

The post Guide to Attracting Critters to Your Garden for Backyard Wildlife Photography by Will Nicholls appeared first on Digital Photography School.


Digital Photography School

 
Comments Off on Guide to Attracting Critters to Your Garden for Backyard Wildlife Photography

Posted in Photography