RSS
 

Posts Tagged ‘Away’

Chinese camera cuts through smog to record details almost 30 miles away

15 May
In this illustration (a) shows the distance between the camera and the target on a map of Shanghai, and (b) shows what the target building actually looks like. Image (c) is the view of the target through the smog of the city, while (d), (e) and (f) show earlier technologies attempting to record the target. Image (g) is the result of the researcher’s improvements

Researchers in China have created a camera that can record through the atmospheric pollutants of Shanghai to pick out objects just 60cm (2ft) high at a distance of 45 kilometers (28 miles). The ‘camera’ uses laser technology to fire light of a specific wavelength at a distant object and then uses a sensor to record the light when it returns so it can produce a picture that shows shapes with some distance information.

The project is being carried out by scientists at the University of Science and Technology of China in Shanghai, who have so far been able to record the form of a distant building with enough resolution to show the windows. The picture is technically a photograph, but not quite as we would expect to record with a normal visible light camera. The idea of the research is to produce an instrument that can ‘see’ further than is possible using visible light, and to be able to see in conditions visible light can’t get through.

At top left you can see the actual set-up of the LiDAR camera mounted inside the telescope, while the diagram top right shows what’s going on inside.

The scientists mounted a LiDAR (Light Detection And Ranging) camera inside a Cassegrain mirrored telescope and fired a near-infared (1550nm) beam from the top of a building on Chongming Island in Shanghai towards the K11 skyscraper 45km away in the centre of the city. As the scientists knew the distance and the speed of the light they were using they were able to calculate when it would return and thus isolate the image forming light from any other stray light in the scene.

An illustration showing how different methods of image extraction can be used to yield a more detailed image.

The quality of the image recorded is hardly going to serve for holiday pictures, but outlines, shapes and forms can easily be seen even when the atmosphere was too thick for visible light. The technology will be useful for seeing when we can’t see – through clouds, atmospheric haze and smog and for security surveillance.

This shows how the researchers are using distance information from the LiDAR to create depth maps of scenes that can hardly be seen with the naked eye

The researchers say they can improve the resolution and the range of their invention, and that they will be able to create 3D images in the future. Already with the range defining abilities of the LiDAR system they can incorporate depth and distance information into their images.

You can read the research paper as a PDF online.

Articles: Digital Photography Review (dpreview.com)

 
Comments Off on Chinese camera cuts through smog to record details almost 30 miles away

Posted in Uncategorized


NASA’s OSIRIS-REx spacecraft captures image of Earth from 71 million miles away

18 Jan

NASA’s OSIRIS-REx spacecraft, which achieved a record orbit at asteroid Bennu earlier this month, has returned an image that, at first glance, is unremarkable. The photo, below, features two bright dots — the larger one on the right is Bennu, and the smaller one on the left is Earth and the moon as seen from a distance of 114 million kilometers / 71 million miles.

The image was captured by OSIRIS-REx’s black and white NavCam1 camera on December 19, 2018, according to the Bennu mission website. The asteroid’s brightness is due to the image’s five second exposure time, which was long enough to make both the Earth and moon visible.

Photo provided by NASA

The OSIRIS-REx probe has been tasked with exploring Bennu, a large asteroid located around 70 million miles from Earth. On December 31, OSIRIS-REx became the first spacecraft to successfully orbit an object as small as Bennu, where it will remain before briefly touching down in 2020 to acquire a small sample.

The spacecraft has returned a number of images to its team on Earth, including close-up shots of the asteroid’s rocky surface. The latest image joins the iconic Pale Blue Dot photo as a rare example of space photography that puts Earth’s tiny place in the universe into perspective. Future images from OSIRIS-REx will be shared in the mission’s Gallery.

Articles: Digital Photography Review (dpreview.com)

 
Comments Off on NASA’s OSIRIS-REx spacecraft captures image of Earth from 71 million miles away

Posted in Uncategorized


Tips for Culling Your Photos – How to Throw Away the Worst and Concentrate on the Winners

12 Aug

Can you happily throw away your worst images and concentrate on your winners? Are you confident culling your photos to find the best?

I know many photographers struggle to cull their photos after coming back home from an enjoyable photo session. It can be effortless to create hundreds of images from a photo session you are immersed in. But feeling buried by a mountain of new photos to post-process can be discouraging.

The key to breaking free of this dilemma is to discern which of the photos are worth keeping, which are the best, and which to throw out. To do this you need a method, a good healthy workflow. Possessing a positive attitude will be a considerable help too.

I use Adobe Lightroom to import and cull my images and I will refer to it during this article. The workflow I am sharing can be utilized with any similar software.

woman catching a pumpkin - Tips for Culling Your Photos

Start by Seeing Your Best

Creative people often excel at being negative when it comes to their own creations. How many times have you heard musicians tell you they are not practiced enough to perform? Or friends who paint tell you they don’t have the confidence to complete a canvas they are working on?

It is quite typical of creatives to be too hard on themselves.

When you first load your images from a new photo session be purposefully positive. Don’t let yourself get sucked into negative thoughts. Start looking for the best photos in a series you have made, not the worst.

Take some time to scan through and get an overview of your new pictures. Look for the ones which excite you and mark them. You can use a flag, color or star rating.

Buddhist monk making art - Tips for Culling Your Photos

Take Out the Worst

You will usually have some photos which are clearly not usable. It is best to remove these from your workspace right at the start.

The most common problems not able to be fixed are:

  • Poor focus
  • Bad timing
  • Very poor exposure
  • Unwanted image blur

Bad focus

You cannot fix poor focus in post-production. If you have a photo that is not sharp where it really needs to be, delete it. It is not worth keeping. Some amount of sharpening can be applied but is only somewhat effective on photos which are slightly out of focus.

monk making pressed metal art - Tips for Culling Your Photos

This one gets deleted. It is not focused.

Very poor exposure

Working with RAW files produced by a modern camera, the images need to be really over or underexposed before I throw them out. You must know your camera and your own post-processing skills. Still, if the exposure is way off, delete it.

Unwanted blur

Sometimes we want blur in a photo. That nice silky look waterfall. The bicycle rider passing. The people walking by in the market. When you have motion blur because your subject moved or your camera has moved, delete those images.

Occasionally you can still make something of an image like that. Not by fixing it, but rethinking it and applying some careful post-processing, but not often.

Bad timing

Maybe someone has walked in front of your camera just as you took a photo. Perhaps the bird you were photographing had already flown out of frame. Many things can happen like this that means you have missed the shot or the decisive moment. Delete them.

Pumpkin Store at the Market - Tips for Culling Your Photos

Poor timing makes this photo unusable.

Don’t Want to Delete?

If you are nervous about deleting photos at first, you can just hide them. I use the flags to determine which images I see and which I do not.

In Lightroom when you are in Grid view in the Library Module with the filter bar showing at the top, click on Attributes at the top of the window. If you then click on the black flag to turn it off all the images you apply a black flag to (rejected) will be hidden from view. To quickly apply a black flag to an image, select it and hit the X key to mark it as rejected.

You can bring the hidden black flagged images back into view by turning on the black flag in the Attributes bar.

Once I have am confident I want to delete my flagged images I turn off the other two flags in the Attribute bar. With only the images I have flagged as rejected showing, I select them all and hit the Delete key and delete them from my disk.

NOTE: Lightroom will give you the option of just removing them from the program or deleting from your hard drive as well – I do the latter, but make note they will be gone forever so make sure you have the right images before hitting delete.

Screen Grab for Black Flag - Tips for Culling Your Photos

Use the grid view, Attributes and flags to help your workflow.

Select Similar Images

Now begin to work through to separate out the best of your photos. Many photographers will take multiple frames of whatever they are photographing. This results in too many images that are really similar. To deal with these, it is good to compare them to each other.

Do this by selecting four to six images and hitting the N key. The selected images will be displayed and the others will be hidden from view. You can now begin to compare your similar images. Using this method it is much easier to concentrate on the qualities of the photos and decide which ones are better than others. Look for similarities and differences in each frame.

Maybe your timing is noticeably better in one than the others. Maybe your composition was a little different or more interesting in one over another. Narrowing down your options as you go will help you see the stronger images more easily.

To do this, keep using the X key to flag the photos as rejects (note: do not do this using the comparison N view as it will tag them all at the same time) so they become hidden. Once you have only one photo in view, press the G key to take you back to Grid view. Now you can select more photos and repeat the process. I sometimes keep the best image from my last selection to compare with three or five other images in the series.

lightroom thumbnails - Tips for Culling Your Photos

Select similar images (use ctrl+click) and the N key to view only the images you have selected.

lightroom compare images side by side - Tips for Culling Your Photos

Look for Strengths in Your Photos

Choose photos which are well-exposed and well composed. Look at your backgrounds. Are there unwanted distractions which will be too difficult to remove? If so, use the X key.

Do you have one or two where your exposure is bang on? These will be potential keepers. Using the P key will mark them with a white flag (as a Pick). You could also use colors or star ratings (from 1-5) to mark your favorites.

Focused Monk - Tips for Culling Your Photos

In this frame, the monk was well focused (pun intended)

Find the photos that make you feel good. Narrow down your selection step by step.

By making comparisons with a small selection it should be less vexing than with all your photos showing at once. You will be more confident to come to recognize your best work using this method. If you are more randomly browsing through hundreds of photos at one time you are less likely to find your best photos as easily.

The post Tips for Culling Your Photos – How to Throw Away the Worst and Concentrate on the Winners appeared first on Digital Photography School.


Digital Photography School

 
Comments Off on Tips for Culling Your Photos – How to Throw Away the Worst and Concentrate on the Winners

Posted in Photography


SLC-1L-03: Need Light With More Edge? Aim It Away From Your Subject.

04 May

The two photos above have the same light source, same light location and same white background. The only difference in the second photo is that the light has been aimed differently. Pointing your light away from your subject—and using the edge of the beam—is a quick way to sculpt much more interesting light on a head shot or portrait.

But how far away do you need to aim it? Further than you'd think. And finding the nice edge to your light is definitely a game of inches.

Here's how to do it.Read more »
Strobist

 
Comments Off on SLC-1L-03: Need Light With More Edge? Aim It Away From Your Subject.

Posted in Photography


RGG EDU is giving away a $300, 8+ hour beer photography course for free

09 Feb

If you’re looking to get into professional beverage photography—and specifically tap into the market for professional beer photography—this course from RGG EDU is definitely worth checking out. Produced by RGG and photographer Rob Grimm, the 8+ hour course covers everything you need to know. And the best part? This course, which usually retails for $ 300, is being given away 100% free.

As with all free offers like this, you’ll have to put in your personal info at checkout, but you can uncheck the “keep me up to date on news and exclusive offers” checkbox and avoid the marketing emails if you’re not keen on those.

The process takes just a few clicks—we went through it ourselves to check that it actually works—and once you’re done, you’ll get an email with a bespoke download link that gives you access to all 25 chapters of photography and retouching tutorial content, 27 RAW files, four full photo shoots, and access to a private Facebook group where you can chat with fellow members of the RGG community about the stuff you’re learning.

Here’s RGG’s description of the course:

In this tutorial, you will see Rob’s entire process for creating beverage images by breaking the composition down into its parts and obsessing over the details. You will learn the foundations of beverage photography from capturing a bottle on white, photographing cocktails including drink styling, proper use of ice, realistic condensation, creating appetite and appeal, and the use of duratrans to make an image that appears to be shot on-location with all the control of a studio.

Rob will share with you his method for generating portfolio ideas that will make you rethink your entire approach to creating images. Finally, world-renowned retoucher Earth Oliver, will walk you through the best methods to bring polish to your images that stand out from the crowd.

To learn more about the course or pick up your free copy, click here.

Articles: Digital Photography Review (dpreview.com)

 
Comments Off on RGG EDU is giving away a $300, 8+ hour beer photography course for free

Posted in Uncategorized


5 Tips for Taking and Caring for Your Camera Equipment in Far Away Places

06 Oct

If the thought of being away from all your camera equipment stresses you out, this article is exactly what you need! I can safely say that being on the road for over two and a half months teaches you a thing or two about need and necessity versus wants.

Road trip

For the longest time, one of my dreams has been to live away from home and travel with my family for an extended period of time. I used to dream about all the places I could travel to, and how much fun I would have living a nomadic life. Of course, then I would wake up and the realities of my responsibilities would take over.

However, earlier this year after suffering a big life setback with the loss of my mom to cancer, I decided that my life was too short to not make my dreams come true. After several months of discussion and planning, my husband and I decided that our little family would spend our summer in India – traveling and visiting family. Somewhere along the way a trip to Ladakh, London, Zurich and Rome got added to my roster and pretty soon I was in charge of planning and packing for a life on the road for two and a half months living out of just four suitcases – one for each one of us. Being a photographer, I knew that somewhere in there I had to pack my camera equipment along with my essentials.

Taking and Caring for Your Camera Equipment in Far Away Places

Sunsets along Lake Zurich were magical – one of my favorite cities that I have ever visited!

Here are a few things that really helped me make the most of my time away from home. It is very likely that I have missed some key photographic opportunities but overall I am very happy with my time away, the opportunities that my family has experienced, and the images that I have created. And as an added bonus, all the camera equipment I did take made it back without any major mishaps along the way.

#1 – Gear Choices

Let’s face the reality of life as a photographer – we all love and want all the gear that we think we need wherever we go. When I was packing I realized that as a photographer I had so many things I wanted to bring, but as a mom, the need for gear was quickly overruled by the need for practical things like clothes, shoes, books, toys, etc. I had to make some very hard choices on the camera equipment that I could take, versus the gear I wanted to take. I narrowed down my list based on where my travels would take me and what gear I could realistically carry and transport safely without any damage.

So, in the end, I settled for this kit:

  • A wide zoom lens – Canon EF 24-70mm f/2.8.
  • A simple point and shoot camera (yes, this was my backup as weight was a concern when flying to and from Asia with layovers on the way there and back).
  • One telephoto lens – Canon 70-200mm f/2.8L.
  • One camera body – Canon 5D MK III.
  • Four camera batteries.
  • One battery charger.
  • A small travel tripod – just a generic brand – mine fits in my carry-on bag.
  • A remote trigger.
  • Five camera CF cards ranging from 8GB to 32GB.
  • Two 2TB External Hard drives ( primary photo storage and a backup photo storage).
  • Two generic lens and camera cleaner kits.

All of these things comfortably fit into my REI brand hiking backpack. I use this bag for everything and store my gear in individual soft-cover bags inside the pack. This is what I have done since day one and something that has worked well for me.

The one thing I wish I had taken with me was a rain cover for my camera. My backpack had its own rain cover which I used numerous times during the trip because we got caught in sudden downpours in the mountains. But without a separate rain over my camera, I was not able to use my gear in the rain.

#2 – Be Prepared and Organized

For me, being prepared and organized included having a rough idea of where I was going and the kind of environment I was going to expose myself and my gear to. Before I left, I jotted down all the serial numbers, make, and brand for my camera equipment and stored them in a document on my cloud-based Dropbox account. All my external hard drives were stored off-site at a friend’s place as well as the remainder of my gear.

Now, obviously, this is a friend I trust. But another option would be to lock it in off-site storage facility. As part of your research, another good thing to keep in your back pocket is the name, address, and contact information of authorized service dealers for your gear in the country you are visiting. Sometimes things just go wrong no matter how prepared you are. Being prepared with this information about services centers and authorized dealers for your gear is a time saver especially when you are traveling in areas where the internet connection is not very reliable.

Taking and Caring for Your Camera Equipment in Far Away Places

An hour’s hike from our campsite in the Himalayas got us to this beautiful alpine lake. But by the time I could get the camera and tripod out, the fog set it…and it was magical!

During my travels, my gear choices on the road would depend on the activities that were planned for the day and the fact that this was a family travel trip, not just a photography expedition. In Rome and Zurich we traveled everywhere either on foot or used public transportation. So I just carried my camera body and the 24-70mm lens among other daily necessities in my backpack. The rest of my camera equipment was either packed away in the hotel room safe or locked away in my suitcase.

When we hiked and camped in the Himalayas, my camera along with both my lenses were always on my person, and the tripod was handed off to the porters that were carrying our camping gear. For my camping trip, I just carried all my CF cards and ditched the charger and external hard drive at the house where we were staying because it was highly unlikely I’d find a charging port on that journey.

All these choices were possible because of the research I had done ahead of time.

Taking and Caring for Your Camera Equipment in Far Away Places

Much of Ladakh is dry and barren and upwards of 10,000 feet above sea level. Altitude sickness is very real and sometimes your gear also acts up. Of course, these dramatic views almost make up for any hardships.

Additionally, a good mindset to have when you travel to far-off exotic locations is one of acceptance of physical and mental limitations – both for yourself and your camera gear. I experienced some altitude sickness in Ladakh as we were traveling on roads at almost 17,000 feet above sea level. I also found my gear did not function as efficiently at that altitude. My batteries did not last as long and the camera also did not shoot as fast. The first few times it happened I freaked out. But then I just accepted it as something beyond my control and gave myself some extra time to be patient in getting the shot that I wanted.

#3 – Know Your Gear

This one is too basic to include here but it is amazing how many of us don’t follow this simple tip. We are so enamored with the latest and greatest gear available, but yet don’t quite know how to use the stuff that we do own.

The best way to get over this is to really limit yourself to a few key pieces of camera equipment for an extended period of time. One of my goals for this trip was to try and capture star trails and The Milky Way when I traveled to Ladakh. After all, I was going to be in a remote part of the country at an altitude of almost 15,000-17,000 feet above sea level. Barring any bad weather, I should be able to get relatively clear shots of The Milky Way and star trails.

Now astrophotography is not my thing. I always limited myself from trying it out because I don’t usually travel with a tripod, nor do I own an intervalometer. So this time I actually downloaded the camera manual on my phone and studied it before I left. With that information, I was able to comfortably and confidently use the B (a.k.a Bulb mode) on my camera to capture star trails in Ladahk. It was quite a thrilling experience for my maiden attempt.

Taking and Caring for Your Camera Equipment in Far Away Places

A 26-minute exposure while sleeping in the car near Jisp along the drive to Leh was one of the highlights of my trip. This is one of my first star trails shot and now I find myself looking out for stars every night! This would have been impossible without a tripod and proper remote trigger.

Another good thing to practice before you head out is gear maintenance. I had to routinely clean my lens and camera throughout this trip. I made the decision to carry two camera cleaning kits just because I knew my gear would get a lot of use. Before every major outing, I spent the time to clean out the dirt and dust from the camera and the lens. The dust pen was kept in my camera bag just in case I needed it while I was out and about photographing.

#4 – Be Local and Think Like a Local

I have to include this one in any travel photography related article because it does relate indirectly to taking care of yourself and your gear. Often times I find photographers I meet along my journeys have a fake sense of entitlement. When you are a guest in someone’s house, are you not on your best behavior? Why is it that when you are a guest in another country, common sense and basic manners seem to fly out the window.

Locals are still people who deserve the same amount of respect and courtesy as anyone. Put yourself in their shoes and try to imagine what they experience when someone shoves a camera in their face without so much as a hello or a smile.

While in Ladhak, we visited a lot of beautiful monasteries. Most of them are still in use and we saw many temples where the monks were in prayer. Even if there is no sign discouraging photography, please use common sense to not invade their private space especially when they are chanting. I cannot tell you how many times I came across tourists that almost jumped over each other or hanging out of moving cars just to take pictures of them chanting and praying. Seeing this rude behavior almost made me embarrassed to take my camera out.

Taking and Caring for Your Camera Equipment in Far Away Places

The infamous cable cars in Lucern, Switzerland…the clouds adds a certain mystery and aura to these engineering marvels!

Additionally flashing your fancy gear around is almost begging for the wrong kind of attention. I remember this one evening in Rome, I was out with my kids taking photos around some of the beautiful horse-drawn carriages. We lost track of time and soon found ourselves in a fairly deserted alley. I quickly put my gear away in my backpack, stuffed it with our jackets, grabbed my kids, and sprinted towards a more crowded piazza.

#5 – Make Friends with Local Photographers

The internet is an amazing tool for almost anything. It is such a great resource to find and connect with other photographers, especially if you are traveling to areas that are new and foreign to you. I was able to connect with some photographers in India as well as in Rome this summer. We chatted on the phone, met for dinner and just became friends.

They even gave me advice on some of the local, non-touristy spots to photograph as well as offered to lend me gear if I needed it. We tried to plan a shoot in India but the timing was not right, I know that the next time around we are going to create some magic, though.

Taking and Caring for Your Camera Equipment in Far Away Places

I met up with another photographer and we attempted to do night photography in Mumbai. But the moisture in the air because of the monsoons was causing some weird light trails against all the lights. So we went for ice cream instead! But it was a cool experience none the less.

Conclusion

I hope these tips are helpful as you plan your next vacation in a far-off destination. If you have other tips and tricks that worked for you, please share them with the community so we may all learn new ways to have an exciting and creatively satisfying vacation.

The post 5 Tips for Taking and Caring for Your Camera Equipment in Far Away Places by Karthika Gupta appeared first on Digital Photography School.


Digital Photography School

 
Comments Off on 5 Tips for Taking and Caring for Your Camera Equipment in Far Away Places

Posted in Photography


Video: mesmerizing stop motion film of raw wood being shaved away layer-by-layer

22 Jun

Photographer and animator Brett Foxwell teamed up with friend and musician Conor Grebel to create something awesome. Together, they painstakingly milled their way through several pieces of wood, layer by layer, capturing one frame of video at a time to create a stop motion film they’re calling WoodSwimmer.

As you can imagine, the process of actually capturing this film was incredibly time-consuming, and at times grueling.

‘[The final video] involved endless hours of shooting, cutting, and prepping for each frame,’ Brett tells DPReview. ‘Which involved either clearing all the wood chips away or keeping them looking consistent and pretty, and finally applying wood oil to the sample for each frame.’

You can see the mess this process created in some behind the scenes images Brett shared with us. Unfortunately, he only captured a couple of these BTS shots, because, in his words, ‘It was just such a grueling process that I never got around to getting proper documentation of the process.’

Regarding gear, Brett tells us he used a Canon EOS 60D with Tamron 90mm macro lens attached. This setup was tethered to DragonFrame, a stop-motion capture software that Brett says is “a great tethering application even if you’re not shooting specifically stop-motion.”

Tons of work and a nightmare to clean up, but well worth it when you get a load of the final product. Here are a couple of stills Brett sent our way:

Several stills from WoodSwimmer are available as prints from Brett’s website, and you can see more of his stop motion, nature photography, and other artistic work by following him on Instagram.

Articles: Digital Photography Review (dpreview.com)

 
Comments Off on Video: mesmerizing stop motion film of raw wood being shaved away layer-by-layer

Posted in Uncategorized


Free Castles & Villas: Italy is Giving Away Over 100 Historic Properties

19 May

[ By WebUrbanist in Boutique & Art Hotels & Travel. ]

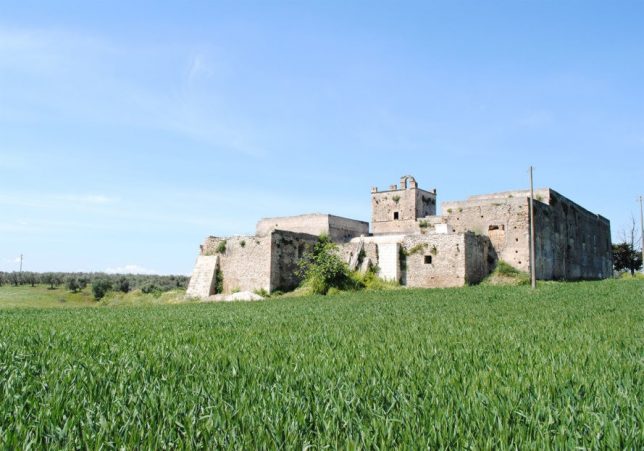
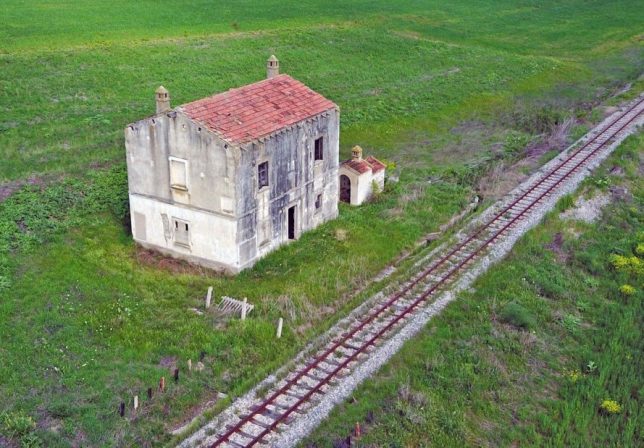
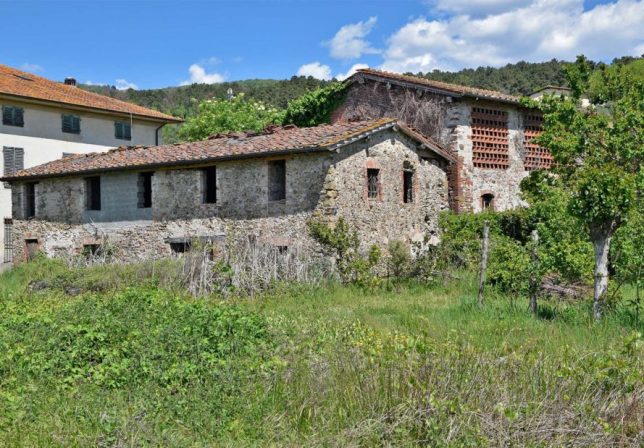
Anyone who has dreamed of retiring from the rat race to run a grand estate hotel, rural farmhouse bed and breakfast, quaint inn or remote monastery spa could see their wish come true in this unprecedented giveaway from the Italian government.

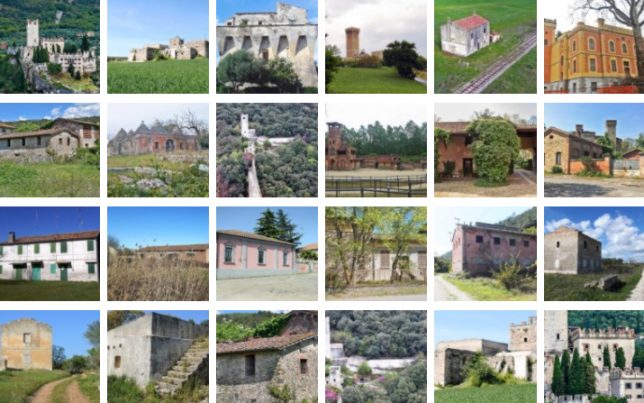
As part of its Strategic Tourist Plan, Italy is offering up 103 historic sites to those with the will and means to renovate them back into use for tourism purposes. And this is just the initial offering: 200 more are slated to be given away over the coming years.

The State Property Agency and Ministry of Cultural Heritage are leading the project, aiming to draw visitors to beautiful areas with currently disused architecture. In some cases, a lot of work is needed, but that’s the nature of centuries-old structures.

State employee Roberto Reggi says “The project will promote and support the development of the slow tourism sector. The goal is for private and public buildings which are no longer used to be transformed into facilities for pilgrims, hikers, tourists, and cyclists.”

The country has previously auctioned off historic properties, including dozens of lighthouses, with similar goals in mind, but this time they are making it all free, banking on the long-term prospects of the renovations to raise funds for local businesses and the national economy (via Inhabitat).

Share on Facebook


[ By WebUrbanist in Boutique & Art Hotels & Travel. ]

[ WebUrbanist | Archives | Galleries | Privacy | TOS ]


WebUrbanist

 
Comments Off on Free Castles & Villas: Italy is Giving Away Over 100 Historic Properties

Posted in Creativity


Olympus to give away OM-D E-M1 ll and 1M Yen in global competition

15 Nov

An Olympus OM-D E-M1 ll with a 12-40mm F2.8 Pro lens and ¥1M is up for grabs for the winner of the 2016-2017 Olympus Global Open Photo Contest. The competition is open to amateur and professional photographers alike, and the company has placed no restriction on the equipment used to take entered images saying ‘Any photographic device from a DSLR to smartphone may be used.’

There are four categories with these themes:

  • Power of life
  • Connections to Cherish
  • Places that Inspire
  • Perspectives Often Missed

There will be three prizes for each category with first place images winning an OM-D E-M5 ll with the 12-40mm F2.8 Pro lens, second placed winners getting an OM-D E-M10 ll with 14-42mm F3.5-5.6 EZ and those coming in third receiving a Pen E-PL8 with 12-42mm F3.5-5.6 EZ. The overall winner will get the OM-D E-M1 ll with the 12-40mm F2.8 Pro lens and the cash.

Entry is free and entrants may submit up to five pictures for each category until the closing date on January 10th 2017. Winners will be announced in April 2017. At current exchange rates 1,000,000 Japanese Yen is worth about $ 9200/£7400/€8600.

For more information visit the Olympus Global Open Photo Contest website.

Articles: Digital Photography Review (dpreview.com)

 
Comments Off on Olympus to give away OM-D E-M1 ll and 1M Yen in global competition

Posted in Uncategorized


Scratching the Surface: Expressive Portraits Chip Away at City Walls

08 Sep

[ By SA Rogers in Art & Street Art & Graffiti. ]

vhils scratched mural 10

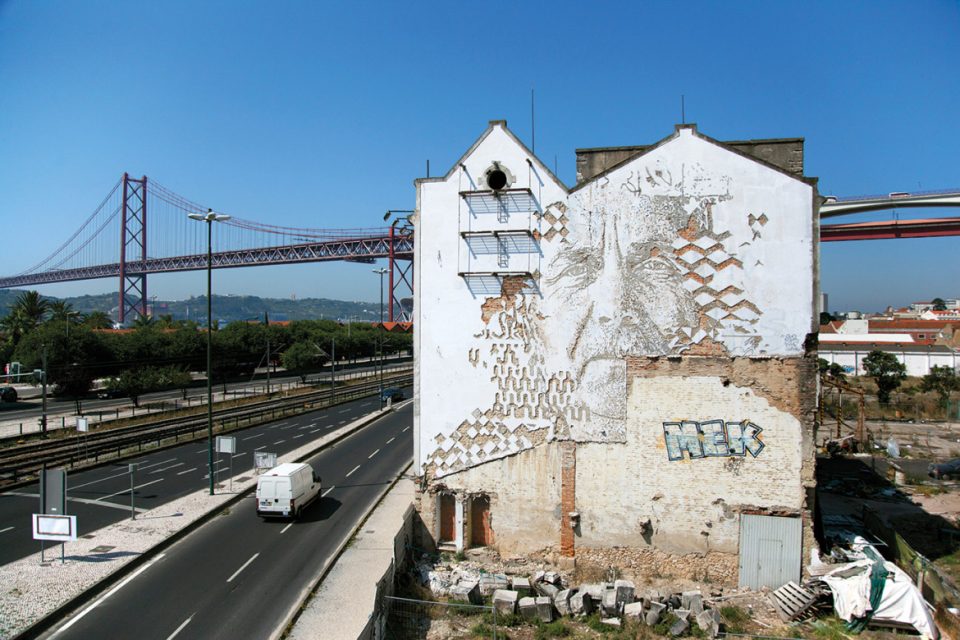
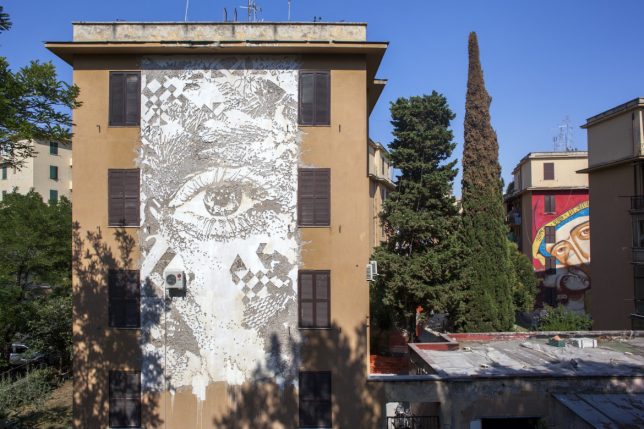
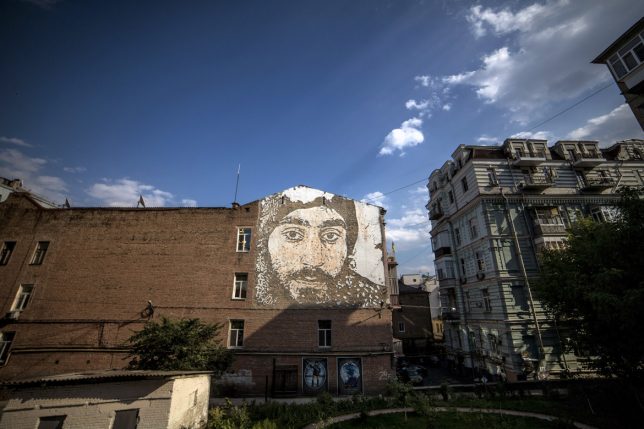
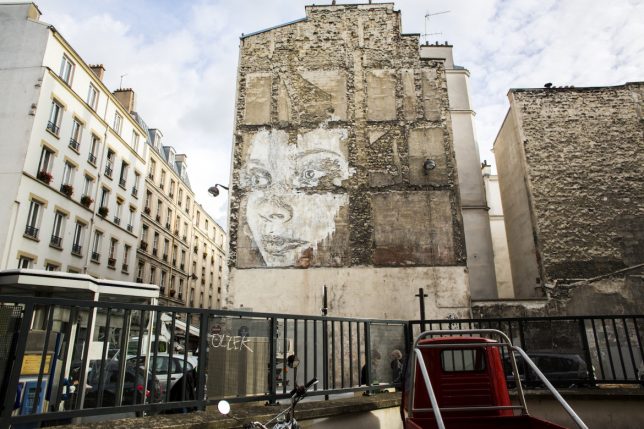
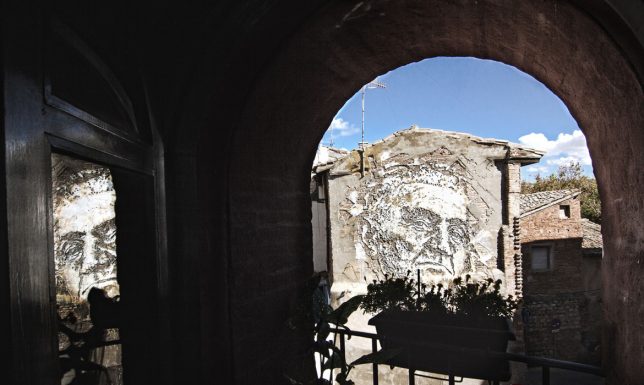
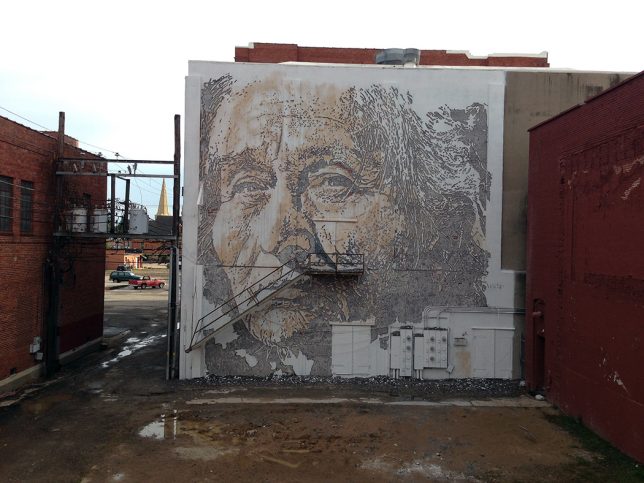
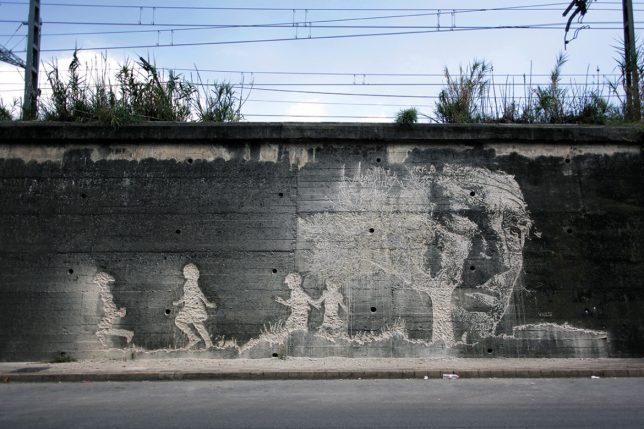
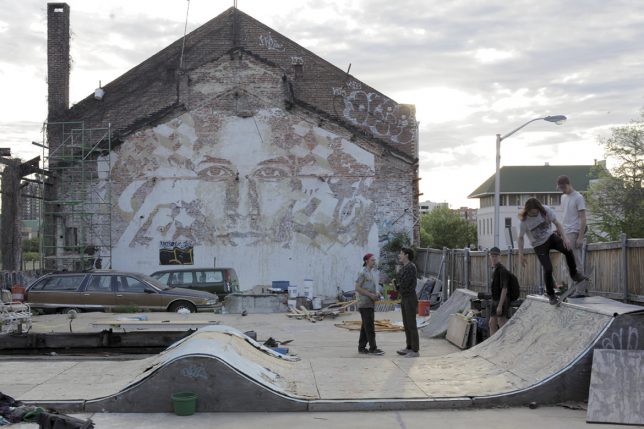
Set in neglected parts of the city, scratched into deteriorating surfaces, expressive portraits loom large, often created with nothing more than a chisel. Alexandre Farto, better known as Vhils, creates art through destruction in a process some might consider vandalism – but this is street art, so what else is new? Vhils first caught the public eye when one of his portraits appeared beside a work by Banksy at London’s Cans Festival in 2008, and since then, he’s been taking his work to the next level.

vhils scratched mural 1

vhils scratched mural 2

The portraits splash the faces of anonymous city residents onto concrete, brick, plaster and other surfaces on buildings and walls throughout the world, particularly in the artist’s home city of Lisbon, Portugal. Nobody else is creating large-scale urban artwork quite like this.

vhils scratched mural 5

The process literally cuts through the outermost layers of wall surface, often utilizing scraps of faded billboards to provide contrast with the rougher surfaces hidden underneath. Sometimes, a little bit of paint is strategically used to highlight the image. Some of the works are even applied on top of much older murals completed way back in the ‘70s and ‘80s after the Carnation Revolution, as if the remains of the older ones are fertilizing new growth.

vhils scratched mural 6

vhils scratched mural 7

“As a kid, I remember seeing how these murals would peel,” says Vhils in an interview with The Atlantic. “I started thinking about how my work could use the layers of the past to reflect the city, to show people living in it and how their identity was lost, or forgotten. I started to paint these billboards white, then carve away the negative spaces. It’s not illegal, because that sort of advertising was illegal already. Carving these walls, peeling away these layers, it’s like contemporary archaeology.”

vhils scratched mural 9

vhils scratched mural 8

Vhils divides the images into three colors to create a three-dimensional effect, scratching out the darkest parts of the portraits and highlighting the lightest. Electric drills and chisels make the process easier on hard walls, and in one extreme example, the artist even used explosives to break away some of the plaster, capturing the process for a music video called M.I.R.I.A.M. Follow Vhils on Instagram to catch his latest works.

Share on Facebook


[ By SA Rogers in Art & Street Art & Graffiti. ]

[ WebUrbanist | Archives | Galleries | Privacy | TOS ]


WebUrbanist

 
Comments Off on Scratching the Surface: Expressive Portraits Chip Away at City Walls

Posted in Creativity