RSS
 

Posts Tagged ‘Avoiding’

6 Tips for Avoiding a Foggy Lens

23 Aug

The post 6 Tips for Avoiding a Foggy Lens appeared first on Digital Photography School. It was authored by Jim Hamel.

6 tips for avoiding a foggy lens

Has this ever happened to you?

  1. You are on vacation at the beach. You decide to photograph the sunrise or sunset, so you grab your camera from your hotel room and head out. You get to the perfect spot and look through the viewfinder at the beautiful sunrise/sunset – only to find that your lens is completely fogged over. You wipe away the condensation from the front of the lens, but it instantly comes right back. Over and over again.
  2. You’re in your car, and you spot something you want to photograph. You pull over, hop out, and set up the shot – only to find that the lens is fogged over, and every time you wipe it away, the fog comes right back. You miss the shot.

In coastal and tropical environments, lens fog happens all the time. Transferring your camera and lens from a cool, low-humidity location like your car or hotel room to a warmer, high-humidity environment causes condensation to form on the lens – which, in turn, causes you to miss photos (and can increase lens issues down the road).

Plus, humid environments are where most folks go on vacation/holiday, and therefore where they tend to take the most pictures. Meaning that the foggy lens problem ruins a lot of shots.

So what do you do? How do you keep a camera from fogging up? And once it’s happened, how do you deal with the condensation? Is there any way to defog a lens?

Read on to find out.

Dealing with a foggy lens

So how do you fix this problem?

Well, I have bad news:

Once your lens is foggy, there’s not a quick and easy fix. There are a few things you can try, which will be addressed at the end of the article, but you just have to keep wiping off your lens and waiting for it to acclimate. This can take a while. Sometimes it just takes a few minutes for the lens to acclimate and stop fogging over, but other times it can take half an hour.

a clear shot of palm trees taken once the lens was clean
Taken at sunrise in the Florida Keys. Although this shot turned out okay, check out the photos below, which were taken minutes before with a foggy lens. I’m lucky I didn’t miss the sunrise entirely.
foggy Florida sunrise
Here is a similar shot to the one above, but this one was taken before the lens had a chance to acclimate to the warm, humid air outside my hotel.

So: since there’s no on-the-spot fix, you have to avoid the problem in the first place – by letting your camera and lens acclimate ahead of time.

Obviously, you cannot just leave your camera bag lying around outside. You will need to let everything acclimate safely. Here are some tips for preventing a foggy lens while keeping your camera gear safe:

1. Leave the camera outside (but in a safe place)

If you have a secure hotel balcony, you might put your camera and lens outside to let them acclimate. You probably don’t want to leave gear out overnight, though. Security concerns aside, the coastal environment is not friendly to electronics, and prolonged exposure isn’t great for your camera. You can, however, place the camera and lens out on the balcony or other secure place while you prepare to go out. (Leaving them outside for 30 minutes or so ought to be sufficient.)

If you are getting up early to shoot a sunrise, for example, you might place your camera and primary lens outside immediately after you wake up, and let them acclimate while you are getting ready to go. That will give them some time to fog up and defog before you need to shoot.

(Also, once you’re ready to go, place your camera and lens in your camera bag while still outside, zip it up, then bring it in. You don’t want to reverse all your acclimation work by causing your equipment to cool down all over again!)

2. Keep the camera in the trunk

When you are driving around or headed to your photo shoot location, keep your camera and lenses in the trunk of your car. That way, they avoid the air conditioning and can acclimate to the outside temperature and humidity.

Sometimes, however, you want to keep your camera handy (just in case you come across a great shot). If that’s the case, turn the AC off and roll down the windows. This will keep your camera and lens out of the air conditioning so they acclimate to the temperature and humidity outside, while ensuring you can still grab a shot or two if need be.

3. Get your equipment out of the bag

If you leave your camera and lens in a zipped-up camera bag, the acclimation process will take far longer. A camera bag, while certainly not airtight, will prevent airflow and keep your camera and lens surrounded by cool, dry air – which will cause condensation the moment you open your gear up to the surroundings.

Instead, when you are acclimatizing the camera and lens – whether that be on the hotel balcony, in the trunk of your car, or some other place – keep them outside the camera bag.

foggy bridge photography
Here is another shot taken immediately upon exiting my cool, dry hotel and entering the warm, humid air in the Florida Keys.

4. Remove the caps and filters

The front of your lens likely has the biggest problem with condensation, so that’s the part you should spend the most time and effort acclimating.

While there aren’t many ways to focus acclimation on a specific lens element, you can take off any filters or lens caps. You don’t want an ND filter or a lens cap keeping the warm air from equalizing the temperatures. Because as soon as you take either of these elements off to shoot, the warm air will rush in – and the fogging will occur.

5. Keep a microfiber cloth handy

Once the condensation happens, you just have to ride it out until your camera and lens acclimate. At the same time, you should periodically wipe off the front of the lens. That way, you can see if the condensation is going to return, and whether you can start shooting. If you are not wiping the lens off periodically, you just won’t know.

In addition, if the fogging isn’t too severe, you can wipe off the lens and then quickly snap a shot or two before the lens starts fogging up again. That usually works after the acclimation process has been going on for a while.

So keep a microfiber cloth handy for this reason. If you don’t have one, you can use whatever is available to wipe off your lens, like your shirt (I’d like to scoff at the idea, but I’ve been forced to wipe lenses with my shirt many times).

Before your outing, buy a couple of clip-on microfiber cloths that come in little pouches. You can just clip one to your camera strap and you’ll always have it handy. This will also keep you from having to dig through your bag to find your cloth (because they always head to the bottom in a hard-to-reach corner!).

6. Fix it in post-production

A picture with any significant fogginess due to condensation is a goner. You will not be able to save it.

But if the picture only has a minor amount of fogginess, you can try to clear it up. There are no surefire cures, but my suggestions below will help in some cases.

Your first thought should probably be to increase the contrast and clarity in Lightroom or ACR. That will work a little bit, but a slightly stronger move is to take the photo into the LAB color space and perform a basic LAB color enhancement. A fortunate side-effect of the color enhancement is that you’ll remove haze from the picture.

Again, neither tactic is a magic wand, but they can help.

bright sunrise with dock and palm trees
To conclude on a positive note, here is a shot taken the same morning as the fogged picture above. The lens cleared in time to capture a great sunrise. Yet another reason to get there early!

Avoiding a foggy lens: final words

Condensation is definitely a trap for the unwary. Light conditions change fast. Optimal conditions at sunrise and sunset are fleeting. You don’t want to be standing around waiting for the condensation on your lens to disappear!

So take steps to avoid the problem. Acclimate your camera and lens ahead of time, then make sure you are wiping off the front of your lens periodically. It will keep you from missing shots when the light is optimal!

Now over to you:

Do you have any advice for dealing with camera and lens condensation? Any defogging tips or tricks? Share your thoughts in the comments below!

person holding up a lens and looking through the center

The post 6 Tips for Avoiding a Foggy Lens appeared first on Digital Photography School. It was authored by Jim Hamel.

Digital Photography School

 
Comments Off on 6 Tips for Avoiding a Foggy Lens

Posted in Photography


Lighting 103: Avoiding Cross Contamination

06 Jul

Abstract: When complementary-gelled lights are falling on the same plane, they can easily rob each other of color. So it is important to make sure your lights are hitting different areas, with minimal overlap.

Above is a two-speedlight portrait against a white wall. White walls are the natural enemy of a gel, and practically live to wash out your color. Especially when using two flashes with dense, complementary gels. Knowing how to keep your multi-colored lights operating on different planes will help you retain more saturated color.

Let's walk through the portrait above to get a better look at how our two lights are working separately—and together—in a variety of ways.Read more »
Strobist

 
Comments Off on Lighting 103: Avoiding Cross Contamination

Posted in Photography


5 Tips for Avoiding Boring Photos of Mountains

21 Jul

Jagged peaks, precipitous drops, deep and sweeping valleys: mountainous landscapes are unquestionably some of the most photogenic places on the planet. It shows too – take a look at any photo magazine or website, and you are likely to find not just one or two, but dozens of images of mountains.

Bhutan-Jhomolhari-02

Mountains are a landscape torn apart by the steady pressure of plate tectonics and erosion, and in that drama is the potential for spectacular photography. Why then are so many images of mountains boring? Because landscape drama does not always translate well into photographic drama, without the right combination of factors. Though there are really too many of these to name, I think five are particularly important: foreground, light, color (or lack of it), juxtaposition, and perspective.

Before we dive in, I want to make it very clear that there are as many different methods for making successful images of mountains as there are mountains themselves. Not every image has to have a compelling foreground, nor does of every image have to contain dramatic color or light. These five points are suggestions and starting places, not a formula. That noted, let’s get started:

1. Foreground

Foreground serves a number of purposes in a landscape; among these are depth and scale, setting details, and to provide a starting point for the path through the image. Foregrounds are tricky, done wrong they can make an image confusing, misleading, or unbalanced.

I’m a sucker for a good foreground. I love the way a well placed element can echo and balance features in the background, provide detail to a larger scene, and lead the viewer’s eye neatly into the photograph.

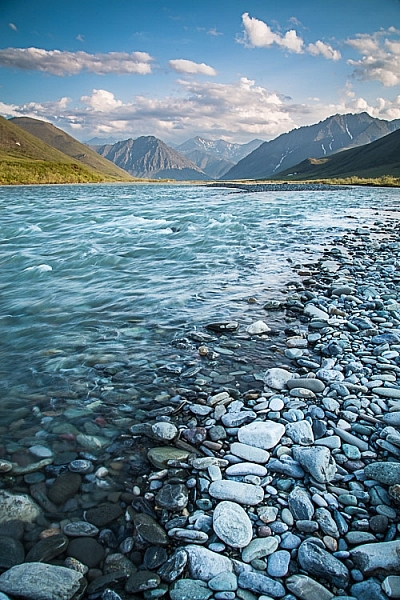
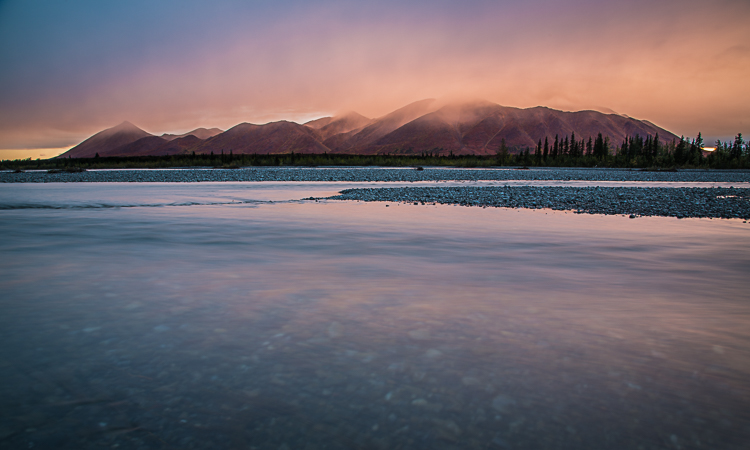
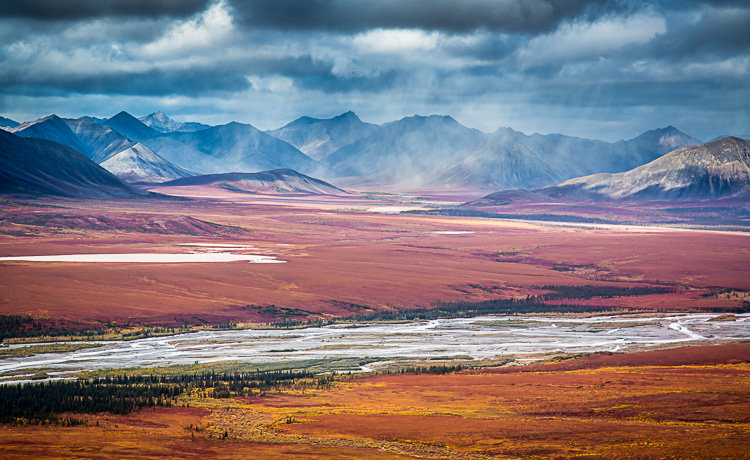
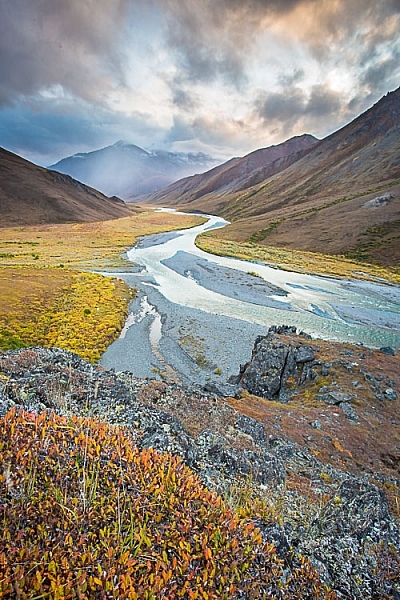
The autumn colors in the close foreground provide a good starting place for this image, guiding the eye to the winding river and then onto the stormy mountains beyond.

The autumn colors in the close foreground provide a good starting place for this image, guiding the eye to the winding river and then onto the stormy mountains beyond.

Yukon-Kluane-lake-123074-32

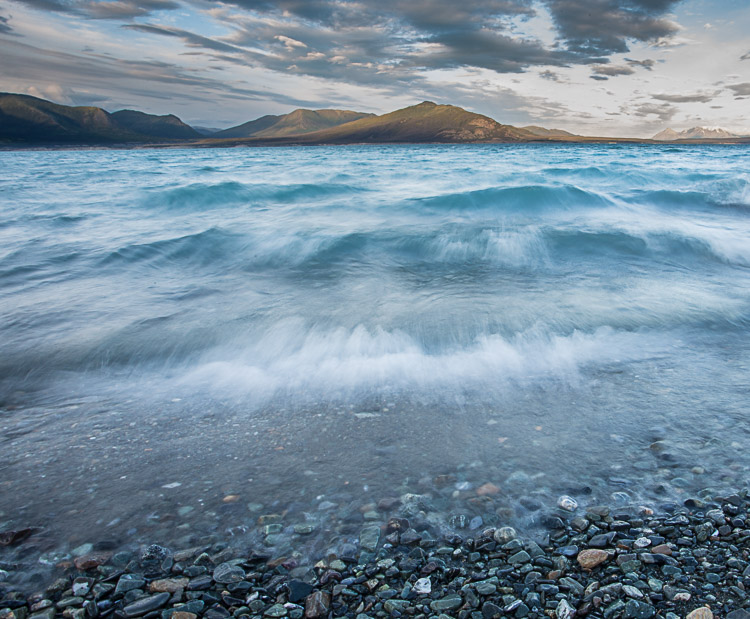
Water is a great foreground subject, and in this image of a wind-tossed lake, the water plays double duty, providing color and interest, while the texture is reminiscent of the mountains in the background.

AK-ANWR-Kongakut-WhaleMtn-1063-101

2. Light

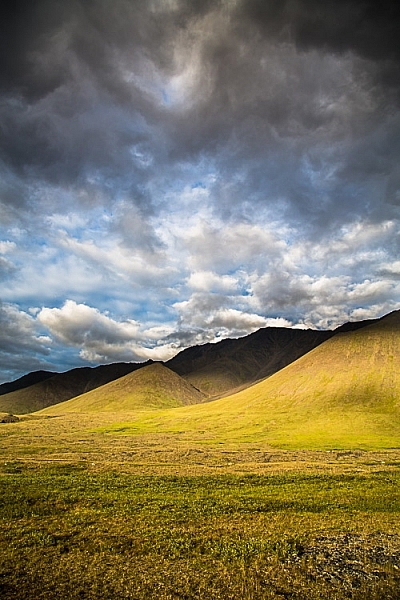
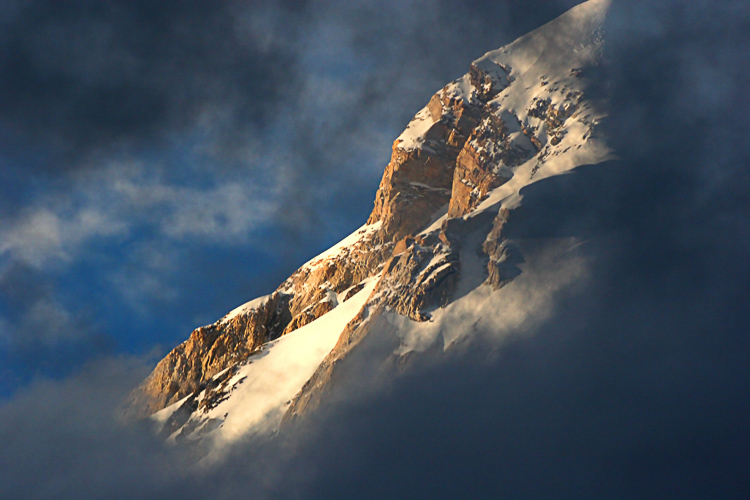
Lighting may be the single most important aspect of a successful image. While backlight, and front light can work under some circumstances, mountains thrive in side-light. Light from the side brings out the shadows, and detail in the ridges, cliffs, and rolling slopes. It provides contrast and drama.

Images of big landscapes, like mountains, rely on natural light to for illumination, so you are really at the whim of the weather. Cloudy days can flatten the light, while midday sun will drown out shadows and turn pleasing contrast into an eye-squinting mass off whites and blacks. Successful images can arise from these challenging scenarios, but low-angle side-light makes our lives as photographers so much easier.

AK-ANWR-Jago-106274-35

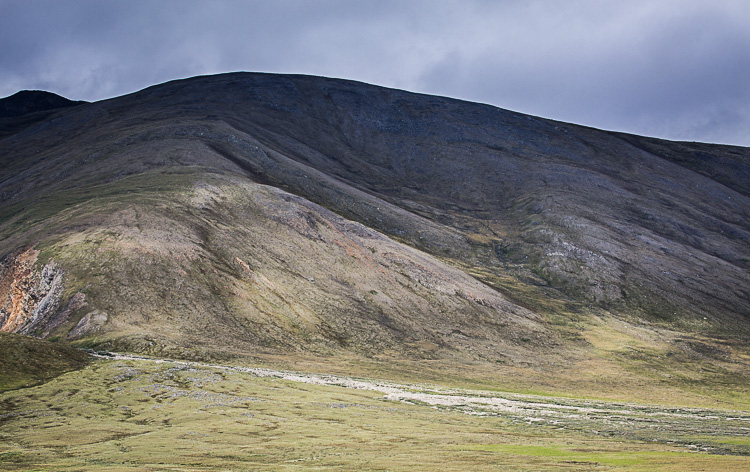
This detail shot of a mountainside in Alaska’s Brooks Range, despite being front-lit, retains some drama thanks to the patchy sunlight.

AK-ANWR-Kongakut-WhaleMtn-1063-274

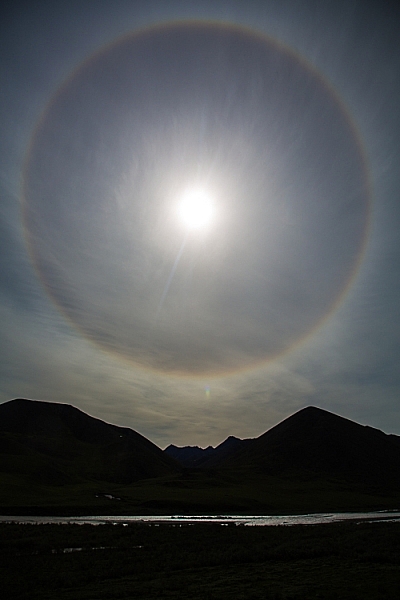
A case where backlight worked to my advantage was when the mountains, darkened to silhouette, appeared to cradle this ring around the sun (caused by high elevation clouds).

AK-DenaliNP-June2008-95

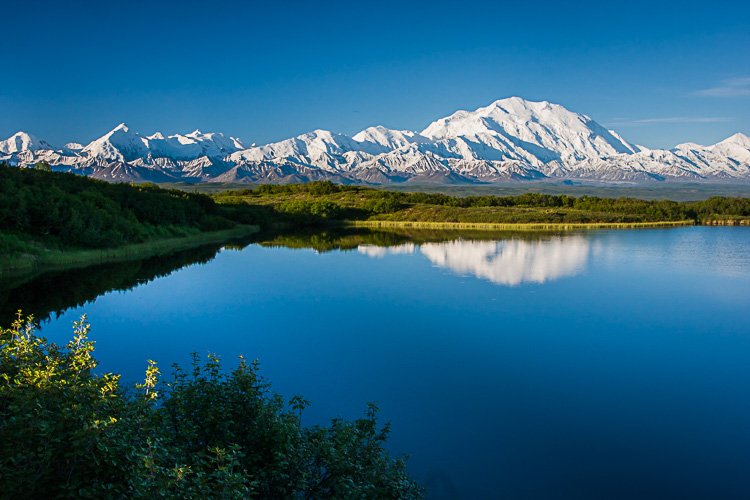
Classic side light on Denali peaks of the Alaska Range, from Reflection Pond in Denali National Park, Alaska.

3. Color (or lack of it)

Bright colors (not artificially saturated) attract the eye. This is particularly true in images of mountains. Sunset and sunrise, colorful foregrounds, and bright blue alpine skies, will help catch and hold the gaze of a viewer.

AK-NoatakPreserve-KellyRiver-1083-320

As I think about it, this goes very tidily with #2 (Light). Good light very often equates to good color. The better the light quality, the more vivid the colors of the scene become. Get one, and you often get the other.

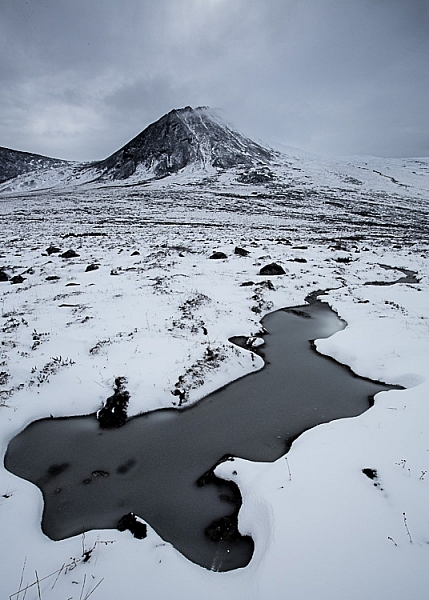
None of this is to say that an image has to have bright colors to be successful. Low-saturation images can be moody and brooding. Storms and winter images are two examples where colors may not be rich, but do not hurt the final image. These photos thrive on the drama of the scene, rather than their colors.

AK-ColleentoKongBP-1066-105

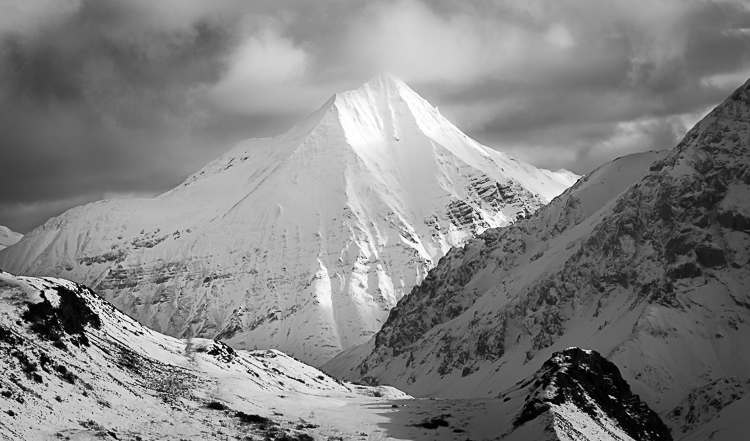
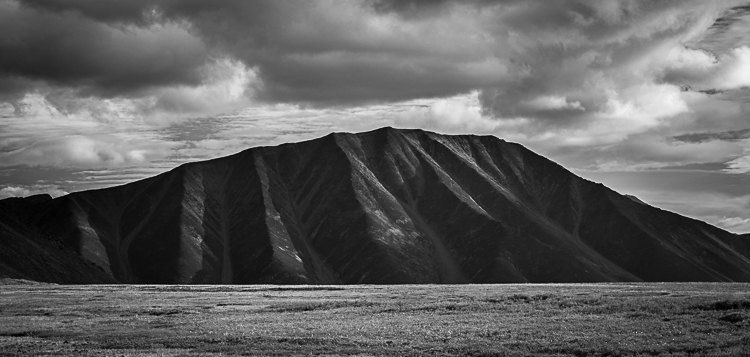
In black and white images, color is absent, and yet can result in a rich portrayal of the mountains. In such images, contrast and mood play an even more important role.

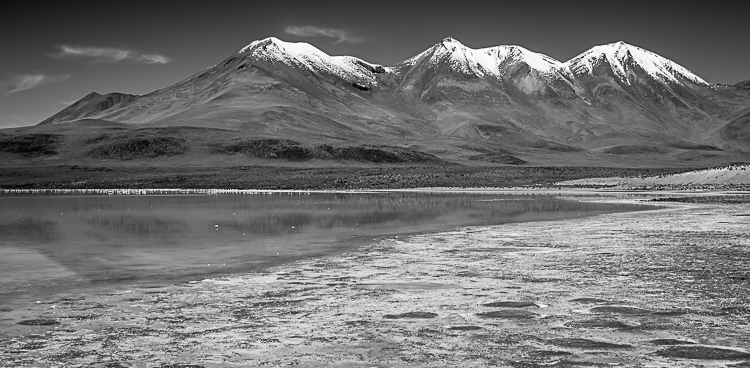
A note on Black and White: when factors like light and color are not in your favor, a black and white conversion can often be a great tool. I’ve made numerous images on flat-light days that converted well to black and white, when a true-color image would have been dull and muted.

AK-DNP-17Sep07-46

AK-GAAR-AIR-1073-1012

Bolivia-Altiplano-Feb2008-555

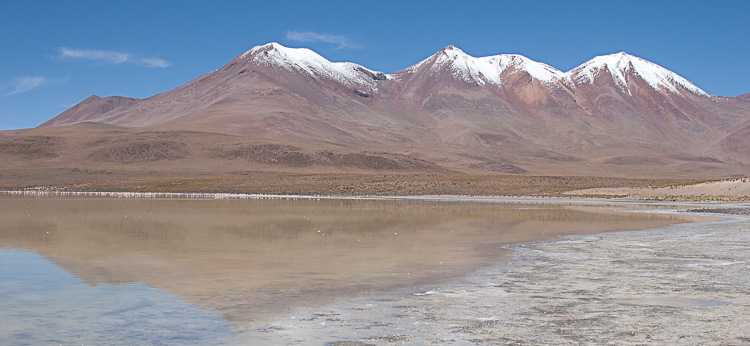
I made this image of peaks in the Bolivian Altiplano at mid-morning when the near-equitorial sunlight was hot and bright. It doesn’t look particularly good in color.

Bolivia-Altiplano-Feb2008-554

Convert the above image to black and white, however, and the photo comes alive in a way it wouldn’t otherwise be able.

4. Juxtaposition

Juxtaposition is defined as: “two things placed together with contrasting effect”. In photography, that contrast can be literal; light versus dark contrast, colors (bright versus subtle), tonality (hot or cool), or, perhaps most effectively, the subject matter.

All of these are important parts of mountain photography. Contrast, I noted earlier in this article, but tonality and subject matter both warrant some attention.

Juxtaposed color tones combine in interesting ways. Mountain scenes, particularly from places like the Rockies, Cascades, or Alaska, tend to be dominated by cool tones; blue skies, green tundra and forest, glacial streams, or clear blue lakes. These cool-colored scenes often benefit when warm tones, like yellow, red, or pink, are integrated into the scene. Often that warm tone is best presented as a flash of color, a setting sun, a wildflower, the bright jacket of a hiker, rather than as an equal to the cool tones. When the two are equivalent, your brain has a hard time sorting out which to pay attention to, and the pleasing juxtaposition becomes a tangle of clashing color.

AK-GAAR-AIR-1073-1028

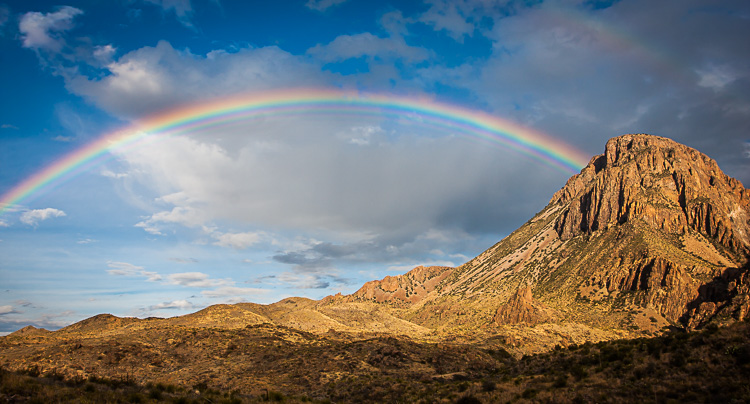
Subject juxtaposition is where a landscape images comes alive. When it comes to mountains, the potential for such contrasts are many. So many in fact, that it’s hard to mention just a few. Some, like the image below of the rainbow over the desert mountains of Big Bend National Park, have obvious subject juxtaposition (rain and dry desert rock). But the same image also has contrasts in shapes and texture (the jagged rocks and and smooth curve of the rainbow for example). All of these combine nicely to provide interest.

TX-BigBendNP-Jan2009-735

AK-CanningMarshFork-1066-49

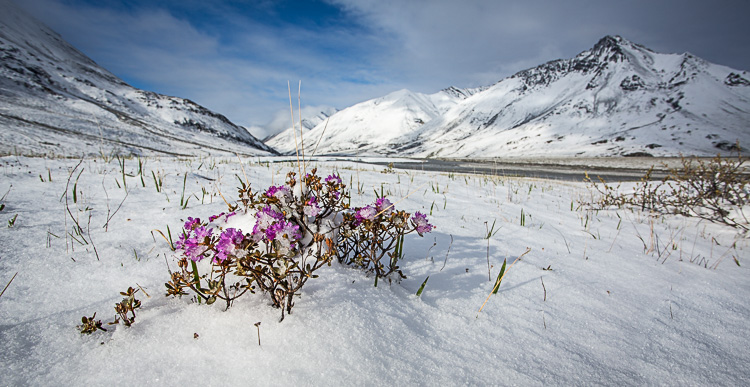
Snow and flowers is an obvious juxtaposition in this image of the aftermath of a June snowstorm in the Arctic National Wildlife Refuge, Alaska.

5. Perspective

The final aspect of mountain photography I want to discuss is perspective. Which is to say, the perspective from which you make the image. For simplicity sake, I’ll break this down into three divisions: bottom, middle, and top. Each of these greatly impacts not just the appearance of the final image, but also its mood and feel.

Photographs of mountains made from a valley bottom looking up, make the mountains appear large and imposing. These low shots provide space for an interesting foreground, and many classic landscapes have been made from this perspective. Though effective, there are drawbacks to shooting from the valley bottom. The low perspective means that the view is limited; there are no seas of mountain peaks spreading to the horizon. Light too is often difficult. The bottom of the valley is the last place to gain sunlight in the morning, and the first to lose it in the evening, so balancing light makes exposure tricky, and by the time the landscape is evenly lit, the sweet light of dawn or dusk is long past.

AZ-GCNP-FebMar12-160

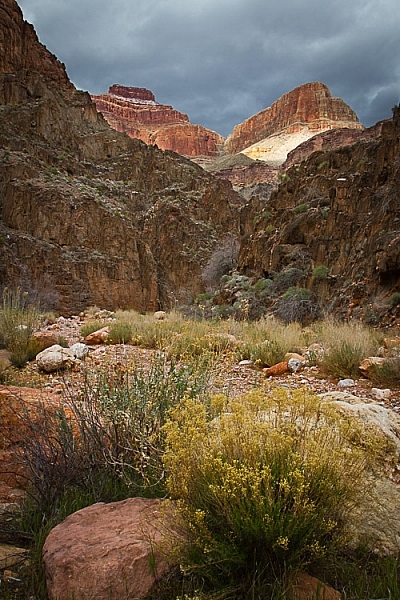
Exposure was tricky as I tried to capture the storm light on the Red Wall of the Grand Canyon high above my camp along the Colorado River.

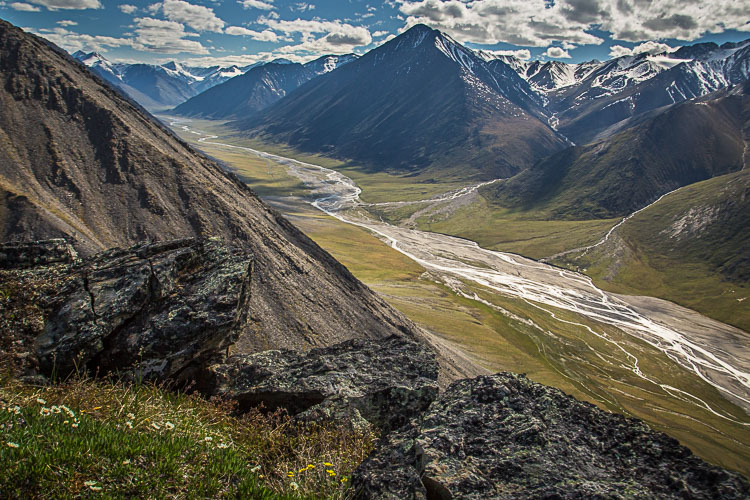
Mid-mountain shots can be spectacular, providing views both below and above. This perspective is one of my favorites, allowing for a lot of depth in the landscape, while maintaining the size and drama of the mountains.

AK-ANWR-Jago-106244-14

AK-NoatakPreserve-KellyRiver-1083-469

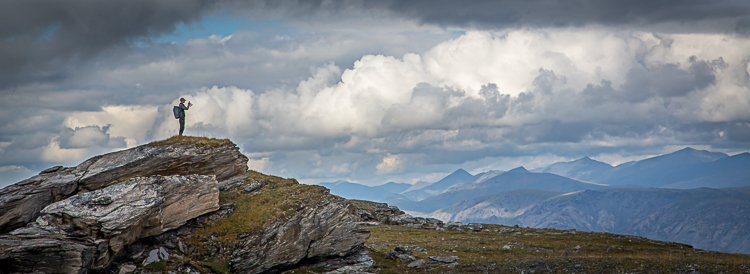
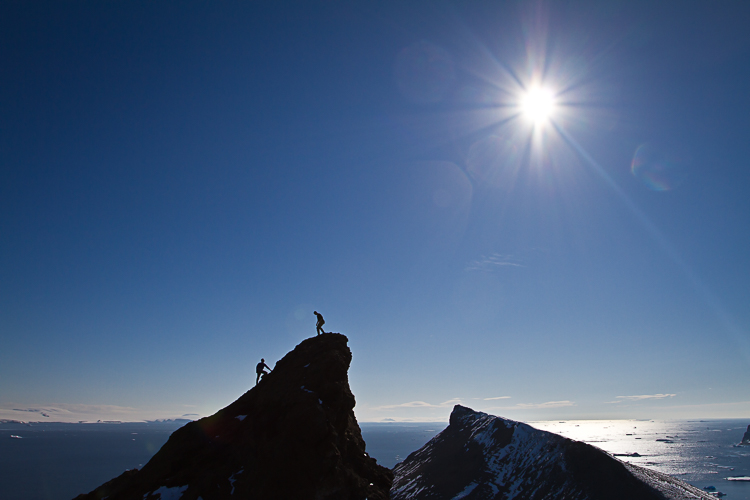
Mountaintops are tricky. Images made from the summit of peaks tend to make the surrounding landscape look small. I’ve taken photographs from peaks in which all the mountains look like rocky waves, rather than the towering summits they are. You can make up for this by adding a human to the shot, which provides scale. You remove the focus from the mountains, and place it on the human experience within them. It changes the image, making it less of a landscape, and more of a portrait or action shot, but the results can be effective.

AK-GAAR-Alatna-Noatak-1083-347

A hiker atop a mountaintop in Gates of the Arctic National Park, Alaska becomes the subject in this image.

ANT-16Jan10-DevilsIsl-11

Without the climbers nearing the top of this peak in Antarctica, there wouldn’t be much to look at in this image.

Conclusion

One of the great joys of photographing mountains, is simply being in the mountains. A camera is great excuse to go for a hike, or float a mountain river. But, the camera can also be a tool for experiencing the place more deeply. It can make you appreciate how the mountains look in various light and seasons, and from different angles. In turn that appreciation can lead to better images. Now go out and explore.

This week we are doing a series of articles to help you do better nature photography. See previous articles here:

  • 3 Habits Every Outdoor Photographer Should Develop to Avoid Missing Shots
  • 5 Tips for Better Nature Photography
  • 27 Serene Images of the Natural World
  • Weekly Photography Challenge – Nature
  • 10 Ideas for Photographing Nature in your Backyard
  • 6 Tips for Capturing Character and Personality in Wildlife Photography
  • 5 Tips for Setting the Focus in Your Landscape Photography
  • 7 Tips for Better Marine Wildlife Photography
  • Tips for Processing Landscape Photos – from Basic Edits to Artistic Interpretation

googletag.cmd.push(function() {
tablet_slots.push( googletag.defineSlot( “/1005424/_dPSv4_tab-all-article-bottom_(300×250)”, [300, 250], “pb-ad-78623” ).addService( googletag.pubads() ) ); } );

googletag.cmd.push(function() {
mobile_slots.push( googletag.defineSlot( “/1005424/_dPSv4_mob-all-article-bottom_(300×250)”, [300, 250], “pb-ad-78158” ).addService( googletag.pubads() ) ); } );

The post 5 Tips for Avoiding Boring Photos of Mountains by David Shaw appeared first on Digital Photography School.


Digital Photography School

 
Comments Off on 5 Tips for Avoiding Boring Photos of Mountains

Posted in Photography


Tips for Avoiding a Foggy Lens

20 Aug
Foggy lens article - example of clear shot taken once lens cleared

Taken at sunrise in the Florida Keys. Although this shot was okay, see below to see the similar shot taken a few minutes before with a foggy lens. I’m lucky I didn’t miss it entirely.

Has this happened to you?

  • You are on vacation at the beach. You decide to photograph the sunrise or sunset, so you grab your camera from your hotel room and head out. You get to the perfect spot to shoot, and look through the viewfinder at the beautiful sunrise/sunset – only to find that the lens is completely fogged over. You wipe away the condensation from the front of the lens, but it instantly comes right back. Every time.
  • Or perhaps you’re in your car, and you spot something you want to photograph. You pull over, hop out and set up the shot – only to find the same thing. The lens is fogged over, and every time you wipe it away, it comes right back. You miss the shot.

This happens all the time in coastal and tropical environments. Transferring the camera and lens from a cool, low-humidity location like your car or hotel room directly into a warmer, high-humidity environment causes condensation to form on the lens (on the front and back elements).

Making the problem even worse is that these humid environments are likely where you like to go on vacation/holiday, and that is when you tend to take the most pictures. So that means this problem ruins a lot of shots. It has happened to me many, many times.

Dealing with a Foggy Lens

So how do you fix this problem? Well, once it happens, there is no fix. There are a few things you can try, which will be addressed at the end of the article, but you just have to keep wiping off your lens, and waiting for it to acclimate. This can take a while. Sometimes it just takes a few minutes for the lens to acclimatize and stop fogging over, but other times it can take half an hour.

Example of picture taken with lens fogged due to condensation

Here is a similar shot to the one above, but this one was taken before the lens had a chance to acclimate to the warm, humid air outside my hotel.

Since you cannot fix it once it happens, you have to avoid the problem in the first place. How do you do that? You have to let your camera or lens acclimate ahead of time.

Obviously, you cannot just leave your camera bag laying around outside. You will need to let everything acclimate while keeping it safe. Here are some tips for decreasing the time necessary for your camera and lens to acclimate to the outside temperature and humidity while keeping it safe:

1. Keep the camera outside (but in a safe place)

If you have a secure hotel balcony, you might put your camera and lens out there to let them acclimate. You probably don’t want to leave them out there overnight though. Even putting aside any security concerns, the coastal environment is not friendly to electronics, and prolonged exposure isn’t great for your camera. You can, however, place the camera and lens out on the balcony or other secure place for a while, as you are preparing to go out. Leaving them outside for a half-hour or so ought to be sufficient.

If you are getting up early to shoot a sunrise, for example, you might place your camera and primary lens out there immediately after you wake up, and let them acclimate while you are getting ready to go. That will give them some time to acclimate.

2. Keep the camera in the trunk

When you are driving around, or heading to a place you plan to photograph, keep your camera and lenses in the trunk of your car. That will keep them out of the air conditioning, and allow them to acclimate to the outside temperature and humidity.

Sometimes, however, you want to keep your camera handy in case you come across a great shot. In that case, keep the AC off and roll the windows down. All you are doing is keeping your camera and lens out of the air conditioning so that they acclimate to the temperature and humidity outside.

3. Get them out of the bag

If you leave your camera and lens in a zipped-up camera bag, then the acclimation process will take exponentially longer. The camera bag, while certainly not air-tight, will prevent air flow and keep your camera and lens surrounded by cool, dry air. You don’t want that.

Instead, when you are acclimatizing the camera and lens – whether that be on the hotel balcony, in the trunk of your car, or some other place – keep them outside the camera bag.

Example of picture taken with lens fogged due to condensation.

Here is another shot taken immediately upon exiting my cool, dry hotel and entering the warm, humid air along the coast in the Florida Keys.

4. Remove the caps and filters

The place where you are likely to have the biggest problem with condensation, is the front of your lens. Therefore, that is the part you should spend the most time and effort acclimating. In doing so, take off any filters or lens caps that are on your lenses. You don’t want a UV filter and a lens cap keeping the warmer, more humid air from getting to the front of your lens and acclimating it to the conditions outside.

5. Keep a micro-fibre cloth handy

Once the condensation happens, you just have to ride it out until your camera and lens acclimate. At the same time, you should periodically wipe off the front of the lens. That way you can see if the condensation is going to return. If you are not wiping it off periodically, you won’t know.

In addition, if the situation is not too severe, you can wipe off the lens and then quickly snap off a shot or two before the lens starts fogging up again. That usually works after the acclimation process has been going on for a while.

Keep a micro-fibre cloth handy for this process. If you don’t have one, you’re going to have to use whatever is available to wipe off your lens – like your shirt (and I’d like to scoff at this notion, but I’ve been forced to resort to that many times). Buy a couple of clip-on micro-fibre cloths that come in little pouches. You can just clip one to your camera strap and you’ll always have it handy. That will also keep you from having to dig through your bag to find one (they always go to the bottom in a hard-to-reach corner).

6. Fix it in post-production?

A picture with any significant fogginess due to condensation is a goner. You will not be able to save it.

If the picture only has a minor amount of fogginess, however, there are some things you can do to try to clear it up. These are by no means sure-fire cures, but they will help a minor case of fogginess. Your first thought will probably be to increase the contrast and clarity in Lightroom or ACR. Those will work a little bit. A slightly stronger move is to take the photo into the LAB colorspace and perform the basic LAB color enhancement move. A fortunate side-effect of the color enhancement move is to remove a haze from the picture. Again, none of these tactics is a magic wand, but they can help.

Foggy lens article - example of clear shot taken once the lens had acclimated

So as to conclude on a positive note, here is a shot taken the same morning as the fogged picture above. The lens cleared in time to capture a great sunrise. Yet another reason to get there early!

Conclusion

Condensation is definitely a trap for the unwary. Light conditions change fast. Optimal conditions at sunrise and sunset are fleeting. You don’t want to be standing around waiting for the condensation on your lens to disappear and miss a shot.

Take steps to avoid the problem and acclimate your camera and lens ahead of time, while at the same time keeping everything safe. Do this either ahead of time, or while you are en route. Then make sure you are wiping off the front of your lens periodically, it will keep you from missing shots when the light is optimal.

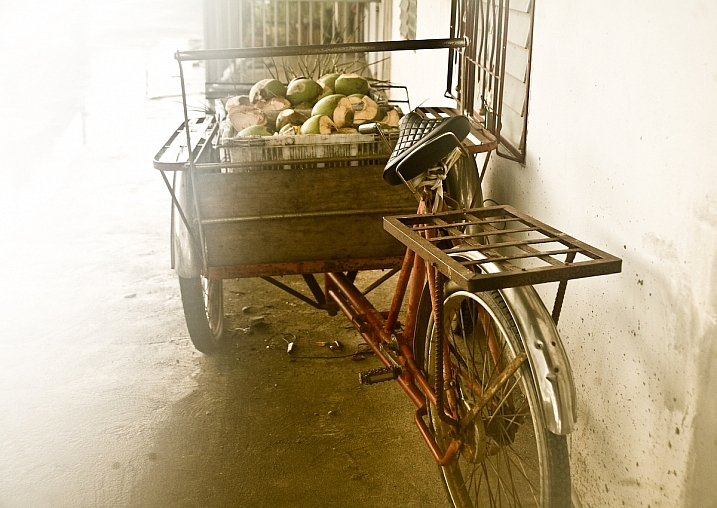
Editor’s Note: I have encountered this situation many times. In Bangkok however I found that the image I took with the fog (below) had more feeling and impact than the ones I took after it cleared. So don’t stop shooting, you never know what you’ll get!

Darlene Hildebrandt

By Darlene Hildebrandt

googletag.cmd.push(function() {
tablet_slots.push( googletag.defineSlot( “/1005424/_dPSv4_tab-all-article-bottom_(300×250)”, [300, 250], “pb-ad-78623” ).addService( googletag.pubads() ) ); } );

googletag.cmd.push(function() {
mobile_slots.push( googletag.defineSlot( “/1005424/_dPSv4_mob-all-article-bottom_(300×250)”, [300, 250], “pb-ad-78158” ).addService( googletag.pubads() ) ); } );

The post Tips for Avoiding a Foggy Lens by Jim Hamel appeared first on Digital Photography School.


Digital Photography School

 
Comments Off on Tips for Avoiding a Foggy Lens

Posted in Photography


3 Tips for Avoiding Blurry Photos of Kids

09 Jun

One of the best things about kids is also one of the most frustrating when it comes to photographing them; they are so full of life and energy they rarely sit still, which can lead to an abundance of blurry pictures and heavy sighs when you go back to review your images. Instead of smiling faces and cute outfits, you often end up with a memory card full of photos where their cute little faces are a mishmash of fuzzy pixels, and any details in their hair or clothes are hopelessly lost. This is a chronic problem with photos of kids from smartphones, but it’s all too common in pictures taken with more expensive DSLRs too.

One solution is to simply use the flash on your camera, but this has the unfortunate side effect of creating harsh shadows, poorly-lit backgrounds, and ghostly red-eye effects that have to be fixed on your computer. To get the types of photos of kids you’ve always wanted it’s important to know a bit about shutter speed, and look at some of the ways you can harness the controls of your camera .

kid-dinner-table-eating

Understanding Shutter Speed

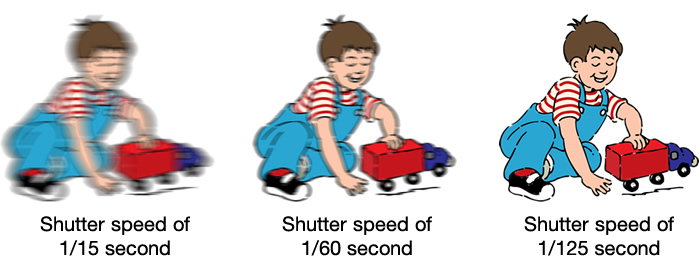
The underlying problem of blurry kid pictures usually stems from your camera’s shutter speed; kids move quickly so a fast shutter is usually required to snap clear pictures. This is fine if you have plenty of light, but as soon as the sun goes down, or you find yourself indoors, your camera’s shutter slows way down in order to let in enough light for exposing – too slow for non-blurry photos of fast-moving children.

A faster shutter will result in sharper photos with less motion blur.

A faster shutter speed will result in sharper photos with less motion blur.

Unfortunately the solution is not always as easy as increasing your shutter speed, as this can lead to pictures that are underexposed if there is not enough light available. This is why your camera will often opt to use the flash if you are shooting in low-light situations on Automatic mode. Rather than decreasing the shutter speed your camera simply creates its own artificial light. If you’re using a kit lens with a focal length between 18-55mm a shutter speed of 1/90 is probably sufficient to capture blur-free images of little ones, though the exact value will change depending on the focal length of your specific lens and how fast the kids are moving. As a general rule I don’t use shutter speeds slower than 1/90 second when taking pictures of kids with my 35mm lens, but that usually means I have to compensate for low light in a few other ways. Here’s a few tips to help:

#1 Increase the ISO

There are three primary ways to control the amount of light that enters your camera:

  • Aperture: Increase size of the opening in your lens so more light can pass through it.
  • Shutter speed: Open the shutter for a longer period of time.
  • ISO: Make the piece of digital film (sensor) in your camera more sensitive to light.

The first method is limited by the physics of your lens. Most basic kit lenses simply don’t have large enough openings, or apertures, to let in much light (unless there is a great deal of light already available i.e. outside during the daytime or in a brightly lit room). The second method is easy if your subjects are not moving. You can leave the shutter open for many seconds at a time and get a non-blurry shot if everything is standing still, but that rarely happens with little kids. The third method, raising the ISO, was not a viable solution until recent years when camera technology advanced to the point that you could greatly increase the sensitivity of your sensor without a massive loss in overall image quality. Camera sensors are now so good that you can use faster shutter speeds to get blur-free shots of kids (even if your lens does not have a wide aperture) simply by raising the ISO.

Shooting at ISO 3200 allowed me to get pictures of my nieces' pajama party without using the flash.

Shooting at ISO 3200 allowed me to get pictures of my nieces’ pajama party without using the flash.

Until a few years ago most DSLR cameras were fine at ISO settings of 400, 800, or even 1600. Beyond that, photos started getting quite noisy and grainy, almost as though they were coated with a fine layer of colored sand. Now even basic consumer cameras like the Canon Rebel T4i or Nikon D3300 can go all the way up to ISO 6400 without too much detriment to their overall picture quality. Granted an ISO 6400 picture is never going to be as clean and sharp as one taken at ISO 100 or 200, but ISO 6400 essentially allows your camera to capture 64 times more light than ISO 100 (equal to 6 stops more). This means an image that would normally require a shutter speed of 1/15 second at ISO 100 could be taken with a shutter speed of 1/1000 second at ISO 6400 – a massive benefit if your goal is to capture pictures that are not blurry.

Shooting at higher ISO values means your photos will have a bit more noise and grain, but you will be able to use much faster shutter speeds. It's up to you whether the tradeoff is worth it, but for me it usually is.

Shooting at higher ISO values means your photos will have a bit more noise and grain, but you will be able to use much faster shutter speeds. It’s up to you whether the trade-off is worth it, but for me it usually is.

One caveat to this technique is you simply cannot do it in Automatic mode. If you don’t feel quite confident to start shooting in Manual, try using the Program Automatic mode instead. Rotate your camera’s command dial to the P setting, then you are free to change the ISO while your camera figures out an appropriate shutter speed and aperture. The more you practice, the more you will get the hang of it, and start feeling comfortable with your particular camera’s capabilities at higher ISO values.

#2 Use a large aperture

I mentioned in the previous section that a wider aperture is one way to let in more light, and the best way to do this is with a prime lens. These lenses do not zoom in and out like the kit lens most cameras come with, but the trade-off is their extraordinarily large apertures – big enough to let in tons of light even at dusk, or in a dimly-lit room.

Shooting at an ultra-wide aperture of f/1.8 allowed me to get a picture of this girl taking her first steps. Using the flash would have resulted in washed-out colors and would have been quite a distraction for the little girl.

Shooting at an ultra-wide aperture of f/1.8 allowed me to get a picture of this girl taking her first steps. Using the flash would have resulted in washed-out colors and would have been quite a distraction for the little girl.

If you don’t have a prime lens you can still use wider apertures, but you will likely have to raise your ISO a bit more as well. Most kit lenses have apertures of roughly f/3.5 when zoomed out all the way and f/5.6 when zoomed in, which might not sound like much but it’s actually a massive difference (f/5.6 to f/2 is three stops or 8x less light so it is quite significant – in the example above it would mean shooting at 1/4 second or 6400 ISO instead). This just means you will have to move around a bit more to position yourself closer to the kids instead of standing across the room and using the telephoto end of your lens.

If you’re not entirely comfortable dealing with apertures and f-stops just yet, try using your camera in Shutter Priority (S or Tv) mode with auto-ISO. This lets you set the shutter speed while your camera figures out the best combination of aperture and ISO. As I said earlier, when taking pictures of kids with my 35mm prime lens I like to use a shutter speed of 1/90 second and faster, like 1/125 or 1/250, if they’re running around or jumping on furniture. The shutter speed you use will be different depending on your camera and the focal length you are using on your lens, but when you shoot in S/Tv mode with auto-ISO your camera will generally default to using the widest possible aperture and then start raising the ISO to get a good exposure. In other words, you are telling your camera “I want a fast shutter and no flash, so it’s up to you to figure out the biggest aperture and highest ISO to make this happen.” It doesn’t always work, but it’s certainly a good technique to try if you want clearer pictures of children.

The only way to get a non-blurry picture of this girl jumping on her trampoline was to use both a wide aperture and fast shutter.

The only way to get a non-blurry picture of this girl jumping on her trampoline was to use both a wide aperture and fast shutter.

This might sound a little counter-intuitive, but if you shoot in Aperture Priority (A or Av) mode, you can tell your camera to use a large aperture but in order to get a good exposure it will usually give you a slower shutter speed. By contrast, shooting in Shutter Priority will force your camera to use the widest possible aperture every single time in order to get a good exposure at the shutter speed you set. (Unless of course there is already plenty of light available in which case it might select a smaller aperture, but you would still get the non-blurry photo you want.)

#3 Make better use of light

One of the best sources of light is available for free all day long right in the sky above you. However, while the sun is certainly the brightest light, it is also the least controllable. This means you have to find ways of making use of the light it does provide, which usually is a simple matter of repositioning yourself or your subjects. When working with adults this is fairly easy, but kids are another matter; they rarely go right where you want, and if they do they are not likely to stay there for long. If you’re the kind of person who likes to take pictures while resting comfortably on a couch you might find yourself with plenty of blurry, or excessively dark or light photos, as a result. If you get up and start roaming about the room you can not only get a better vantage point from which to take your pictures, but find ways of making much better use of the sunlight that is likely to be streaming in through the windows.

Sunlight was pouring in through a window just to the right of this photo, so I quickly found a location that took advantage of such a large amount of available light.

Sunlight was pouring in through a window just to the right of this photo, so I quickly found a location that took advantage of such a large amount of available light.

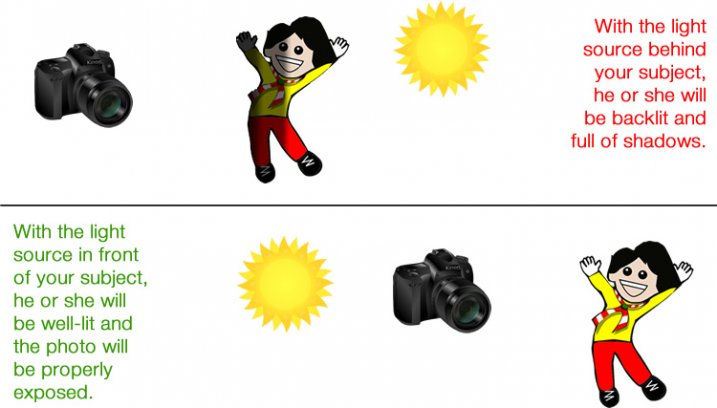
This technique works great even if you don’t have a fancy DSLR or other such expensive camera. I often see pictures of kids posted to social networks that are blurry because the shutter speed was too slow to capture the action, even though there is plenty of sun or other light available. The trick is to learn how to reposition yourself such that your subject is in front of you and the main source of light is behind you. This will help make sure your subjects (whether they are kids, adults, pets, plants, or anything else) are properly lit, while also giving you enough light to use faster shutter speeds.

light-sources


This takes a bit of time to adapt to because you may be used to staying relatively still while kids run around and play. Once you start getting up, moving around, and learning to harness the available light instead of using the flash, you will see a dramatic improvement and far fewer blurry photos, even if you are using an iPhone or an inexpensive point-and-shoot camera.

Do you like taking pics of children? What are some of your favorite techniques for getting photos that are sharp, in focus, and not blurry? Leave your thoughts in the comments below.

googletag.cmd.push(function() {
tablet_slots.push( googletag.defineSlot( “/1005424/_dPSv4_tab-all-article-bottom_(300×250)”, [300, 250], “pb-ad-78623” ).addService( googletag.pubads() ) ); } );

googletag.cmd.push(function() {
mobile_slots.push( googletag.defineSlot( “/1005424/_dPSv4_mob-all-article-bottom_(300×250)”, [300, 250], “pb-ad-78158” ).addService( googletag.pubads() ) ); } );

The post 3 Tips for Avoiding Blurry Photos of Kids by Simon Ringsmuth appeared first on Digital Photography School.


Digital Photography School

 
Comments Off on 3 Tips for Avoiding Blurry Photos of Kids

Posted in Photography