RSS
 

Posts Tagged ‘astrophotography’

Samyang 14mm f/2.8 Lens – Astrophotography On A Budget

04 Nov

When it comes to choosing lenses, there are two main schools of thought. The first is to use a minimum number of zoom lenses with a large range of focal lengths. The second is to use more lenses with a smaller range of focal lengths.

As a travel photographer, I’ve worked hard to minimize my gear. I would love to own a dozen lenses, I just don’t want to carry them all. It’s rare to find more than three lenses in my bag.

I’ve followed that first school of thought for years, and it’s served me well.

Samyang 14mm f/2.8 lens for astrophotography

The Case For Specialist Lenses

Whatever you photograph, there inevitably will come a time when you want a specialist lens for a specific subject. I’ve experienced this a couple of times.

In a past life as a wedding photographer, I owned a macro lens that I bought exclusively for photographing details such as rings. My other lenses weren’t up to the task, so I added it to my kit for just a few detail images per wedding.

Fast forward a few years, and I discovered a love for astrophotography. I found once again that my landscape lenses weren’t up to the task.

Astrophotography is a highly specialized subject and one that calls for the right gear. I was getting some reasonable night sky photos with my 16-35mm f/4 lens, but I wanted something wider and faster. I needed another specialist lens.

The Samyang 14mm Ultra Wide-Angle f/2.8 IF ED UMC Lens

My search for a lens that was wider than 16mm and faster than f/4 led me to a few lenses that I would’ve loved to add to my kit. The problem was that they were all either too large or too expensive. I didn’t want or need another wide-angle zoom lens.

Then I found the Samyang (also branded as Rokinon) 14mm f/2.8 lens. 14mm gives you a 115° view, which is plenty wide enough to capture the night sky.

The maximum aperture of f/2.8 is fast enough to capture insane amounts of light in the stars. Being a prime lens, it’s lighter than most wide-angle zoom lenses. As if that wasn’t enough, it’s cheap.

Samyang 14mm f/2.8 lens for astrophotography

Weight

At around 550g, this lens isn’t going to add a lot of extra weight to your camera bag. It’s made mainly of plastic, but build quality is surprisingly good for the price.

It isn’t the highest quality astrophotography lens on the market, but for a budget lens, it’s good enough.

Samyang 14mm f/2.8 lens for astrophotography

Sharpness

Image sharpness is about what you would expect for a budget lens.

It’s sufficiently sharp for astrophotography, but personally, I wouldn’t use it for landscape photography during daylight hours.

This lens also has quite a significant distortion, but that’s unavoidable with such a wide lens. Lightroom’s lens correction profile does a pretty good job of correcting it.

Focus

One thing you need to consider before buying this lens that it’s manual-focus only. It also uses a manual aperture ring.

This has never been a problem for me, as I’ve found auto-focus to be virtually useless when photographing the stars. The focus ring has a nice smooth feel to it and a large throw, making focusing incredibly accurate.

Samyang 14mm f/2.8 lens for astrophotography

You’ll also need to consider that you can’t use filters with this lens due to the large front element. Again, this shouldn’t be an issue if you’re using it for astrophotography, because you won’t be needing filters.

Who Is This Lens For?

If you’re looking for a wide lens on a budget, you should definitely consider the Samyang 14mm f/2.8 lens.

For a great astrophotography lens that won’t break the bank, it’s hard to beat. It may not be the best option if you’re planning to sell large prints, but the image quality will be sufficient for most photographers.

Samyang 14mm f/2.8 lens for astrophotography

Other uses for this lens could be architecture and real estate interiors photography.

You could definitely photograph landscapes with it, but the image softness could be an issue. If you want a higher quality, sharper lens, you’ll need to increase your budget a fair bit.

It’s available with mounts for Canon, Nikon, Sony, and Pentax, and compatible with both full frame and cropped sensors.

Have you used the Samyang 14mm f/2.8 lens? What’s your go-to lens for astrophotography?

The post Samyang 14mm f/2.8 Lens – Astrophotography On A Budget appeared first on Digital Photography School.


Digital Photography School

 
Comments Off on Samyang 14mm f/2.8 Lens – Astrophotography On A Budget

Posted in Photography


TinyMOS unveils ultra-portable NANO1 astrophotography camera

17 Oct

TinyMOS, the company behind the TINY1 astrophotography camera introduced in 2015, is back with a successor. The newly unveiled NANO1 is only one-third the size of the TINY1 and offers multiple improvements over the original model, including greater portability, increased resolution, and a dual-mount lens system.

The NANO1 is highly portable, weighing in at less than 100g/3.5oz with a size considerably smaller than the TINY1. Despite the size reduction, the NANO1 astronomy camera will offer triple the resolution of the original model, featuring a Sony BSI sensor capable of capturing 12MP still images and 4K Ultra HD videos.

$ (document).ready(function() { SampleGalleryV2({“containerId”:”embeddedSampleGallery_0104584846″,”galleryId”:”0104584846″,”isEmbeddedWidget”:true,”selectedImageIndex”:0,”isMobile”:false}) });

TinyMOS packed a dual-mount system into the NANO1, one capable of supporting both “very small” M12 lenses, as well as larger C-mount lenses. Users will be able to control the camera using an iPhone or Android smartphone running a companion app. The apps will also support downloading and sharing images.

Joining the NANO1 camera will be a product line of accessories designed to pack flat, according to TinyMOS, including a miniature Z-tripod mount. The new astrophotography camera model will be launching this fall with deliveries expected to start in April 2019. The NANO1’s price hasn’t been revealed, but interested buyers can sign up for future news about the model here.

Articles: Digital Photography Review (dpreview.com)

 
Comments Off on TinyMOS unveils ultra-portable NANO1 astrophotography camera

Posted in Uncategorized


How to Add More Interest to Your Astrophotography With Light Painting

05 Oct

Photographing the night sky is a lot of fun and can result in some stunning photographs. You don’t need to look far to find some incredible, out-of-this-world astrophotography.

As the low-light performance of cameras continues to improve, astrophotography has come within reach of more photographers.

joshua tree astrophotography light painting

You may have tried your hand at photographing the stars and the Milky Way, or you may be fantasizing about going out to play while the world sleeps. If you aren’t new to astrophotography, you’ve likely found that it isn’t as easy as you might think. Even with the right gear, it takes a lot of practice and can be incredibly frustrating at times.

Even if you’ve managed to come home with some sharp, well-exposed images of the stars, you may be wondering what’s missing. What are so many night sky photos missing? It’s easy to get so focused on photographing the sky that you can forget that it’s the earth that makes them interesting.

Adding Interest to Your Night Sky Photos

One of the best things you can do to add depth to a landscape photo is include some foreground interest. Astrophotography is no different.

This is why you’ll find that some of the most stunning astrophotos include natural or man-made elements like rock formations, lighthouses, or old barns.

beach astrophotography light painting

BEFORE: A 20-second exposure using only ambient light.

beach astrophotography light painting

AFTER: The same scene with the sand illuminated by light painting with the screen on my phone.

You may have already tried including some foreground interest into your night sky photos. The problem is that the best places for astrophotography are the darkest places. As far away from light pollution as possible, with little or no moonlight. Unfortunately, this means there is very little ambient light to illuminate the foreground that you’re trying to include.

One simple solution is called light painting. It comes in many forms and can be done using many different techniques. The basic principle is that you add light to parts of the scene to illuminate them. It can not only transform your astrophotography, it’s also a lot of fun.

The best part is that you don’t need any fancy or expensive gear. All you need is a light source. You can use anything you have lying around. A flashlight, light bar, camping lamp, your phone, or your car’s headlights. I’ve even seen people using a drone. I always take a headlamp so I can see what I’m doing so that often does the trick.

How to Paint With Light

Light painting isn’t difficult, in fact, it’s really easy. Once you have your camera set up and ready to go, take a photo of the scene with ambient light to make sure you’ve exposed for the sky and stars.

When you’re happy with your settings, either you or a buddy will use the light source to paint light onto the foreground elements that you want to illuminate. Start by painting a small amount of light into the scene, then check the image. You’ll rarely get it right the first time.

camping astrophotography light painting

BEFORE: A 25-second exposure of a camping scene with the light of the fire and an LED placed inside the tent.

camping astrophotography light painting

AFTER: The same scene with the vehicle illuminated by my headlamp to the right of the scene.

Take multiple exposures, slowly painting in more light as necessary. Try experimenting with painting from various angles to see how it changes the way the foreground looks. Don’t be afraid to walk into the frame. With exposure times of 20-30 seconds, you won’t be visible as long as you keep moving. Just be careful not to shine the light source into the lens. I find wearing black helps you stay invisible.

As you’re photographing tiny amounts of ambient light, you’ll find it’s easy to overdo it with the light painting and overexpose the foreground. Less is more with this technique. If you find the foreground is too bright, paint less light in or use a light source that isn’t as bright. I find the light from the screen on my phone works well. It also allows you to choose the color of the light.

As with any form of photography, don’t forget that off-camera light (light coming from the sides of the scene) gives a much more pleasing look and creates depth in your photos. Instead of standing behind your camera and light painting while the shutter is open, move off to the side or walk through the scene to vary the angles of the direction of the light. Just be sure to check where you’re walking first!

tree astrophotography light painting

BEFORE: A tree silhouetted against the light of the Milky Way.

tree astrophotography light painting

AFTER: I used a camping light to paint the edge of the tree with light, helping to give the scene some depth and lead the viewer’s eye into the stars.

Post-Processing Astrophotography Images

When it comes time to edit your photos, the more frames you have to work with the better. You may find that there’s one exposure where you nailed the exposure and light painting in one frame, in which case you can go ahead with post-processing it.

In the more likely scenario that you like different parts of different frames, which you can easily blend together in Photoshop to create a composite.

This is where your base exposure with no added light will come in handy. Go through and select the images that you want to create the composite with, including the base exposure, then use this digital blending technique to combine them in Photoshop. I like to do a basic edit to the images in Lightroom before exporting to Photoshop, then I add final touches after blending them into one image.

joshua tree astrophotography light painting

BEFORE: Rocks and Joshua trees are slightly illuminated by the ambient light pollution.

joshua tree astrophotography light painting

AFTER: The same rocks and trees painted with light from my flashlight as I walked through the scene.

It’s easier than you think

Light painting may seem like a complex photographic technique, but it’s actually quite simple. It can take your astrophotography from good to great, and you’ll find the process is very enjoyable, even addictive!

Next time you head out into the night with camera in hand, pack an extra flashlight and give light painting a try. You’ll be glad you did.

The post How to Add More Interest to Your Astrophotography With Light Painting appeared first on Digital Photography School.


Digital Photography School

 
Comments Off on How to Add More Interest to Your Astrophotography With Light Painting

Posted in Photography


How to Reduce Digital Noise in Astrophotography Using Exposure Stacking

09 Jun

Astrophotography has become increasingly popular in recent years, with good reason. There’s something about the night sky, stars, and The Milky Way that are fascinating to us. They remind us of how small we are and how huge the universe we live in really is. Photographing them can make for some pretty spectacular images.

How to Reduce Digital Noise in Astrophotography Using Exposure Stacking - night photo with Milky Way visible

Digital Noise in Astrophotography

As camera technology has advanced, photographing the night sky has become possible for photographers of all levels and budgets. Low-light performance continues to improve, allowing us to photograph the stars at higher and higher ISOs. However, digital noise continues to be one of the biggest challenges for astrophotographers.

There are a number of different approaches to dealing with digital noise in your astrophotography, from your camera settings to the way you process them in post-production.

Digital noise is caused by a couple of things. Firstly, the camera sensor heats up as it exposes an image, causing an increase in noise. Secondly, an increase in sensor sensitivity, or ISO, can lead to more digital noise in your images. As both high ISO values and long exposures are going to lead to more digital noise, you’re going to need a strategy to deal with it in your astrophotography.

path to the ocean with Milky Way in the night sky - How to Reduce Digital Noise in Astrophotography Using Exposure Stacking

Exposure Stacking

There is a technique called exposure stacking that is very effective in reducing the digital noise in your photos. You take multiple exposures with the same settings, stack them into layers inside Photoshop, align the stack, then Photoshop will create an image based on the median of all the stacked exposures. The final image will show the parts of your exposures that are consistent through each layer, like the stars. Because digital noise is random, and changes from one exposure to the next, it will not be visible in the final stacked image.

If you’re still following me, great. It sounds complicated, but I’m going to walk you through exposure stacking step-by-step and you’ll see it’s really not that difficult. It can take a little time to get right, but it’s totally worth it when you see the difference it can make in your night sky photos.

Milky Way beach photo - How to Reduce Digital Noise in Astrophotography Using Exposure Stacking

Capturing the Stars In-Camera

There are plenty of other articles that will teach you in detail how to take great astrophotography, so I won’t go into it here. However, there are a few considerations that are required to get the exposures correct in order to be able to use the exposure stacking technique later.

1. You need multiple exposures with the same camera settings. You can take as many shots as you want, but I would suggest using a minimum of 10. Try to capture them as close together as possible to minimize movement of the stars between each exposure. The more time that lapses from the first exposure to the last, the more work will be required to stack them properly.

2. Turn off Long Exposure Noise Reduction. This is probably called something like “Long Exposure NR” in your camera. It will cause each exposure to take twice as long when it’s turned on, meaning there will be twice as much movement of the stars between exposures. It also means you’ll be double-processing your images, causing a reduction in image quality.

3. Make sure the stars in your photos are pinpoint. They need to be sharp and have as little streaking as possible. You can work out the maximum exposure time to create pinpoint stars based on the focal length of your lens using this tool.

Import and Develop in Lightroom

Again, there is a wealth of information about how to process astrophotography in Adobe Lightroom. All I do in Lightroom is check each exposure to eliminate any images that are unusable due to camera movement, do a basic edit, then open my selected images to Photoshop as layers.

How to Reduce Digital Noise in Astrophotography Using Exposure Stacking

Use “Open as Layers in Photoshop” to do exposure stacking. Go to: File > Edit In > Open as Layers in Photoshop.

The main things to remember here are that you make sure to sync your edits with all the exposures that you’ll be using and to avoid over-processing the images in Lightroom. Avoid sharpening and noise reduction at this stage of the process. Also take it easy on contrast, clarity, and dehaze. You can perform more creative edits on the final stacked image.

Aligning and Stacking Exposures in Photoshop

Ensuring your images are all aligned correctly is vital when doing exposure stacking. If they are not, you will end up with blurry stars. There are a couple of ways to align exposures. Try the auto-alignment method first and if it doesn’t do a good job you’ll need to use the manual method.

Auto Alignment

  1. Select all layers.
  2. Select Edit > Auto-Align Layers…
  3. Select Auto. Click OK.

How to Reduce Digital Noise in Astrophotography Using Exposure Stacking - auto-align layers

Manual Alignment

    1. Make only the bottom two layers visible.
    2. Select the second layer and change its blend mode to Difference. You’ll see the image go mostly black with white specks. The white areas represent the parts of the two visible images that are not aligned correctly.

How to Reduce Digital Noise in Astrophotography Using Exposure Stacking

  1. Click Edit > Free Transform.

How to Reduce Digital Noise in Astrophotography Using Exposure Stacking - free transform

  1. Click View and make sure Snap is unchecked.
  2. Zoom in on a corner, hold down command/control and move the corner box around until you see the white parts of the image line up and turn black. It will take some trial and error.

How to Reduce Digital Noise in Astrophotography Using Exposure Stacking

    1. Repeat with each corner of the image. You may need to go back to readjust a corner that you’ve already moved. It won’t be perfect, but try to get it as close as possible.
    2. Press return to exit Free Transform mode, then change the blend mode back to Normal.
    3. Make the layer you’ve just adjusted invisible and the next one up visible.
    4. Repeat with every layer, aligning each one with the base layer until they’re all aligned as well as possible.

Stacking Layers

  1. Make sure all layers are visible and selected.
  2. Right-click on one of the layers and click Convert To Smart Object.

How to Reduce Digital Noise in Astrophotography Using Exposure Stacking

  1. Click Layer > Smart Objects > Stack Mode > Median.

<ol> <li>

Finish up

When Photoshop has finished working its magic, you should end up with an image that’s much cleaner with significantly less noise than you started with. Your stars probably won’t look quite as sharp when zoomed into 100%, especially if the alignment wasn’t quite right, but you’ll be the only person who looks that closely. Don’t forget to crop the edges that have moved during the alignment process.

Now you can apply any other creative edits you might like to your image. You can either do this while still in Photoshop or save the image and apply the adjustments back in Lightroom.

This may seem like a complicated process, but once you’ve done it once or twice you’ll get much quicker. If you’re anything like me, you’ll find the effort is worth it for the lovely, clean, noise-free astrophotography images it gives you.

The post How to Reduce Digital Noise in Astrophotography Using Exposure Stacking appeared first on Digital Photography School.


Digital Photography School

 
Comments Off on How to Reduce Digital Noise in Astrophotography Using Exposure Stacking

Posted in Photography


Astrophotography lens shootout: Samyang 14mm F2.4 vs Sigma 14mm F1.8

02 Dec

If you’re thinking of picking up a great ultra-wide astrophotography lens, chances are good you’ve looked at the three 14mm primes featured in this video. The old Samyang 14mm F2.8 is a classic and affordable choice; the updated Samyang 14mm F2.4 is faster, higher quality, and not prohibitively expensive; and the Sigma 14mm F1.8 Art is a lens astrophotographers have been drooling over ever since it was announced in February.

So which do you pick, and why?

NatureTTL’s Matthew Saville took all three lenses into the middle of the desert to shoot some nightscapes and compare the performance of these extremely popular choices.

You’ll definitely want to check out the full video if you’re deeply uncertain about which to choose—there are some great side-by-side sharpness comparisons that should satisfy the pixel peepers out there—but Saville manages to break the trio down into a very neat categories:

The Sigma 14mm F1.8 Art is your choice if you absolutely need the extra light over the F2.4 and don’t mind spending a bunch more money to get it. It’s extremely sharp, and will deliver exceptional results… even wide open… even in the corners.

The Samyang 14mm F2.4 is hard to beat as an overall choice when you look at performance-to-price ratio. To his eye, it’s a tiny bit sharper in the corners wide open than the Sigma—even when you stop the Sigma down to F2.4—and it’ll cost you half as much. You are, of course, sacrificing AutoFocus over the Sigma, but many nightscape and night sky photographers shoot in manual focus all the time anyway.

The Samyang 14mm F2.8 is by far the most affordable of the bunch. This classic lens will cost you as little as $ 250 on sale, making it less than half as much as the Samyang 14mm F2.4, which was already half the price of the Sigma 14mm. But that drop in price comes with a significant drop in performance. Saville labels it a great choice for those just getting into nightscape photography, as a time-lapse lens if you’ll be displaying your footage in 1080p, or as a solid backup that is so cheap it would be silly not to own one.

Check out the full video up top to hear all of Saville’s thoughts on these three popular 14mm primes. And if you want to find out more about why the Sigma 14mm F1.8 Art lens just might be worth spending that bundle of money on, click on the big blue button below to read about why DPReview’s Dale Baskin named it his Gear of the Year 2017.

Gear of the Year 2017 – Dale’s choice: Sigma 14mm F1.8 Art

Articles: Digital Photography Review (dpreview.com)

 
Comments Off on Astrophotography lens shootout: Samyang 14mm F2.4 vs Sigma 14mm F1.8

Posted in Uncategorized


Put a stamp on it: The astrophotography of Matt Dieterich

10 Jul

The Astrophotography of Matt Dieterich

Star trails and aurora over Mount Rainier from Reflection Lakes. This photograph was selected by the United States Postal Service for a new ‘Forever Stamp’ celebrating the National Park Service 2016 centennial.

The year 2016 is the centennial anniversary of the U.S. National Park Service, which manages over 400 parks, monuments, and historical places across the United States. To observe this anniversary, the U.S. Postal Service recently issued a special series of stamps celebrating the National Parks, featuring images from 16 parks across the country.

One of those images was taken by astrophotographer Matt Dieterich of Morgantown, WV, whose image of star trails over Mt. Rainier was selected by the Postal Service for this historic series of stamps. The opportunity couldn’t have happened to a better person: not only is Matt an accomplished photographer, he’s an enthusiastic supporter of the National Parks, and even spent a summer working at Mt. Rainier National Park in Washington state. On the following pages, Matt gives us some insight into his photography, how his image ended up on a postage stamp, and why the National Parks are such an important resource.

If you would like to own a part of history, Matt is offering a limited-edition series of prints featuring the image of Mt. Rainier that appears on the stamp. Head over to his website for more information.

The Astrophotography of Matt Dieterich

This large Milky Way panorama was created from 14 individual images.

How did you discover astronomy, and at what point did your interest in astronomy translate into astrophotography?

“When I was about 10 years old my godparents gave me a telescope. Then, when I was about 16 I got another one for Christmas. It was just a little one, but it had a computer on it and you could tell it where to go. I could have it point to Jupiter, the Orion Nebula, or anything I wanted. It was really cool, but I wanted to show people what I was seeing, because being outside by the telescope all by yourself wasn’t as much fun. The only way I could do that was to connect a camera to the telescope.”

“I originally bought a film SLR, but the images turned out horrible. Later that year my parents helped me buy a DSLR, and from then on it was history because I could get instant results from the digital camera. That’s what I needed to learn quickly with astrophotography – it’s trial and error and experimentation. Going through high school it helped spur my interest in science; there’s an experimental thought process and you never give up on trying to figure out what’s wrong when you take a photo, and how to improve it.”

The Astrophotography of Matt Dieterich

The Milky Way, with light pollution from Portland, Oregon, captured from Mt. Rainier National Park.

Was your experience in astronomy, and astrophotography in particular, part of what inspired you to study sciences in college and graduate school?

“It was. The reason I went into geology and environmental science was because I love being outside. I like understanding why the earth looks the way it does. Why am I seeing what I’m seeing? To me, it’s motivation to learn more about what’s around us as humans. The night sky is something that we don’t all get to experience a lot. Everyone’s usually asleep, and many people don’t fully understand what’s above our heads because of the city lights.”

“My background and interest in photography definitely pushed me towards a career that would give me the time and opportunity to take photographs.”

The Astrophotography of Matt Dieterich

The Milky Way as seen from Zion National Park in Utah. Matt took this photo from his campground and remembers how much it inspired the other campers to look at his photos of the night sky.

Your portfolio has amazing images from lots of places, but something that really jumps out are all the photos of the night sky in National Parks. What’s special about the National Parks that makes them such a great place for your photography?

“The National Parks serve as islands – islands of protected resources. Just like the meadows and the trees and the animals, the parks serve to protect the night sky. That’s the purpose of National Parks in general. They’re regions that are to remain unchanged by man, and the night skies across National Parks are phenomenal, especially out west where the elevation is high and where climates are dry. Southern Utah, Death Valley, and other regions like that are pretty inhospitable to humans, and as a result you’re going to get some pretty amazing landscapes and night skies.”

The Astrophotography of Matt Dieterich

Matt decided to have a little fun with this image captured in Badlands National Park in South Dakota, and pointed his flashlight toward the galactic arm stretching across the sky.

Are you hoping to inspire other people to discover astronomy, or to go to the National Parks and have their own park experiences?

“Oh, without a doubt. The goal of my photography is to get everyone, but especially kids, involved in astronomy. All it took for me was a photograph, looking at an astronomy magazine, or a book about space, when I was a kid. It gets the hamster wheel in your head turning and your imagination going. It really gets you thinking. You never know what a kid will dream about just from a simple photograph of say, the Milky Way, or Earth from space. Also, I want to inspire people to get out and enjoy the National Parks that we have, because they belong to all of us. They’re amazing to experience in person and they can really humble you.”

The Astrophotography of Matt Dieterich

Matt Dieterich, appearing at an event to support Washington’s National Park Fund, posing with the photo that now appears on a special-issue postage stamp honoring the U.S. National Park Service.

It’s often said that luck is what happens when preparation meets opportunity; it seems that this was true in your case. Can you share the story of how your photo of Mt. Rainier was selected for a postage stamp?

“It’s a fun story. A year ago I was working at Mt. Rainier. I had finished grad school and wanted to work as a night sky ranger. I’ve always dreamed about going on a road trip and just taking photos. I drove 3,500 miles form Pittsburg to Mt. Rainier and stopped at parks along the way. When I was working there I used every free chance to go outside at night, to roam the park and capture the night sky. By August, I had a handful of great photos taken in the park.”

“One day my boss emailed me and said that someone in Washington, DC, was looking for photos of people looking through a telescope. I sent them what I had, but they couldn’t use it because I didn’t have a model release. So I just sent them the rest of my gallery of Mt. Rainier, and within an hour or two they responded in all caps, just loving the photo of Mt. Rainier with the star trails and aurora. Within a day they got back to me and said ‘Hey, this is going to be a stamp. But you can’t say anything about it until it gets released.’”

“The person at the Postal Service told me they had been working on this for years, and all of a sudden – rush, rush, rush – they needed a photo of the night sky. It’s kind of amazing when I think about it, but I’m just very humbled by the fact that they liked my photograph so much.”

The Astrophotography of Matt Dieterich

The Milky Way with green airglow over Glacier National Park in Montana.

Having your image on a postage stamp is a rare, and likely once-in-a-lifetime, opportunity. What is it like knowing that one of your photos is part of this history? Does it have special meaning given your relationship with the National Parks?

“It’s very humbling. I’m kind of at a loss for words. It’s an honor to be able to represent the Park Service and also promote the night skies. As a person trying to get my name out there for my photography… I never expected it to happen in this manner. The irony is that when I started working at Mt. Rainier they went around the room of interpretive rangers asking what our goal was for the summer. I’ll never forget; I said that if I could take one good photograph, I would be happy. Looking back now, it hits me hard knowing that this is something people are going to enjoy for the rest of time. It’s pretty remarkable.”

The Astrophotography of Matt Dieterich

Matt captured this Milky Way photo over a muddy pond in Arches National Park, in Utah, after hiking up to Delicate Arch. He liked the mud in the foreground, and the standing water made for a great Milky Way reflection.

Does an image on a postage stamp have the power to connect people you’ve never met to the National Parks? Can it inspire them to visit one?

“Sure. I definitely think so. When I gave my thank-you speech in New York City [at the official unveiling of the stamp series] I had this gentleman come up to me afterward. He was crying, saying how much it was a remarkable photo. He had some emotional connection to it, because I don’t think I gave an amazing speech that would bring someone to tears. But there was something about this photo… He had some emotional experience with the mountain and that photo was really meaningful.”

“It’s not the experience I expected when I went out to take the photo, but if that photo gets people to go outside, to look up, then that’s all I wanted to do. I want them to experience it. To me, the night sky is very emotional. It’s a human connection that I want everyone to experience. Maybe some people won’t feel it, but for many people it could really be life changing. What I’ve seen through my work, shooting the night sky, is that people are blown away because it’s not what they’re able to see every day. It’s very powerful, and the fact that a photograph could do that is astonishing.”

The Astrophotography of Matt Dieterich

Matt shot this Milky Way panorama with northern lights from Mt. Rainier National Park in Washington.

What type of equipment do you use for your work?

“Oh, I just use a disposable camera. No – I’m kidding. I use a Nikon D750. It’s a great full frame, low-noise camera for night sky photography, and is great for capturing wide views of the sky. I also use a Rokinon 24mm F1.4 lens, an Induro tripod with a ball head, and a shutter release intervolameter cable.”

“The Rokinon is great, but it definitely has a lot of coma, because I shoot wide open. I shoot F1.4 because my goal is to collect as much light as I can. When I’m doing a time-lapse I need to take as many frames as I can, and it takes 30 images to make a one second time-lapse video. I also have the Nikon 14-24mm F2.8 which is amazing as well, and it has practically no coma wide open. It’s pretty amazing, but you get what you pay for at $ 2,000. I have a D800 as well. I’ll use the D750 for a time-lapse while roaming around taking other photos with my D800.”

The Astrophotography of Matt Dieterich

Milky Way over Haystack Rock on Cannon Beach in Oregon.

How much post-processing is involved in your work? Is it a matter of just exposing correctly, or are there techniques that are important?

“After doing this for many years I’ve gone through different periods, and I guess, as an artist, that’s the way you change. In the beginning, I would process things very heavily because you have do do that when shooting through a telescope. You stretch the data. You physically stretch the histogram, but you have to make sure that everything is in that window of available dynamic range to avoid blowing the highlights or clipping the blacks. Working through the telescope you have to take calibration frames. You have to take not just one photo of the Orion Nebula, you’re taking a hundred. The more photos, the better, because you’re going to stack them like a sandwich, and it reduces the long exposure noise that cameras produce.”

“Then I transitioned to night sky work with just a camera and tripod. You see a lot of artistic images now and it’s possible to change the way an image looks, but I try to keep it natural. However, by stretching the data you’re already taking it beyond anything you’re physically going to see with the naked eye.”

“It’s tough to replicate exactly what you’re seeing, but I try to be natural and be gentle with the images. It’s what I want to do more of now. For example, in my Cannon Beach shot, I’m standing there on the beach with the Milky Way. I tried to process that very gingerly, bringing up the Milky Way just a little bit, and darkening the sides of the sky to make the Milky Way stand out just a little bit more. Folks fell in love with that. That’s my most liked Instagram photo and I think it’s because it looks real.”

The Astrophotography of Matt Dieterich

The Milky Way and Perseid meteor shower over Mt. Rainier.

A lot of photographers use apps that help see what’s in the night sky, or to plan their shoot. Are there any particular apps that you recommend?

“I know a lot of photographers, including night sky photographers, who swear by some of these apps on their phone. But when I was living at Mt. Rainier I was under the night sky every night, so I learned where things were going to be and how to frame and set things up. My general rule of thumb was ‘Okay, the sun rises in the East and sets in the West,’ and knowing the constellations as well. If folks just get a star map or star chart to learn the constellations, that’s important during meteor showers to know where the meteors are coming from.”

“Once you can point out a few objects in the night sky then you know them. You’ll know them for the rest of your life. No matter where you go – as long as you stay in the same hemisphere – the sky is going to be the same. It might change a little as you move from Mt. Rainier to Big Bend in Texas, where you get closer to the southern horizon, but other than that it’s a matter of learning some basics and getting out there. I haven’t used any apps for planning shoots, but I know a lot of people swear by them, and maybe one day I’ll try to find a benefit for using them.”

The Astrophotography of Matt Dieterich

The Milky Way appearing to erupt out of the summit of Mt. Rainier, a dormant volcano.

What other National Parks are high on your list of places to shoot?

“Oh, goodness… Let’s see… I was only at Yellowstone for one night and I didn’t get to pull out my camera because the clouds came in. So I think Yellowstone, because the night skies are amazing there. Big Bend National Park is on my list too because they have some of the darkest skies in the U.S., and I haven’t been there yet. I’d go back to one of the parks in Utah again, probably Bryce Canyon. I haven’t been to the Grand Canyon, either, but I’ve seen photos from there and the skies are remarkable. So there’s a lot. There’s a long list, but those are a few that I’d try to go to.”

The Astrophotography of Matt Dieterich

Matt created this panorama from 16 frames and shows the Milky Way right before dawn in Glacier National Park in Montana. He was able to use the soft light of dawn to illuminate the foreground stream.

What are your long term goals as a photographer? What do you hope to accomplish?

“I want to use my images to keep advocating, to use those images to inspire people, as well as doing public speaking and writing. People can relate to an image. It grabs them, and it’s another way we can connect them to protecting natural resources like the night sky. It’s something we can reclaim, but it’s something we’ve lost touch with, especially from city lights.”

“We’re at a point in time that we can really have an impact and can improve the night sky, but it’s only going to come through educating people and bringing them out into the night sky, bringing them to the resource. Photography does that. You can bring it right to their desk, but my goal is to get them outside because that way we can get them emotionally connected to it.”

“If we don’t get people emotionally connected to a resource, what’s the likelihood they will want to protect it? Whether it’s bison in Yellowstone, or elk in Rocky Mountain National Park, it’s the emotional connection that drives people wanting to do something, and that’s the real goal of my photography.”

For more information on Matt’s photography, or to purchase a print of the photo that appears on the postage stamp, you can visit his website. You can also follow him on Instagram.

Articles: Digital Photography Review (dpreview.com)

 
Comments Off on Put a stamp on it: The astrophotography of Matt Dieterich

Posted in Uncategorized


Astrophotography Made Simple

27 Oct

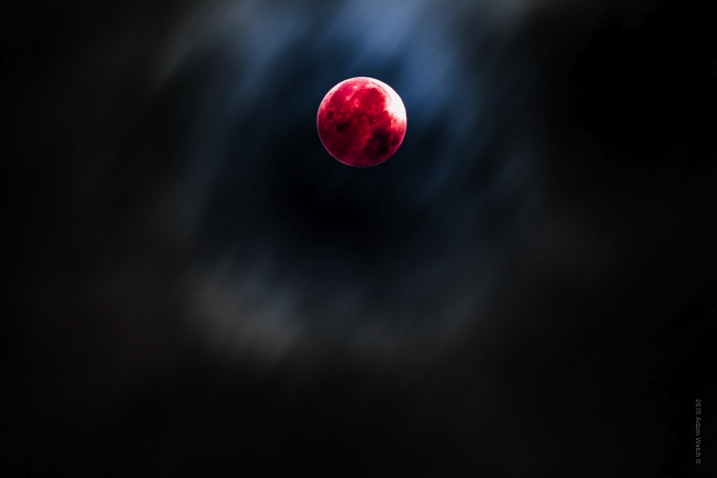
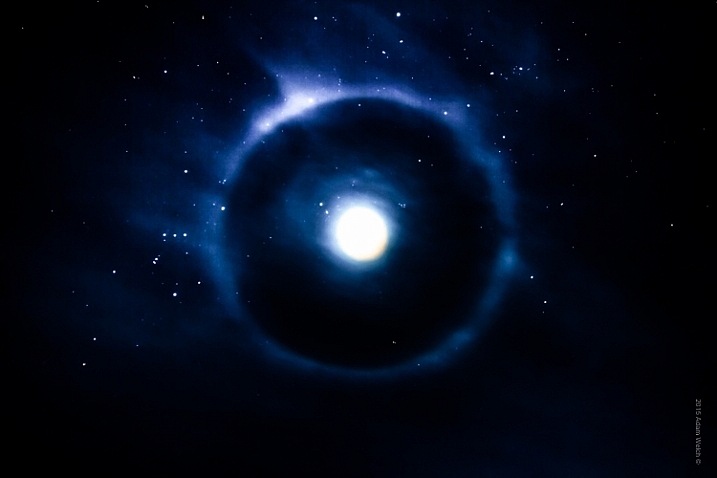
There may not be a more challenging subject matter for photographers than astrophotography. When I first began making photographs, I had an elusive and challenging goal which was to make a photograph of the moon.

Moon

13 years later (has it really been that long?) I think back and smile at how impossible capturing that photograph of the night sky seemed to me at the time. Back then, the idea of making an image that captured the moon or the stars, and even a galaxy, seemed impossible. I assumed the images would require an expensive camera or some kind of magical photo gear. I couldn’t have been more wrong. In reality, you probably have everything you need to get started in astrophotography right now!

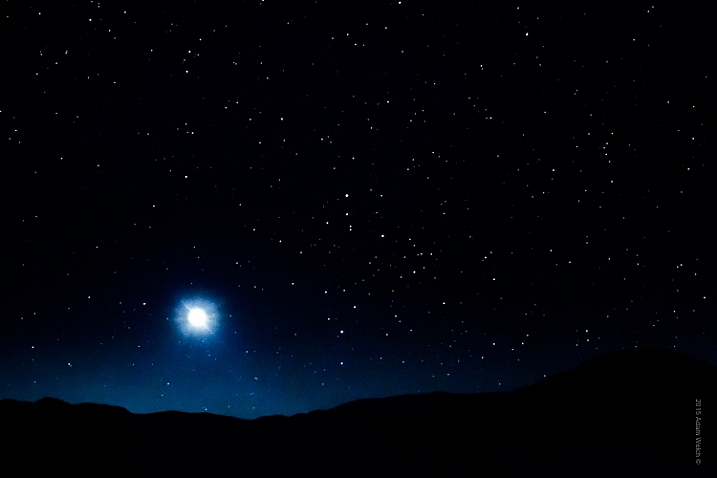
Astrophotography is simply a name for the realm of photography which images astronomical objects and the night sky itself. The moon, stars, constellations, galaxies, and even the sun, are all considered astronomical objects. In this article, you’ll learn just how easy it is to make great single exposure photographs of the wonders to be found in the expanses of the night sky.

You will only need some basic photographic gear and a small dose of patience. Complicated image stacking software and astronomically priced lenses and professional cameras not required. Now let’s get started!

Cade's Cove Moon

GEAR

Let’s talk about some of the bare bones gear that you will need in order to make your astro photos.

1 – A camera capable of shooting in full manual mode

You need to be able to control as many variables as possible, so shooting in Manual Mode is essential. Bulb capability is a plus, but not required. Bulb mode means that the exposure begins when you open the shutter and continues until you choose to end it by closing the shutter. Bulb mode is a setting which is now available on even the most budget friendly dSLR’s and mirrorless cameras (even some point and shoots have it).

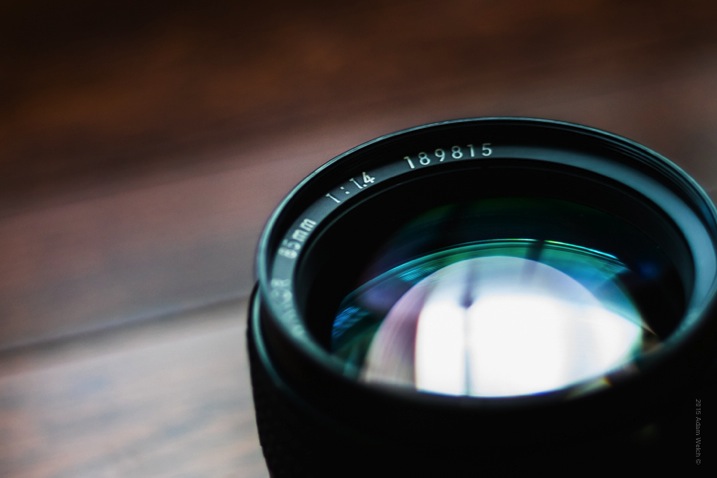
2 – The fastest (largest aperture) lens you have in your bag

Fast Lens

Wide angle lenses are sometimes viewed as the only focal length to use for astrophotography, but that is most definitely not true. The key to solid astrophotography is to use a lens which can let in the most light. These lenses will be rated with a small f-number and are often prime (fixed focal length). While wide angle lenses will give you a sweeping vista of the sky, don’t count out your medium-telephoto lenses.

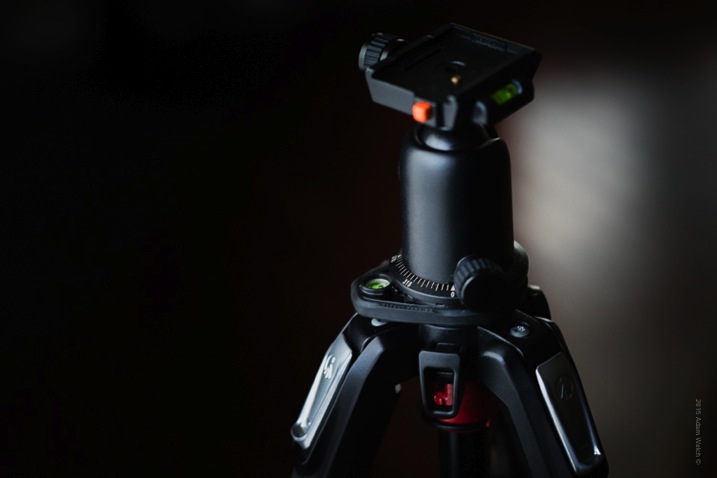
3 – A solid tripod

Tripod

You simply cannot escape the fact that a reliably sturdy tripod is the foundation on which all strong astrophotographs are built. Unwanted motion is your enemy. You will need a tripod that can support the weight of your camera and keep it completely motionless. Also, the mount on which the camera physically attaches will play a key role in the outcome of your images. Low quality ball-head mounts can sometimes drift under the weight of your camera during long exposures, so keep that in mind as well when choosing your tripod head.

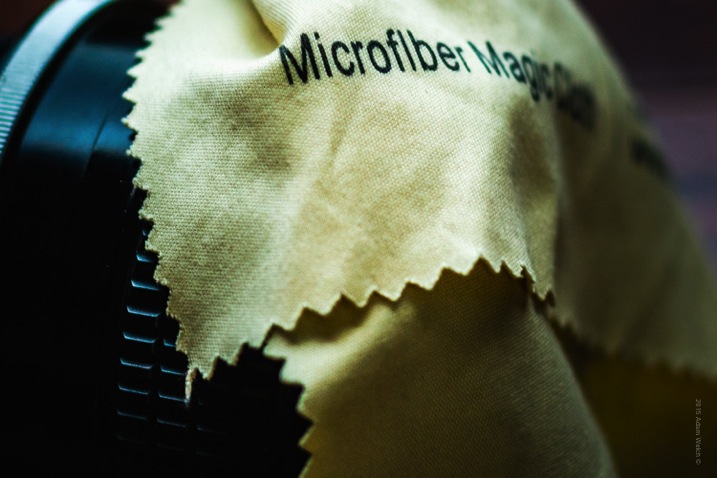
4 – A microfiber lens cloth

Cloth

You will have your lens tilted upward for many of your shots, so settling dew can become a problem, especially in the summer months. Be sure to pack at least one clean micro-fibre lens cloth to wipe off any moisture which can accumulate on your lens’ front element during long exposures. This is a small piece of gear that can make or break your photo outing.

5 – Optional remote shutter release

Unless you are shooting in Bulb mode, a remote shutter release in not necessary. However, it makes your shooting a little easier, and helps to ensure less camera shake. When not using a remote, set your shutter release on the 2-second timer so that you will not shake the camera by pressing the shutter button.

Camera settings

Now that you know what gear you will need, let’s look at how to go about making your astrophotographs.

Shutter speed

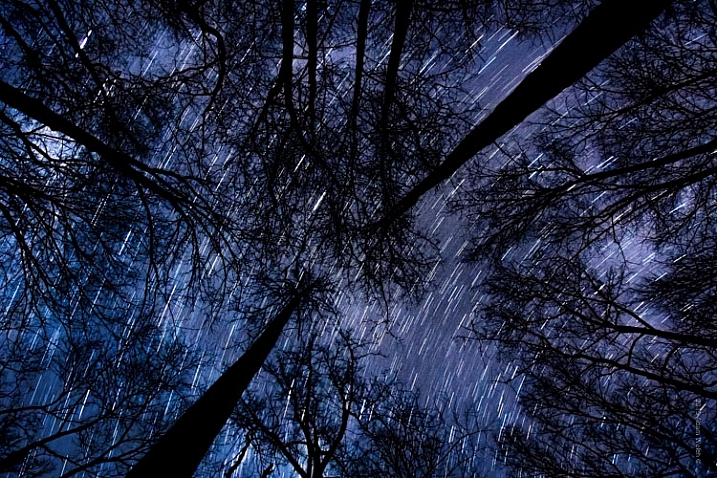
Without a doubt, the biggest question about astrophotography is, “How long should I expose my image?” The answer depends on what kind of photograph are you planning to make. The night sky is dynamic. Everything we see is moving, although it may not appear that way to our eyes. I often relate making photos of the night sky to making photos of water. If you want motion blur (star trails) you will need a longer exposure time. If you want to freeze motion (constellations and galaxies) you will need a shorter exposure time.

Startrail Trees

In my experience, the sweet spot for obtaining workable images of stars and the Milky Way without star trails, is around 15-20 seconds depending on the ISO and aperture (more on that shortly) settings. While there are of course no absolute formulas, a good guideline is called the 600 Rule. It is very similar to the reciprocity rule used for avoiding camera shake during hand-held shooting.

The 600 Rule states that to reduce celestial motion blur, the exposure time should be no longer than the equivalent of 600 divided by a given focal length. Meaning that the maximum shutter time in order to reduce star streaking for a 50mm lens would be 12 seconds (600 / 50 = 12), for a 14mm focal length it would be 42 seconds (600 / 14 = 42), and for a 24mm focal length it would be 25 seconds (600/24). This rule is based on full-frame digital image sensors and will keep star trailing less than 8 pixels wide. If you’re shooting an APS-C(cropped sensor) camera, try using 400 instead of 600 in order to obtain similar results.

The important thing to understand about shutter speed as it relates to astrophotography is that, just as in any other type of photography, longer shutter speeds will result with increased motion blur.

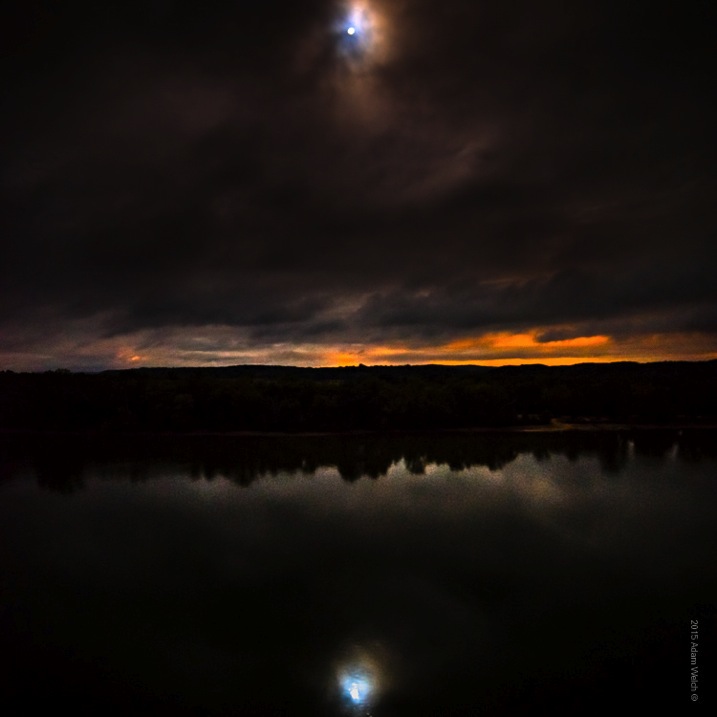
Reflection

Aperture

Aperture controls how much light is allowed to enter your camera, and in astrophotography the more light you have to work with, the better your images will be. Shoot your scene at the widest aperture possible. Keep in mind though, that all lenses have ideal apertures, and opening a lens all the way up (largest aperture) often affects overall sharpness. That being said, using a large aperture is almost always desirable, because it allows in the maximum amount of light, which will make your stars brighter and small celestial details more visible.

I shoot the majority of my astrophotography from f/1.8 down to f/3.5 and even f/4. Remember too, that with a wider aperture, precise focusing becomes very important due to the decreased depth of field. Manual focusing is very useful. If your camera has a focus magnification option, use it to zoom in on pinpoint stars or the moon, so that you can obtain the sharpest focus possible. Don’t rely on the infinity focus markings on your lens (they are often not accurate).

ISO settings

Selecting the ISO for your astrophotography is an exercise in compromise. High ISOs are better for shooting in low light conditions, but will also result in more grain and noise in your final photograph. Finding a comfortable medium can be difficult. Shoot with the highest ISO that you feel gives you the least amount of noise, but still allows you to use your desired shutter and aperture settings.

Mother Moon

Most cameras now have high ISO noise reduction built into the their on-board software. I find it is almost always helpful to turn this function off – stay with me here. The reason being, is that image post-processing software today almost always does a better job of reducing noise than does in-camera high ISO noise reduction, which can sometimes reduce contrast and image sharpness. I highly recommend that you experiment with your particular camera and find out what you prefer for your own needs.

Shoot RAW

You may have heard the benefits of shooting in RAW format. In astrophotography, shooting your images in RAW format becomes extremely helpful. The extra information gathered from these larger files will add a huge amount of dynamic range, which will allow you to process the images to a greater degree. Noise reduction will also work more effectively when coupled with the RAW image format.

Tips to make your astrophotography stand out

Incorporate external elements within the scene

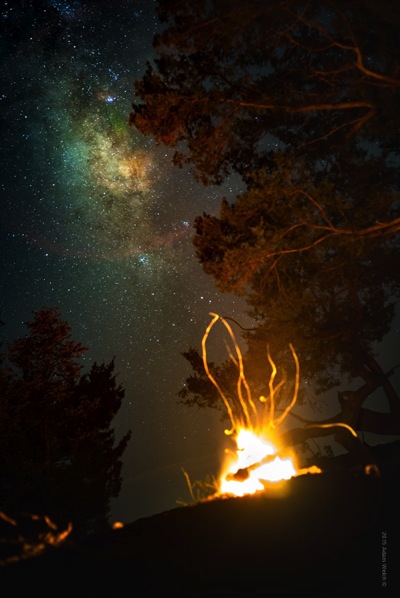
Milky Way Fire

While the objects found in the night sky are incredibly beautiful on their own, adding additional points of interest will often make your astrophotography even stronger. Add reference points such as trees or buildings. Look for a elements that bring harmony within the composition, and flow well with your astrological subject.

Light pollution can be useful

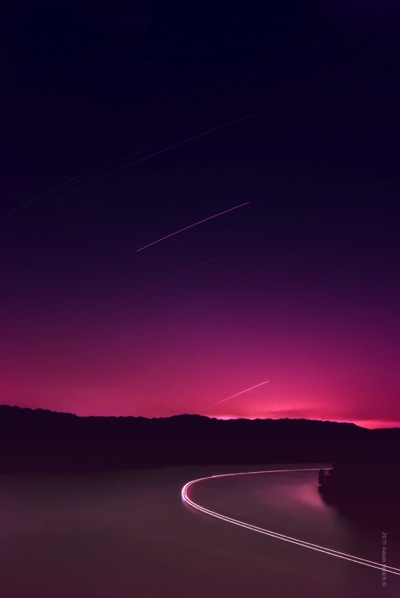
Boat Trail

While dark skies are certainly ideal for astrophotography, don’t feel that that all external light sources are a bad thing. Sometimes having city lights, or other luminance, interact with your scene can heighten the impact of your composition and add contrast within the image.

Experiment with color

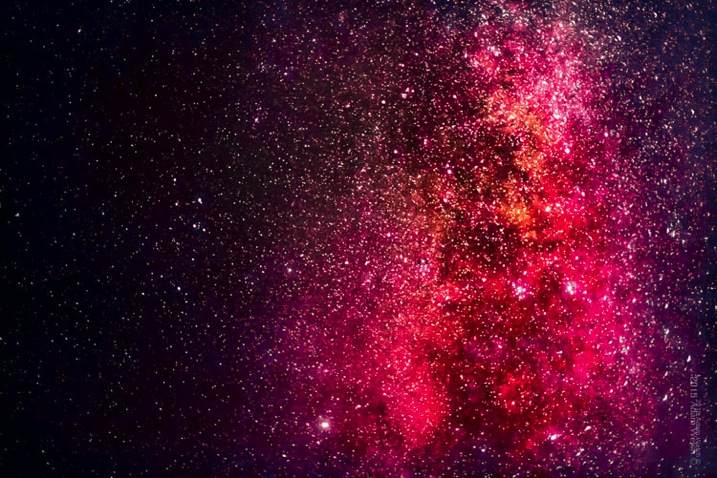
Red Galaxy

Astrophotography loves color. Don’t be afraid to increase, and manipulate saturation and hues in your post-processing workflow. Experimenting with colors will make your photograph a piece of personal art, rather than just a representation. Still, it is advisable not to over process your images so much that you lose detail, and/or make the entire image gaudy and unrealistic (which of course is very subjective). As always, less can sometimes be more.

Astrophotography is challenging, fun, rewarding, and educational. Making images of the heavens is a great way to develop your skills as a photographer, while at the same time producing beautiful images of things that most people may not have noticed before. Today, cameras and imaging software make it easy for us to make great photographs of the night sky. The information you have read here will put you well on the way to producing exciting astrophotos. Shoot for the moon!

googletag.cmd.push(function() {
tablet_slots.push( googletag.defineSlot( “/1005424/_dPSv4_tab-all-article-bottom_(300×250)”, [300, 250], “pb-ad-78623” ).addService( googletag.pubads() ) ); } );

googletag.cmd.push(function() {
mobile_slots.push( googletag.defineSlot( “/1005424/_dPSv4_mob-all-article-bottom_(300×250)”, [300, 250], “pb-ad-78158” ).addService( googletag.pubads() ) ); } );

The post Astrophotography Made Simple by Adam Welch appeared first on Digital Photography School.


Digital Photography School

 
Comments Off on Astrophotography Made Simple

Posted in Photography


TinyMOS startup introduces Tiny1 astrophotography camera

02 Oct

TinyMOS, a startup formed by National University of Singapore students, has introduced its Tiny1, a camera designed for astrophotography. The camera was introduced earlier this month at TechCrunch Disrupt 2015, and claims to be the first-ever portable consumer-level astronomy camera. Read more

Articles: Digital Photography Review (dpreview.com)

 
Comments Off on TinyMOS startup introduces Tiny1 astrophotography camera

Posted in Uncategorized


Nikon aims for the stars with the D810A, world’s first full-frame astrophotography camera

10 Feb

Nikon has announced the D810A: the first full-frame astrophotography-specific camera. This is the largest sensor to appear in a consumer astrophotography camera, bringing improved light capture capabilities to the discipline. It’s essentially a Nikon D810 with a modified IR-cut filter to ensure the camera can capture light emitted by nebulae and additional features to support long exposure photography. Read more

Articles: Digital Photography Review (dpreview.com)

 
Comments Off on Nikon aims for the stars with the D810A, world’s first full-frame astrophotography camera

Posted in Uncategorized


15 November, 2014 – My Astrophotography Adventure

16 Nov


Lately, as many readers know, Michael Reichmann has ventured into a new area and interest for himself and that is astronomy and mixing it up with photography.  Astrophotography is the term we’ll use and as usual when Michael dives into something he dives into the deep end head first.  Today’s article is a look into his journey in Astro Photography – My Astrophotography Adventure.

Don’t forget we still have a small number of berths available for the Antarctica Trips due to a few cancellations.  It’s still not too late to join us on Antarctica 2015.  Also we have only a few spots left on our Iceland workshop in June.  If you want to explore Iceland differently than other workshops then check out this Iceland 2015 Workshop .


The Luminous Landscape – What’s New

 
Comments Off on 15 November, 2014 – My Astrophotography Adventure

Posted in News