RSS
 

Posts Tagged ‘Artistic’

Creative Phone Photography: 8 Tips for Artistic Mobile Photos

02 Jul

The post Creative Phone Photography: 8 Tips for Artistic Mobile Photos appeared first on Digital Photography School. It was authored by Megan Kennedy.

creative phone photography: 8 tips for artistic images

A phone with a camera is great for photography. But it can be tough to break away from a “snapshot” mindset and start taking images that are truly creative.

In this article, we’ll take a look at some tips to help you capture creative phone photography. Specifically, I’ll share:

  • Key settings to make the most of your phone’s camera
  • Several tips to get you creating unique, artistic compositions
  • A simple secret for surreal-looking phone photos
  • Much more!

So if you’re ready to shoot some creative images, then let’s get started.

1. Shoot in RAW

Familiarizing yourself with the ins and outs of your phone camera is an important way to expand your creative options. Modern camera phones have a surprising range of capabilities that you can use for better photos.

For example, it’s a good idea to shoot in a RAW file format (an option now offered by many native camera apps). While JPEGs are the default format on many phones, they experience a loss in image quality thanks to compression – whereas RAW files are uncompressed and therefore tend to look better.

RAW files also offer greater post-processing versatility. You can adjust colors and tones and recover lost details in a natural, realistic way.

So if you’re after high-quality photos – which allow for extensive enhancement during post-production – then try switching to RAW. (Even if your mobile phone doesn’t offer RAW in its native camera app, you should still be able to find a third-party app that produces high-quality RAW files.)

setting up RAW format on a phone
RAW activated in Pro mode on an Android device.

2. Make the most of Manual mode

As with a conventional camera, Manual mode allows you to take control of your phone’s camera’s settings when capturing a photo. In Manual mode, you can adjust shutter speed, ISO, and white balance – and this additional control allows for greater creative input.

Creative phone photography bokeh

To activate Manual mode (also known as Pro mode) on some devices, open your Camera app and look at the camera mode tray. You should see settings like Timelapse and Panorama, and if you’re lucky, you’ll also have a Pro option.

Simply tap the Pro mode icon, and you’ll be good to go; you’ll gain access to numerous options for adjusting your phone camera’s functionality.

If your phone doesn’t offer a Pro mode, don’t worry. Simply download a third-party app such as ProCamera, Camera+ 2, or Obscura 2. All of these apps feature a Manual mode of sorts, and you can use it to harness your phone camera’s creative potential.

3. Don’t forget about composition!

Over time, plenty of guidelines have been developed to help photographers compose effective images. While none of these guides are inflexible laws, if you’re familiar with some basic compositional concepts, your photos will come a long way.

Of course, compositional knowledge translates to creative phone photography, too! For example, by activating your phone camera’s grid function, you’ll get a useful visual overlay, perfect for positioning key points of interest.

rocks on a beach

Learn about the rule of thirds, leading lines, the rule of space, triangular composition, and more; each of these will be helpful tools that’ll aid in your creative phone photography.

4. Make use of editing apps

I’ve already mentioned how third-party camera apps can give you increased control over your phone camera. But did you know that editing apps offer a whole other world of creativity?

For instance, Snapseed (Android and iOS) is a (free!) Google-owned application with plenty of tools for tweaking images and applying filters. VSCO (Android and iOS) offers some editing functions for free, including artistic, film-like filters. Adobe Lightroom (Android and iOS) supplies image editing tools similar to its desktop counterpart for free, and it can also be upgraded to a paid premium version for additional functionality.

(Unlike VSCO and Snapseed, only the paid version of Lightroom will edit RAW files.)

editing apps for creative phone photography

There are plenty of fun, creative apps available for both iOS and Android devices. Need a retro aesthetic? Afterlight (above, left) provides users with an advanced toolkit to add light leak effects to an image. Want to combine two images into a single photograph? Snapseed (above, right) allows you to quickly and easily merge image layers to create a double-exposure effect.

There are a multitude of apps that suit a huge variety of purposes and capabilities. The fun part is trying them all out!

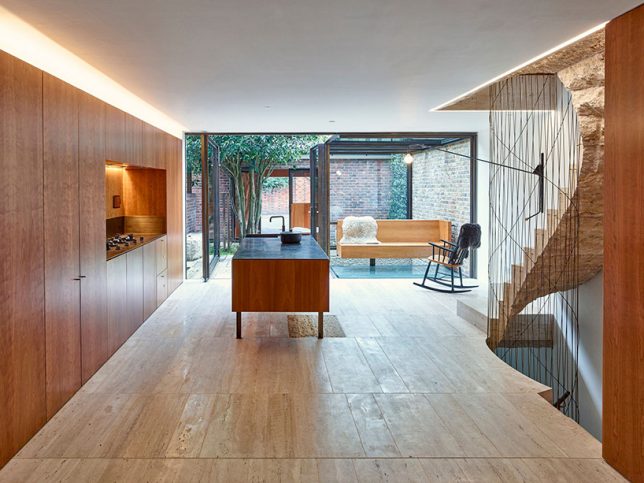
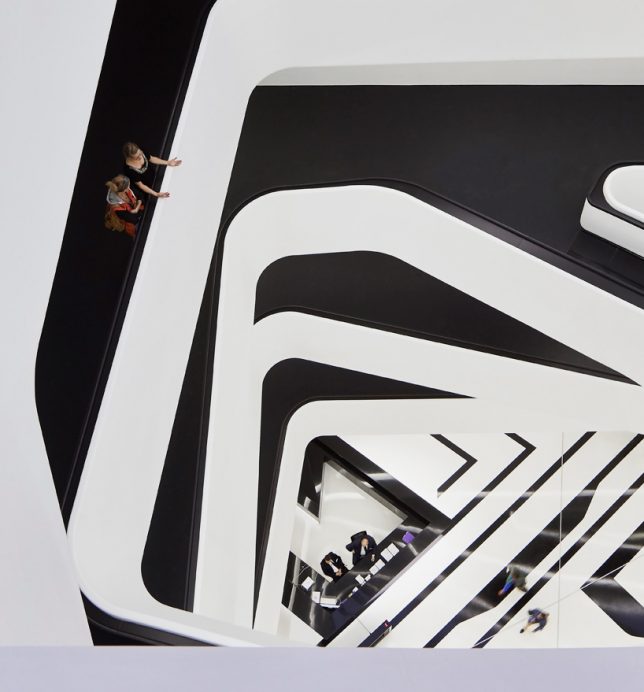
5. Try different perspectives

One of the great things about creative phone photography is the mobility of a small photographic device. A camera phone isn’t just an accessory; it’s a pocket-sized machine capable of capturing stunning photos.

So take advantage of the size and portability of a phone camera by physically experimenting to create intriguing perspectives. Place your phone close to the ground, try a high angle, or shoot from off to the side. Just make sure to get a non-conventional perspective, and you’re bound to end up with interesting results.
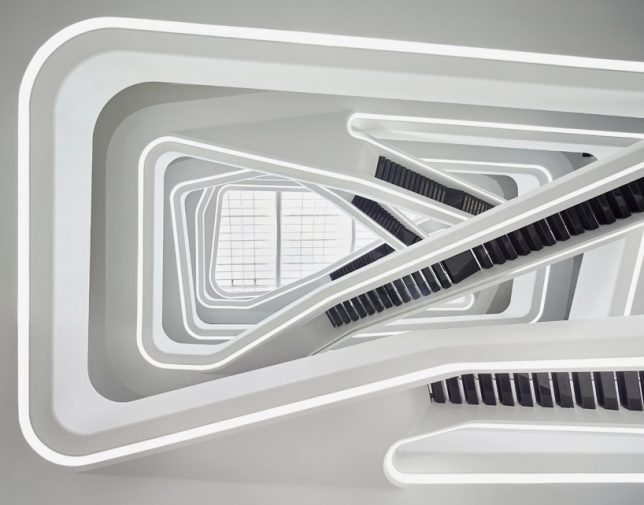
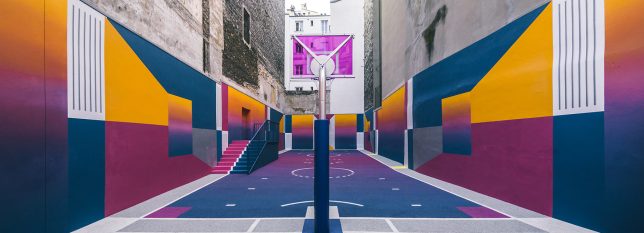
cake from above

6. Go abstract

Also known as experimental, non-objective, or conceptual photography, abstract photography avoids depicting immediately identifiable subject matter.

In fact, creative phone photography and abstraction are a good mix. The accessibility of the phone camera allows you to snap abstract images anywhere, anytime. For instance, when you’re out in a city, you might capture abstract images of puddles on the ground, posters torn off a wall, or reflections in a glass building.

And thanks to readily available editing apps, unique abstract perspectives can be rapidly captured, edited, and shared – or even saved as inspiration for a later shoot with a dedicated camera.

abstract creative phone photo

7. Photograph details

If you have your phone in your pocket all the time – and let’s face it, most of us do! – you’ll be ready to capture even the smallest occurrences at a moment’s notice.

Even when it’s tough to find inspiration, focusing on the details that shape an everyday environment can make for beautiful photos. Try activating your phone’s close-up or macro function, then get close to a subject. You can even purchase little lenses that attach to your phone for close-up photography. A small tripod or a sturdy surface can help keep the camera phone steady.

black and white creative images

8. Experiment!

It may sound obvious, but doing great phone photography can take a little experimentation. Many people assume (due to the advanced and accessible nature of phone camera technology) that every shot will be successful.

But in reality, practice and experimentation are the keys to effective creative phone camera photography. Familiarize yourself with your phone camera’s capabilities and make time to shoot. The more you experiment, the better your images will turn out.

experimental phone photo of a blurry road

Creative phone photography tips: conclusion

Phone photography is a great way to create stunning photos, especially if you want to be artistic without investing in a heavy camera.

Plus, with such a huge variety of apps available, doing creative phone photography has become a much more streamlined process.

There is an old saying: “The best camera is the one you have with you.” And while this might not always be the case, if you take advantage of your phone camera, you can create some truly outstanding images!

Now over to you:

Have you done a lot of phone photography? How do you like it? Which of these tips do you plan to use first? Share your thoughts in the comments below!

The post Creative Phone Photography: 8 Tips for Artistic Mobile Photos appeared first on Digital Photography School. It was authored by Megan Kennedy.


Digital Photography School

 
Comments Off on Creative Phone Photography: 8 Tips for Artistic Mobile Photos

Posted in Photography


How to Create Beautiful, Artistic Photos Using a Book

11 Feb

The post How to Create Beautiful, Artistic Photos Using a Book appeared first on Digital Photography School. It was authored by Ramakant Sharda.

how-to-create-beautiful-artistic-photos-using-a-book

Photography is an art, and every photographer is an artist who uses his or her imagination to create a beautiful work of art. A real artist can take anything and convert it into breathtaking artwork. In this tutorial, we are going to do the same thing. We’ll create beautiful, artistic photos using a book and an LED light.

how-to-create-beautiful-artistic-photos-using-a-book

What you need to create beautiful, artistic photos using a book:

To create beautiful, artistic photos using a book, you need a camera. Any camera, including your mobile camera, will work. A tripod is a “must” to hold the camera. A shutter release cable is also required. You’ll also need an LED torch. Again, the LED light of your mobile will work perfectly for this shoot. You may also use a torch, a bulb, or any other light source – even flash.

Of course, you also need a book. It should be big and have thick, glossy pages so that it will reflect the light well. I used Guinness World Records; if you have this book, you can do the same.

You need a dark room, so it’s better to do this shoot at nighttime.

Setup:

This shoot doesn’t require a complicated setup. Simply open your book from the center and fold over 10 pages, like in the following picture.

How to Create Beautiful, Artistic Photos Using a Book

To find the center, divide the total number of pages by 2; whatever figure comes up, open to that page number.

Now place the book at the edge of a table. Put a light behind the book at a lower angle so that it won’t show in the photo.

You can put a black glass below the book to show the book’s reflection.

Camera settings:

To create beautiful, artistic photos using a book, set your camera on Aperture Priority mode. Set your ISO to 100 and aperture to f/11 or f/16. With these settings and a mobile LED light, you’ll get a shutter speed of between one and two seconds. Because our subject is still, you won’t have any problems.

Fix your camera on the tripod. Set the frame, focus manually, and leave it. Your aperture is too narrow, so you’ll get a deeper depth of field, and the entire book will be in focus.

Don’t forget to switch your camera to manual focus mode.

Workflow:

Now you need to throw light from the back and take the shot.

Play with different angles of light to get different shots, but remember that the light will always be at a lower angle.

Once you get enough shots, change the camera position. Set it a bit lower or higher to get different results.

How to Create Beautiful, Artistic Photos Using a Book

How to Create Beautiful, Artistic Photos Using a Book

Method two

We have created pictures using LED light. Now we are going to create some different kinds of shots.

For this, you need a big monitor or TV and some abstract images. This method is quite simple. Display abstract images on your monitor or TV and place the book in front of it. There should be some distance between the book and the abstract images so that the abstract images become blurred in the picture.

You’ll need to widen the aperture, so set it to f/4 or f/5.6.

how-to-create-beautiful-artistic-photos-using-a-book

Method three – multicolor book

This method is a little hard and requires some post-processing work, but it’ll give you wonderful results. You should have a basic knowledge of Photoshop and an idea about layer masks.

It requires the same LED light setup.

You are going to take a series of pictures with different-colored lights and merge them in post-processing. You’ll need to use gels or colored gelatin paper to get colorful light.

Take five shots with different-colored lights like white, orange, red, blue, and green. Make sure that you don’t move your camera in between the shot.

Now you’ll use these photos to create a multicolor picture.

how-to-create-beautiful-artistic-photos-using-a-book

Putting it together in Photoshop

  • Open all five photos in Photoshop and stack them into layers.
  • Now select one layer.
  • Press ‘Alt’ and add a layer mask. This will add a black layer mask and hide everything. Do the same with all five layers.
  • Now take a soft brush and make sure that the foreground color is white. Set both brush opacity and flow to 50%.
  • Paint on the layer masks randomly. Change the brush size randomly. Increase and decrease the brush opacity randomly. You can also use special-effect brushes to get different results.

After some time and practice, you’ll get a photo like this.

how-to-create-beautiful-artistic-photos-using-a-book

So, postpone all the programs for tonight and create these artistic photos using a book to get some masterpieces. Then, share them here. If you have any problems, just comment on this post, and I’ll help you solve them.

The post How to Create Beautiful, Artistic Photos Using a Book appeared first on Digital Photography School. It was authored by Ramakant Sharda.


Digital Photography School

 
Comments Off on How to Create Beautiful, Artistic Photos Using a Book

Posted in Photography


5 Ways to Create More Artistic Photos (Fast!)

30 Jan

The post 5 Ways to Create More Artistic Photos (Fast!) appeared first on Digital Photography School. It was authored by Jaymes Dempsey.

create-more-artistic-photos-fast

Are you looking to create more artistic photos? Do you feel like your photos need a bit of an upgrade?

You’re not alone.

This type of struggle is one that most photographers feel at one point or another. I’ve felt it myself, which is why I developed several methods for increasing the artistry in my own photography.

And I’m going to share these methods with you today.

So if you’re looking to add a level of creative and artistic flair to your photos, keep reading.

Image: 300mm, 1/1250 sec, f/6.3, ISO 200

300mm, 1/1250 sec, f/6.3, ISO 200

1. Use minimalism to improve your compositions

Creating more artistic photos can start by changing up your compositions.

Because here’s the thing:

After doing photography for a bit, you start to fall into compositional patterns. You’ll take the same type of photo, over and over again. You may not even realize it.

So in order to take things to the next level…

…you should make a strong effort to break free of your compositional patterns.

One of my favorite ways to do that is with minimalism. Minimalism involves using lots of negative space, while also positioning your subject toward the edges of the frame.

create-more-artistic-photos-fast

400mm, 1/320 sec, f/5.6, ISO 400

For instance, a minimalistic photographer might take a single plant and place it down at the very top or bottom of the frame, while the rest of the scene stays primarily white:

Image: 100mm, 1/125 sec, f/2.8, ISO 320

100mm, 1/125 sec, f/2.8, ISO 320

Minimalism is great, and one of the things I love most about it is how it feels so different from normal compositional techniques. Once you start thinking minimalist, your whole outlook can change.

And your photos will start to look far more artistic.

2. Add split toning to enhance the colors

If you’re looking to increase the artistry in your photos, ask yourself:

How am I doing with color?

Because color is one of the most neglected aspects of photography, despite its important role in most photos.

Color adds contrast, creates harmony and disharmony, and evokes different moods.

(All in a wonderfully subtle way!)

Now, one aspect of improving the use of color in your photography involves looking for interesting color combinations when out shooting.

But you can also make changes after you’ve finished your photoshoots.

More specifically, split toning will allow you to add a bit of mood and contrast to your photos.

Here’s a photo with a bit of split toning to deepen the yellow highlights and the green shadows:

Image: 90mm, 1/160 sec, f/9.0, ISO 320

90mm, 1/160 sec, f/9.0, ISO 320

Basically, a split tone just involves putting one color cast in the highlights of your photo and one color cast in the shadows of your photo. Cold shadows and warm highlights are pretty common, so you could easily go with a blue/yellow split-tone combination. But you should also experiment with other possibilities to make things as artistic (and interesting!) as possible.

Note that pretty much every RAW photo editor offers split toning in one form or another. So no matter your preferred post-processing software, you’ll be able to add some color!

3. Decrease the depth of field for a softer look

This is one of my personal favorites for making photos more artistic:

Bringing down that depth of field.

With a shallow depth of field, you can create all sorts of interesting effects: Stunning background bokeh, soft subjects, and even abstract-type images.

Image: 50mm, 1/2000 sec, Freelensed, ISO 250

50mm, 1/2000 sec, Freelensed, ISO 250

Now, to create a shallow depth of field look, you’ll need to use a lens with a wide maximum aperture (something in the area of f/1.2 to f/2.8 is best). You’ll also want a lens of at least 50mm, and you’ll want to get close to your subject, if possible. The closer you are to your subject, the better the soft-focus effect.

Note that it can be difficult to focus when working at such a wide aperture. So you may need to switch your lens over to manual, in order to ensure you nail focus every time.

To add additional interest, you might try positioning a light source in the background, so that you can create cool bokeh, like this:

create-more-artistic-photos-fast

90mm, 1/100 sec, f/2.8, ISO 320

I’d also recommend thinking about your subject a bit differently. Don’t envision the subject as a single entity; instead, look for shapes and lines that you can use for a more powerful composition. That way, you’ll be able to use the soft-focus effect for more artistic, abstract-style images.

4. Look at the work of good photographers for inspiration

If you’re the type of person who likes to get out and practice photography, you may grumble at this suggestion. After all, practice makes perfect, right?

But it’s important to realize that it’s hard to know what perfect would mean…

…if you haven’t ever seen it.

That’s why I urge you to look at the work of photographers you admire. Do it all the time. If you like, you can simply look at photographers in your favorite genres.

Image: One of the photographers whose work I view over and over again is Jess Findlay. While he and...

One of the photographers whose work I view over and over again is Jess Findlay. While he and I gravitate toward different subjects, his work serves as a constant inspiration to me.

Or you can expand your horizons, looking for photographers in many different areas.

(In fact, I like to look at work that’s not in my areas of interest; I find that it gives me fresh ideas that would’ve never occurred to me if I’d stuck to my preferred genres.)

When you look at photography that you like, ask yourself:

What is it that makes this work special? What is it that makes it so artistic?

Then come up with some ideas for incorporating that level of artistry into your own work. Don’t copy blindly, but try to pull out bits and pieces of wisdom that you can use to enhance your own photos.

For instance, if you notice that a photographer likes to shoot from a low angle, start shooting from a low angle yourself.

If you notice that a photographer loves to juxtapose two contrasting subjects, try juxtaposing some contrasting subjects yourself.

Just give it a try. My guess is that you’ll notice improvements in your own photos pretty quickly.

And then you won’t want to stop looking at other photos!

5. Lengthen your shutter speeds for more abstract photos

Here’s a final, practical tip for creating more artistic photos:

Use creatively long shutter speeds.

For instance, photograph moving a flower, but drop the shutter speed way down, so you get a cool blur effect.

And then move your camera around, even as you’re taking the photo. That’ll give you an even more interesting abstract:

create-more-artistic-photos-fast

100mm, 1/6 sec, f/2.8, ISO 250

Personally, I love doing handheld abstracts with long shutter speeds. Sure, they take a lot of experimentation, but they’re also very liberating. And they’re great for situations where the light is too low to get sharp shots handheld and you don’t want to use a tripod.

Now, to pull off this type of abstract image, you’ll need to put your camera in Manual mode (or Shutter Priority) and drop the shutter speed until it reaches 1/10s to 1s (or longer). Then, as you hit the shutter button, move your camera. I’d recommend aligning the movement with compositional elements in your scene (e.g., if there are trees in the scene, move the camera along the tree trunks).

You’ll end up with some very artistic blurs!

Five ways to make your photography more artistic: Conclusion

Hopefully, you now know a few easy ways to make your photos more artistic.

After all, capturing artistic photos doesn’t have to be hard…

…it just involves changing things up!

So try some of the ideas I’ve suggested, and see how things go. I bet you’ll like the result!

create-more-artistic-photos-fast

300mm, 1/400 sec, f/6.3, ISO 320

Do you have ideas for creating more artistic photos? Share them in the comments!

The post 5 Ways to Create More Artistic Photos (Fast!) appeared first on Digital Photography School. It was authored by Jaymes Dempsey.


Digital Photography School

 
Comments Off on 5 Ways to Create More Artistic Photos (Fast!)

Posted in Photography


Technique vs Artistic Creativity in Photography – How Important is it to Find a Balance?

12 Jan

The post Technique vs Artistic Creativity in Photography – How Important is it to Find a Balance? appeared first on Digital Photography School. It was authored by Kevin Landwer-Johan.

technique-vs-artist-creativity-in-photography

Discussion about technique vs artistic creativity in photographic circles can cause tensions. Much of what’s focused on when learning photography is camera technique. Creative aspects are often left out, even after you’ve picked up some camera skills.

Developing a balanced approach to photography is important. If you’re content to just document what’s in front of you, don’t worry about it. You need to know how to operate your camera competently to be creative with it. Camera technique vs artistic creativity is a matter of engaging both brain hemispheres.

Image: © Kevin Landwer-Johan

© Kevin Landwer-Johan

Left brain vs right brain functions

It’s said that the left hemisphere of our brain is more academic and logical. The right hemisphere is more imaginative and artistic. Technique vs artistic creativity seems to separate somewhat in our thinking.

Learning to work with a camera well requires a good understanding of its basic functions. Controlling the amount of light entering your camera is essential to master. Of course, you can leave this left brain function to the camera’s artificial intelligence (AI). This happens when you use any of its auto or semi-auto modes.

Relying on the camera’s AI takes away some of the technical challenges in camera use. It also inhibits the full expression of the right brain hemisphere’s artistic creativity. When your camera chooses the exposure setting, you relinquish much of your creative expression.

Image: © Kevin Landwer-Johan

© Kevin Landwer-Johan

Photography means ‘drawing or painting with light’

Camera’s don’t take fabulous photographs, fabulous photographers do. Just as an artist’s brush doesn’t make a beautiful painting on its own, a camera is only as creative as the person using it.

The word ‘photography’ comes from the Greek language. It means ‘drawing or painting with light’.

The amount of light entering your camera affects the way your ‘digital canvas’ will appear. Understanding how the camera captures light requires left brain function. Leaving the camera to determine the ‘right’ amount of light negates much of the function of the right brain in creative photography.

If you can’t manage your exposure well it doesn’t matter how good your composition or timing is, your photos will lack creativity. Painting with light requires a good deal of creative decision making.

Image: © Kevin Landwer-Johan

© Kevin Landwer-Johan

Master your camera

When you have mastered your camera, you’re in a stronger position to balance technique vs artistic creativity. Learning how to control the essential functions of your camera frees you up. Then you can concentrate more on the creative aspects of taking photos.

Frequent camera use and study will give you the ability to use your camera fluidly. The more you learn and practice with your camera, the less you will have to concentrate on it.

It can be like learning to touch type or drive a manual-shift car. At first, these are difficult and require a lot of concentration. Plenty of mistakes happen. Spelling mistakes happen. The car will bunny hop and stall. But, with a dedication to learning, the errors become minimized. You can begin to focus your attention on other things. You no longer have to look at where you are placing your fingers on the keyboard. Driving becomes smooth and you can enjoy the scenery.

Camera use is no different.

Once you study and practice enough you will free up your mind to concentrate on the creative aspects of photography. The technical actions required to take photos will consume less of your attention.

Image: © Kevin Landwer-Johan

© Kevin Landwer-Johan

Release your creative expression

Once you’re comfortable controlling your camera, you can be more creative with it. When you understand how it captures images, you’ll be able to manage the settings artistically. Knowing how the sensor responds to light will give you the ability to control it with more innovative expression.

Leaving the exposure up to the camera’s AI will most often result in rather bland results. Your photos will look like everyone else’s who uses and auto mode. This is because the AI is not creative. It’s all algorithm-based and calibrated in a technical lab.

Technique vs Artistic Creativity in Photography – How Important is it to Find a Balance?

Your camera does a pretty good job of exposing your photos. It aims to provide an even exposure, not blowing out highlights or diminishing shadow detail. This does not, however, often make the most expressive exposures.

Manually exposing a photograph well adds depth and feeling to the picture. Scene modes on some cameras will include options for portraits, landscapes, action, and the likes. I have never come across a camera that offers automatic modes to create dramatic, happy or somber photographs. Controlling your camera manually allows you to make creative choices.

Being in control of your exposure allows you to make choices based on what your main subject is. Your camera does not know what it is. Some AI systems in cameras will guess what you are photographing and return exposure results on this presumption.

You will know exactly the nature of your composition and, when you have some understanding of light, you’ll expose it the way you want it to look.

Image: © Kevin Landwer-Johan

© Kevin Landwer-Johan

Push beyond what’s considered correct

Technique vs artistic creativity teaching is often dominated by those whose aim is to take technically correct photos. Photos that don’t fit in the technically correct ‘box’ are scorned.

For creative photographers, ‘correct’ photos are usually perceived as dull, no matter what the subject. Whether a particular composition rule applies does not matter to them. If the whole image is not evenly exposed the photo is still acceptable.

I’ve met far too many photographers who think their photos must reach certain technical standards to be any good. This is what they focus on, and often, their photos lack creative expression.

Knowing how to manage your camera settings well is vital to creative photograph. The technique is very important, but the rules are not.

Image: © Kevin Landwer-Johan

© Kevin Landwer-Johan

Conclusion

Aim to use your camera without consciously thinking about it – much the same way you’ll drive a manual shift car after enough practice.

Instead of thinking about your shutter speed and aperture settings, focus on how you are feeling. What do you want to express in the photographs you are taking? Be present within the moment and relate more to your subject than to your camera. Then you will find the balance between technical vs artistic creativity.

Share your thoughts on this in the comments below.

The post Technique vs Artistic Creativity in Photography – How Important is it to Find a Balance? appeared first on Digital Photography School. It was authored by Kevin Landwer-Johan.


Digital Photography School

 
Comments Off on Technique vs Artistic Creativity in Photography – How Important is it to Find a Balance?

Posted in Photography


5 Ways to Apply Artistic Expression for Memorable Photography

21 Dec

The post 5 Ways to Apply Artistic Expression for Memorable Photography appeared first on Digital Photography School. It was authored by Jeremy Flint.

Rickshaw rider, Kathmandu, Nepal © Jeremy Flint

Photography can be a wonderful way to express your creativity and artistic flair. Artistic expression is all about you and allowing yourself the freedom in your photography to satisfy your visual curiosity. Fundamentally, it is a means to fuel your imagination and a way of being artful, according to your mood. The subject matter is entirely your choice, whether you decide to capture wildlife, landscapes, architecture or abstract scenes.

You can apply photography techniques that inspire you, from motion blur to creative arrangements. Alternatively, work with what you find.

Here are 5 ways you can use artistic expression in your photography to capture some memorable shots:

1. Sharpness and blur

Freezing the action of your chosen subject can be achieved with short exposure times and result in sharper images. Photography doesn’t have to be about capturing the beauty of a scene in its sharpest and most natural form. You can be playful in your creations and apply a bit of artistic blur from time to time. Adding artistic blur is a great way to put some art and movement into your photographs.

Sharp images are dynamic and provide an obvious and real static representation of a scene. However, using blur can make an image more compelling. Using a slower shutter speed helps to provide motion and movement to photographs while adding drama and vitality.

Hyena Pan, Tanzania © Jeremy Flint

2. Light trails at night

At nighttime, as darkness falls, lights come on and provide excellent subjects to capture. Roads become lit by light trails from vehicles that give unique patterns.

© Jeremy Flint

Fairgrounds are great for artistic shots. This is due to their unique atmosphere, as well as the fairground’s color and excitement. Be inventive and artistic in your approach to capturing these scenes. Look for elements such as the vibrant and attractive Christmas lights and car light trails as shown in the image below.

London Xmas Lights © Jeremy Flint

3. Shoot a silhouette

While many shots taken during daylight hours tend to show all details in an image, get creative by shooting a silhouette. You can achieve a silhouette by mainly photographing a subject’s outline and making it featureless against a bright background.

Stonehenge, Wiltshire, UK © Jeremy Flint

In the image example here, I have used the famous landmark of Stonehenge in the UK with a vibrant sky behind. Make sure you choose a strong subject for a silhouette such as the distinct shape of a person or animal. The best way to shoot a silhouette is to position your subject in front of a bright background and to expose for the background, rendering your subject dark and underexposed.

© Jeremy Flint

Silhouettes are an interesting way to convey drama and energy into your images and makes them stand out.

4. Shoot an abstract

Abstract photography can be made up of several characteristics. Usually, abstraction takes place when a photographer focuses on a section of a natural scene isolating it from its context. This could be a color, texture, line, shape, geometry, symmetry or reflection of a scene. The photographer changes our perception of the real and familiar subject or object. The viewer doesn’t immediately recognize it.

Abstraction facilitates a move away from the specific, the concrete and the obvious. You achieve abstraction by isolating, or eliminating an object and its texture, shape, and form. Color and tones can become strong elements in an abstract photograph.

Slot Canyon, Arizona, USA © Jeremy Flint

Details can be used to create abstract photographs by moving closer to our subjects. Alternatively, you can achieve abstraction through movement. Through subject motion, photographer motion, camera movement or a combination of any of these, information gets reduced, and impressions are created. For example, moving the camera upwards or downwards when photographing trees leaves behind colors, patterns, and lines.

5. Find patterns

Patterns are a wonderful way to add interest to your abstract photography. Our day to day visual life consists of patterns, shapes, and textures that evoke a certain mood or atmosphere.

We are visually drawn to patterns because they provide us with a graphic element that looks appealing and interesting.

© Jeremy Flint

Photographing patterns can make for good compositions. For example, you could show a small area of a broader subject. Macro lenses can be used to get in close and add more interest.

Conclusion

Learning to apply artistic expression in your photos can be a great way to create intriguing and unusual images that make a viewer stop and think about your image. Try out the 5 techniques outlined above and share your images with us below.

The post 5 Ways to Apply Artistic Expression for Memorable Photography appeared first on Digital Photography School. It was authored by Jeremy Flint.


Digital Photography School

 
Comments Off on 5 Ways to Apply Artistic Expression for Memorable Photography

Posted in Photography


Artistic Versus Technical Photography Skills – What is Holding You Back?

24 Apr

Eiffel tower at dusk - How to overcome your technical or artistic shortcomings and improve your photography

In my work as a teacher – and as an artist – I have noticed something that might sound very obvious but is rarely talked about in our journey to become better photographers. That is, how we live our day-to-day lives will show us where we are going wrong in our photography. Figuring out your shortcomings is the only way to overcome them.

Let me explain.

“Creativity takes courage.” – Henri Matisse

How to overcome your technical or artistic shortcomings and improve your photography - night shot of Paris

Photography is an inner game. Everything about who we are is expressed in our photos. You can ask 100 photographers to photograph the same scene and they will all pick out different elements, they will all work on different parts of the scene and they will all end up with different images.

“There is only you and your camera. The limitations in your photography are in yourself, for what we see is what we are.” – Ernst Haas

What we respond to as a human being is filtered through our experiences and thoughts and for a huge part, through our personalities.

Paris monument - How to overcome your technical or artistic shortcomings and improve your photography

So if you are unhappy with the photos you are taking, as well as looking at all the usual suspects – technique, composition, etc. – I would take a close look at how you do things in your life and what that says about your personality.

Look at the strengths and weaknesses in yourself – you can then work to balance them and become the very best photographer you can be. Let’s take a look at a few (stereotypical) examples:

Person A – technically proficient, creativity lacking

This first stereotype is of someone whom I have met several times on my workshops. There are many of these people about. Let’s call them Person A.

night shot of a city - How to overcome your technical or artistic shortcomings and improve your photography

Person A lives very much in their left brain – the home of the analytical mind. Person A is great with detail-oriented, academic tasks.

I am going to bet that because Person A is so strong in this area of analysis, they have lived in that side of their brain for a long time, and become better and better at tasks associated with that. But they have neglected their right brain, their more creative side.

Your right brain is the home of creativity, of ideas, of inspiration even. At least that is what science is saying at this point…

Person A is often amazing with their camera – they either know or are working on knowing, a lot of camera techniques. Technically their photos are excellent, which sounds great, right?

night shot in Paris - How to overcome your technical or artistic shortcomings and improve your photography

But their photos are boring! Their photos lack feeling. They can see it themselves. They look at their photos and wonder why they lack that certain “Je ne sais quoi” – that certain something – that takes a photo from good to wow!

Their photos are decent, they work technically and/or compositionally. But they aren’t memorable, or particularly unique looking. People don’t look at them and feel something deep in their souls, they don’t feel stirred by them. Worst of all, they don’t remember them.

What’s the problem? And what is the solution? My number one diagnosis is that this person finds it very difficult to be present, to live in the present moment and to just “be”. They find it very hard to daydream, to drift, to explore and get lost. They have lost touch with their imagination.

Blue hour mosque Istanbul - How to overcome your technical or artistic shortcomings and improve your photography

Person A is drawn to interesting looking subjects but they don’t feel much when they are taking photos – so their images end up looking a bit cold or soulless.

Person B – highly creative, technically challenged

Now person B is very different. They are very good at inhabiting emotional states, they are drawn to mood, feeling, and atmosphere. Capturing subjects that move them and fill them with wonder and awe is their forte.

They have so much passion for photography, and constantly seek out locations and subjects that really excite them. The process of being creative is exciting, inspiring, and gives them so much joy.

Hagia Sofia Istanbul - How to overcome your technical or artistic shortcomings and improve your photography

The problem here, though, is when they look at their photos they are rarely, if ever, what they pictured in their head. They may see the feeling and atmosphere but in reality, if they are being honest, they don’t capture the feeling or mood of the subject in their images. The images don’t ooze with atmosphere in the way they want them to.

Person B is thinking – why aren’t my photos better!

Finding your solution

Now the creative solution for these two people would be completely different from each other – right? What person A has to do to create better photos is not what person B needs to do to create better photos.

night scene on the river - How to overcome your technical or artistic shortcomings and improve your photography

This is why you need to know what your strengths and weaknesses are so you can work to balance them out. Learning is not a one-size-fits-all journey.

I have students who pick up using Manual Mode in 2 weeks and some who take two years to master it. Others take two years to feel comfortable shooting strangers, whereas some are relaxed and confident after one afternoon’s instruction and shooting.

But it’s not how long it takes – it’s the fact that you are working on improving all aspects of your photography.

“It does not matter how slowly you go as long as you do not stop.” – Confucius

man in a workshop - How to overcome your technical or artistic shortcomings and improve your photography

In fact, it’s more impressive to me that someone continues and perseveres than just focuses on what is easy for them. That’s how you improve.

Now back to our example people. I wonder if you can imagine what solutions I’m about to suggest for each to help them develop their photography.

The solution for those lacking creativity (A)

If this sounds like you, what you are doing, for the most part, is focusing on the technical execution of the image, not the real feeling behind it. And if you can’t feel anything when looking at an image – then what’s the point? You might as well as just stare at cereal boxes.

night shot of city - How to overcome your technical or artistic shortcomings and improve your photographySo you need to work on inhabiting states of emotion, wonder, and awe whilst shooting. To notice atmosphere and to then translate that into your images.

The solution if you lack technical abilities (B)

For Person B: There is a definite lack of technical skills – and this translates as not being able to capture the vision in your head. You could see a life-changing sunset, but pointing your camera at it will not capture the real vision of what it looks and feels like to be there. You have not learned to translate emotion via the technical.

cat on a street scene - How to overcome your technical or artistic shortcomings and improve your photography

If this sounds like you, then you need to get a better understanding of your camera and the technical possibilities. An understanding of composition is also helpful. By learning and utilizing the potential of the camera you will be able to create the photos within that you so desire.

Can you see that I have taken two extremes and that in an ideal world they would both get a little of the other’s natural tendencies? By doing that we can then create balance. And nature thrives on balance and harmony. Not too much of this, not too much of that.

Salt is essential to bring out the flavor in cooking, but if you add too much it’s gross…you get what I’m saying.

Haman sign Turkey - How to overcome your technical or artistic shortcomings and improve your photography

These examples may seem extreme but I do teach many people who fall into either one of these camps.

So instead of just focusing on learning more, I encourage you to take a long, long look at what your personality is like – and work out where you need to focus.

The way that I have thought about it for myself is that I am very good at being in the moment. It’s a skill I’ve developed over 30 years of shooting. I also love the technical part of photography (never met a user manual I didn’t want to read).

So what’s the personality issue that affects my photography?

Blue mosque Instanbul - How to overcome your technical or artistic shortcomings and improve your photography

Well, I am so in the moment, so wrapped up in light and mood and atmosphere that the big challenge I’ve had in my career is to not get stuck into taking singular great images. One of this, one of that.

My weakness has been the inability to create and sustain a varied collection of photographs. It took me several years to realize that I was reacting to the world, rather than going out and seeking what I wanted.

I would just wander and drift, and see where my interest and attention led me. I had to work hard on becoming much more proactive – instead of I’ll wait for the shot, I had to become open to the idea of I’m going to find the shot.

sunset over a city scene - How to overcome your technical or artistic shortcomings and improve your photography

Now, keep in mind that I don’t always do that. Again the key here is finding a balance. Don’t throw the baby out with the bathwater; build on your areas of weakness, but still, celebrate your areas of strength.

I am now a much more proactive photographer – I don’t confine myself to singular, wicked shots. I build projects, and I sustain them over time, and I work hard to make incredible images that work together as part of a story.

All the photos in this article are from a series of projects I’ve been working on for several years of cities at dawn. I love photographing the beauty of dawn light, the emptiness of the streets and the odd snippet of early morning life. The cities in these photos are Paris, London, and Istanbul.

tulips - How to overcome your technical or artistic shortcomings and improve your photography

Some tips to help you

How do we overcome our weaknesses?

To start – you need to know the strengths and weaknesses of your personality. If you don’t already know then ask your family or friends, I’m sure they would be more than happy to tell you!

You might think of concerns like:

Issue: You’re very shy and you find yourself holding back when you really want to grab a shot.

Solution: Do the thing that you fear! Perhaps it’s some street photography or portrait work to build your confidence with people. Or wandering off up that cool looking mountain.

flag in Turkey - How to overcome your technical or artistic shortcomings and improve your photography

If you don’t overcome your fears, you will always be holding yourself back from what you love to photograph. Great images rely on jumping into the process with your whole being, your whole heart.

Issue: You are better at talking about what you’re going to do than actually doing it. You alternate between perfectionism and procrastination.

Solution: Focus lots and lots of effort on getting started and work on producing a project. Don’t worry about it being perfect, or waiting for exactly the right time, because as someone with procrastinator to perfectionist tendencies, this could mean that the perfect time will never happen.

For this issue, start to work on producing something, anything, just so you can move through that block of never doing something. Then once you’ve got some work under your belt, you can then start working on making the photos or project you are involved in, better. Getting started and staying with something is the thing to focus on initially, though.

blue hour image - How to overcome your technical or artistic shortcomings and improve your photography

Once you know where your weaknesses lie, then you can start to look for ways to overcome those issues. There are always solutions. When you are not afraid to look at the weaknesses in your creativity and to work on them, then you create so much more freedom in your photography practice.

If you feel like you can go anywhere and do anything, then your photography will grow exponentially.

Do things differently

Shake things up a little. For example, if you’re a big planner in your “real life” – maybe you want to begin by not planning. Go out, drift around, get lost, and just explore. Move away from all the planning.

night street scene - How to overcome your technical or artistic shortcomings and improve your photography

Or if you are like me – doing more planning has been essential to being a better photographer. I am so used to exploring with my senses rather than doing lots of research. While that is great and has served me well, a little planning has made me much more effective on my shoots.

Develop an “open awareness”

We tend to live our lives going from one fixed activity to the next. Whether that is at work, driving home, shopping, cooking, emailing or sorting out the myriad of problems, issues, and conflicts that pop up every day.

We end up flitting from one thing to the next, mostly concentrating in a narrow focus on one thing at a time – which is obviously very helpful when we want to get things done.

If, though, you want to develop new ideas and get good insights about yourself or your photography, then having an open – rather than focused – awareness is key.

Open awareness is being aware of your thoughts, but not paying too much attention to them. Allow for some space to enter and open up to the world around you. So you are letting thoughts drift through but you are still noticing other things – the weather, the clouds, the birds – but not letting your attention focus on any one thing in particular.

This brings tremendous space to your mind, space you need for new ideas and insights. If you are always thinking, thinking, doing, doing; you won’t have space for inspired ideas or amazing insights.

London at sunset - How to overcome your technical or artistic shortcomings and improve your photography

When you develop open awareness you have the ability to see your thoughts, your ideas, but also allow space for other things. You start to observe the world around you, to pay attention to your thoughts and habits and tendencies without getting locked into them.

Believe that you can change and develop yourself

“We are what we believe we are.” – C. S. Lewis

I know so many people who are scared of their cameras. They are intimidated by learning the technical aspects of photography. They tell me it’s impossible to learn!

Yet I know that as humans it’s possible to learn anything if the desire is strong enough.

You don’t have to confine yourself with your photography just because you can’t do something. As Picasso said:

I am always doing that which I cannot do, in order that I may learn how to do it.” – Pablo Picasso

Science is also telling us now that what we previously thought about the brain – that it was a set, fixed entity that stops developing as we become adults – is in fact not the case.

We can develop our brains at any point by having new experiences and learning new things. We can cultivate new skills, we don’t have to stay in this fixed idea of what we are good at and what we aren’t good at.

“The meaning of life is to find your gift. The purpose of life is to give it away.” – Pablo Picasso

I cannot stress the importance of this idea enough. If you feel the urge to create in your life – with photography or any other medium – it’s a beautiful calling.

In my life, there is nothing more important than taking photographs. I know what it brings to my life, to ideas about photography and how I’m able to light little fires of inspiration in other people.

When you are being creative you are putting down your smartphone, the to-do lists, the emails and the shopping lists. Instead of looking inwards at your life – you are looking outwards at the world. You are committing yourself to the deeper, more interesting, more beautiful parts of life.

You are connecting to other people and to the world around you. Surely, paying more attention and creating connections to others is an incredibly important thing to promote in this day and age.

“Photography in our time leaves us with a grave responsibility. While we are playing in our studios with broken flower pots, oranges, nude studies and still lifes, one day we know that we will be brought to account: life is passing before our eyes without our ever having seen a thing.” – Brassai

Photography is such an exciting way to be creative, I hope I’ve given you some ideas on how to challenge yourself to keep improving and growing as a photographer.

We all have it in us to create memorable, unique, and interesting images. I’d love to know what you think of these ideas – please comment below.

The post Artistic Versus Technical Photography Skills – What is Holding You Back? appeared first on Digital Photography School.


Digital Photography School

 
Comments Off on Artistic Versus Technical Photography Skills – What is Holding You Back?

Posted in Photography


This NVIDIA algorithm copies the artistic style of one photo onto another

26 Mar

Struggling with stylistic consistency, or wanting to transpose the style of your best picture onto the rest of your Instagram feed? Thanks to a group of scientists at Cornell University, you can now do just that with surprisingly accurate and realistic results.

The team created an algorithm for graphics card company NVIDIA that lifts the stylistic characteristics of one picture and drops them onto a completely different image with startling precision. The algorithm is called FastPhotoStyle, and it’s capable of transferring the coloration, drama and atmosphere of one picture and making an entirely different frame look as though it was taken at the same time even if the subject matter is totally unrelated.

According to the developers, the goal of photorealistic image style transfer is:

…to change the style of a photo to resemble that of another one. For a faithful stylization, the content in the output photo should remain the same, while the style of the output photo should resemble the one of the reference photo. Furthermore, the output photo should look like a real photo captured by a camera.

There are programs already invented to do this, but the inventors of this algorithm claim that what already exists is slow, and doesn’t produce realistic results anyhow.

FastPhotoStyle is different, they say, because it uses a smoothing process after the initial whitening and Coloring Transfer step—or PhotoWCT step. This smoothing step tries to ensure that neighboring pixels receive similar styling and, by using what they call Matting Affinity, individual areas of the image can be subjected to slightly different treatment. This is what helps the algorithm produce such realistic looking results.

Another major difference is that this program reportedly operates as much as 60x faster than existing algorithms.

The code can be downloaded from NVIDIA’s GitHub for anyone to use under Creative Commons license (BY-NC-SA 4.0), and a user manual download is included on the page. If you’re brave, you can read the full technical paper as well.

Technical Paper Abstract:

A Closed-Form Solution to Photorealistic Image Stylization

Photorealistic image style transfer algorithms aim at stylizing a content photo using the style of a reference photo with the constraint that the stylized photo should remains photorealistic.

While several methods exist for this task, they tend to generate spatially inconsistent stylizations with noticeable artifacts. In addition, these methods are computationally expensive, requiring several minutes to stylize a VGA photo. In this paper, we present a novel algorithm to address the limitations.

The proposed algorithm consists of a stylization step and a smoothing step. While the stylization step transfers the style of the reference photo to the content photo, the smoothing step encourages spatially consistent stylizations. Unlike existing algorithms that require iterative optimization, both steps in our algorithm have closed-form solutions.

Experimental results show that the stylized photos generated by our algorithm are twice more preferred by human subjects in average. Moreover, our method runs 60 times faster than the state-of-the-art approach.

Articles: Digital Photography Review (dpreview.com)

 
Comments Off on This NVIDIA algorithm copies the artistic style of one photo onto another

Posted in Uncategorized


How to Create Colorful Artistic Images Using Oil and Water

28 Feb

Colors are the smiles of nature. We see colors all around us and it makes us feel happy and alive. Just imagine a life without color, where everything is simply in black, white and in between, how dull and boring it would be. Luckily, our beautiful world is full of colors.

In this article, you’ll learn how to create some colorful images using just water and oil to make your world even more beautiful.

Oil in Water 17

I am sure you have seen oil and water images on the internet before and may have even tried to photograph it. But this is your lucky day, as you are going to learn a very easy technique where you don’t need any flashes or artificial lights and your pictures will come out beautiful and vivid.

Are you ready for this? Okay, let’s move on.

What you need

Like any other kind of photography, first, you need a camera. You can use any DSLR or compact camera or even your mobile phone. There is no restriction on lens choice as well.

Second, you need a glass dish. Just look in your kitchen and you will find one. If it’s square, that will work great otherwise, a round dish will work too.

I took some photos using a glass bowl but found a little problem. Bowls usually have a smaller bottom compared to the top and this shape affects the picture. Also, bowls may not be 100% transparent, so I went to a local aquarium shop and had them make an 8×12 inch glass tray with one-inch depth. You can also get the same for yourself.

How to Create Colorful Artistic Images Using Oil and Water

Background

Next, you need background images and there is a super simple trick. Go to Google and search for “colorful wallpaper” images. You’ll find lots of wallpapers that you can download and use. Download whichever ones you like, just make sure they have lots of colors and patterns.

Now send these photos to your iPad or tablet (or Google directly on the iPad and save). You will use these pictures as a background instead of a printed one, so you don’t need any lights and the colors will be very bright. If you don’t have a tablet, you may lay your computer monitor or laptop down and use it.

NOTE: If you do this, please do so at your own risk and take all safety precautions.

Other than this, you’ll need water, vegetable oil, dish soap, a plastic sheet to cover your tablet and two boxes about six inches high.

Setup and camera settings

Okay, place the two boxes about 8 inches apart so you can place your tablet between them. Now put your glass tray on top of the boxes. If you are using a glass bowl and it’s small in size, put two metal rulers on the boxes and place the bowl on them.

Now pour some water in the tray and add 4-5 tablespoon vegetable oil to it. When it’s ready, set up your camera. You may fix it on a tripod or you can shoot handheld, but it’s always better to use a tripod and get your hands free to do other tasks.

Set the ISO to 200, aperture to f/5.6, and your shutter speed will be around 1/25th (depending on the brightness of your screen). If you have a wide aperture lens like a 50mm f/1.8, it’s better to use that (you don’t need a lot of depth of field for this type of shot).

Since the water and oil bubbles are on the same focal plane, even if you use an aperture of f/1.8, the entire picture will be in focus. The background will be more blurred which is actually a good thing. So, just go with the widest aperture your lens allows and change the other settings on the camera accordingly.

Now place your tablet below the glass tray. It should be around six inches below the tray. Make sure you wrap it in plastic so if you accidentally drop some water or oil on it, it will be safe.

How to Create Colorful Artistic Images Using Oil and Water

Workflow

Now relax because the hardest part is already done and all you have to do now is change the image on the tablet and take some pictures. When you shoot one image, use a spoon to stir the water gently, let it settle down and take another shot. After four or five shots, change the image on the tablet and repeat the process.

You’ll find that oil drops are very big in size. Don’t worry about it and take some shots. When it’s complete, put a few drops of dish soap or any other liquid soap into the water, mix it well and voila, the oil drops have now become smaller. Don’t try to understand the science behind this, just change pictures on the tablet and shoot three or four pictures, change the photo again, and repeat the process.

Large oil droplets.

Smaller droplets created by adding soap.

Even smaller yet.

Post-processing and finishing up

There is no need for heavy post-processing, just levels, sharpening, and cropping is enough.

Okay, call your friends and tell them that you’ll be busy next Sunday because you’re creating some extraordinary beautiful images. Just do it, share with them and don’t forget to share in the comments below too.

The post How to Create Colorful Artistic Images Using Oil and Water by Ramakant Sharda appeared first on Digital Photography School.


Digital Photography School

 
Comments Off on How to Create Colorful Artistic Images Using Oil and Water

Posted in Photography


A Few Steps Higher: 14 Unusually Artistic Modern Staircase Designs

11 Sep

[ By SA Rogers in Design & Fixtures & Interiors. ]

Stairs are inherently utilitarian, but some architects choose to really step up their interiors with highly sculptural designs that make you want to walk up and down a bunch of times. Cantilevered creations, floating stairs, spirals made of stone and zig-zagging graphic designs add both literal and figurative movement to these apartments, museums, offices and shops.

Stone and Wire in London by Groupwork + Amin Taha

During the completion of a renovation on a terraced house in central London dating to the 1950s, Groupwork + Amin Taha created a gorgeous centerpiece with this stone staircase, spiraling around a central cylinder-shaped wire cage, which acts as a balustrade. The load-bearing cantilevered travertine staircase extends from the basement to a skylight in the apartment’s roof.

Atrium Stairs at Moscow’s Dominion Office Building by Zaha Hadid

There’s something very futuristic-looking about the stark, graphic black-and-white stairs zig-zagging through the atrium of Zaha Hadid’s ‘Dominion Office Building.’ Each level is slightly offset from the next, producing a disorienting effect when looking down at the stairs from the edge of any of the balconies.

Mirrored Staircase at Kaleidoscope House by Paul Raff Studio

Sometimes, all it takes is a little creativity to produce a stunning effect, rather than a large space and expensive materials. The staircase ascending through Paul Raff Studio’s Kaleidoscope House features mirrored side panels on the balustrade which continue onto the landings of each level, reflecting each other so you can’t quite tell what’s real and what’s reflection. This piece is the heart of the home’s ‘kaleidoscope effect.’

Plywood Puzzle Stairs in London House by Tsuruta Architects

This staircase in a London Home renovated by Tsuruta Architects consists of nearly 2,000 plywood pieces slotted together like a puzzle. Replacing a larger staircase with a more compact design, this new creation connects all four stories without visually obstructing the transitional spaces between them, allowing light to filter through.

Smooth Staircase at Singapore Apple Store by Foster + Partners

It’s not unusual for Apple stores in larger cities to function as showcases for architecture nearly as much as they do for electronics. In this case, internationally renowned firm Foster + Partners augmented “the greenest Apple space yet” with two hand-carved spiraling staircases made of Italian Castagna Stone. The architects describe them as “warm and beautifully sculpted bookends” in an “homage to craftsmanship and materiality.”

Next Page – Click Below to Read More:
A Few Steps Higher 14 Unusually Artistic Modern Staircase Designs

Share on Facebook


[ By SA Rogers in Design & Fixtures & Interiors. ]

[ WebUrbanist | Archives | Galleries | Privacy | TOS ]


WebUrbanist

 
Comments Off on A Few Steps Higher: 14 Unusually Artistic Modern Staircase Designs

Posted in Creativity


Nothin’ But Net: 12 Slam Dunk Artistic Basketball Court Designs

03 Jul

[ By SA Rogers in Design & Fixtures & Interiors. ]

Way cooler than your standard basketball court, these custom-designed settings and hoops turn the sport into something like an interactive art installation in which the players ‘perform’ in more ways than one. Outdoor courts are painted in vivid hues or plunked on rooftops, hoops are reinvented in stained glass or set within the crashing waves of the ocean, and court lines light up and transform.

Pigalle Basketball Court in Paris by Pigalle, Ill-Studio and NIKE

French fashion brand Pigalle teamed up with Ill-Studio and NIKE to paint a stunning sunset-hued basketball court set between two apartment buildings in Paris. Gradients of deep blue, fuchsia, pink, orange and yellow creep up the walls of the three surrounding structures and out to the sidewalk to celebrate the release of Pigalle’s latest collection with NIKElab.

Carlo Carrá Park in Alexandria, Italy by Gue

The muralist known as ‘Gue’ gave the basketball court at Carlo Carrá Park in Alexandria, Italy a bright makeover as part of an urban regeneration and redevelopment effort. “The idea was born from the possibility of being able to cross the field’s space,” says the artist, “and to stay inside the composition and change the perception of shapes through the game’s movement.”

House of Mamba Basketball Court by NIKE

Leave it to NIKE to create a totally functional basketball court that doubles as a work of modern installation art. The brand teamed up with AKQA to develop a full-sized LED court for the NIKE RISE basketball tour taking place across China, utilizing motion-tracking and reactive LED visualization to lead players through drills based on Kobe Bryant’s training. Then, in 2015, they completed ‘Rise 2.0,’ a second version of the court with LeBron James.

Rooftop Basketball Court in Venezuela by PICO Estudio

Design collective PICO estudio teamed up with local and international firms as well as volunteers and community members to transform a self-built house that was once a drug trafficking venue in Caracas, Venezuela into a valuable community space hosting a recording studio, computer area, waiting area, kitchen and an incredible rooftop basketball court retrofitted with vibrant green steel framing and chain-link fencing for safety.

Next Page – Click Below to Read More:
Nothin But Net 12 Slam Dunk Artistic Basketball Court Designs

Share on Facebook


[ By SA Rogers in Design & Fixtures & Interiors. ]

[ WebUrbanist | Archives | Galleries | Privacy | TOS ]


WebUrbanist

 
Comments Off on Nothin’ But Net: 12 Slam Dunk Artistic Basketball Court Designs

Posted in Creativity