RSS
 

Posts Tagged ‘Analog’

Why Analog Photography (Still) Rocks!

28 Aug

by Matthias Hombauer and Karl Blümel from “The Analog Docs”.
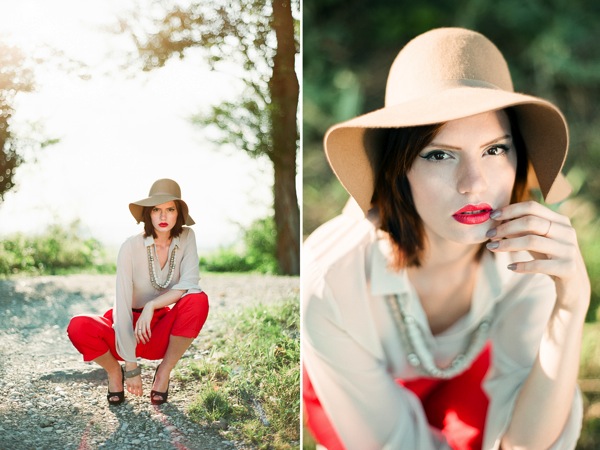
015 The Analog Docs

We are two professional music and wedding photographers and we shoot digital when necessary. However, we clearly see the point of going back to analog like a lot of pros are doing nowadays. In this post, we would like to discuss the benefits as well as the drawbacks of film photography from our point of view. 

Since we love film, we decided to start our own project named “Analog Docs“, where we exclusively use analog medium format cameras. 

The following points are true for all analog camera systems.
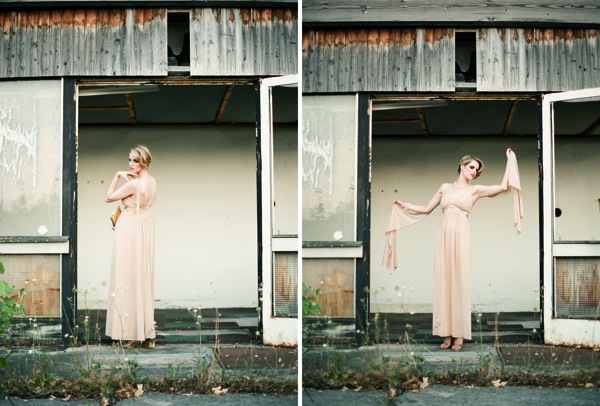
001 The Analog Docs

1. The Look

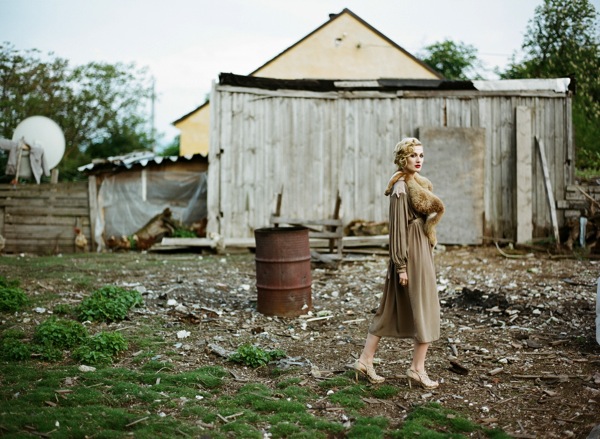
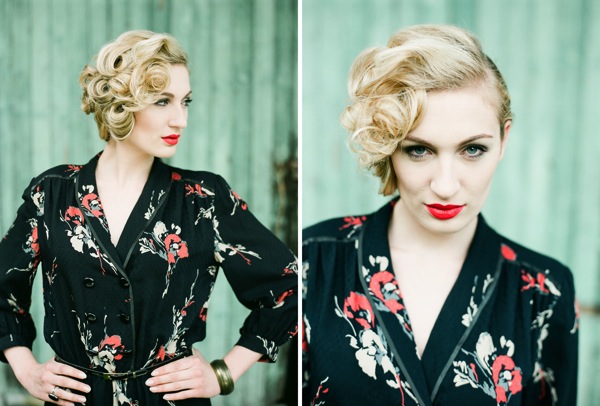
Ok, let’s face it. Film shooters will tell you how much they love this special look of film. This is similar to music lovers who tell you that vinyl sounds more organic than a CD. A lot of digital shooters try to imitate this look on their digital files – but you can hardly get there. Film has an incredible colour palette and a huge dynamic range of detail in both highlights and shadows. So why imitate when you simply can shoot analog?
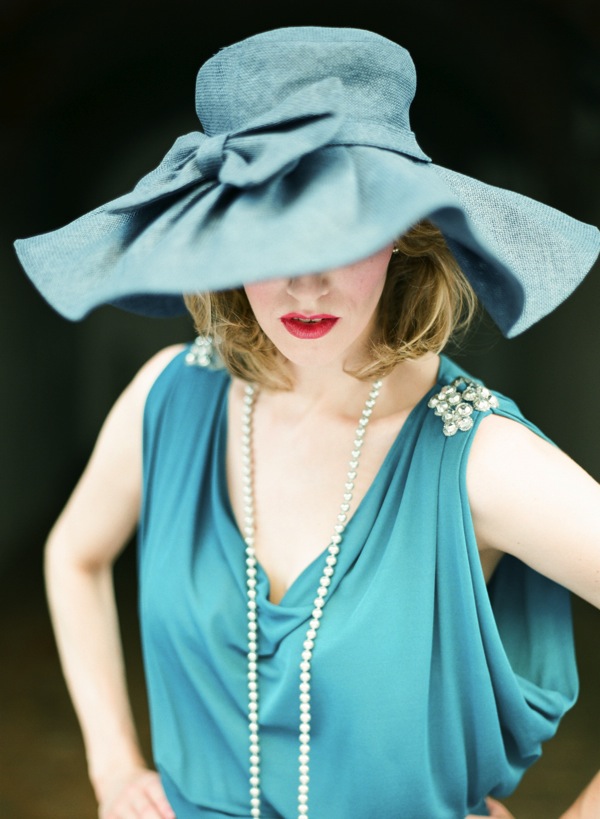
005 The Analog Docs

2. Film will make you a Better Photographer, Promise!

When shooting film, you are bound to know exactly what you are doing. You have to nail the exposure, how you frame the picture and how to direct the model so that he or she doesn’t have his or her eyes closed in the moment you release the shutter. Every picture costs money and believe us, you want to be sure to know your camera beforehand. Furthermore, most of the cameras have got only manual focus lenses and you need an external light meter to get the right exposure. This sounds a little bit frightening to someone who has experience only in digital photography. It’s a steep learning curve but it’s absolutely worth it.
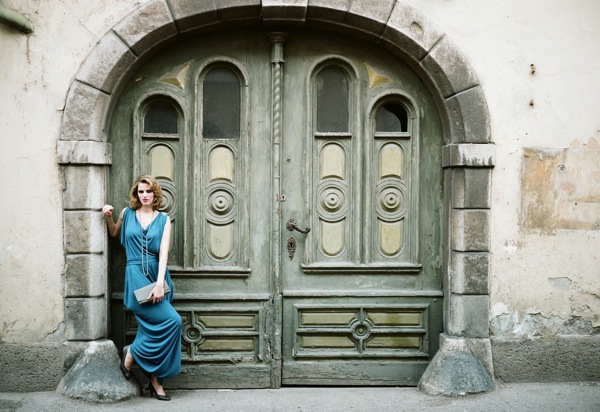
006 The Analog Docs

3. Film is a Time Saver

When we are shooting digital, we return from a job with hundreds of pictures, which have to be sorted out and post-processed (we always shoot RAW). With film, we come back with 40 pictures and most of them are awesome. We have outsourced the developing and scanning process of our films and get them sent from our photo lab. Once you know how to handle the different films like Fuji or Kodak already in the camera, you will save a lot of time with post-production. Honestly saying, there is almost no post-processing necessary and you can spend more time on doing the things you love, too.
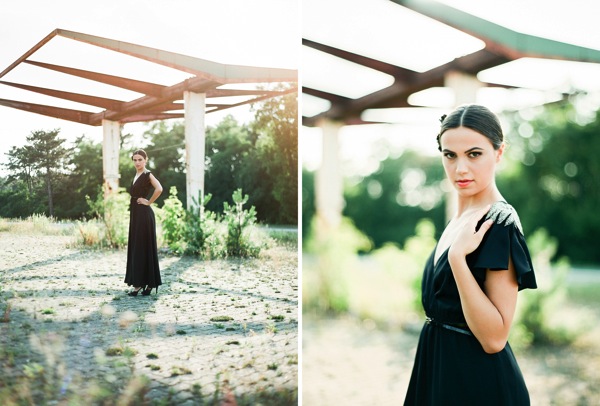
008 The Analog Docs

4. Film Gear is Cheap (but this Might Change in the Future)

20 years ago, a professional medium format camera was as expensive as a car. Today you can pick a Mamiya, Hasselblad or Fuji for a decent price and you’ve got an awesome camera, like the pros were/are using. For Contax cameras, this is another story. The price is skyrocketing in the second hand market, cause it is the most popular camera for wedding photographers nowadays. However, you can also acquire an old 35mm camera for a few bucks and get the whole analog experience with it. 
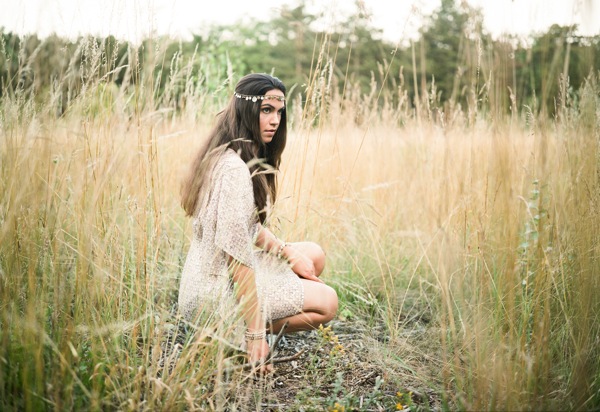
009 The Analog Docs

5. BOKEH Madness

BOKEH (Japanese for ‘blur’) is the way “the lens renders out-of-focus points of light”. And this seems to be the search for the Holy Grail for every portrait photographer. There are tons of articles and discussions going on in the web about which lens is the best. The bigger the aperture is, e.g. 1.2, 1.4, the narrower is the depth of field. This makes you just focus on the eyes where the eyelashes are already out of focus. The quality of BOKEH on a medium format camera looks different than a 35mm camera system. So therefore we love our medium format cameras to get this special out-of-focus look. 
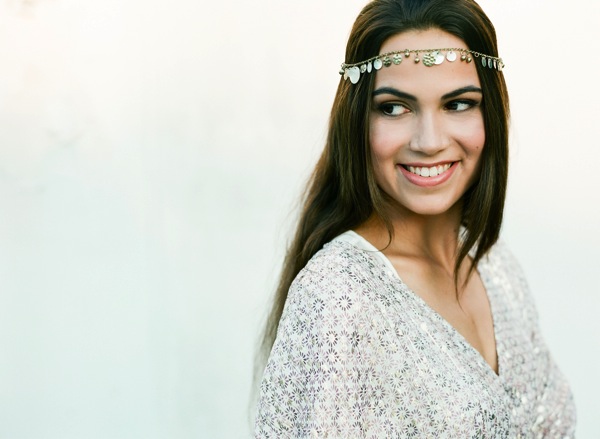
010 The Analog Docs

6. Forget to search the Rumours Sites

One advantage of these old cameras is that once you bought them you don’t have to satisfy your needs to have the newest equipment for it: It’s as simple as that: There will not be new stuff released. Most of the cameras we use are 30+ years old and everything you need is available on the second hand market. And there are also a lot of reviews about the equipment in the web, which make it easier to decide which system you should get. Additionally, these cameras are built like tanks and they are of superior quality compared to the newest DSLRs.
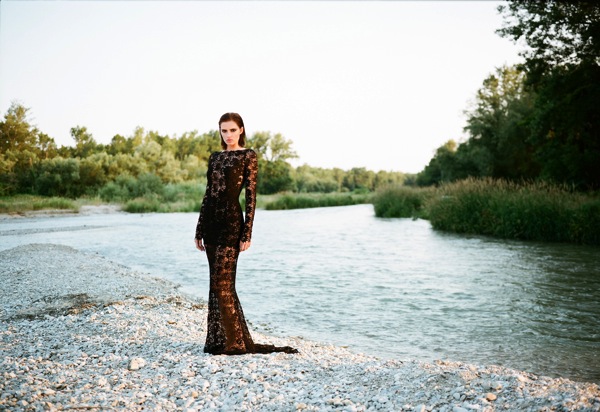
016 The Analog Docs

Advantages:

  • the look
  • you will become a better photographer
  • film saves you time 
  • it’s still cheap (when you know what you are doing)
  • gorgeous BOKEH

Disadvantages:

  • old camera systems, sometimes no service for them
  • you have to calculate per picture
  • it takes more effort to get your pictures
017 The Analog Docs

To us as professional photographers, the advantages are still striking. We provide the best quality you can get from a camera to our clients, which is the most important point. As said in the beginning, we are also shooting digital when needed. When shooting for newspapers and magazines, the time pressure to deliver the pictures won’t always allow for the analog option. However, the best magazine photographers like Martin Schoeller or Dan Winters are still shooting film. 

Sure, there is the option of digital medium format cameras, which are gaining wide popularity in the scene. The prices are dropping but they are still in the 30 000$ range. Compared to digital, buying an analog medium format system is a no-brainer.
019 The Analog Docs

So the final question you should ask yourself is: What do I use my camera for?

If you are a sports or newspaper photographer, then shooting film might not be the best choice. But for all of you who want to shoot great portraits, landscapes or architecture and you are willing to learn more about the craft of photography, you should definitely give film a chance.

Matthias Hombauer (Ph.D.) and Karl Blümel (MD) are both professional photographers based in Vienna/Austria. They are founder of “The Analog Docs”. They also have a facebook fanpage.

Post originally from: Digital Photography Tips.

Check out our more Photography Tips at Photography Tips for Beginners, Portrait Photography Tips and Wedding Photography Tips.

Why Analog Photography (Still) Rocks!


Digital Photography School

 
Comments Off on Why Analog Photography (Still) Rocks!

Posted in Photography


Cranking Out Memories: Analog Playback for Digital Videos

20 Apr

[ By Delana in Gadgets & Geekery & Technology. ]

bioscope hand crank camera

Being able to store old videos in digital formats has helped preserve some of the world’s most important footage. It has also helped us keep all of our old family memories intact without worrying about ever losing that video of Dad at the beach or the family at Disneyland. The problem with digital, though, is that it takes away a certain kind of connection to the video.

digital analog video camera

The Bioscope is an interesting project from Jon Stam and Simon de Bakker that reappropriates digital, previously-analog footage into a once-again analog format. The Bioscope is a kind of hand-held one-person cinema experience. Its shape was based on a child’s video viewer toy, a small plastic device through which one could look while turning a hand crank. A video would magically play through the viewfinder, much to the amazement of the child lucky enough to play with this amazing toy.

bioscope camera

The same kind of wonder and amazement are recreated with the Bioscope. Digital video is fed into the device via a USB stick. From there, the functionality is up to the user. Turning the crank on the side quickly will make the video play fast; turning it slowly will play the video back in nostalgia-filled slow motion. The movement of the pictures is entirely up to you; if you stop cranking, the pictures stop moving.

While it is an unusual step backward in technology, the creators insist that this is necessary for us to again become connected to our data, to our memories, to our lives. Interacting with our memories in this more tactile, physical way allows us to form new bonds with them and attach new emotions to those images captured long ago.

Share on Facebook


[ By Delana in Gadgets & Geekery & Technology. ]

[ WebUrbanist | Archives | Galleries | Privacy | TOS ]


WebUrbanist

 
Comments Off on Cranking Out Memories: Analog Playback for Digital Videos

Posted in Creativity


How We Got Here: Analog Photoshop

27 Feb

There is nothing about flash in this post, except for "pre-flashing," and that is not what you think.

Every time I adjust the exposure slider in a raw converter or tweak the tonal curve into a subtle S-shape, I think back to how we used to do some pretty insane stuff—very improbably—with film, subtle tweaks of light and a witches-brew of chemistry.

If you are under 40, most of this is gonna be brand new. If you are older than that and used to shoot night sports for a newspaper, see how your experience matches up… Read more »
Strobist

 
Comments Off on How We Got Here: Analog Photoshop

Posted in Photography


Impossible Gadget Turns Digital Photos Into Analog Prints

03 Nov

[ By Delana in Gadgets & Geekery & Technology. ]

People around the world shed a little tear when Polaroid announced that it would stop producing the instant film that had become synonymous with the company’s name. The folks at The Impossible Project took up the torch and began producing instant film for Polaroid instant cameras, but they also realized that the photography world has changed significantly. They set out to produce something that was distinctly Polaroid, but that would also cater to the new generation of photographers who use their iPhones as their primary cameras.

(all images via: The Impossible Project)

The Impossible Instant Lab combines the best qualities of instant film photography and iPhone photography to create something entirely new and kind of magical. The device is more or less an iPhone cradle that turns digital photos into instant analog photo prints that you can actually touch, write on, and hand off to friends.

The portable “lab” makes it simple to turn iPhone photographs into physical instant film photos. Using the Instant Lab iPhone app, you pick the photo you want to print. Place the iPhone on the cradle, open the device’s shutter, and push a button to eject the exposed photo. That’s it – your high-tech digital photo is now a retro, low-tech, completely awesome Polaroid.

There are, of course, plenty of wi-fi and Bluetooth photo printers that can spit out hard copies of digital iPhone photos. The Impossible Instant Lab isn’t for the people who are satisfied with those pictures. This gadget is for the people who have felt like something is missing from their lives ever since Polaroid abandoned their instant photograph fans.


Want More? Click for Great Related Content on WebUrbanist:

Holgas, Polaroids & Pinholes: Lush Low-Tech Photography

Film photography is a dying art, but should we so fast to let go of the amazing images created with low-tech cameras like Holgas, pinhole cameras and Polaroids?
6 Comments – Click Here to Read More »»


Oh, Snap! 10 Camera Concepts Focused on Innovation

Digital photography has come a long, long way in the relatively short time it has been around. These forward-thinking camera designs want to push it further.
1 Comment – Click Here to Read More
»»


Share on Facebook


[ By Delana in Gadgets & Geekery & Technology. ]

[ WebUrbanist | Archives | Galleries | Privacy | TOS ]


WebUrbanist

 
Comments Off on Impossible Gadget Turns Digital Photos Into Analog Prints

Posted in Creativity


Retro-Hype Film: Analog- und Digitalfotografie im professionellen Umfeld

09 Apr
Dies ist ein Artikel von Johnny Patience. Er ist als Fotograf für Bondshots Photography international tätig und lebt in West Cork, Irland. Johnny beschäftigt sich überwiegend mit cinematischen und fotojournalistischen Elementen in den Bereichen Fine-Art, Portrait und Commercial.

Mit dem Einzug der digitalen Fotografie ist das Medium Film im professionellen Umfeld nahezu ausgestorben. Im 35mm-Kleinbildformat sind seit etwa zehn Jahren keine neuen Geräte mehr erschienen, Nikon produzierte die legendäre F5 bis ins Jahr 2004 und stellte die Produktion der meisten ihrer analogen Kameras dann im Jahr 2006 ein.

Seitdem erlebt die analoge „Film“-Fotografie allerdings als Nischenprodukt eine stetige Renaissance, die sich in den letzten zwei bis drei Jahren zu einem regelrechten Retro-Hype entwickelt hat. Analoge Geräte sind bei Ebay gefragt wie nie und viele Hobby-Fotografen entscheiden sich nun vorzugsweise für gebrauchte Leicas oder Hasselblad Mittelformat-Kameras der 500er-Serie.

Ein nicht unerheblicher Faktor vieler derartiger Strömungen ist die Inspiration über andere Künstler. So haben beispielsweise einige überwiegend amerikanische Fotografen mit der Kombination Contax 645 und Carl Zeiss 80mm f/2.0 maßgeblich dazu beigetragen, dass nun viele andere Kollegen versuchen, diesen Stil und die entsprechenden Farben zu reproduzieren. Der erste Schritt ist hierbei oftmals, dasselbe Equipment einzusetzen und dies ist aktuell das Mittelformat – Rolleiflex, Hasselblad, Contax oder andere schwere Geschütze.

Natürlich sind das alles wundervolle Kameras, die jedem erstklassige Ergebnisse bescheren, der sie zu meistern weiß. Für mich persönlich ist das allerdings ein wenig „too much“. Ich besitze selbst eine analoge Nikon FM2 und die Kamera macht eine Menge Freude, insbesondere in Verbindung mit einem manuellen 50mm f/1.2 Ai-S Objektiv.

Es ist aber nicht zu unterschätzen, wie viel Aufwand es bedeutet, analoge Fotografie ernsthaft in einen professionellen Workflow zu integrieren, auch wenn dies vor ein paar Jahren noch Gang und Gäbe war. Dazu kommt unter anderem: Ein gutes Fotolabor mit einem entsprechenden Scanner und gut ausgebildeten Experten findet man nicht an jeder Straßenecke.

Allerdings gibt es zwei gewichtige Gründe, die nach wie vor für die analoge Fotografie sprechen: Der absolut unschlagbare Kontrastumfang von Film und die nur äußerst schwer zu reproduzierenden Farben. Kurzum: Das „Look and Feel“.

Der weitläufigen Meinung ausschließlich digital arbeitender Fotografen, es sei unglaublich schwierig und zu riskant, analog zu fotografieren, möchte ich hier übrigens widersprechen: Film vergibt mehr als ein digitaler Sensor. Mit dem Dynamikumfang von Film kann keine normale digitale Kamera mithalten.

In Kombination mit einem guten Labor ergibt sich daraus eine Menge Raum für die Korrektur falscher Belichtungseinstellungen. Profis bilden mit dem richtigen Film und dem richtigen Scanner einen Dynamikumfang von zehn Blendenstufen in einem Bild ab. Davon können digital arbeitende Fotografen nur träumen.

Genau hier setzt auch der Ansatz von Nikon an, aus zwei unterschiedlichen Belichtungen automatisch ein einziges Bild zu errechnen. Fuji erzielt einen ähnlichen Effekt über die automatische Reduktion der Bildauflösung und steigert den Dynamikumfang damit ebenfalls erheblich. Die Hersteller beginnen also langsam zu begreifen, dass die Zukunft eher in deutlich empfindlicheren Sensoren mit einem besseren Kontrastumfang liegt als in der stetigen Steigerung der Auflösung in Verbindung mit reduziertem ISO-Rauschen.

Zum Look and Feel von Film gehört aber nicht nur der Dynamikumfang, sondern insbesondere auch die einzigartigen Farben. Hat man die Hand bei Fine-Art-Fotografie relativ frei, da die Farbigkeit als deutlich wahrnehmbarer Teil des künstlerischen Ausdrucks einfließen kann, so ist es bei professionellen Shootings umso wichtiger, den besonderen Wert auf Natürlichkeit und Konsistenz zu legen. Oftmals werden nach einem Shooting einige hundert Bilder präsentiert und diese sollten trotz wechselnder Lichtbedingungen und Locations alle identisch entwickelt werden und im Gesamtbild harmonisch wirken.

Entwickelt werden muss übrigens in beiden Welten gleichermaßen: Bei analogen Bildern im chemischen Entwicklungsprozess des Films und anschließend am Scanner mit Farbprofilen und -korrekturen. In der digitalen Fotografie je nach Workflow zunächst in Lightroom und anschließend in Photoshop, für das Color-Matching und gegebenenfalls die individuellen Farben des Fotografen. Fotografiert man beides, sollten die Farben der analogen und digitalen Bilder optimalerweise nicht voneinander zu unterscheiden sein. Viele bekannte Fotografen mischen aus diesem Grund gern analoge Bilder in Farbe mit digitalen Bildern in Schwarzweiß.

In der digitalen Welt gibt es vielseitige Bemühungen, nicht nur das Look & Feel von Film im Allgemeinen, sondern den exakten Look eines bestimmten Filmes zu reproduzieren. Der Anbieter VSCO beispielsweise hat kostenpflichtige Presets für Lightroom und ACR entwickelt, die mit einem eigenen Kameraprofil für jeden gängigen Film geliefert werden und den so genannten „Light-Rolloff“ von Film simulieren wollen. Dies ist eine clevere Idee, in der Praxis kommen diese Produkte allerdings trotz aller Bemühungen nicht wirklich an das Original heran. Film verhält sich gegenüber Licht nicht linear und dies lässt sich mit einem digitalen Sensor nicht abbilden, daran ändert auch ein Kameraprofil nichts.

Es ist also relativ schwierig, einen bestimmten „Film-Look“ in digitalen Bildern zu emulieren. Fotografiert man analog, ist es andersherum allerdings fast unmöglich, mit einem Scan an die Möglichkeiten einer Raw-Datei zu gelangen, falls man diese Farbwelt auf Wunsch einmal verlassen möchte. Für mich persönlich ist dies auch der Hauptgrund, überwiegend digital zu fotografieren: Für Gegenlichtaufnahmen in der Hochzeitsfotografie mögen die cremigen Pastelltöne eines überbelichteten Fuji 400 H wunderbar passen. Für viele andere Situationen allerdings nicht. Und über den kreativen Freiraum meiner Farben möchte ich gern selbst entscheiden.

Ich bekomme über meine Website regelmäßig eine Menge Fragen zu meiner Nachbearbeitung, dem Film-Look in meinen digitalen Bildern und zu den Farben, die ich in meinen Bildern verwende. Das ist kein Hexenwerk und ich teile gern meine Erfahrungen. Ich möchte hier daher einmal beispielhaft einen Workflow vorstellen, den ich in diesen Medien noch nicht besprochen habe.

In diesem Zusammenhang sei nochmals betont, dass ein deutlicher Unterschied zwischen Fine-Art- und beispielsweise Hochzeitsfotografie besteht. Was in digitaler Form interessant aussieht, wirkt auf einem Abzug auf Fotopapier oftmals „over-processed“. Man sollte daher sehr vorsichtig arbeiten und es nicht übertreiben, es kann auch zu viel des Guten sein.

Ich versuche in meinen Bildern übrigens, nur generelle Merkmale analoger Fotografie zu integrieren und keinen bestimmten Film zu emulieren. Ich erreiche dies unter anderem über detailreiche Schatten, gedämpfte Highlights, den Einsatz eher matter und entsättigter Farben sowie durch einen nicht zu scharfen Fokus. In der analogen Welt entsprechen diese Merkmale am ehesten dem Kodak Portra 400 NC, der allerdings nicht mehr hergestellt wird.

Um den analogen Look zu emulieren, beginne ich, falls notwendig, zunächst in Lightroom. Ich fotografiere im Raw-Format und bei vorsätzlich überbelichteten Bildern hilft die Highlight-Recovery-Funktion von Lightroom, Details wiederherzustellen, die sonst unwiederbringlich verloren wären. Anschließend exportiere ich meine Bilder und bearbeite sie in Photoshop weiter.

Ich arbeite bei meinem persönlichen Film-Look ausschließlich visuell, ohne wissenschaftlich exakte Laborwerte. Ohne Gefühl und ein wenig Erfahrung mit beiden Medien erscheint des zunächst schwierig. Man sollte daher erst einmal ausprobieren, wie Film sich überhaupt „anfühlt“ und verhält, um diese Eigenschaften digital nachempfinden zu können. Hat man das Prinzip allerdings visuell nachvollzogen, so kann man diesen Look mit relativ einfachen Mitteln reproduzieren. Ich empfehle dazu, einfach einmal selbst ein wenig in Photoshop zu experimentieren.

Ich möchte hier beispielhaft meinen Workflow für das Bild „6235“ vorstellen, aufgenommen mit einer Nikon D700 und dem Nikkor 50mm f/1.4 G:

1. Originalbild
Das unbearbeitete Originalbild „straight out of camera“.


Nikkor 50mm f/1.4 G @ ƒ/1.4 – Nikon D700

2. Farbkorrektur

Das in Photoshop farbkorrigierte Originalbild.

3. Optimierung von Helligkeit, Kontrast und Farbsättigung
Durch den Einsatz von Gradiationskurven, Tonwertkorrektur und Farbentsättigung wurden Helligkeit, Kontrast und Grundfarben optimiert.

4. Graduelle Füllebene für gleichmäßiges Licht
Anschließend wurde die Lichtwirkung durch den Einsatz einer graduellen Füllebene mit geringer Transparenz und Sättigung verbessert. Diese hebt den Bildmittelpunkt hervor und läßt das Licht insgesamt weicher und gleichmäßiger wirken.

5. Farbkorrektur und Vignettierung
Durch den Einsatz von selektiver Farbkorrektur und Gradiationskurven wurden die Grundfarben kühler temperiert. Lichter und Schatten wurden hervorgehoben. Die Vignettierung betont den Bildmittelpunkt.

6. Füllebene für mattes Finish
Eine farbige Füllebene gibt bei sehr geringer Deckkraft einen samtigen Look und nimmt die Lichter und Schatten ein wenig zurück.

Insgesamt dauert diese Form der Entwicklung etwa 20 Minuten. Wenn man in Photoshop immer wieder die selben Aktionen durchführt, empfiehlt es sich, daraus eine Aktion zu erstellen, indem man seinen Workflow aufzeichnet und dann beliebig oft abspielt. Das spart bei der späteren Bearbeitung weiterer Bildern derselben Session eine Menge Arbeit und alle Bilder des Shootings können dann per Knopfdruck den gleichen Look bekommen.

Ist der analoge Retro-Hype im Bezug Fotografie also gerechtfertigt? Das muß wohl jeder für sich selbst entscheiden. Wer noch nie mit analoger Fotografie experimentiert hat, dem kann ich dies nur wärmstens empfehlen.

Im professionellen Einsatz bevorzuge ich persönlich allerdings die digitale Fotografie. Auch wenn mir Film privat sehr viel Freude bereitet, so mag ich in der täglichen Arbeit nicht auf Backups verzichten oder mich auf die termin- und farbtreue Zuarbeit eines Fotolabors verlassen. Der Film-Look läßt sich mit ein wenig Fingerspitzengefühl digital nachempfinden, auch wenn dies hoffentlich nie ein Ersatz für analoge Fotografie sein wird.


KWERFELDEIN | Fotografie Magazin

 
Comments Off on Retro-Hype Film: Analog- und Digitalfotografie im professionellen Umfeld

Posted in Equipment