RSS
 

Posts Tagged ‘Ambient’

What is Ambient Light in Photography? An Explanation for Beginner Photographers

17 Jan

The post What is Ambient Light in Photography? An Explanation for Beginner Photographers appeared first on Digital Photography School. It was authored by Lily Sawyer.

what-is-ambient-light-in-photography

Have you ever wondered what ambient light in photography means? You may have heard phrases such as “capture the ambiance,” “allow ambient light,” and have wondered how to do that. This article explains exactly that!

So let’s get started.

dps-ambient-light-in-photography-beginners-guide-tutorial

f/5.6, ISO 3200, 1/60th

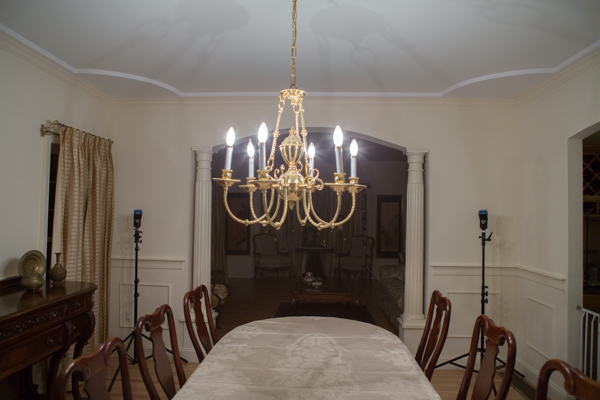
Simply stated, ambient light means the light already available in the space before you add any other lighting. Yes, any light already available and that could be many types!

Types of ambient light in photography

1. Natural light from outdoors

The first type of ambient light in photography is natural light from outdoors. This is the daylight that comes through side windows, ceiling windows, and open doorways.

dps-ambient-light-in-photography-beginners-guide-tutorial

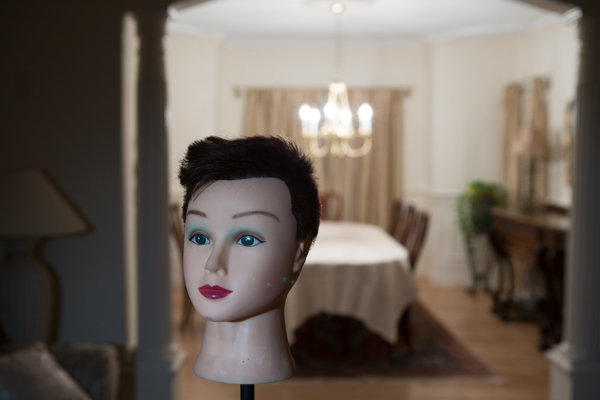
f/5.6, ISO 6400, 1/60th (This was shot on a very dark and overcast winter day in a north-east facing kitchen)

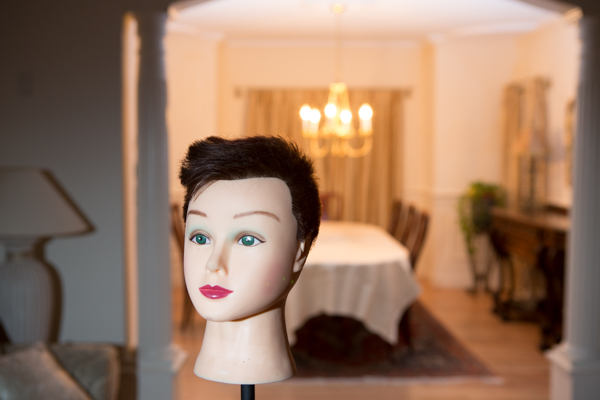
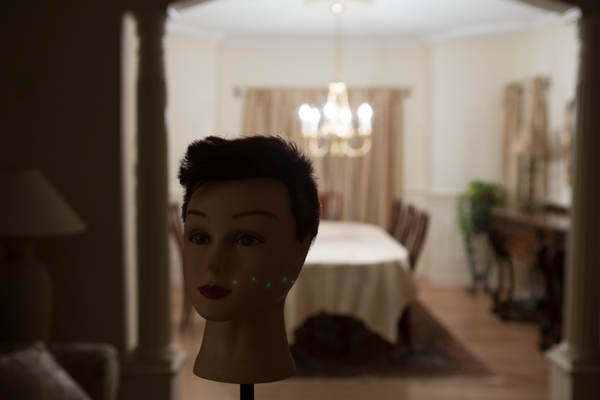
Compare the two images above and below. The image above was taken using purely natural light from outdoors whilst the image below incorporated neons, lamps and spotlights.

dps-ambient-light-in-photography-beginners-guide-tutorial

f/5.6, ISO 4000, 1/60th

2. Natural light from indoors

Candle lights and the glow of light coming from fireplaces are natural lights that can already be indoor sources rather than the natural sunlight coming from outdoors.

dps-ambient-light-in-photography-beginners-guide-tutorial

f/5.6, ISO 1600, 1/60th


dps-ambient-light-in-photography-beginners-guide-tutorial

f/5.6, ISO 1000, 1/60th

3. Artificial lights in the home

This is a range of lights commonly seen in homes and spaces. It includes ceiling down-lighters, spotlights, ceiling pendants, chandeliers, table lamps, floor lamps, neon lights, lights from mirrors, fluorescent lights, and wall sconces.

dps-ambient-light-in-photography-beginners-guide-tutorial

f/5.6, ISO 6400, 1/30th

Which light/lights do you require?

In photography, the question is, what light is needed to achieve the image the photographer wants to capture? I dare say there are no hard and fast rules as the success of an image depends on getting the correct lighting combination required, regardless of the type of lighting.

Let’s explore some lighting scenarios in various spaces.

Portraits

Just like any type of lighting, whether it be natural or artificial, ambient light is just one option for photographers.

dps-ambient-light-in-photography-beginners-guide-tutorial

Left: f/2.8, ISO 1000, 1/100th  Lens 24-70mm Right: f/4, ISO 400, 1/125th with off-camera flash

In portraits, ambient light could be purely the sunlight coming through a side window. To shoot this, a photographer would only need a camera. And, if it helps to achieve the image, a few accessories such as a reflector, a diffuser, and a backdrop – or use an existing wall.

dps-ambient-light-in-photography-beginners-guide-tutorial

Left: f/2.8, ISO 1000, 1/100th  Lens 24-70mm Right: f/4, ISO 400, 1/125th with off-camera flash

Conversely, the photographer may choose not to use ambient light at all and solely utilize electronic flashes or vice versa in the same space above.

Sunlight from windows is not usually strong (depending on the size of windows and the position of the sun). It’s definitely not as strong as electronic flashes can be, so sometimes there is no need to block it out fully. Electronic light can cancel out any natural light from the windows or can add a touch of light to any ambient light where needed. The outcome depends on the settings used by the photographer.

The images on the left above have been shot using natural light filtering through the diffused window and a reflector to increase the shadows. The images on the right have been shot using electronic flash in a softbox. Here is an article on how to achieve both set-ups. My typical settings for portrait shots are around f/2.8 – f/4, ISO 200 – ISO 400, SS 1/100 – SS160.

Events

Ambient light is your best friend when it comes to events. Weddings and parties are often busy and buzzing with people. Here in the UK, space for large equipment at such events is not always available and often the photographer has to rely on just a camera and a speedlight to capture these events.

dps-ambient-light-in-photography-beginners-guide-tutorial

f/2.8, ISO 3200, 1/100th  Flash power 1/32 Lens 24-70mm

Letting the ambient light in is key to capturing the ambiance of the room and the atmosphere of the party. This means allowing background lights such as fairy lights, festoon lights, wall sconces etc to seep into the image.

The resulting look has depth rather than a flat dark backdrop. My typical settings for events range between f/4 – 5.6, ISO is rather high especially indoors in dark areas around 3200 – 6400, SS rather low around 1/60 – 100.

dps-ambient-light-in-photography-beginners-guide-tutorial

f/5.6, ISO 3200, 1/100th  Lens 70 – 200mm

The last thing a photographer wants to do is to kill any ambiance by using a strong flash to mitigate low light – especially in events where dry ice is used to create smoke effects and various colored lighting for a party atmosphere.

You don’t want to completely obliterate these just to light your subjects’ faces.

dps-ambient-light-in-photography-beginners-guide-tutorial

f/8, ISO 2000, 1/30th, Lens 24-70mm, off-camera flash

Balancing speedlight flash power and shutter speeds is key to achieving images like these as well as incorporating existing ambient light.

dps-ambient-light-in-photography-beginners-guide-tutorial

f/5.6, ISO 3200, 1/125th, Lens 24-70mm with off-camera flash

You can read more about dragging the shutter here, a technique used often to produce these images.

dps-ambient-light-in-photography-beginners-guide-tutorial

f/5.6, ISO 2500, 1/60th,  Lens 70 – 200mm with off-camera flash and on-camera flash

You can use ambient light in the background to create silhouettes.

In the photo below, there was no light whatsoever on the balcony. I used the light inside the building to create a silhouette of one of the guests. This was an unposed shot so it was a rather hasty one.

dps-ambient-light-in-photography-beginners-guide-tutorial

f/11, ISO 2000, 1/200th,  Lens 24-70mm

Interiors

Most photographers and magazines require natural light only in the interiors images they use.

Most often this would need a tripod and the use of slow shutter speeds to mitigate dark areas in the space that need capturing. But if the space is characterized by light features such as neon and lamps that make the atmosphere of the room, then I’m for capturing these with the lights on too.

dps-ambient-light-in-photography-beginners-guide-tutorial

f/5.6, ISO 2000, 1/100th,  Lens 24-70mm

In my opinion, it is necessary to be selective with the amount of artificial ambient light to allow in a photographic composition to ensure a harmonious and natural-looking image.

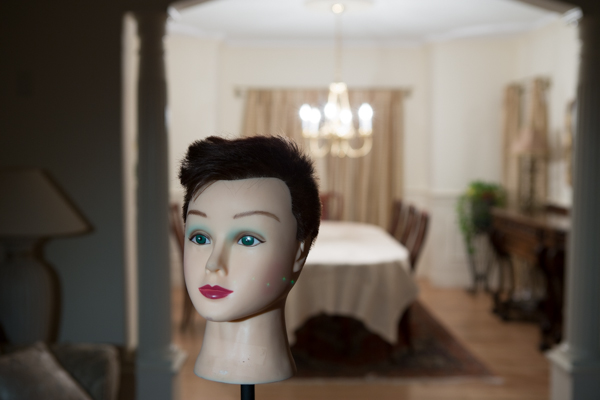
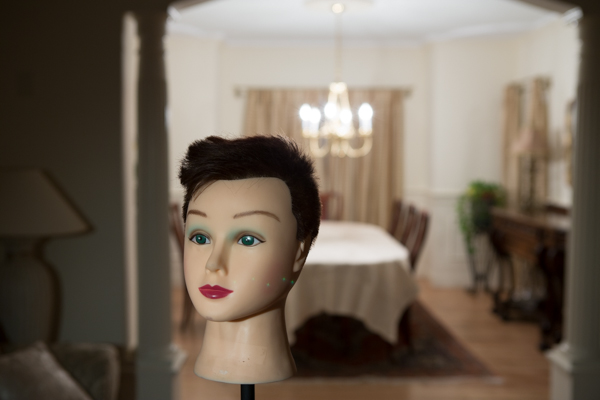
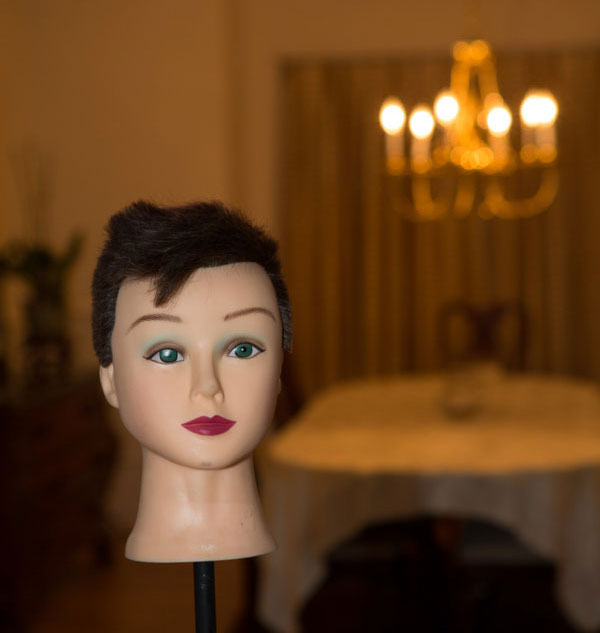
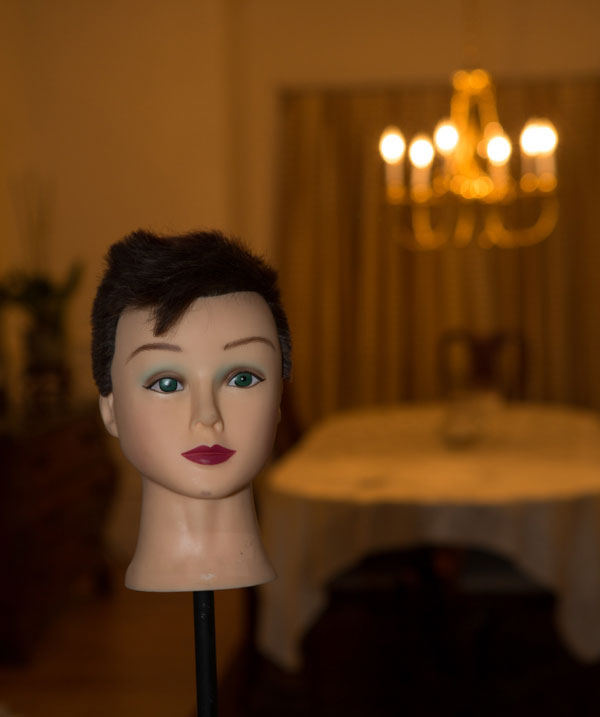
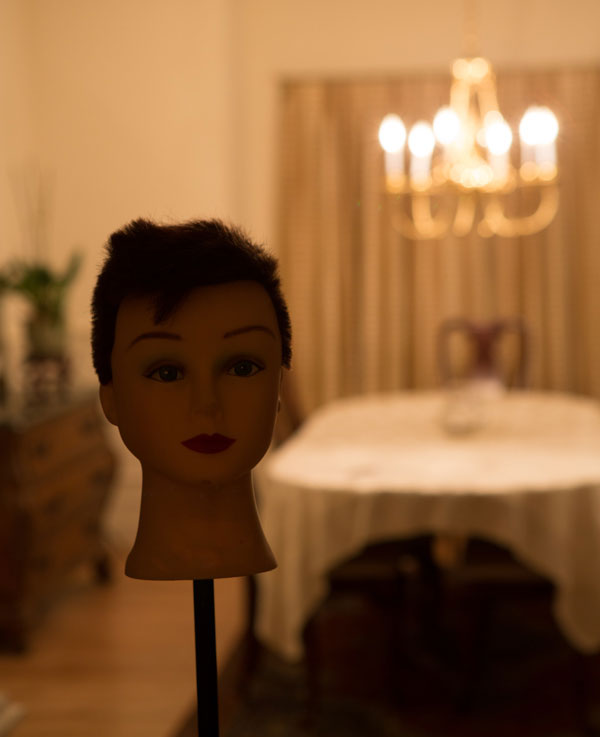
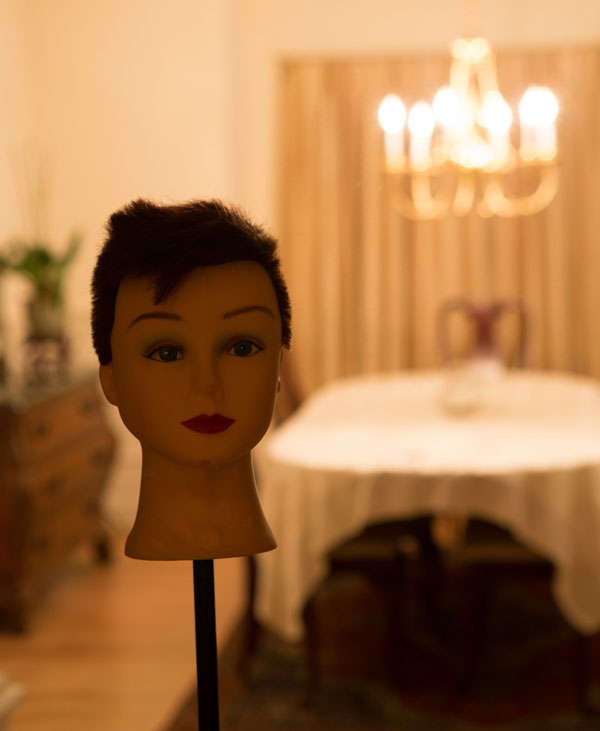
More importantly, it is a must to edit out the lights that are unnecessary in the space for the image you want to achieve. Below are three different lighting set-ups in one space. All three dramatically change the look and feel of the same room.

My typical settings for interior shots depend on the time of day and how much natural light the room gets but range between f/5.6 – f/8, ISO is quite high around 2000 – 4000, SS usually really low around 1/30 – 60 or 100 depending on light availability.

On the photos below, the top photo utilized only natural light. The photo in the middle had all sorts of lights going on like festoon, lamps, fairy lights, candlelight, and neon but without the main ceiling chandelier, which is very bright. The third photo had the chandelier switched on on top of everything else, but because it got too bright, it killed the ambiance in the room.

dps-ambient-light-in-photography-beginners-guide-tutorial

f/5.6, ISO 3200, 1/80th,  Lens 24-70mm

dps-ambient-light-in-photography-beginners-guide-tutorial

f/5.6, ISO 4000, 1/80th,  Lens 24-70mm

dps-ambient-light-in-photography-beginners-guide-tutorial

f/5.6, ISO 3200, 1/60th,  Lens 24-70mm Highlights taken down in editing.

I lean towards a selective mixture of lighting in my interiors.

Some areas are so hard to capture. For example, really dark areas where there is no ambient light at all and using a long shutter speed will overexpose the areas with light and correctly expose the unlit area.

dps-ambient-light-in-photography-beginners-guide-tutorial

f/5.6, ISO 2500, 1/60th, Lens 24-70mm

Of course, this can be rectified by bracketing and compositing in Photoshop. But I don’t always want to be doing that! Besides, I think adding some form of ambient light brings some charm in. Take these photos above and below, for example, illustrating this point.

dps-ambient-light-in-photography-beginners-guide-tutorial

f/5.6, ISO 6400, 1/30th,  Lens 24-70mm

Color temperature

One of the most common problematic issues when using mixed lighting, especially when including electronic flash into the mix, is color temperature disparity. Natural light from sunlight is usually around 5600K range, while tungsten lights indoors are usually around 3200K.

This means that when shooting outdoors, you need to set your white balance to around 5000 – 5750 Kelvin. That way, the resulting image looks similar to what you see with the naked eye. If you were to set the white balance to 3000K, for example, everything will look very blue (nothing worse than a white wedding dress looking blue!).

The same is true when shooting indoors with tungsten or incandescent lights on. The temperature required to shoot this image is around 3200K, but if you shoot it with the white balance set at 5650K, you will end up with an image looking very orange.

dps-ambient-light-in-photography-beginners-guide-tutorial

f/5.6, ISO 3200, 1/80th,  Lens 24-70mm

The most important thing to remember is to shoot with the correct white balance setting.

However, when using mixed lighting, you will still get color disparity. Here are three ways to solve this, depending on what you require for your images.

  1. You can adjust the white balance in post-production (shoot with a gray card or specified color temperature in your white balance)
  2. Use gels for your artificial lights to match the ambient temperature
  3. Change the bulbs in your indoor lamps to match the sunlight temperature and then adjust everything evenly in post-production if required.

As for me, I try to match what I see in real life to the outcome of the images. Then they are warmed up in post-production for a natural color with the added touch of a film look to best capture what my eye sees.

I hope this little article has helped you in your understanding of ambient light in photography as well as balancing color temperatures when dealing with mixed lighting.

If you have any tips to add about ambient light in photography, do share in the comments below.

The post What is Ambient Light in Photography? An Explanation for Beginner Photographers appeared first on Digital Photography School. It was authored by Lily Sawyer.
Digital Photography School

 
Comments Off on What is Ambient Light in Photography? An Explanation for Beginner Photographers

Posted in Photography


Lighting 103: Using Gels to Shift the Ambient

21 Apr

Abstract: By combining a white balance shift in your camera with a complimentary gelling of your flash, you can easily and efficiently alter the ambient color temperature of an entire environment.

In addition to controlling the color of light from your flash, gels can also allow you to control the color of the ambient areas of your frame. This can allow you to tweak, enhance or drastically an ambient color environment. Read more »
Strobist

 
Comments Off on Lighting 103: Using Gels to Shift the Ambient

Posted in Photography


Lighting 103: Using Gelled Flash to Correct Ambient Light

07 Apr

Abstract: You can alter your camera's white balance and gel your flash to "correct" nearly any ambient light color shift. But should you?Read more »
Strobist

 
Comments Off on Lighting 103: Using Gelled Flash to Correct Ambient Light

Posted in Photography


Datacolor updates Spyder5 calibration software to add auto ambient light switching

30 Mar

Calibration company Datacolor has updated the Spyder5 software package that accompanies its Spyder5 monitor calibration devices for Pro and Elite customers. The update sees the packages renamed Spyder5Pro+ and SpyderElite+ to indicate that both now feature automatic ambient light switching and what the company calls 1-Click Calibration. The ambient light feature relies on the Spyder5 calibration device recognising that the lighting conditions in the monitor room have altered to trigger a different monitor profile. In previous versions users had to remember to make the adjustment manually.

The new 1-Click Calibration system is really a 1-click solution for monitors that have already been calibrated by the device before, and allows the re-calibration with a single click without having to go into the menu system. Both versions of the software also provide more in-depth control of saved profiles through an extra profile management tool.

The Elite package additionally offers a better soft-proofing workflow as well as Enhanced StudioMatch which helps users to calibrate multiple monitors so they all look the same.
For more information, including pricing for upgrades for each of the packages, see the Datacolor website.

Press release

Datacolor Announces Spyder5+ Software Upgrade with Enhanced Display Calibration Features

Datacolor®, a global leader in color management solutions, today announced the release of Spyder®5+, the next generation software expertly designed to build upon its popular color calibration tools for photographers, designers, videographers and imaging professionals.

“Spyder5 is already an amazing tool for getting the best color out of your display. With the Spyder5+ upgrade, Datacolor has added several really nice features that are an absolute no-brainer for the price,” said David Cardinal, professional photographer and Datacolor Friend with Vision. “I’ve been using the new capabilities and am really pleased with how much time they’ve saved me, as well as the additional productivity they’ve provided.”

The software upgrade is now available for all existing and new Spyder5 customers, with the option to purchase Spyder5PRO+ or Spyder5ELITE+. Spyder5+ adds unique features to the Spyder5 calibration tools by enhancing users’ digital color workflow, including:

* Automatic Room Light Switching ensures users’ monitor profile changes as the room light conditions shift, with no user interaction required
* 1-Click Calibration streamlines a user’s workflow with a single click to start the calibration without having to re-select saved settings
* Profile Management Tool gives users the ability to edit, remove, rename, locate, and activate each display profile for ultimate control and flexibility

Users who purchase the Spyder5ELITE+ upgrade will have access to all of the above features, in addition to:

* Spyder SoftProof improves “Screen-to-Output” matching with a new workflow to simulate how photos will look on any printer or device – including home printers, online or retail printers, and certain mobile/tablet devices
* Enhanced StudioMatch verifies precise monitor matching and takes the guess work out of making all connected displays look the same – including a new visual verification step that assists you by fine tuning your results

“We’re very excited to add this upgrade to our Spyder5 product line. This new software offers unique tools to ensure color management across all devices, so our customers can remain confident in their decision to choose Datacolor for their color calibration needs,” said Stefan Zrenner, Director Global Sales & Marketing Imaging, Datacolor. “With a competitive set of features, Spyder5+ is the perfect tool for creatives that rely on consistency in their work.”

New and existing Spyder5 customers wishing to purchase the Spyder5+ software add-on can find out more and buy via the Datacolor website. Upon software purchase, customers will receive a software serial number and a step-by-step guide for easy download.

Articles: Digital Photography Review (dpreview.com)

 
Comments Off on Datacolor updates Spyder5 calibration software to add auto ambient light switching

Posted in Uncategorized


Shooting Indoors in Ambient Light: Yoga Photo Session

23 Jul

Shooting indoors is always a challenge unless you have a professional lighting setup with you. The light is usually low, so it’s hard to get any kind of depth of field. Lightbulbs inside of lamps tend to glow orange, while overhead florescent lights show up on the greenish side, and aren’t very pretty. So what do you do? Let your Continue Reading

The post Shooting Indoors in Ambient Light: Yoga Photo Session appeared first on Photodoto.


Photodoto

 
Comments Off on Shooting Indoors in Ambient Light: Yoga Photo Session

Posted in Photography


How to Mix Ambient Light and Fill-Flash for Outdoor Portraits

31 Mar

If you have ever wondered how to improve your outdoor portraits. Turn off your Smartphone, shuffle your schedule, and make sure you read every single word on this page. Because outdoor portrait lighting secrets will finally be revealed.

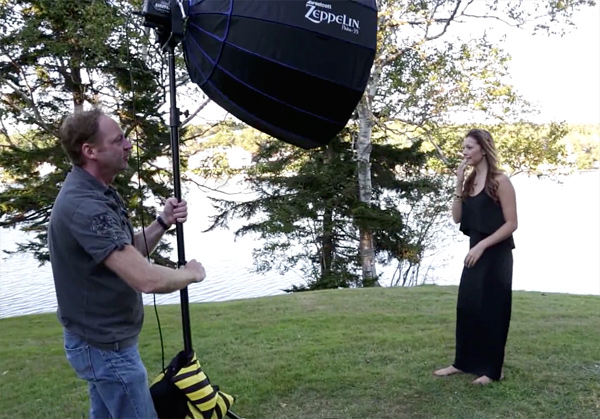
Below is an example of one of my typical on-location lighting setups. It consists of a studio strobe with a battery pack and a Westcott 35″ Deep Parabolic Zeppelin modifier.

Mod1

I am guessing you have most likely stumbled upon this article because you are searching for a way to improve your outdoor portraits. If you would like to capture perfectly exposed images in ambient light, the real secret is to use fill-flash and a light modifier. Sure, if you have a reflector and an assistant you may be able to achieve similar results using only natural light. But in this article, I am going to assume you shoot outdoor portraits by yourself and you are looking for the easiest way to control, and modify the light in your images.

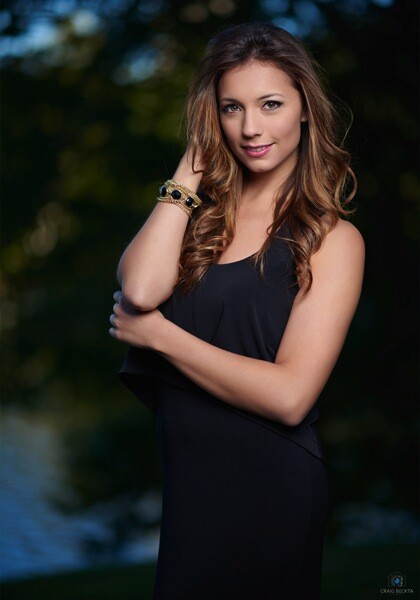
Below is an example of an image taken with the above lighting set up, where I lowered the background exposure with a three stop neutral density filter.

Lia1

Before we go any further, I just want to caution you, you may find some aspects of this article confusing the first time you read them. So I have included a video tutorial for you to further illustrate the lighting concepts discussed here.

Let’s break it down step by step:

Step #1 – meter the background

Step one is to meter the background area behind your subject, using either a light meter or your in-camera meter. For example, let’s say you metered the background at f/5.6 and you took a test exposure with your camera.

Step #2 – check highlights on the test shot

The second step is to examine your test shot and to make sure there are no blown out highlights in the brightest part of your image. Some DSLR models have a highlight warning indicator that you can enable and you can also view the Histogram to help you decide if your exposure falls within an acceptable range. The reason you are checking for blown out areas, is that once you loose detail in the highlights, the information from that part of the image is lost forever. So adjust your exposure if necessary to ensure you have an accurately exposed image with highlight detail intact.

Malia1

Step #3 – check highlights on the test shot

Once you are pleased with the background exposure you may find that your subject appears too dark in relation to the background. Your next step is to match the foreground exposure with fill-flash. To do that, you can use either a speedlight or a studio strobe with the light modifier of your choice.

Let’s go into a little more detail. For example, if your background is exposed at f/5.6 then you have to match the same exposure on your subject’s face. Sounds simple right? Here is where you can run into some problems. If you meter the background at f/16 on a sunny day, but the speedlight you are using only meters f/11 at full power – then what do you do? Your subject will appear darker than the background. What are your choices?

In most cases your first impulse would be to raise the shutter speed, but when you’re using strobe lights you are capped at a shutter speed between 1/160 and 1/200th of a second. In some cases you may be able to use high-speed sync, but for the purpose of this article let’s say your maximum shutter speed is 1/200 (your camera’s native flash sync speed). If that is the case, you will have to use a two or three stop neutral density filter to lower the background exposure, so you can match the foreground exposure to the background.

Have I lost you yet? In case you find this concept difficult to grasp, I have included another video tutorial below on outdoor portraits using fill-flash, where I use a three stop neutral density filter to bring down the ambient exposure. In this example that allows me to use a wide open aperture, in combination with fill-flash to create a blurry background effect.

If you are like most people, it will probably take you a little practice until you feel comfortable balancing ambient light and fill-flash. Take your time and have fun with it. Read the article a few times and watch the video tutorials again. Once you have a pretty good grasp of the concepts discussed, head out and practice balancing your exposure. Some people prefer a background exposure that is one to two stops darker than their subject. Experiment with different ratios until you find a look that suits your style.

Sheena1

Please post any questions you have in the comments below.

googletag.cmd.push(function() {
tablet_slots.push( googletag.defineSlot( “/1005424/_dPSv4_tab-all-article-bottom_(300×250)”, [300, 250], “pb-ad-78623” ).addService( googletag.pubads() ) ); } );

googletag.cmd.push(function() {
mobile_slots.push( googletag.defineSlot( “/1005424/_dPSv4_mob-all-article-bottom_(300×250)”, [300, 250], “pb-ad-78158” ).addService( googletag.pubads() ) ); } );

The post How to Mix Ambient Light and Fill-Flash for Outdoor Portraits by Craig Beckta appeared first on Digital Photography School.


Digital Photography School

 
Comments Off on How to Mix Ambient Light and Fill-Flash for Outdoor Portraits

Posted in Photography


How to Balance Off-Camera Flash and Ambient Light on Location

01 Dec

In this Adorama TV video Gavin Hoey takes you on location to learn how to balance flash and ambient light to create some stunning portraits in the forest.

After going through three different setups outdoors he takes you inside for the post-processing stage so see how he completes the images in Photoshop.

Some of the items Gavin used and demonstrated in the video for your convenience:

  • Canon 70-200mm f/2.8L lens
  • BlackRapid Curve RS-7 camera strap
  • Flashpoint RoveLight 600ws monolight
  • Glow ParaPop 28″ R Series
  • Sekonic L-308S Flashmate light meter

You can get the free light ray brushes he mentions in the video here.

In Practice

Have you tried any location portraits using both the natural or ambient light combined with flash? If you have any other tips or want to share your images, please do so in the comments below.

The post How to Balance Off-Camera Flash and Ambient Light on Location by Darlene Hildebrandt appeared first on Digital Photography School.


Digital Photography School

 
Comments Off on How to Balance Off-Camera Flash and Ambient Light on Location

Posted in Photography


Balancing Color for Flash and Ambient Light using Gels

13 Jan

Flash with 1 CTO plus 1/8 CTOIn the last article Balancing Flash and Ambient Light Using an Incident Light Meter I did not mention color temperature or any correction for the colorcast in the background. There were however requests for it in the comments section, so in this article we will cover three ways of balancing color for flash and ambient light (tungsten yellow/orange which is approximately 3200°K, flash which has a color temperature close to daylight or 5500°K).
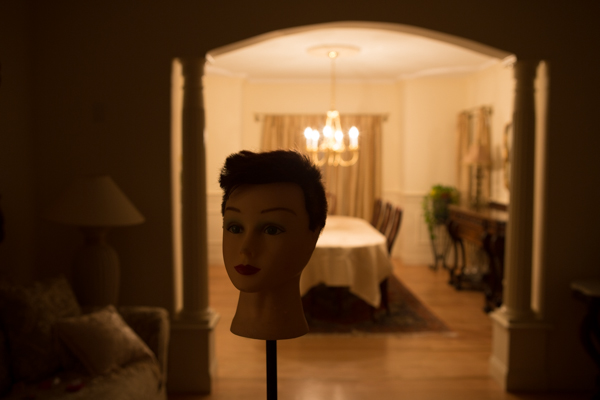
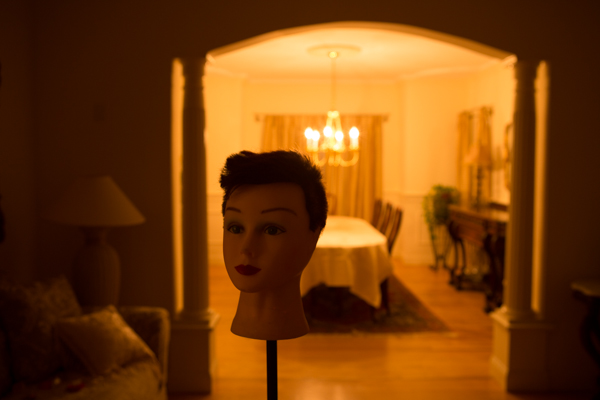
Color Temperature Explained

Before you go into the process of correcting color imbalance you will need to understand color temperature. A basic description of color temperature is based on the color characteristics of visible light from warm (yellows) to cool (blues) and the ability to measure this in degrees Kelvin (°K). Degrees Kelvin is a numerical value assigned to the color emitted by a light source. Visualize a lamp filament that is heated using an electric current. It starts off as black and starts getting hot. At a particular point it will become hot enough to start glowing, typically a dark red. As it gets hotter, it will change from dark red to orange to yellow to practically white. It is important to understand that technically, red light has a lower color temperature but is described as warm, while blue light is a higher color temperature but is described as cool. So remember that the terms warm and cool describe color, not temperature. This is a fairly extensive topic but for a quick explanation this should help.

Read more on White Balance and color temperature:

  • Practical White Balance and Why You Should Learn It!
  • Introduction to White Balance

Since warm and cool are colors, we can change their characteristics by modifying color. In lighting we achieve this modification by using various colored gels of varying densities. Lets examine the first and simplest method.

Method One – Using Color Gels on the Flash

Here are two images of the same scene, one using Auto White Balance (AWB) and the next using Daylight White Balance (WB). The daylight WB is 5200°K while the AWB applied 3200°K. Clearly the Daylight WB is too yellow.

Auto WB

Image captured with camera set to Auto White Balance (AWB)

Same scene as above captured with the camera set to Daylight White Balance

Same scene as above captured with the camera set to Daylight White Balance

The Problem

The background room is lit by tungsten bulbs (typically around 3200°K). We will use a flash to light the main subject (approximately 5500°K).  This is a considerable difference that you will need to resolve. So if you can make both the light sources match in color temperature, you can then set the WB on your camera to that, and get a perfectly balanced image.

The Solution

To achieve this balance, you will use a color correction gel on your flash, to match the orange color of the tungsten bulbs. Theoretically both sources will now produce the same color. So if you set your camera’s WB to “tungsten” you will capture the background without any colorcast and it will look neutral. What about your primary subject? Since the flash output has been color modified to “tungsten”, the entire scene will look natural and devoid of any colorcast as long as the lights are close to the color temperature of tungsten.

Color correction is achieved using gels. These gels are manufactured by companies like Roscoe, Lee and ExpoImaging. Gels come in all sizes from large rolls to precut sheets. My preferences are the Rogue Gels made by ExpoImaging as they are the perfect size for flash heads and are attached using an elastic band. Each gel is marked for its strength and light loss. As a starter, for under $ 10 you can buy sample packs from most lighting supply stores.

Gels that create yellow/orange light are known as CTO gels (Color Temperature Orange). These gels are available in various strengths as follows:

  • 1/8 CTO Converts 5500°K to 4900°K
  • 1/4 CTO Converts 5500°K to 4500°K
  • 1/2 CTO Converts 5500°K to 3800°K
  • 3/4 CTO Converts 5500°K to 3200°K
  • Full CTO Converts 5500°K to 2900°K

I recommend you start with a full CTO and adjust by adding or reducing the color temperature correction by either combining gels or using gels of lesser strength. Since these gels add color they also reduce the amount of light transmitted. Based upon the gel that you are using, you will need to compensate for the loss of light. The typical light loss is mentioned in “f” stops with each gel strength. This information is typically imprinted on the gel or provided on a backing sheet of paper. You should use this information as an initial guideline for compensating your exposure.

This method will work reasonably well. However, it is not the most accurate, as it relies purely on a visual color correction. See the result in the following image:

The camera White Balance is set to Tungsten and the flash is gelled using a Full CTO

The camera White Balance is set to Tungsten and the flash is gelled using a Full CTO

Notice that the color of the subject is fairly accurate but the background is still a bit yellow/orange. The color temperature of the lights in the background may not be true 3200°K.

Method Two – Gels on the Ambient Light Source

In the second method, you will use gels over the offending lights if at all feasible. In this example consider it not feasible. However, you can use additional flash heads to overcome the problem of the tungsten colorcast. You do this by applying an opposing color gel to one or more flash light sources to fill the background. Keep in mind that based upon the size or the area and the intensity of the ambient light in the background, this too may not always be feasible. Take the additional flashheads (make sure they can be fired as slaves) and put a CTB (Color Temperature Blue) gel on each. What you are attempting to do is to negate the effect of the Tungsten by adding blue light to the ambient environment. Test your exposure and set the camera to “flash” white balance. Once again, you may need to add or subtract the gel intensity.

The set up. Note how the flash heads are concealed from view

The set up: note how the flash heads are concealed from view and pointed into the room that is the background

The CTB gels like CTO gels are available in multiple strengths as follows:

  • 1/8 CTB Boosts 3200°K to 3300°K
  • 1/4 CTO Boosts 3200°K to 3500°K
  • 1/2 CTO Boosts 3200°K to 3800°K
  • 3/4 CTO Boosts 3200°K to 4100°K
  • Full CTO Boosts 3200°K to near daylight

Once you are satisfied with the background color, go ahead and photograph the primary subject. Do not gel the main flash and leave the white balance on “flash”.

Color Bal

Color Correction using blue gels in the background

In each of the cases above there is still some color cast in the final image. This is because the lights in the background are not true 3200°K and we have been relying on tungsten color temperature for our corrections.

Method Three – Custom White Balance for Background and Matching Gels on Flash

Here you use custom white balance to establish an exact white balance setting for the ambient light. It is best to use a “white balance card” or a device like the X-Rite Color Checker Passport.

Color Checker Passport in Ambient Light

Image captured of  a Color Checker Passport in ambient light

Zoomed in for creating a Custom White Balance

Color Checker Passport – Zoomed in for creating a Custom White Balance

Image of the Color Checker Passport after Custom White Balance was established

Image of the Color Checker Passport after Custom White Balance was established

If possible, bring that image into Lightroom or Adobe Camera Raw and determine the actual color temperature. In this case, it is 2400°K, which, as you can see, is vastly different from the 3200°K tungsten. No wonder there was still a yellow colorcast in the first method. Use this measurement to establish the gel strength needed for the primary flash. If you cannot use Lightroom or any other software to obtain an accurate color temperature reading, you will need to do a bit of trial and error to determine how much CTO to use. In this case we need to get to 2400°K. A full CTO will drop 5500°K to 3200°K and a 1/8 CTO will drop an additional 600°K bringing the correction to 2600°K which is fairly close to what we need. Leave the camera set to the custom WB and gel the flash with one Full CTO gel and one 1/8 CTO gel to get a well balanced image.

The correct White Balance for the background

The correct White Balance for the background


Using a Full CTO on flash head

Using a Full CTO on flash head

Flas with 1 CTO plus 1/8 CTO

Flash with a Full CTO plus a 1/8 CTO – a well color balanced image

One full CTO and one 1/4 CTO – the subject is a bit warm

One full CTO and one 1/4 CTO – the subject is a bit warm

In Conclusion

Always keep a set of color correction gels in your bag if you use flash on location.  Not only will you need them for indoor flash photography but the CTO gels are a ideal when using flash for portraiture at sunrise or sunset.

The post Balancing Color for Flash and Ambient Light using Gels by Shiv Verma appeared first on Digital Photography School.


Digital Photography School

 
Comments Off on Balancing Color for Flash and Ambient Light using Gels

Posted in Photography


Balancing Flash and Ambient Light Using an Incident Light Meter

22 Nov

Contribution by Shiv Verma

Balancing Exposure

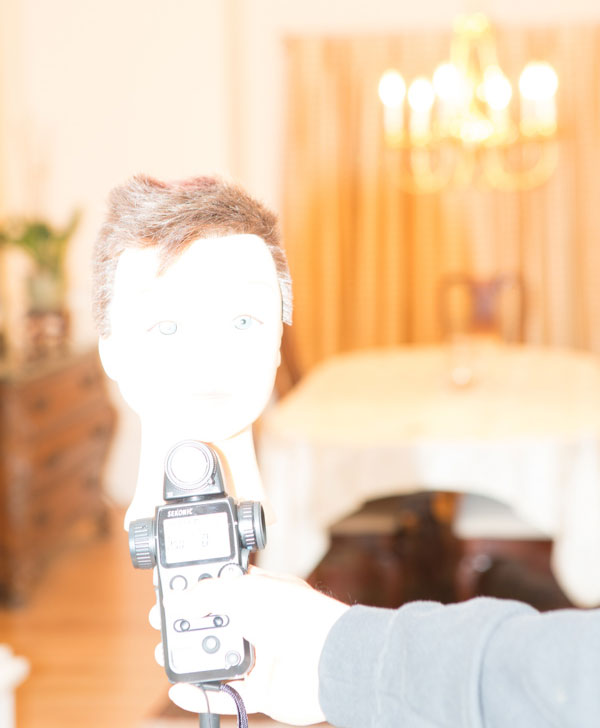
Ambient underexposed by two stops by changing the shutter speed to 1/40th of a second

Why is an incident meter important for flash photography?

How often have you struggled trying to capture a well-exposed portrait in a dimly lit room or hall. All you have is the ambient light and your speedlight. With an understanding of exposure and flash techniques you can learn to successfully balance ambient and flash exposures to create exceptional photographs. Ones that look natural, without the harsh appearance of flash, and without detracting from the ambient light.

For the most part, your camera’s meter and exposure evaluation will be just fine when you are capturing images in even light situations.  However, the onboard system will usually fail when you are trying to properly expose a subject in a dimly lit room.  In these situations, you must be in a position to balance the ambient light that is in the room ,and the light from the flash that will light your subject.  The same concept applies to photographing subjects in low light situations outdoors.

The camera’s metering system is not capable of evaluating the two light sources and establish the correct exposure for the scene, or in other words, balancing flash and ambient light.  The camera’s meter when set to evaluative (Canon) , matrix (Nikon), centre-weighted, or spot metering works great for a balanced scene, but not when the exposure of the environment is vastly different than the exposure of the flash lit subject.

Two examples of how in-camera metering systems fail

Choose a camera capable of using a hot shoe or off-camera flash to follow along.  The pop-up flash is not suitable for this exercise. Keep the aperture value at f/4 and the ISO at 400 for each scenario.

In the first image, below, the flash is set to ETTL (electronic through the lens meter system).  The camera is set on aperture priority and evaluative metering mode.

Notice that the subject is reasonably well lit but the background is under exposed.

Notice that the subject is reasonably well lit but the background is under exposed

For this next example, set the meter to the spot metering mode and take the reading for the background. All other settings remain the same and the flash is still on ETTL. Notice the overall image is now underexposed.  The metering system is unable to properly evaluate the scene and the primary subject. (image below)

flash-photography-lighting-metering-02b

For the third image in the sequence turned off your flash, and set your camera evaluative/matrix metering.  The idea is to try and get the best exposure for the background. Make note of your shutter speed and exposure settings.

Shutter speed 1/13th second and the background is reasonably well exposed, though not perfect

Shutter speed 1/13th second and the background is reasonably well exposed, though not perfect

Using a hand-held incident light meter to solve the problem

Good hand-held meters have multiple modes: a spot metering mode which is a reflective reading (usually 2 degrees or less), an incident mode using the meter’s light dome, and one or more flash modes.  It is imperative you learn the proper use of these modes in order to be successful at flash photography.

You want all your images to be good, not the occasional 1%.  You need to stop struggling and juggling settings to produce the image you want.  Experiments are good only if you know what you are doing and what your tools are.  Realize that there are infinite ways to light your subject with strobes, as there are infinite scenarios that your subject can be in. So learn how to expose correctly, learn how to balance ambient light and flash, but most of all, learn how to read light.

Set up the ambient exposure first

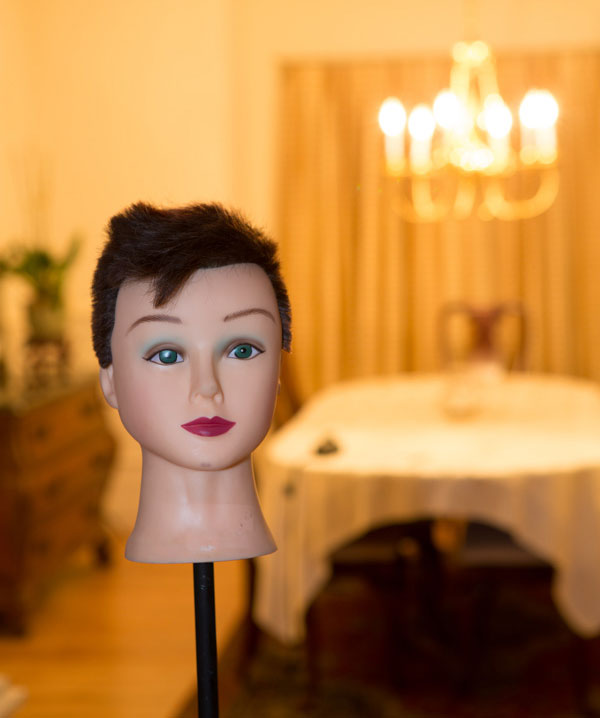
Let’s go back to the scene as we had above.  Set your camera to manual exposure mode. As before, keep your aperture at f/4. Next, to properly expose the room you measure the ambient light using the spot meter function of the hand held meter pointed at an area that is mid tone (approximately the same as medium grey) in the scene.  In this test case the meter indicated 1/10 sec at f/4.  Set your camera to these settings. Take a test shot to ensure your exposure is correct for the ambient light. See below:

Test exposure using ambient light only

Test exposure using ambient light only

Next set the flash exposure for the primary subject

You can experiment with off-camera flash if you do not have remote triggering capability, using an off-camera remote flash cord (for Canon, or Nikon). On-camera hot shoe flash use is not recommended as it produces harsh, flat lighting. But in order to simplify this exercise, you can use the hot shoe flash mounted on you camera.  It will be just slightly off center when you have your camera oriented in portrait mode.

To read the flash exposure, set the hand held meter to “incident” mode, and the exposure on the “flash non-cord” setting (do not use the corded or triggered setting). This will read the light falling on the subject when the flash is fired.  If you are using a remote trigger, then the next step is easy.  If not, then have someone assist you for the next reading.  Position the meter such that the dome points to the camera and fire the flash.  At full power, in this test case, the reading was f/19.  See the image below:

How to point your meter and measure the flash

How to point your meter and measure the flash, this is obviously too much power

An f/19 reading indicates overexposure, as your camera is set at f/4 for the depth of field you want. To resolve this, you need to dial down the output of the flash by five stops (f4 > f5.6 > f8 > f11 > f16 > f19>.  Set the flash to 1/32 power which is five stops below full power. It is always good to take another test reading and adjust the distance of the flash to subject to compensate for a half stop variance (to f/19).  Now you should get a reading of f/4 and you are ready to shoot.

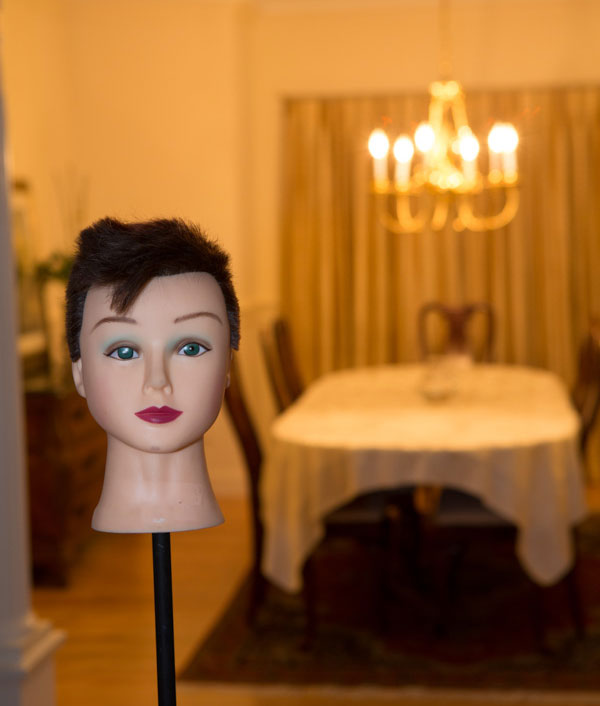
Flash and ambient balanced successfully

Flash and ambient balanced successfully. The exposure on the subject is perfect and the room is properly exposed too.

Adjust shutter speed to feature the subject more

Basically, the settings on camera indicate equal exposure and you can see that both the subject and the room are exposed correctly at an aperture of f/4.  This is good. But, if you want to emphasize the subject more, you want to underexpose the room. With the way you have your exposure already set up, this is really easy. All you need to do is increase the shutter speed by a stop, two stops, or more. This under exposes all the areas lit by the ambient light but the exposure on the subject remains the same and is always correctly exposed.

Ambient underexposed by one stop by changing the shutter speed to

Ambient underexposed by one stop by changing the shutter speed to 1/20th of a second

Ambient underexposed by two stops by changing the shutter speed to 1/40th of a second

Ambient underexposed by two stops by changing the shutter speed to 1/40th of a second

The reason for this is that the meter reading for the background is based on the ambient light. The subject however, is lit using the flash, an instantaneous light source. Your flash exposure is controlled by its power output, increasing or decreasing the flash’s distance from the subject and by the aperture setting on your camera. Typically, flash exposure is not affected by shutter speeds as long as your camera’s shutter speed is set to the flash sync speed or slower. As a result, changing the shutter speed affects the ambient light exposure (the exposure of the room) without affecting the flash exposure (the exposure of the subject).

Summary and action plan

In conclusion, relying on your camera’s metering system, be it evaluative, spot or centre-weighted, never gives you the kind of exposure control that you can achieve when using a good hand-held incident light meter.

If you have additional tips or tricks please share them in the comments below, and if you haven’t tried your flash off the camera yet why not give it a go!? Grab yourself a light meter and try it!


shiv-smShiv Verma, is a photographer, educator and technologist and lives in Wrentham Massachusetts. He is an avid wildlife and commercial photographer and conducts photo workshops and tours worldwide. You can check out more of his work on his website at: www.shivverma.com. Follow him on:  Google+, Facebook  and Twitter  

Post originally from: Digital Photography Tips.

Check out our more Photography Tips at Photography Tips for Beginners, Portrait Photography Tips and Wedding Photography Tips.

Balancing Flash and Ambient Light Using an Incident Light Meter

The post Balancing Flash and Ambient Light Using an Incident Light Meter by Guest Contributor appeared first on Digital Photography School.


Digital Photography School

 
Comments Off on Balancing Flash and Ambient Light Using an Incident Light Meter

Posted in Photography


Dragging The Shutter: Balancing Fill Flash With Ambient Light

17 Feb
Wedding receptions are notoriously dimly lit places that make use of a flash a must. In this shot, I wanted to balance the ambient light from the stage with my flash to create more depth to the image. EOS-1D X, EF 24-70 f/2.8L II. 600EX-RT Speedlite. 1/60, f/2.8, ISO 800.

Wedding receptions are notoriously dimly lit places that make use of a flash a must. In this shot, I wanted to balance the ambient light from the stage with my flash to create more depth to the image. EOS-1D X, EF 24-70 f/2.8L II. 600EX-RT Speedlite. 1/60, f/2.8, ISO 800. Photo by Rick Berk/kNot Photography

Shooting indoors with a flash can challenge the best of photographers. Many times, the goal is simply to create enough light to illuminate your subject, and background be damned.  The results, however, tend to be less than pleasing when we allow the flash to be the only light source.  Assuming there is some ambient light in the room, adjusting the settings in your camera can help allow that ambient light into your exposure and create more depth in your image.

Most cameras typically sync with a flash at around 1/200 or 1/250 of a second.  While this speed is fine for the flash alone, it is generally too fast a shutter speed to allow ambient light to factor into the exposure. This creates images with a brightly lit subject and a very dark background.  To allow more ambient light in, you’ll want to slow your shutter down.  Putting the camera into Manual mode will allow you to adjust your shutter speed to do this.  You can then also open your aperture as wide as it can go to allow as much light as possible into the scene.  This technique is typically known as “dragging the shutter”.

The problem with dragging the shutter is that if the shutter speed is too slow, any movement can cause a ghost image, ruining the shot.  So you’ll need to keep the shutter speed fast enough to avoid that.  This may not allow enough ambient light in, so you have one last option to allow more light in.  Adjusting the ISO.  By raising the ISO speed, you make the camera’s imaging sensor more sensitive to light, allowing that ambient light to show in the image.

For the image above, the stage lighting for the band created a nice background light, but my flash was too powerful and my shutter speed too fast at the maximum sync speed of 1/250. By slowing down the shutter speed to 1/60, I gained two stops of light sensitivity.  I also raised the ISO to 800 to allow the sensor to be even more sensitive.  This allowed the flash to illuminate the bride and groom, and the stage lighting to show brightly in the background.

Another way to do this is to change the shooting mode on your camera. For most cameras, shooting in Program or Automatic means the camera will treat the flash as the only light source, and disregard the ambient light for exposure. However, if you change the mode on your camera to Aperture Priority, the camera then sets the exposure based on the ambient lighting, and flash is simply treated as fill.  The one caveat with this is that the camera could choose a shutter speed that is too slow to safely hand-hold, creating ghosting or blur in your image.  You’ll want to keep an eye on the shutter speed, and if necessary, raise the ISO to give you a faster shutter speed.  Many cameras also have a setting, allowing you set a minimum shutter speed when using flash in Aperture Priority mode to help avoid ghosting.

Post originally from: Digital Photography Tips.

Check out our more Photography Tips at Photography Tips for Beginners, Portrait Photography Tips and Wedding Photography Tips.

Dragging The Shutter: Balancing Fill Flash With Ambient Light


Digital Photography School

 
Comments Off on Dragging The Shutter: Balancing Fill Flash With Ambient Light

Posted in Photography