RSS
 

Posts Tagged ‘Alien’

Alien Skin Software is changing its name to Exposure Software

31 Aug

Plug-in and stand-alone imaging application manufacturer Alien Skin Software has announces it’s changing its name to Exposure Software. The company, which started life in 1993 and is well known for its Eye Candy and Exposure Photoshop plug-ins, will switch its name to align itself more closely with its flagship Exposure X package. It says that with the release of Exposure X5 the transition will be complete.

Writing on the company blog CEO Finley Lee says the Exposure X5 plug-in ‘will be a big stride forward in creativity and efficiency.’ The new company name expresses our complete focus on serving creative photographers.’ The current version of the plug-in is Exposure X4.5, which retails from $ 119. For more information see the Exposure Software website.

Articles: Digital Photography Review (dpreview.com)

 
Comments Off on Alien Skin Software is changing its name to Exposure Software

Posted in Uncategorized


Alien Skin Software changes its name to Exposure Software

30 Aug

Plug-in and stand-alone imaging application manufacturer Alien Skin Software has announces it’s changing its name to Exposure Software. The company, which started life in 1993 and is well known for its Eye Candy and Exposure Photoshop plug-ins, will switch its name to align itself more closely with its flagship Exposure X package. It says that with the release of Exposure X5 the transition will be complete.

Writing on the company blog CEO Finley Lee says the Exposure X5 plug-in ‘will be a big stride forward in creativity and efficiency.’ The new company name expresses our complete focus on serving creative photographers.’ The current version of the plug-in is Exposure X4.5, which retails from $ 119. For more information see the Exposure Software website.

CEO’s blog post

I’m pleased to announce that we are changing our company name to Exposure Software! We made Exposure in 2006 to help photographers develop beautiful images. Our upcoming release of Exposure X5 will be a big stride forward in creativity and efficiency. The new company name expresses our complete focus on serving creative photographers.

You’ll see some changes immediately. Our website has a new logo and url – https://exposure.software. We’ll be updating our social media channels with our new name over the next few weeks. When Exposure X5 is released this fall, the transition will be complete.

One thing that won’t change is our commitment to amazing service. We’ll continue to offer the best customer support in the software industry, and to deliver tools that are fun, reliable, and inspire creativity!

I’d like to offer a special thanks to everyone who has used our products over the years. We couldn’t have done it without you, and we hope to keep serving you for many years to come.

Finley Lee

Articles: Digital Photography Review (dpreview.com)

 
Comments Off on Alien Skin Software changes its name to Exposure Software

Posted in Uncategorized


Alien Skin Exposure X4 software review

24 Jun

Alien Skin Exposure X4
$ 119 | alienskin.com/exposure

A screenshot of Exposure X4.

When I reviewed Alien Skin Exposure X3, I noted several features that make it unique among other photo editing and organizing applications, such as its extensive library of professional presets, a quad-layout interface option for reviewing multiple similar shots at once, and a novel way of storing nondestructive edits on disk.

The changes in this release address some prior rough edges, add features and refine the experience of processing your photos

Although the new Exposure X4 version 4.5 feels more evolutionary than its version number would suggest, that’s not a criticism. The changes in this release address some prior rough edges, add features that are now expected for this class of software, and in general refine the experience of processing your photos without feeling like the software is getting in the way.

Performance and Fixes

In Exposure X3, I was surprised by laggy performance when editing photos, specifically working with the Raw files from my FujiFilm X-T1 and its 16.3MP X-Trans sensor. Using the brush to paint adjustments was like watching a movie with dialogue out of sync: I’d paint an area, wait for the software to apply the effect, paint another area, wait, and so on. The problem wasn’t as pronounced with Canon or Nikon Raw files, though it did show up to a lesser degree on large Sony Raw files.

The improvement between that experience and Exposure X4 is noticeable: the lag is gone

The improvement between that experience and Exposure X4 is noticeable, even with larger Raw files from today’s cameras, including the 26MP FujiFilm X-T3. I’m using the same computer (a 2016 MacBook Pro with 16GB of RAM and the Radeon Pro 460 graphics processor with 4GB memory), and, happily, the lag is gone.

There’s still a pause when opening Raw files or switching zoom levels, as Exposure X4 loads the image data, but even that seems improved with this version. I see the once-ubiquitous “Rendering” badge less often now.

The Shadows control, which was oddly heavy-handed in the previous release, now behaves as you would expect, manipulating just the tones in shadow areas instead of lightening or darkening the entire image.

Unedited (aside from simple Black & White conversation) version at left; shadows adjustment at right.

New Organizing Features

When importing photos from a memory card or camera, Exposure X4 now includes image thumbnails so you can choose which photos to copy – a seemingly essential feature that was missing in previous versions. That fills out the Copy Photos from Card dialog, which also allows you to select multiple cards or directories at the same time, make backups to a separate location during import, and assign metadata to the images.

Preview and select which photos to import.

The new Smart Collections feature displays photos based on criteria you set, such as revealing all photos captured with a 50mm lens rated three stars or higher. As you add photos to your library that match those specifications, they’re automatically added to the smart collection.

The feature does have one limitation I’d like to see fixed. When defining capture time as a criterion, you can enter only specific dates. So, for example, you can define a smart collection that shows all flagged photos captured between May 1 and May 31, but you cannot specify a less-specific range such as “the last 30 days” or “one year ago today.”

The only flaw in smart collections is that date ranges must be defined as specific dates, not general ranges such as “the previous month.”

Exposure X4 populates its library by reading folders on disk, as opposed to some applications that move images to a central library, which means it’s always on the lookout for file changes. (Lightroom, by contrast, requires any file management be done within the app, or else it loses track of where photos are stored.) Exposure X4 is quick about updating folders when new images are added to them.

Exposure X4 populates its library by reading folders on disk, as opposed to some applications that move images to a central library

That’s the basis for a new Monitor feature for tethering purposes. Although Exposure X4 doesn’t include a direct camera tethering option, if you have software running that can shuttle image files directly from the camera to a folder on disk, the response is fast enough that photos appear in the library almost instantly. When you instruct the application to monitor a folder, it adds the ability to assign metadata and rename files as they’re ingested.

Monitoring a folder lets you assign metadata and rename files as they arrive via a tethered connection.

I also discovered, by accident, that Exposure X4 does a good job of keeping edits and metadata together with original files if the images are moved on disk. To recap the program’s method of handling this information: edits and metadata are stored in special sidecar files, nested in folders in the same directory as the photos. When I moved some images to a different folder in the Finder on my Mac, Exposure X4 automatically moved the associated sidecar files to the new location.

New Editing Features

The editing improvements bring Exposure X4 in line with modern photo editors. You can apply color lookup tables (LUTs) to affect how colors are translated and to apply distinct looks. The advantage of a LUT, compared to a preset, is that LUTs don’t affect any other editing controls; once a LUT is applied, you can then build adjustments on top. The application includes nearly a dozen sample LUTs, with the ability to import more.

Get different looks by applying LUTs.

Exposure X4’s Overlays panel now includes light effects to superimpose colors, simulated light leaks, sun rays, and others. Now some of those effects can be freely moved, scaled, and rotated. With controls for zoom, opacity, and blend mode, you can make an effect as dramatic or as subtle as you wish.

This is a before/after view of applying an editable light effect.

There’s also a Transform panel that includes controls for stretching, scaling, and rotating the image.

If you still have years of Adobe muscle memory, you’ll quickly realize that Exposure X4 doesn’t share any keyboard shortcuts: pressing G reduces highlights by –5 instead of switching to the Grid view, for example. But now you can remap every shortcut in the preferences if you want to, or just see which keys perform which actions.

The editing improvements bring Exposure X4 in line with modern photo editor

Speaking of Adobe, Alien Skin added a Lightroom migration tool to Exposure X4, but be aware that Lightroom’s adjustments don’t carry over as editable settings. Instead, there’s an option to save edited photos as new files, which you can use as reference if you need to re-edit the original in Exposure. Still, metadata, color labels, and ratings all transfer. That’s not an ideal situation, but one can safely assume that the bulk of your editing going forward will be on new images, not ones in the library.

Odds and Ends

Review similar shots in quad-layout mode.

Some of my favorite features aren’t new, such as the ability for collaborators to edit the same image by storing it (and its associated sidecar file) on a shared local volume or cloud drive, as long as only one person is editing at a time to prevent conflicts. Also helpful are export presets for generating photos formatted for social networks; Exposure X4 now also includes print presets.

One item on my feature wishlist remains unchanged: Raw+JPEG pairs are still treated as separate images. I’ve softened my stance on this over time, as there are situations when you may specifically want a JPEG adjusted in-camera (such as shooting in a black and white simulation) while keeping the original Raw file. However, I’d still like to see options for handling Raw+JPEG pairs get a bit smarter, such as having an option to import only raw files, or to view them as a single shot with the ability to choose which version you wish to edit.

You can remap every shortcut in the preferences if you still have years of Adobe muscle memory

I also ran into a weird problem that ate up several hours of diagnosis. Sometimes, the Folders panel—and therefore, my library—would not appear when I launched Exposure X4. It turns out to be part of a feature, but one which looks like a bug. When the application is opened as a plug-in from within another program, such as Lightroom Classic, the Folders panel and the Crop tool are disabled, because the expectation is that you’re only editing. Opening Exposure from a third-party launch utility, in my case LaunchBar, makes the application think it’s being opened as a plug-in. This situation isn’t triggered when opening Exposure X4 using the macOS Spotlight shortcut (Command-space).

Conclusion

Exposure X4 is a solid update that shores up some areas that needed attention and builds on a photo editor that already stands apart in interesting ways. And most important, Alien Skin improved the performance in areas that make a difference.

Exposure X4 is available as a single purchase, not a subscription

I can’t wrap up this review without noting that Exposure X4 is available as a single purchase, not a subscription, which I think is still a motivating factor among many photographers. It costs $ 119 for Exposure X4 itself, or is available as a bundle for $ 149 that includes a couple of other Alien Skin utilities. Upgrade pricing for earlier versions of Exposure is also available, and you can try the software for free during a 30-day trial. It runs on Mac OS X Yosemite or newer and Windows 7 64-bit or newer.

What we like:

  • Improved performance, specifically with Raw files
  • Review photo thumbnails during import from memory cards
  • Import from multiple cards simultaneously
  • Improved shadow and highlight recovery
  • Smart collections
  • Monitored folders improve tethering options
  • LUT support

What we don’t:

  • Raw+JPEG pairs still treated as separate images
  • App confusion when opening it from a launcher utility

Who’s it for:

Photographers who want sophisticated editing and organization without a subscription or a central-library structure.

Articles: Digital Photography Review (dpreview.com)

 
Comments Off on Alien Skin Exposure X4 software review

Posted in Uncategorized


Review: Alien Skin Exposure X4 Software

24 Feb

The post Review: Alien Skin Exposure X4 Software appeared first on Digital Photography School. It was authored by Peter West Carey.

Alien Skin Exposure X4 is a photo editor providing direct competition to Adobe Lightroom, but with a few extra tricks up its sleeve. While it is a cataloging software, it doesn’t require a catalog like Lightroom. There is no importing to be done. It has a host of features and over 500 presets to help get you started with edits.

Who is it for?

Exposure X4 is aimed at a wide variety of users. From novices just getting started who want a little help via presets, to advanced photographers possibly tired of the subscription model Adobe keeps pushing for its programs.

As a professional myself, I don’t find any show-stopping limits within the program as I’ve seen from Lightroom competitors in the past. You’ll notice the word “robust” used a number of times in this article and I don’t use it without warrant. It’s a very serious competitor to Lightroom.

Highlighted Features

No catalog

At its core, Exposure X4 is built to edit photos quickly, dynamically and then to help you get the finished product out to the world, be it in print or online. Exposure X4 uses non-destructive edits, much like Lightroom, and does this without a catalog. Instead, Exposure X4 drops another folder inside of any folder you are editing as in the screenshot below.

Some may like this system because without a catalog there is no catalog to corrupt. While not a widespread problem in Lightroom, it can happen if you don’t close the program properly or if your computer crashes. Uniquely, it also allows for a limited amount of shared editing.

As the program only looks to individual edit information files (those ending in .exposurex4 in the screenshot above), it is conceivable to run the program on two computers sharing the same files, such as with a Network Attached Storage or other file sharing services (Dropbox, iCloud, OneDrive, etc…). There’s also no need to pack up or export a catalog before moving files as the folder with edits will travel with the master folder.

File copy from cards

Instead of importing files, Exposure X4 uses a simple copy and bookmark feature to handle raw images.

The copy feature lets you copy from a card, or from a hard drive or network resource if you want to move files. This is a separate process than simply bookmarking an existing folder to bring its contents into Exposure X4.

The copy feature is pretty robust, with the ability to change file names, make backup copies, add metadata, including keywords and copyright. It can also apply presets (from the over 500 included or ones you create yourself).

The file naming convention is also robust with all kinds of variables you would expect. Below is an example of all the date related options you have.

As a long time Lightroom user, I was happy with the selections included.

Bookmarks instead of Imports

Lightroom requires you to run an import function to bring any images you want to edit into its catalog. Exposure X4 accomplishes this, in my opinion, in a more elegant way.

Simply click the plus sign on the Folders pane and select which folder you want including in the program.

The program also has the ability to monitor folders, so when new images show up (if you are importing with another program, for instance, or shooting tethered) the program will automatically bring those images in.

Layers

For those familiar with Photoshop, the Layers technique of editing will see standard practice. Using features like Brushes (for masks) and gradients will create a new layer for each desired effect.

In this case, I added some clarity to the mountains and a slight gradient. The array of presets is decent and you can modify any mask/edit to your liking.

Each layer can be turned on or off, which is very helpful when you want to see what effect each has without having to step back through the History.

Lastly, as you would expect, layers can be copied, named and deleted.

All the other edits

Exposure X4 has a vast array of editing options as you can see from this collapsed panel below.

While featuring every single item is beyond the scope of this review, I will mention the IR (infrared) and Focus.

For instance, take this shot of photographers in front of Cho Oyu, the 6th highest mountain in the world, shot from the Nepal side.

With a quick swipe of the adjustment brush on a new layer mask then a few slider moves as such:

Bingo! We have selective focus.


Further editing needs to be done, but this is a nice start to helping the photographers stand out.

Presets galore

If you love presets, you’re going to love what Exposure X4 packs into its programming. Here’s a quick screenshot of the categories:

If you want to see what is behind each of those headings, take a look at their website.

One downside I can see is there aren’t many third parties making presets for this program, at least not that I was able to find.

However, you are able to create your own with no limits.

Lightroom Migration Tool

Now the crux of it!

When you install Exposure X4 on a computer with Lightroom, it will add a Migration Tool as an add-on within Lightroom.

So what does it do?

It’s fairly basic and, for the most part, tells Exposure X4 where to find all your files from the Lightroom catalog as well as bring over keywords and collections.

Does it work?

Yes and no. You need to know what to expect.

First off, it’s not going to bring over the entire history for a photo with all your edits just as they are in Lightroom.

You have two options: 1) Simply point Exposure X4 to the RAW file and then start from scratch or 2) Export each file that you have edited as either a JPG, TIFF or PSD file.

The second option works well when I had it create new PSD files. Keywords, star ratings, color coding, and all the metadata came right along into Exposure X4. The one annoying thing is it renames each file and appends it with “_migrated.psd”. This can easily be cleaned up with Exposure X4’s renaming feature.

Here’s an example of a small catalog brought into Exposure X4.

More info on the tool can be found on their site.

Show me more

There really is way too much to talk about in this one post. Luckily they have a great Features page that lists the plethora of features you may be looking for.

What Could Use Work

I found a few issues with the program while testing it. I left out the items I would describe as “That’s not the same as Lightroom!” where I blurted out that phrase because it’s not exactly the same.

No preview on import

I admit that import is the wrong name for it. Mentioned above, I’m talking about the “Copy From Card” feature to move items from a card to a local hard drive and also include them in Exposure X4.

When running this feature, there’s no ability to preview the images. This also means there is no ability to choose individual images when copying from a card.

Hopefully, this will be addressed in a future version. But I can see why they left it this way; because Exposure X4 is supposed to look at all images in a folder. If you don’t want to see them, they shouldn’t be there! It does cut down on the need to synchronize things as Lightroom can.

Not all profiles are present

The camera profile for my drone, a Mavic 2 Pro, was not included. At least that’s what I thought.

While it did have the profile for the Mavic Pro, it was not automatically recognized and applied in the Lens Correction pane. This may be a temporary thing, but the Mavic 2 Pro has been out since last summer.

Two finger rotation

This will seems like a little thing, but it really annoyed me. Rotating images is accomplished by holding down Command/Ctrl and the left and right arrow keys. Using the arrow keys make sense, because they point the way of rotation, but I want it quick and easy, not with the added Command key.

I know, it’s a little thing.

Lack of Add-Ons and Plug-Ins

Because it is not Adobe, Alien Skins doesn’t have a huge pile of developers pumping out plug-ins and add-ons for Exposure X4. It tries to make up for this fact by offering a robust program from the start, but I use the Lightroom tethering abilities often and not having that feature in Exposure X4 is hampering.

Conclusion

Alien Skin Exposure X4 can do almost all of what Lightroom can do. It’s worthy competition that deserves a close look if you are getting fed up with Lightroom and Adobe’s current path.

It offers a number of creative features you won’t find in Lightroom, like the adding sun streaks or other lighting effects to your photos.

It’s a fun and different approach than Lightroom. It can export to Photoshop and has a decent migration tool if you are already using Lightroom.

It’s not compatible with Lightroom, though. Using both programs on the same images will not work, so you need to choose one or the other. In my mind, it’s worth giving it a try and really diving into the keyboard shortcuts (“-” is used to reject a photo and “+” is used to flag it, while either shortcut can be used to toggle off the flag. No more trying to find “U” (to unmark!) to see if it is the right program for you.

Have you used this software? What are your thoughts?

The post Review: Alien Skin Exposure X4 Software appeared first on Digital Photography School. It was authored by Peter West Carey.


Digital Photography School

 
Comments Off on Review: Alien Skin Exposure X4 Software

Posted in Photography


Alien Skin offers Exposure X3 update

20 Mar

Alien Skin has released a significant update for its Exposure X3 image editor, adding greater precision to adjustment tools and more printing capabilities, among other improvements.

Called the Exposure X3 Complete Workflow Update, this software version introduces hue, luminance and saturation controls for individual colors. New white balance presets and adjustment in Kelvin values is now available, and workflow when copying images from a card to a collection has been improved. Along with new watermark adjustment options and added keyword functions, the update expands camera support and adds pre-sets to match Fujifilm’s film simulation modes.

Exposure X3 Complete Workflow Update is available now; current owners of Exposure X3 can download the update for free. Exposure X2 and earlier customers can upgrade for $ 99, while new customers will pay $ 149.

We’ve been given an early look at the update – take a look at our Exposure X3 review.

Alien Skin Software Announces Exposure X3 Complete Workflow Update for Photographers

Update for Exposure X3 includes hue and luminance color controls – Kelvin-based temperature and tint controls – printing – enhanced watermarks, keywords, and side-by-side view – expanded camera support

Raleigh, NC (March 20, 2018) – Alien Skin Software today announced the release of the Exposure X3 Complete Workflow Update, the latest version of their non-destructive RAW photo editor. The award-winning Exposure combines powerful organizational tools and accurate photo processing into a single intuitive solution. Enhancements to this latest version make Exposure the ideal solution for handling the full photography workflow.

Photographers can easily organize, edit, retouch, export, and print their photos using Exposure’s efficient workflow. Exposure’s intuitive design streamlines image management and backups. Its support of cloud-based storage enables multi-computer and collaborative workflows.

The Exposure X3 Complete Workflow Update introduces numerous creative and organizing enhancements.

“This latest update to Exposure X3 provides photographers with additional creative and organizational control, and handles their printing needs as well,” said Alien Skin CEO Finley Lee. “Exposure’s speed, stability, and power makes it the fastest way for photographers to bring their vision to life.”

Improvements to the color controls enable photographers to adjust hue, luminance, and saturation for specific colors. In addition, users can can easily target specific colors in their image for detailed adjustments.

For RAW images that record white balance data, photographers can now specify precise Kelvin values to correct for lighting conditions and unwanted color casts. New white balance presets provide a quick way to set the Kelvin temperature for a specific type of light.

Photographers can now print their photos directly from Exposure. New print capabilities include numerous preview and margin options, output sharpening, integrated watermarks, grid capability for printing contact sheets, and more.

Collections see several refinements. New images copied from a photo card are now placed in a Last Copy From Card collection. Optionally, when copying images from their camera card, photographers can choose to add images to any existing collections. Also, when creating a collection, it’s possible to add any images that are currently selected.

Keywords have been improved with the ability to remove all keywords from a photo and to add and remove keywords from a set. It’s also now possible to import keyword sets from other applications like Lightroom.

Exposure’s watermarks now have new metadata options, a watermark preview in the Export dialog, and improved control when moving and rotating a watermark.

A number of miscellaneous improvements include expanded camera support, the ability to backup photos to a second location when copying images from a card, a six image side-by-side layout, a new uninstaller, 15 new presets that mimic Fujifilm in-camera film simulations, and more.

About Exposure

Exposure is a RAW photo editor that provides photographers with all the tools they need to complete their workflow: from first copying images to their computer, culling and organizing, creative edits and retouching, and finally exporting and printing.

Exposure’s beating heart is its advanced rendering engine, which handles the demanding task of accurate film emulation and provides exceptional processing quality and performance. Exposure handles the most sophisticated edits. Its extensive library of customizable presets makes hundreds of iconic film looks and other styles available to photographers. Extensive editing, layering, and retouching tools make it easy to refine images, as well as to blend subtle or bold creative looks.

Powerful organizing tools enable photographers to manage even the largest photo collections.

All of Exposure’s tools work together in a carefully designed, customizable user interface, resulting in a seamless workflow for a wide range of photographers.

Exposure also works as a creative editing plug-in with other editors, such as Adobe Photoshop and Lightroom.

Pricing and Availability

The Exposure X3 Complete Workflow Update is available now from www.alienskin.com for $ 149. The update is free for current owners of Exposure X3. Upgrade pricing is available to owners of Exposure X2 and earlier versions for $ 99.

The Exposure X3 Complete Workflow Update is also the centerpiece in the Exposure X3 Bundle. This integrated collection bundles Exposure with Alien Skin’s award-winning Blow Up and Snap Art tools to add high-quality upsizing and natural media special effects. It is available for $ 199. Owners of one or more of the current apps in the Exposure X3 Bundle can purchase for $ 119. It is free for current owners of the Exposure X3 Bundle.

A 30-day fully-featured free trial of Exposure is available. Visit www.alienskin.com/exposure to learn more and download the trial.

Host Requirements

The Exposure X3 Complete Workflow Update may be used as a standalone program or as a set of plug-ins. When used as a set of plug-ins, it requires one of the following host applications:

  • Adobe Photoshop CS6 or Adobe Photoshop CC 2015 or newer
  • Adobe Lightroom 6 or Adobe Lightroom CC 2015 or newer

System Requirements

  • Apple Mac: OS X 10.10 Yosemite or newer
  • Microsoft Windows: Windows 7 64-bit or newer
  • An Intel Core 2 processor or compatible
  • A monitor with 1280 × 768 resolution or greater

Articles: Digital Photography Review (dpreview.com)

 
Comments Off on Alien Skin offers Exposure X3 update

Posted in Uncategorized


Alien Skin Exposure X3 review

20 Mar

Alien Skin Exposure X3 3.5
$ 149 | www.alienskin.com/exposure/ | Buy Now

This review is based on use of Exposure X3 and a beta version of Exposure X3 Complete Workflow Update for Mac.

Introduction

We’ve reached the point with image editing software that most basic features are covered. Correcting for exposure, saturation, and other settings are the expected baseline, which means applications need something more to differentiate themselves.

Some, like Skylum’s Luminar or Serif’s Affinity Photo (see Review: Affinity Photo 1.5.2 for desktop), are competing on price, along with the fact that they don’t require subscription plans.

Add to the mix Alien Skin Software’s Exposure X3. It’s competitive on price—$ 149 on its own, or $ 199 for a bundle that includes a couple of the company’s utilities, with no subscription—but it also includes several unique features that demonstrate the company is willing to tailor the software experience to how its customers use the product.

Differentiation in organizing

Like Adobe’s Lightroom family of products, Exposure X3 is both an image editor and an organizer for managing your photo library. You can preview thumbnails, rate and flag photos, assign keywords, and fill in basic IPTC metadata such as Title, Caption, Copyright, and contact information.

People who capture many images at a time and need fast turnaround will appreciate Exposure X3’s ability to import from multiple connected memory cards at once. You can rename files at import, specify custom destinations (and create presets for folder structures), and apply keywords and metadata during the ingest process. What it doesn’t do, surprisingly, is let you preview thumbnails of what’s coming in to cull shots before they’re copied to disk. It also doesn’t let you specify how to treat Raw + JPEG image pairs; you get both shots as separate images.

Import photos from multiple sources in the same batch.

Reviewing photos is aided by Exposure X3’s Quad and Six layout views, especially when you have several photos from the same capture burst where the subject is similar in each one. Four or six adjacent images in your library are displayed in a grid so you can compare differences between them, such as the expression on a person’s face. (There are also options to compare two or three images at a time.) If one stands out, you can pin it to the screen and compare it to others. The views are synchronized, so zooming in on one zooms them all at the same location in the image.

Compare four similar images at a time in the Quad view.

An important distinction about Exposure X3’s asset management features is that they’re directory-based, not catalog based. Applications such as Lightroom and Apple’s Photos keep track of where your photos are located on disk—sometimes all within the same library file or folder, set up by the software—and store metadata and edits about the images in a central catalog.

The advantage to this approach is that, as long as you continue to use that application to manage everything, all that data is more easily accessed by the software. You don’t need to worry about managing files, because the application does it for you. On the other hand, it means the metadata and edits don’t live with the image files. If you move an original Raw file on disk to a new location, for example, any edits you made would not go along with it. And in the case of Lightroom, moving the file in the Finder or Windows Explorer confuses Lightroom because it’s lost track of the image.

Exposure X3 doesn’t use standard XMP files, as many applications do

Exposure X3 takes a different tack. It reads images from the folders in which they’re stored, and writes edits to a separate sidecar file that lives in the same directory as the image file. When you view a photo in Exposure X3, the software also reads the information in the sidecar file and displays the edits noted there.

However, Exposure X3 doesn’t use standard XMP files, as many applications do. Within every directory of images, it creates a folder hierarchy, “Alien Skin > Exposure X3,” that contains metadata files ending in “.exposurex3” created for every image you edit. Those files use the same structure as XMP files, but can also include editing instructions that only Exposure X3 understands.

Some directory viewing software is just a visual way to traverse the folders on your disk, but Exposure X3 does use some centralized know-how to help you organize photos. The Collections feature lets you create virtual albums to group related photos that may exist in separate directories, such as shots from a single client captured over several photo shoots. Adding photos to a collection doesn’t move the files on disk.

Differentiation in editing

Before Alien Skin released Exposure as a stand-alone application, it was known for its presets that simulated the looks of film stocks and other effects. Those are all there in Exposure X3, and the results are quite good.

Exposure X3’s many presets simulate the looks of old photo processes, favorite film stocks, and more.

Want to preview how a preset will look before you apply it? Mousing over the preset thumbnails reveals the effect on your image, but you can also “audition” up to four presets at a time by selecting an image and dragging the presets you want to open slots.

Compare presets to the same image before applying your pick.

In addition to the basic editing adjustments (tone, color, and so forth), Exposure X3 also includes controls for controlling grain and creating vignettes that introduce variation such as distortion and lump size for more organic results. An IR panel introduces the soft hazy signature look of infrared photos with sliders to control color contrast and the degree of halation (light spread). A Bokeh panel includes a multitude of controls for adding selective focus. Exposure X3.5 brings the Color tools into the present with the addition of granular Hue, Saturation, and Luminance controls, as well as white balance controls listed in Kelvin units and with camera Raw presets.

One feature I stumbled upon is the software’s batch editing feature, which resulted in me accidentally making the same adjustments to several shots at once. Instead of making edits to one photo and then copying them to other images, you simply select all the images you want to change in the grid view or the filmstrip at the bottom of the screen. As you make edits to one, the adjustments are applied to all of the others.

When you make any adjustment, as with Lightroom, the effect is applied to the entire image. Unlike Lightroom, Exposure X3 supports multiple layers, enabling you to isolate adjustments on their own layers. In fact, local adjustments such as brush strokes or radial or linear gradients automatically appear as new layers. Each layer has an automatic mask that hides the adjustments until you expose them with the brush or gradient tools.

If your images are stored in a shared location, such as a Dropbox folder, someone else running Exposure X3 can view the photos

The Portrait Touch Up preset demonstrates this: when you apply it, Exposure X3 creates three layers designed to whiten teeth, smooth skin, and enhance a subject’s iris. Paint over the affected areas to reveal the effects. You can’t apply blend modes between layers, as some applications allow, but you can choose an opacity level for each layer.

Remember earlier when I mentioned that Exposure X3 stores metadata in its own sidecar files? All of the editing information is also stored in the same place, creating an interesting collaborative possibility. If your images are stored in a shared location, such as a Dropbox folder, someone else running Exposure X3 can view the photos. The adjustment data exists in the text-only sidecar files that are updated on both machines as they’re changed.

You’ll want to make sure you’re not both editing at the same time, which can overwrite edits, but it allows you to work on an image together over the phone or in alternating sessions without having to send file revisions back and forth.

Performance

Working with layers and local adjustments in Exposure X3 is a bit of a mixed bag. When editing Raw .RAF files from my FujiFilm X-T1, there was noticeable lag when using the brush, which meant I became accustomed to painting an area and waiting a beat for the result to appear before moving on. The lag was more pronounced when viewing an image at 1:1 zoom; an onscreen Rendering progress indicator showed up often. Even when reviewing images, I saw pauses as the software processed my Raw files.

This was a surprise, because I came to Exposure X3 with the expectation that it tended to do a better job handling the Raw files from Fuji’s X-Trans sensors. The update from version 3.0.6 to 3.5 did improve performance somewhat, but the lag is still noticeable.

I became accustomed to painting an area and waiting a beat for the result to appear before moving on

I also loaded some Nikon .NEF Raw files from a D90, as well as Sony .ARW Raw files from a Sony a7R III. Performance was just fine on the former, and a little slow on the latter’s significantly larger (86 MB) image files. But the X-T1’s images, which max out at 16.3MP (compared to the larger 24.3MP files from the Fujifilm X-T2, which I didn’t have to test) still performed the slowest.

For context, I tested Exposure X3 on a late-2016 MacBook Pro with Touch Bar, outfitted with 16GB of RAM (the maximum the machine can handle) and the Radeon Pro 460 graphics processor with 4GB memory (the top-line GPU upgrade when the computer was offered). This isn’t the most powerful Mac available, but it isn’t a slouch, either.

With the caveat that I’m not a software engineer, I suspect one possibility for the lackluster editing performance is that Exposure X3 doesn’t seem to be making use of the high-performance GPU. (You can check this by opening Activity Monitor, switching to the Energy tab, and looking at the Requires High Perf GPU column.)

I was also surprised that the Shadows control seems subpar. Yes, it brightens shadow areas, but it does so by flattening the entire image more than you’d expect; it feels like using a blunt instrument instead of a surgical one.

It’s a reminder that even basic features need attention, as well as the differentiating ones.

Pros and Cons

Pros:

  • Import from multiple sources at the same time
  • Edits and metadata are stored in local files, not a central database
  • Quad layout reviewing
  • High-quality presets
  • Ability to audition presets
  • Fixed price, no subscription

Cons:

  • Frequent rendering lag using Fujifilm Raw files
  • Shadows control is heavy-handed
  • No thumbnail preview during import
  • Raw+JPEG pairs are treated as separate images

Good for:

Photographers looking for non-subscription software that does more than basic editors.

Not good for:

The impatient.

Articles: Digital Photography Review (dpreview.com)

 
Comments Off on Alien Skin Exposure X3 review

Posted in Uncategorized


Alien Skin unveils Exposure X3 raw editor and organizer, available this fall

14 Sep

Alien Skin is gearing up to launch Exposure X3, the next installment in its Exposure software line. Exposure X3 is a non-destructive raw image organizer and editor, and it will bring multiple improvements and new features over the previous version. Among the changes will be new “toning enhancements” for B&W and color images, as well as a side-by-side view that allows you to compare two images.

Though the product hasn’t yet been fully fleshed out for the public, Alien Skin has revealed that X3 users will have the option of creating virtual copies of images so that the same photo can be edited in different ways without using up extra hard drive space. The company also shared that X3 will bring radial and linear brush shapes, plus adjustable borders.

Alien Skin plans to launch Exposure X3 on both macOS and Windows this fall for $ 150, though existing Exposure users will have access to a $ 100 upgrade option. Alien Skin will also offer a $ 200 bundle that includes X3, Snap Art and Blow Up, and anyone who owns at least one of these apps can get the bundle for $ 120.

Articles: Digital Photography Review (dpreview.com)

 
Comments Off on Alien Skin unveils Exposure X3 raw editor and organizer, available this fall

Posted in Uncategorized


Alien Architecture: Modern Buildings Recast as Extraterrestrial Ships

01 Sep

[ By WebUrbanist in Art & Photography & Video. ]

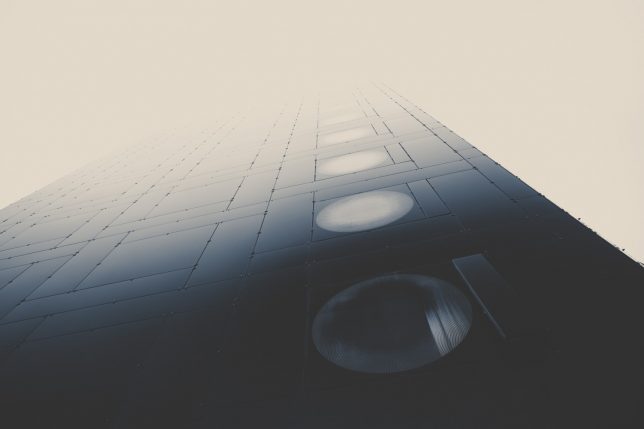
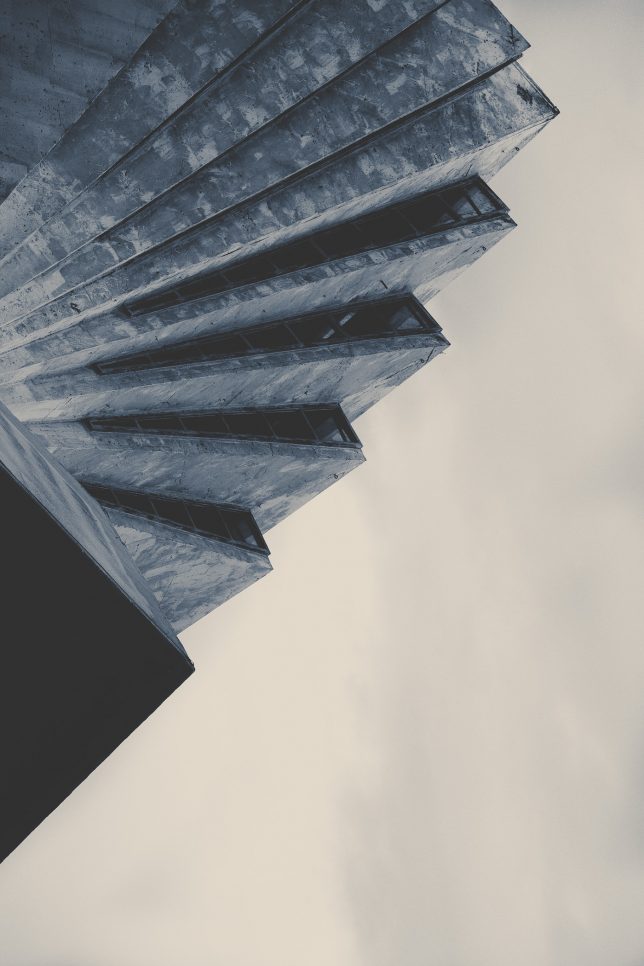
Composition, color and contrast and go a long way toward reframing photographic subjects, in this case: making familiar architectural forms seem like parts of dark and looming alien spaceships.

German photographer Lars Stieger has a knack for capturing ordinary building surfaces, materials and details and rendering them uncanny, especially in this Spaceships series photographed across Europe.

Glass-and-metal cladding in the fog can easily looked like the curved hull of an otherworldly vessel in the right light, while intersecting geometries taken out of context call the posters of science fiction classics to mind.

Stieger’s subjects range from the inside of an old gasometer to Olympic parks — often large, public and industrial works of design that already appear a bit strange even under normal circumstances. Check out more from this Spaceships series as well as his other photo sets on Behance and Instagram.

Share on Facebook


[ By WebUrbanist in Art & Photography & Video. ]

[ WebUrbanist | Archives | Galleries | Privacy | TOS ]


WebUrbanist

 
Comments Off on Alien Architecture: Modern Buildings Recast as Extraterrestrial Ships

Posted in Creativity


Painting with Light on a Canvas of Night: Alien Blooms by Hannu Huhtamo

17 Jan

[ By SA Rogers in Art & Photography & Video. ]

light-painting-1

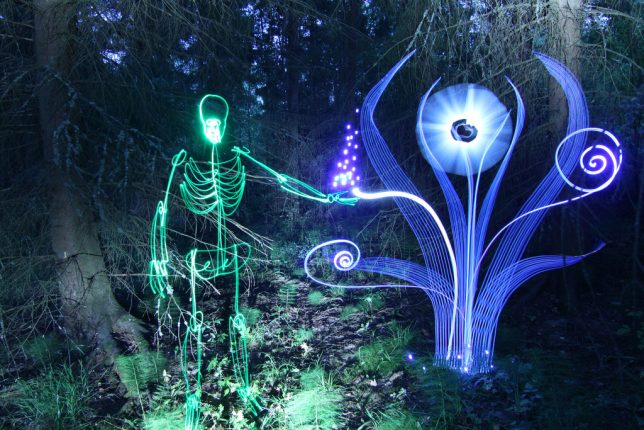
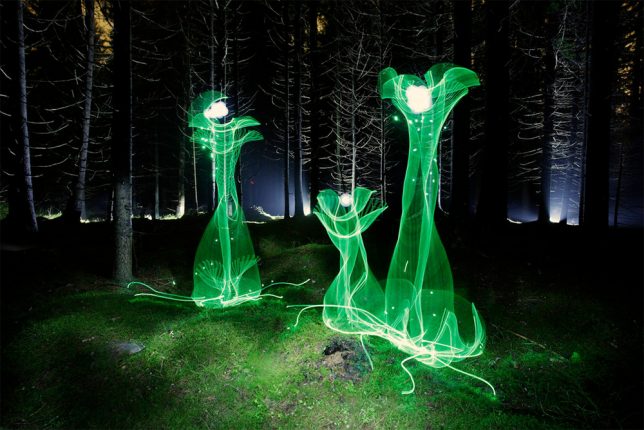
The strange glowing figures in these images are so complex, you might think they’re screenshots from a digital animation, or created in Photoshop – but there’s no computer-based trickery here. Just the same long exposure techniques light artists have been using for decades to create and capture ethereal compositions, albeit applied in an unusually creative manner.

light-painting-2

light-painting-3

light-painting-4

Hannu Huhtamo’s bizarre shapes glow against twilight landscapes and abandoned interiors, often looking somewhere between a plant and an alien insect. They sprout up in snowy fields, appear from inside giant teacups at theme parks or take shape in darkened living rooms.

light-painting-5

light-painting-6

light-painting-7

A musician by training and hobbyist photographer, the Finnish artist first experimented with lighting techniques when taking promotional photos for a death metal band and deciding he wanted a long-exposure pentagram made with the flame of a lighter. Years later, when he met light artist Janne Parviainen and got a look at his work, Huhtamo decided to revisit the technique from a new angle.

light-painting-8

light-painting-9

light-painting-10

All of his work is created ‘SOOC’ or straight out of the camera, and he uses no special light equipment other than El-Wire (electroluminescent wire) and modified LED flash lights. “Darkness is my canvas and the light is my brush,” he says in this behind-the-scenes video produced by Great Big Story.

Share on Facebook


[ By SA Rogers in Art & Photography & Video. ]

[ WebUrbanist | Archives | Galleries | Privacy | TOS ]


WebUrbanist

 
Comments Off on Painting with Light on a Canvas of Night: Alien Blooms by Hannu Huhtamo

Posted in Creativity


Alien Skin Exposure X2 launches with several new tools and Exposure Bundle

28 Sep

Alien Skin has announced the launch of Exposure X2, the second iteration of its non-destructive photo editor and organizer. The company has added several features to its latest version of Exposure, some of which have been frequently requested by users, including faded presets, a spot healing tool, metadata search and a history panel. An updated Exposure Bundle is also available, bringing with it Alien Skin’s Blow Up, Exposure and Snap Art apps.

As expected, the new spot healing tool enables users to quickly fix small imperfections in photos without opening a separate photo editor; the tool supports both healing and cloning. The faded presets, meanwhile, are customizable and add a hazy look to images. The history panel tracks any changes you make to your images, and the metadata search, of course, enables searches based on various criteria including the camera used, shutter speed, ISO and more.

Alien Skin Exposure X2 is available now for $ 149 for new customers, and $ 100 for existing Exposure X owners. The Exposure X2 Bundle is higher at $ 199 for new customers, or $ 119 for existing customers who need the upgrade.

Via: Alien Skin

Articles: Digital Photography Review (dpreview.com)

 
Comments Off on Alien Skin Exposure X2 launches with several new tools and Exposure Bundle

Posted in Uncategorized