RSS
 

Posts Tagged ‘Advantage’

Using HDR Photography to Your Advantage

10 Aug

sunset on the water - Using HDR Photography to Your Advantage

Over the years, HDR Photography has become synonymous with over-saturated, over-processed, and unrealistic images. Some hear the term HDR and never give it a second thought because of their perception of what it is. Add to that, all the camera dynamic range improvements and many say that HDR has lost its place for good.

So how exactly can HDR photography still be beneficial to you? How can you use it to your advantage?
Using HDR Photography to Your Advantage

The oversaturated look that has become synonymous with HDR photography. 

What exactly is HDR Photography?

HDR or high dynamic range refers to the difference between extremes – the brightest and darkest areas of your image. In reality, your eyes can adjust for shadows and highlights in the same scene, but a camera cannot (again this has come a long way over the years).

Using HDR Photography to Your Advantage

A more realistic looking HDR image.

Have you ever witnessed a scene that took your breath away, but were unable to capture it as is because you had to choose what your camera captured?

Exposing for the highlights left some of your image too dark or exposing for the shadows left your highlights too light. Or maybe you tried for somewhere in between and ended up with both dark shadows and light highlights?

Well when you want to capture the dynamic range of an area, you sometimes need to take more than one photo. To do that, you need to use bracketing, which is taking multiple images of the same scene at different exposures.

Most cameras now come with auto bracketing modes (AEB) , but you always have the choice to manually adjust your exposures between shots.

house in the trees - Using HDR Photography to Your Advantage

HDR Photography usually involves several bracketed images with a minimum of three images to capture the dynamic range. One image is exposed for the darker areas in your scene, another for the mid-tones and the third for the highlights. When you merge these images, you create an HDR image which reveals more detail than a single shot.

Fun Fact: Did you know that HDR photography has existed since the days of film?

How does this work to your advantage?

If you are not interested in creating mind-bending images with HDR, what’s the point? Well, the main benefit is capturing/revealing any lost details and doing so in a realistic way.

Think of it as extending the tonal range of what your camera reproduces to mimic what your eyes see, as opposed to the graphic style that HDR has become synonymous with.

building ruins - Using HDR Photography to Your Advantage

Subtle HDR also helps reveal textures in an image.

Steps for a Realistic HDR Photo

Truthfully the steps for making a realistic HDR are not drastically different from one that looks overly processed. The key is to know when to stop processing.

1. Selecting a scene

So what kind of shots are right for HDR photography?

Typically these include scenes that have a lot of contrast, for example, landscape and architectural photography. HDR is not recommended for scenes with a moving subject, or for shooting portraits (as it has a reputation for aging faces).

It is fun to experiment with bending the rules though and seeing the results.

old saloon hotel - Using HDR Photography to Your Advantage

2. Capturing your images

To eliminate or minimize movement between your shots, a tripod is an essential tool. This also ensures that each image in your sequence has the same composition.

An HDR image is usually composed of between three to seven bracketed images. Three exposures are sufficient for a more photo-realistic HDR, at two stops (EV) apart. If done manually, this means that your first shot will be metered for the mid-tones of the image (0EV), followed by dialing down your exposure to -2 for your second shot, and lastly where your meter is at +2 for your third shot.

dark image -2 Using HDR Photography to Your Advantage

Bracketed image underexposed (exposure -2).

Using HDR Photography to Your Advantage

Overexposed (exposure +2).

Bracketed image mid-tones (exposure metered at 0).

Use the HDR or Auto Bracketing (AEB) feature of your camera to accomplish this automatically.

Note: If you are shooting into the sun, you may need to do five exposures at one or two stops apart.

3. Processing your images

Processing HDR photography is essentially combining your images and adjusting your tonal mapping for detail. When it comes to processing, you have a choice of software: Photoshop, Photomatix, Lightroom and Aurora HDR to name a few.

Processed bracketed images – reveals more details (warmth boosted).

Again, processing is the place where you can push your HDR too far or end up with a nice photorealistic image.

Usually, HDR software comes with presets that give you a range of looks. If you want your image to be more on the realistic side, you need to take control of the settings. Some of the settings you want to control include; reducing noise, fixing chromatic aberrations and dialing back your tonal adjustments.

Conclusion

The main benefit of HDR photography is recovering detail in your images. Landscape and architectural photographers often use HDR realistically to portray high contrast scenes.

HDR photography is often associated with overcooked images, but when it’s not overdone it can balance out a scene and makes it more appealing to your viewer. Your objective is to post-process just enough to maintain a natural look.

The post Using HDR Photography to Your Advantage appeared first on Digital Photography School.


Digital Photography School

 
Comments Off on Using HDR Photography to Your Advantage

Posted in Photography


The Highs and Lows of ISO and How to Use it to Your Best Advantage

29 Apr

Treating ISO as the foundation of the exposure triangle and only adjusting it when you really need to will help you produce more consistently creative photographs.

Asian woman taking a photo - all about ISO

ISO 100 (allowing a wide aperture setting).

ISO stands for International Standards Organization, which does not really help you understand what it is. But it does indicate the standard is international and it is constant across all brands and types of cameras.

The ISO is the measurement of how responsive your camera’s sensor is to light. The lower the numeric value, the less responsive, the higher the value, the more responsive.

Editor’s note: ISO is actually much more complicated than that but for purposes of this article, this is generally considered the easiest explanation of ISO to understand, especially for beginners. 

Close up of twp people holding DSLR cameras - ISO settings

ISO 400

Low ISO

Choosing a low ISO setting, say less than 400, is best when there’s a lot of light or when you have a tripod and the style of photograph you want to make allows you to use a long exposure. When the ISO setting is low, the sensor is less responsive to light, so, therefore, it requires more light to create a well-exposed photograph.

Using a low ISO setting will result in better technical quality photos generally. There will be little or no digital noise, the colors and contrast in your images will be better.

Woman standing in a fresh market holding vegetables - ISO 100

ISO 100 allowing for a slow shutter speed in bright light. My friend was standing very still and my camera was on a tripod.

High ISO

Choosing a higher ISO setting is best when the light is low or you are not able to make a long exposure. Higher ISO setting means your camera’s sensor is more responsive to light, so it needs less light to reach the sensor to create a well-exposed photograph.

It also means the technical quality of your images may be affected by digital noise, colors may be less vibrant and overall image contrast is flatter. How much, depends on how high you have your ISO setting and your camera model.

Sensor technology is rapidly changing and, if you have a newer, higher-end model of camera you can more confidently choose to make photos at higher ISO settings than with older, lower-quality cameras.

Sky lanterns being released in Chiang Mai during Yee Ping festival - high ISO

ISO 6400. Allowing a fast enough shutter speed to avoid motion blur in the lantern in low lighting conditions.

When and Why to Adjust the ISO

Unlike shutter speed and aperture settings, the ISO setting has no direct creative impact on your photographs. If you think the inclusion of obvious digital noise in an image mimics a creative value similar to film grain I suggest you do some more serious study on the matter.

Adjusting the ISO can assist you to achieve the shutter speed and/or aperture settings you desire to create the style of photograph you have in mind.

Street scene at night in Thailand - ISO

ISO 100 allowing a very slow shutter speed (long exposure).

ISO and Aperture Creativity

If you are wanting to blur a background using a wide aperture setting when the light is bright, you will need to adjust your ISO to one of the lowest settings to accomplish this. If you were to use a high ISO setting you may not be able to obtain a good exposure with a wide enough aperture setting, so your background will not be as soft looking as you want it to be.

Asian woman portrait - ISO

ISO 160 allowing a wide aperture setting to achieve a blurred background.

Alternatively, if you want to create an image where everything in your composition is in sharp focus, it is best to choose a higher ISO, especially when the light is not so bright. By choosing a higher ISO you will be able to set your aperture to a higher f-stop number and achieve a greater depth of field than if your camera were set to a lower ISO value.

ISO and Shutter Speed Creativity

Choosing a low ISO can assist you in achieving a slow shutter speed when you want to create a photograph incorporating some motion blur. If you are photographing a moving subject, like a waterfall, and wish capture a lovely silky effect in the water, you will need to use a slow shutter speed.

This is easier to do when your ISO setting is low.

Mae Ya Waterfall - low ISO

ISO 50 on a bright day to set the shutter speed slow enough to capture motion blur in the water.

Freezing action by using a fast shutter speed will often require you to choose a higher ISO setting, especially if the light is not so bright. Being able to adjust your shutter speed so that is will render a fast moving subject as though it’s frozen in time will often mean balancing your exposure with a higher ISO.

Auto ISO

If you are comfortable with having your camera in control of your exposure, then Auto ISO is a good option to consider. If you set your ISO to Auto as you adjust your aperture and/or shutter speed settings, the ISO will modify itself to make an exposure the camera finds appropriate.

Night time photo of Chedi Luang Thailand - ISO 800

ISO 800

If you do choose to work with Auto ISO, I recommend you do some testing first to discover what maximum ISO setting you are comfortable with for your camera.

To do this, take a series of photos of the same subject in the same lighting conditions and double your ISO setting each time. Then compare all the photos (look at them close-up and full image) and find the ISO setting for the image you are comfortable with, the one just before you see too much digital noise.

Editor’s note: Try not to overly pixel-peep. By looking at your images at 100% on your computer screen you will not get a true feeling for the amount of noise which will be visible at a normal viewing distance. 

Many cameras have a means to set a maximum when using Auto ISO. So you can now set this to the number you determined with the test above.

Practical Conclusions

Three Asian woman review an image on a DSLR monitor - ISO

ISO 320

Adjusting your ISO setting is generally only necessary when you want to achieve a specific effect or when the light conditions change.

When we do our photography workshops we always make sure to choose some locations which are outdoors and some which are indoors. This gives us the opportunity to demonstrate when it’s good to make an adjustment to the ISO setting.

Thai Wood Carver - ISO

ISO 2000 allows for a shutter speed fast enough to freeze the action in this low light setting.

If you are photographing outdoors on a bright day, your ISO setting will most likely be between ISO 100 and ISO 400. If you go inside, especially to a dimly lit building with few windows, you may find yourself struggling to obtain a good exposure with a fast enough shutter speed if you are only adjusting your aperture and shutter speed settings.

By adjusting your ISO so your camera’s sensor becomes more responsive in the low light you will be more flexible and capable of being more creative with your camera.

?

The post The Highs and Lows of ISO and How to Use it to Your Best Advantage appeared first on Digital Photography School.


Digital Photography School

 
Comments Off on The Highs and Lows of ISO and How to Use it to Your Best Advantage

Posted in Photography


Think Tank Airport Helipak for 3DR Solo drone and Airport Advantage bags now available

17 Sep

Think Tank has a new rolling camera bag and a drone backpack for traveling, the Airport Advantage and Airport Helipak for 3DR Solo. The Airport Advantage bag is designed for safely transporting cameras and lenses, while the Helipak model is designed to transport the 3DR Solo drone, a 15-inch laptop, and related drone accessories including the controller.

The Airport Advantage bag meets both international and US airline carry-on requirements, according to Think Tank, weighing in at 5.8lbs / 2.7kg with 2.7 W x 19.5 H x 7.3in D / 32.3 x 49.5 x 18.5cm external dimensions. This rolling bag can accommodate various camera and lens arrangements, such as two gripped DSLRs with lenses and three or four additional lenses, a pair of mirrorless camera bodies with ‘lots of lenses,’ or a standard DSLR with attached lens alongside three or four other lenses, a 15-inch laptop, and a gripped DSLR with an attached lens.

The Airport Helipak, meanwhile, is a soft-bodied backpack with a dedicated pocket for a 15-inch laptop, plus a custom divider that enables the wearer to reconfigure the bag’s space to accommodate other gear. According to Think Tank, the bag can hold the laptop, 3DR Solo drone and its controller, a charger and spare rotors, extra batteries, tools, GoPro cameras, a jacket and other items. The backpack weighs 4.6lbs / 2.1kg and has 14 W x 20.5 H x 9in D / 35.6 × 52.1 × 22.9cm external dimensions.

Both the Airport Advantage and the Airport Helipak for 3DR Solo are available now for $ 249.75 and $ 199.75.

Via: Think Tank (1), (2)

Articles: Digital Photography Review (dpreview.com)

 
Comments Off on Think Tank Airport Helipak for 3DR Solo drone and Airport Advantage bags now available

Posted in Uncategorized


3 Ways to Take Advantage of Bad Weather

23 Aug

In Norway we grow up hearing, “there’s no such thing as bad weather, only bad clothes”. While this wasn’t what you wanted to hear when you were eight years old, and had to go to school even though it’s -20c and a snowstorm, it’s what we are used to. Instead of complaining about the cold weather we would wear an extra layer of clothes and go about our day as normal.

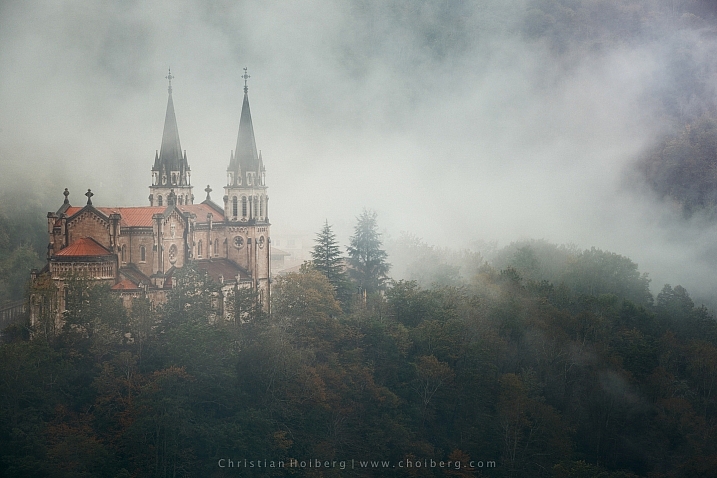
Foggy sunrise at Covadonga cathedral in Asturias, Spain

Foggy sunrise at Covadonga cathedral in Asturias, Spain

This way of thinking has in many ways impacted my photography and made me go out with a camera, even though it’s rainy, windy or just bad weather. What many seem to neglect is that even though the weather is bad, there are still a whole lot of great images waiting to be captured. They are just a little harder to find. Here are three ways to take advantage for bad weather conditions and still get good photos.

#1 – Drop the sky and zoom in

Bad weather often means a grey sky without contrast. Personally, there’s not much I dislike, more than that in a landscape image. Most of the time this uninteresting sky will take unnecessary attention from the subject, and do more harm than good.

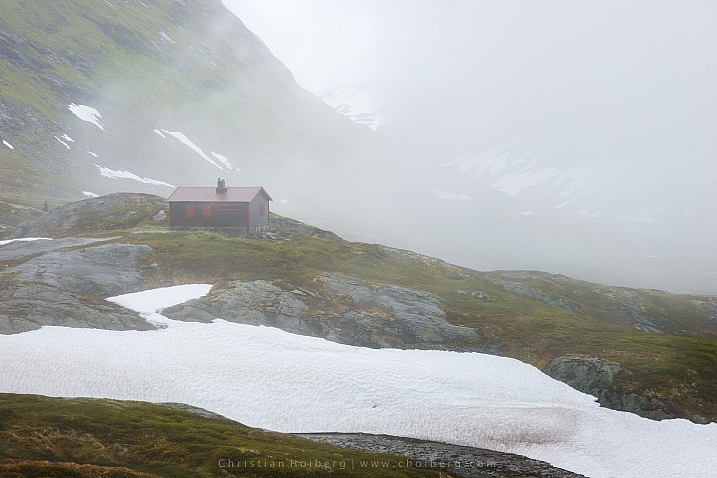
Jotunheimen-Cabin-Fog

Remote cabin in Jotunheimen in foggy weather

So, instead of including a sky that lacks contrast, use a telezoom and focus on a smaller detail in the landscape. Perhaps there’s a cabin, a river, or maybe even a deer in the area around you. Use your zoom and make these subjects into the main part of your image.

This can also be a good exercise for your creative vision, as it forces you to slow down and pay attention to your surroundings. It forces you to carefully look through the landscape and notice every single

In fact, I’ve found using a telezoom beneficial for my photography in general, as I’ve become more aware of the scenery, and I’m constantly searching for something that sticks out.

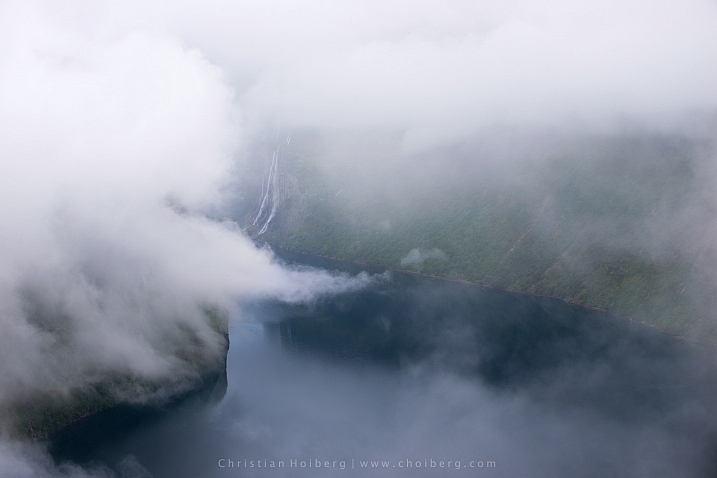
Geirangerfjorden-fog

The low clouds made an interesting framing of this waterfall in Norway

#2 – Photograph waterfalls

On sunny days it’s very hard to get good images of waterfalls, as the light is hard and the reflections are bad. Most likely the water will look hard and “shiny” even though you’re using a long exposure.

When the sky is grey, it’s raining, or when there are a lot of clouds, you’ve got the perfect excuse to go photograph waterfalls. Since the sun is not an issue, the light will be softer, and you’ll have no problems with hard light on the water. This lets you do both short and long exposures, and still have decent light.

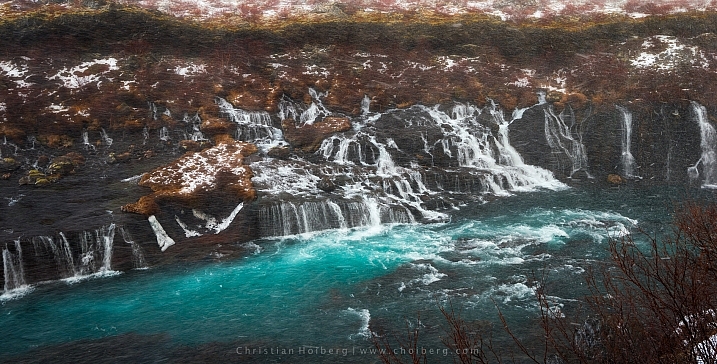
Hraunfossar-snowstorm

A quickly passing snowstorm gave interesting light to this waterfall on Iceland

If it’s raining you should consider using a polarizer filter, though, as the rocks (if any) around the waterfall might reflect some light. The polarizer will kill most of the remaining reflections and you’re left with a great result.

#3 – Take a hike in the woods

My last piece of advice on how to take advantage of bad weather, is to take a walk in the woods. This is something I often do when it’s a rainy day, both with and without my camera. Sometimes it’s nice just to go for a hike in familiar terrains, while other times it can be really rewarding to bring the camera.

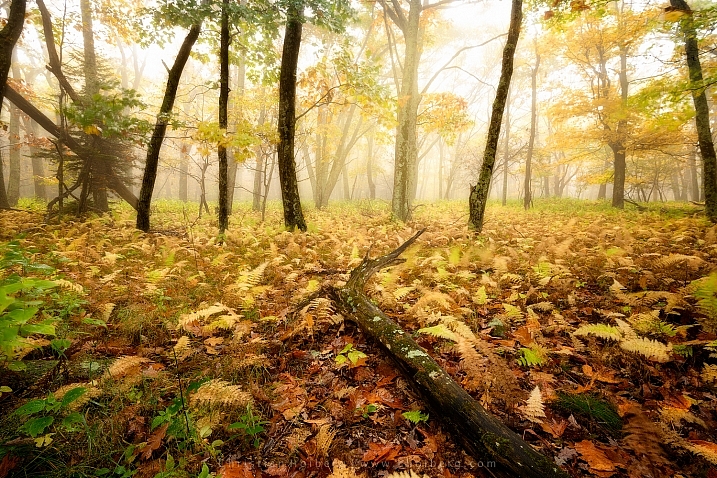
ShenandoahMistFall

Misty morning in Shennandoah National Park

Personally, I do not often bring my camera in the woods when I’m going during the daytime. The reason is that I find the mood to be much more compelling when it’s early in the morning, or late at night. At this time the light is even softer, and you can get some dark moody images, or perhaps you’re lucky to even get the light shining through.

Another benefit of going early in the morning is that you increase the possibility to encounter deer or other animals. Just be sure that you don’t make too much noise when hiking, as that will scare away most wildlife.

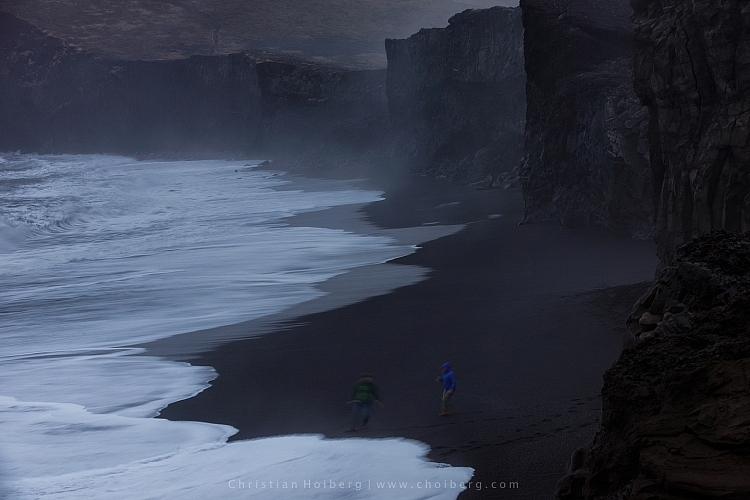
Dyrholaey-people

Bonus tip: Bring rain gear for both yourself and the camera! Also, bringing both an air blower and a microfiber cloth is important when you’re photographing in bad conditions.

What do you prefer to photograph when the weather is challenging? Let us know in the comments below, and share your images of bad weather as well.

googletag.cmd.push(function() {
tablet_slots.push( googletag.defineSlot( “/1005424/_dPSv4_tab-all-article-bottom_(300×250)”, [300, 250], “pb-ad-78623” ).addService( googletag.pubads() ) ); } );

googletag.cmd.push(function() {
mobile_slots.push( googletag.defineSlot( “/1005424/_dPSv4_mob-all-article-bottom_(300×250)”, [300, 250], “pb-ad-78158” ).addService( googletag.pubads() ) ); } );

The post 3 Ways to Take Advantage of Bad Weather by Christian Hoiberg appeared first on Digital Photography School.


Digital Photography School

 
Comments Off on 3 Ways to Take Advantage of Bad Weather

Posted in Photography


7 Ways to Take Advantage of Autumn in Your Portrait Photography

29 Sep

Fall is my favorite. At least it used to be before it was Pumpkin Spice Everything. I’m so tired of Pumpkin Spice Everything, but I’ll never tire of chilly weather, or scarves, or leaf piles. Or even shorter days, mainly because long summer days are just too much pressure for me.

lynseymattingly1

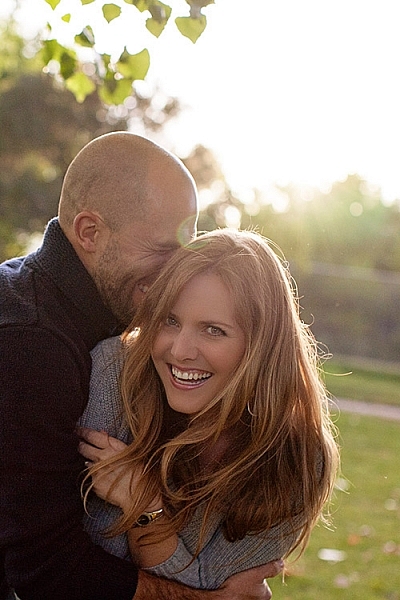
I like everything about fall including, maybe especially, that it’s ripe for portraits. Here are seven ways to help you take advantage of all of autumn’s goodness in your portrait photography.

lynseymattingly2

1) The light is phenomenal 

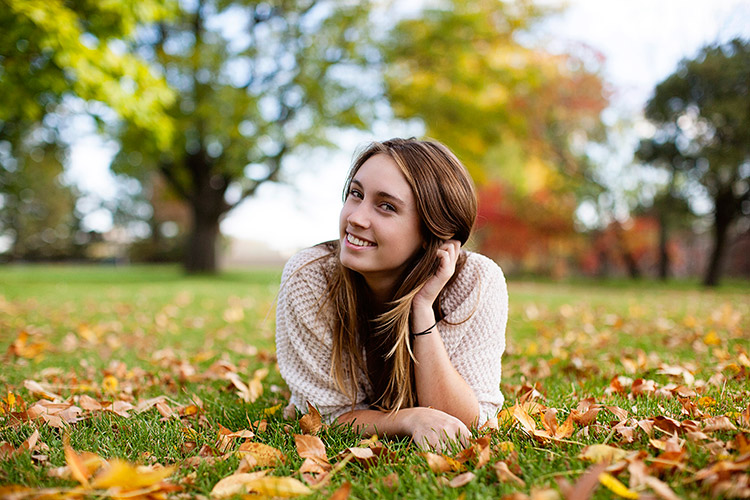
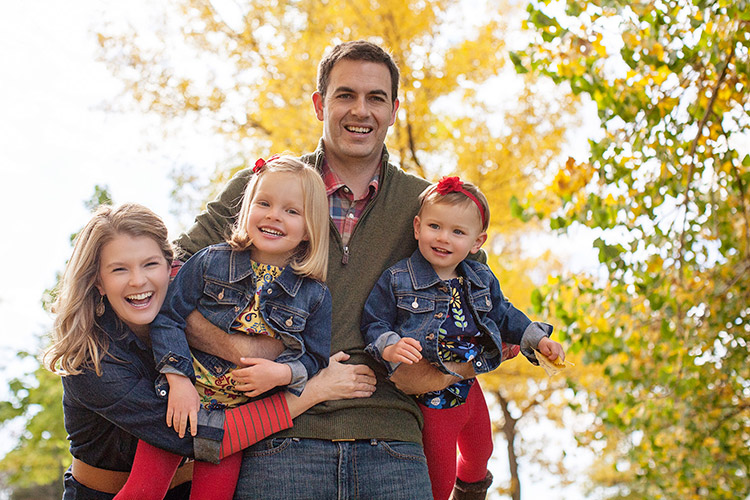
Yes, there is less of it, but it is so golden and delicious. I’m sure there is a very scientific reason for that, which of course I know and understand exactly, but I don’t want to bore you. I like a warmer image, so to get one without having to add a filter is fantastic. I prefer to shoot in the morning and early evening hours but in the fall, the light reflecting off of the warmer tones in the trees make even the deadest of shady patches come alive.

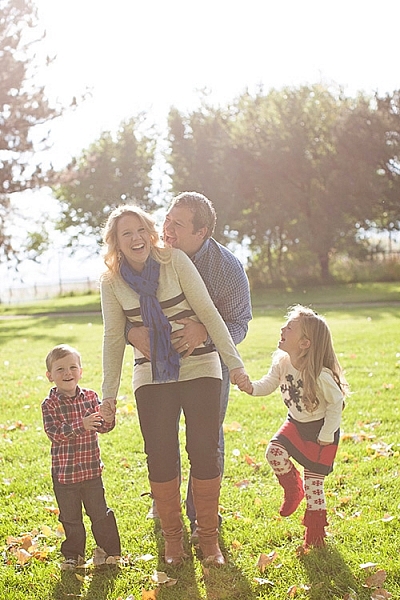
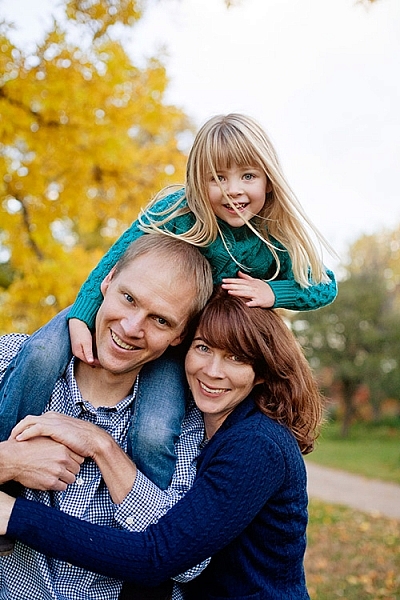
While people don’t normally wear yellows and oranges for picture day, the golden tones found in nature compliment all skin tones. This is why I always tell my clients to dress in colors that are found naturally outside—not only does it keep people from showing up in lime green, but the palette works for whatever background we find that day, and this time of year dressing in earth tones can really make a portrait pop.

lynseymattingly4

2) Clients dress in their finest

I’m not big on fancy clothes, but even I agree that flip flops take a back seat once we can bust out boots and scarves. Fall is when people tend to take it up a notch, plus it’s layering season. Layering is the best way to achieve portraits that look high-end or even fashion shoot-like. You won’t ever find me in boots, a t-shirt, a jacket, a skirt, tights, a scarf and a hat in real life….but on picture day, I’ll happily dress everyone in five layers and make them stick with it for 20 minutes if it makes my ragamuffin family look like we bathe regularly. I’ve found that my clients feel the same. Which is not to say that my clients are ragamuffins, I’m sure they always look as sharp as they do on picture day.

lynseymattingly3

3) Fall adds a playful feature to portraits

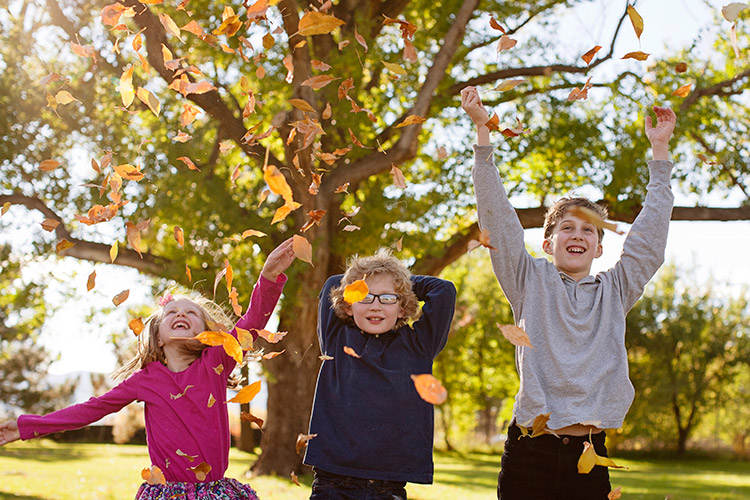
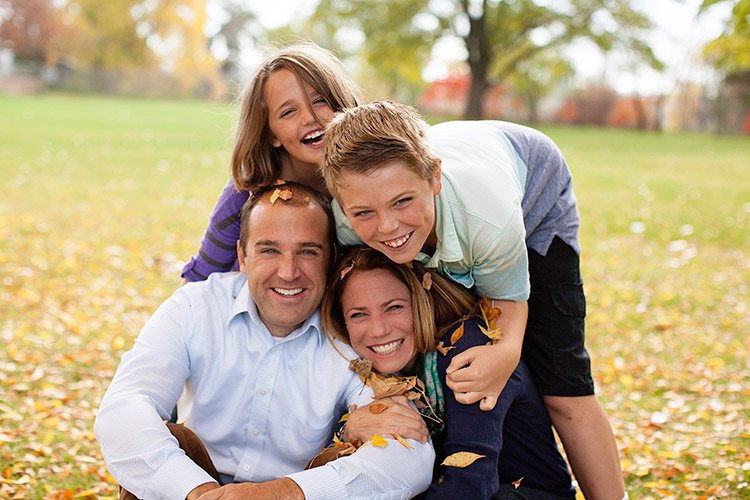
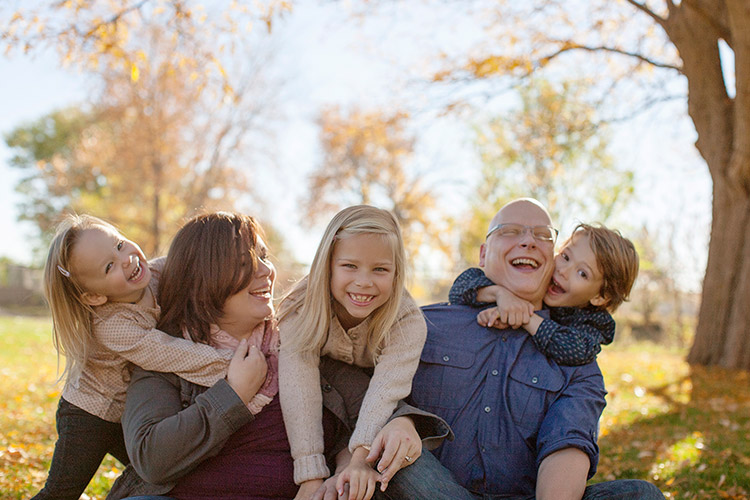
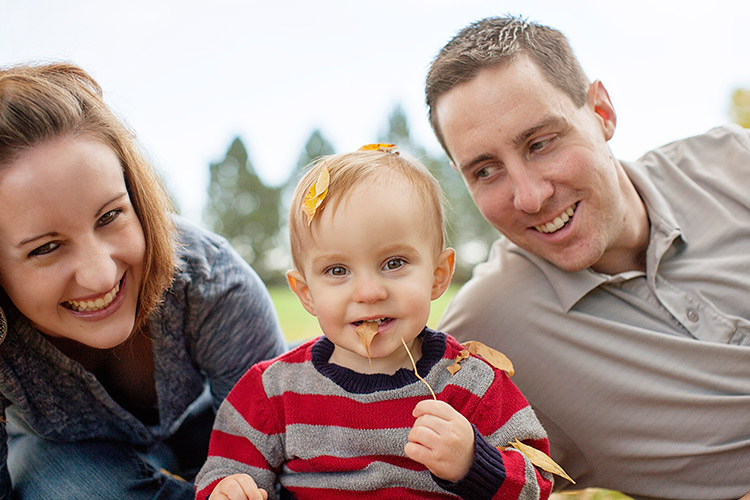
I don’t like traditional posing so fall adds so many more options: throw leaves, lay on leaves, climb in colorful leaves, throw leaves at me! (Try to watch out for sticks please) You get the idea. The colors are almost like an extra family member that matches everyone, and isn’t making things more difficult. Use it to your every advantage. It’s not possible to look like you’re miserable in five layers of fancy-pants clothes when you are having a leaf fight. I know, I’ve done the research.

lynseymattingly5

4) Don’t forget black and white

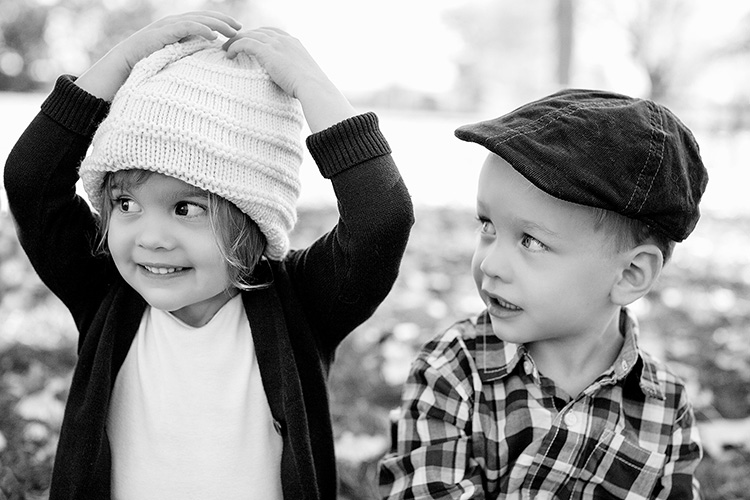
While the changing fall season offers colors, it also offers texture. Black and white portraits can still feel the magical spell of autumn through texture, tone, and playfulness. Plus, that phenomenal light thing goes for black and white too (see #1). I love black and white portraits, and while I am likely to do more color this time of year, I still proof a few black and whites for all of my clients.

lynseymattingly6

5) Compensate for the warmer tones

Sometimes if I am hitting the light just right, and my subjects are in perfect clothes, and the moon isn’t void of course, I find that images can get too warm. I know that sounds crazy, but it can happen. A custom white balance can help you on the front end, but if you didn’t notice it until after, don’t despair. An auto color run (under Image in Photoshop) or a cooling filter can fix everything. For as much as warm tones are flattering, no one wants to look like a seasonal gourd.

lynseymattingly9

6) Fall weather is perfect for cuddling

Now I’m not one to cuddle, much to my husband’s dismay; I can’t take people in my personal space for an extended period of time. Last weekend a client that knows how I feel about hugging and all that, giggled at how often I tell people to “snuggle up” when I’m shooting family portraits. I guess I figure that most people enjoy it. Or are at least willing to pretend they do for the sake of the pictures (even I am willing to do that for a good Christmas card), especially if it’s not 100 degrees F (30c) outside. And a snuggle feels like a lot less pressure than cuddling, now doesn’t it?

lynseymattingly8

7) The holidays are around the corner

In the US, the changing colors of the trees means that winter is almost here, which puts portrait photographers square into Holiday Card Season. Most of the clients I photograph this time of year are planning on using their images for sending out cards, or even creating holiday gifts.

So this is the only time of year I’m likely to offer a sale or special on portrait sessions, and every time I do, they sell out. That also means that this is the time of year that I can lose my mind in a pile of editing if I am not careful. To try to prevent both a nervous breakdown and spending a month staring at my computer screen, I usually offer mini sessions—10 to 15 minute shoots where I promise five or so pictures that I deliver as high resolution files. This takes any printing or card creating out of the equation, and also limits the amount of images I promised, rather than a full session which for me can be 50 or more. In turn, my clients get a few choices of images for their holiday cards and gifts, including that one great picture that was likely the whole reason they wanted portraits anyway. And I don’t have a nervous breakdown. Probably.

lynseymattingly7

So throw back a pumpkin spice latte and put on a pair of boots and go shoot some portraits, even if you usually don’t. Everything is on your side in the fall – great light, fabulous surroundings, and more clients than any other time of year. That doesn’t happen very often (well, it happens once a year, but still).

lynseymattingly10

googletag.cmd.push(function() {
tablet_slots.push( googletag.defineSlot( “/1005424/_dPSv4_tab-all-article-bottom_(300×250)”, [300, 250], “pb-ad-78623” ).addService( googletag.pubads() ) ); } );

googletag.cmd.push(function() {
mobile_slots.push( googletag.defineSlot( “/1005424/_dPSv4_mob-all-article-bottom_(300×250)”, [300, 250], “pb-ad-78158” ).addService( googletag.pubads() ) ); } );

The post 7 Ways to Take Advantage of Autumn in Your Portrait Photography by Lynsey Mattingly appeared first on Digital Photography School.


Digital Photography School

 
Comments Off on 7 Ways to Take Advantage of Autumn in Your Portrait Photography

Posted in Photography


How to use Lens Flare to Your Advantage

10 Feb

Flare can be a polarizing topic in photography, and many articles have been written about how to prevent or eliminate lens flare. But there are many situations where you can use lens flare creatively to enhance your photographs.

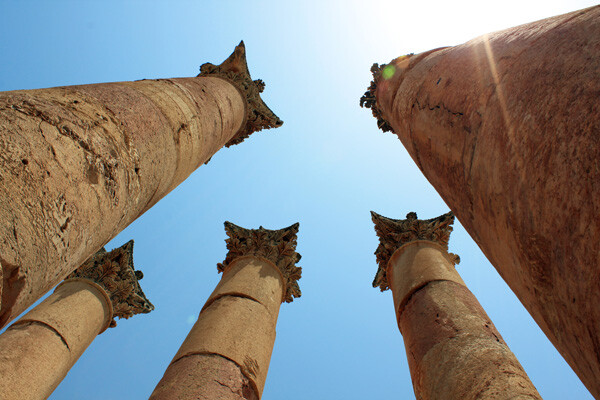
McEnaney-flare-columns

What is Lens Flare?

Lens flare and sun flare are terms that are often confused in photography literature. Sun flare generally refers to turning the sun into a starburst shape, while lens flare is an artifact of stray light bouncing around the lens and being recorded by the sensor. This article will focus on lens flare, but you can read more about Using Sun Flares to Create Dramatic Images.

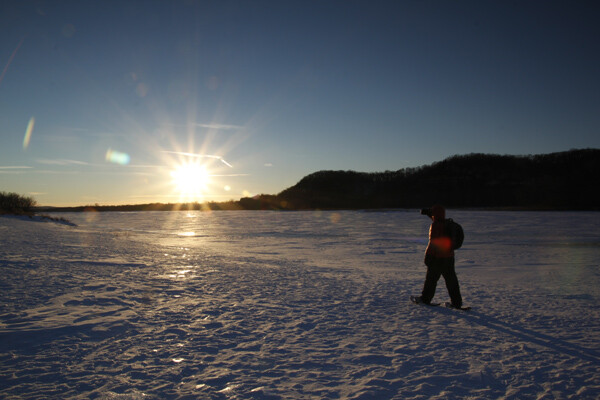
Lens flare comes in several varieties but all are related to light (generally from the sun) bouncing around inside the lens. It can include circular, or curved areas of light, around the sun, somewhat like a natural sun dog, as well as the more common stray flashes of light, or dots and dashes of light in a line.

McEnaney-flare-varieties-snowshoer

Most articles are full of advice for how to avoid lens flare, which is a good place to start if you then want to do the opposite. The first strategy for avoiding lens flare is to use a lens hood on your camera, which blocks light coming into the camera lens from the sides. The second strategy is to limit the use of filters in front of your lens, as additional glass, especially low-quality glass, can lead to more flare. There is some debate about whether a UV filter alone helps to eliminate or accentuate flare, but the pricier the glass, the less likely that there would be adverse effects.

Creating and Controlling Lens Flare

So, if you want to create lens flare intentionally in an image, you should first remove your lens hood. This allows more sunlight directly into your lens. As for filters, you can experiment with removing your filters all together or trying to combine more than one filter (such as a UV filter and a polarizer) at a time. I have not found much difference between keeping or removing my UV filter, so I tend to keep it on for ease and lens protection.

McEnaney-flare-bw-woods

Consider using a zoom lens rather than a prime lens when shooting for flare. Zoom lenses tend to have more internal elements than prime lenses, which create more potential to interfere and add flare. Zoom lenses also give you a range of focal lengths and compositional options to allow you to best place and manipulate the flare exactly where you want it in your image.

You will need the sun in, or near the edge, of your frame to create successful flare. This is easier to accomplish in the early morning or late afternoon when the sun is lower in the sky. Be careful any time you are shooting directly into the sun, as there is potential to damage your camera’s sensor and your eyesight. Be sure to wear your sunglasses and compose shots quickly. You can often get flare effects with just a hint of the sun coming in from the top edge of your image, which will also reduce potential damage to you or your camera.

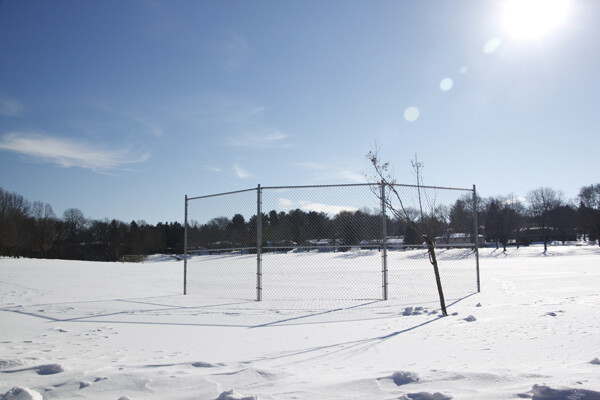
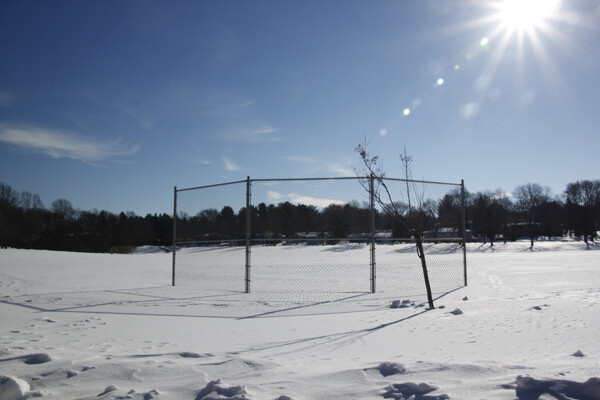
Flare effects are often more pronounced at narrower apertures, like f/22, as the narrower opening in the lens gives the light more potential to scatter. But, as you can see from the comparison shots below (at f/8 top and f/22 bottom), you can get lens flare at many apertures.

McEnaney-flare-compare-top

Shot at f/8

McEnaney-flare-compare-bottom

Shot at f/22

Depending on your subject, you may need to shoot in manual or use exposure compensation to overexpose your scene (positive values) relative to your camera’s sensor. Because lens flare requires additional light entering your camera, your subject might otherwise appear dim or darker than intended. Meter for your subject (or set exposure compensation to a positive value), and you will have a correctly-exposed subject against the extra brightness of the background flare.

Creative Uses of Lens Flare

Flare has become trendy as a way to emphasize the brightness or perceived warmth of a scene. Lens flare is even starting to make inroads in movies, as popularized in J.J. Abrams’ Star Trek reboot, where he uses lens flare and lighting to cement the futuristic nature of the film. Post-processing to add lens flare to an image is even common among portrait photographers.

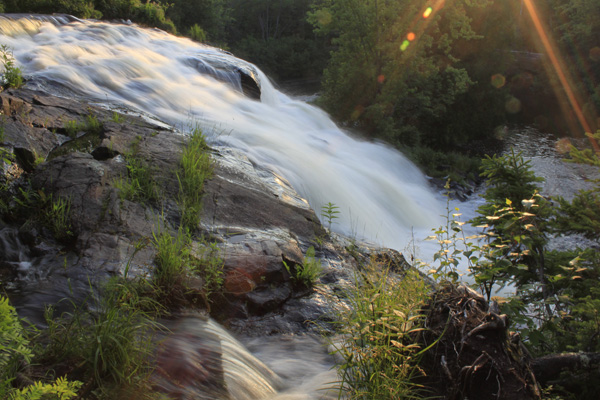
How will you share your flare? Show us in the comments below!

McEnaney-flare-waterfall

The post How to use Lens Flare to Your Advantage by Katie McEnaney appeared first on Digital Photography School.


Digital Photography School

 
Comments Off on How to use Lens Flare to Your Advantage

Posted in Photography