RSS
 

Posts Tagged ‘advanced’

DJI launches Phantom 4 Advanced drone

14 Apr

Drone maker DJI today launched a new model in its Phantom 4 series, the Phantom 4 Advanced. Compared to the original Phantom 4, the Advanced adds a 1″ 20MP sensor and a mechanical shutter to its onboard-camera. It is also capable of shooting 4K video at 60 frames per second and supports H.264 4K video at 60 fps or H.265 4K at 30 fps.

In addition the new drone comes with a range of navigation and flight features that we’ve already seen on the original Phantom 4, such as Draw, ActiveTrack, TapFly, Gesture and Tripod. The Phantom 4 is also equipped with DJI’s FlightAutonomy system that uses 5 vision sensors, a forward-facing obstacle avoidance system, dual-band satellite positioning and ultrasonic rangefinders. 

The Phantom 4 Advanced now offers increased storage capacity, thanks to using a 128GB microSD card, and an extended flight time of up to 30 minutes.There is also a Phantom 4 Advanced+ version that offers an integrated 5.5″ 1080p screen in the controller. 

With the introduction of the new model the original Phantom 4 will be phased out but DJI promises after sales support will continue. The Phantom 4 Advanced and Advanced+ will be available from April 30 on store.dji.com? for $ 1,349 and $ 1,649 respectively. More information on the new model can be foud on the DJI website. 

Press Release:

New Phantom 4 Advanced Gives Creators The Ideal Flying Camera For Expanding Their Creative Vision

New Phantom 4 Advanced Gives Creators The Ideal Flying Camera
For Expanding Their Creative Vision

April 13, 2017 – DJI, the world’s leader in civilian drones and aerial imaging technology, Thursday, introduced a new addition to the Phantom family – the Phantom 4 Advanced – offering creators an affordable way to capture aerial imagery with a more powerful camera and more precise controls. The new Phantom 4 Advanced model improves on the original Phantom 4, giving photographers a 1-inch, 20-megapixel sensor and a mechanical shutter that lets them explore all the creative possibilities that a flying camera can provide.

The Phantom 4 Advanced’s upgraded camera is capable of shooting 4K video at 60 frames per second. The more powerful video processing now supports H.264 4K videos at 60fps or H.265 4K at 30fps, both with a 100Mbps bitrate. Excellent optical performance, sensors and processors ensure everything is captured with high dynamic range and more image detail needed for advanced post-production.

Similar to the Phantom 4 Pro, it comes with many key intelligent features that allow smooth automatic flight modes, including Draw, ActiveTrack, TapFly, Gesture and Tripod. Equipped with the FlightAutonomy system made up of 5 vision sensors, forward-facing obstacle avoidance system, dual-band satellite positioning (GPS and GLONASS), and ultrasonic rangefinders, the Phantom 4 Advanced is able to hover precisely in places without GPS and fly in complex environments.

The Phantom 4 Advanced+ version offers a 5.5-inch 1080p screen integrated into the controller. The screen is more than twice as bright as conventional smart devices, making it an ideal aerial imaging solution for outdoor use. In addition, creators can now do more with the Phantom 4 Advanced’s increased storage capacity using a 128GB microSD card and a flight time extended up to 30 minutes.

For those who are ready to take their aerial camera work to the next level, the Phantom 4 Advanced is truly the most affordable, intelligent and powerful flying camera you can find. For more information, visit http://www.dji.com/phantom-4-adv.

With the introduction of the more affordable, yet powerful Phantom 4 Advanced, the Phantom 4 model will reach its End of Life (EOL) on April 30, 2017. DJI will continue to provide after sales support to Phantom 4 customers and they can continue to enjoy flying their aircraft using the DJI GO 4 app.

The US retail price of the Phantom 4 Advanced and Phantom 4 Advanced+ is USD1,349 and USD1,649, respectively. It will be available on store.dji.com/? and the product will start shipping on April 30, 2017.

Articles: Digital Photography Review (dpreview.com)

 
Comments Off on DJI launches Phantom 4 Advanced drone

Posted in Uncategorized


Advanced Shooting Modes: What They Are and When to Use Them

06 Apr

Are you ready to get off Auto? When most people get started in digital photography, the first thing they do is set the shooting mode dial on the top of the camera to Auto. It makes sense to let the camera make decisions about things while you’re just getting used to using it.

In Auto mode, the camera makes decisions not only on the Aperture, Shutter Speed, and ISO but also on many other factors such as White Balance, Focus Mode, Focus Points and Metering Mode.

After awhile, you might start to choose one of the automatic scene modes such as portrait, sports, landscape or night, if your camera has those options. This gives the camera a bit more information about what you’re shooting so it can make better decisions for you.

But at some point, you are going to want to take control and make those decisions for yourself. Your camera is smart, but it’s not an artist! This is where the advanced shooting modes come in.

The Exposure Triangle

Before we get into discussing advanced shooting modes, you need to understand the concept of how the exposure triangle works.

First, there is shutter speed – the length of time that the shutter is open. This is the easiest part of the triangle to understand; the longer the shutter is open, the more light comes in and hits your camera’s sensor.

The San Diego skyline by Anne McKinnell - Advanced Shooting Modes: What They Are and When to Use Them

ISO 100, 24mm, f/22, 80 seconds

Second, there is the aperture – the variable opening in your lens through which the light passes. The opening is round and works just like the pupils in our eyes. On a bright day, you squint, making the pupil smaller to let in less light. When the light is dim, your pupil is larger to let in more light.

Generally speaking, a small aperture opening and a long shutter speed may allow the exact same amount of light in as a large aperture opening and a short shutter speed. Choosing this balance between aperture and shutter speed is the key, and your choice will depend on what you are trying to achieve with your photograph.

The third and final factor in determining exposure is ISO – the sensitivity of your camera’s sensor to light. For those of you who remember the film days, ISO is similar to ASA, the speed of the film. Essentially, it’s best to leave ISO at a low setting such as 100 (other photographers will recommend using high ISO as needed – do your own research and experiment with your camera). But if you’re in a low-light situation, you might need to increase it so that less light is required to make a good exposure.

Advanced Shooting Modes: What They Are and When to Use Them

Big Bend Ranch State Park, Texas. ISO 200, 10mm, f/18, 1/10th of a second.

Advanced Shooting Modes

There are five main advanced shooting modes available on most digital cameras:

  1. P for Program Mode
  2. A or Av for Aperture Priority Mode
  3. S or Tv for Shutter Priority Mode
  4. M for Manual Mode
  5. B for Bulb Mode

Many professional photographers frown upon using anything other than Manual Mode. But I respectfully disagree. A camera is just a tool and a smart one at that! There’s nothing wrong with letting your camera do what it’s good at as long as you are controlling the factors that are important to you.

Program Mode

In Program Mode, your camera chooses the shutter speed and aperture. You can control other factors like white balance, focus mode, focus points and metering mode. Program mode is a good place to start when you’re just coming off of auto mode and learning how to use your camera settings. But it isn’t where you want to stay because aperture and shutter speed are the key to taking control of your images.

Aperture Priority Mode

When you use Aperture Priority Mode, you tell the camera what aperture you want to use, and it will calculate the appropriate shutter speed to make a good exposure. The size of the aperture affects depth of field, which is a critical concept when you want to take creative control of your images.

When you have a very large aperture opening, such as f/2.8, you are going to have a shallow depth of field. That means that whatever you focus on will be sharp, but everything in front and behind it will be out of focus.

On the other hand, when the aperture opening is small, such as f/22, you have a large depth of field, so more things that are in front and behind your focus point will also be sharp.

The difference between large and small apertures - Advanced Shooting Modes: What They Are and When to Use Them

Try them all

The best way to understand this is to try it out for yourself. Put your camera in Aperture Priority Mode and take the exact same photograph using each aperture setting. Then look at the photos on your computer and you’ll see the effect that aperture has on the depth of field.

What you’ll find is that photos with a large aperture have a soft background and photos with a small aperture have a background that is in focus. For me, depth of field is the most important factor in my photography, so I almost always use Aperture Priority Mode.

Organ Pipe Cactus National Monument Arizona - Advanced Shooting Modes: What They Are and When to Use Them

ISO 100, 33mm, f/18, 1/25th of a second. For this image, it was important to keep everything sharp from the closest cactus in the foreground to the mountains in the background. So I chose a small aperture to ensure I had good depth of field.

F-Numbers are Tricky

Before we leave this topic, there’s one thing that many people find confusing and that is the f-stop numbers. A large aperture opening is represented by a small number and a small aperture is represented by a large number. I don’t want to get into too much math here, but my trick for remembering how this works is to think of it like a fraction. 1/2 is larger than 1/8, so f/2 is a larger opening than f/8.

Shutter Priority Mode

When you use Shutter Priority Mode, you tell the camera what shutter speed you want to use, and it will calculate the appropriate aperture to make a good exposure. This mode is most useful when you have moving objects in your frame and you want to either freeze the motion or blur the motion.

For example, if you are photographing a bicycle race, you probably won’t be happy with just any old shutter speed. You’ll likely want to use a relatively long exposure, such as half a second or one second, to blur the motion of the bicycles going by. Or you’ll want a fast shutter speed such as 1/500th of a second to freeze the motion. Anything in between would look out of focus.

Shooting waterfalls is another good example of when to control the shutter speed for the silky water effect.

Englishman River Falls, Vancouver Island, British Columbia - Advanced Shooting Modes: What They Are and When to Use Them

ISO 100, 180mm, f/22, 1/10th of a second.

Manual Mode

When you are in Manual Mode, you must tell your camera both the aperture and the shutter speed you want to shoot at. You will use your camera’s light meter to determine whether the settings you have entered will create a good exposure, then adjust the settings based on whether you have too much or not enough light.

In Manual Mode you are in complete control and practicing with it will give you a good grasp on how aperture and shutter speed work together. Once you understand this, it may be more convenient to use either Aperture Priority Mode or Shutter Priority Mode to accomplish your goals.

Bulb Mode

Bulb Mode allows you to extend the shutter speed beyond the camera’s built-in limit, which is usually 30 seconds. You can use this mode to photograph the streaks of clouds moving across the sky, or at night to photograph star trails.

To use Bulb Mode, press the shutter button and hold it down. The shutter will open and stay opened until you release the shutter button. But of course, this method isn’t practical because you can’t just stand there holding the shutter button down for 10 minutes! Plus, having your finger touching the camera during a long exposure will cause camera shake and your photo would be blurry.

Star trails at Joshua Tree National Park, California - Advanced Shooting Modes: What They Are and When to Use Them

This photo was made using an intervalometer programmed to make a 7-second exposure every 15 seconds for two hours. Then all the images were stacked to create the star trails.

The best way to use Bulb Mode is to use a shutter release cable (or a remote trigger). This allows you to press the button on the cable to open the shutter and then lock it opened so you can walk away and come back later to release it. Another option, instead of using a cable release, is to use an intervalometer which will allow you to program how long you want the shutter to be opened and even program multiple shots. For example, you can set it to take a 2-second exposure every 5 minutes for an hour.

Conclusion

Remember, the camera is your tool to use any way you like to make your art. The shooting modes are just some options that are available to you so you can accomplish your creative goals. Have fun and experiment!


Shooting modes are just one of the camera settings you’ll want to master to take control of your camera and your photography. My new eBook Taking Control: Essential Camera Skills for Beginners will help you understand what all the knobs and dials on your camera do and how to use them for creative control over your images.

The post Advanced Shooting Modes: What They Are and When to Use Them by Anne McKinnell appeared first on Digital Photography School.


Digital Photography School

 
Comments Off on Advanced Shooting Modes: What They Are and When to Use Them

Posted in Photography


GIMP seeks funding for future advanced features

20 Jan

Open source image editing application GIMP has always been free, but the work required to continue building and improving the software doesn’t come without cost. In a recent post, the team asks GIMP’s users to lend financial support to Øyvind Kolås, the man behind the Generic Graphics Library (GEGL) and 42% of its commits.

Kolås is responsible for numerous improvements to the graphics engine GEGL, as well as the pixel data conversion library babl. Thanks to this work, in part, GIMP 2.10 will offer numerous notable features including the previously announced 16-bit and 32-bit color channel processing. However, some requested features are still missing, including CMYK and spot colors support, additional filters, better GPU usage and more. 

To help get the ball rolling on those features and others like them, GIMP is pointing users toward a Patreon page for Kolås, where he explains, “GIMP does not redistribute donations to developers/contributors — and I am currently living off savings…” Thus far 186 patrons have lended a total of $ 793/month support for Kolås. Support options for prospective patrons starts at $ 2/month, and ranges up to $ 128/month or higher for institutions.

Via: GIMP

Articles: Digital Photography Review (dpreview.com)

 
Comments Off on GIMP seeks funding for future advanced features

Posted in Uncategorized


8 Advanced Street Photography Tips to Get You to the Next Level

23 Nov

In photography, teaching and learning can only get you so far. At some point, you will get to a skill level where it’s up to you to put in the time and effort to continue improving. However, dedication and self-learning aside, here are some advanced street photography tips that I think can help you significantly improve your skill level in this area.

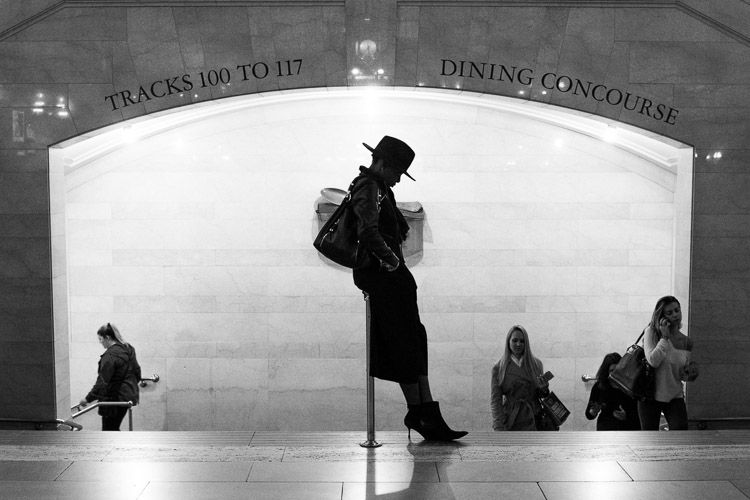
Grand Central Woman, NYC

1. Use your eyes instead of the viewfinder

When photographing, it is very common for people to look straight into the viewfinder and forget about the world around them, but this can make street photography tougher. Your vision through the viewfinder is hindered significantly, and that can hurt your ability to capture spontaneous moments. You need to see everything that is happening around you. This will help you to anticipate the special moments that are about to occur in front of your camera.

Your eyes are the real viewfinder, and you will be able to notice much more if you use them. Scan the area and look for subjects that are both near and far. Wait until you notice something with your eyes, then put your viewfinder to your eye to capture the moment. If you start with your head in the viewfinder, by the time the moment happens, your ability to notice it will be a half-second too slow.

2. Embrace spontaneity

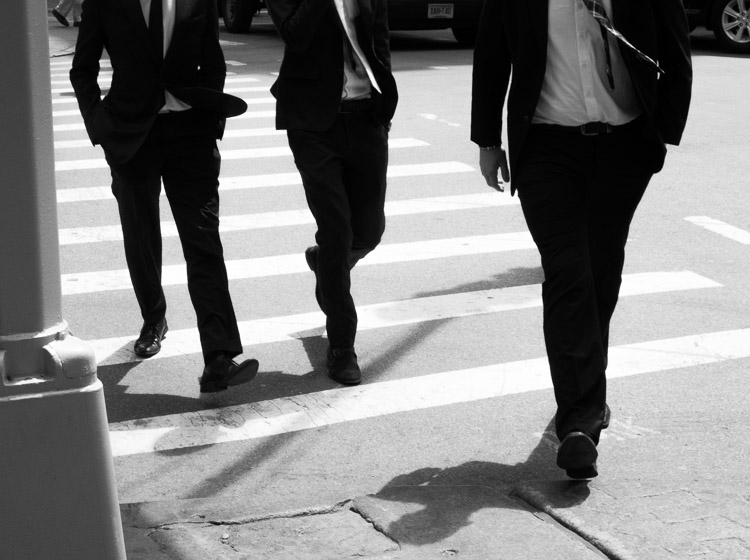
Suits, SoHo, NYC

This was one of the early tips that Garry Winogrand received in his photography education that set him on a path to become one of the most renowned photographers of all time. You should certainly spend a lot of time thinking about your work and what you like to shoot, but when you are out there going through the motions, embrace your gut feelings. Instead of worrying about every little detail and thinking about if you are doing a good job or not, put that all aside and have fun.

There is no need to worry about what other people will think. If you feel like there might be a chance for a good photograph, then go for it, no matter how weird the image may be. Don’t let your brain talk you out of it. That gut feeling exists for a reason, so use it to your advantage. If you use your instincts and shoot confidently, that will show in your photographs. They will feel more real and more you. Of course, you will probably take more bad photographs as well, but the good ones will be that much better. Trust your gut.

Keep in mind that some people may take this suggestion too far and machine-gun fire their camera every time they have an inkling that there’s a good photograph. That’s taking this tip too far. Turn off continuous shooting and make sure that you are able to recognize and capture tha moment with a shot or two.

3. Think about how your photos are going to age

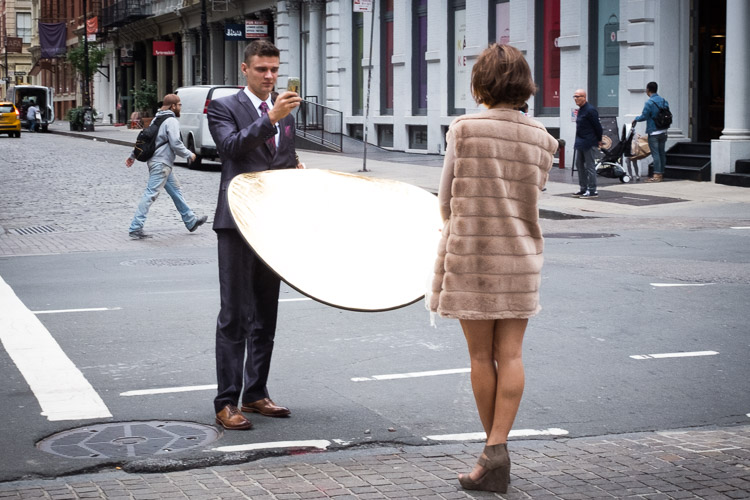
Cellphone Fashion Shoot, Soho, NYC.

It is important to think about your work in a historical context. Think about classic photographs and what makes them special. Simple old photographs of window displays and fashions look incredible, but those photographs might have seemed very ordinary back then. If you could go back in time to photograph, what you might see as interesting then would probably be much different than what most photographers were shooting at that time.

What about your life and area is going to be interesting in the future? What is going to change? Are people still going to be staring at their cell phones every second with huge headphones on and completely disconnected from reality? Who knows, maybe?

Try not to take anything for granted, and if you notice yourself disregarding something, then think about why you feel that way. Occasionally, these situations can make the best photographs.

4. Create themes and consistency in your photography

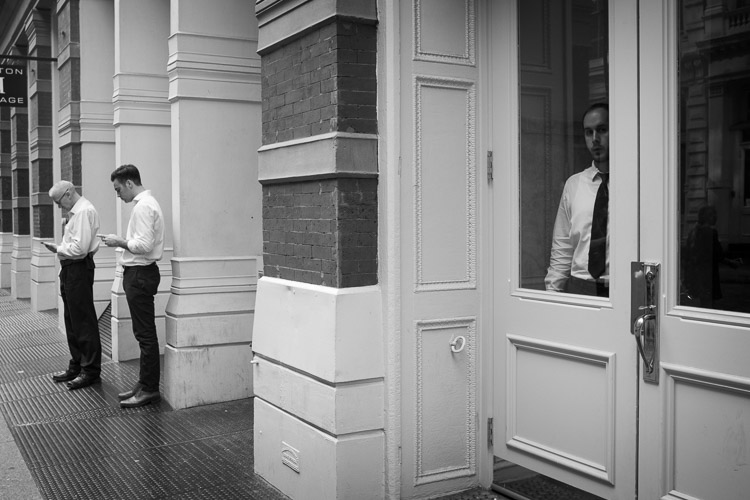
Cellphones, Greene Street, SoHo, New York

The more you shoot, the more you will notice that you are attracted to certain types of photographs. Find these consistencies when you are editing and embrace them. Over time, these ideas can blossom into full-fledged projects and books.

Group these images together into collections, and think about the type of photographs that you would like to add to them. Then the next time you come across a moment that fits into that category, you will be quick to notice and capture it. Each individual photograph is a piece of art, but a collection of photographs is its own work of art. Play with the order of your photographs and the meaning that comes out with different sequences of them.

Consistency does not mean that you can’t photograph different types of subject matter or in both color and black and white. You can be very diverse in how you shoot, and you can change and evolve as you go along, but you can still group these consistencies into projects that fit well together.

5. Repetition

Lower East Side, New York.

The real key to improving your photography is through repetition. It is necessary to photograph frequently to keep your eyes sharp and your hand-eye coordination ready. Your instincts will improve. The more often you do it, the better you will be. Keep the rust away. Even the best photographers need to continually photograph to keep their skills up.

The more you learn to enjoy the act of photographing, the easier it will be to walk out the door to shoot more. Photography shouldn’t be about feeling inspired or uninspired. You do not need to feel inspired to photograph if you enjoy the act of walking. Create a plan for how often you will photograph, just like the gym, and stick to it. Over time, it will become routine and your enjoyment for it will continue to grow.

There is no need to worry about coming back with good photographs. That is going to happen, and you shouldn’t feel sad if you didn’t get anything good in a session. The good photographs will come, but if you feel frustrated too often, then that will affect how you photograph. Just enjoy the process of being out in the world doing something you love. The more you enjoy that, the better you will be.

6. Photograph where you live

Brooklyn Home, NYC.

No matter where you live, whether it’s in the middle of a big city or in a small suburb, use that as a backdrop for a project. That is the area that you frequent the most, and know the best. Go to places that you think would be incredibly boring for photographs and figure out how to get a good photograph there. Don’t take things for granted. Absolutely anything can make a good and beautiful photograph. All it takes is dedication.

7. Emotion and gesture

Jerry Delakas, Astor Place Newsman.

As photographers, our job is to pass on an idea or an emotion to the viewers of our work. How you do that is something for you to figure out. Search for feeling and emotion when you are shooting. Aim to create evocative photographs.

If you are photographing people, it is important to capture them when they are portraying an emotion. This can be shown in a facial expression, what they are doing, or the gesture of their body. Sometimes, you will capture a unique looking person with no emotion or gesture and that will ruin the photograph. Other times, you will capture someone that you did not think would be a good subject, but the emotion shown on their face make the entire photograph. When you photograph people, this emotion is vital to focus on.

8. Zone focusing

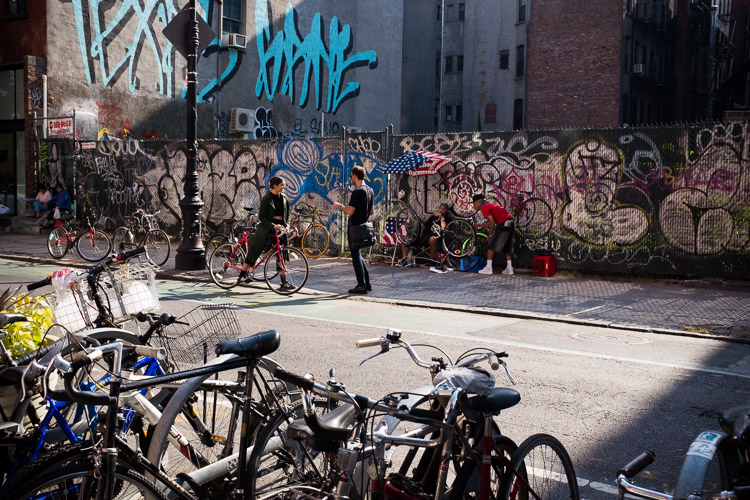
Lower East Side, New York City

Zone focusing is the toughest technical skill to learn in street photography, but it is very important to learn. At first, you will screw up a lot of photographs, but over time it becomes a more accurate way of obtaining sharp photographs.

Zone focusing works particularly well in busy areas, but it can be used any time once you get good at it. I tend to zone focus 60% of the time and autofocus the rest. If your subject isn’t moving and you have time to autofocus, it is always good to do that as it will guarantee perfect focus. But the rest of the time zone focusing can be the way to go.

What is zone focusing and how is it done?

This strategy of zone focusing is basically just using manual focus your camera and guessing the distance to subjects. Because of this, you will need a distance meter on either your lens or in your camera. You then want to turn your camera (or lens) to manual focus. Set the focus at a certain distance away from the camera. I prefer 8-10 feet, although I will do a smaller distance if I’m in a really busy area where people are closer together. Next, figure out how far that distance is away from your camera, and now you know that everything at that distance away from you will be sharp.

Zone focusing can be done well at very large apertures, even f/2, but it becomes much more difficult to do well. This focusing strategy works much better with apertures of f/16, f/11, and f/8 and a wide-angle lens such as 35mm. That will ensure there is a large depth of field in your image (make sure to also raise your ISO to achieve this and still keep an adequately fast shutter speed). Thus, there will be a significant area both in front and behind of the spot that you are focused on that will all be in sharp focus. This helps for situations where you miscalculate the distance when the perfect moment happens and it’s not exactly where are focused, and when you have multiple subjects at different distances that you want to be relatively sharp.

This is why it is always good to start off zone focusing in bright sunlight with a wide-angle lens. This will allow you to shoot at f/11 or f/16 so that a lot of your image will be sharp and you will barely have to worry. Set your focus to 8 or 10 feet away and pay attention to your subjects more than your focusing. It is a very freeing feeling, and the extra time you save not having to focus will aid you in catching those spontaneous and instantaneous moments that appear before you.

Conclusion

If you want even more street photography tips, check out: The Ultimate Guide to Street Photography (you can even download it as a PDF).

What things to you practice to up your street photography game? Please share your comments and images in the section below.


If you’d like to learn more about Street Photography, then please check out my ebook The Essentials of Street Photography.

googletag.cmd.push(function() {
tablet_slots.push( googletag.defineSlot( “/1005424/_dPSv4_tab-all-article-bottom_(300×250)”, [300, 250], “pb-ad-78623” ).addService( googletag.pubads() ) ); } );

googletag.cmd.push(function() {
mobile_slots.push( googletag.defineSlot( “/1005424/_dPSv4_mob-all-article-bottom_(300×250)”, [300, 250], “pb-ad-78158” ).addService( googletag.pubads() ) ); } );

The post 8 Advanced Street Photography Tips to Get You to the Next Level by James Maher appeared first on Digital Photography School.


Digital Photography School

 
Comments Off on 8 Advanced Street Photography Tips to Get You to the Next Level

Posted in Photography


Google updates Photos app with advanced editing features

17 Nov

Yesterday, Google introduced its pretty impressive new PhotoScan app and presented RAISR, an upsampling method that uses machine learning. You would think that was enough innovation in imaging for one day, but no, Google also implemented some pretty interesting upgrades to its Photos app that be found pre-installed on most Android smartphones and is also available for iOS devices and on the web.

A new auto enhance function balances exposure and saturation in order to maximize detail at the tap of a button. For those who prefer more manual input, advanced editing controls for light and color allow you to fine tune your images using a range of sliders for highlights, shadows and warmth among others. The Deep Blue parameter allows for partial adjustment of the blue tones in images of sea and sky and there is an equivalent slider for fine-tuning skin tones. 

In addition there are 12 new smart filters that Google calls looks. Looks use machine learning to analyze the contents of an image and then make edits based on brightness, darkness, warmth, or saturation before the final filter is applied. If you want to try the new features you won’t have to wait. The upgraded Google Photos app is rolling out today across Android, iOS and the web. 

Articles: Digital Photography Review (dpreview.com)

 
Comments Off on Google updates Photos app with advanced editing features

Posted in Uncategorized


Manfrotto Advanced & Street lineup expanded with bags for mirrorless cameras

13 Oct

Manfrotto has launched five new bags in its Advanced and Street Collections, each of them designed for use with mirrorless cameras, lenses and other items. Referring to them as the company’s new Advanced & Street selection, Manfrotto says these bags are aimed at amateur and ‘advanced hobbyist’ photographers in need of Compact System Cameras (CSC) bags. The bags are, according to Manfrotto, a mixture of lightweight, durable and stylish.

The new lineup is composed of the Advanced Compact 1 and Street CSC backpacks, the Street CSC Messenger, Advanced Compact 1 Shoulder Bag and Street CSC Shoulder Bag. The two backpacks are designed to accommodate a mirrorless camera or compact DSLR, as well as up to three lenses, a 12.9-inch iPad Pro, and accessories. The Street CSC Messenger is similar, though it can only accommodate the smaller 9.7-inch iPad Pro, while the two shoulder bags can accommodate either camera type, as well as two lenses and ‘personal items.’

The Advanced Compact 1 shoulder bag is priced at £39.95 and the backpack at £79.95. The Street CSC shoulder bag is £39.95, the messenger bag is £59.95, and the backpack is £79.95.

Articles: Digital Photography Review (dpreview.com)

 
Comments Off on Manfrotto Advanced & Street lineup expanded with bags for mirrorless cameras

Posted in Uncategorized


DxO OpticsPro 11 brings advanced Raw noise reduction

02 Jun

DxO has updated its OpticsPro software to version 11. OpticsPro 11 brings improvements to one of the last generation’s headline features – ‘PRIME’ noise reduction. DxO promises that PRIME 2016 offers improved bokeh protection and better detail retention, particularly in shadows. Processing times have decreased, and users can expect up to 4X faster performance.

A new spot-weighted option is now offered under ‘DxO Smart Lighting’, limiting the effects of ‘Smart Lighting’ tone-mapping to local areas of the image (that you can define). This helps preserve overall contrast, particularly in detected faces. DxO demoed the feature for us, and it really helped curb the flattening effect of too high a ‘Smart Lighting’ setting.  

The hallmark of DxO OpticsPro is the profile-based automatic corrections the software performs simply reading the metadata of your Raws. On top of that, smart algorithms like ‘Smart Lighting’ really help get you a good starting point, while remaining customizable in their effect. Do you rely on DxO OpticsPro for your images and, if so, what’s your favorite aspect of the software?

Let us know in the comments below the Press Release.


Press Release:

DxO OpticsPro 11 introduces new innovations in advanced RAW image processing

DxO PRIME 2016 noise reduction technology and automated spot weighted corrections are indispensable tools for photographers

Special discounts on all DxO software through June 30, 2016

PARIS & SAN FRANCISCO—June 1, 2016—DxO, a world leader in digital imaging technologies, announces the immediate availability of DxO OpticsPro 11, a major update to its award-winning photo software for Mac and PC. DxO OpticsPro 11 introduces important enhancements to DxO PRIME, the industry-standard for noise reduction, and new automated tools, such as spot weighted correction, auto microcontrast and auto red-eye that leverage face detection to help bring out the subtle nuances in images — all in just a few clicks and regardless of the original shooting conditions.

DxO PRIME 2016, better and faster

DxO OpticsPro 11 features DxO’s proprietary DxO PRIME 2016 noise reduction, which enables photographers to salvage noisy photos thought previously unusable. With DxO OpticsPro 11, photographers can capture new images at an even higher ISO by using a new version of PRIME that is better and faster than ever. DxO PRIME 2016 better preserves bokehs and smooth transitions, retains more details, and more faithfully preserves colors in dark areas, and it does this all automatically by reading each camera’s precise calibration data. And through an intense effort to adapt and optimize this technology, DxO PRIME 2016 is now able to process RAW files up to 4x faster than before — in fact, the higher the ISO, the bigger the benefit of processing time.

“The new DxO PRIME noise reduction is nothing short of amazing,” said professional photographer Mike Mezeul, “it gives me the ability to capture images at incredibly high ISOs and still render out incredibly rich, detailed, and noise-free images.”

Automated Spot Weighted Corrections

The image scientists at DxO have designed a new enhancement to DxO OpticsPro’s Smart Lighting tool that uses face detection to apply an intelligent tone map on the entire image, to better extend the dynamic range, add fill light, and improve contrast while optimizing illumination on faces. The result is genuine spot processing—after capture—with the very same results as spot metering typically provides in camera, but with the added benefit of fine-tuning flexibility.

“The image scientists at DxO have done it again,” said Camilla Ferrari, professional photographer and DxO ambassador, “by using face detection, the new spot weighted correction is able to apply even a very strong level of Smart Lighting, while keeping the people in my images looking much more natural and pleasing to my eye.”

Other enhanced tools, including new full screen mode

DxO OpticsPro 11 also adds a number of other useful tools for photographers, including an auto microcontrast mode that enhances image content while taking care to preserve faces and keep noise under control. The selective tone control produces more natural results, efficiently recovering information in shadows and highlights while avoiding flattening midtones, and there’s also a new tool that uses face and eye detection to automatically apply red eye correction, even as a batch process on multiple photos. In addition, a brand new full screen viewer removes distracting clutter so you can focus more on selecting, rejecting and rating your images, while using new shortcuts designed to help speed up the culling process.

Even more cameras supported

Without any user intervention (apart from simply viewing your image) DxO OpticsPro will read the metadata in your photo, and prompt you to download the appropriate camera/lens module. With that module, OpticsPro automatically and intelligently applies corrections such as distortion, chromatic aberration, vignetting, and lens softness. And with this latest release, DxO OpticsPro 11 adds support for a number of new cameras, including Nikon’s new flagship D5, bringing the total number of supported camera/lens combinations to well over 28,000!

Pricing & Availability

The ESSENTIAL and ELITE editions of DxO OpticsPro 11 for Mac and Windows are immediately available in the DxO online store (shop.dxo.com) and at photo resellers at a special discount through June 30, 2016:

GBP:

• DxO OpticsPro 11 ESSENTIAL Edition : £79 instead of £99
• DxO OpticsPro 11 ELITE Edition : £119 instead of £159

(Suggested retail prices, including VAT)

Photographers who acquired or upgraded a DxO OpticsPro license on or after April 1, 2016, are entitled to a free upgrade to version 11.

A fully-functional trial version of DxO OpticsPro 11, good for one month, is available on the DxO website: http://www.dxo.com/en/photography/download

About DxO

DxO develops the world’s most advanced image processing technologies, which have enabled over 300 million devices to capture the highest quality images achievable. DxO’s award-winning OpticsPro software lets serious photographers quickly and easily make their best photos look even better, and the DxO ONE miniaturized camera has redefined mobile photography with a design that pairs perfectly with iPhone and iPad to capture DSLR quality images that are instantly available to share with family, friends and followers.

Articles: Digital Photography Review (dpreview.com)

 
Comments Off on DxO OpticsPro 11 brings advanced Raw noise reduction

Posted in Uncategorized


Advanced Accessibility: 12 Futuristic Wheelchair Designs & Concepts

11 May

[ By Steph in Technology & Vehicles & Mods. ]

future wheelchairs off road 1

Technological advancements could enable wheelchair users to stand up to reach high objects, zoom around on sandy and snowy landscapes, power up hills without an assistant and even climb stairs. Lightweight materials like carbon fiber, user-friendly adjustable components, seats customized to the user’s body measurements and electronic features like LED lights, collision sensors and built-in heating systems make these mobility solutions cooler and more functional than ever.

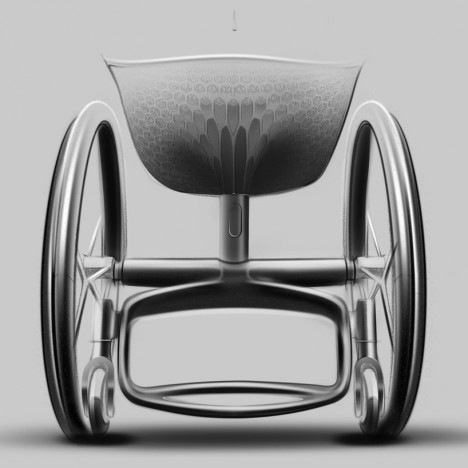
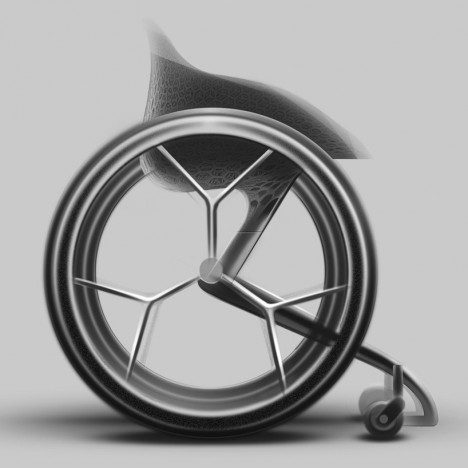
Go Wheelchair: Custom 3D-Printed for Each User
future wheelchair go

future wheelchair go 2

3D printing technology can customize the dimensions of a wheelchair to a specific user’s body measurements as well as giving them a choice of colors and additional components. The appearance can be specified with an app, and the finished product could be delivered in two weeks. “With the Go Wheelchair, we saw an opportunity to really progress the manual mobile category for users with disabilities, and to use 3D-printing technology to solve significant and meaningful problems,” says designer Benjamin Hubert of Layer.

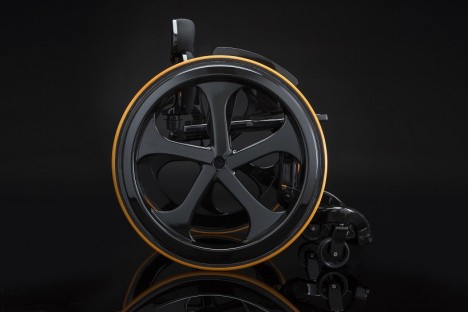
Ultra-Tough Carbon Fiber Wheelchair

future wheelchair carbon black

future wheelchairs carbon black 2

future wheelchair carbon black 3

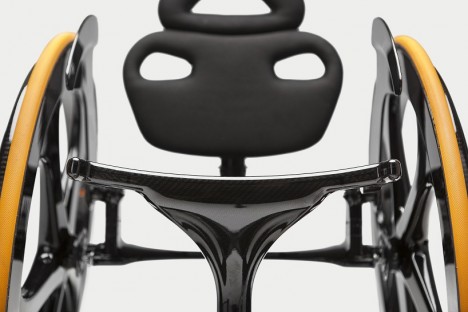
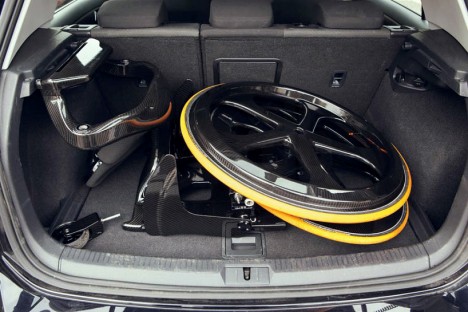
“I felt what wheelchairs were horrible medical devices, and couldn’t understand why companies didn’t advance their wheelchairs in the same way bike companies did with their products, says designer Andrew Slorance, who suffered a spinal injury at the age of 14. His desire for a better-looking, higher quality chair led him to create the ‘Carbon Black,’ which adds a lot of bike-like functionality including an optional LED system for night time travel. Minimal and lightweight, the wheelchair is made of carbon fiber and can be quickly and easily dismantled and reassembled for travel.

Off-Road Wheelchair for Adventurers

future wheelchairs off road 1

future wheelchairs off road 2

future wheelchairs off road 3

future wheelchairs off road 4

No sandy shore or snow-covered field is off limits when you’re in the Ziesel, an off-road outdoor mobility solution with 4-season rubber tracks and a high precision joystick. Made for exploring cross-country skiing tracks, hiking trails, beaches and dunes, the high performance chair by Mattro even has a fully automated heating system and can transport heavy loads on a trailer.

Transformable Wheel Chair by Caspar Schmitz
future wheelchair transformable 1

future wheelchair transformable 2

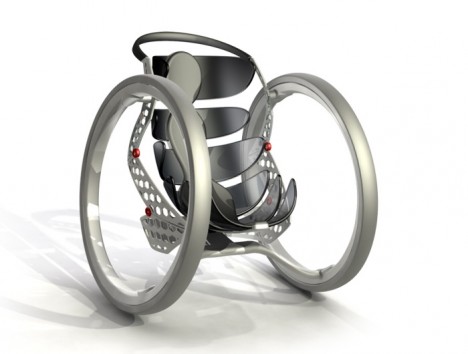
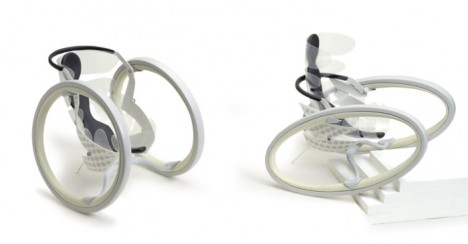
With flexible wheels that adapt to a variety of ground conditions, the lightweight and durable polyurethane Transformable Wheel can climb stairs and handle other rough terrain. While this design is just a concept, it’s an intriguing take on multifunctional wheelchairs that give users more independence.

Next Page – Click Below to Read More:
Advanced Accessibility 12 Futuristic Wheelchair Designs Concepts

Share on Facebook


[ By Steph in Technology & Vehicles & Mods. ]

[ WebUrbanist | Archives | Galleries | Privacy | TOS ]


WebUrbanist

 
Comments Off on Advanced Accessibility: 12 Futuristic Wheelchair Designs & Concepts

Posted in Creativity


6 Advanced Composition Techniques to Improve Your Photos

27 Jan

When you think of composition in photography, what is the first idea that pops into your head? Let me guess – the rule of thirds?

Likely that was true for many of you who reading this, why do you think that is? The rule of thirds is probably the most widely known, and well used compositional tool in photography. Most often, it is the first composition tool we are taught (it was for me anyway). Once we know it, and use it, we don’t really think about it, or about any other compositional techniques.

There are other methods though, using visual design techniques that talk about texture and colour, amongst others. Many photographers simply default to the rule of thirds and take the shot, without trying other compositions. These other techniques can make a difference in your images. This article is about six techniques you can use to improve your compositions, and your photos Some of these would be known as advanced techniques, but once you understand them, they are pretty self explanatory.

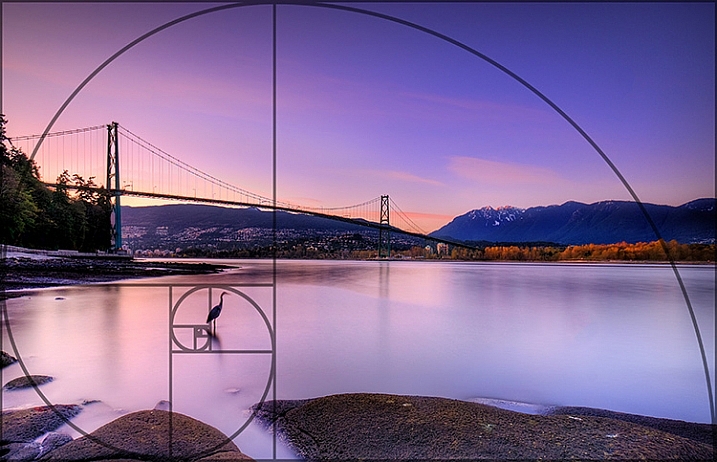
1. The Golden Ratio or Fibonacci Spiral

Use the Golden Ratio to enhance your composition

Use the Golden Ratio to enhance your composition

This is a tool that has been used for centuries, as a design principle. Many famous works of art use the Golden Ratio in their composition and it is often seen in nature’s own designs. Think of the spiral of a snail shell, how it curls in on itself. That shape conforms to the Golden Ratio. It is a ratio of 1:1.618 which seems to work really well in design and photography. To read much more detail about this technique check out: Divine Composition With Fibonacci’s Ratio (The Rule of Thirds on Steroids).

2. Unity

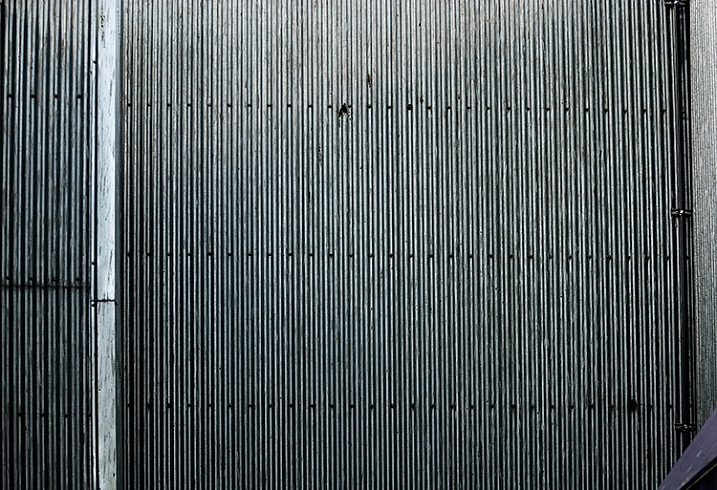
Unity is about order. Repetition can be very powerful in this regard. You can repeat shapes, lines, or colours in your image. By doing so you create a unified view of the scene, and this in turn gives a very powerful compositional effect. Unity can bring a calming feel to the image, try and find a subject that portrays this.

The lines and the rivets in the image make it feel uniform, as does the lack of colour

The lines and the rivets in the image make it feel uniform, as does the lack of colour

3. Coherence

Different from unity, coherence is more about similar types of elements or shapes in your scene. Think of a rocky river bed with similar sized rocks and pebbles. This scene would be coherent if the rocks and pebbles are a similar size, shape, and colour. Coherence appeals to the viewer’s sense of order, and can make for very interesting images.

Similar shapes and colours make this image feel more coherent

Similar shapes and colours make this image feel more coherent

4. Balance and Rhythm

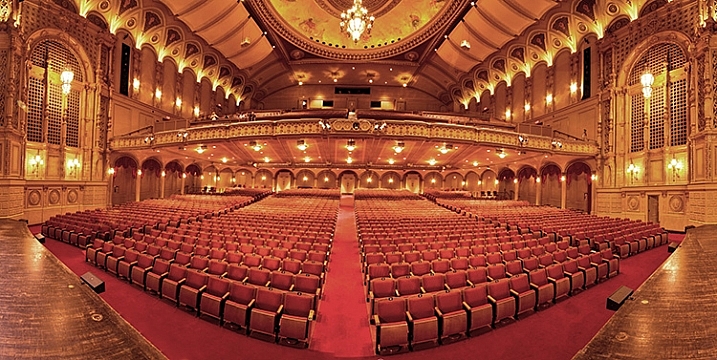
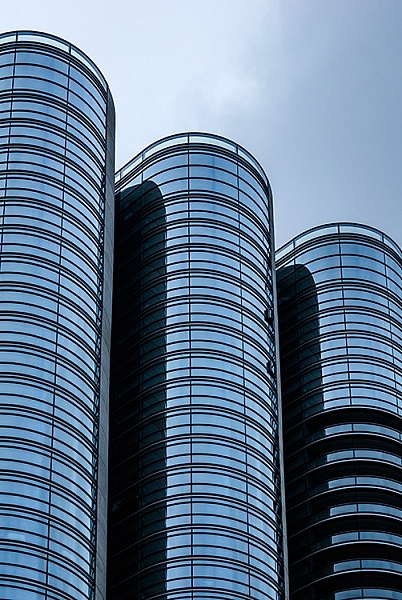
Balance is pretty much as it says, the idea here is to try and arrange the elements in your scene so that the image is symmetrical. This can be done using lines and shapes. The ideas is to create a sense of equality in the scene. Rhythm is similar in a sense, but is about a repeating pattern in the scene. These are a little more difficult to find, but often a close up or abstract image can showcase this technique well.

The centred composition of this image of a theatre shows the balance in the scene

The centred composition of this image of a theatre shows the balance in the scene

The curved shapes of the glass buildings gives a great sense of rhythm

The repeated curved shapes of the glass buildings gives a great sense of rhythm

5. Space

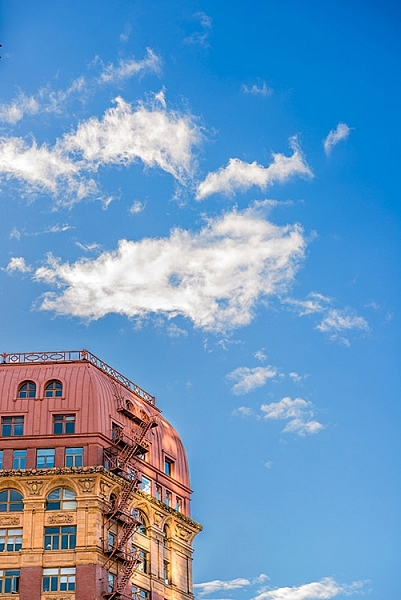
Open, or negative space, in your image is sometimes as important as the subject. Negative space gives your subject context, and shows the viewer where or how your subject relates to its surroundings. Quite often, negative space is the sky. It can be tempting to ignore this one, but if it’s used correctly, this can be a very powerful compositional tool.

The texture in the clouds in give this image some gravity. If the sky were simply blue, it would not be as impactful

The texture in the clouds in give this image some gravity. If the sky were simply blue, it would not be as impactful

6. Breaking the Rules

Now that you have some new ideas about how to make better compositions. Knowing these techniques will certainly improve some of your images, but also, knowing how to break them is just as important. In some cases, it will be obvious which technique to use, in others, you may find that putting your subject in the middle of your frame works best. You need to decide what will work for your image. Try techniques like this and see if one works. If not, break the rules and do what you think looks good.

By cropping the building quite aggressively, the image seems unfinished, but the colours and the sky make it work

By cropping the building quite aggressively, the image seems unfinished, but the colours and the sky make it work

googletag.cmd.push(function() {
tablet_slots.push( googletag.defineSlot( “/1005424/_dPSv4_tab-all-article-bottom_(300×250)”, [300, 250], “pb-ad-78623” ).addService( googletag.pubads() ) ); } );

googletag.cmd.push(function() {
mobile_slots.push( googletag.defineSlot( “/1005424/_dPSv4_mob-all-article-bottom_(300×250)”, [300, 250], “pb-ad-78158” ).addService( googletag.pubads() ) ); } );

The post 6 Advanced Composition Techniques to Improve Your Photos by Barry J Brady appeared first on Digital Photography School.


Digital Photography School

 
Comments Off on 6 Advanced Composition Techniques to Improve Your Photos

Posted in Photography


Pulse aims to bring advanced wireless control to your DSLR

04 Dec

Pulse, a project currently seeking funding on Kickstarter, aims to bring wireless control to many Nikon and Canon DSLRs. The device consists of a wireless controller that attaches to a camera’s hot shoe and plugs into its USB port, connecting to Android and iOS smartphones over Bluetooth. Read more
Articles: Digital Photography Review (dpreview.com)

 
Comments Off on Pulse aims to bring advanced wireless control to your DSLR

Posted in Uncategorized