RSS
 

Posts Tagged ‘Accent’

Luminar 3.1.0 update introduces ‘human-aware’ Accent AI 2.0 technology

29 Apr

Skylum Software has announced the latest update to its Luminar 3 photo editing software, Luminar 3.1.0. Four significant upgrades have been added including improvements to its proprietary artificial intelligence tool that enhances photos. Upgraded from version 1.0, Accent AI 2.0 features facial and object recognition technology that help photographers create a more authentic effect in their images.

Accent AI 2.0 upgrade

Accent AI was developed to help photographers speed up their workflow. By automatically handling common tasks like shadows, highlights and contrast, time spent editing an image takes seconds instead of a few minutes. Accent AI 2.0 boasts improved presets and is “human aware,” meaning it recognizes people in the photo and provides skin tone adjustments selectively for a more natural look.

Accent AI 2.0 also includes more accurate color correction and detail boosts. If it can’t make a specific detail in a photo look better, it’ll remain untouched. While the artificial intelligence suggests enhancements including color, depth, detail, and exposure that eliminate the need to adjust several sliders in the development process, the photographer has the flexibility to customize all aspects of the image.

Improved Sync Adjustments command

Photographers can adjust one image, using Luminar’s image-aware filters or Looks, select a series of images that they want to apply the same changes to, and synchronize them. Filters and Looks are transferred while image-specific adjustments such as cloning and cropping remain untouched.

RAW + JPEG organization

For those shooting in RAW + JPEG mode, photos are easier to organize and view. When importing pairs of images into Luminar 3.1.0, the option to choose RAW, JPEG, or both files is available. Select one for less clutter or both for side-by-side comparison. If both RAW and JPEG versions of an image are uploaded, the option to delete one file and keep the other in that pair is available. Changes made in one file can be transferred to the other with the Sync Adjustments command.

Improved sorting method

When images are uploaded to Luminar, attributes such as ratings, file size, and color labels can be applied for organization purposes. When using the Gallery view, it’s now easier to locate images as a second organizational label is automatically applied. When sorting through images, they will be displayed by the new category first followed by the date.

Windows updates

The Windows version of Luminar 3.1.0 received a slew of updates. They include the ability to import images from a memory card or hard drive and copy them to a folder, post images directly to SmugMug, add folders and user albums to the shortcut list, rotate images by 90-degree increments in the gallery, and install the Luminar plugin into Photoshop Elements.

How to update

Users with Luminar 3 can update for free to version 3.1.0.

  • Mac users can update by choosing Luminar 3 in the top menu bar, then clicking “Check for updates.”
  • Windows users can choose Help > Check for updates on the top toolbar.

Pricing

Skylum is offering special, limited-time pricing through May 14th on its photo editing software and courses. Mixed-computer households can share the same product key for Mac and PC. The software can be operated on up to five devices.

  • $ 60 / €60 /.£56 – Luminar 3.1.0
  • $ 70 / €70 / £65 – Luminar 3.1.0 & Photography 101 Video course by SLR lounge ($ 99 value)
  • $ 129 / €129 / £118 – Bundle (Luminar & Aurora) + Photography 101 Course by SLR Lounge ($ 99 value)
  • Standard pricing: $ 70/€70/£65 for all new users
  • Free trial and 60-day money back guarantee.
  • Free “Photography 101: A-Z Guide to Photography” course from SLR Lounge

DPReview will be independently reviewing Luminar 3.1.0, so stay tuned. To get a walkthrough of the improvements described above, check out the above video by professional photographer and Skylum’s Vice President of Product, Richard Harrington.

Articles: Digital Photography Review (dpreview.com)

 
Comments Off on Luminar 3.1.0 update introduces ‘human-aware’ Accent AI 2.0 technology

Posted in Uncategorized


How to Quickly Process Your Holiday Photos with Luminar’s Accent AI Filter

12 Dec

The holiday season is upon us, and suddenly everyone seems to be in a rush. We all have a million things to accomplish in just a few short weeks. At this time of year, I’m always scrambling to get my Christmas photos processed and ready for viewing. Feeling overwhelmed once again this year I decided to turn to Luminar by Macphun, soon to be Skylum, and try out their unique Accent AI Filter. It’s supposed to be a super simple and quick way to get beautiful images.

What is the Accent AI Filter?

AI stands for Artificial Intelligence and this filter is designed to do all the hard work for you. It uses artificial intelligence to assess the image and then applies the required adjustments to the image. This means that each image is processed according to the individual shadows, highlights, and colors present within the photo. The Accent AI Filter allows you to make quick, impactful adjustments with just one slider.

Locate the Accent AI filter in Luminar by clicking on the “add filter” button or by selecting the workspace called “Quick and Awesome”. This workspace combines the Accent AI filter plus the Clarity and Saturation filters to create a dynamic combo of super quick adjustments.

How to Process Your Holiday Photos with the Accent AI Filter in Luminar

Find the Accent AI filter quickly using the “add filter” button.

How to Process Your Holiday Photos with the Accent AI Filter in Luminar

The Quick and Awesome Workspace is easy to use for super simple adjustments.

Time to edit some photos

Each holiday season I have to process a large number of images. The first set of images usually belongs to the commercial realm. I’m often shooting photographs that are used to promote various Christmas art sales. When I’m staring at a collection of 300 images and a rushed timeline, a quick post-processing workflow is so important. I need to download, tweak, and upload and deliver digital images to clients for their social media campaigns. It’s fun, but it can be overwhelming when it needs to be completed in such a short frame of time.

Using Accent AI with commercial images

It’s time to test the Accent AI filter on these commercial images and see how it handles the varied lighting conditions at these venues. These images of a Christmas craft sale located here in Canada were shot in a heritage building.

The lighting was pretty terrible, and on this particular day, it was cloudy, so I was challenged by these factors along with the fact that many of the pieces were quite shiny. It was a challenging situation, especially when I had to photograph the items during gallery hours and I couldn’t set up any lights. I had to use what was available.

Image #1 –Only one adjustment

For the following images, I had to use fairly high ISO settings and a wide aperture of f/2.8 to f/4. In the case of the image below, I moved the slider on the Accent AI Filter over to the right and was able to quickly and easily adjust the image without making any other tweaks. The item in the image is clear and easy for customers to view. It only took me a few seconds to prepare this image for upload.

How to Process Your Holiday Photos with the Accent AI Filter in Luminar

I quickly applied the filter to this image. The result is certainly good given the lighting and conditions in the art gallery.

How to Process Your Holiday Photos with the Accent AI Filter in Luminar

Here’s the full image after processing.

Image #2 – Applied as a mask

In this second image, I found that the Accent AI filter created too much of a yellow tone that took away from the beauty of the color of the red hat. The wall looked yellow, and I didn’t like this effect. However, I really liked the way the filter treated the hat itself, and I think it brought out its details and rich color.

So I applied the Accent AI Filter as a mask. I added a second layer (just click the + sign next to the word “Layers”) and painted in the filter over the hat. The resulting image took just a few minutes to create.

How to Process Your Holiday Photos with the Accent AI Filter in Luminar

When I applied the Accent AI filter to this entire image it made the wall quite yellow.

How to Process Your Holiday Photos with the Accent AI Filter in Luminar

Here I used a mask to apply to filter to just the hat so that the wall remained white.

The Accent AI Filter helped me to edit my photos for clients quickly. It handled the editing of images taken under some fairly challenging lighting circumstances with high ISO settings. I think this speaks to the capabilities of the filter to assess each image and adjust it accordingly.

It should also be noted that you can have too much of a good thing. In some instances, the filter created too much of an unnatural HDR look. It’s important to adjust the slider accordingly and subtly. In this case, I didn’t want a heavy HDR look, and I had to be careful just how much of a boost I applied to each image.

How to Process Your Holiday Photos with the Accent AI Filter in Luminar

Here I purposely applied the filter to illustrate the point that the Accent AI filter can become too “heavy-handed” if you take it too far.

Using the Accent AI Filter for art images

I also tested out the Accent AI Filter on some images I created for use on Art Cards. The following image was shot with the purpose of being used as a Christmas card. I usually make a collection of 10 images that are all winter or Christmas themed. In years past I’ve slaved for hours, carefully editing the work. This year I decided to see if the Accent AI Filter could handle my art photos as well.

In the image below of an ice-crusted coniferous tree, I was struggling with a very hazy atmosphere. I wanted the yellowish tree to stand out from the green of the trees behind. I also wanted to define the ice and create an image that showed the unique nature of that moment in time. Remember I said to be careful in applying the filter too heavily, but in this case, I cranked it all the way to the right.

The brown of the tree branches stood out from the yellow of the tree needles, which is good. I also like how defined the ice became on the strands of dried grass below. There was no banding present, and the image still had a fairly natural look. In this case, the heavily applied filter worked perfectly.

How to Process Your Holiday Photos with the Accent AI Filter in Luminar

Here’s the unprocessed image.

How to Process Your Holiday Photos with the Accent AI Filter in Luminar

Here you can see the Accent AI Filter at 100 percent.

How to Process Your Holiday Photos with the Accent AI Filter in Luminar

The changes made to this image are considerable with the filter at full strength.

How to Process Your Holiday Photos with the Accent AI Filter in Luminar

Here’s the completed image.

Using the Accent AI Filter to adjust family snaps

Annually, I take a quick photo of the family to document the year. These images are not spectacular. They are family photos that are cherished on a personal level and document the changes each year brings. But they have to be shot quickly as my family isn’t overly patient when it comes to photography. I decided to see how the Accent AI filter would handle the editing of these photos.

Again the lighting is often challenging as they are usually shot on Christmas Eve. I wanted to see if the filter could enhance these memories and also help to fulfill my obsessive photographer tendency to want to take professional quality images all the time. In this case, I messed around a little and wanted to see how the filter affected the portrait.  This time I used Luminar as a plugin for Lightroom.

So I made a few adjustments in Lightroom first. I straightened the image and cloned out the cat’s tail. Then I moved over to Luminar and applied the Accent AI Filter. I like the resulting image. The filter helped to put a little bit of definition into the boys faces and balanced out the light. All in all, it worked pretty well.

How to Process Your Holiday Photos with the Accent AI Filter in Luminar

With the filter to almost 50% strength, the image is still pleasing.

How to Process Your Holiday Photos with the Accent AI Filter in Luminar

Here you can see the subtle difference the filter made in this image. Look closely at the detail in the blue t-shirt (after image the right of the line)

How to Process Your Holiday Photos with the Accent AI Filter in Luminar

Here you can see the changes in a side by side back in Lightroom. The image on the left shows the Luminar adjustments.

Conclusion

In conclusion, the Accent AI Filter in Luminar is an effective tool that can help you to adjust a large range of images. The filter is highly “intelligent”. It saves several steps in post-processing. If I were to edit these images without using the Accent AI Filter, I would have had to apply several different filters and spend time carefully adjusting their effect on the image. The Accent AI filter streamlined the process for me.

Also read: Speed up Your Workflow with the Accent AI Filter in Luminar and Batch Processing for more on how to apply this handy filter as a batch to a whole set of images at once. 

Here’s another image finished with slight adjustments using the Accent AI Filter.

Disclaimer: Macphun, soon to be Skylum, is a dPS advertising partner.

The post How to Quickly Process Your Holiday Photos with Luminar’s Accent AI Filter by Erin Fitzgibbon appeared first on Digital Photography School.


Digital Photography School

 
Comments Off on How to Quickly Process Your Holiday Photos with Luminar’s Accent AI Filter

Posted in Photography


Speed up Your Workflow with the Accent AI Filter in Luminar and Batch Processing

03 Oct

It’s not uncommon for me to sit down at my computer with a memory card full of images and stare blankly at my ever-growing Lightroom catalog while my mind reels at the thought of editing each and every one of them. Many photographers have experienced this phenomenon and there are certainly some good methods of dealing with it such as using Presets in Lightroom, syncing edits across multiple photos, or even just copying and pasting a series of edits from one image to the next and then tweaking as you go.

Other programs offer similar tools for processing multiple images at once, but the Achilles Heel of this type of workflow is that the edits are often static in nature. You can choose from a predetermined set of values (e.g. Clarity +10, Saturation +5, Highlights -20, etc.) and then apply that to many images at one time. But what if some of your images require subtle changes to those parameters?

Lightroom and just about every image editor I have ever used for batch processing won’t tweak your editing parameters if a picture needs a little extra contrast boost or exposure adjustment. That’s where Luminar is different, and its unique Accent AI filter combined with the program’s built-in batch processing offers a great way for you to significantly speed up your workflow while producing outstanding images for yourself, your clients, or your fans on social media.

How to Speed up Your Workflow Using the Accent AI Filter in Luminar to do Batch Processing

After batch processing with the Accent AI filter in Luminar.

Accent AI Filter in Luminar

The Accent AI filter is new in Luminar Neptune, an update to Luminar that was released this summer. It works by using artificial intelligence to analyze your image and make adjustments depending on where it thinks the picture needs it most. Accent AI isn’t just a predetermined set of adjustments, but a series of tweaks and edits applied dynamically to the image, all controlled by a single slider that lets you control the overall intensity of the filter.

When I edit my images in Lightroom I often start with a custom preset that includes many alterations such as sharpness, highlights, shadows, tone curve, etc., and then adjust those on a per-image basis according to how I want them to be fine-tuned. It’s the latter part of that process which becomes tedious, and it’s precisely where the usefulness of the Accent AI filter really starts to show.

If Luminar thinks that an image might benefit from lowering the highlights, increasing shadow detail, altering the exposure, or any number of other editing parameters then it adjusts all of these at once instead of forcing you to edit individual sliders and change numerical values.

How to Speed up Your Workflow Using the Accent AI Filter in Luminar to do Batch Processing

Original unprocessed image. All I did to edit this into the image you see above was to use the Accent AI filter in Luminar and nothing else.

Applying the Accent AI Filter

Another example of the effectiveness of the Accent AI filter is this image of the Seattle skyline I took from the Sky View Observatory at the top of the Columbia Center Tower. I spent a lot of time using the various sliders in Lightroom to try to get a decent final result. But when opened the same picture in Luminar and used the Accent AI filter, I got a great finished photo in a matter of seconds.

How to Speed up Your Workflow Using the Accent AI Filter in Luminar to do Batch Processing

Original photo. Listen closely and you’ll hear a sad trombone playing in the background.

The first version, processed only using Lightroom. I spent about 10-15 minutes to achieve this in LR.

The Luminar version is so good I like it even better than the results I got from manually tweaking all sorts of sliders in Lightroom, and it literally took less than 10 seconds with the single Accent AI slider.

How to Speed up Your Workflow Using the Accent AI Filter in Luminar to do Batch Processing

Applying the Accent AI filter dramatically improved the image. The only thing I don’t like about this picture are the spots from dust on my lens in the top-left corner. Accent AI is great at many things, but it won’t fix blemishes like that. Luminar does include a powerful Erase tool to fix blemishes if you want to, but of course, it doesn’t work for batch processing.

Accent AI can also be used in combination with other filters in Luminar to enhance your images even more. You can get just the right combination of editing parameters to make your photos shine. I often use the Accent AI Filter as a starting point, usually adjusting the value to between 60 and 80, and then apply other edits as I need them like Vignette, Dehaze, or Soft Focus.

But the real power of Accent AI lies in how it can be used for batch processing wherein it can dramatically speed up and enhance the results of your photo editing workflow.

Creating Presets in Luminar

How to Speed up Your Workflow Using the Accent AI Filter in Luminar to do Batch Processing

Click the Add Preset button (shown here with a red circle around it) to create a new Preset that you can use when Batch Processing several images.

In order to use Accent AI for batch processing you must first create a preset, since you can’t just apply individual filters when going through a batch of images. Your mileage may vary but I’ve found that a good place to start when working with this type of operation is a value of 75. Set that, then click the icon third from the left (circled in red on the screenshot) and give your Preset a name, but make sure it’s descriptive like “Accent AI 75”.

Presets can contain as many filters as you like. I have create several for different types of images including: landscape, close-up, portraits, etc. All of them include the Accent AI filter and a combination of other filters in order to get the right look. The heavy lifting is done with the Accent AI filter, though. So I have a few different presets created with just that one filter set to different values like 60, 80, and 100 so I can quickly apply a single Accent AI adjustment to multiple images at once.

The Accent AI filter shines

Since the Accent AI filter examines each image individually and edits them based on where it thinks they need to be altered, I can generally trust it to give me good results and often don’t even need to use any other adjustments or filters.

Another way to approach batch processing with Accent AI is to open a single image from a collection of similar photos, apply the filter just as much as you want for that specific image, and then save that value as its own unique Preset. Then enter the Batch Processing mode and apply that Preset to all of your images at once.

How to Speed up Your Workflow Using the Accent AI Filter in Luminar to do Batch Processing

The thought of going through and editing each one of these pictures individually really bugs me. I created a preset called Cicada Accent AI 82 for editing these in a batch, which was nothing more than the Accent AI filter set to 82 Percent.

The major difference between using the Accent AI Filter in Luminar and syncing (or copy/pasting) edits in Lightroom is that Accent AI works dynamically to apply adjustments where they are needed. So each picture is edited individually rather than having all the same edits applied to all of them at once. That makes it ideally suited for batch processing in a way that is a step above what Lightroom and other programs have to offer. I’m not all that comfortable with applying a single preset in Lightroom to many pictures at once without then going through and tweaking all of them. But I’ve learned to trust the Accent AI Filter in Luminar and I’m quite pleased with its results.

Batch Processing

Once your preset is created, click the multi-file icon in the top-left of the Luminar interface to enter Batch Processing mode. Here you can set a variety of options such as export location, image format and quality, resizing, renaming, and more.

How to Speed up Your Workflow Using the Accent AI Filter in Luminar to do Batch Processing

In the example above I have loaded the Accent AI 75 Percent preset and ran a batch process on 50 photos of a cicada bug. Luminar processed all of them in about the amount of time it would have taken me to edit a single image in Lightroom.

How to Speed up Your Workflow Using the Accent AI Filter in Luminar to do Batch Processing

A quick caveat

As good as the Accent AI filter is for batch processing, it does have some important limitations that you should be aware of. I have found that it works best for nature, landscape, and architecture photography and generally prefer its results in those types of situations over portraits.

That’s not to say it isn’t useful for portraits, just that I’m a bit overly picky and tend to obsess over small details that even the advanced artificial intelligence in the filter can’t quite match. Also there can be a tendency to apply it a little too much, especially when you first start using it. My advice would be to hold back a bit to a value of 40 or 50, especially when batch processing. Sliding the filter all the way to the right can sometimes result in photos that look a little too over-edited and fake, so it might be best to start small and then find how you like to use it over time.

How to Speed up Your Workflow Using the Accent AI Filter in Luminar to do Batch Processing

Conclusion

Even if you don’t like the idea of trusting a computer to edit your photos for you, I would encourage you to at least give the Accent AI filter inside Luminar a try. Use it in combination with a couple other filters and see how it could save you a great deal of time, especially with batch processing or generating proofs for clients. You might be surprised at how much you like it.

The post Speed up Your Workflow with the Accent AI Filter in Luminar and Batch Processing by Simon Ringsmuth appeared first on Digital Photography School.


Digital Photography School

 
Comments Off on Speed up Your Workflow with the Accent AI Filter in Luminar and Batch Processing

Posted in Photography


Macphun introduces Luminar Neptune with Accent AI filter

16 Jun

Software company Macphun has launched an update to its easy-to-use image editor Luminar. The most significant innovation in Luminar Neptune is a new artificial intelligence powered filter. The Accent AI Filter improves images with one simple slider instead of many adjustments and controls, such as shadows, highlights, contrast, tone, saturation and exposure.

The new filter uses artificial intelligence to analyze different areas of an image based on structure, objects, dark and light zones, colors and other parameters. As a user moves the slider across the image, the software automatically detects what areas of the image need improvements and applies them. You can also adjust the intensity of changes, generating a more natural or dramatic look, depending on the desired effect.

“Our mission to make complex photo editing tasks simple and fun led the team at our R&D Lab to explore Artificial Intelligence technology for image enhancement,” said Kevin La Rue, Vice-President at Macphun. “The Accent AI Filter emerged as a ground-breaking way to make perfect images instantly, incorporating the power of dozens of filters into one convenient tool. This is something other photo software is missing; and what’s more important, it’s something that all photographers will greatly benefit from,” concluded La Rue.

There is also a new workspace called Quick & Awesome. It consists of three filters which can create results very quickly: the aforementioned Accent AI Filter, Saturation & Vibrance and Clarity. The latter two allow for fine-tuning of the image after application of the Accent AI filter. Other updates include plug-in integration with Aurora HDR 2017, faster masking/brushing, an improved vignette filter and better memory management.

This latest update of Luminar is currently available for Mac only but Macphun is planning to launch a public beta of Luminar for PC in July. More information and free trials are available on the Macphun website.

Articles: Digital Photography Review (dpreview.com)

 
Comments Off on Macphun introduces Luminar Neptune with Accent AI filter

Posted in Uncategorized


Accent Lighting for Portraits

23 Feb
accent lighting

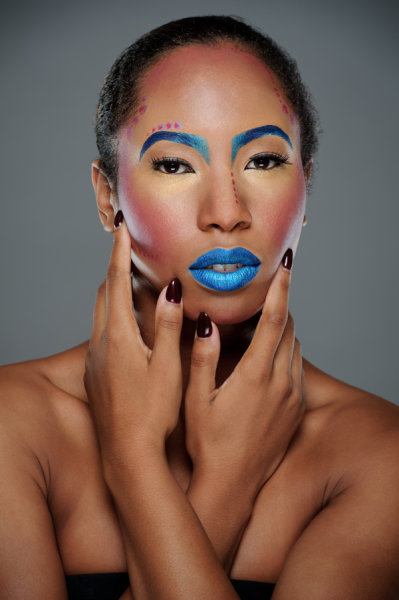
Tthanks to the wonderful Bridgette for her work as the make-up artist in this image

Studio lighting continues to mystify and bewilder many developing photographers. The intimidation of lighting ratios, modifiers, set-ups, etc… often seems as complex as deriving the quadratic equation or suffering through an explanation of Michaelis-Menten enzyme kinetics. Oh yes, for those of you biochemically privy folk, I did just go there! Well, one does not have to get lost amidst the photonic chaos if they understand how to interpret and understand the meaning of light.

Wow! Meaning of light? Sounds kind of deep and metaphysical doesn’t it? Please don’t worry! The only thing you need to remember about light is that it illuminates and creates shadows. Fairly simple, huh? We all know that when we shine a light onto something it allows us to visualize whatever is illuminated by the light. That is simple enough, right? Now, consider that behind every good light is a shadow waiting to give shape, form and dimension to your subject. This intricate interplay between what you illuminate and what you keep in shadow is what brings visual interest and creative acuity to your images. In studio lighting, this is your raw material with which you have to work and create.

There are many articles and books that describe studio lighting and as the student you may tend to focus on that main key light with simple one or two light set-ups, so we can dip our toe into the pool, so to speak, and see if the temperature is warm enough for us to dive in. A main or key light is simply the light source that is providing the primary illumination for our subject. Now, don’t get me wrong, one can create some amazingly, captivating portraits with a single light, but what if you want to add a little something extra? A little hint of spice to get some unique seasoning and flavor?

This is where accent lighting comes out to shine.

What is an accent light?

accent-lighting-01

Accent lighting is typically a very controlled light source that highlights specific areas of the subject. It can be a hair light that gives you some separation from a background, or a side light that illuminates the drops of sweat on an athlete after an intense workout. It gives some shape or form to elements of the photo allowing your eyes to experience the different dimensions of the image. Now, there are two important things you want to remember about accent lighting:

  1. The source should be very controlled and only hit the areas you desire
  2. It should be brighter then your main light to create a proper highlight

Easy ways to control accent lights are with modifiers such as barn doors, spot grids or small strip soft boxes. Basically, anything that will narrow and direct the beam of light coming form the light source. Heck, it could be a flashlight beam, the sun shining on the back of a subject’s head, or even the bright screen of a tablet or computer in the right conditions (yes, the eye fatigue from staring at the LCD screen is setting in). Add some colored gels to the accent lights to really make your images pop or bring some warmth into the mix.

Personally, I love adding side accent lighting to my portraits by firing my strobes into narrow V-flats (two large pieces of foam core taped together to form a v-shape) directed at the subject on either side to highlight the cheekbones and neck and really sculpt out those beautiful forms in light and shadow. The possibilities with accent lighting are truly endless, and the luminous results are absolutely stunning.

accent-lighting-02

For more on portraits and lighting check out these articles:

  • Portrait Tutorial Feast – Best of dPS 2013
  • 4 Tips for a Perfect White Background in High Key Photography
  • Portraits – Lighting the Shot, a dPS eBook

The post Accent Lighting for Portraits by Alex Smith appeared first on Digital Photography School.


Digital Photography School

 
Comments Off on Accent Lighting for Portraits

Posted in Photography


Hyundai Accent 3D projection mapping

28 Mar

Wow…this was an awesome video created for the Accent. Check out the cool graphics. It highlights the new slogan “New Thinking. New Possibilities.” and showcases the Accent in many way. Enjoy this clip!