
Many of the fixes we commonly apply to images come from darkroom processes. Contrast masking is one of those fixes and it can be used to fix an image which is under or over exposed.
Contrast masking is a relatively simple process and it can work wonders with your images. I like it because it generally doesn’t require you to make selections and there is a lot to like about fixes that don’t involve selections.
Here’s how to use Contrast Masking to fix an under exposed image:
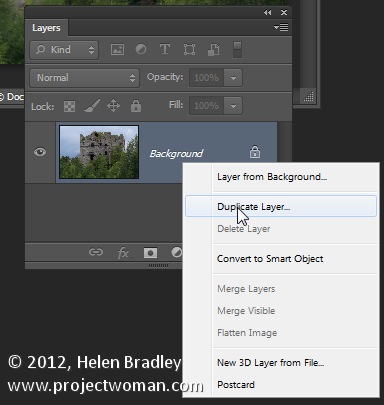
Open your image and duplicate the background layer. Target this duplicate layer in the Layers palette.
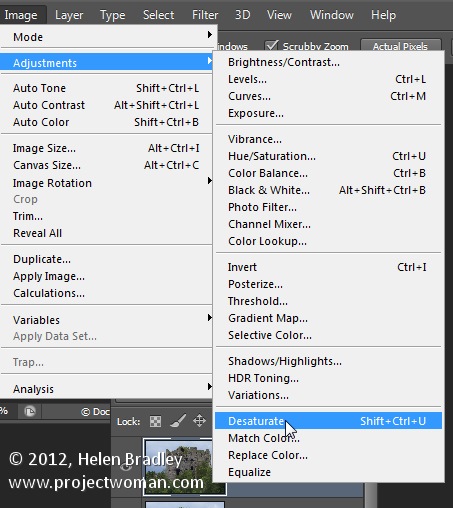
Desaturate this layer by choosing Image > Adjustments > Desaturate. Right now the default convert to black and white is just fine.
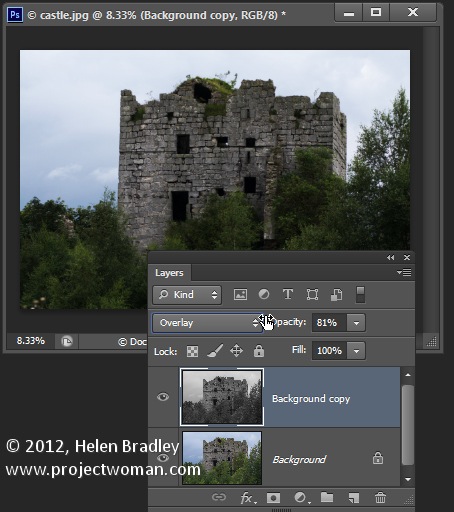
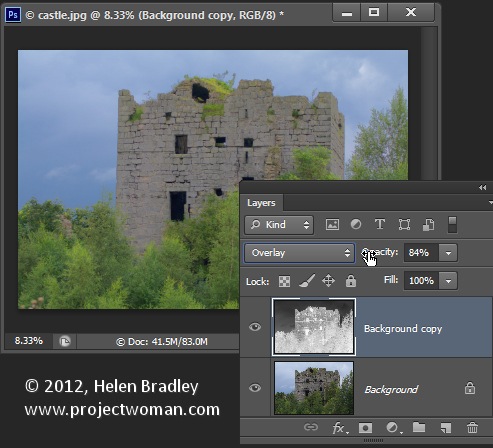
Alter the blend mode of this layer to Overlay.
To invert this black and white layer choose Image > Adjustments > Invert – this gives a negative of the image.
Adjust the layer opacity to suit.
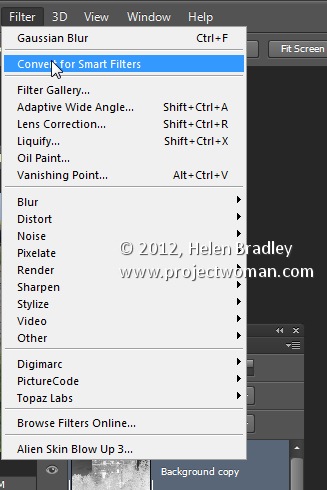
Convert the top layer to a Smart Object by choosing Filter > Convert for Smart Filters.
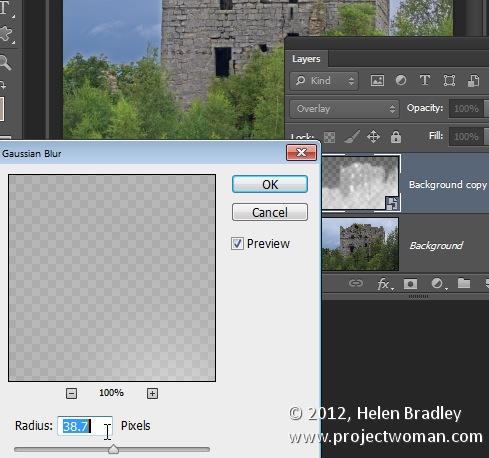
Now blur this layer by choosing Filter > Blur > Gaussian Blur. Adjust the Radius to adds some sharpening back to the image. Check the preview to get the best result for the image.
Post originally from: Digital Photography Tips.
Check out our more Photography Tips at Photography Tips for Beginners, Portrait Photography Tips and Wedding Photography Tips.
Fixing Images with Contrast Masks in Photoshop