We all love long exposures, well I personally do. They are a great way to create dynamism, movement, and add depth to your images.
In this tutorial, I’ll show you two long exposure hacks that can be useful if your Neutral Density filters are not dark enough, if it’s too bright outside and you cannot get a long exposure, or if you simply don’t have any ND filters. Dark ND filters can be really expensive, so this is a good alternative.
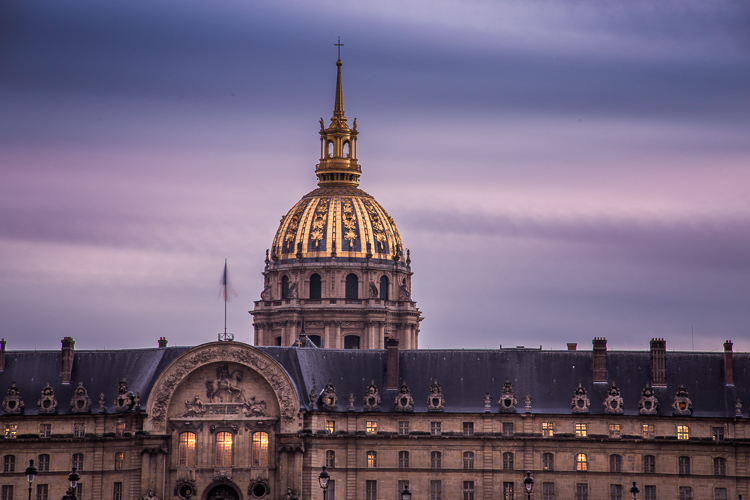
Long exposures create this surreal, and yet very pleasing effect to give a WOW factor to your images. Whenever you take a photo at night you will automatically get a long exposure, unless you use a very high ISO. For this tutorial I am talking about long exposures during the daytime, which are a bit more complicated to achieve.
The two hacks involves taking nine different images, and stacking them together. Now before I actually explain them, I will briefly give you the best camera settings and shooting conditions:
Shooting and camera settings
- You will ultimately get the best results if you shoot on a cloudy day with a lot of wind. Why? Because on a cloudy day you will get clouds, and the wind is going to give them movement, and that’s what you want – movement. On a cloudy day, you will also get the minimal amount of light to be able to extend your shutter time.
- You absolutely need a tripod, first all of all because your images need to be aligned, and you want your images as sharp as possible. With a shutter speed slower than 1/60th, you will start to get blurry results without a tripod.
- Use a cable release or a 2-second timer every time you take an image. This again is a great way to avoid camera shake and get sharp results.
- Focus on your subject and put the lens to manual focus, before you start taking your images. DO NOT refocus between the nine shots you are going to take.
- Use an ISO of 100. You are on a tripod, so you don’t really need a higher ISO.
- Use a very small aperture, like f/22. This will cut down the light entering your camera as much as possible and with an ISO of 100, will help slow down the shutter speed.
- Shoot one or two hours before sunset, then you will also have a minimal amount of light to extend your shutter speed even slower.
- Use your ND filters if you have some. If your ND filters are very dark (10 stop for example) you won’t need these hacks because you will directly get long exposures. If your filters are not dark enough, I would still recommend using them even if you have a one second exposure.
- I recommend exposing, and focusing before putting your ND filters on, because after that – well you won’t be able to see clearly.
Hack #1 – multiple exposure mode
The first hack consists of using the multi-exposure mode on your DSLR. If you do not have this mode, don’t worry the second hack works for all cameras. I personally use a Canon 6D, but this multi-exposure mode is mostly available for all sorts of advanced DSLRs.
You will find this mode on your menu, you just need to enable it.
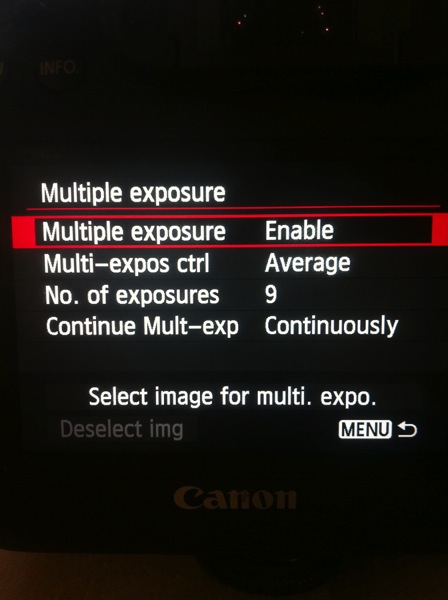
For the settings:
- Average for the Multi-expos ctrl option
- Continuously for Continue Mult-exp setting
You have the choice to pick how many exposures you want to shoot, the maximum will depend on your DSLR. I usually pick nine exposures to get as much movement on the clouds as I want.
This mode will allow you to multiply your shutter speed by the number of exposures you shoot. For example, If you shoot a single image with an exposure of one second, you will get a total exposure of nine seconds if you shoot nine exposures. It works the same if you have an exposure of 15 seconds.
With this mode, the camera will automatically stack the images together and give you one single image with all the cloud movement. This trick also works if you want some nice silky water.
If the clouds are moving really fast, then I recommend waiting around two seconds before you take another shot. The main trick is to not have the clouds at the same position one shot after the other. If the clouds are moving very slowly then I recommend waiting around 10-15 seconds between shots.
This mode will also tell you on your screen, how many images you have left to complete your multi-exposure.
This is an example of a long exposure I got using this method. My aperture was f/22, ISO 100, and I had a shutter speed of one second after using my ND filters. That wasn’t enough to get a long exposure with stretchy clouds, so I decided to use the multi-exposure mode. I took a total of nine shots, and you can see below the before and after using this mode. You can see that it does not only affect the clouds, my water looks nice and silky as well.
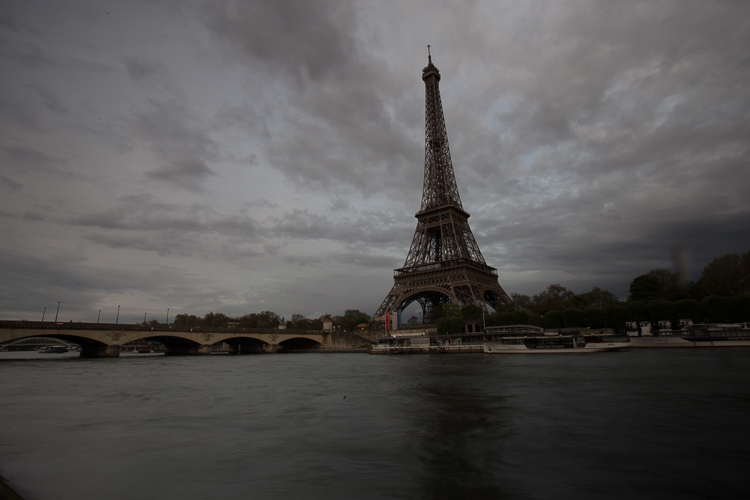
Single image
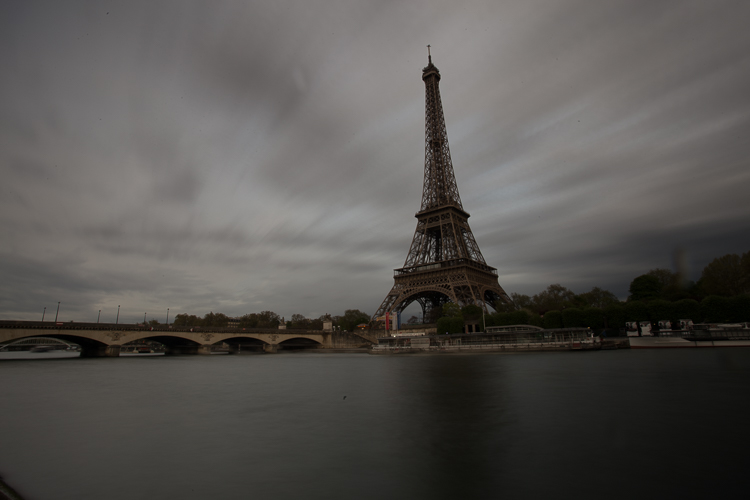
Nine shots using multi-exposure in-camera.
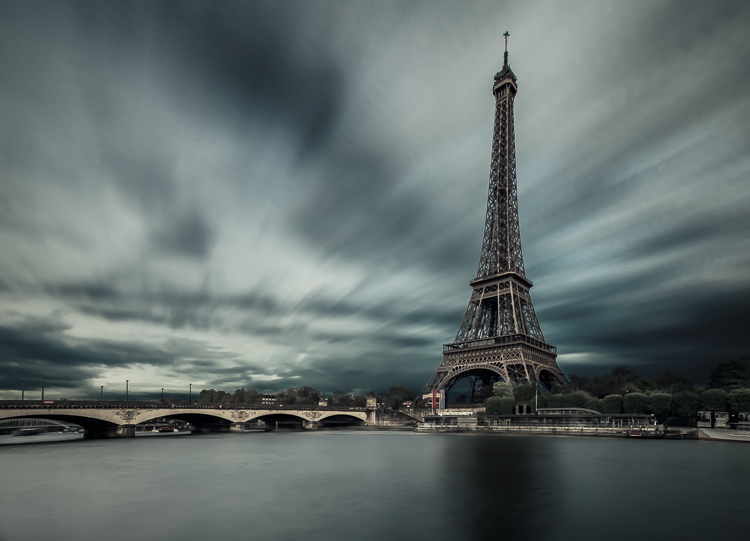
After some retouching, I got this result!
Hack #1 – multiple exposures merged in Photoshop
The second hack consists of doing exactly the same thing but manually. If you are used to shooting time lapses, then this shouldn’t be too complicated to understand.
The multi-exposure mode in-camera gives you automatically, and directly, the long exposure result in one image. For this hack, will shoot nine separate images, one after the other.
You need to use the same camera settings I mentioned above (manual mode, manual focus, tripod, small aperture, ISO 100, release cable or 2-second timer). For the shooting conditions I would also recommend the same thing, and use ND filters if you have some.
You will basically shoot a time lapse of nine images only. Do not forget to have an interval of 10 seconds minimum between each shots. This process can be quite boring. I personally use the magic lantern camera hack that has an intervalometer built inside the camera. I can then pick how long I want my interval to be between each shot, and the camera will automatically take an image every 10 seconds, for example, until I decide to stop.
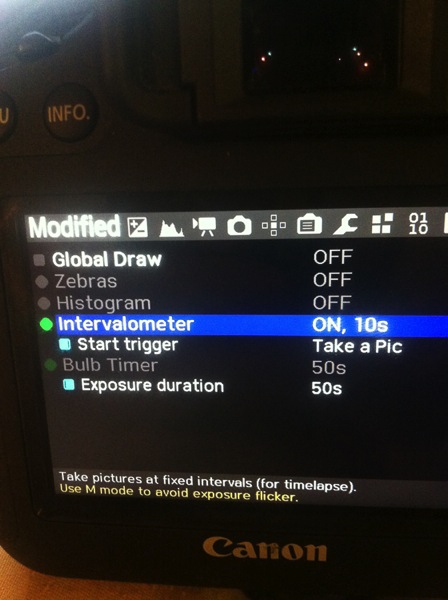
You can buy an intervalometer or use the timer on your phone to count your intervals. It’s really up to you.
Here’s an example of nine images I shot one after the other with an interval of 15 seconds between each. You can clearly see that the clouds are moving. For demonstration purposes, I have intentionally underexposed these shots.
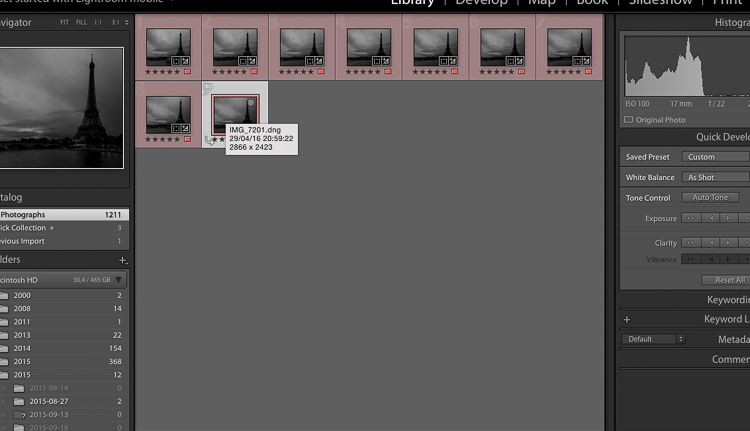
So after you get all your images, import them into Photoshop as layers (from Bridge or Lightroom whatever fits with your workflow).
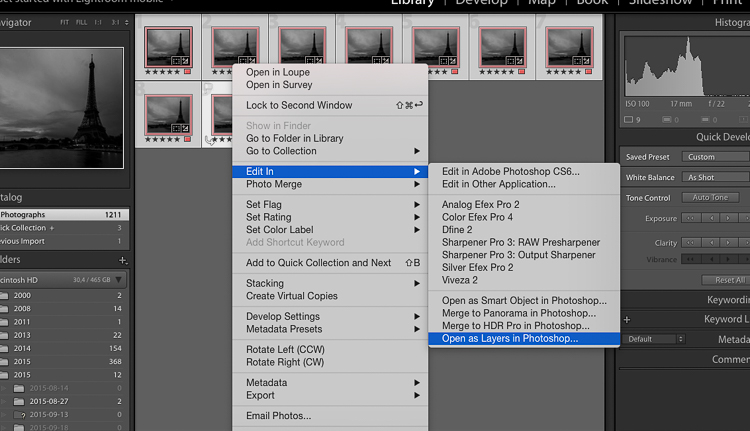
Open as Layers in Photoshop after selecting the images in Lightroom.
Then next thing you want to do is to select all the layers, and create a smart object.
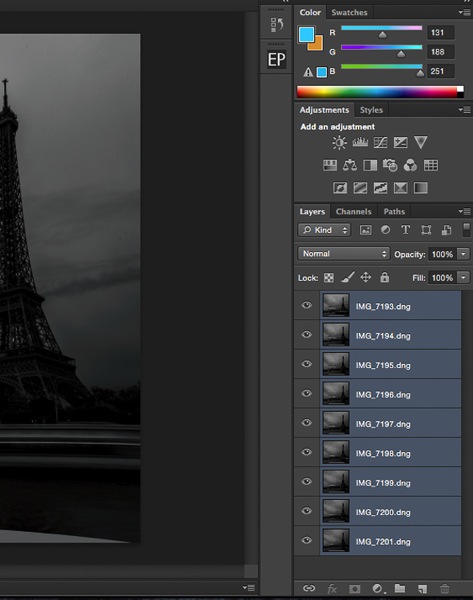
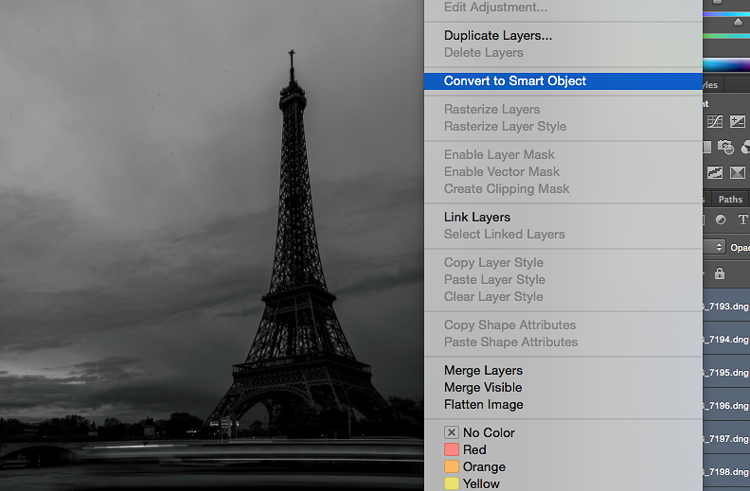
After that go to Layers -> Smart Objects -> Stacking -> Mean.
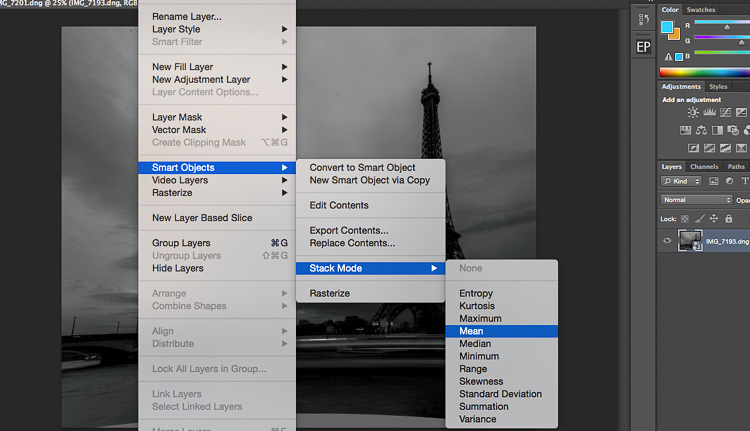
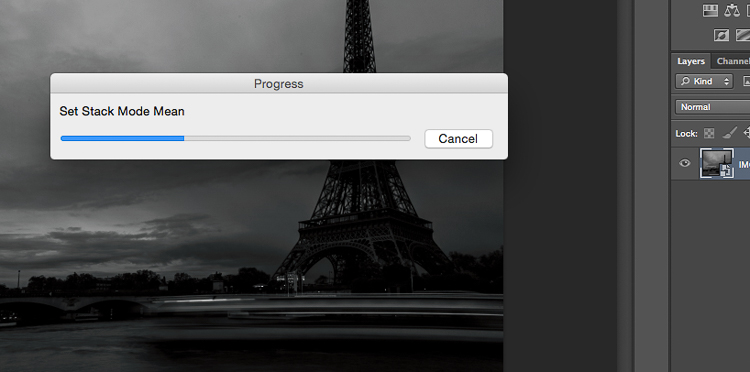
Photoshop will create a nice long exposure now, combining all the layers.
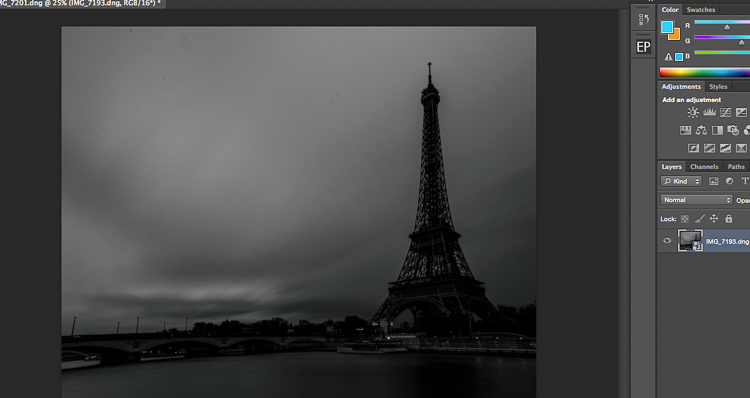
Here’s the before and after:
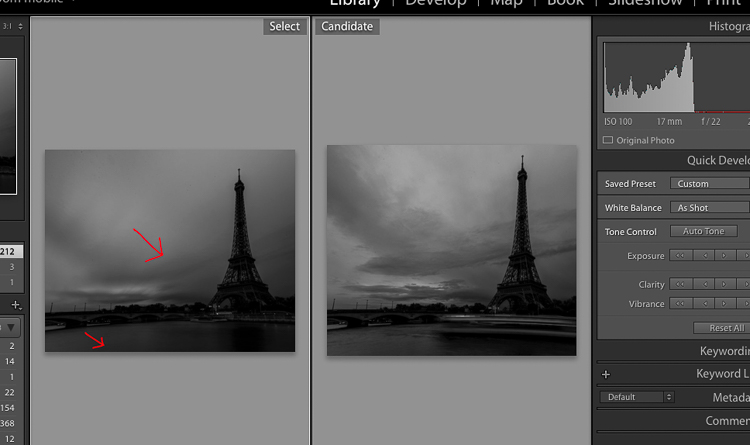
Before is on the right of a single image – after is on the left.
Conclusion
You don’t need super dark expensive filters to create long exposures. Of course, you will get the best results with them, but this is a pretty cool alternative. Now personally as a 19 year old student, I cannot spend a lot of money on gear, and so far these two hacks have worked perfectly for me.
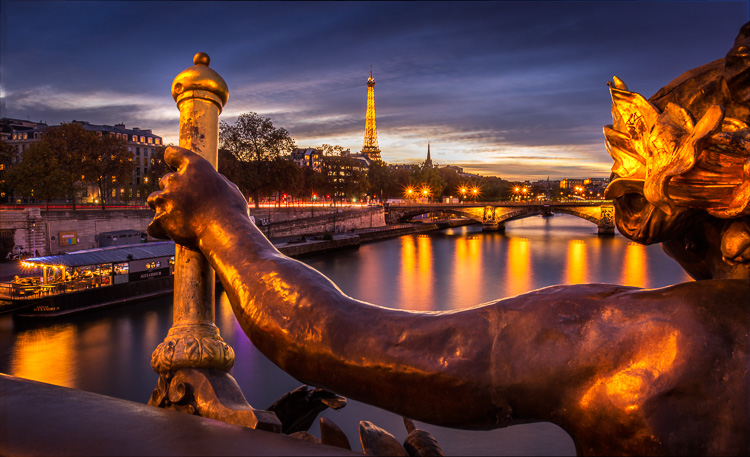
Enjoy the art, and share your hacked long exposure images in the comments below. I’d love to see your results.
googletag.cmd.push(function() {
tablet_slots.push( googletag.defineSlot( “/1005424/_dPSv4_tab-all-article-bottom_(300×250)”, [300, 250], “pb-ad-78623” ).addService( googletag.pubads() ) ); } );
googletag.cmd.push(function() {
mobile_slots.push( googletag.defineSlot( “/1005424/_dPSv4_mob-all-article-bottom_(300×250)”, [300, 250], “pb-ad-78158” ).addService( googletag.pubads() ) ); } );
The post 2 Long Exposure Photography Hacks to Try if You Don’t Have an ND Filter by Yacine Bessekhouad appeared first on Digital Photography School.
You must be logged in to post a comment.