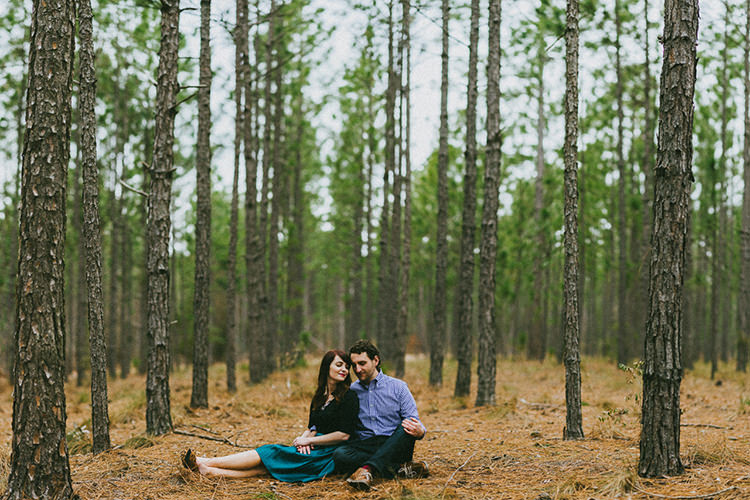
Lightroom is a fantastic program for keeping your photos organized, but it also provides many tools to speed up your editing workflow. You can even process many photos at once with batch editing. These techniques are by far the biggest time savers Lightroom provides. Once you start using them you’ll wonder how you ever edited each image individually.
Technique 1: Applying presets on import
Presets are hugely popular, and for good reason. They allow you to apply frequently used edits and adjustments to photos, instead of having to manually adjust the settings for each new image. But did you know you can apply your favorite preset during import and cut out a lot of steps?
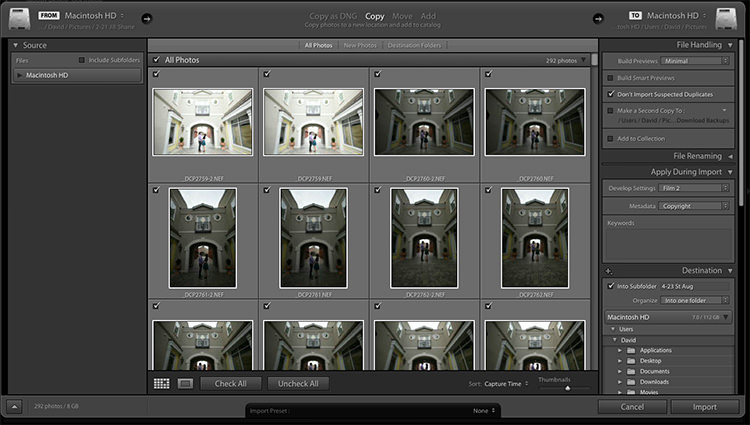
Step 1: Start an import in the library module
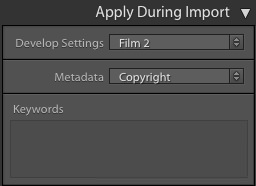
Step 2: On the right panel in the import dialog you’ll see the “Apply During Import” module.
Step 3: If you have a base preset, or a most commonly used one, select it here and click import to have it automatically applied to all of the photos as they are imported into Lightroom.
This not only skips a lot of clicks for you, but it applies them faster than selecting them individually in the develop module later.
Technique 2: Apply presets in the Library module
Applying presets on import is great if all the photos are similar, but you may need to use different presets on varying scenes, poses, etc. Instead of applying these one image at a time, you can select them in the library module and apply them in a group. This trick is great for weddings, or similar shoots where you may be inside then outside, or have constantly changing light conditions.
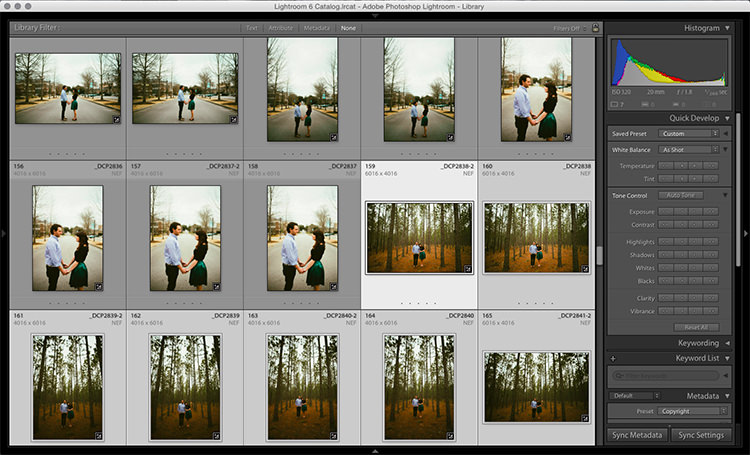
Step 1: Click the first image in the set, then hold down the Control button and click any others to which you want to apply the same preset.
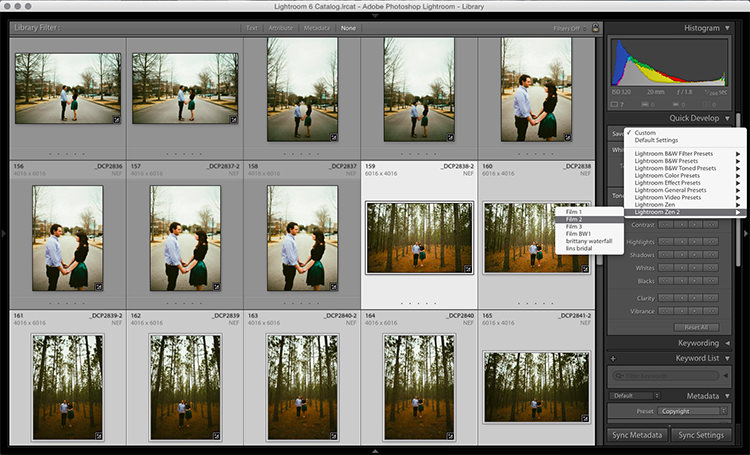
Step 2: At the top of the Quick Develop panel, click the drop down menu under “Saved Preset” and select the new preset. It will update the settings from that preset to all the selected photos.
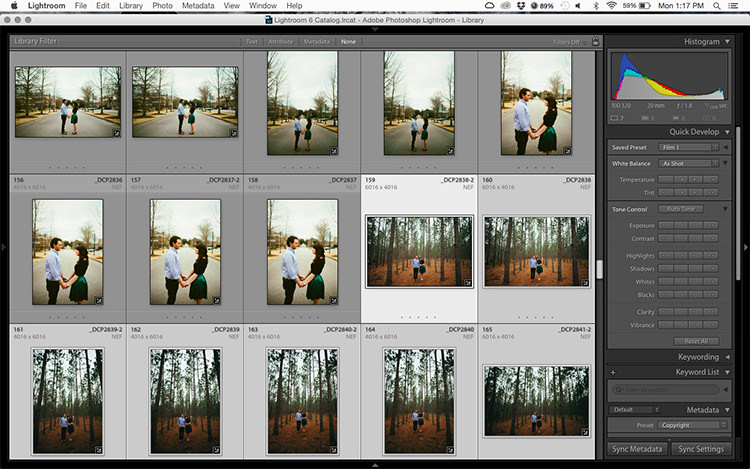
Step 3: Repeat for each changing scene as needed.
Technique 3: Edit in the Library module
The Library module runs much smoother, and processes changes faster than the Develop module. Since you have already applied your presets to the images, you will mostly need to make broad adjustments to your photos now. The Library module can edit the major adjustments like white balance, exposure, contrast, and more. Even better, you can apply these adjustments to multiple photos at once, making them more consistent, and saving you a lot of time.
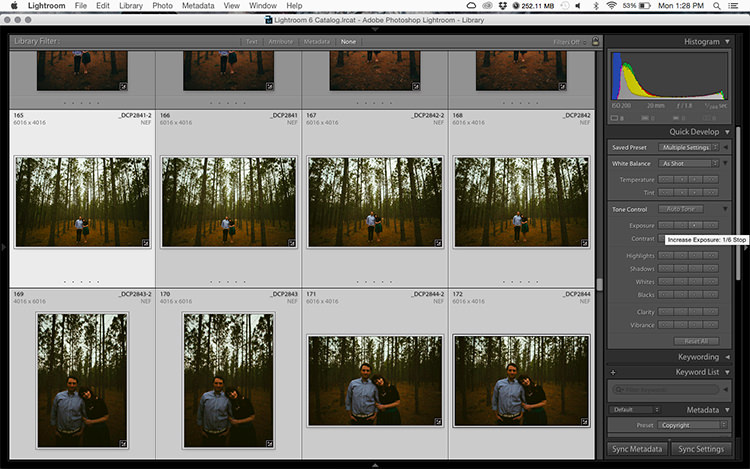
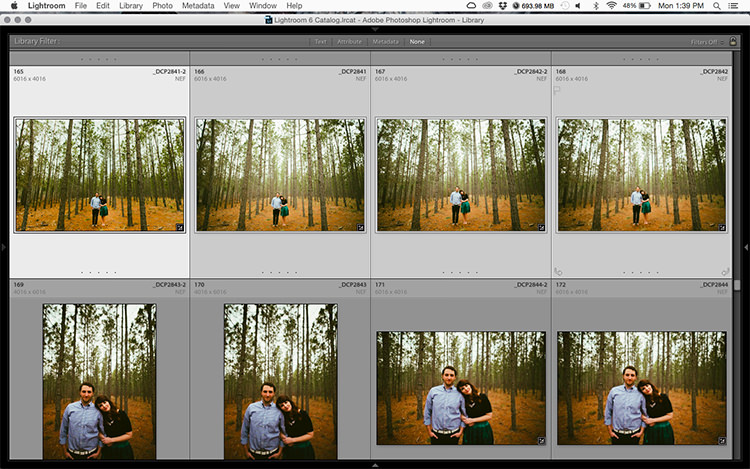
Step 1: Select a group of images as above (CTRL + click to add to your selection) in the Library module.
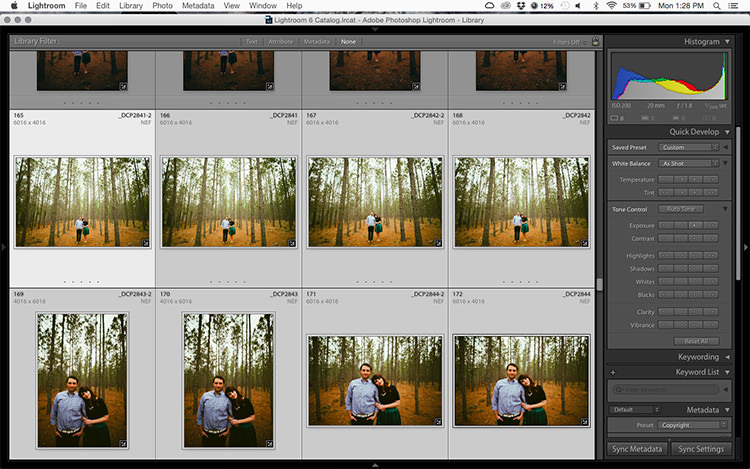
Step 2: In the Quick Develop panel on the right, click the arrows under Exposure, Contrast, and any other applicable options, to apply the changes to all selected photos at once.
Step 3: You can use the + and – key to enlarge or minimize the library view, allowing you to get a better view of the adjustments you are applying.
Technique 4: Sync adjustments across multiple photos in the Develop module
After applying the broad adjustments, you may need to fine-tune a few things in your images. These may include changes like a curve adjustment, add a gradient filter to fine tune a bright sky, etc. These are changes you have to make in the Develop module, but you can still apply them in batches, instead of doing them one photo at a time.
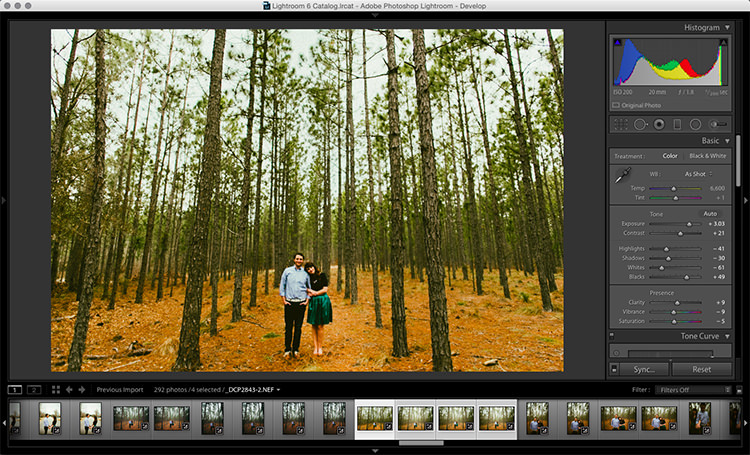
Step 1: In the Develop module, apply the adjustments to a single photo.
Step 2: In the Develop filmstrip or Library grid view, select multiple photos (CTRL + click).
Step 3: At the bottom of the right hand panel, select “Sync”, it will be the left button beside “Reset”
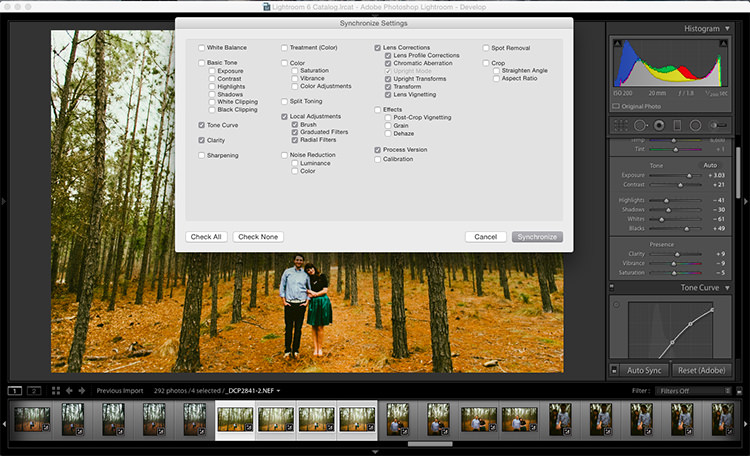
Step 4: Check the options that you want to sync with all the selected photos. These should include any adjustments you just made in the Develop module.
Keep in mind
When batch editing, be careful you don’t sync anything that you don’t want applied to all of the selected images. If you use the adjustment brush on skin in one photo and sync that to another photo, chances are that the subject has moved slightly, and the brush will be applied to the wrong part of the image.
Stick with it!
Do you think these batch editing techniques have a spot in your workflow? For me, learning to batch edit allowed me to cut my wedding editing time down to a fraction of what it was before. You can focus on the big picture and style of each shoot, and not get lost spending 10-15 minutes on every image. Batch editing lets you get more work done in less time, and that is fantastic!
Do you have any additional tips to add? Please do so in the comments below.
googletag.cmd.push(function() {
tablet_slots.push( googletag.defineSlot( “/1005424/_dPSv4_tab-all-article-bottom_(300×250)”, [300, 250], “pb-ad-78623” ).addService( googletag.pubads() ) ); } );
googletag.cmd.push(function() {
mobile_slots.push( googletag.defineSlot( “/1005424/_dPSv4_mob-all-article-bottom_(300×250)”, [300, 250], “pb-ad-78158” ).addService( googletag.pubads() ) ); } );
The post 4 Batch Processing Techniques to Speed Up Your Workflow in Lightroom by David Childers appeared first on Digital Photography School.