You’re probably quite familiar with Lightroom presets for editing photos, called Develop Presets. When was the last time you created your own Export Presets, though? These presets can help you speed up your workflow even more, by allowing you to save different export settings, for different needs. Let’s look at what they are, how they can help you in your workflow, and how to create your very own.
What are export presets?
Export presets are simply ones that tell Lightroom the parameters to follow when it exports your image files. Just like develop presets, they save you from applying the same settings repeatedly, only these are for exporting rather than editing.
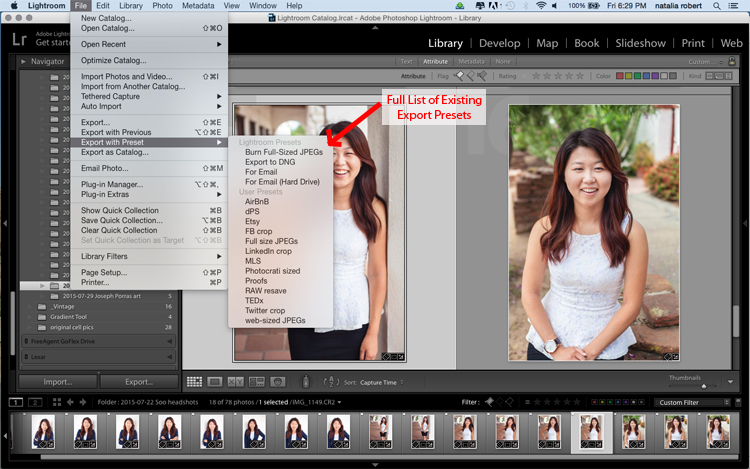
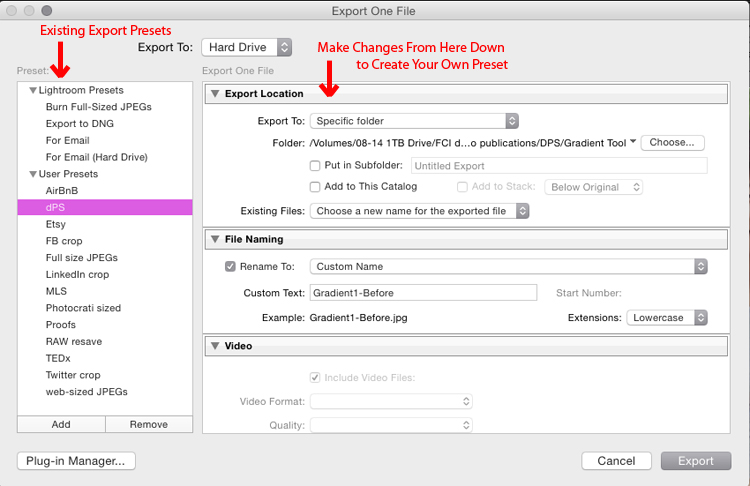
To see the current presets you have loaded, go to the Library Module, select a sample photo, and click Export. A window will pop up with all your exporting options, including things like destination folder, image name, image size, and watermarking options. The left side of this box will have a list of what export presets are available for you. Alternatively, you can see the list of presets if you go to File -> Export with Preset and you’ll see the list pop up. That view, however, doesn’t show you the details of each preset.

Why use export presets?
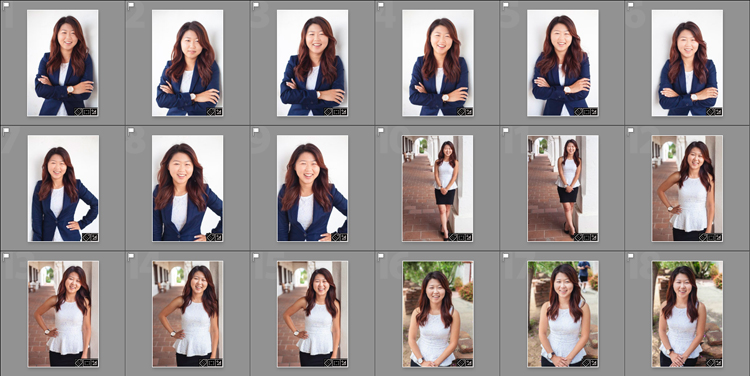
This is all great, but how are they helpful to you? Let’s work through your general workflow and see how these presets can be beneficial. You import your fresh photos into Lightroom, then go into the Develop module to work your editing magic. Once you’re ready to finalize and export the final product, you click back into the Library module to export. You have loads of options for how you could export this photo, all depending on its intended use.
Will the photo be used for social media? Then the size and resolution will be lower, and most likely you’ll want to add a watermark. Is this photo going to be printed and enlarged? Then you’ll want to make sure to give a large size and higher resolution to allow for enlargements. Is this photo going to be part of a set? Perhaps you want all the final photos to be labeled cohesively (for example: JonesFamilySession-1.jpg). Export presets allow you to set up parameters for each of these situations, saving you from having to remember settings and change them with each export. You can select multiple photos, click Export, and select the export preset that will then be applied to all photos in that export session.
How to use export presets
Great! Export presets are awesome! Let’s talk about how you can create some for yourself. While in the Library module, click Export to get the exporting window to pop-up. Begin at the top with Export Location and choose all the settings to put the images where you want them for your current need. If you’re exporting to send someone proofs from a session, for example, you’ll want to pay attention the resolution, watermarking, and file naming so that they are ready to show to your client. Don’t be shy about clicking on pull-down menus or playing with various numbers – you can always click Cancel and start over.
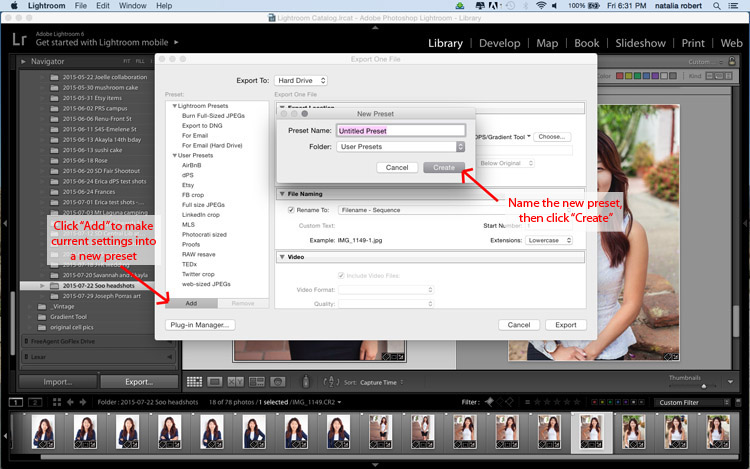
You can also always delete a preset if it was not properly set up. Now that you have the options all set how you want them, look to the left column where it has the list of existing presets. In the bottom of this column there is an Add button. Click that and a new small window will pop-up for you to input the name. Here is where you will name this preset, so be sure to make it something simple and clear for your future use. You can name it anything as long as it doesn’t have the exact same name of another existing preset. For example, your preset for client proofs may simply be called Proofs.
You can see that I have created a preset for images shown on Digital Photography School to fit the website requirements! Go through this process for each preset you want to create.


When you are ready to use one of these presets, select the photos to export, click Export, select the preset you want to use, and then click Export to complete! Note that you can modify these presets as you use them. For example, say I want to export a file with the same parameters as the Proofs preset, but I don’t want to watermark this one. I simply go to export, click on Proofs, then scroll down and modify the setting for the watermark. If this is a one-time use and I do not want to save this as a new preset, then I simply go ahead and click Export. If I decide I want this to be a new modified preset for me, then I would click Add after making my modifications, and name it something different (like: Proofs-clean).
What happens if you make a mistake and save an export preset you no longer want? In the Library module, click to Export. When the window pops up, click once on the export preset you want to delete. When that preset is highlighted, the Remove button next to Add will become available. Click Remove and it’s gone! Note that there is no confirmation window that pops up for deleting the preset, so be sure that you do want to remove it completely before you do this.
Do you have other exporting tips for speeding up your workflow and making life a bit easier? Please share in the comments below!
googletag.cmd.push(function() {
tablet_slots.push( googletag.defineSlot( “/1005424/_dPSv4_tab-all-article-bottom_(300×250)”, [300, 250], “pb-ad-78623” ).addService( googletag.pubads() ) ); } );
googletag.cmd.push(function() {
mobile_slots.push( googletag.defineSlot( “/1005424/_dPSv4_mob-all-article-bottom_(300×250)”, [300, 250], “pb-ad-78158” ).addService( googletag.pubads() ) ); } );
The post The What, Why, and How of Using Lightroom Export Presets by Natalia Robert appeared first on Digital Photography School.
You must be logged in to post a comment.