Do you ever find yourself struggling to include everything you want to capture in a single frame? Well then, panoramic photography might be exactly what you need to solve this problem. With the new release of Lightroom 6, Adobe has made it possible to take multiple single frames of a panorama and stitch them seamlessly together with a few clicks of the mouse.
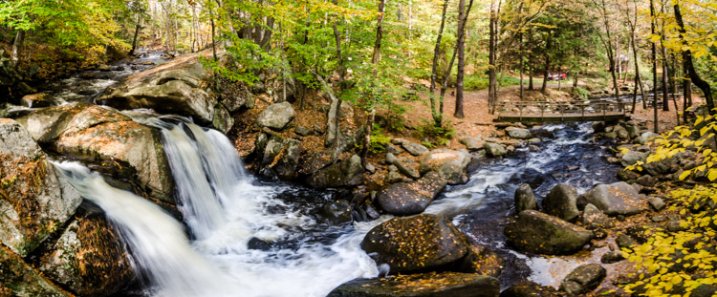
Before we dive into the post production aspect of making a panoramic photograph, let’s take a step back and make sure you have a basic understanding of what you’ll need to capture in order to create an panoramic photograph.
Panoramic Photography 101
A quick guide to capturing suitable images
You’ll need at least two different frames to stitch together to create your panorama, but three to five will give you more to work with, and allow for a much richer image. When capturing these frames make sure to overlap each frame by about 30% or so to allow enough information for the algorithms to match each image with its neighbor.
A few other quick pointers to make it as simple as possible for yourself when you get back to the computer include:
- Use a tripod to line up each shot.
- Manually set your white balance, ISO, aperture and shutter speed as consistency between each frame is extremely important.
- Make sure your area of focus remains consistent throughout the series of shots. Use back button focus, or autofocus and then switch to manual to lock it.
Of course, that was only a quick taste of what it takes to capture images for a panorama. For more on the subject of capturing the images read these two great dPS guides:
- How to shoot panoramas
- Getting started in panoramic photography
Panoramic Photography with Lightroom 6
Once you’ve captured a set of images for a panoramic photograph, and imported them into your Lightroom library, Adobe makes creating the panoramic photograph about as easy as: select, click, done. Let’s walk through the process.
Step #1 – Select the images you want to merge
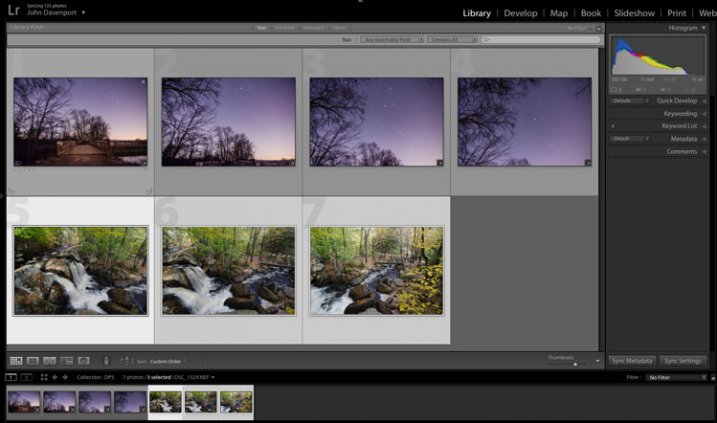
Here I’ve selected the three separate frames that make up the panorama attached at the top of this article. It doesn’t matter if you’re in the Develop module or the Library as you’ll be able to create the panoramic image from either place.
Step #2: Right click and select Photo Merge > Panorama
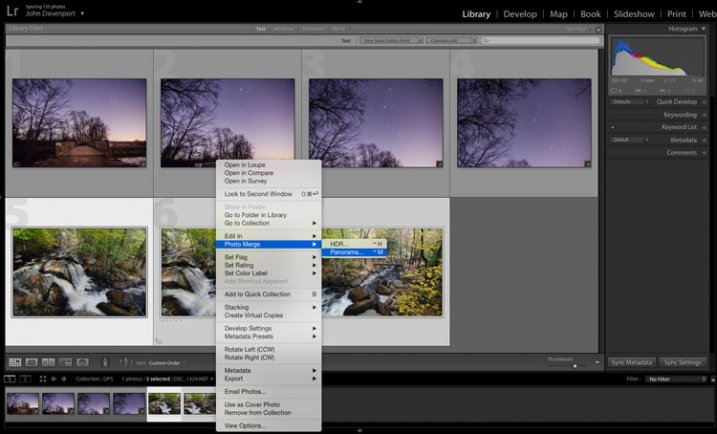
Yep! It’s really that simple!
Once you’ve selected Panorama you’ll be brought into a new window called the Panorama Merge Preview. There you’ll be able to see what the resulting panoramic photograph will look like, and you’ll have a few options for customizing it.
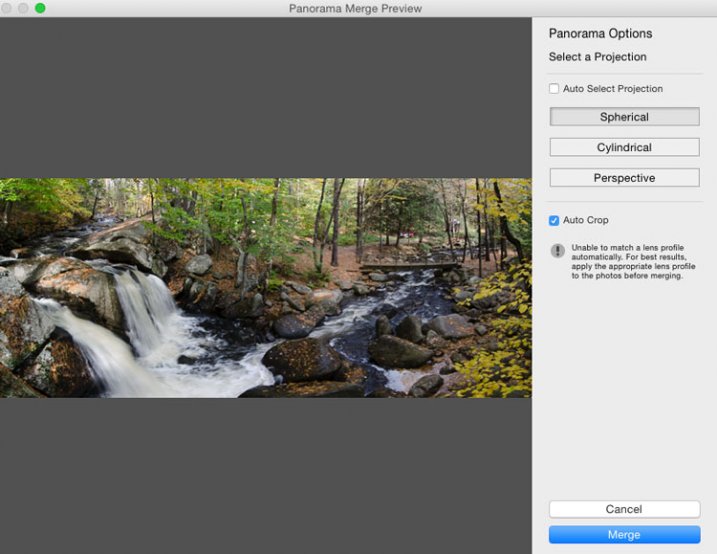
The settings here are not exactly self explanatory, and Lightroom doesn’t really provide any popup hints to help you out – so here’s the basic rundown of these options.
You have three options to choose from as to how you want your image to be projected as a panorama: Spherical, Cylindrical, and Perspective. This setting will determine how Lightroom merges the single frames together to control the distortion of the image.
Spherical – Great for wide panoramas and essentially transforms your selected images as if they were placed on the inside of a sphere.
Cylindrical – Similar to the spherical algorithm except that you’re images are now placed on the inside of a cylinder. In this case the vertical lines will remain straight.
Perspective – Great for architectural photography as it will try to keep all straight lines straight, however, wide panoramas may experience excessive distortion.
By selecting Auto Set Projection you can take the guess work out of this process by allowing Lightroom to pick the best option for you based on the images you’ve selected. In my experience Lightroom usually does a good job at choosing.
Finally, inside of the preview window you have the option to tell Lightroom to automatically crop the image. If left unchecked this is how the waterfall image above would have looked.
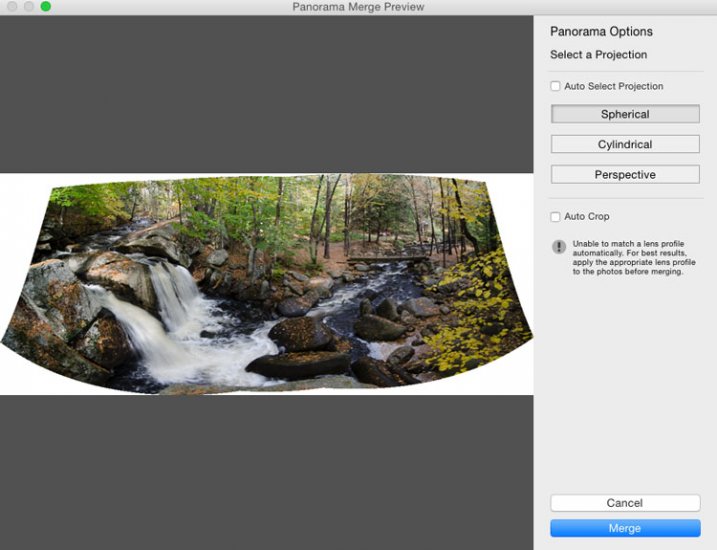
However, even if you leave the Auto Crop box checked, using the crop tool once you’re back inside Lightroom will allow you to get back the uncropped image should you want to change anything at a later time.
Step #3 – Final Touches
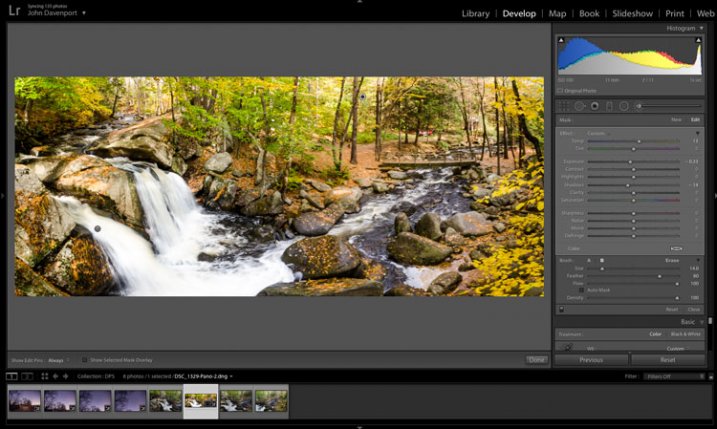
Once you’re done merging your image it will be brought back into Lightroom, ready for you to finalize as you desire. Here I’ve just made a few small tweaks to bring out the colors and brighten the image up a bit.
Another example – if you prefer video
Don’t forget that you can also use Lightroom to create panoramic images of a vertical scene as I’ve done here with this photograph below.
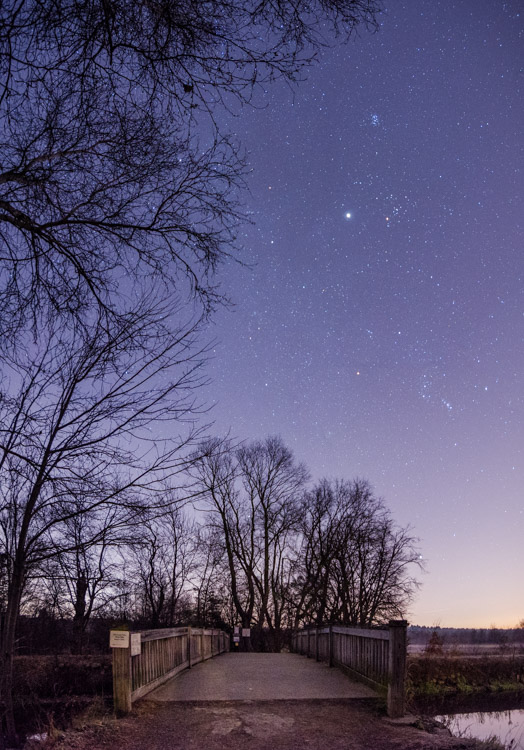
Because everyone learns differently I’ve also created a simple video walkthrough of the process explained above, using this photograph to demonstrate the process click for click. Watch it below.
See more of Lightroom 6’s new features here.
googletag.cmd.push(function() {
tablet_slots.push( googletag.defineSlot( “/1005424/_dPSv4_tab-all-article-bottom_(300×250)”, [300, 250], “pb-ad-78623” ).addService( googletag.pubads() ) ); } );
googletag.cmd.push(function() {
mobile_slots.push( googletag.defineSlot( “/1005424/_dPSv4_mob-all-article-bottom_(300×250)”, [300, 250], “pb-ad-78158” ).addService( googletag.pubads() ) ); } );
The post Step by Step Using Merge to Panorama in Lightroom by John Davenport appeared first on Digital Photography School.
You must be logged in to post a comment.