
I recently bought a Sony A7 to compliment my Canon 6D DSLR. A friend convinced me that having small-form, full frame camera would be an entire different way of shooting. I value his opinion, so I picked one up. You can see how I used it in my last article: when to trick your camera for the perfect exposure.
A New Love of Prime Lenses
I started off with a Sony 55mm f/1.8 and a 24-70mm f/2.8 lens that requires a Sony adapter. The 55mm shoots like a dream and is insanely light-weight.
The 24-70mm and adapter are super heavy and ridiculously front-heavy. It’s a great lens but after taking it out a few times, I concluded it wasn’t for me. I really enjoy having big apertures available for low light so I started looking for another prime lens.
A Lens Defect Leads to Awesome Bokeh
I was looking through photos on Flickr and noticed a few images in which the bokeh appeared to be swirling in a circular pattern. It was awesome and unlike anything I had ever seen!
I did some quick digging and found out this was called “swirly bokeh” and certain vintage lenses created this effect through a manufacturing defect. Well, this “defect” looked really cool to me and I wanted to incorporate it into my lens collection.
Meet the Helios 44-2 58mm f/2 Lens
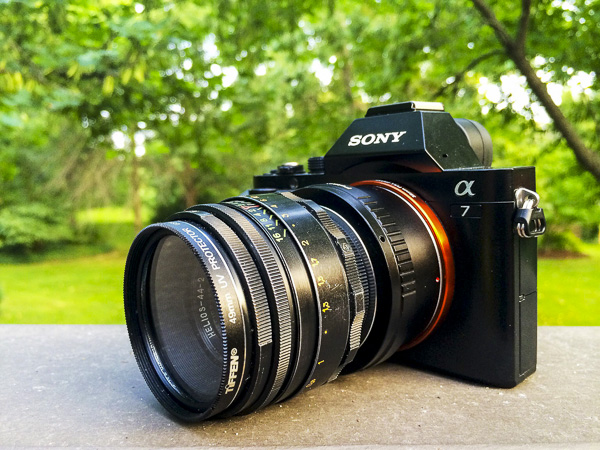
Sony A7 with Helios 44-2 58mm f/2.0 lens
I quickly found out that there is a cult following for a lens called a Helios 58mm f/2. This was a Russian-made lens that essentially tried to emulate a famous Zeiss one.
Several companies made these lenses over several decades, in the millions of units, so they aren’t exactly rare. This means they are really inexpensive because they are so common.
Where to Find the Helios 44-2 Lens
Out of the several models of these lenses, the Helios 44-2 model lens reportedly creates the “swirly bokeh” I was looking for. I did a quick search on Ebay and quickly found a ton of these for sale out of Russia and the Ukraine.
After looking at several of them I found one in excellent condition and ordered it for less than $ 50 including shipping. What a deal! I’ve seen plenty of people get even better deals on Ebay than I did.
Mounting it on the Sony A7 Camera
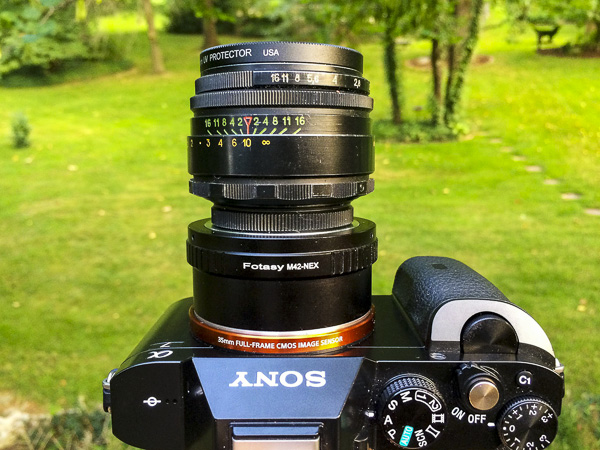
Mounting the Helios 44-2 to the Sony A7
These lenses were created for the Leica M-mount so I needed to get an M mount adapter for the Sony A7. I picked up a $ 10 Fotasy M42-NEX adapter which works perfectly.
It looks like a Franken-camera. I really dig how crazy this thing looks. Other photographers have stopped to ask what the heck this lens setup is.
Using Manual Focus and Manual Aperture Lenses
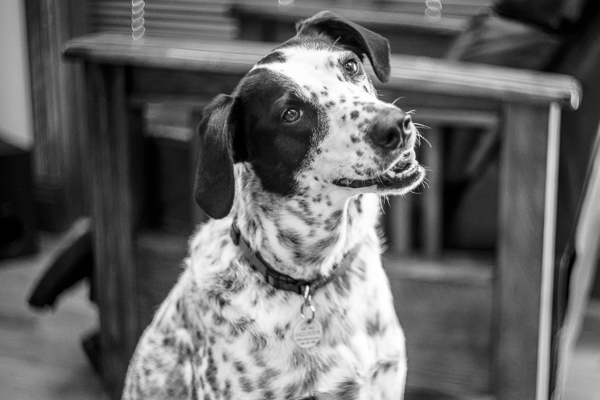
The Sony A7 focus assist feature makes it easy to nail perfect focus each time.
I’ve never had a lens that was manual focus only, much less manual aperture. Instead of using a front or rear dial on the camera to choose your aperture, you grab a ring on the front of the lens to change it by twisting it to the left or right.
Some of you reading this are used to these type of lenses, but this was new to me.
Using the Manual Aperture Lens
While the aperture ring took some getting used to it really slowed my photo-taking process down. The aperture ring on the front of the lens reads 16 on the left, then 11, 8, 5.6, 4, 2.8, and 2 as you turn to the right. Simply twist the dial to change the aperture.
Manual Focus Rocks with the A7 and the Helios 44-2

Light pole in a Missouri truck stop parking lot surrounded by corn.
The standard challenge with manual focus is trying to eyeball the focus correctly. You might think your subject is in focus but you might be just an inch or two out of focus.
The A7 has focus assist (also called focus peaking) that lights up in-focus sharp details in red so you know what part of the image is in focus. This makes it so simple.
Taking a portrait? Twist the focus ring until a person’s eyes are rimmed in red and guarantee the eyes are sharp in focus. It’s so easy its almost like cheating!
Finally – the Swirly Bokeh

This unfocused image shows the popular swirly bokeh effect
I bought the lens right before a two-week trip to St. Louis, Missouri to visit family. It arrived the day before we left so it was ready to go right away. After a quick test shoot I decided I was going to shoot this Helios 58mm 44-2 exclusively for the entire trip.
Finding the swirly sweet spot
I took the lens into my in-laws yard to find out how best to find the swirly spot. When you shoot wide open at f/,2 close up to the subject, the background is a beautiful, buttery, soft bokeh.

This image was shot up close which caused the background to blur too much for the swirl I was looking for. I aimed up at a leaf that was a little further away, still shooting wide open at f/2.
It isn’t swirly bokeh yet, but it definitely has more shape to it. I’m getting closer.

I took another shot with a subject at mid range, perhaps 4-5 feet away while still shooting wide open at f/2.

Can you start to see the swirl shape in the background? This photo showed me I’m getting closer. It seems that you need some decent distance from your subject, and you need some background that can fall into swirly bokeh in the distance.
I aimed up at a birdhouse about 8 feet away, which conveniently had a cute little toad in the lower peep hole and took the shot.

Success! Apparently you need a pretty good distance in the background so the little light spots and details can register into that swirl shape. I’m really in love with this Helios 44-2 lens.
The Helios 44-2 lens is fast with the f/2 aperture, weighs next to nothing, and was incredibly inexpensive at less than $ 50 including shipping. Even at very small apertures, it tops out at f/16, the lens puts out beautiful images.

The first of many manual focus prime lenses
I’ve had such a great time with this lens that I’m going to purchase more manual focus primes. The glass creates very unique images and I can’t wait to pick up my next one.
Have you ever mounted older lenses with your DLSR camera?
If so let me know what lens(es) you have in the comments below as I’m looking to try out even more. Share your images too please.
The post Creating Swirly Bokeh with the Helios 44-2 lens by Mike Newton appeared first on Digital Photography School.
You must be logged in to post a comment.