RSS
 

Posts Tagged ‘PostProcessing’

dPS Top Post-Processing Tips of 2020

30 Dec

The post dPS Top Post-Processing Tips of 2020 appeared first on Digital Photography School. It was authored by Jaymes Dempsey.

dPS top post-processing tips of 2020

If you’re looking for a quick way to improve your photos…

…then I highly recommend you take your post-processing knowledge to the next level.

Unfortunately, learning to post-process isn’t easy – which is where these tips will come in handy!

So without further ado, here are the most popular post-processing tips of 2020:

1. 5 Things to Do to Every Photo In Lightroom to Improve Your Photos

5 Things to Do to Every Photo In Lightroom to Improve Your photos

2. Luminar vs Lightroom: Three Reasons Luminar is Better (and Two Reasons It’s Not)

Luminar vs Lightroom: Three Reasons Luminar is Better (and Two Reasons It’s Not)

3. How to Use the Photoshop Camera Raw Filter for Better Photo Editing

How to Use the Photoshop Camera Raw Filter for Better Photo Editing

4. RAW vs DNG: What’s the Difference and Why Does It Matter?

RAW vs DNG: What’s the Difference and Why Does it Matter?

5. A Beginner’s Guide to Layer Masks in Photoshop

A Beginner’s Guide to Layer Masks in Photoshop

6. Lightroom Moon Editing Tips for Awesome Moon Photos

Lightroom Moon Editing Tips for Awesome Moon Photos

7. 10 Tips for Using a Graphics Tablet for Easier Photo Editing

10 Tips for Using a Graphics Tablet for Easier Photo Editing

8. Good Crop Bad Crop – How to Crop Portraits

Good Crop Bad Crop – How to Crop Portraits

9. 8 Vital Tips To Crop Your Photos For Stronger Compositions

8 Vital Tips To Crop Your Photos For Stronger Compositions

10. Capture One 20 Review: Time to Make the Switch From Lightroom?

Capture One 20 Review: Time to Make the Switch from Lightroom?

11. How to Create a Photogram Effect With a Digital Process

How to Create a Photogram Effect with a Digital Process

12. 8 Core Lightroom Retouching Techniques to Enhance Your Photos

8 Core Lightroom Retouching Techniques to Enhance Your Photos

13. How to Convert a Photo to a Drawing in Photoshop

How to Convert a Photo to a Drawing in Photoshop

14. Mastering Noise Reduction in Lightroom: The Essential Guide

Mastering Noise Reduction in Lightroom: The Essential Guide

15. RAW Photo Editing in Lightroom: How to Make Your Photos Look Real to Life

RAW Photo Editing in Lightroom: How to Make Your Photos Look Real to Life

Conclusion

If you enjoyed these post-processing tips, then I highly recommend you check back on Thursday – which is when we reveal our final set of top tips from 2020!

Specifically, you’ll get to discover the most popular nature and wildlife photography tips of this year.

So make sure you don’t miss out!

The post dPS Top Post-Processing Tips of 2020 appeared first on Digital Photography School. It was authored by Jaymes Dempsey.


Digital Photography School

 
Comments Off on dPS Top Post-Processing Tips of 2020

Posted in Photography


5 Post-Processing Effects to Instantly Enhance Your Photos

03 May

The post 5 Post-Processing Effects to Instantly Enhance Your Photos appeared first on Digital Photography School. It was authored by Jaymes Dempsey.

awesome post-processing effects featured image

Do you want some quick and easy ways to improve your images with post-processing effects?

Look no further.

Because this article will give you 5 excellent post-processing effects to take your photos to the next level, instantly. And best of all: You can use them in pretty much any editing program and on pretty much any photo!

Sound good?

Let’s dive right in.

lightroom post-processing effects

1. Increase the contrast and saturation for more powerful photos

This effect is extremely easy, and yet sometimes easy is best:

Boost the contrast.

And then boost the saturation.

Because here’s the thing:

Most photos suffer from a lack of tonal contrast and a lack of color richness. This makes the photos look flat. They look uninteresting. They’re, well, boring.

But they can be quickly and easily spiced up…

…by doing a little work with the contrast and saturation sliders.

palm tree saturation and contrast adjustment
This image required a bit of a saturation and contrast boost before it really popped.

Note that pretty much every photo editing program offers both of these options in a basic form, though, you can choose to selectively edit tones and colors, as well. And while there’s definitely value in doing more careful tonal editing (via a curves adjustment, for instance), I like to start with the basic contrast slider. It gives me a sense of what the contrast will do to my image, and it’s a great starting point.

The same is true of the saturation slider. Sure, it’s possible to do more advanced adjustments by selecting individual colors. But it’s not necessary for this editing step. Instead, just push up the saturation slider a tad, and see how it looks.

Now, when working with the saturation slider, you do have an alternative:

Vibrance.

Vibrance is a smart saturation. It enhances colors by selectively saturating colors that are less saturated, while also leaving skin tones alone. So if you’re hoping for a more subtle look, the vibrance slider may be the way to go.

dog with contrast and vibrance adjustment
I boosted both the contrast and vibrance to make this image stand out.

(In fact, feel free to try both. There’s no reason not to experiment!)

At the end of the day, it pays to start with basic edits (such as contrast and saturation). Just a little bit of editing can go a long way!

2. Pull up the darker tones for a nice cinematic fade

This is one of my favorite editing effects, however, it’s very easy to overdo (so be careful).

It’ll give you a faded, cinematic look, like this:

leaf with cinematic fade

Start by accessing your tone curve, and placing points at the center and toward the bottom left:

tone curve in Lightroom

Then carefully drag up the end point, watching the darkest areas of your photo as you do.

When you do this right, the deepest blacks in your photos will lighten, giving you a beautiful fade.

You can also experiment with the amount you actually pull up the tone curve (the more you pull, the stronger the effect). And you can try pulling down the tone curve just before the leftmost edge, to create a more contrast-heavy look:

contrast-heavy tone curve

The key is to experiment and see what you can come up with. No look is necessarily better than the others, just different. So test out many possibilities; you can even create presets out of your favorites.

3. Split tone with blues in the shadows and gold in the highlights

Split toning is all the rage in photography these days, especially with more fashion and portrait-focused photography (though you can definitely use split toning in landscape, street, and most other forms of photography). The idea is that you add different colors into the highlights and the shadows, giving a more creative feel to the image.

Here’s the split-toned look:

split toned flower example - post-processing effects

Do you see how the shadows are slightly bluer, and the highlights are slightly gold? While this is a look that is often overused, it can be a great addition to your photos when used with restraint.

In fact, I recommend you use the split tone I’ve previewed above as a starting point:

Blue shadows, gold highlights.

From there, you can start experimenting with other split tone options: yellow shadows, green highlights, orange shadows, teal highlights, even pink highlights, blue shadows (and so much more!).

Many of the best split tones use complementary colors (colors that sit opposite one another on the color wheel). Complementary colors contrast heavily with one another, which adds impact and depth to your photos, hence the popularity of those split-tone combinations. But bear in mind that you can also use analogous colors, which sit next to one another on the color wheel and bring a sense of harmony to your photos (blue and green are a great example).

In fact, the key to split toning is to think about the mood you want to evoke, and then choose color combinations that convey that mood!

Note that split toning is offered by most editing programs, but it may be a bit difficult to find. For instance, Lightroom puts its split toning panel just above the Detail module:

split toning panel Lightroom

Once you’ve found it, have fun experimenting!

4. Selectively saturate the blues and greens for added impact

I’m a huge fan of selective color editing.

Why?

Because it allows you to both simplify and enhance the composition, which results in better, more powerful compositions overall.

Plus, it can just look plain cool.

Generally speaking, it can pay to selectively saturate the colors of your subject, especially if your subject is struggling to stand out against a colorful backdrop.

(Note that you can also desaturate the background colors, or even do both at once for an enhanced effect.)

But for a really neat effect, I recommend you focus on two specific colors:

Blues and greens.

That’s what I did for the image below:

black-eyed susan with blues and greens enhanced - post-processing effects

You see, blues and greens tend to look really, really good when saturated more deeply. They’re not close to skin tones, so you don’t have to worry about messing up portrait shots. And they’re mostly in the background, so they just add a bit of pizzazz to your photos.

Of course, saturating blues and greens won’t always look good. There are situations where it just won’t work.

But generally speaking, richer blues and greens will serve to enhance your photos.

Now, to do selective color adjustments, you’ll need to work with individual colors. In Lightroom, this requires using the HSL sliders in the Develop module.

HSL sliders in Lightroom

Just remember:

Don’t saturate just to saturate. Instead, do it if it improves your photos. Saturated blues and greens are nice, but only to a point. As with any good post-processing effect, don’t get carried away!

5. Use exposure gradients to add depth to your photos

Exposure gradients aren’t difficult to pull off, but many photographers never bother to learn how to create them.

Which is absolutely a mistake, because exposure gradients can take your photo from boring to life-like in two seconds flat.

flower image with gradient applied - post-processing effects

First things first:

An exposure gradient simply lightens or darkkens a part of your photo in gradient fashion. So the effect gradually dissipates as it moves across your photo. Like this:

gradient overlay dissipating

Now, this may seem like a silly effect, but think about what you could do if you put the gradient in the corner, just below where the sun sat in the sky. You’ll get an artistic, flare-like result.

Neat, right?

You can get even better results by warming up the gradient. That way, the light is slightly golden:

lightroom gradient example - post-processing effects

Flare-like effects are cool, but my favorite thing about gradients is how they add depth to images. The gradient gives an element of three-dimensionality that’s hard to produce otherwise, and for that reason alone, gradients are worth trying out.

Here’s the bottom line:

While you won’t always end up using the exposure gradient in your final image, it’s often worth a try. Because gradients can make a huge difference to your photos.

Plus, they’re very cool!

5 post-processing effects to instantly enhance your photos: Conclusion

Hopefully, you now feel like you can do a lot with post-processing, even if editing isn’t your strong suit.

And, as I said, these effects aren’t actually hard to use. Just give yourself a bit of time to learn how to produce the effects, then start practicing.

You’ll soon be processing gorgeous photos!

lightroom gradient example - post-processing effects

Do you have any other post-processing effects tips you’d like to share? If so, please share them with us in the comments. We’d also love to see your post-processing effects results, so feel free to share those too.

If you are interested in further post-processing tips, why not try out Jim Hamel’s Lightroom course.

The post 5 Post-Processing Effects to Instantly Enhance Your Photos appeared first on Digital Photography School. It was authored by Jaymes Dempsey.


Digital Photography School

 
Comments Off on 5 Post-Processing Effects to Instantly Enhance Your Photos

Posted in Photography


Poll: What Post-Processing Software Do You Use to Edit Your Photos?

17 Apr

The post Poll: What Post-Processing Software Do You Use to Edit Your Photos? appeared first on Digital Photography School. It was authored by Caz Nowaczyk.

Poll: What Post-Processing Software Do You Use to Edit Your Photos?

Here at dPS, we’d like to know what post-processing software you use to edit your photos so that we can deliver some post-production tutorials that better suit you.

Let us know below. You can vote for more than one if you use multiple editing platforms. If the software isn’t listed, please let us know what you use in the comments section!

Note: There is a poll embedded within this post, please visit the site to participate in this post’s poll.

The post Poll: What Post-Processing Software Do You Use to Edit Your Photos? appeared first on Digital Photography School. It was authored by Caz Nowaczyk.


Digital Photography School

 
Comments Off on Poll: What Post-Processing Software Do You Use to Edit Your Photos?

Posted in Photography


The dPS Top Photography Post-Processing Tips of 2019

29 Dec

The post The dPS Top Photography Post-Processing Tips of 2019 appeared first on Digital Photography School. It was authored by Caz Nowaczyk.

dPS-Top-Photography-Post-processing-Tips-of-2019

This week on dPS, we’re featuring some of the top articles in different categories that were published on the site throughout 2019. It’s always a bit tricky to gauge the overall popularity, as some were published earlier in the year and have had more time on the site than the ones posted more recently. But still, it gives you an idea!

We’ve already published the overall Top Photography Tips of 2019, the Top Photography Gear Tips of 2019, and the Top Landscape Photography Tips of 2019.

So now we have the Top Photography Post-Processing Tips of 2019.

Here are the Top Photography Post-Processing Tips of 2019:


1. 5 Photo Editing Mistakes Every Beginner Must Avoid

By Kunal Malhotra

5 Photo Editing Mistakes Every Beginner Must Avoid

2. 5 Basic Post-Processing Tips to Instantly Improve Your Photos

By Nisha Ramroop

5 Basic Post-Processing Tips to Instantly Improve Your Photos

3. 6 Great Lightroom Tricks You Probably Didn’t Know About

By Kav Dadfar

6 Great Lightroom Tricks You Probably Didn’t Know About

4. Four of the Latest Updates to Lightroom Classic CC

By Adam Welch

Four of the Latest Updates to Lightroom Classic CC

5. How to Move Your Lightroom Library to an External Drive

By Simon Ringsmuth

How to Move Your Lightroom Library to an External Drive

6. 10 Tips to Make Lightroom Classic CC Run Faster

By Darina Kopcok

10 Tips to Make Lightroom Classic CC Run Faster

7. Four Lightroom Tips to Enhance Your Landscape Photos

By Simon Ringsmuth

Four Lightroom Tips to Enhance Your Landscape Photos

8. 3 Photo Editing Mistakes to Avoid

By Lily Sawyer

3 Photo Editing Mistakes to Avoid

9. The Secret to Sharing Photos with Lightroom CC

By Simon Ringsmuth

The Secret to Sharing Photos with Lightroom CC

10. How to Light, Shoot, and Edit for High-Key Photography

By Rick Ohnsman

How to Light, Shoot, and Edit for High-Key Photography

11. Are Your Photos Safe in the Cloud? The Real Cost of Using these Services

By Simon Ringsmuth

Are Your Photos Safe in the Cloud? The Real Cost of Using these Services

12. No Filter? No Problem! 3 Simple Methods to Fix Your Sky in Post-Production

By Nils Heininger

No Filter? No Problem! 3 Simple Methods to Fix Your Sky in Post-Production

13. How to Make Your Photos Awesome in Lightroom or Photoshop Camera RAW

By Caz Nowaczyk

How to Make Your Photos Awesome in Lightroom or Photoshop Camera RAW

14. How to Achieve Color Accuracy in your Photos

By Karthika Gupta

How to Achieve Color Accuracy in your Photos

15. Don’t Create Detail, Just Reveal It – How to Reveal the Hidden Details in Your Photos

By Herb Paynter

Don’t Create Detail, Just Reveal It – How to Reveal the Hidden Details in Your Photos

If you enjoyed these Top Photography Post-Processing Tips of 2019, stay tuned for tomorrow, where we share the top gear photography tips of 2019!

If you have a favorite post-processing-related dPS post, share it with us in the comments!

The post The dPS Top Photography Post-Processing Tips of 2019 appeared first on Digital Photography School. It was authored by Caz Nowaczyk.


Digital Photography School

 
Comments Off on The dPS Top Photography Post-Processing Tips of 2019

Posted in Photography


Your Comprehensive Guide to Photography Post-Processing Software

04 Sep

The post Your Comprehensive Guide to Photography Post-Processing Software appeared first on Digital Photography School. It was authored by Herb Paynter.

My recent article, 3 Alternative Post-Processing Applications that Challenge the Adobe Throne, presented just three of the many post-processing software packages available (both free and paid) that provide excellent post-processing capabilities. In this article, I’ll give you a much longer list of post-processing software. To be impartial, I’ll list the titles in alphabetical order.

Your Comprehensive Guide to Photography Post-Processing Software

DXO Photolab 2

A few of the titles added by readers in the Comments section of the “3 Alternatives” article impressed me with their power and innovative design. I’ve been editing digital images with every software package available since late 1986, and I thought I’d seen most of them. However, it seems that the list of capable editing software grows weekly.

As you will notice, I do not mention ALL the software available for download or online use. Those that made the cut will be actual production titles with a minimum set of well-designed editing functions.

To be honest, I’ve looked at a significant number of offerings that are little more than public domain routines. They are not fully implemented or even adequately defined. These were considered but not listed.

Listed below is a wide variety of packages on both mobile and laptop/desktop platforms; a true variety pack that covers the field from hobbyist to professional users. No matter what your preference, you’ll find something here to tickle your fancy and meet your demands.

Your Comprehensive Guide to Photography Post-Processing Software

ACDSee Photo Studio Professional

As was welcomed in my first article, additional post-processing software titles should be added to this list by readers who have discovered (and used) them.

It is important to recognize all such products in a desire for fairness and sharing information. Because this list includes many more titles, I will not mention individual features of these titles, only a brief mention of the product’s most notable features.

This is where you can really contribute…

I’ll rely on you to describe your favorite features and benefits of your favorite titles. Let’s make this a very collaborative group effort BUT with one important request: please be brief and succinct with your comments. Limit your comments to one or two of the features that make your favorite app stand out from all others. That way, we learn from each other without monopolizing the mutual pulpit.

Image: Skylum Luminar 3

Skylum Luminar 3

List of photography post-processing software

ACDSee Photo Studio

Publisher: ACDSee Systems International

Website: https://www.acdsee.com/en/index/

Trial: Free/30 days

Price: $ 60 Mac/Win/Mobile

Afterlight 2

Publisher: Afterlight Collective

Android Website: https://play.google.com/store/apps/details?id=com.fueled.afterlight&hl=en_US

Apple Website: https://apps.apple.com/app/id1293122457 

Trial: Free/30 days

Price: $ 60 Mac/Win/Mobile

Affinity Photo

Publisher: Serif

Website: www.affinity.serif.com

Trial: Free/30 days

Price: $ 50 Mac/Win/iPad

Capture One

Publisher: Phase One

Website: https://www.phaseone.com/en/

Trial: Free/30 days

Price: $ 299 or $ 20/month Mac/Win

Darktable

Website: www.darktable.org

Price: Free

Exposure X4.5

Publisher: Alien Skin

Website: https://www.alienskin.com

Trial: Free/30 days

Price: $ 119 Mac/Win Computer

Fotor

Publisher: Fotor

Android Website: https://play.google.com/store/apps/details?id=com.everimaging.photoeffectstudio&hl=en_US

Apple Website: https://apps.apple.com/app/id440159265?referrer=click%3D8cd7ac09-77a3-42f6-9005-ed622bd3e17f

Price: Free

Gimp

Publisher: Gimp

Website: https://www.gimp.org

Price: Free Mac/Win Computers

Google Photos

Publisher: Google

Website: https://www.google.com/photos

Price: Free online

Lightroom CC and Lightroom Classic

Publisher: Adobe Systems

Website: https://www.adobe.com/creativecloud/photography.html

Trial: Free/30 days

Price: $ 10/mo Mac/Win

Your Comprehensive Guide to Photography Post-Processing Software

Adobe Lightroom Tablet/Computer/Mobile

Online Photo Editor

Publisher: PicMonkey

Website: https://www.picmonkey.com/

Trial: Free/7 days

Price: Starts at $ 7.99/month

Photo RAW

Publisher: ON1

Website: https://www.on1.com/products

Trial: Free/30 days

Price: $ 80

PhotoLab 2

Publisher: DxO

Website: https://shop.dxo.com

Trial: Free/30 days

Price: $ 129 Mac/Win Mobile/Computer

Paint Shop Pro X9

Publisher: Corel

Website: https://www.paintshoppro.com/en/

Trial: Free/30 days

Price: $ 80 Mac/Win

Anthropics Portrait Pro 2 post-processing software

Anthropics Portrait Pro 2

Photoshop/Camera RAW

Publisher: Adobe Systems

Website: https://www.adobe.com/creativecloud/photography.html

Trial: Free/30 days

Price: $ 10/mo Mac/Win

Photoshop Elements

Publisher: Adobe Systems

Website: https://www.adobe.com/creativecloud/photography.html

Trial: Free/30 days

Price: $ 59.99 Mac/Win

Photoshop Express

Publisher: Adobe Systems

Android Website: https://play.google.com/store/apps/details?id=com.adobe.psmobile&hl=en

Apple Website: https://apps.apple.com/us/app/photoshop-express-photo-editor/id331975235?mt=8&ign-mpt=uo%3D4

Price: Free

PhotoPad

Publisher: NCH Software

Website: https://www.nchsoftware.com

Trial: Free/30 days

Price: $ 40

PicsArt

Publisher: PicsArt

Android Website: https://play.google.com/store/apps/details?id=com.picsart.studio

Apple Website: https://apps.apple.com/us/app/picsart-photo-studio/id587366035

Price: Free

Pixlr Editor

Publisher: Pixlr

Android Website: https://play.google.com/store/apps/details?id=com.pixlr.express&hl=en_US

Apple Website: https://apps.apple.com/us/app/pixlr-photo-collages-effect/id526783584

Price: Free online

Pixlr Mobile Android/IOS post-processing software

Pixlr Mobile Android/IOS

PortraitPro 18

Publisher: Anthropics

Website: https://www.anthropics.com

Trial: Free/30 days

Price: $ 45 Mac/Win

RAW Therapee

Publisher: Softpedia

Website: https://www.softpedia.com

Price: Free (but only offered on Windows)

Skylum Luminar 3

Publisher: Skylum

Website: https://skylum.com/luminar

Trial: Free/30 days

Price: $ 70 Mac/Win Computer

Smart Photo Editor

Publisher: Anthropics

Website: https://www.anthropics.com/smartphotoeditor/product/

Trial: Free/30 days

Price: $ 30 Wind/Mac

Snapseed

Publisher: Google

Android Website: https://play.google.com/store/apps/details?id=com.niksoftware.snapseed&hl=en_US

Apple Website: https://apps.apple.com/us/app/snapseed/id439438619

Price: Free

Sumo Paint

Publisher: Sumo

Website: https://www.sumopaint.com

Trial: Free/30 days

Price: Free version, but Sumo Pro is $ 4/month

Topaz Studio 2

Publisher: Topaz Labs

Website: topazlabs.com

Trial: Free/30 days

Price: $ 100 Mac/Win

Your Comprehensive Guide to Photography Post-Processing Software

Anthropics Smart Photo Editor

Conclusion

Some titles didn’t make this list’s cut simply because they are only marginally useful. Needless to say, in today’s market, there is an innumerable slew of entertainment-level phone/tablet-based image “editing” apps also available. There are way too many even to mention, let alone keep current information on.

Many of these apps are made for the amusement of the younger social media crowd who appreciate more unicorns and stickers than serious editing power. Not to sound judgmental, there is an app for everything and everyone, but this listing is “focused” on actual photo editing capabilities more than the social media aspect.


photography-post-processing-software

The post Your Comprehensive Guide to Photography Post-Processing Software appeared first on Digital Photography School. It was authored by Herb Paynter.


Digital Photography School

 
Comments Off on Your Comprehensive Guide to Photography Post-Processing Software

Posted in Photography


5 Basic Post-Processing Tips to Instantly Improve Your Photos

02 Sep

The post 5 Basic Post-Processing Tips to Instantly Improve Your Photos appeared first on Digital Photography School. It was authored by Nisha Ramroop.

Are you a beginner looking to improve your post-processing skills?

That’s what this article is all about. In it, you’ll discover five post-processing tips that will immediately take your photos to the next level. Best of all, these tips aren’t even difficult to follow, and they require nothing more than the most basic image-editing program.

Let’s dive right in.

post-processing tips boats on water edited

1. Straighten your horizon for professional-looking photos

When the horizon isn’t straight, even the untrained eye picks up that something is off. They might not know exactly what’s wrong, but they’ll be aware that the scene seems out of order.

Which is why you absolutely must make sure your horizon is straight.

Fortunately, it’s very easy to correct the horizon; you can do it in any post-processing program.

Here are the instructions for straightening the horizon in Photoshop:

Step 1: Select the Crop tool

Step 2: Click the Straighten option at the top

Step 3: Click one side of your horizon and drag across the horizon line before you release

Your horizon will instantly straighten!

straightening boats in photoshop

2. Adjust the white balance for natural-looking images

White balance is a setting used to balance the color of the light you shoot, in order to get it close to a neutral white.

You see, when the color of your subject is distorted by the existing lighting conditions, you need to use the white balance setting to save the day.

Now, one way to set the white balance correctly is to get it right in-camera. However, some photographers prefer to shoot in RAW with an auto white balance setting, and then adjust the white balance afterward.

If that’s your preference, then you’ll need to choose your white balance in a post-processing program. It’s generally easy to select a white balance option that adjusts for the lighting of your shot. You’re also free to experiment with different white balance options so you can choose the one that most reflects your creative vision.

For instance, the scene below has a Fluorescent white balance applied to it using Adobe Camera Raw.

adobe camera raw white balance

And here’s the same scene but with a Shade white balance applied:

white balance adobe camera raw post-processing

3. Boost your contrast to create images that pop

Do your images look a little flat?

One of the simplest ways to make your photos pop is to adjust the contrast. A contrast adjustment further separates the darkest and brightest areas of your image. In other words, it makes the dark tones darker and the light tones lighter.

beach scene

Increased contrast, therefore, makes tones stand out and gives your photos a more three-dimensional feel. Compare the image above to the image below; I added contrast to the second image, which gives it a subtle pop.

beach scene with increased contrast

Pretty much every image editor has a contrast slider. And boosting the contrast is often as simple as pushing the slider to the right.

So just remember:

If you’re struggling to make your photos more lively, try increasing the contrast. It’s a simple post-processing tip, but one that really works!

4. Boost the saturation or vibrance sliders for better colors

The saturation and vibrance adjustment sliders usually sit next to each other and can be confusing. Both of these add an extra color punch to your image, but they do so in different ways.

You see, saturation adjusts the intensity of all the colors in your image at once. If you push the saturation slider, you’re going to see color saturation increase across the board. Therefore, it’s an adjustment you want to use sparingly.

Vibrance, by comparison, is a “smarter” saturation tool, one that adjusts only the duller colors in your image. Increasing the vibrance will boost the less-saturated colors, but won’t affect colors that are already saturated.

Look at these two photos:

lighthouse with increased colors

I boosted the saturation of the photo on the left, and I boosted the vibrance of the photo on the right.

Note that when you lower the saturation of your colors, your image takes on a more muted effect, like this:

reduced saturation lighthouse

In general, boosting the vibrance or the saturation will instantly improve your images.

5. Sharpen your photos for the best display on the web

Your images are most likely going to be displayed on the internet.

However, when you export your photos from most image-editing programs, you’re going to end up with blurry photos. Unless you sharpen for the web, that is.

There are a few ways to sharpen in Photoshop. Here is one you can try:

Step 1: Resize your image to the size you want it displayed. (If you sharpen your high resolution/original image and then resize it, the image will appear to lose its sharpness. Sharpening an image at your display resolution works better.)

resizing images post-processing tips

Step 2: Duplicate your layer.

Step 3: Desaturate your new layer (from Menu, Image > Adjustments > Desaturate).

sharpening your images

Step 4: Change your blend mode to Overlay. (Alternatively, you can use the Soft Light blend mode for a more subtle effect.)

Step 5: Now apply a High-Pass filter (from Menu, Filter > Other > High Pass) and choose a radius around 2.0 for an image of 730 pixels (on the long side). The Overlay option you chose above allows you to see how the radius affects the image so you can play around with it.

Note: The bigger your image, the larger your radius will be.

If the sharpness doesn’t look good on the entire image, you can use a layer mask and paint black over the areas where you want to hide the effect.

Step 6: Save for the web (from Menu, File > Save for Web). Check the Convert to sRGB box if unchecked.

Conclusion

If you’ve just begun your photography journey or if you’re looking to improve your basic editing skills, then these post-processing tips are a great place to start.

In fact, basic editing is often all you need to dramatically improve your photos.

So follow these tips, and watch as your images improve!

The post 5 Basic Post-Processing Tips to Instantly Improve Your Photos appeared first on Digital Photography School. It was authored by Nisha Ramroop.


Digital Photography School

 
Comments Off on 5 Basic Post-Processing Tips to Instantly Improve Your Photos

Posted in Photography


3 Alternative Post-Processing Applications that Challenge the Adobe Throne

01 Aug

The post 3 Alternative Post-Processing Applications that Challenge the Adobe Throne appeared first on Digital Photography School. It was authored by Herb Paynter.

Image: Adjusting color, recovering highlights, and salvaging shadow detail are just some of the capa...

Adjusting color, recovering highlights, and salvaging shadow detail are just some of the capabilities that make these three software packages powerful challenger to the Adobe dynasty.


alternative-post-processing-applications

ON1 Photo RAW 2019, Alien Skin Exposure X4.5, and Capture One 12


Apples, oranges, and bananas

Yes, they are all fruits, all are natural, and they all taste sweet, but there are differences between each that appeal to different pallets. When comparing these three alternative post-processing applications to the revered Adobe offerings of Photoshop, Lightroom, and Camera RAW, the differences are as noticeable as the similarities.

A little background

When it all began, Photoshop offered digital photographers a simple collection of imaging tools that allowed them to adjust the colors, tones, and sharpness of their pictures. It was all nice and simple.

However, that simplicity got more complicated.

The ’90s was an era that awakened a new generation of photographers. The taste of blood was in the public waters, and it attracted all forms of predators. As users became more sophisticated, demanding more power and software magic, Silicon Valley awoke to the smell of profits. Computer technology companies sprung up everywhere, developing new and faster processors, higher resolution monitors and larger storage devices.

The door to the digital darkroom swung wide open, and the Adobe marketing machine began rolling out yearly updates for their breakthrough photo editing software. Cha-Ching.

Adobe not only started a new industry – they owned it. For the first ten years or so, Adobe wisely kept any imaging software challengers at bay by enlisting them to develop supporting software (called plugins) that added functionality to Photoshop without challenging its command directly. Dozens of very cleaver plug-in technology companies were welcomed to demonstrate their products (and their allegiance) to Adobe within their mammoth booth at all the trade shows.

Adobe Systems became a very extended family and quickly established themselves as the Goliath that nobody dared to provoke.

Image: Adobe booth at MacWorld show in San Francisco.

Adobe booth at MacWorld show in San Francisco.

The Adobe scientists invested in the digital camera manufacturers and Silicon Valley chip wizards. Every year these developers delivered smaller and more powerful image sensors and processors able to capture and deliver incredible levels of detail from digital camera images. Adobe introduced a powerful plug-in package of their own called Camera Raw, able to mine and manipulate the vast amounts of RAW data captured by the sensors.

Image: Early Panasonic PV-SD4090 PalmCam digital camera and Panasonic Lumix DMC-G7 4K Mirrorless, 20...

Early Panasonic PV-SD4090 PalmCam digital camera and Panasonic Lumix DMC-G7 4K Mirrorless, 2018.

When first introduced, digital cameras were only able to capture 256 levels (8-bits) of color. However, the sensors and processors for the new generation of cameras upped the ante by delivering up to 4 trillion (14-bits) color.

The Photoshop dreadnaught continued to grow and dominate the market. For that first decade, Photoshop was not only the digital imaging Sheriff – it was the law!

However, as it happens with many other products, Photoshop eventually became so gorged with various tools and appliances intended to address every need of photographers and artists, that it began to resemble a cramped and crowded commercial kitchen; pots, pans, and ladles hanging from every conceivable hook. The once swift, svelte and powerful software buckled under its own excesses, eventually being tagged by one industry pundit as bloatware.

But nobody has ever accused Goliath of being either daft or deaf. Adobe listened and learned from its more sophisticated photographer base who demanded a software package streamlined and focused specifically on the professional user. This new software would include filing and database features allowing professional photographers to catalog, label, sort, and shape their images in one arena, and free of most of the fluffy and artsy features of Photoshop. Adobe crowned this new pro-focused software Lightroom. Pretty cleaver… Photo Shop and Light Room. Hmm-m.

3 Alternative Post-Processing Applications that Challenge the Adobe Throne

Goliath and the David class

All this time, quietly in the background, several talented Photoshop plug-in developers were busy developing their own image-altering software. Software consisting of mostly specialty filters and visual effects tools that worked within both Photoshop and Lightroom as plug-ins. In addition, they operated as standalone software editing applications.

Behind the scenes, a silent revolution existed that would someday rise up and directly challenge Goliath. These same “deep-bit” RAW processing tools once only available in Camera Raw and Lightroom were now available from these independent developers who had quietly amassed millions of faithful followers. The “David” class of software emerged, with the battle lines now drawn. Goliath had some worthy opponents to contend with and some new battles to fight.

Many of the software developers in this “David class” were long-term seasoned veterans in the image editing field with their own stable of brilliant young engineers. They had initially opened their doors for business in the early nineties, just a couple of years after the introduction of Photoshop.

These companies included Extensis, Alien Skin, and Phase One Camera Systems. My own software company, ImageXpress, introduced our Scanprep plug-in product in 1993, so I have known and respected these companies for over twenty-five years. They each offer unique products and have earned long and distinguished records in the industry.

3 Alternative Post-Processing Applications that Challenge the Adobe Throne

Extensis, Alienskin and Eye Candy

Extensis, founded in Portland, Oregon in 1993, offered several products, including Intellihance. At that time, Craig Keudell was the company’s VP of Sales and Operations and would later become President. Originally developed as a plug-in for Photoshop, Intellihance offered simple image corrections.

Craig went on to found ON1, Inc in 2005. ON1 is the developer of Photo RAW 2019, a dead-serious Lightroom contender sporting a powerful Raw processor, image editor, and DAM (digital asset management) system.

Alien Skin Software was also founded in 1993 by Jeff Butterworth (joined soon thereafter by Finley Lee), on the other side of the country in Raleigh, North Carolina. This company’s first software product was called Eye Candy, an image interpreter that gave users the ability to produce attractive (and sometimes bazaar) special effects from digital images. Alien Skin’s current flagship software, Exposure X4.5, provides RAW processing, image editing, and a nearly exhaustive collection of pre-set filters. These filters simulate the look of just about every film-age photo paper, film emulsion, and toning process.

alternative-post-processing-applications-2


Phase One – Capture One 12

Phase One Camera A/S is a Danish company founded that very same year (1993). It produced a unique medium format digital camera system for the professional market. The Copenhagen-based camera manufacturer’s latest hardware offering is the XF IQ4 Camera System, now in its fourth generation. Phase One’s precision camera systems require a very sophisticated software product to exploit the massive amounts of spectral data delivered by their cameras.

In 2003, Capture One software first began to support 35mm DSLR cameras from third-party manufacturers such as Canon, Nikon, and Fuji. The software now supports 500+ cameras. Capture One 12 is the current version of this advanced editing software.

Products and uses

Most users of Lightroom operate the software for similar reasons – cataloging, organizing, and the basic editing of digital images. In that respect, all of the challengers offer similar services and features.

But not all users have the same needs with their software.

Digital photographers come in all sizes with diverse desires. Many users don’t get beyond the simple primping stages of brightening, straitening, and cleaning up their images – the basic processes that all began thirty years ago with Photoshop. Others are either professional photographers or dead-serious enthusiasts who utilize very advanced features of the software.

With the variety of software available in this field, there is something for everyone.

The Adobe alternatives

Just as these original three “David class” developers focused on different areas of the imaging industry with their initial products back in the ‘90s, each of their current products has established turf in today’s market. While offering the same basic editing and non-destructive RAW adjustment tools as Camera Raw and Lightroom, each product maintains its own personality.

There are similarities with these post-processing applications in the initial “sliders” appearance and the operation of each application, but beyond the basic tonal and color adjustments, the individual strengths become more evident.

Depending on your needs and personal preference, you may find that one of these products appeal to you and draw you away from your Adobe subscription addiction.

Let’s take a look at the strengths and personalities of the software products.

alternative-post-processing-applications-3

ON1 Photo RAW 2019.5

Purchase price $ 100 (upgrade from the previous version: $ 80)

ON1 Photo RAW 2019.5 will give you the features photographers use the most from the Lightroom and Photoshop worlds in a single application. With Photo RAW, you can quickly browse, organize, manage, and catalog photos in your photo editing workflow. The ultra-fast photo browser and organizer are perfect for rapidly viewing and culling through photos without waiting on previews to generate or an import process.

Importing images is not necessary with Photo RAW. You don’t create libraries or catalogs with this software. Instead, you view the images where they reside on your computer. If you want easy access to specific images within specific folders, use the indexing feature. Indexing these folders in Photo RAW keeps track of all thumbnails in each folder. Photo RAW actually moves the image files to a folder that you specify.

Photo RAW key features: HDR, Noise Reduction, Versions (Virtual Copies), Photo Stitching (Merge to Panorama), Keywords, Tethered Shooting, Portrait Retouching, and Layers.

With the addition of layers, ON1 ups the ante by allowing you to blend, mask, replace backgrounds, and more. ON1 Photo RAW also provides 27 unique filters, LUTs, and textures, delivering ample interpretations of each image.

ON1 also includes a Lightroom Migration assistant that utilizes AI-powered algorithms to transfer Lightroom edited photos, keep the non-destructive settings, and move them into ON1 Photo RAW.

alternative-post-processing-applications-4

Alien Skin Exposure X4.5

Purchase price: $ 119, (upgrade from previous versions $ 79-$ 89), and bundled with Blow up and Snap Art for $ 149.

Exposure X4.5 offers powerful organizing tools, fast performance, an intuitive design, and a subscription-free approach. With this one piece of software, you can handle all your photo editing work. Exposure X4.5 is best known for its selection of beautiful customizable presets, which span the entire history of film and beyond.

With Exposure X4.5, you choose the image folders you want to organize by adding them as “bookmarks.” Once a folder is ‘bookmarked,’ you can browse the subfolders as indexed and cataloged folders, searching for photos using keywords or image metadata.

Exposure X4.5 key features: Extensive browsing, search, and cataloguing tools (Smart Collections and Bookmarks), Light Effects and Textures, analog film effects, ample LUTs (lookup tables for instant tone and color shifts), Virtual Copies, sophisticated Bokeh effects, transform tools to straighten and correct perspective shots and watched folders.

alternative-post-processing-applications-5


Phase One Camera Systems Capture One 12.03

Perpetual license: $ 299, subscription $ 15/mo.

Capture One offers a lot of everything for just about every level of interest. Delving into its inner workings allows one to tinker with color on a near-molecular level. While it is not a particularly intuitive tool for the beginner, it is a pure delight for those who want infinite control over their adjustments. New users can go to learn.captureone.com to get started. Capture One offers a very logical and exhaustive array of tools and controls, leaving little need for a wishlist. The learning curve is steep, but the control provided is nearly exhaustive.

Capture One offers two ways to access and file images:

  • Catalog – a full DAM (digital asset management) system which works very similar to Lightroom, and
  • Session – a per project-based image access process.

The Session choice works by clicking on the small folder icon in the upper left-hand part of the original open window and accessing a very simple Mac/finder-type search dialogue. You indicate your image folder and then view the images inside that folder stacked vertically on the right-hand side of the Capture One window. Double-click an image and start working.

Capture One key features: Near-infinite masking tools for Basic, Advanced, and Skin Tone colors, including Hue, Saturation, Lightness, and Smoothness (feathered edges), Color Balance for Highlight, Midtone, Shadow, 3-Way (overall), color channel controlled B/W conversions, Layers (up to 16, each with individual chroma/luma range assignments), and dynamic Histogram readouts that track every adjustment.

Capture One’s extensive masking tools provide unparalleled control over both color and tonal shape with each mask creating its own layer. The variety of masks include Luminosity, Linear Gradient, and Radial Gradients. Each mask is infinitely adjustable and can be tweaked and finessed at any time. You can also purchase additional Styles Packs (essentially, presets that don’t alter the exposure or white balance).

Image: The goal of any image editing software is a successful result. Each of the software packages...

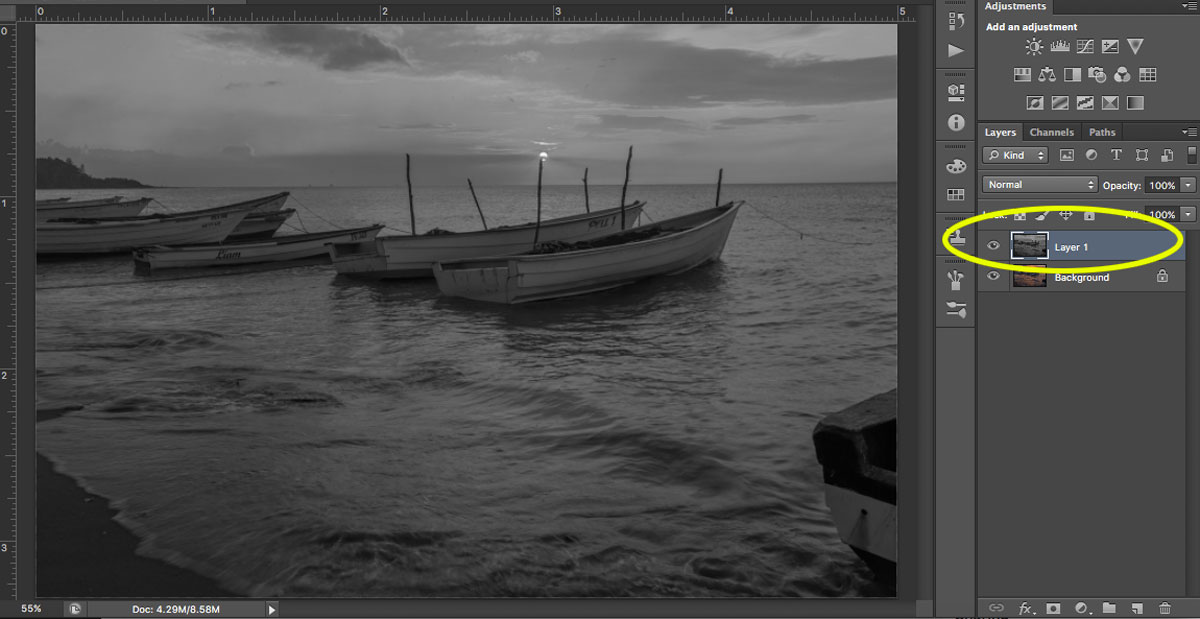
The goal of any image editing software is a successful result. Each of the software packages mentioned herein is capable of delivering just that. I’ll leave it to you to predict which software I chose to rescue and produce this example.

Conclusion

I’ve made no attempt to declare a winner in this article, but most assuredly these alternative post-processing applications are very valid and capable challengers to the Adobe dynasty.

You certainly owe it to yourself to download a trial to each one of these packages and experiment with the possibilities. The alternatives are both diverse and similar in their offerings.

Each of these three packages requires a bit of habit remapping, and you should afford the time needed to draw your conclusions. Your personal requirements and tastes will ultimately deliver your answer.

I should note that no one piece of software; neither the Adobe family nor the challengers, provides a single comprehensive solution for all needs. Whichever addresses your particular needs best will become the backbone of your post-production work.

Fortunately for me, I own (and use) all of these alternative post-processing applications.

Have you used these any of these alternative post-processing applications? What are your thoughts?


alternative-post-processing-applications

The post 3 Alternative Post-Processing Applications that Challenge the Adobe Throne appeared first on Digital Photography School. It was authored by Herb Paynter.


Digital Photography School

 
Comments Off on 3 Alternative Post-Processing Applications that Challenge the Adobe Throne

Posted in Photography


How to Make Well Exposed Photos Every Time – Part Three – Post-Processing for Exposure Optimization

26 Apr

The post How to Make Well Exposed Photos Every Time – Part Three – Post-Processing for Exposure Optimization appeared first on Digital Photography School. It was authored by Kevin Landwer-Johan.

Digital photography allows us an incredible scope to work on our computers to enhance and manipulate images. Optimizing your exposures during post-processing can make a dull, flat-looking photograph into a much more vibrant and interesting one.

How to Make Well Exposed Photos Every TimeMarket Guy

© Kevin Landwer-Johan

My approach to post-processing most of the time is to make my photos look as they did when I captured them or with some variation to the background tone. Because our eyes see more dynamic range than our cameras, this means I am working to balance my exposure and the way the light looks in the photo.

RAW or Jpg?

If your photos are saved only as jpg’s, your camera will have made certain tweaks to them already. It may have added some sharpening, color balance, contrast tweaks and possibly manipulated them in other ways. Jpg images as designed to look good straight out of your camera and may require little or no post-processing.

If you do decide to work on your jpg files, you will face limitations because of the file quality. As your camera saves jpg files, it compresses them and discards some of the information from the photos. Jpgs are technically lower quality which means they do not stand up to as much post-processing as RAW files do.

RAW files contain all the information your camera captured when you pressed the shutter release. They do not look great when you first see them because the camera has not altered them at all during the capturing and saving process.

To make a RAW file look good you must make some adjustments manually or use a preset or Action to make them for you. The technical quality of a RAW file is superior because there is no data lost from what your camera recorded. You have a greater capacity to be able to manipulate these files without losing quality.

How to Make Well Exposed Photos Every Time Temple and Big Sky

© Kevin Landwer-Johan

Choose your best photos

From each series of photographs you make I hope that you will have a number of exposure options to choose from when you sit down at your computer. Picking the best images to work on is the first part of post-processing.

Naturally, you’ll be wanting to pay most attention to the main subject in your photo. Is it exposed the way you want it to be? Can you see that there’s sufficient detail in those areas of your composition?

In some cases, such as when you’ve made a silhouette or are using low-key lighting and high contrast, you may have little or no detail in your subject. This is okay if that’s what you want.

However, if exposing for detail was your intention, and there’s not enough in your photo, look at the pictures where you used different exposure settings.

Your background exposure is also important. Does it enhance and support your main subject? Is it too bright or too dark? Again, look to see if there is detail. When there’s no detail, because of overexposure or underexposure, it will be more difficult to manipulate these areas.

How to Make Well Exposed Photos Every Time Attractive Young Photographer

© Kevin Landwer-Johan

Make use of the histogram

Your histogram gives you information about the tonal values in your images. It shows you where the most detail is and if you have lost detail in the bright or dark parts of your compositions.

If your histogram is bunched up to the left or the right of the chart, with the graphic touching the top, this means there will be no detail recorded in those areas.

If you can see a histogram bunched to the right and hitting the top, you will have lost detail in the highlights. If it’s bunched to the left and hitting the top, you have lost detail in the dark areas.

If your main subject is within this range and you wanted it to contain detail, you will need to choose a photo with a different exposure setting to work on.

How to Make Well Exposed Photos Every Time Hill Tribe Girl

© Kevin Landwer-Johan

Using presets or manual manipulation

Lightroom and Photoshop come with presets and Actions. These can be used to help balance your exposure. You can also download many more or make and save your own. These tools can enhance and speed up your post-processing workflow.

I often chose one of a variety of presets as I begin to post process a photograph. Rarely do I apply a preset without then tweaking it further. Every exposure you make is different, so to get your photos looking their best some manual manipulation is usually best.

Working your highlights and shadows

Having been careful to expose your main subject well, you may already be happy with its tone value. However, some parts of your composition may still need tweaking to get them looking the way you want.

How to Make Well Exposed Photos Every Time Happy Hat Wearer

© Kevin Landwer-Johan

Your intention is the most important. How do you want your photograph to look?

Here are two examples of different manipulations made to the same RAW file.

Example one: Dark background

I wanted to make the background darker so the roses would stand out. Using a preset I made in Lightroom, I then made further manual adjustments. I controlled the Blacks, Dehaze, Contrast, and Shadows sliders.

When making this kind of adjustment to manipulate the background of your image, pay attention to your main subject also. These sliders make universal changes to your photos so affect your main subject as well.

With a light-toned main subject and a predominantly dark background, the changes I made did not have much effect on the roses.

How to Make Well Exposed Photos Every Time Lightroom Dark

I then opened the photo, with the Lightroom adjustments, in Photoshop. At this stage, I darkened the lightest part of the photo to lower the overall tone range.

There are many techniques you can darken or lighten specific areas of a photo. I prefer to use the Dodge and Burn tools set to a low exposure to do this. I also used the Patch tool to remove a few of the brighter areas in the background.

As a result, the background is darker, and the highlights on the rose are not so bright.

How to Make Well Exposed Photos Every Time

Example Two: Light Background

To render a lighter, softer look, I took the Dehaze slider towards the left, and the Shadows towards the right. I added a little more Black and some Contrast, otherwise the image looked too flat.

Next, using Photoshop, I tweaked the highlights a little so they were not so bright.

How to Make Well Exposed Photos Every Time Roses

In both of these examples, my main objective was to enhance the roses because they are my main subject.

The background tone is also important. Between the two examples, there is the most difference in the tone of the background. This has a large impact on the overall feel of the photo.

Conclusion

As with all post-processing, there are a variety of methods you can use to gain similar results. Here I have demonstrated a few techniques I am comfortable using.

Concentrating primarily on the tone of your main subject in relation to the background is a good place to start when post-processing. Once you have made adjustments you are satisfied with, you can then move on and make other changes to your photos if you wish.

Aim to expose your main subject the way you want at the time of making your photos. Doing so allows you more flexibility to make changes in post-production and not lose quality. If you are stuck working with a main subject that’s either underexposed or overexposed, you will be limited in how much you can achieve.

Experimentation is the best way to discover how you like to work with photo manipulation software. There is no right or wrong way to work with your photos so long as you achieve the result you want.

You may also like

  • How to Make Well Exposed Photos Every Time. Part 1 – Seeing the Light
  • How to Make Well Exposed Photos Every Time. Part Two: Managing Your Exposure


The post How to Make Well Exposed Photos Every Time – Part Three – Post-Processing for Exposure Optimization appeared first on Digital Photography School. It was authored by Kevin Landwer-Johan.


Digital Photography School

 
Comments Off on How to Make Well Exposed Photos Every Time – Part Three – Post-Processing for Exposure Optimization

Posted in Photography


Blackmagic Design unveils the DaVinci Resolve Editor Keyboard for easier video post-processing

13 Apr

Blackmagic has announced the DaVinci Resolve Editor Keyboard, a new console-inspired keyboard designed specifically to improve video editing workflows inside DaVinci Resolve.

The keyboard is constructed of a metal frame with a revised QWERTY layout that’s pre-programmed to speed up the most-used tools and features inside DaVinci Resolve. The keys are tiered and set on top of mechanical switches for a more tactile feel and although the keys and switches are rated for millions of clicks, each switch and key is user-replaceable in the event something breaks over time.

A single USB-C port on the back of the board is used to connect it to its accompanying hardware, but Blackmagic Design has also included two additional USB 3.0 ports on the rear of the keyboard for additional accessories.

The DaVinci Resolve Editor Keyboard also includes a search control dial that accurately scrubs through footage. When paired with the oversized in/out and source/timeline keys, the control dial makes it easy to cull through footage and get it its place faster than ever. Blackmagic has also included a dedicated numpad section for direct timecode entry.

Blackmagic Design says the DaVinci Resolve Editor Keyboard is set to ship in August for $ 995 USD through authorized retailers. B&H currently has it available for pre-order, but it’s priced at $ 1,025.

Articles: Digital Photography Review (dpreview.com)

 
Comments Off on Blackmagic Design unveils the DaVinci Resolve Editor Keyboard for easier video post-processing

Posted in Uncategorized


Review: The Elgato Stream Deck is a customizable hardware control for post-processing

06 Apr

Elgato Stream Deck
$ 149 | elgato.com

The Elgato Stream Deck is a small, customizable keypad primarily targeted at gamers who stream live content. I’m not a prolific gamer, but it occurred to me that the Stream Deck might also be a useful tool in my daily post processing work, cutting down on mouse clicks and keyboard shortcuts, and speeding up my workflow.

In my case that means a non-linear editor, or NLE, for video editing. However, the Stream Deck isn’t limited to NLEs; it can be used with just about any editing software such as Photoshop, Lightroom, or Premiere Pro.

Key features:

  • 15 customizable keys, each with its own LCD screen
  • 210 actions* available by using folders
  • Macros** can be assigned to each key
  • Different profiles and key sets can be created for different applications

The power of the Stream Deck is that each of the keys contains an individual LCD screen behind a concave plastic window. You may remember the Optimus Maximus OLED keyboard which, when launched in 2007, had a full qwerty keyboard with an OLED display on each key. The Stream Deck takes this idea and makes it more accessible at a price of $ 149.

Design

The Stream Deck’s fascia is aluminum while the body is plastic, with dimensions of 118 x 84 x 21mm (4.6 x 3.3 x 0.80 in) and it connects via a captive USB cable approximately 1.5m long. Included in the box is a lightweight plastic stand which allows the Stream Deck to sit at multiple angles, and it includes rubber feet on the bottom to stop it from sliding across your desk when you push a button.

The Stream Deck’s stand. It does the job, but as I discuss below there’s room for improvement.

Setup

Out of the box, the Stream Deck does nothing, so the first step is to download the Stream Deck software from Elgato’s website, which allows you to completely tailor each key. It’s already loaded with several shortcuts for popular streaming software like Twitch, OBS, YouTube, etc. and these can just be mapped to the keys on the device.

However, my reason for buying the Stream Deck was to use it with Davinci Resolve, my NLE of choice, though it can be used just as easily with tools like Premiere Pro, Final Cut Pro X, or Lightroom. However, doing so requires a more involved setup process as there are no pre-configured shortcuts available for these applications.

To do this, I set up a new Davinci Resolve profile in the Elgato software that auto-loads when I run Resolve. This can be done for any software that’s being used, and therefore you can have multiple sets of shortcuts (210) for each program. It’s completely feasible to have different set ups for Resolve, Premiere Pro and Lightroom for example.

Configuring keys with the Elgato software.

I created keys for common tasks, some of which were duplicates of already available keyboard shortcuts, but with larger dedicated icons I didn’t have to remember the shortcuts for some of the lesser used key commands. It also meant that some actions that used a three-key combination for something like ‘freeze frame’ could now be achieved with a single button.

There’s also a certain satisfaction in quickly navigating pages of shortcuts with a single button press. Trust me – you have to try it to appreciate it.

Customizing Keys

For the functionality that I wanted I needed to register the required Resolve keyboard shortcuts in the Elgato software. I also created icons for the buttons. Some of this was achieved with the Elgato Key Creator, which is web based, but quite a few of my keys were also constructed with Photoshop. Any image editing software will work as you only need to create a 288 x 288 pixel PNG file for each button.

There’s a certain satisfaction in quickly navigating pages of shortcuts with a single button press.

Like anything worthwhile, setup and customization took some time. At first it seemed a little involved, but effort spent configuring at the start saved more time later. I spent a lot of time making the icons for the buttons and assigning functions, but also some thought into where to place them and how far down into the sub pages to go.

But, I hear you cry, fifteen buttons is not enough! Well, in that case you can actually use one of the buttons to access up to fourteen more sub pages of buttons, each with another fourteen buttons on them (one is reserved for going back a page). In this case you can see the appeal of the screens providing labels and icons representing their function. I certainly couldn’t remember what each one did without them.

One example of a bespoke key set on the Stream Deck.

However, the ability to customize the Stream Deck doesn’t stop there. With the help of software like Auto Hot Key for Windows or similar scripting software for Mac, scripts can be written and assigned to any button. This means if there isn’t an exact shortcut available in the software you want to use it with then you can record something like a simple mouse click on an on-screen button and assign it to a stream deck key. Although I haven’t used this yet, It might be something I look at doing in the future as my workflow evolves.

Workflow improvements

After working with the Stream Deck for a couple of weeks I’ve found it very useful, though not without making some adjustments. First, getting used to having the device placed to the left of my usual keyboard was a bit unusual (of course it can be placed anywhere). This, combined with the fact that I had to think and stop myself using the regular on screen buttons, also slowed me down initially.

After about half a day I found that my usual edit process had sped up, probably on the order of 20-30%.

After about half a day, however, I found that my usual edit process had sped up, probably on the order of 20-30%. Persistence pays off, and sometimes it’s all too easy to forget and go back to the old ways of working, but when I did I found that I slowed down again. After about a week or so of using it I needed to reorganize the button layout a bit, something I think will be an ongoing process.

Opportunities for improvement

Overall the Stream Deck works well and I’m impressed with the feel of the keys, however there are some improvements I’d like to see. First, I’d like the option for a detachable cable rather than a captive one. What happens if the cable get’s damaged? There have also been reports from some users of screen burn in on early units, but this seems to have been addressed in later ones and Elgato have been swapping out units with this issue.

The Stream Deck attaches to your computer using a captive cable. I’d prefer a detachable cable in case it gets damaged.

The Stream Deck’s stand is just OK, and I’d like to see a way of making the unit fit more securely into it. The way it adjusts for different inclinations could be improved as well, such as having a much more positive lock into position. I would also like to see a more ergonomic version of the Stream Deck; three rows of five keys works, but it’s a bit cramped and the spacing could be better. The way my hand lies it would be better if it was wider, and I’d like to see they keys placed more naturally.

Elgato also makes the Stream Deck Mini with six keys. Perhaps there could be an option for a Stream Deck Max with 30 keys? I know this would probably take it out of the realm of being a pure streaming tool, but it opens up possibilities for other markets. If Elgato really wanted to they could compete with other control devices by adding knobs and sliders, but I guess this might be a little outside their key user base.

It is for you?

Considering it’s a product aimed at online gamers, the Stream Deck is a tool that can be easily adapted for use by photo and video editors to streamline and speed up everyday workflows. It can take time to set it up properly and develop the muscle memory required to use it, and will probably require some ongoing tweaks to get the most out of it, but the time invested up front will be saved in use.

Its usefulness will very much come down to the individual and their workflow. The more time you invest in getting things working correctly for you the more benefits you’ll see. I’ve yet to really use it to it’s full potential and I’ve already seen the benefit.

What we like

  • Ease of use
  • Customization options
  • Cost
  • Tactile feel

What we don’t like

  • Stand design; positioning and adjustment could feel more positive
  • Captive cable

*An action may be any function assigned to a key on the Stream Deck, such as a keyboard shortcut or combination of keys pressed simultaneously.
**If you use macros to create automated scripts on your computer it’s possible to map an entire macro to a single button.

Articles: Digital Photography Review (dpreview.com)

 
Comments Off on Review: The Elgato Stream Deck is a customizable hardware control for post-processing

Posted in Uncategorized