RSS
 

Posts Tagged ‘concert’

10 Must-Know Camera Settings for Concert Photography

05 Jun

The post 10 Must-Know Camera Settings for Concert Photography appeared first on Digital Photography School. It was authored by Matthias Hombauer.

10 key camera settings for concert photography

What are the best concert photography settings, and how can you use them for great results?

Settings are a key part of getting awesome concert photos, especially in low-light situations. If you get your settings right, the results will be spectacular. But if you get them wrong? Your shots will be blurry, unpleasant, and just all-around bad.

That’s why, in this article, I’m going to share 10 settings for concert photography. These are the exact camera settings I use in my own concert shooting, so you know they work. (And I promise: They’ll help you immediately boost your career!)

Let’s dive right in.

The Rolling Stones
The Rolling Stones
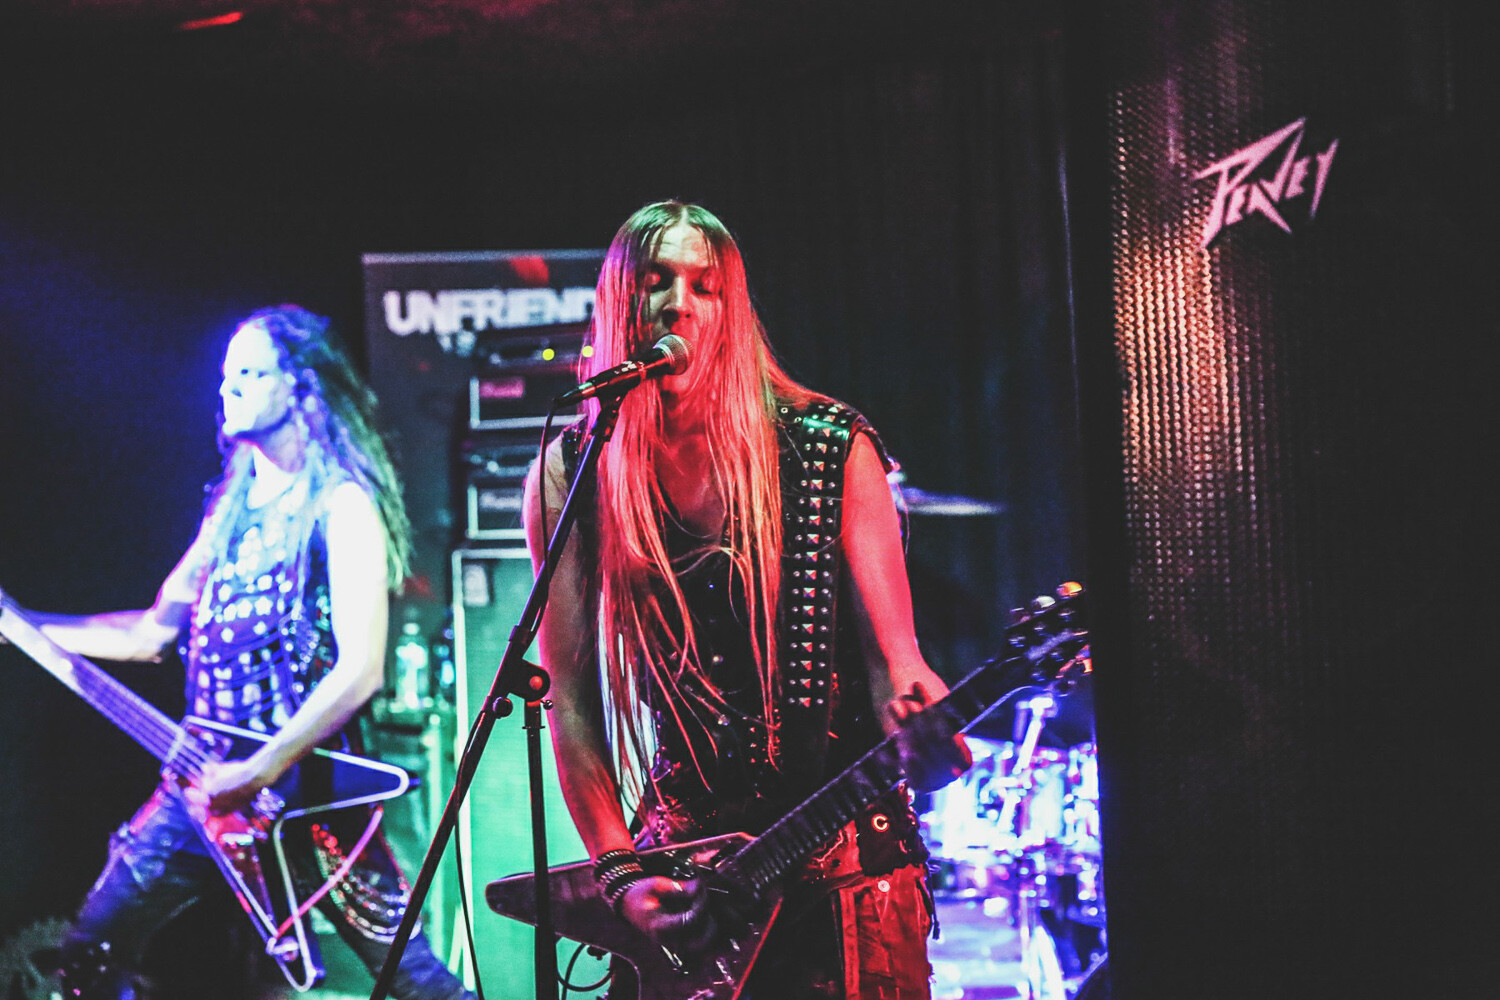
Nikon D800 | 185mm | f/4 | 1/320s | ISO 1600

1. Use Manual mode or Aperture Priority

When I started off doing concert photography, I used Aperture Priority mode. I would dial in the aperture, my camera would set the shutter speed accordingly, and I’d hit the shutter button.

And in general, Aperture Priority works well. It’s great for beginners because it partially automates the exposure process, giving you one less thing to worry about.

But after shooting for a while, I recognized that only Manual mode would give me the flexibility I was after. I wanted to set the aperture, shutter speed, and ISO – and then change each setting on the fly based on my requirements.

So depending on your level of experience and comfort, pick one of these two options.

(Also, if you do choose Manual mode, make sure to frequently check your LCD preview and your histogram to ensure your exposure is correct!)

Fink concert photography settings
Fink
Nikon D700 | 14mm | f/2.8 | 1/200s | ISO 3200

2. Use your lens’s widest aperture setting

Struggling to decide which lens to use for concert photography? I always give the same advice: use fast lenses and shoot them wide open.

Set your aperture to the smallest f-number your lens allows, which will give you the biggest aperture opening. That way, the most possible light hits your sensor.

A wide aperture is especially important in low-light concert photography. If possible, shoot with an f/2.8, f/1.8, f/1.4, or f/1.2 lens.

If you’re a beginner on a budget, I’d recommend grabbing a 50mm f/1.8 lens, which is cheap, features a wide maximum aperture, and offers surprisingly nice image quality.

3. Use a fast shutter speed

Have you ever been to a concert where the artist was running and jumping from one side of the stage to the other?

This type of action makes for some great photography – but to freeze such movement, you must use a fast shutter speed.

In general, I set my shutter speed to 1/200s or faster (and depending on the level of action, you may want to push this even higher.)

Miley Cyrus
Miley Cyrus
Nikon D800 | 340mm | f/4.8 | 1/320s | ISO 1600

4. Boost your ISO

The higher your ISO, the less light you need for a proper exposure – and in concert photography, where light is generally limited, this is a key setting to get right.

Your camera’s ISO range likely starts at 100. But if you’re shooting a low-light concert, I’d recommend kicking this up to 1600, 3200, or even 6400. Otherwise, your shots will end up far too dark (or you’ll be forced to drop your shutter speed, which will introduce blur).

Unfortunately, a high ISO does come with a significant tradeoff:

Noise.

As you push your ISO from 400 to 800 to 1600, you start to get little flecks of color and light that look pretty bad. The specifics will depend on your camera (modern sensors do a very good job of minimizing high-ISO noise!), but you should always be cautious when boosting the ISO. Only raise it when absolutely necessary, and be mindful of your particular camera’s high-ISO capabilities.

5. Use spot metering

Spot metering limits your camera’s exposure readings to the center of the scene – which allows you to determine the exposure based on a small subject (e.g., a face). It works especially well when your subject and background are differently lit.

And when shooting concerts, the artist will often be lit by a spotlight while the rest of the stage remains dark.

So here’s what you do:

First, switch your camera to spot metering mode.

Then place the artist’s face in the middle of your viewfinder and memorize the recommended exposure settings.

Finally, if you’re using Manual mode, you can dial in the settings, then compose without worrying about fluctuating meter readings. If you’re using Aperture Priority, you’ll need to lock in the exposure; that way, you don’t end up with varied exposures as the performers jump around your viewfinder.

If you don’t like spot metering and it’s giving you bad results, you can try the matrix/evaluative metering mode. The camera will take a light reading at several points in the scene, and this can work – but you’ll want to be on the lookout for overexposed faces, especially when the background is dark.

Atari Teenage Riot
Atari Teenage Riot
Nikon D700 | 50mm | f/1.8 | 1/2500s | ISO 1600

6. Use the middle autofocus point

Did you know that different autofocus points feature different levels of accuracy?

It’s true. Peripheral autofocus points tend to work fine in good light, but the performance weakens as the light drops.

Whereas the center autofocus point remains effective in both good light and bad.

That’s why I recommend you use the central focus point in low-light situations. It’ll be the most accurate, and it’ll ensure you get the sharpest results, no matter what the artist is doing on stage.

If you don’t want the artist to sit smack-dab in the center of the frame, you’ll need to use a focus-and-recompose technique; simply push your shutter button halfway down to focus on the artist’s face – this will lock focus – then adjust your composition until you get the desired framing. Once you’ve nailed both focus and composition, press the shutter button the rest of the way.

Note: To use this focus-and-recompose technique, you’ll need to set your camera to One-Shot AF, also known as AF-S. Otherwise, the camera will focus continuously while you reframe your picture.

(You can also set up back-button focus, which many shooters – myself included! – love. With back-button AF, you use a button on the rear of your camera to lock focus, then use the shutter button to take the shot.)

7. Use Auto White Balance

White balance combats unwanted color casts in your scene, and it’s important to use if you want good-looking photos.

However, I highly recommend you deal with white balance after taking your photos, during post-processing. So set your camera to Auto White Balance, then ignore the WB setting until you’re back at home.

You see, if you shoot in RAW, the white balance is completely flexible. Whether you determine the white balance setting at the time of capture or whether you wait until you’ve opened up Lightroom days later makes zero difference.

Except that setting the white balance during a concert is difficult to do, especially when you have different lights flashing all around the stage. So do yourself a favor and leave the white balance setting for another time.

Skunk Anansie
Skunk Anansie
Nikon D700 | 85mm | f/3.5 | 1/500s | ISO 1600

8. Use burst mode

Your camera’s burst mode setting, also referred to as continuous shooting, lets you do rapid-fire photography.

With burst mode activated, you can shoot five, ten, or even sixty frames per second, depending on your camera.

And this is hugely helpful in concert photography, for two reasons:

  1. If you take several shots in a row, at least one of them will probably turn out sharp even if the others aren’t in focus.
  2. Multiple photos increase your chances of nailing the perfect frame.

Now, I don’t recommend you set your camera to its high-speed continuous shooting mode and use it nonstop. You’ll run out of storage space pretty quickly, plus you’ll just end up with thousands of unnecessary photos.

But I do recommend analyzing the situation, then – when you’re ready to capture split-second action shots – turn on burst mode and use it judiciously.

Make sense?

9. Never use flash

This is a quick tip:

Don’t use flash at a concert.

For one, you’re not allowed; imagine ten photographers bursting their flashes all at the same time.

And straight flash pictures don’t look great. For good flash photography, you’ll need to position your flash off to the side of the artist (i.e., you’ll need an off-camera flash), which isn’t really feasible in a concert setting.

Korn concert photography settings
Korn
Nikon D700 | 130mm | f/2.8 | 1/250s | ISO 3200

10. Shoot in RAW format

Here’s your final concert photography setting, and it’s a big one:

Always, always, always shoot in RAW.

If you shoot in JPEG, your camera will automatically add processing, such as contrast, saturation, and sharpness. And while it might look nice, it’ll limit your post-production freedom, so you won’t be able to further enhance your concert photos.

On the other hand, if you shoot in RAW, the camera won’t process your photo at all. That way, you can change parameters such as exposure, white balance, saturation, contrast, and clarity long after you hit the shutter button.

(In other words: If you’re careful and deliberate with your editing, you can make your photos look a lot better!)

Must-know concert photography settings: final words

Now that you’ve finished this article, you’re well-equipped to capture some stunning concert photos. And for quick reference, here are the concert settings I recommend:

  1. Manual mode
  2. Your lens’s widest aperture
  3. A fast shutter speed
  4. A high ISO
  5. Spot metering
  6. The middle autofocus point
  7. Auto White Balance
  8. Burst mode
  9. No flash
  10. RAW format

So the next time you’re out shooting a concert, make sure to dial in those settings. Your photos will instantly improve!

Now over to you:

Which of my recommended settings do you use for concert photography? Do you have any additional settings you love to use for concerts? Share your thoughts in the comments below!

The Prodigy
The Prodigy
Nikon D800 | 85mm | f/1.8 | 1/320s | ISO 1600
Zola Jesus concert photography settings
Zola Jesus
Nikon D700 | 50mm | f/1.8 | 1/200s | ISO 1600

The post 10 Must-Know Camera Settings for Concert Photography appeared first on Digital Photography School. It was authored by Matthias Hombauer.


Digital Photography School

 
Comments Off on 10 Must-Know Camera Settings for Concert Photography

Posted in Photography


5 Reasons to Consider Concert Photography with a Wide Open Aperture (and the Secret to Perfecting it)

21 Oct

Concert photography is arguably one of the most adrenaline-filled niches you can engage in as an image maker. Musicians, magazines, fans, and record labels alike turn to skilled concert photographers to tell a story for the momentous performance. For most music photographers (due to venue constraints) there is less than ten minutes to capture enough great images to populate a full gallery. Partner this with tumultuous circumstances such as sporadic lighting and an excitable audience and you have effectively created a photographic situation that is unlike any other.

As such, shooting with a very wide open aperture might appear to be too daunting of a task! There are common misunderstandings of how to use and work with a wide open aperture! If your inner aesthete drools over soft, dreamy photographs and creamy bokeh, then you better get ready to play with some low, low, low numbers. We are here to tell you how to photograph concerts at f/1.2, f/1.4, and f/1.8!

Wide aperture concert photography tips

Why Use an Ultra Wide Aperture?

Here are 5 reasons you may want to consider shooting concert photography with a wide open aperture.

1. Aesthetic and Style

To preface, a lot of the quality and final image look is based on the type of lens used. In the past several years, photography fans are gravitating towards the shallow depth of field aesthetic. If you’re in the business of producing commercial music photography (like myself), you’re going to want to keep following the trends and adapting to what is sought after in the industry.

Aesthetic and Style with Wide Aperture Concert Photography

An added bonus is being able to niche yourself a bit in an industry that has a lot of competition, many photographers are wary of shooting fast paced events with a wide aperture due to potential focusing issues. If you can master this art, you have something that will separate you from others.


2. Low Light Capability

Low light concert photography with wide aperture

Unless you’re shooting a big name at an amphitheater, a lot of smaller venues will have very poor lighting. You’ll need to use equipment that will illuminate the frame with whatever limited lighting is available. In these low light scenarios you need a lens with a wide enough aperture to let in more light. Using a lens that goes down to f/1.2, for example, is a great way to let enough light in and make the frame bright. Remember, the aperture is the hole the light passes through in your lens. The wider the aperture, the more light that enters the camera.


3. Shallow Depth of Field

Shoot concert photography with shallow depth of field

The wider the aperture, the shallower the depth of field. Shallow depth of field is great for live concerts because the stage can be rather cluttered compositionally. From instruments to cables, background props, and other band members, there can be a lot going on in the frame at once. Only having one subject in focus with the rest blending into a creamy bokeh makes for a much more visually pleasing and simplified image. With the depth-of-field being so shallow, whatever troubles you about the background can easily melt into a beautiful creamy bokeh.


4. Detail Shots

Capture detail in your concert photography with wide aperture

On the topic of shallow depth of field, if you are photographing for an instrument company, an aperture of f/1.8 will likely become your best friend. This is because photographs taken with a large aperture allow all of the focus to lie on the subject, and the background ceases to remain a distraction. Many instrument companies love to have their products captured in a natural usable setting, such as musicians at a live show.A shallow depth of field will keep the interest solely on your single subject.


5. Sharpness

How to achieve sharpness in your concert photography with wide aperture

Due to technological constraints, lenses that open their aperture below f/2.8 are fixed millimeter lenses (they do not zoom). As a general rule, fixed millimeter lenses tend to be sharper than lenses with a range.


Let’s Talk About the Elephant in the Room: Focusing with a Wide Open Aperture

Right where all of the benefits of an f-stop of 1.2 start to break down is the focusing. The wider the aperture and the shallower the depth of field, the more difficult it can be to focus on what you want. Pair that with a live show in which the lighting is a bit of a mess, and the subjects move spontaneously in various directions, and it sounds like the perfect recipe for a photographer migraine. However, focusing with a wider aperture doesn’t have to be so difficult- it’s just a different thought process.

The Concept of Sharpness

Sharp concert photography through composition

Really, the focus stems from a desire to have an image that is sharp. But what is sharpness? Sharpness is an interesting concept. How sharp a subject appears is a matter of two things: the focus the camera captures and the amount of contrast on your subject. The term “sharpness” is, in fact, an illusion. You see, for an image to be considered sharp, it needs to have contrast. If the there is little contrast in the image, the subject will not look three-dimensional regardless of whether the focus is perfect or not. Biologically, the way that our eyes work, our vision naturally detects edges to register sharpness, and shadows and highlights in order to record the depth in a subject. This is a very important concept to understand when answering the question of how to make images look sharp. When editing your concert photography images, be attentive to the shadows and highlights. And add contrast to define your subject.


Perfect Focus

Sharp concert photography through perfect focus and wide aperture

In terms of getting your image to actually be sharp (from being in perfect focus), here is the basic concept of how focus works in a camera. When you focus your camera on a subject, it establishes a focal plane. To get your subject in focus, it has to be on the focal plane. Focal planes happen on an x (horizontal) and y (vertical) axis. This means anything along either of those axes will be in focus, and anything not on them will be out of focus. The concern with a wide open aperture is that your focal plane is quite small. As you decrease your aperture number and make the opening wider, the invisible area in front and behind the plane of focus will get smaller and smaller, leaving you with much less wiggle-room. As such, distance from the subject plays a key role in your focus.

When shooting wide open, even the smallest diversion from either of the focal plane axes will cause your subject to be out-of-focus. You cannot take a step forward or back without the need to refocus when shooting at a wide aperture. But by keeping this in mind, you can adjust your photography technique to better accommodate the small focal plane.

Single Point Autofocus

Using single point focus and wide aperture in concert photography

A trick to help make sure that what you want in focus is indeed sharp, is to use single point autofocus. By default, your camera will probably select either the object that’s closest to the camera or what’s in the center of the frame. By using single point autofocus, you tell the camera exactly where to focus, which is extremely helpful with low aperture numbers. Refer to your camera model’s manual to find how to change the focus setting!

The Real Secret

The real secret to wide aperture concert photography

Keeping in mind how the focal plane works, this is the big trick to shooting wide open at a concert: The farther away you are from the subject, the easier it is to get the subject in focus. You can get the subject in focus and still maintain and extremely creamy depth of field.

Whether you’re in a photo pit or just in the main venue floor, your position to begin the concert shoot can significantly affect your success for the rest of the shoot. Keeping in mind that for most general photography passes your time is limited, you need to be ready to jump right into the shoot the very second the music hits your ears. My suggestion is to start on the outer edges of the pit or venue and work your way to the middle. Many concert photographers all flock to the center of the shooting zone, and begin shoving to claim their dead center spot. When you start from the edge, while the other photographers are all congregating and fighting for the center, you have much more room to move freely on the outer edge. This is where you will have an advantage to be able to move a bit further away from your subject in order to expand your plane and get that perfect focus.

Shooting concert photography in wide aperture

Now that you’ve been let in to the secret, go out there and capture some awesome concert shots!

The post 5 Reasons to Consider Concert Photography with a Wide Open Aperture (and the Secret to Perfecting it) appeared first on Digital Photography School.


Digital Photography School

 
Comments Off on 5 Reasons to Consider Concert Photography with a Wide Open Aperture (and the Secret to Perfecting it)

Posted in Photography


How to Take Better Concert Photos

29 Sep

COOPH has released a 4-minute video with photographer Michael Agel, decoding the mystery behind shooting great concert photos. Concerts and gigs typically feature challenging, but also very unique, lighting situations.

This can make for incredible images, but if you don’t know exactly how to handle the drastic lighting changes and colors then it could go very wrong for you!

Better concert photos

?

“Photography, for me, is painting with light,” says Agel. “You have to look where there is interesting light, and create a good image.”

Agel is also a big advocate of putting down the camera and building rapport with the musicians you are shooting. This will help you to create better shots, but also avoid potentially disastrous situations (such as standing in front of a confetti cannon that’s about to go off!

Staying invisible will help you to nail those perfect shots; knowing when and how to choose your moments is paramount. You don’t want to get in between the singer and the crowd, and it’s key things like this that will make for a much smoother shoot – and hopefully get you booked again!

Check out the full video above to hear from Agel himself and see more of his work.

More reading

For more on concert photography check out these dPS articles:

  • 11 Ideas for More Unique Concert Photos
  • Tips for Doing Concert Photography like a Pro
  • 5 Tips for Better Concert Photography in Low Light Conditions
  • Concert Photography 101: Cameras and Lenses for Beginners
  • 10 Must-Have Camera Settings for Concert Photography
  • Anatomy of a Concert Photography Shoot

The post How to Take Better Concert Photos appeared first on Digital Photography School.


Digital Photography School

 
Comments Off on How to Take Better Concert Photos

Posted in Photography


Tips for How to Photograph a Rock Concert or Show

14 Sep

There are the stories, I’m sure you’ve heard them. Annie Leibowitz hanging out with the Rolling Stones. Bob Gruen photographing John Lennon on New York rooftops.

Let’s face it, second to being an actual rock star (we’ve all used a hairbrush as a microphone at some point, right?) being a music photographer and capturing all of the action, has a certain allure to it that for many of us, is hard to shake. But how do you actually do it? How do you photograph a rock concert or show?

Tips for How to Photograph a Rock Concert or Show - wide shot from the stage

Let’s start by getting one thing straight, your first show is not going to be a recording artist at the height of their fame. Even if it was, you will not have the skills you need to be able to do it justice. These shows come with time, effort and a good portfolio. The best thing to do is start with lower expectations.

Step 1. Find a band to shoot

Although it may seem a little daunting, this is pretty simple. There are two ways to go about it.

Firstly there is Social media. Search for musicians in your local area. Many towns and cities will have Facebook groups for live music, which is a great place to start, and most bands will have some sort of Social Media presence. You can check out their music, see what photos they already have and find out where they are playing. From here, you can simply send them a message and see if they would be happy for you to take photos at their next gig.

Tips for How to Photograph a Rock Concert or Show

The other way is to go to venues in your local area that put on bands. Get out there, talk to the bar staff, talk to the locals. Ask if they have any restrictions on photography in the venue, etc. This way you can see what the venue has to offer in terms of lighting, as well as being able to approach bands directly and build relationships with people who can help get you in front of bands you want to photograph.

It is simply is a case of speaking to people. Being an introvert myself, I know this can be hard, but sometimes you need to suck it up and put yourself out there.

Step 2. Know your camera

This is the key technical thing you need to be aware of. Do you know how to change your ISO with your eyes closed? If not, you should so practice until you can. Shooting live music means you will generally be in very dark conditions and unless you are able to access things quickly, you may miss the perfect shot.

It might seem pretty boring learning this stuff and, to be honest, it is, but consider it the homework you need to do in order to begin your journey into music photography. Imagine the lead guitarist hitting their rock god pose only to find that you have been staring at your camera, trying to remember how many clicks you need to change your ISO by one stop and completely missed it.

Tips for How to Photograph a Rock Concert or Show

While we are on the subject of knowing your camera, you really need to shoot in RAW. Live music images generally need to be processed to get the best color from them and RAW gives you the largest amount of data to work with.

Although there is technically no pressure to deliver amazing images for a shoot like this, you should approach every shoot like a dream assignment and deliver the best images possible. Seeing the band members reactions to your amazing photos will make all the memories of the boring stuff fade away.

In the same way, learning the exposure triangle is never the most fun but it is the thing that really helps you cope with the demanding situations you will face when shooting live music. Which brings me nicely to my next point.

Step 3. Learn to shoot in Manual Mode

Lighting in live music is complicated at best. At worst it is downright terrible. Camera meters will generally struggle with the type of lighting you are going to be facing. While aperture or shutter priority is great, what happens when those fail you?

Tips for How to Photograph a Rock Concert or Show

Shooting in Manual Mode means that if you find there is heavy backlight on the performer, you know how to move past it. It is the difference between looking at the back of your camera and wondering what is going wrong, to looking at the back of your camera and knowing how to fix it.

Manual Mode is something that will really help you up your photography game no matter what you shoot. It is the basic principle of photography that you really should take the time to learn. There are so many great resources available for this, it simply needs practice and isn’t as hard as it seems at first.

Having the knowledge to be able to fix exposure problems is something that takes your photography game to the next level. Why? Because you have the confidence to be able to handle the lighting, rather than hope that it is going to be okay.

Step 4. Gear

While I am no means a gear nerd, or an advocate of buying gear for the sake of it, if you are wanting to do this regularly you really need to consider a lens with a fixed f/2.8 aperture.

Most music photography means almost exclusively low light shooting situations and having a lens with a wide aperture means you can get more light into your camera. In terms of focal length, the 24-70mm (or 17-50mm if you are on a crop sensor camera) is the most used lens in almost every music photographer’s bag. The wide aperture also has the advantage of blurring the background, which is useful in venues that don’t have the most attractive backgrounds.

Tips for How to Photograph a Rock Concert or Show

You can purchase these lenses reasonably second hand, or you could always rent them. A cheaper alternative is the legendary Nifty Fifty lens, but it has big limitations for shooting music and even more if shooting in a small venue. While I love the 50mm lens I can’t really recommend it as a one to purchase for music photography when starting out.

I must stress though, these lenses are nice to have. You can shoot a show with any lens and any camera, but if you are considering this in the longer term, it will be a worthwhile investment.

Step 5. Shoot Day

It’s here. You’ve found a band to photograph, you know your camera and have learned how to shoot better in Manual Mode. It is time to go to the show.

Tips for How to Photograph a Rock Concert or Show

The first thing is to make sure you get to the venue in plenty of time. This means you will not be rushing around and it also means you can check the venue, say hello to the band, and get yourself prepared. You may be tempted to have a drink for some liquid confidence, but I would advise against that. You need to be at your best and a few drinks aren’t always helpful.

It is always a good time to check the basics. Format your memory card in the camera. Make sure you have a spare card at hand, check your camera is in the right mode and the lens is clean. It sounds really simple when you are reading this, but honestly, this is the sort of thing you will easily forget due to nerves.

On one of my first shoots, I forgot to put a memory card in the camera, so when the show started, I had to rush into my bag and sort it out. Luckily nobody noticed and the shoot went well, but this mistake is the reason I am so anally retentive in my pre-shoot ritual and you should be too.

Step 6. Etiquette

This is a big one!

You need to make sure you behave appropriately. The most obvious thing is to be mindful of those who are watching the show. You need to be aware of them and make sure you are courteous. A general rule of thumb is to not stay in one place too long. People generally want to see the band, not just the back of the photographer’s head.

Some fans will also be quick to let you know. I have been sworn at, had beer thrown at me and been threatened with violence. While you want to tell them off or snap back, you must remain professional and rise above it. To the band, their fans are number one, so make sure you treat them the same way.

Tips for How to Photograph a Rock Concert or Show

If there are other photographers shooting the show, always say hello and be polite. It is nice to see people you know when shooting shows and having friends to bounce ideas off, etc., is always a great thing.

When shooting the show, the general rule of thumb is if you want to go behind someone while they are taking photographs, gently tap them on the back and carefully walk behind them. It is a simple gesture, but one that people always appreciate. Again make sure that you don’t stick in one spot, make sure the other photographers can shoot from the same place as you. Get your shot, move on, and let others have their chance.

Now we come to one of my pet peeves. Please, pretty please with a cherry on top, don’t hold your camera over your head and blindly take photos. While it may get you a shot you like, it is the most annoying thing for the fans, for the other photographers, and for the band themselves. It also screams “I don’t know what I am doing”. Just don’t be that person, please.

Step 7. To flash or not to flash

The next thing to consider is using your flash. Now many smaller bands will not mind this, or at least they will say they don’t. But imagine being in a dimly lit space and having someone fire off a camera flash at you 10 times a minute. It soon becomes annoying!

The best solution is to try and avoid flash wherever possible. Modern cameras hold up really well at higher ISOs, so you should not have a problem. Photographing live music, generally means shooting at ISO 3200 or even 6400, but this is something most newer cameras can handle well enough.

Tips for How to Photograph a Rock Concert or Show

Shutter speeds should be 1/125th or higher and your aperture will generally be as wide as your lens will go.

Now having said all that, what if you do need to use flash because the lighting is just that bad? Firstly be frugal. As tempting as it is to fire off hundreds of shots, it will just annoy everyone. Pick your shots carefully and shoot sparingly.

The other thing when shooting flash is to make sure you pick up some ambient light or your shots will lack atmosphere. Start with an exposure that gets close to where ambient would be, then add flash as a small fill. This not only means you get more atmosphere in your shots, it also lessens the flash power, which is better for the artist you are photographing.

Don’t be afraid of slowing your shutter speed down when using this technique. 1/30th of a second or even slower can add some cool effects to your shot and will help keep the atmosphere.

Once you move into bigger bands, it is a simple rule, first three songs, no flash allowed. Break this rule and not only will you be removed from this show, but you will find it hard to get your next pass. The music business is a small world and lots of promoters know each other, lots of tour managers talk and if you annoy one, your name may spread. Practice not needing your flash now, then when you move onto bigger bands, you will be more confident and be able to do the show justice.

Step 8. Composition

Tips for How to Photograph a Rock Concert or Show

Composition is incredibly important in music photography. Simply put, there are shots to get and shots not to bother with. The most common shot that I see from those starting out in music photography is one of the singer’s face covered by the mic. This shot is considered a no-no in professional music photography, simply because it hides the singer’s expression.

When shooting, you need to pick your moments and move around frequently to be able to capture the best images possible. Do your research before the shoot. Look at popular music websites, look at professional music photographers and see what the best in the business are doing, then apply this to the band you are photographing.

Every band wants to be on the cover of Rolling Stone. While you can’t provide them with this, you can give them photographs that look like they could be in the magazine.

Step 9. Post-Processing

Tips for How to Photograph a Rock Concert or Show

This could be a whole tutorial in itself, so I will keep it brief. You will need to work with the color. By shooting in RAW this will give you the best data to work with later. You generally will need to tweak live music images, especially the color balance and JPEG simply does not give you enough scope to do this.

The most important thing is getting the images out quickly. When shooting professional bands, this means as soon as possible after the concert. When you are just starting out it is still a good idea to get the images to the band while the gig is still fresh in their minds.

Step 10. Practice

You’ve done it. You’ve now photographed your first show. I am sure you had a blast and the band loved the images. So what now?

Do it again and again, and again. Get out there and shoot! This will make sure you are constantly improving, but also allows you to start to build a reputation in your local area and building up a portfolio. This is key in moving to the next level and shooting bigger bands. They want to know you will take photos that make them look good.

Tips for How to Photograph a Rock Concert or Show

So how do you shoot bigger bands? Well, that’s a story for another day. For now, you need to get out there and practice. What’s stopping you? I can’t wait to hear how it went. Please share your rock concert photos and questions in the comment area below.

The post Tips for How to Photograph a Rock Concert or Show appeared first on Digital Photography School.


Digital Photography School

 
Comments Off on Tips for How to Photograph a Rock Concert or Show

Posted in Photography


11 Ideas for More Unique Concert Photos

16 Aug

Musicians, magazines, fans, and record labels alike turn to skilled photographers to tell a story of a momentous performance and return unique concert photos.

Concert photographers are often on assignment for a publication that has sent them out to capture meaningful pictures that could very well go down in music history. Otherwise, music photographers are individually hired by the performing artists. Whatever brings you to the photo pit, your goal is to capture something wonderful.

That being said, the music photography industry has become surprisingly saturated in recent years. In order to stand out amongst the crowd, you have to take live music photographs that differ from others in your photo pit. Here are 11 tips on how to take more unique concert photographs.

#1 – Don’t Forget About the Detail Shots

still life concert image - 11 Ideas for More Unique Concert Photos

Band: Behemoth

Although you want to focus heavily on the musicians performing on the stage, the detail shots are just as important.

Many bands put in a significant amount of effort into their live show productions, from stage props to lighting schemes. A unique and effective statement to your live concert gallery are some close-ups of the epic stage props that the band uses.

At the very least, the artist who created the props or the instrument company will thank you!

#2 – Play with Art and Distortion Lenses

blue and pink concert lighting - 11 Ideas for More Unique Concert Photos

Band: MGT. Shot with the Lensbaby Burnside 35.

Though concert photography is often an assignment from a journalistic outlet, that doesn’t mean that you can’t have a couple of minutes to yourself to do something vastly different. You do not have to be afraid of using artistic or distortion lenses at a live show. If anything, they make the frame exceptionally cool!

The fish-eye lens became very famous by well-known concert photographers by being used at live shows. I, myself, love using the Lensbaby lenses at live concerts. The manual focus can oftentimes be much more effective than relying on autofocus.

Try using a copper tube to create very cool swirls around your subject.

art lenses - 11 Ideas for More Unique Concert Photos

Band: A Mirror Hollow. Shot with the Canon 16-35mm f/2.8 L IS USM lens.

You can submit the standard shots to the outlet, and the unique ones to the band. I am telling you, the musicians will love a new take on their live performances.

#3 – Tons of Flying Hair is Great

hair whipping - 11 Ideas for More Unique Concert Photos

Band: Cradle of Filth

Naturally, try to capture the facial expressions of the performers. However, you are dealing with rockstars here, and part of the cool factor of these rock gods is their wild style.

Take advantage of the flying hair and fun headbanging, they can sometimes make cooler shots than your standard singing portraits.

#4 – Perspective is Everything

band between legs - 11 Ideas for More Unique Concert Photos

Band: HIM

Although concert photography can be very limited, between shooting time restrictions and limitations on your shooting location, you can still play with perspective.

The key to being different is viewing life through a lens that is more diverse than those around you, no pun intended. Get low, low, low to the ground and shoot up or move yourself to the very far side of the photo pit and shoot from there! Photograph in between the heads of fans or get up on the balcony.

Whatever you do, find new angles, views, and compositions to take advantage of to create more unique concert photos.

#5 – The Musician Doesn’t  Always Have to Look at You

musician on stage - 11 Ideas for More Unique Concert Photos

Band: Nightwish

It is true that the viewer connects best when the subject is looking at or engaging with the camera.

However, you don’t always have to fight for that type of shot during a live concert setting. It’s okay for the musicians not to interact with you as a photographer. Shots of them looking away or down can be just as eye-catching.

#6 – Embrace the Light, Don’t Avoid it

stage lighting - 11 Ideas for More Unique Concert Photos

Band: IAMX

Having a good grip on lighting will aid you in your concert photography journey. Stage lighting can differ tremendously between shows, venues, and even what lighting is available for that evening. The lighting can range from bright white strobes to deep reds.

Understanding how lighting is photographed by your camera, how it reflects on the instruments and equipment, and how the bulbs affect the performer’s skin tones will change how you take the photograph.

Most incredibly safe and tame images come from the photographer being wary of taking advantage of the lighting situation at concerts. Don’t be afraid to jump right in there and take advantage of whatever bizarre lighting scheme the performers have cooked up for you.

At the end of the day, the lighting is a part of the concert experience, and your job is to capture that.

#7 – Lens Flares are Rad

lens flare musician performing - 11 Ideas for More Unique Concert Photos

Band: Epica

On the topic of lighting, lens flares can be very cool!

This is, of course, an aesthetic choice, but I personally find them to be quite fun. You can cause a flare in a similar fashion to photographing during sunset or golden hour. When the light hits the front glass element of your lens at a specific angle, a flare will appear.

#8 – Overexposing and Underexposing Can Work

moody concert lighting - 11 Ideas for More Unique Concert Photos

Band: The Misfits

To help accurately capture the emotion and feel of the show, it is alright to overexpose or underexpose your frame. This can also create a rather unique and uncommon type of photograph.

Use your best judgment and common sense here to determine when such exposures are appropriate.

#9 – Don’t Be Afraid to Get Close

close up of a band member on stage - 11 Ideas for More Unique Concert Photos

Band: Jyrki69

Guitarists don’t bite (not hard anyway)! Don’t be afraid to get close to the performers on the stage. Take a wide-angle lens, such as a 16-35mm lens, and get right up in there. The perspective distortion can make for a very cool shot.

However, that being said, be aware of your surroundings. I cannot reiterate this point enough. Absolutely be aware of your surroundings!

It is easy to get lost in the moment and fall into a creative bliss when shooting, but a live music event is not the place to lose yourself.

If you’re not growing eyes in the back of your head, you’ll most likely get clonked right in the temple by a crowd surfer, tangled in a microphone cord, or smacked by a flying guitar. This will help you avoid injury to yourself and others.

#10 – In-Between Moments Tell a Story

singer between songs - 11 Ideas for More Unique Concert Photos

Band: HIM

The band may have put their instruments down for a moment, but that doesn’t mean that the job of the photographer ends there.

Some in-between moments can become incredible iconic images through their powerful storytelling ability.

#11 – The Moment is More Important than Technical Accuracy

red concert lighting - 11 Ideas for More Unique Concert Photos

Band: IAMX

Let’s face the facts, we all pixel peep. I believe that over time, passionate photographers get a bit anxious about technical perfection in their images (I know I sure do sometimes). However, some niches such as event photography are not as fussed over technical mistakes as long as the moment captured is important.

There is be a fine balance between taking a good photograph by technique and taking a good photograph by design (aka a great and powerful moment). However, if you have to choose between capturing a fantastic story and ensuring equipment perfection, pick the story.

Many wonderful images are overlooked because the focus is too set on ensuring that an image is tack sharp rather than what the subject portrays.

Of course, this isn’t meant to be interpreted as disregarding technical proficiency. You should aim to take exceptional photographs, but don’t get lost in your pursuit and forget your purpose for photographing the event.

Your turn

Now that you have these tips in your photography toolbelt, go out there and take some wicked shots!

Band: Epica

The post 11 Ideas for More Unique Concert Photos appeared first on Digital Photography School.


Digital Photography School

 
Comments Off on 11 Ideas for More Unique Concert Photos

Posted in Photography


Musician kicks photographer in the face during rock concert, sending her to the ER

12 Dec

Queens of the Stone Age leading man Josh Homme did something at a show last night that seems both willful and horrifying. In the middle of a song, with no reason or provocation, he walked over to photographer Chelsea Lauren and kicked her squarely in the camera and face. Lauren, who was shooting the show for Shutterstock, seems to have been simply doing her job from the pit.

The whole incident was caught on video as well as in photos, with Lauren taking to Instagram to vent her disbelief and ask “WHO DOES THAT?” after the show last night.

Thanks to Josh Homme @queensofthestoneage I now get to spend my night in the ER. Seriously, WHO DOES THAT?!? #joshhomme #queensofthestoneage #qotsa #qotsafamily #concertphotography #musicphotographer

A post shared by Chelsea Lauren (@chelsealaurenla) on

Later, Lauren uploaded a series of three photos from the incident. Two showing the moment right before she was kicked, and a third showing Homme “later after he cut his own face with a knife. I was in the pit in tears – and he just stared at me smiling.”

Thank you everyone that has reached out with supportive messages. A small update, as I’m being flooded with questions: My neck is a sore, my eyebrow bruised and I’m a bit nauseous. The doctor released me early in the morning. Here are three images. Two of them as Josh looked at me, smiled and then kicked me. The other one is later after he cut his own face with a knife. I was in the pit in tears – and he just stared at me smiling. Assault in any form is not okay, no matter what the reasoning. Alcohol and drugs are no excuse. I was where I was allowed to be, I was not breaking any rules. I was simply trying to do my job. I hold nobody accountable for this but Josh himself. KROQ has nothing to do with this and I will always support them. The irony is someone had thrown an ice cube on to the very slick catwalk before the QOTSA set. I was afraid that one of the band members might slip and hurt themselves so, when the lights went dark, I used my arm to wipe down the runway so nobody would hurt themselves. Thank you to @variety for their immediate concern and care with this matter. As of now, nobody from QOTSA has reached out to me. #queensofthestoneage #QOTSA #JoshHomme

A post shared by Chelsea Lauren (@chelsealaurenla) on

Lauren tells Variety that it was “obviously very intentional,” saying later that she spoke out because “I feel like if I don’t do anything, he gets to kick people in the face and not get in trouble because he’s a musician.”

For his part, Homme has since released two apologies. The first, published through the Queens of the Stone Age Twitter account characterized the incident as an accident.

Last night, while in a state of being lost in performance, I kicked over various lighting and equipment on our stage. Today it was brought to my attention that this included a camera held by photographer Chelsea Lauren. I did not mean for that to happen and I am very sorry. I would never intentionally cause harm to anyone working at or attending one of our shows and I hope Chelsea will accept my sincere apology.

But with both photo and video evidence seeming to show that the kick was intentional, this first apology came off more callous than sincere. It was followed by two tearful video apologies posted to Instagram:

Interestingly enough (though, perhaps, not surprising) it seems that other photographers have been warned about Homme in the past. In a post on her Facebook page, photographer Tanya Voltchanskaya said that she was told not to stand in front of Homme during a show back in 2014 because, and here she quotes directly, “[you] will get a boot in the face.”

Articles: Digital Photography Review (dpreview.com)

 
Comments Off on Musician kicks photographer in the face during rock concert, sending her to the ER

Posted in Uncategorized


Tips for Doing Concert Photography like a Pro

21 Aug

Imagine being a concert photographer and getting the chance to cover loads of concerts. Imagine standing just feet away from your favourite artists as you capture so many shots of them. Doesn’t that just sound like the best thing? As opposed to other genres of photography like portraiture, fashion, etc., we have little to no control over lighting, the artists, and tons of other factors in concert photography.

So what are some of the best settings and tricks to capture those perfect shots at concerts? Images which will make you proud, make the artists and the viewers sat “Wow that is indeed one brilliant capture.”?

Tips to capture concert photos 7

Use a fast lens and shoot wide open

Using a fast lens is highly important and is a basic requirement for concert photography. Almost all concerts happen during evenings or night, or indoors under low lighting, which is why your camera sensor requires more light to enter through the lens opening. Moreover, the performers keep moving around the stage so you need to use faster shutter speeds to freeze their motion.

A fast lens is one which allows shooting at wider apertures such as f/2.8, f/1.8, etc. By using lenses like the 50mm f/1.8 or 135mm f/1.8 at the smallest aperture value, you can capture a well exposed shot by keeping the shutter speed fast enough. Another reason for using a fast lens is because usually the distance between the backdrop and the subject is minimal, so to create a shallow depth of field with a bokeh effect, a smaller aperture value would have to be used.

Tips to capture concert photography 5

Shoot in Aperture Priority Mode

Using Aperture Priority Mode to shoot concerts allows for more stress-free shooting. You simply tell your camera the aperture you want to use and it automatically sets the corresponding shutter speed. For many newbies shooting their first few concerts and even for many pros, using aperture priority allows for hassle free shooting.

Also, since the your mind is not all occupied by technical settings, you have freedom to look around at the artists, the crowd, etc., and end up shooting something really creative.

Shoot in aperture priority, with your f-number set to the smallest available on your lens, usually f/1.8 or f/2.8.

Crank up the ISO

Tips to capture concert photos 1

Concerts usually take place in low light settings and for many reasons, using a tripod is not possible. So you can resort to the one setting which you have control over and can easily use, the ISO.

Before the concert really gets going, fire off a series of test shots at different ISO values to judge after what point the noise becomes unacceptable. (Usually ISO 3200 or 6400). Some noise is actually okay and is far better than having a totally underexposed or blurry shot simply because you didn’t increase your ISO value.

The noise generated by the high ISO values can be used creatively to capture something unique. A monochrome shot with some noise would lend a really cool film grain effect to your shot. High noise can be fixed later on in post-processing too. So don’t think twice before cranking up that ISO, it’s far better than having no photo to show.

Avoid using your flash

Tips to capture concert photography 2

MOST important- Avoid using your flash at concerts. It is looked down on and frowned upon a lot. Imagine that you are firing your flash towards the performer(s), and there are 10 others doing the very same. That is surely going to annoy the artists, not to mention almost blind them.

Another important aspect of concert photography is photographing the audience, and no photographer would like to distract the audience from the artist who is performing for them. Repeatedly firing the flash at their faces while capturing their photos can easily annoy audience members.

Also, if we are aiming to capture candid photos of either the artists or the crowd, then firing a flash at them surely is not the right way to do that. And yes, a majority of photos using the built-in pop-up flash simply aren’t worth it. They look flat and uninspiring.

Move around

Tips to capture concert photography 4

You are not there to stand at one place and shoot the same picture 10 times. As a concert photographer it goes without saying that you will have to move around. Move with the artists, move as the lighting changes, etc., to capture those standout moments. (Note: unless, of course, the venue or artist has put restrictions on photographers moving around.)

If you find people blocking your view, you have to move. After all, they have paid to watch their favourite artists perform. If the lead singer moves to one side of the stage, then you have to follow him over there.

The lights too will change from time to time, and it is important to know when which area of the stage will be illuminated to capture the performers properly with adequate lighting.

Tips to capture concert photos 6

Moving around will always get you some really creative shots. You could capture a shot of the lead guitarist under the spotlight, a shot of the lead singer standing isolated from everyone else, etc. The possibilities are endless.

Wait and anticipate

Waiting for that perfect moment is as important as learning to anticipate it. This is a habit which can be developed easily, and is only fine tuned over time. Observe the artists and you will notice certain habits of theirs.

Moments such as a guitarist bending backwards during a particularly intense moment, a DJ waving his arms in the air, a singer grabbing the mic in a particular manner, etc., are all moments which would make for a perfect shot. It is important to know when these moments are around the corner so that you are ready to fire your camera when they come.

Tips to capture concert photography 3

Conclusion

These are just a few tips to help you do better concert photography. Please share any others you’ve learned as well as your concert photos, in the comments below.

The post Tips for Doing Concert Photography like a Pro by Kunal Malhotra appeared first on Digital Photography School.


Digital Photography School

 
Comments Off on Tips for Doing Concert Photography like a Pro

Posted in Photography


5 Tips for Better Concert Photography in Low Light Conditions

04 Aug

Concert photography is one of the hardest subjects to nail down for one main reason: the conditions almost always have low lighting and you aren’t allowed to use flash. With that said, there are some tips for optimizing your concert photography experience. Whether you’re equipped with a DSLR and a photo pass for a big arena show or simply shooting a local band in a pub or a school performance, use these tips to enhance your low lighting photography.

1. Choose a Low Lighting Lens

5 Tips for Better Concert Photography in Low Light Conditions - use a fast lens

One of my first concert photos snapped with an old Nikon D90 and a 24-70mm f/2.8 lens.

Generally speaking, the gear you shoot with doesn’t really matter, except when it comes to low lighting photography. In this case, you’ll want to have a fast lens with the lowest f-stop possible. For most concert photographers, this equates to a 24-70mm f/2.8 and/or a 70-200mm f/2.8. These are two of the most popular concert and event photography lenses thanks to their low f-stops and vast focal length coverage.

However, fast lenses like these two can be very expensive. If you’re on a budget, consider an affordable prime lens such as the 50mm f/1.8 or 85mm f/1.8. While you sacrifice the ability to zoom, you gain an extra stop or two of light while also saving money.

2. Adjust Your Aperture to Shoot Wide Open

Now that you have a large aperture lens, switch your camera over to Aperture Priority or Manual mode and shoot “wide opened” at the lowest f-stop number your lens allows. This will let the most amount of light get to your camera’s sensor.

As a tradeoff, the lower f-stop number means a smaller depth of field, meaning your images may not be as sharp as if you were shooting at a higher f-stop. So if you happen to be shooting in ultra bright lighting conditions, consider bumping your f-stop up to get more of the scene in focus.

5 Tips for Better Concert Photography in Low Light Conditions

Sometimes you are blessed with ample venue lighting that gives you more flexibility with your camera settings. Shot at f/4 at 1/125 at ISO 640.

3. Watch Your Shutter Speed

If you shoot in Aperture Priority mode like I do, then you won’t have to worry about setting your shutter speed. However, you should always take note of it while shooting and understand how it may affect your image.

As a baseline, your shutter speed should be at least 1/250th to freeze motion while shooting concerts. But this is a luxury often reserved for shooting well-lit shows or outdoor concerts. In low lighting conditions, your shutter speed will probably be much lower than 1/250th. I can usually push my camera to go as low as 1/60th and still pull off decent concert photos, but it’s best to not go any slower than 1/100th.

5 Tips for Better Concert Photography in Low Light Conditions

4. Increase the ISO

Increase the ISO until you are able to shoot at your desired aperture and shutter speed. For most conditions, this means cranking the ISO up to 3200 or even as high as 6400. The exact ISO limitations will vary according to your camera. And just because your camera can shoot at ISO 10,000 doesn’t mean that you should. Experiment with your camera until you find the highest ISO that you are comfortable using (based on the noise level, etc.).

As a tradeoff, a higher ISO means you’ll have more noise or grain in your images. However, many digital cameras today produce very good quality images even at high ISOs. Also, there is noise reduction software available that will help you reduce noise in post-production. The bottom line is that more digital noise or grain in an image is better than having it be blurry due to a slow shutter speed. Don’t hesitate to increase the ISO.

5 Tips for Better Concert Photography in Low Light Conditions

Shot at f/2.8 at 1/100 at ISO 5000. Not the sharpest photo, but it captured a key moment in a venue with horrible lighting.

5. Shoot in RAW

If your camera allows for it, shoot your images in RAW format, rather than JPG. Concert photography is notorious for having inconsistent lighting with red or blue lights that can flicker or change throughout a concert, making it hard to adjust the in-camera white balance. If you shoot in RAW, you’ll have more flexibility to fix and edit those photos in post-production.

concert photography tips

Over to You

What are some of your best tips for photographing concerts in low lighting without flash? Please share them in the comments below.

The post 5 Tips for Better Concert Photography in Low Light Conditions by Suzi Pratt appeared first on Digital Photography School.


Digital Photography School

 
Comments Off on 5 Tips for Better Concert Photography in Low Light Conditions

Posted in Photography


Concert Photography 101: Cameras and Lenses for Beginners

20 Jul

If you’ve ever wondered how to become a concert photographer, one of the very first steps is to acquire the right gear. You’ve probably been to a concert or festival and seen music photographers hauling tons of equipment such as two camera bodies and enormous lenses. While it’s certainly ideal for a professional to have this much stuff (and then some), most beginners or amateurs absolutely don’t need this much gear to get started. Read on for some of my suggestions on how to gear up as a beginning doing concert photography.

Concert Photography 101: Cameras and Lenses for Beginners

Concert photography rules

Before we get into gear, let’s discuss your typical concert photography setting. Whether you’re shooting a big arena show or a small, casual performance in a bar, concert photography rules are more or less the same. You get to shoot for the first three songs only, and cannot use a flash or strobe of any sort. With these two rules in mind, this means that you need gear that allows you to adjust and shoot quickly and pull off shots in a low lighting setting.

What kind of camera do you need?

First off, invest in a solid DSLR camera. While there are point and shoot cameras that could arguably get the job done, you need the lens choices that come with DSLRs. It doesn’t really matter what brand you choose. What does matter is being comfortable using it and knowing that you have a wide variety of lenses to pair with it. Canon and Nikon are two of the biggest camera brands that are among the most popular for concert photographers.

Crop Sensor or Full Frame?

When researching DSLR camera options, you’ll have a choice between investing in a crop sensor or full frame camera. The differences between the two types of DSLR cameras is best explained in this article.

To quickly summarize, crop sensor cameras are typically smaller in size and much cheaper than full frame cameras. The main disadvantage to crop sensor cameras has to do with their smaller sensor sizes that will impact available ISO options, thus resulting in slightly noisier or grainy photos than full frame cameras. In short, start out with a crop sensor camera if you’re on a budget, and aim to upgrade to a full frame camera the further you get in your concert photography career.

Concert Photography 101: Cameras and Lenses for Beginners

Canon 5D Mark III (full frame) on the left and a 6D on the right.

Suggested concert photography cameras

Full Frame

  • Canon EOS 6D
  • Canon 5D Mark IV
  • Nikon D810
  • Nikon D750
  • Nikon D610

Crop Sensor

  • Canon 7D Mark II
  • Canon 77D
  • Canon 80D
  • Canon EOS Rebel T6i
  • Nikon D500
  • Nikon D7500
  • Nikon D5600
  • Nikon D3400

What are the best concert photography lenses?

After you’ve invested in a DSLR, be sure to budget for the purchase of accompanying lenses, which can end up being just as expensive as the camera body. Generally speaking, you shouldn’t use the kit lens that automatically comes with your DSLR camera.

Most of these kit lenses are fine for shooting in ample lighting conditions, but they won’t perform well in the low light settings of concerts. Instead, what you want is a fast lens with a wide aperture (or f-stop) of between f/1.2-f/2.8. This will help you capture moving subjects in dark settings.

Concert Photography 101: Cameras and Lenses for Beginners

Canon 24-70mm f/2.8 and 70-200 f/2.8.

Start with prime lenses

For beginning concert photographers on a budget, prime lenses are your best bet. While these lenses have fixed focal lengths, meaning you can’t zoom with them, their low f-stops mean they will shoot better in low light. Prices and exact lens models will vary according to which camera brand you’ve chosen. Since I’m a Canon shooter, these lenses are geared toward Canon.

  • 50mm f/1.4 (or the cheaper 50mm f/1.8) – for Nikon try the 50mm f/1.8G
  • 85mm f/1.8 – for Nikon try the 85mm f/1.8G
  • 35mm f/1.4  – for Nikon try the 35mm f/1.4

Put these lenses on your wish list

Pretty much every professional concert photographer will have two go-to lenses on hand: a 24-70mm f/2.8 midrange zoom lens, and a 70-200mm f/2.8 telephoto lens. Neither of these lenses is cheap and should definitely be considered a long-term investment. But if you can afford one or both, don’t hesitate to add these lenses to your concert photography kit.

Concert Photography 101: Cameras and Lenses for Beginners

Keep an eye on third party brands

While it’s certainly ideal to purchase lenses in the same brand as your DSLR camera manufacturer, there are many third party companies producing cheaper and sometimes even better options. Great lens options exist from Sigma, Tamron, and Tokina, to name a few. Again, the specific options will depend on the DSLR camera body you’ve chosen, but here are a few possible options for Canon shooters:

  • Tokina 11-16mm f/2.8 (for Canon EF-S/crop sensor or Nikon DX)
  • Sigma 17-50mm f/2.8 (for Canon EF-S/crop sensor or Nikon DX)
  • Sigma 24-70mm f/2.8

If you’re on a budget

It’s a reality that concert photography equipment isn’t cheap. But there are some ways to score more affordable camera gear. First, look into used or refurbished camera bodies and/or lenses. As long as you purchase from an accredited source, you can save hundreds of dollars on gear.

On the flip side, keep in mind that camera gear retains its value as long as you take care of it. So if you buy a lower-end camera or lens and want to upgrade later on, it’s pretty easy to sell off your old gear to help you invest in newer options.

Finally, look for older models or previous versions of gear. For example, you could spring for the brand new Canon 5D Mark IV camera body, or you can save over $ 1,000 by investing in the older yet still very functional Canon 5D Mark III. The same is true for many other camera bodies and lenses on the market. It all depends on your budget and what kind of features you absolutely need to have.

Concert Photography 101: Cameras and Lenses for Beginners

In Conclusion

Consistently pulling off pro-quality concert photos often requires investing in pro-grade camera gear. But it’s best to start small and to upgrade over time as your skills and budget increase. What are your go-to concert photography cameras and lenses? Let me know in the comments below!

Concert Photography 101: Cameras and Lenses for Beginners

The post Concert Photography 101: Cameras and Lenses for Beginners by Suzi Pratt appeared first on Digital Photography School.


Digital Photography School

 
Comments Off on Concert Photography 101: Cameras and Lenses for Beginners

Posted in Photography


Tips for Mastering Concert Photography

31 May

Everyone’s been there – front and center, in a dark, sweaty club crammed between hundreds of rabid fans listening to your favorite band.

So, you pull out your iPhone because this is a moment you totally need to remember forever.

But let’s be honest – what kind of memory is a blurry guitar player or the back of another concert goer’s head? Not a very good one (and we all know it).

So we chatted with Madison-based concert photographer Justin Kibbel to learn his simple tips for capturing that dynamic rock-n-roll moment with your DSLR with a few tips for phoneographers too.

From gear to ninja stealth, he’s got a LOT of great advice.

(…)
Read the rest of Tips for Mastering Concert Photography (1,137 words)


© Meg for Photojojo, 2017. |
Permalink |
No comment |
Add to
del.icio.us

Post tags:

The post Tips for Mastering Concert Photography appeared first on Photojojo.


Photojojo

 
Comments Off on Tips for Mastering Concert Photography

Posted in Equipment