RSS
 

Archive for February, 2013

Maldives & More: 12 Envy-Worthy Resorts of the Rich

11 Feb

[ By Steph in Global & Travel & Places. ]

Resorts for the Rich Main

Not all of us can afford to rent out an entire private island in the Caribbean, or even an ocean villa in the Maldives, but it’s fun to dream. With the most picturesque tropical views of crystal-clear blue-green waters and white sand beaches imaginable, these 12 luxurious island resorts don’t come cheap, but their oversized tubs, infinity pools and hammocks suspended over the sea are capable of making you feel more relaxed with photos alone.

Musha Cay, The Bahamas

Resorts for the Rich Musha Cay

Among the priciest resorts in the world, David Copperfield’s Musha Cay in The Bahamas is only accessible to those with millions in the bank. It’s $ 37,000 per night, with a four-night minimum, for up to 12 people. But at that price, the island is all yours – so if you’ve got the cash, it’s worth it. There are five plantation-style villas and The Landings, the main building holding the restaurant and clubhouse. Beach barbecues, jet skis, banana boats, tennis courts and a pool table that once belonged to Harry Houdini are just a few of the activities offered.

Maafushivaru Hotel, Maldives

Resorts for the Rich Four Seasons Maldives 2

Resorts for the Rich Maldives Paradise

Choose from a spacious pool villa or a cozier ocean villa at the stunning Maafushivaru Hotel in the Maldives. Each little getaway is perched above crystal-clear waters, with a serene white sand beach within easy walking distance. Rooms start at $ 2,600 per night – per person.

Laucala Island, Fiji

Resorts for the Rich  Laucala

The all-inclusive Laucala Island resort is located on the largest private island in the Southern hemisphere, just off the coast of the Fijian island of Taveuni; it was once the private island of Malcolm Forbes and is now owned by the head of Red Bull. It features 25 bungalows, each with its own private pool and oversized outdoor stone or wooden bathtub. Coming with a group? Rent the Hilltop Residence, which has six bedrooms, three baths and a 360-degree view of paradise.

Coco Palm Bodu Hithi Resort, Maldives

Resorts for the Rich Coco Palm 1

Resorts for the Rich Coco Palm 2

Locate on a private island in the Maldives, the Coco Palm Bodu Hithi Hotel boasts eight restaurants, a spa with yoga and tai chi classes, and 100 guest units. Elevated wooden walkways lead from one section of the resort to another, and infinity pools jut out over the deeper blue of the sea water.

Hayman Hotel, Australia

Resorts for the Rich Hayman Hotel 1

Resorts for the Rich Hayman hotel 2

The incredible Hayman Hotel has its own artificial barrier island creating a private cove-like pool area. Nearly all the guest rooms overlook this massive aquatic playground and the sea beyond it, which is just a stone’s throw from the legendary Great Barrier Reef.

Next Page:
Maldives More 12 Envy Worthy Resorts Of The Rich

Share on Facebook


[ By Steph in Global & Travel & Places. ]

[ WebUrbanist | Archives | Galleries | Privacy | TOS ]


WebUrbanist

 
Comments Off on Maldives & More: 12 Envy-Worthy Resorts of the Rich

Posted in Creativity


Makha Bucha Day

11 Feb

‘Thailand’s Makha Bucha Day’ at ‘Wat-Phra-Pathom-Chedi’ ‘Nakhon-Pathom’ province, Thailand. 18 FEB 2011. With NIKON D5000 and NIKKOR AF-s 18-55VR
Video Rating: 5 / 5

This is my submission to my schools art show. It is a collection of time lapse clips from St. Albans School in Washington DC This was shot with a Nikon D5000 on interval shooting mode Lens: 18-55mm f/3.5 Song: I Am You By: Hecq
Video Rating: 5 / 5


Microstock Agency Review – Photaki

11 Feb

It has been some time since visual content demand has risen on the internet, and with that some new business models have appeared, one of them being microstock. In the last years, quite a lot of microstock agencies have been created, an interesting option for contributors (photographers, graphic designers or illustrators to say some) and image buyers alike. Creative minds Continue Reading

The post Microstock Agency Review – Photaki appeared first on Photodoto.


Photodoto

 
Comments Off on Microstock Agency Review – Photaki

Posted in Photography


Nikon d600 Video Clips

11 Feb

A few quick and dirty shots I took the day after I got the camera. Quite a few high iso shots. Some shots with the face detection auto focus on, just to experiment. I mostly used a not great lens, a Nikkor 28-80mm F3.3-5.6. This was the kit lens from a Nikon film camera I bought 15 years ago. I dusted it off to try it out. I wouldn’t usually use this lens for video.
Video Rating: 5 / 5


Finding Your Way Around the Mode Dial

11 Feb

This is the first in a series of articles by Andrew S Gibson, the author of Understanding EOS: A Beginner’s Guide to Canon EOS cameras.

01

Your camera’s Mode Dial is the gateway to its exposure modes. Knowing which exposure mode to use, and why, is the key to creative photography, and to taking photos like the one above.

If you want to create beautiful images then you need to know how to control your camera’s settings. It all starts with your camera’s Mode Dial (not all cameras have a Mode Dial, but most do). Here’s what the Mode Dial from the EOS 650D (or Rebel X4i if you’re in North America) looks like. It’s fairly typical of many SLR cameras:

02

As you can see, there are a lot of icons. This can be confusing, especially for newcomers to photography. If you’re new to using an SLR, then how do you know which mode to select?

Let’s start by looking at Full Auto. It’s depicted by the green A+ icon on the Mode Dial of the EOS 650D (the precise term for the fully automatic mode on this camera is Scene Intelligent Auto). With other camera brands the Full Auto mode is also clearly marked by using an icon of a different colour to the rest (Nikon uses green, Pentax and Sony blue).

Full Auto mode is aimed at photographers who don’t know how to use the camera’s more advanced controls. If you’ve just picked up a digital SLR for the first time you can set it to fully automatic and start taking photos even if you know nothing about photography.

03

There are several other fully automatic modes on the EOS 650D’s Mode Dial (see above). Not all cameras have these modes (they are noticeably absent on many models aimed at semi-pro and professional photographers). They have names like portrait, landscape, close-up mode etc.

They are also aimed at photographers who don’t know how to use the more advanced controls on their camera. Their use is straightforward. If you’re taking a portrait, for example, then just set the camera to portrait mode. You don’t need to know anything about the camera or how it works to do this.

Fully automatic modes are very helpful for photographers that don’t know much about how their camera works. But they are too restrictive to be useful to creative photographers. On Canon EOS cameras, for example, you can’t change the white balance, Picture Style, autofocus mode or shoot in Raw in the fully automatic modes. Neither can you override the camera’s selected aperture, shutter speed and ISO settings. You can’t even use exposure compensation. You are locked into the settings the camera selects, and there’s nothing you can do about it. The fully automatic modes on other manufacturer’s cameras have similar restrictions.

The creative half of the Mode Dial

04

Now, these are the modes that creative photographers are interested in! They are Program Auto Exposure (P), Aperture Priority (Av on Canon EOS cameras), Shutter Priority (Tv on Canon EOS cameras) and Manual (M).

I’m a great believer in keeping things simple. You’ll find the only exposure modes you need in this section of the Mode Dial.

If you’re new to photography, your task as a creative photographer is to move away from the fully automatic modes and start using Program, Aperture Priority or Shutter Priority as soon as you can.

Once you’re comfortable with using these modes, you can also consider using Manual mode. There are some compelling reasons for doing so (I discussed them in another article here).

Let’s take a brief look at the benefits of Program, Aperture Priority and Shutter Priority modes:

Program Auto Exposure (P)

Often overlooked, Program is a surprisingly useful exposure mode. It works like this: you set the ISO and the camera sets the shutter speed and aperture according to the reading from its built-in exposure meter.

Many cameras now also let you use Auto ISO. With Auto ISO activated, the camera also selects the ISO. You can usually restrict the upper (and sometimes the lower) end of the ISO range available to the camera so that it doesn’t set an ISO that is too high.

At first glance, Program seems nearly the same as Full Auto. But the differences are crucial. You retain full control over settings like image quality (ie Raw or JPEG), white balance and Picture Style. You can use exposure compensation to override the camera’s exposure settings. And if you don’t like the aperture/shutter speed combination selected by the camera, you can use Program Shift (that’s Canon’s term, check your manual if you have a different brand of camera) to nudge the selected settings one way or the other.

In other words, while the camera is in an automatic mode, you stay in control of the settings. This is crucial for creative photography.

This is the sort of photo you might take in Program mode. Neither the aperture nor the shutter speed are particularly important:

05

The next two exposure modes really let you get creative:

Aperture Priority (Av)

I’m sure plenty of readers are already aware of the effect of aperture on the photo. For those of you who aren’t, here’s how it works. There are three approaches to using aperture:

06

1. You use a wide aperture to take a photo with shallow depth-of-field. You know those beautiful portraits you’ve seen with the background completely out of focus? That’s the sort of thing you can achieve with a wide aperture. Some photographers buy prime lenses (which have wider maximum aperture settings than zoom lenses) just to take advantage of this characteristic. I created the above portrait with an 85mm lens set to f1.8.

07

2. You use a small aperture to ensure that the entire scene is in focus from front to back. This is the opposite approach and one often used by landscape photographers who want everything within the scene to be rendered sharply. It’s the opposite to the first approach. I selected an aperture of f16 to create the above landscape image.

08

2. You use a middle-of-the-road aperture, that is one somewhere in the middle of your lens’s aperture range, to create a photo where part or most of the scene is in focus. Parts of the background may be out of focus, even if you have to look closely to see it. This is the sort of approach you would take when you want the background to be recognisable, but it’s not important for it to be completely sharp. The above photo is a good example, taken with an aperture of f5.6.

Aperture Priority works very simply. You set the ISO and the aperture, and the camera sets the shutter speed required to give the correct exposure.

Shutter Priority (Tv)

You use Shutter Priority when you want to set a certain shutter speed to record any movement within the frame a certain way. Again there are three approaches:

09

1. Set a fast shutter speed to freeze motion. This is what sports photographers do when they freeze the motion of athletes in mid-leap. I used a shutter speed of 1/2000 second for the above photo.

10

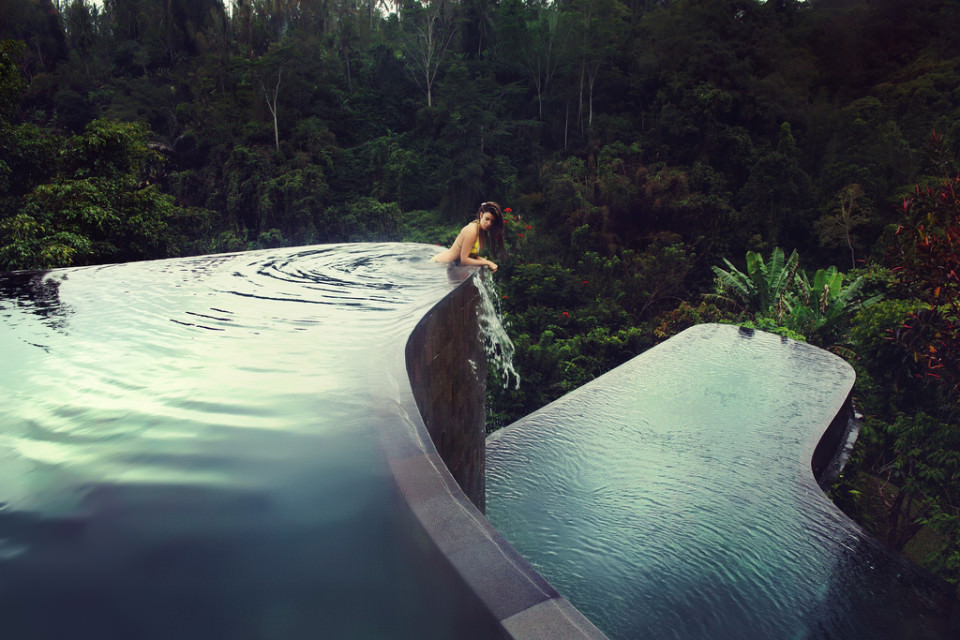
2. Set a slow shutter speed to blur any movement within the scene. You would normally set the camera on a tripod to support it when you do this, although you can also use creative techniques like panning if you are hand-holding the camera. I used a shutter speed of 30 seconds and asked my model to stand still to create the photo above.

3. Set a middle-of-the-road shutter speed that freezes most motion and lets you take a photo free from camera shake. This is the typical approach that many photographers take most of the time. But exploring fast and slow shutter speeds is fun and creative.

Shutter Priority also works very simply. You set the ISO and the shutter speed, and the camera sets the aperture required to give the correct exposure.

Conclusion

There are only three modes you really need to use on your camera: Program Auto Exposure, Aperture Priority and Shutter Priority (some of the others, such as Manual or Bulb mode, will come in useful as your skills develop). But as for the fully automatic modes on your camera, it’s best to forget about them completely. They will hold you back, and prevent you from getting the full potential out of your camera.

This article is the second in a series. The next one will take a close-up look at your camera’s colour and contrast controls.

11

Understanding EOS

Andrew S Gibson is the author of Understanding EOS: A Beginner’s Guide to Canon EOS cameras. The use of the Mode Dial is one of the topics discussed in-depth within the ebook.

Post originally from: Digital Photography Tips.

Check out our more Photography Tips at Photography Tips for Beginners, Portrait Photography Tips and Wedding Photography Tips.

Finding Your Way Around the Mode Dial


Digital Photography School

 
Comments Off on Finding Your Way Around the Mode Dial

Posted in Photography


Digital Photography 1 on 1: Episode 50: HDSLR Part 3: Audio for Video

11 Feb

This week is the third episode in a series about shooting video on a DSLR camera. HDSLR cameras are capable of producing remarkable images but they are all pretty awful in the audio department. In order to combat these audio issues Mark will show a number of different microphones and audio devices that can be used to ensure that you’re getting the best audio. In the coming weeks, he will go over basic editing techniques as well as compressing for the web- so stay tuned!
Video Rating: 4 / 5


The ultimate Introduction to DSLR Filmmaking | Basic Tutorial

11 Feb

A tutorial by Fenchel & Janisch Facebook: www.fb.com YouTube: www.youtube.com This introduction to DSLR video is divided into six parts. Learn how to set up your camera, shoot in daylight and at night. This tutorial shows you how to get the cinematic film look that so many people are talking about. In the fall of 2008 Vincent Laforet was the first one to use the Canon EOS 5D Mark II which was the first digital SLR capable of recording full HD video. The short film he shot mostly at night, called “Reverie”, become popular over night. Something that Canon never intended got more and more in focus of amateur filmmakers all over the world: Shooting films and commercials with a stills camera. It only took a few month and the first accessories were released. Since then a lot has happened and a lot of TV shows like “House MD” or “CSI Miami” used DSLRs on set. Philip Bloom, another pioneer in digital filmmaking, used cameras on the Lucas Film production “Red Tails”. The small body and the great image quality has fascinated international acclaimed cinematographers like Rodney Charters (“24”). In independent cinema those cameras became indispensable. Questions: www.fenchel-janisch.com ETHIC STATEMENT: Fenchel & Janisch GbR is not affiliated with any of the companies shown or named in this video. © 2012 by Fenchel & Janisch Filmproduktion GbR
Video Rating: 4 / 5


One Light – Butterfly Lighting

11 Feb

How to setup simple butterfly lighting.


Im Gespräch mit David Olkarny

11 Feb

David Olkarny, 25-jähriger Fotograf aus Belgien beeindruckte mich mit seinen Arbeiten sofort. Deshalb bin ich sehr froh, dass ich die Möglichkeit hatte, ihm in einem Interview etwas auf den Zahn zu fühlen. Seine Arbeiten könnt Ihr Euch auf Flickr, Facebook und auf seiner Webseite anschauen.

Hallo David, Deine Fotografien sind ziemlich beeindruckend. Wie bist Du zur Fotografie gekommen und wie lange dauerte es, bis zu dem Punkt zu kommen, an dem Du jetzt stehst?

Danke. In meinem zweiten Studienjahr entdeckte ich die Fotografie für mich. Ich habe Film studiert und meine erste Kamera war eigentlich für Dreharbeiten und verschiedene Aufnahmen gedacht. Ich war von der Qualität der Bilder, die mein neues Spielzeug fabrizierte, aber so begeistert und der Gedanke, dass ich nun atemberaubende Szenarien einfangen oder sogar kreieren konnte, ließ mich erzittern. Es war klar: Ich musste Fotograf werden.

copyrigth by David Olkarny

Die meisten Deiner Fotografien sind gekennzeichnet durch Farben, Accessoires und eine Menge Licht. Kannst Du uns Deine Arbeitsweise, angefangen von der Idee bis zum fertigen Bild, beschreiben?

Ich beginne damit, einen Ort zu wählen, der mich visuell anspricht. Dann suche ich ein geeignetes Modell dafür. An dieser Stelle fange ich an zu improvisieren. Ich bereite mich nicht im Vorfeld darauf vor, die richtige Location sorgt immer für spontane Dinge und ich kann mir immer eine Szenerie während des Shootings vorstellen.

Zuhause wähle ich die besten Fotos aus und bearbeite sie in Photoshop. In Photoshop kann es schon mehrere Stunden dauern, um die Farben zu verändern und die Realität zu verzerren, um es kurz zu fassen: Ich bringe etwas Magisches in die Bilder.

Copyrigth by David Olkarny

Wie hast Du gelernt, mit Blitzlicht und anderen Lichtquellen umzugehen?

Größtenteils habe ich den Umgang mit Licht in meinem Filmstudium gelernt. Es hat mir sehr geholfen, durch Licht verschiedene Stimmungen zu erzeugen und ich habe viel Equipment, das es mir erlaubt, das Licht so einzusetzen, wie ich es möchte.

Wie sieht bei Dir die Nachbearbeitung aus?

Ich benutze zunächst Lightroom, um meine Raw-Dateien zu sortieren und etwas zu bearbeiten und wenn ich sie dann sorgfältig ausgewählt habe, übernehme ich sie in Photoshop für die weitere Bearbeitung. Was ich prinzipiell in Photoshop benutze, sind die zwei Bearbeitungsmodi Gradationskurven und Tonwertkorrektur, die mir wunderschöne Farben und einen starken Kontrast garantieren, um das im Bild hervorzuheben, was mir wichtig ist.

Copyrigth by David Olkarny

Welche Art von Fotos machst Du am liebsten?

Am liebsten mag ich Geschichten in einem Bild, die dem Betrachter etwas erzählen und bei denen er die Möglichkeit hat, zu interpretieren. Farbenstarke Bilder, ein Universum, das draußen stattfindet, weit weg von den Studios, mit einer Dosis Surrealität, Fantasie und Schwerelosigkeit. Meine Arbeiten haben einen Hang zum Surrealen, es gibt viele Szenarien, die ziemlich konstruiert sind. Das erlaubt mir, mich von der Realität zu lösen und meine eigene Sicht der Welt darzustellen.

Copyright by David Olkarny

Welche Ratschläge hast Du für Anfänger, die gern mit Blitzlicht fotografieren möchten?

Ich habe bemerkt, dass Fotografen sich immer mehr aufs Blitzlicht verlassen und dabei vergessen, auf das natürliche Licht einer Szene zu achten. Das ist schade. Der beste Tipp ist, erst das natürliche Licht zu analysieren und zu nutzen und dann unter Umständen einen Blitz auf einem Stativ zusätzlich zu verwenden. Das Ergebnis wird überzeugender und schöner ausfallen.

Copyright by David Olkarny

Zusammen mit Rafael Deprost hast Du bereits einige Backstage-Videos veröffentlicht, bei denen der Zuschauer einen Blick hinter Deine Kulissen werfen kann. Wie bist Du auf die Idee gekommen?

Es war einfach der Gedanke, meine Arbeit etwas zu entmystifizieren. Ich wollte zeigen, dass ich mich selbst nicht zu ernst nehme und dass Fotografieren vor allem erst einmal Spaß bedeutet.

Wenn Du mit einem anderen Fotografen zusammenarbeiten könntest, wen würdest Du Dir aussuchen?

Ich würde unheimlich gern mit Christophe Gilbert zusammenarbeiten. Er ist ein belgischer Werbefotograf und seine Arbeiten sind unglaublich.

Was sind Deine Pläne für die Zukunft? Gibt es vielleicht ein geheimes Projekt, das Du über kwerfeldein zuerst bekanntgeben möchtest?

Ich werde in die Welt der Werbefotografie zurückkehren. Mehr als zuvor und ich hoffe, mich professionell weiterzuentwickeln. Kleines Geheimnis: Derzeit ist ein neues Konzeptvideo in Produktion und es wird bald erscheinen!

Copyright by David Olkarny

David, ich danke Dir für dieses Interview und wünsche Dir viel Erfolg mit Deinen Plänen. Hast Du abschließend noch einen Ratschlag für aufstrebende Fotografen?

Mein Ratschlag zum Ende: Macht Fotos für Euch und versucht nicht, einer Galerie oder der Öffentlichkeit zu gefallen. Ich denke, dass das sehr wichtig ist und dass viele Fotografen in diese Richtung abdriften. Seid verrückt, impulsiv, leidenschaftlich und waghalsig, aber ein wenig technisches Verständnis hat noch niemandem geschadet.

Danke für das Interview!


kwerfeldein – Fotografie Magazin

 
Comments Off on Im Gespräch mit David Olkarny

Posted in Equipment


Rethink with Paul Barron – Innovation in Leadership

11 Feb

Rethinking business is the key and future to our success. Join host Paul Barron with Vaughan Lazar Co-Founder of Pizza Fusion, a leading green and organic pizza chain. Understanding how to lead and what are the next steps for the restaurant industry are some of the topics we discuss in this episode.
Video Rating: 5 / 5

Here’s a video showing how I created my own “air brush” system. It’s a quick solution for you when you are in a pinch! While I wouldn’t recommend it for long term use, or for detailed airbrushing, it’s a quick and easy way to make your own air brush effect when you need it! I also tried the Stampin’ Up markers and Bic Mark It with the air can, and was able to get great results, but the brush nibs on those pens means you have to hold it a little bit better, where the chisel tip on the copics was easier to hold to the tip….
Video Rating: 4 / 5