Consulting the rules of composition before taking a photograph, is like consulting the laws of gravity before going for a walk. –Edward Weston
To some photographers composition is an innate process, whereas to others it is a life-long learned challenge laden with frustration. Regardless of which category you find yourself, good composition is a learned skill that will enhance the overall aesthetic appeal of the end result. While I subscribe to Weston’s notion, I also believe we first learn to crawl before walking.
Our challenge is to learn how to use diagonal lines, contrast, simplicity, point of interest, and so on to allow us to translate the three-dimensional scene being photographed onto a one-dimensional plane while retaining the original perception of depth and movement.
The first rule that we must accept is that there is no right way to take a picture. Regardless of the subject matter, you should always analyze your picture to ensure it answers the question: Does this picture satisfy my reasons for having made the exposure in the first place? Should your answer be yes —congratulations. If not — why not?
The art of making a photograph can be broken down to its most basic and elementary form: Placing the point of interest in the most satisfying position within the frame to achieve the desired result. It really is that simple; everything from this point forward will evolve by way of personal technique.
The first photographic rule that must be learned, and adhered to from this day forward, is the use of a tripod. It is unquestionably the most valuable piece of ancillary equipment you can have at your disposal. Only when your camera is firmly grounded with the flexibility and advantage of controlled movement can you then start to accurately study the scene in the viewfinder, thus ensuring all elements are properly placed in the scene prior to making the exposure. There have been many articles and reviews written on the multitude of tripod models available, please defer to those that are easily located by doing a web search.
By recognizing that we want to photograph a particular scene or subject, we have also admitted to having identified the point of impact within that scene. Perhaps it is a lazy fox in big landscape, a detail of some mammal, a grey wolf peering from behind a tree, or perhaps the snow-capped mountains in some distant vista. Where we place that identifying feature within the viewfinder will unquestionably enhance the final impact of the image.
One of the very first rules of thumb to be learned in composition is the utilization of the ‘Rule of Thirds.’ Essentially the viewfinder is divided into nine equal spaces by placing two equally spaced horizontal lines and two equally spaced vertical lines. Where these lines dissect each other will create the four ‘Points of Impact’ within the frame.
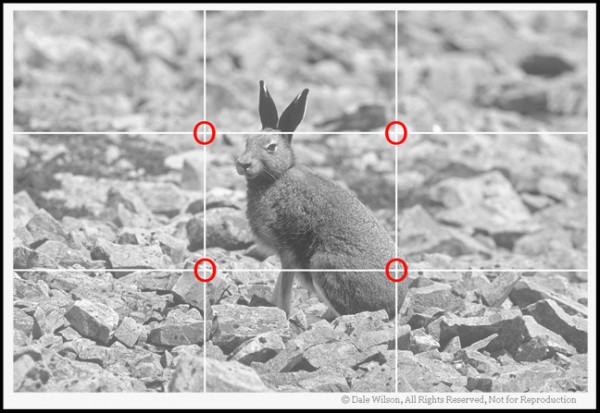
Canada’s easternmost province of Newfoundland has the southernmost population of arctic hare in the world. This fellow was located atop Gros Morne Mountain, and the photo was captured with little regard for composition. With uncontrolled animals (non-zoo setting) just get the shot first,and then concentrate on refining the image with the next frame. With gained experience you will soon find yourself intuitively placing the subject at the correct ‘Point of Impact’ as indicated here with red circles.
Regardless of subject matter, by placing our primary point of interest in one of the four ‘point of impact’ locations within the frame we will dramatically improve the dynamic and aesthetic appeal of the picture.
What I would like you to do now is locate simple subjects in your backyard or neighbourhood park. Do not try to make complex pictures, but just a single subject on a plain background – perhaps a solitary tree against a sky background. While employing the “Rule of Thirds” place that tree, or other chosen subject, in each of the four “point of impact” locations. For the fifth photo of the tree, place it in the centre of the viewfinder. Which photo do you prefer and why?
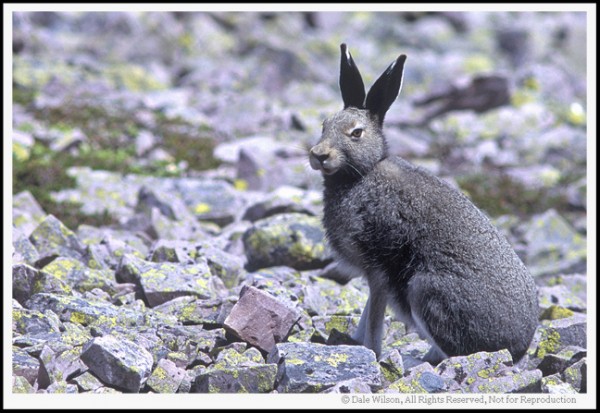
Once this hare heard the mirror-slap on my medium format camera (Pentax 67) he was gone faster than a … well, shot at rabbit. Fortunately, due to the large film size I am able to crop the image and place the ‘Point of Interest’ (the hare) in the most pleasing ‘Point of Impact’ within the frame. When we are working with “living critters, including people” we will usually want to focus on the eyes and frame the animal in such a fashion to leave room for them to “look into the frame.”
As you go through this exercise, remember the most important rule in photography: Have fun. If, after all, you are having fun then you are doing it right.
Post originally from: Digital Photography Tips.
Check out our more Photography Tips at Photography Tips for Beginners, Portrait Photography Tips and Wedding Photography Tips.
Learning to See, Part VIII
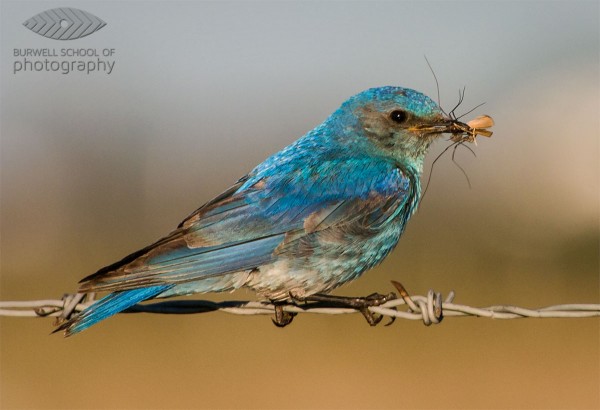
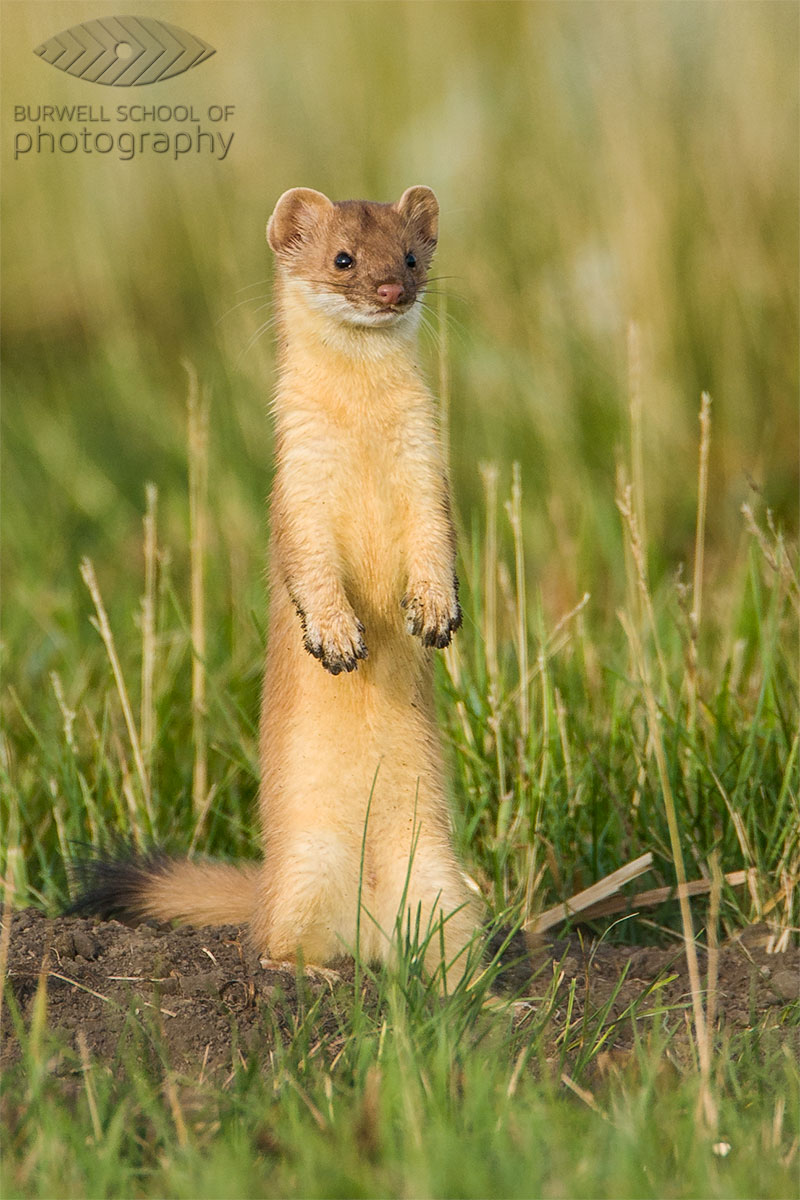


 Photo 2
You must be logged in to post a comment.