RSS
 

Posts Tagged ‘Bokeh’

How to Create a Unique Bokeh Portrait for Under $10

28 Nov
1

This shot was lit with one light on the subject along with the Christmas lights.

You can have a luxurious bokeh in any of your images for the low cost of $ 4.99. Yes, you heard me right, just $ 4.99. How, you ask? I’ll tell you, but you won’t believe me – Christmas lights.

Just a single strand of Christmas lights and a couple of flash units are all you need to immerse your subject in full-blown bokeh bliss. This isn’t a double exposure or a Photoshop trick. It can all be done in camera in a single exposure. I bought a strand of cheap Christmas lights from the store, draped them over a C-stand arm so that the lights were layered and overlapping. I used a Canon 100mm f/2 lens that I had borrowed from my buddy for the shoot.

I also had two flashes. The background light was set to 1/8 power (in manual mode) and gelled red, aimed at the red wall behind the subject. The second light was set to 1/16 power and shot into a silver umbrella about seven feet away from the subject.

2

Note that the output on both speedlights was set rather low so that I could shoot with a wide open aperture. The large aperture, combined with a slower shutter speed of 1/30th, helped me attain a proper exposure when shooting the low watt Christmas lights. In order to properly pull off this technique, the room you are shooting in can’t be too bright, whether it be overhead lights or window light – the ambient light can’t overpower the Christmas lights or this won’t work.

3

Once I was ready to start shooting, I made sure that I was standing within two to three feet of the lights and the subject was five feet beyond the lights. Depending on how close I was standing to the Christmas lights, the size of the bokeh would change. When I was closer to the lights, the bokeh spots were larger and, accordingly smaller when I was further away from them.

Focus issues

One issue that you may encounter when shooting through an object is that the lens will try to focus on anything in the foreground. This is a problem, since what you want to focus on is behind the Christmas lights. There are a few ways to get past this. The first is switching to manual focus. But I don’t trust my eyes enough for this option.

The second option is the enabling back button focus on your camera. This is the option that I use. Enabling this feature is a bit different for each camera, so you’ll have to look up how exactly to do it on your specific camera body. Basically what it does is allows you to shoot without the interruption of autofocus, and when you want to re-focus, you simply press the assigned button on the back of your camera and resume clicking.

The third option is only available if you have a zoom lens that allows you to set your focal distance. For example, I have a Canon 70-200 f/4L IS which has a switch that, when flipped one way says 1.2m to infinity, and the other way says 3m to infinity. That means that if I don’t want to focus on the object in the foreground, I would select the 3m to infinity option so the lens doesn’t look for anything closer than 3 meters, which saves the lens and battery some focusing time.

4

This shot was lit with one light on the subject and one light gelled red on a red background.

Now you’re ready to shoot. Play around with your camera’s placement in relation to the Christmas lights. As you move around, pay attention to where the colored bokeh is falling in the frame. Is it on the subject’s face? Maybe move an inch to the left so their face isn’t green. Or maybe you want it to be green. Take a shot and then move a bit and take another. Play around with size and placement of the bokeh and have fun!

5

Standing further away from the Christmas lights makes the bokeh smaller.

6

Standing closer to the Christmas lights makes the bokeh larger.

The post How to Create a Unique Bokeh Portrait for Under $ 10 by Nick Fancher appeared first on Digital Photography School.


Digital Photography School

 
Comments Off on How to Create a Unique Bokeh Portrait for Under $10

Posted in Photography


Creating Swirly Bokeh with the Helios 44-2 lens

13 Aug

Hacking_Photography_Helios_44-2_Lens-0086

I recently bought a Sony A7 to compliment my Canon 6D DSLR. A friend convinced me that having small-form, full frame camera would be an entire different way of shooting. I value his opinion, so I picked one up. You can see how I used it in my last article:  when to trick your camera for the perfect exposure.

A New Love of Prime Lenses

I started off with a Sony 55mm f/1.8 and a 24-70mm f/2.8 lens that requires a Sony adapter. The 55mm shoots like a dream and is insanely light-weight.

The 24-70mm and adapter are super heavy and ridiculously front-heavy. It’s a great lens but after taking it out a few times, I concluded it wasn’t for me. I really enjoy having big apertures available for low light so I started looking for another prime lens.

A Lens Defect Leads to Awesome Bokeh

I was looking through photos on Flickr and noticed a few images in which the bokeh appeared to be swirling in a circular pattern. It was awesome and unlike anything I had ever seen!

I did some quick digging and found out this was called “swirly bokeh” and certain vintage lenses created this effect through a manufacturing defect. Well, this “defect” looked really cool to me and I wanted to incorporate it into my lens collection.

Meet the Helios 44-2 58mm f/2 Lens

sony a7, helios lens,

Sony A7 with Helios 44-2 58mm f/2.0 lens

I quickly found out that there is a cult following for a lens called a Helios 58mm f/2. This was a Russian-made lens that essentially tried to emulate a famous Zeiss one.

Several companies made these lenses over several decades, in the millions of units, so they aren’t exactly rare. This means they are really inexpensive because they are so common.

Where to Find the Helios 44-2 Lens

Out of the several models of these lenses, the Helios 44-2 model lens reportedly creates the “swirly bokeh” I was looking for. I did a quick search on Ebay and quickly found a ton of these for sale out of Russia and the Ukraine.

After looking at several of them I found one in excellent condition and ordered it for less than $ 50 including shipping. What a deal! I’ve seen plenty of people get even better deals on Ebay than I did.

Mounting it on the Sony A7 Camera

sony a7, helios lens, helios 44-2,

Mounting the Helios 44-2 to the Sony A7

These lenses were created for the Leica M-mount so I needed to get an M mount adapter for the Sony A7. I picked up a $ 10 Fotasy M42-NEX adapter which works perfectly.

It looks like a Franken-camera. I really dig how crazy this thing looks. Other photographers have stopped to ask what the heck this lens setup is.

Using Manual Focus and Manual Aperture Lenses

english setter, helios 44-2 lens,

The Sony A7 focus assist feature makes it easy to nail perfect focus each time.

I’ve never had a lens that was manual focus only, much less manual aperture. Instead of using a front or rear dial on the camera to choose your aperture, you grab a ring on the front of the lens to change it by twisting it to the left or right.

Some of you reading this are used to these type of lenses, but this was new to me.

Using the Manual Aperture Lens

While the aperture ring took some getting used to it really slowed my photo-taking process down. The aperture ring on the front of the lens reads 16 on the left, then 11, 8, 5.6, 4, 2.8, and 2 as you turn to the right. Simply twist the dial to change the aperture.

Manual Focus Rocks with the A7 and the Helios 44-2

Hacking_Photography_Helios_44-2_Lens-0431

Light pole in a Missouri truck stop parking lot surrounded by corn.

The standard challenge with manual focus is trying to eyeball the focus correctly. You might think your subject is in focus but you might be just an inch or two out of focus.

The A7 has focus assist (also called focus peaking) that lights up in-focus sharp details in red so you know what part of the image is in focus. This makes it so simple.

Taking a portrait? Twist the focus ring until a person’s eyes are rimmed in red and guarantee the eyes are sharp in focus. It’s so easy its almost like cheating!

Finally – the Swirly Bokeh

Hacking_Photography_Helios_44-2_Lens-0100

This unfocused image shows the popular swirly bokeh effect

I bought the lens right before a two-week trip to St. Louis, Missouri to visit family. It arrived the day before we left so it was ready to go right away. After a quick test shoot I decided I was going to shoot this Helios 58mm 44-2 exclusively for the entire trip.

Finding the swirly sweet spot

I took the lens into my in-laws yard to find out how best to find the swirly spot. When you shoot wide open at f/,2 close up to the subject, the background is a beautiful, buttery, soft bokeh.

flowers

This image was shot up close which caused the background to blur too much for the swirl I was looking for. I aimed up at a leaf that was a little further away, still shooting wide open at f/2.

It isn’t swirly bokeh yet, but it definitely has more shape to it. I’m getting closer.

branch bokeh

I took another shot with a subject at mid range, perhaps 4-5 feet away while still shooting wide open at f/2.

swirly bokeh, helios lens, helios 44-2

Can you start to see the swirl shape in the background? This photo showed me I’m getting closer. It seems that you need some decent distance from your subject, and you need some background that can fall into swirly bokeh in the distance.

I aimed up at a birdhouse about 8 feet away, which conveniently had a cute little toad in the lower peep hole and took the shot.

swirly bokeh, helios lens, helios 44-2

Success! Apparently you need a pretty good distance in the background so the little light spots and details can register into that swirl shape. I’m really in love with this Helios 44-2 lens.

The Helios 44-2 lens is fast with the f/2 aperture, weighs next to nothing, and was incredibly inexpensive at less than $ 50 including shipping. Even at very small apertures, it tops out at f/16, the lens puts out beautiful images.

Mississippi river,

The first of many manual focus prime lenses

I’ve had such a great time with this lens that I’m going to purchase more manual focus primes. The glass creates very unique images and I can’t wait to pick up my next one.

Have you ever mounted older lenses with your DLSR camera?

If so let me know what lens(es) you have in the comments below as I’m looking to try out even more. Share your images too please.

The post Creating Swirly Bokeh with the Helios 44-2 lens by Mike Newton appeared first on Digital Photography School.


Digital Photography School

 
Comments Off on Creating Swirly Bokeh with the Helios 44-2 lens

Posted in Photography


Lastolite ‘Out of Focus’ backgrounds bring beautiful bokeh to your home studio

26 Jul

Everyone loves the look of a nice out of focus background, but it’s hard to achieve in a home studio. Accessory manufacturer Lastolite believes it might have the solution, with two new reversible backgrounds printed with out of focus images of the ocean / autumn foliage and summer foliage / city lights. Measuring 1.5 x 1.2m, the backgrounds are big enough for almost full-length portraits of most adults, and weigh in at 3kg (6.6lb) each. Click through for more details.

Articles: Digital Photography Review (dpreview.com)

 
Comments Off on Lastolite ‘Out of Focus’ backgrounds bring beautiful bokeh to your home studio

Posted in Uncategorized


Focus on Blur: Bokeh Cityscapes Celebrate Color & Light

06 Jan

[ By WebUrbanist in Art & Photography & Video. ]

bokeh urban color light

Stretching and reversing conventions for balancing foreground and background, one urban photographer in Tokyo is taking the Japanese concept of Bokeh to dazzling extremes.

bokeh vertical landscape city

Bokeh (which translates as ‘blur’) plays with a lens’s circle of confusion in which points of light become glowing discs, but instead of making the background fuzzy, Takashi Kitajima unexpectedly lets the foreground become the backdrop.

bokeh blurred city street

The result seems to highlight the chaos and movement of what is closest to the viewer’s perspective in a surreal but suggestive way that indirectly resonates with our actual experience of cities.

bokeh city angled view

bokeh statue monument focus

In turn, more distant monuments, buildings and bridges on the horizon or off to one side emerge as stable anchors, contrasted with a sea of light.

bokeh zoom foreground background

The net effect is something between a photograph and a watercolor or pastel painting, a fusion of concrete realism and playful abstraction.

Share on Facebook


[ By WebUrbanist in Art & Photography & Video. ]

[ WebUrbanist | Archives | Galleries | Privacy | TOS ]


WebUrbanist

 
Comments Off on Focus on Blur: Bokeh Cityscapes Celebrate Color & Light

Posted in Creativity


tadaa: Bokeh und Masking für’s iPhone

18 May

Ein Beitrag von: Anne Koch

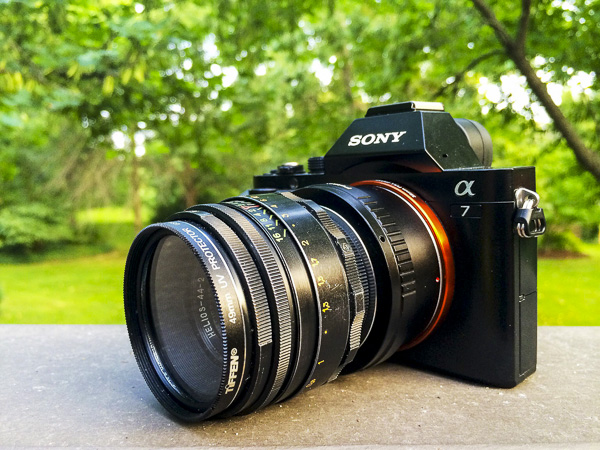
Für mich ist mein iPhone eine gute Immerdabei-Kamera geworden. Ich fotografiere damit wieder mehr einfach so und zwischendurch ganz ohne Druck. Das ist für mich von großem Wert, da ich beruflich auch fotografiere (da natürlich nicht mit dem iPhone).

Das iPhone hat meine Fotografie ein gutes Stück wieder befreit. Wenn das gemachte Bild etwas kann – super! Wenn nicht – auch nicht tragisch, ich hatte ja kaum Aufwand. Ich probiere wieder mehr aus, einfach so, ohne den Anspruch, dass da jetzt unbedingt Großartiges entstehen muss.

tadaa © Anne Koch

Unverzichtbar ist für mich dabei die App tadaa geworden. Das deutsche Start-up sitzt in der Hamburger Speicherstadt und auch wenn die Funktionen auf den ersten Blick denen von Instagram sehr ähnlich sind, so gibt es doch einige Besonderheiten und ganz klare qualitative Unterschiede. (Ganz abgesehen davon, dass Instagram inzwischen Facebook gehört und damit immer ein komisches Bauchgefühl bleibt, wenn man Bilder teilt.)

Was jetzt kommt, ist eine absolute Premiere, denn normalerweise zeige ich keine Vorher-Nachher-Bilder. Ich bemerke aber bei mir selbst, dass ich immer wieder zwischen Original und Bearbeitung hin- und herwechsle. tadaa kann einfach Dinge aus einem iPhone zaubern, von denen ich nie dachte, dass mein Telefon das kann.

Ich will hier jetzt gar nicht alle Funktionen ausführlich schildern, sondern mich vor allem auf Masking und Bokeh-Tilt-Shift konzentrieren, da das unscheinbar daherkommende, aber unglaublich mächtige Tools sind.

Aber mal von Anfang an, eine kleine Anleitung:

tadaa © Anne Koch

Die Bearbeitungstools von tadaa: Filter

tadaa hat insgesamt 35 unterschiedliche Filter (auch im Liveview, falls man mag), immer wieder kommen neue Filter dazu, kostenlos für alle registrierten User. Die Registrierung kostet auch nichts und lohnt sich sowieso. Wer Filter verpasst hat: Soweit ich weiß, kann man eine Mail an tadaa schreiben und nett danach fragen. Überhaupt ist der Support freundlich, schnell und zuverlässig.

tadaa © Anne Koch

Alle Filter kann man in der Intensität anpassen, was ich sehr gern mag, da sie mir bei 100% oft zu stark sind.

Der unscheinbare Apply-Button unten rechts speichert alle bisherigen Einstellungen zwischen und danach könnt Ihr weiterbearbeiten. Ich benutze bei fast all meinen Bildern nicht nur einen Filter, sondern lege mit Apply mehrere Filter mit geringer Intensität darüber.

Für die Grundierung nehme ich zum Beispiel sehr gern Souvenir oder Laika bei etwa 50-60%, insbesondere Souvenir ist nett zu Hauttönen. Danach swipe/wische ich weiter durch meine Lieblingsfilter, bis ich die perfekte Mischung habe.

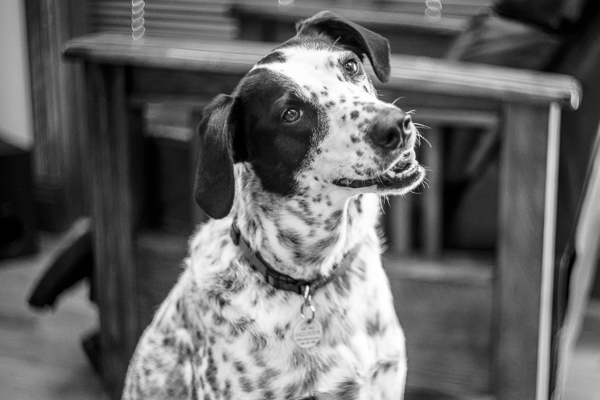
Für die grauen Tage bietet sich Campfire an, Doku macht schöne Kontraste und schönes Schwarzweiß, Kino ist auch gut für Haut und macht schöne leicht blaue Schatten bei einer feinen Körnung. In letzter Zeit mag ich es, über die Bilder noch ein kleines bisschen Persico zu legen. Aber all das ist natürlich Geschmacksache. Bei der großen Auswahl findet sicher jeder seine Lieblingskombination.

tadaa © Anne Koch

Bokeh und Tilt-Shift

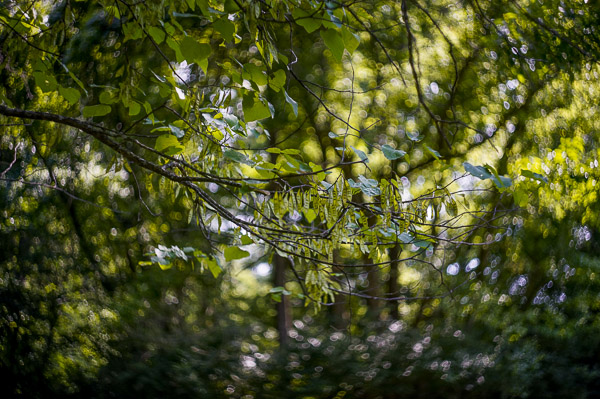
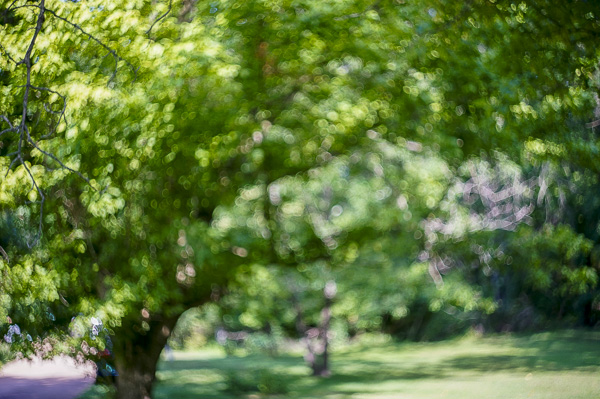
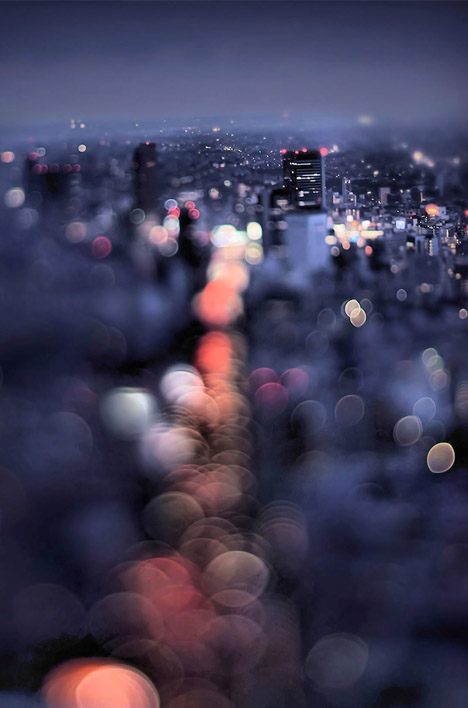
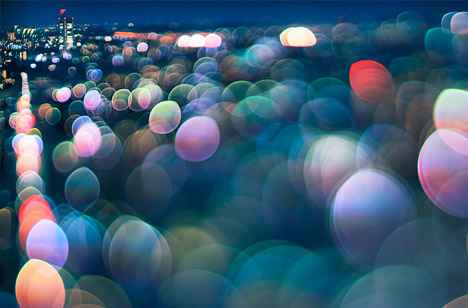
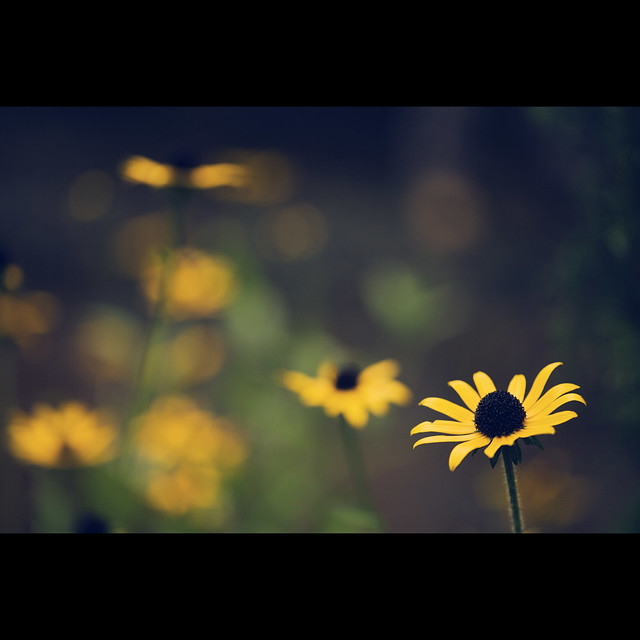
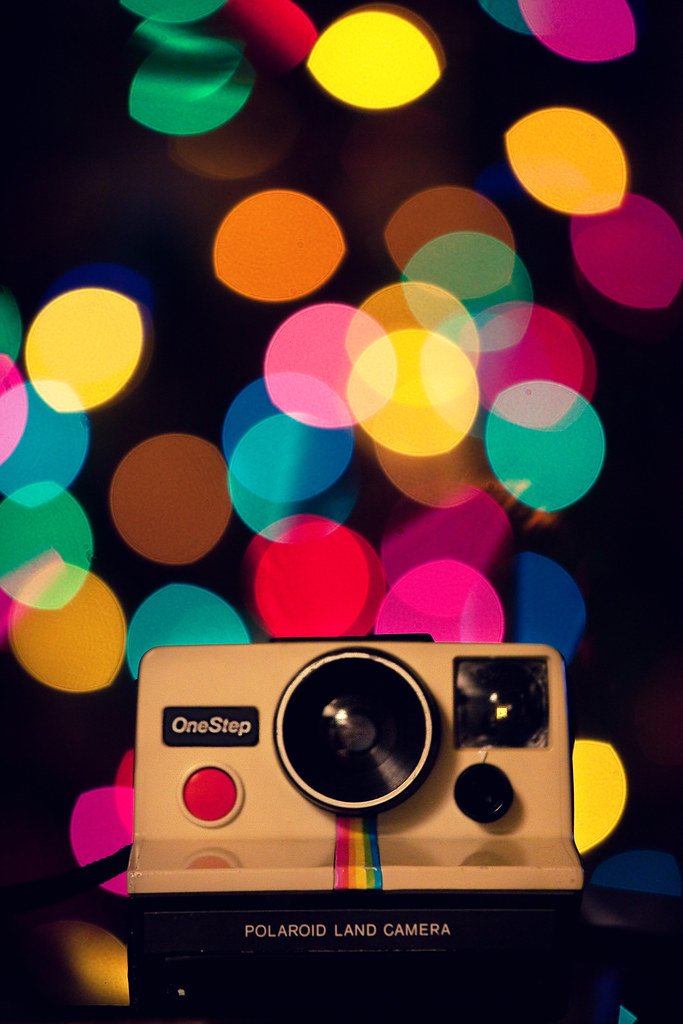
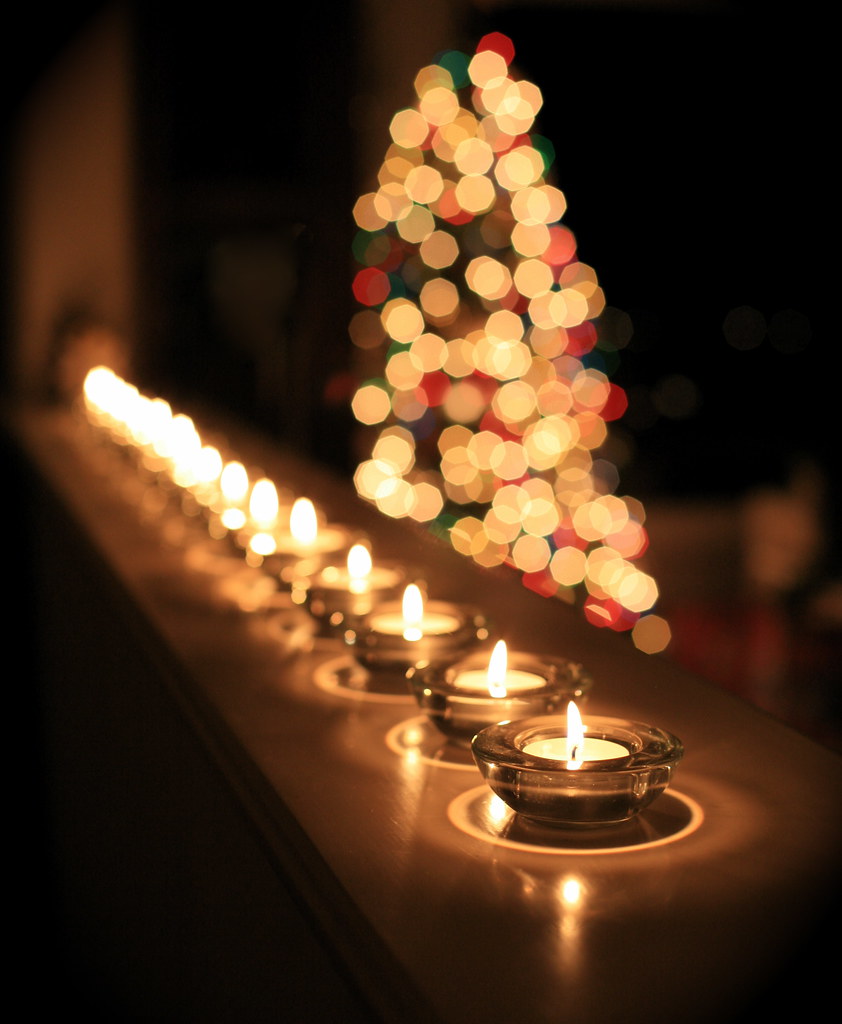
Jeder kennt diese runden, leuchtenden Kreise auf Bildern, die mit Offenblende fotografiert wurden – wir reden von Bokeh. Durch die Unschärfe wird die Aufmerksamkeit auf das eigentliche Motiv gelenkt.

Nun gibt es viele Apps, die mit dem Tilt-Shift-Effekt spielen und so störenden, unruhigen und ablenkenden Hintergrund entfernen sollen. Doch die Unschärfe ist oft platt und langweilig. Auch der Gaußsche Weichzeichner in Photoshop wirkt wenig überzeugend.

Nun – tadaa hat einen Weg gefunden, Bokeh unglaublich realistisch und schön zu berechnen. Es simuliert die echte Physik eines Tessars, jeder einzelne Pixel fällt wie ein Lichtstrahl durch den Algorithmus, in Fast-Echtzeit.

tadaa © Anne Koch

Man kann über die verschiedenen Regler einstellen, wie groß und wie intensiv das Bokeh und die Unschärfe sein sollen.

Es gibt verschiedene Tilt-Shift-Modi bei tadaa: Linear, rund, oval oder auf das ganze Bild bezogen (das wird nachher für das Masking noch relevant). So handhabt man das Tilt-Shift von tadaa:

Mit zwei Fingern bewegt, vergrößert und verkleinert man den Ausschnitt – die zwei inneren Linien sind ganz scharf, der Zwischenraum zwischen inneren und äußeren Linien reguliert den Übergang, dieser kann über „Radius“ geregelt werden. Je nachdem, wie hart der Übergang sein soll.

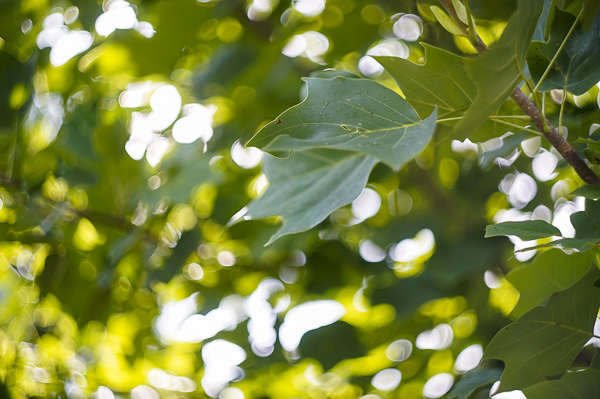
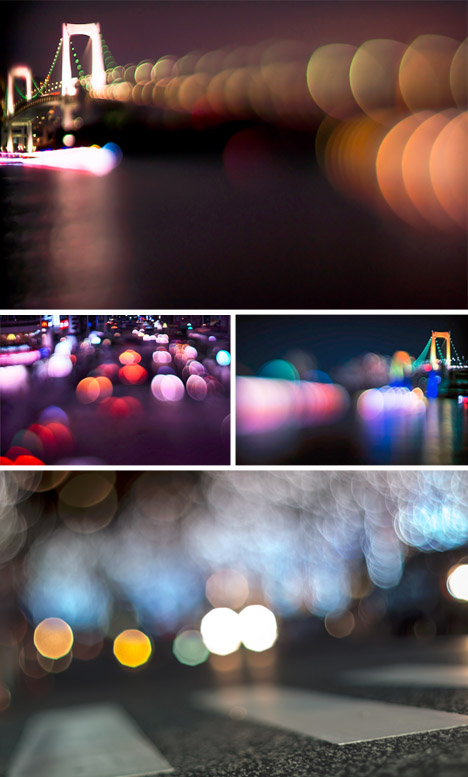
Über den Blur-Regler kann man die Intensität der Unschärfe einstellen. Wenn Highlights im Bild vorhanden sind, die zu Bokeh werden sollen, macht mehr Unschärfe (mehr Blur) die Kreise größer, wenig Unschärfe macht die Kreise kleiner.

„Highlights“ regelt die Intensität der Bokehkreise, also wie stark sie leuchten sollen. Natürlich müssen für Bokeh irgendwo im Bild Highlights vorhanden sein – einfach Leuchtkreise auf das Bild zu klatschen, hat noch nie überzeugt.

tadaa © Anne Koch

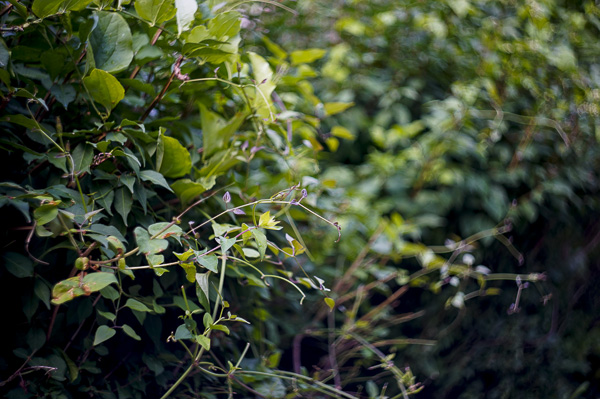
Ich muss gestehen, ich hatte bis auf wenige Ausnahmen immer Schwierigkeiten, mich mit dem Tilt-Shift-Effekt anzufreunden – ganz gleich von welchem Anbieter. Denn man hat nicht richtig in der Hand, was jetzt scharf ist und was nicht, die Dinge sind nun mal nicht immer nur oval, rund oder in einer Linie.

Um glaubhafte Tiefe zu erschaffen, reicht das selten und genau hier kommt bei tadaa das Masking ins Spiel.

Masking

Mit Masking kann man genau bestimmen, wo die Schärfe liegt, ohne Kompromisse. Man markiert einfach mit dem Finger alles grün, was scharf sein soll. Mit zwei Fingern kann man zoomen und das Bild hin- und herschieben, um noch detaillierter zu arbeiten.

tadaa © Anne Koch

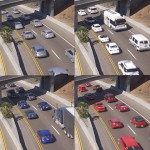
Hier alle Schritte der Bildbearbeitung: Original, Maskieren, Bokeh-Tilt-Shift anpassen, Filter (hier „Kino“) auswählen, fertig.

Wie genau und penibel man dabei ist, ist letztlich jedem selbst überlassen. Nur so viel: Wer Perfektionist ist, wird hier auch voll auf seine Kosten kommen. Mit der Bestätigung der Maskierung landet man direkt im Bokeh-Tilt-Shift Modus. Hier kann man wieder anpassen, wie intensiv die Unschärfe sein soll.

tadaa © Anne Koch

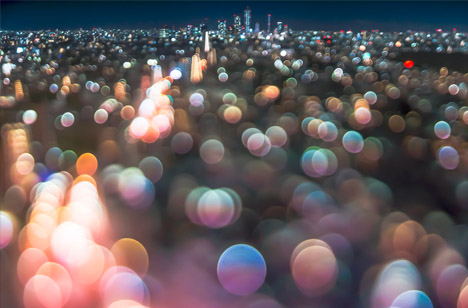
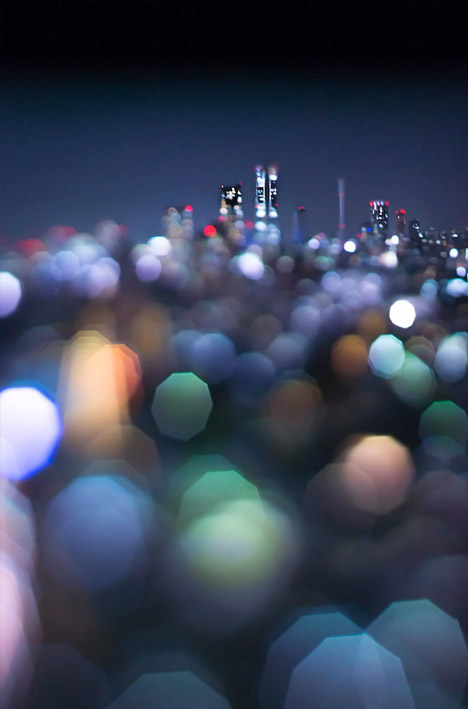
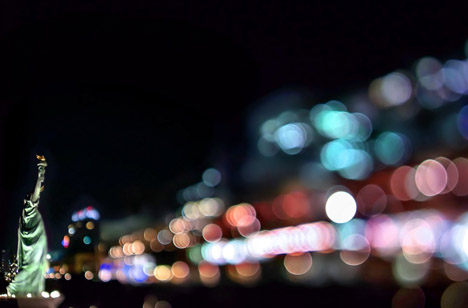
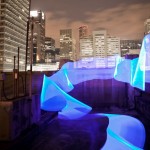
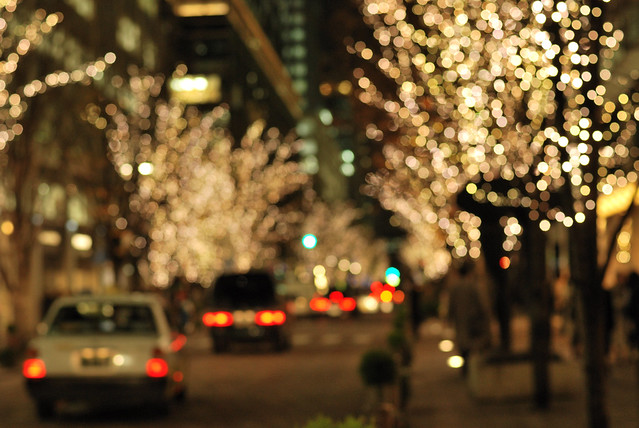
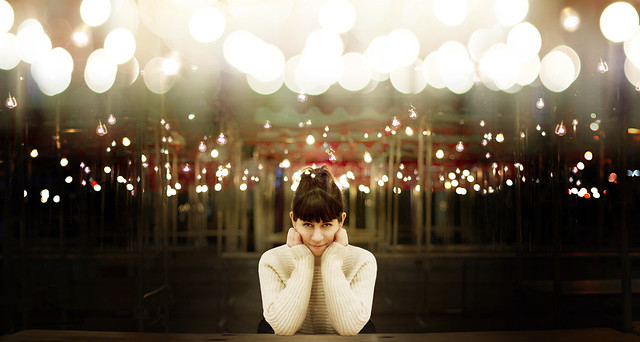
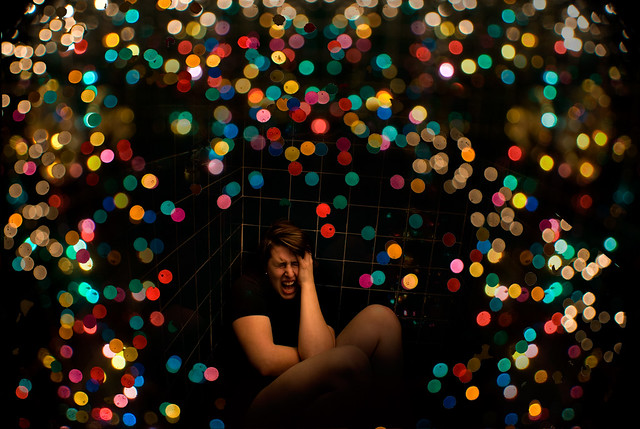
Ein nächtliches Bild mit vielen Lichtern. Im Original … naja. Ein rundes Tilt-Shift in den Vordergrund für einen schöneren Verlauf. Maskiert habe ich dann nur die Person.

Wie man hier sieht, bietet es sich oft an, ein lineares oder rundes Tilt-Shift-Feld in den Vordergrund zu legen, damit das maskierte Objekt nicht so ganz frei in der Unschärfe schwebt.

Grundsätzlich versuche ich auch, es so realistisch wie möglich zu halten. Also Dinge auf gleicher Ebene gleich scharf bzw. unscharf zu machen.

tadaa © Anne Koch

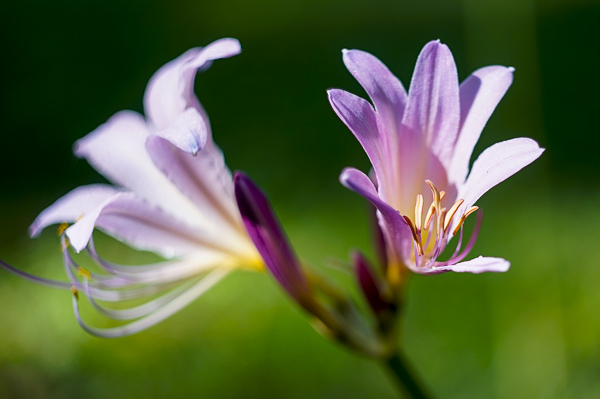
Maskiert habe ich hier die Hand, die Blume (ich gebe zu, die war ein bisschen Gefrickel) und das Mädchen. Filter: Helligkeit, etwas Souvenir und ein bisschen Charleston. Hat man eine gleichmäßige Fläche – wie hier den Himmel – muss an dieser Stelle nicht so sorgfältig maskiert werden.

tadaa © Anne Koch

Maskiert habe ich die beiden Fußgänger mit Regenschirmen, im Vordergrund liegt ein lineares Tilt-Shift, das bis zum Bordstein reicht und da ausläuft.

Ein lustiger Anblick, wie sich die beiden durch Wind und Regen kämpfen. Durch das Masking wird der störende Hintergrund ausgeblendet und der Fokus auf die beiden gelenkt. Der Filter Doku hat echtes analoges Korn. Er bietet sich für Masking oft auch an, da er die Übergänge etwas weicher macht.

tadaa © Anne Koch

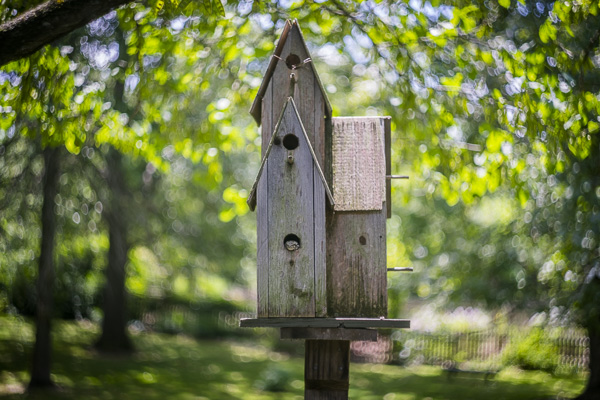
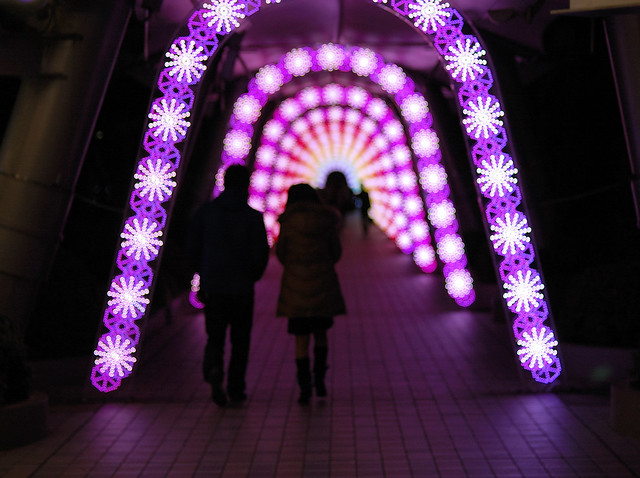
Maskiert habe ich das Paar, ein rundes Tilt-Shift liegt im Vordergrund. Filter: Campfire, etwas Helligkeit, etwas Persico. Ganz realistisch ist das hier mit der Schärfe natürlich bei dem Pfosten nicht, aber ich habe ihn zugunsten des Fokus auf den Menschen nicht auch maskiert.

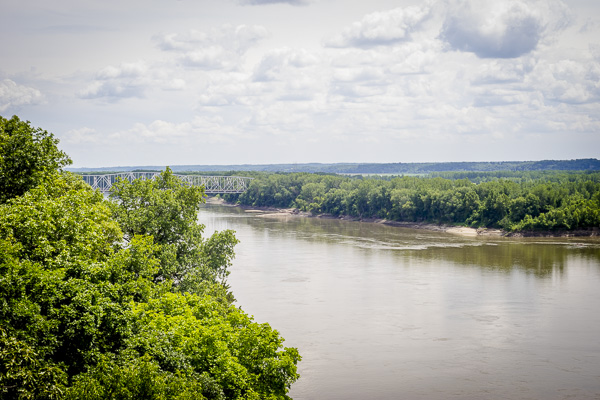
Dieses Bild ist ein Beispiel dafür, dass mein Gefühl von einer Situation und einem Bild nicht unbedingt dem entspricht, was die Kamera im „Original“ ausspuckt. So habe ich die Situation nicht gesehen.

Übrigens finde ich nicht, dass „no filter“ oder „out of cam“ ein Prädikat für ein Bild ist, denn die Kamera und die Voreinstellungen interpretieren ja auch schon immer die Wirklichkeit. Und was ist schon Wirklichkeit? Wie wir eine Situation empfinden, beeinflusst doch auch, wie wir sehen. Aber das nur eine kleine Bemerkung am Rande.

12_masking

Maskiert habe ich hier lediglich die tolle Frau, kein zusätzliches Tilt-Shift. Filter: Helligkeit, Souvenir und ein kleines bisschen Woodstock.

Hier ein Tipp für Haare: Fusselhaare zu maskieren, kann sehr … haarig sein. Hier hilft oft auch ein kleiner Tilt-Shift-Kreis um den Kopf.

tadaa © Anne Koch

Maskiert hier: Mein kleiner Neffe und die Schaukelketten, ein rundes Tilt-Shift liegt auf dem Boden für den Verlauf. Filter: Helligkeit und Souvenir. Für mich ist das Maskieren zu einer Art Meditation geworden; ich muss zwar dabei immer die Luft anhalten, aber es lohnt sich.

tadaa © Anne Koch

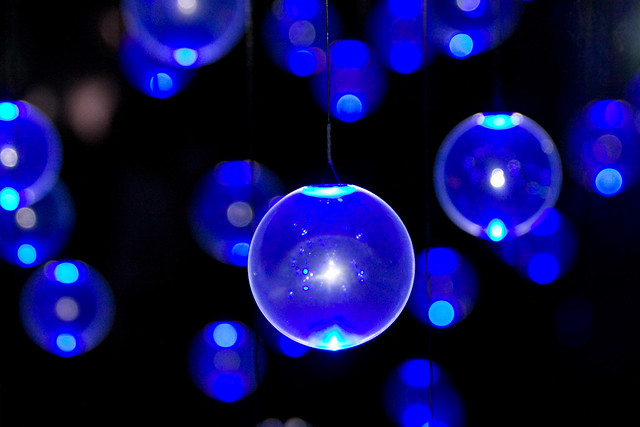
Maskiert habe ich die Seifenblasen, die Stäbe und Seile und das Mädchen, wieder liegt ein rundes Tilt-Shift auf dem Boden. Filter: Laika, Kontrast und ein bisschen Persico.

Seifenblasen haben ja per se Potential, aber ohne das Maskieren wären die Seifenblase hier in dem Gewirr untergegangen.

Durch das Masking wurden einige Bilder, die sonst achtlos im Müll gelandet wären zu Lieblingsbildern. Die neueste tadaa-Version (4.6) verfügt außerdem über eine patentierte automatische Kantenerkennung – dadurch wird das Maskieren noch mal deutlich vereinfacht.

Und ja, ich weiß, Instagram ist vielleicht einfacher, aber ich benutze am Computer ja auch lieber Photoshop als Paint.

Die Bilder wurden übrigens alle mit einem iPhone 4 gemacht und ausnahmslos mit tadaa bearbeitet.


kwerfeldein – Fotografie Magazin

 
Comments Off on tadaa: Bokeh und Masking für’s iPhone

Posted in Equipment


Canon 35mm 1.4 Bokeh Test Low Light

15 Feb

low light, bokeh test with my Canon 35mm 1.4 on a 7D. Between 100 – 800 ISO.

Video demonstrating the wide and zoom capabilities of Nikon’s 18-300mm AF-S lens. Like I mention in the video, it is a bit heavy. Although considering how many lenses it replaces, it is a pleasure. However, compared to Tamron’s 18-270mm, it is noticeably heavier. Perhaps I’ll make a video comparing the two (Tamron 18-270mm to the Nikon 18-300mm) …thoughts? Enjoy!


How To Achieve Nice Bokeh [In Plain English]

03 Feb

By Annie Tao

Want to take portraits that have nice bokeh?  First, what is it?

BOKEH = noun.  a Japanese term for the subjective aesthetic quality of out-of-focus areas of a photographic image.

Below is a photo I took just the other day.  It is an example of an image with nice bokeh and how to use it effectively.

Annie Tao Photography bokeh Ex1

By blurring out the background, the entire image looks visually pleasing. You can’t even see she is standing on a sidewalk next to a parking lot!

HOW TO ACHIEVE NICE BOKEH (in plain English!)

1.  Use the right lens.

All lenses can create some kind of bokeh, but the REALLY nice, drool-worthy bokeh is from prime lenses with large apertures, like f/1.4 and f/1.8.

2.  Select a large aperture.

The larger the aperture (the smaller the aperture number) = a narrower depth of field and more bokeh!  Usually f/2.8, 1.8 and 1.4 create the best results.

3.  Get close to your subject.

4.  Focus on what you want to have sharp.

I know, I know…. duh.  But there may be someone out there who isn’t sure!  

5.  Put your subject far from the background you want blurred out.

In the image above, there is beautiful green bokeh because there were bushes on the far side of the parking lot.  I took the shot from a lower angle (shooting upwards) to intentionally miss the cars in the parking lot, which were directly behind her. 

The result is a deliciously smooth wash of color in the background, which made it look more like the little girl was standing in a meadow than a parking lot.

MORE EXAMPLES OF BOKEH

Annie Tao Photography bokeh Ex2

Annie Tao Photography bokeh Ex4

Annie Tao Photography bokeh Ex3

Sometimes I create bokeh in the FOREGROUND because it tells a different story…

Annie Tao Photography foreground bokeh

And sometimes I don’t want any bokeh at all. I want to see all the details, like the textures of these walls, so I place my subjects close to the background and have my camera set at a smaller aperture.

Annie Tao Photography No Bokeh Ex2

Annie Tao Photography No Bokeh Ex1

Annie Tao is a lifestyle, commercial and event photographer in the San Francisco Bay Area. You can get more tips or inspiration at www.annietaophotography.com and stay connected with Annie at https://www.facebook.com/annietaophotography

Post originally from: Digital Photography Tips.

Check out our more Photography Tips at Photography Tips for Beginners, Portrait Photography Tips and Wedding Photography Tips.

How To Achieve Nice Bokeh [In Plain English]


Digital Photography School

 
Comments Off on How To Achieve Nice Bokeh [In Plain English]

Posted in Photography


Bokeh: Weekly Photography Challenge

02 Feb

Earlier today we published a plain english guide to achieving nice Bokeh in your shots – so lets put the teaching into practice and make Bokeh our theme for this week’s photography challenge.

Beauty In-Focus | Explored

We want to see you grabbing your camera over the next day or two and setting out to take some wonderful shots with Bokeh in them (i.e. some lovely out of focus areas in your shots).

You can take Bokeh shots in portraits, macro work, still life, nature… really any type of photography you like – so hopefully there’s something for everyone!

Learn how to take shots with Bokeh

In addition to todays guide to shooting Bokeh check out:

  • How to Achieve Better Bokeh – 4 Simple Steps
  • How to Achieve Blurred Backgrounds in Portraits
  • 17 Beautiful Images with Shallow Depth of Field
  • How to Take Beautiful Bokeh Christmas Images (with 39 Examples)
  • Once you’ve taken and selected your best Bokeh shot upload it to your favourite photo sharing site and either share a link to it or – embed it in the comments using the our new tool to do so.

    If you tag your photos on Flickr, Instagram, Twitter or other sites with Tagging tag them as #DPSBOKEH to help others find them. Linking back to this page might also help others know what you’re doing so that they can share in the fun.

    Also – don’t forget to check out some of the great shots posted in our last challenge – Best Shot of 2012 challenge where there were some beautiful shots submitted.

Post originally from: Digital Photography Tips.

Check out our more Photography Tips at Photography Tips for Beginners, Portrait Photography Tips and Wedding Photography Tips.

Bokeh: Weekly Photography Challenge


Digital Photography School

 
Comments Off on Bokeh: Weekly Photography Challenge

Posted in Photography


Bokeh Photography Tutorial

25 Dec

photoextremist.com This photography bokeh tutorial will show you how to take a picture with a defocused background using a DSLR camera and shallow depth of field.


How to Take Beautiful Bokeh Christmas Images [With 39 Stunning Examples]

11 Dec

Pin It
LOVE 10/50

It’s beginning to feel a lot like Christmas… and in our forums I’ve noticed more and more great Christmas images being shared – some of which feature a technique that is always popular at this time of year – Bokeh Christmas lights shots.

Christmas tree lights II

The technique takes a bit of experimenting and practice but is relatively simple to do. You need some Christmas lights and a camera lens with a reasonably ‘fast’ aperture (or a large aperture).

#ds385 - Red Wool Socks

The key is to shoot at the larger end of your available aperture – this throws the background (and foreground) of your shot out of focus and any Christmas lights in the foreground or background will become little balls of light.

Dreaming about bokeh

As you’ll see in most of the images featured in this series – the technique is particularly good if you also have some element in your shot that is in focus. This ‘subject’ might be a person, a pet, a Christmas decoration or something else.

Gracie

You can make the little balls of light bigger by increasing the distance between your in focus subject and the out of focus lights in the background.

Holiday bokeh

While most of the images in this series have the Christmas lights in the background of the image (behind the subject) it is also possible to create the little bokeh balls of light by putting the lights in the foreground of your image (in front of your subject). You can see this in the image below. The impact is a little different as the bokeh balls will cover part of your subject.

335/365: ¿Que puedo hacer con estas luces que no se haya hecho ya?

Another popular technique is to create different shaped bokeh. You can make stars, hearts or even little snow flakes like the image below.

Joyeux Noël!  Merry Christmas!

To get these different little bokeh shapes is pretty simple. You just need to make a little cutout ‘mask’ for your lens. Rather than go over how to do it here check out this video tutorial that will walk you through it here.

My Cat's Starry Christmas

Love a Good Buzz - 347/365

The other way to change the shape of your bokeh balls is to experiment with different apertures. You’ll find that in most cases the larger your aperture the rounder the ball – but go for a slightly smaller aperture you may find your bokeh becomes more hexagonal (or Heptagonal or Octagonal… the number of sides will depend upon how many blades your lens has).

christmas kiss

The different ways of using this bokeh Christmas lights technique is only limited by your imagination. Here are some more examples to give you ideas. Enjoy!

Letters to Santa

Christmas Ball-keh (Explored!)

bright lights

Day 4 - 25 Days of Christmas 2007

Brighton Clock Tower

magic of the season

love

Light way

lick

Seasons Greetings - Explore 28.12.09

Happy Holidays!

Merry Christmas to all my Flickr friends.

Blurry Christmas....

What to my wondering eyes should appear ...

Have a Very Bokeh Christmas

Warm Fuzzies

Elvis!

HAPPY CHRISTMAS BOKEH! XXX WWW.SIMONKEEPING.CO.UK

Christmas lights bokeh

2007-0001-0016

Boy Christmas I

Mireia

50mm Noctilux-M f/1.0

Christmas Lights Bokeh Baby

Merry Christmas

Bokeh Hostage + 65/365

...and to all a good night!

Falling Stars (EXPLORE #18)

Get more tips like these with our free weekly email photography newsletter.

Pin It

Post originally from: Digital Photography Tips.

Check out our more Photography Tips at Photography Tips for Beginners, Portrait Photography Tips and Wedding Photography Tips.

How to Take Beautiful Bokeh Christmas Images [With 39 Stunning Examples]


Digital Photography School

 
Comments Off on How to Take Beautiful Bokeh Christmas Images [With 39 Stunning Examples]

Posted in Photography