Don’t write off smartphone camera accessories just yet – a three-lens bundle from Singapore-based Inmacus produces surprisingly good results. Read more
Articles: Digital Photography Review (dpreview.com)
Don’t write off smartphone camera accessories just yet – a three-lens bundle from Singapore-based Inmacus produces surprisingly good results. Read more
Articles: Digital Photography Review (dpreview.com)
$ (document).ready(function() { SampleGalleryV2({“containerId”:”embeddedSampleGallery_4391102760″,”galleryId”:”4391102760″,”isEmbeddedWidget”:true,”standalone”:false,”selectedImageIndex”:0,”startInCommentsView”:false,”isMobile”:false}) });
US accessory manufacturer Fotodiox has announced an XL version of its WonderPana Free Arc filter system for wide angle lenses that it says is designed specifically to allow users of the Canon EF 11-24mm F4L USM lens to use filters over the front element. The Canon super-wide zoom has no filter thread of its own and the front element is heavily convex, so fitting filters in the traditional way is impossible. The WonderPana Free Arc system positions a filter holder over the front of the lens that takes 186mm screw-in filters and/or 80mm rectangular filter sheets. The holder is enormous so that large filters can be used to avoid vignetting when the lens is used at its widest setting.
The Free Arc clamps the hood of the lens between its collar and the screw-on filter-holding cone, and provides a 186mm thread for the company’s screw-in filters. A set of brackets can also be attached to the cone that allow two square filters to be fitted as well. The system makes it possible to fit one round filter and one square filter at the same time, and the whole filter stage is rotatable so graduated filters can be positioned to suit the subject.
The Fotodiox WonderPana Free Arc XL costs $ 225.95 and the 183mm filters start at $ 99.95. For more information visit the Free Arc page on the Fotodiox website.
Ultra wide-angle lenses are typically impossible to filter due to their bulbous front lens element, lack of filter threads and potential for severe vignetting. The ALL NEWWonderPana FreeArc XL, however, is the latest in our line of aluminum filter collars that let you to attach our massive 186mm filter options, like ND 4-1000 and circular polarizers, to wide and ultra wide-angle lenses.
Perfect for landscape and architectural photographers and filmmakers, we designed the WonderPana FreeArc XL to suit Canon’s new breed of 11-24mm lens. Durable and lightweight enough for hand-held shooting, it can be ready at a moment’s notice to answer any image challenge that requires filters. You can even keep it installed on your lens as a critical layer of lens protection. Just check out our video below to learn more:
Articles: Digital Photography Review (dpreview.com)
There’s a scene in the original Jurassic Park movie, that almost perfectly describes one lesson I have learned when documenting the world around me with my camera. In this scene Dr. Ian Malcolm, a brilliant mathematician who is visiting the prehistoric park, expresses severe reservations about the idea of resurrecting long-extinct species during a conversation with John Hammond, the director of the park. Hammond is gleefully explaining the incredible genetic breakthroughs that his scientists have achieved. “Our scientists have done things which nobody’s ever done before.” Incredulous, Malcolm responds with equal fervor and says, “Your scientists were so preoccupied with whether or not they could, they didn’t stop to think if they should.” The same holds true for camera lenses. Just because you can shoot wide open at f/1.4 or f/1.8, doesn’t mean you should.
When I first got into serious photography work, I was amazed at the power and light-gathering ability of my 50mm f/1.8 lens. It opened up a whole new world of photographic possibilities, that I continue to explore today, and was capable of producing incredible images, even on my humble little Nikon D200. Unfortunately, like the scientists in Jurassic Park, I did not spend years in the trenches learning my trade and honing my skills in order to learn how to truly utilize the power of such wide apertures, and went through a phase where I shot everything wide open because of things like low light photos, depth of field, and of course bokeh. Always with the bokeh. Now it’s important to note that I don’t regret any of those early lessons but I do want to offer youa few simple things I’ve learned over the years, and a couple reasons why you might want to reign things in a bit and not shoot wide open with that fancy prime or ultrafast zoom lens just yet.
I shoot most of my photos with three prime lenses: a 35mm f/1.8, a 50mm f/1.8, and my favorite, an 85mm f/1.8, that I call my supermodel lens. (Seriously, you could just about point that lens at a moldy old scarecrow, and get a portrait worthy of Vogue magazine.) Each of these lenses has its own set of unique advantages and limitations, but as you can probably already tell, the one thing they all have in common is a super wide maximum aperture. Certainly there are plenty of lenses available with even bigger apertures, like the Nikon 58mm f/1.4 or Canon 85mm f/1.2, but when push comes to shove an f/1.8, or even f/2.8 lens, is no slouch either. Wielding one of these ultra-wide beasts can be a bit like riding a tyrannosaurus rex, in that the sheer amount of power at your disposal is kind of insane. But, one advantage of fast primes like this, an ultra-shallow depth of field, can also be somewhat of a curse if not used properly.
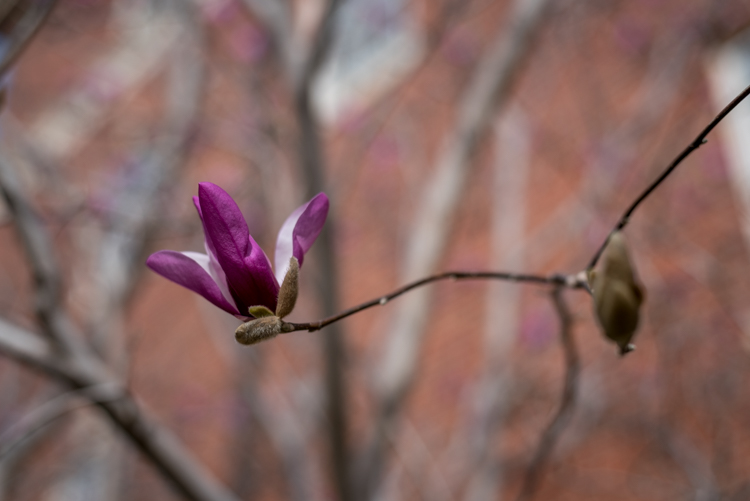
I’m not going to lie, it’s a ton of fun to shoot things with your lens wide open but it took me a while to learn, that just like the scientists of Jurassic Park, maybe I should have held back a bit. This portrait of a college student is yet another time in which I had no good reason to shoot wide open, but did anyway, and the result was a photo that simply could not be used. Due to the wide f/1.8 aperture, and my proximity to the subject, it left me with a depth of field consisting of just a few centimeters. Her left eye (on the right side of the photo) is perfectly in focus while the other side of her face is blurry, and the result is a strange-looking picture that I had to discard. Thankfully, I quickly realized my mistake and got some other perfectly usable images by shooting at f/2.8 and f/4. But, this was one of those situations in which I thought it would be super cool to get the way awesome background blur of an f/1.8 aperture, but did not realize how I nearly destroyed the portrait in the process.

85mm, f/1.8, 1/750 second, ISO 400
Here’s another example from when I first got my 50mm lens, and thought it was so cool to go around shooting all my pictures at f/1.8 – because my warped sense of logic told me that no depth of field could ever be too thin. As a result this picture of some crocuses contains an ugly streak across the center where one flower and a lot of dead grass is in focus while the rest of the image is a blurry mess. Shooting at a smaller aperture would have given me a smooth transition between in-focus and out-of-focus areas and a much more pleasing image overall.
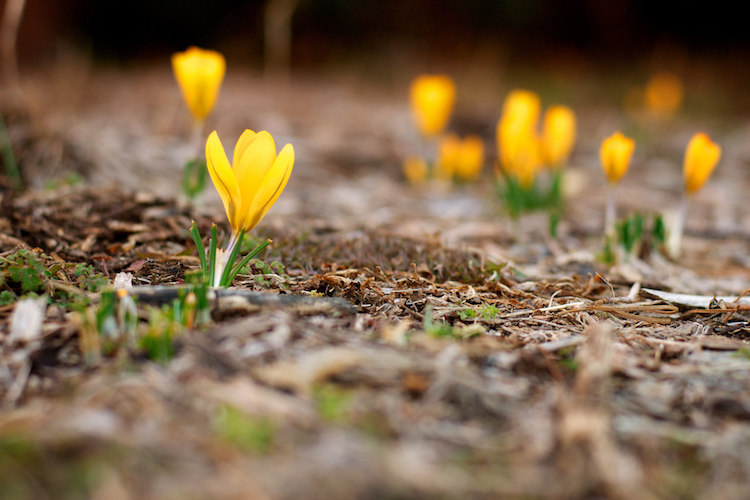
50mm, f/1.8, 1/500 second, ISO 400
This is a bit subjective, and open to interpretation on the part of both the photographer and the viewer, but over the years I have found that shooting at the widest possible aperture in order to get the most possible bokeh, or background blur, things can go from artistic and interesting, to messy and incomprehensible very quickly. Bokeh is nice and can certainly be used to add an artistic flair to an image, but when overused, it can overpower the subject and ruin the picture. The following photo of a purple flower sticking up from a bed of grass shows this phenomenon in action.
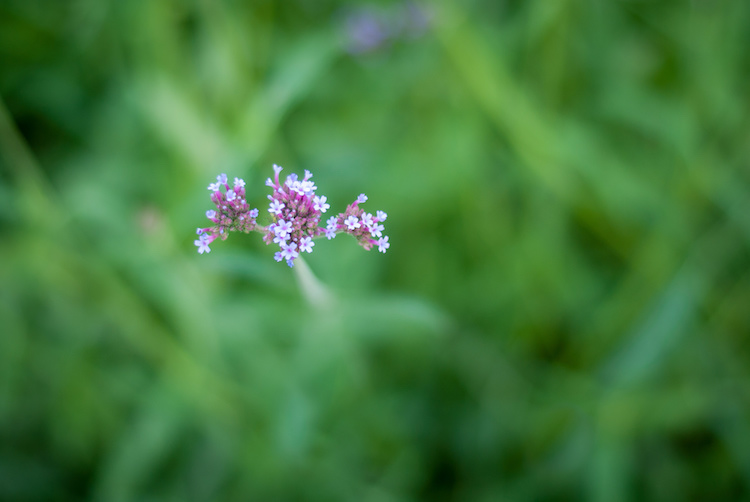
The flowers are so removed from the background it’s almost like they are hovering in midair, and the effect is somewhat disconcerting, and borders on upsetting. Blowing out the background so much has removed any sense of place and context for the subject, and what’s left is a green and purple mess, that is neither artistically interesting, nor aesthetically pleasing.
Before I say too much on this subject perhaps I need to add a bit of a preface. Less expensive lenses can behave strangely when you shoot with them wide open, but more expensive glass is usually much better at this sort of thing. With that disclaimer out of the way, it’s important to understand some of the optical abnormalities such as vignetting, chromatic aberration, and softness, that often show up when your lens is opened up as far as it will go.
Vignetting is when the edges of your image look a bit darker than the rest of the picture, due to how light is manipulated inside your lens before it hits the image sensor inside your camera. It’s not too big of a problem on cameras with smaller sensors like APS-C or micro four thirds models, but it is certainly there, and even more so on full frame cameras.
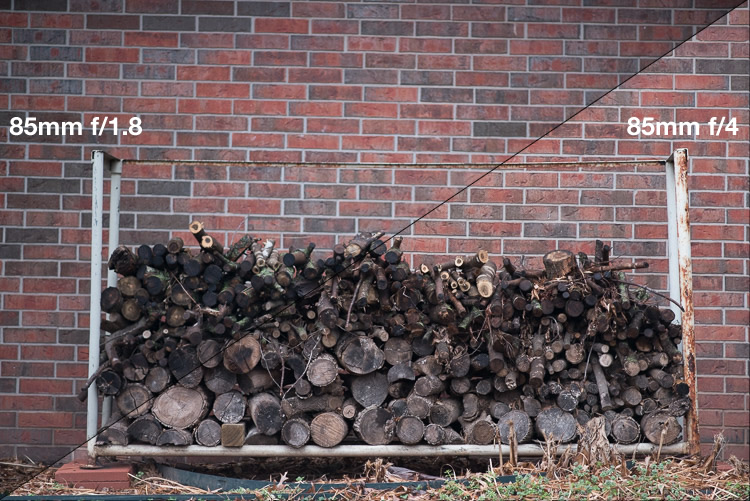
Vignetting can be a major issue when shooting wide open. Notice how the centers of both images are equally exposed but the corners are much darker at f/1.8.
If you shoot in RAW, you can use Lightroom, Photoshop, or other such applications to mitigate most of the effects of vignetting if you want. Of course another solution is to use a smaller aperture, which tends to eliminate most vignetting altogether. Vignetting is not always a dealbreaker, and many photographers, myself included, actually prefer the subtle effects of a well-used vignette. You may find that you fall into this camp, in which case go right ahead and shoot at f/1.8 or f/1.4 to your heart’s content.
The other optical abnormality that often rears its ugly head at wide apertures is chromatic aberration, which might be a much bigger problem if you are not ready for it. This usually manifests itself as purple or green outlines or fringes, around places in your pictures with harsh contrast between dark and light. For example the image below was shot at f/1.8, and upon first glance, looks perfectly usable.
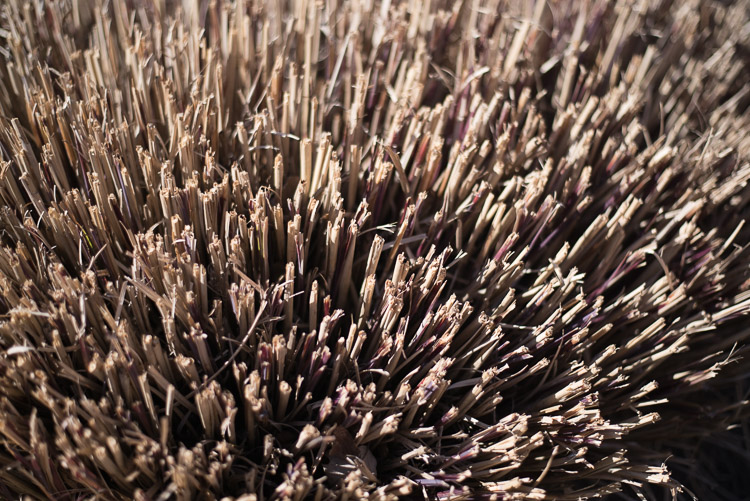
50mm, f/1.8, 1/3000 second, ISO 100. It looks Okay on first inspection, but all is not well up close.
Take a closer look and you will notice a big problem around the edges of most of the dry stalks of grass. Ugly green halos show up all over the place, and this is a direct result of shooting wide open, due to how the incoming light is transformed by the lens on its way to the camera. Here’s a 100% crop of the image next to the exact same picture shot at f/8.
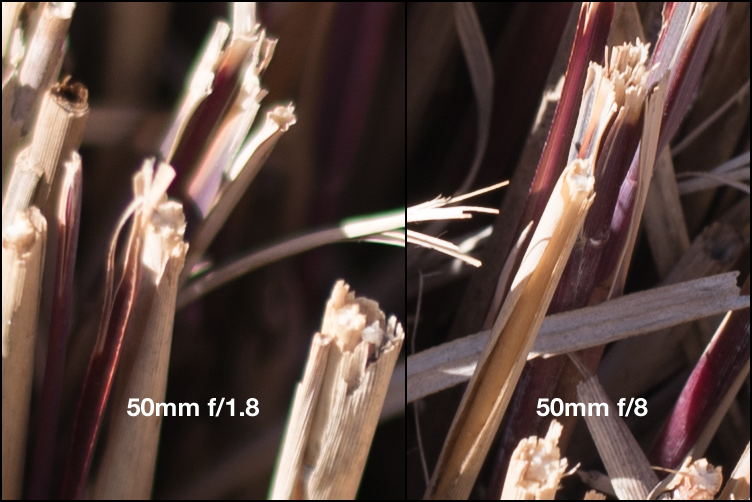
Green outlines abound on the left side while stopping down to f/8 eliminates them entirely.
This optical imperfection can often be mitigated somewhat in Lightroom, by using its: Remove Chromatic Aberration option in the Develop panel. But even then the results are not ideal, and you will often be left with images that still show some green or purple artifacts, or lose a bit of color from other parts of your picture. Rather than mess around with fixing these issues in post-production, I like to just avoid it from the start and shoot at a slightly smaller aperture. It usually fixes the problem, and still leaves me with the same overall composition I would have had with a wider aperture.
The last weird characteristic of most lenses at their widest apertures might not be that big of a problem unless you are painstaking examining your pictures on a per-pixel basis, but it’s something you should know about nonetheless. Almost all lenses are a bit softer when used at their widest apertures, which can result in pictures that are not quite what you want. The picture below was shot at f/1.8 and looks decent upon first glance, but a closer inspection reveals a very different story.
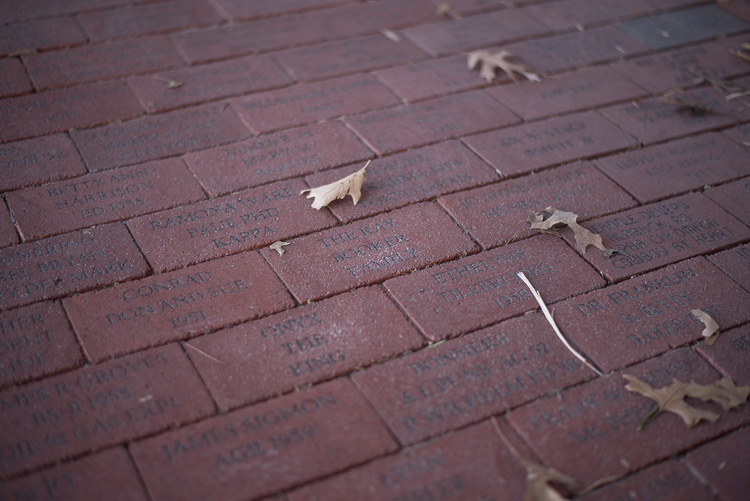
50mm, f/1.8, 1/125 second, ISO 100. Seems decent but once again a closer look reveals a much different story.
Zooming in on the exact center of the image, the point at which I locked focus, shows two very different pictures when this is put next to the very same picture shot at f/8.
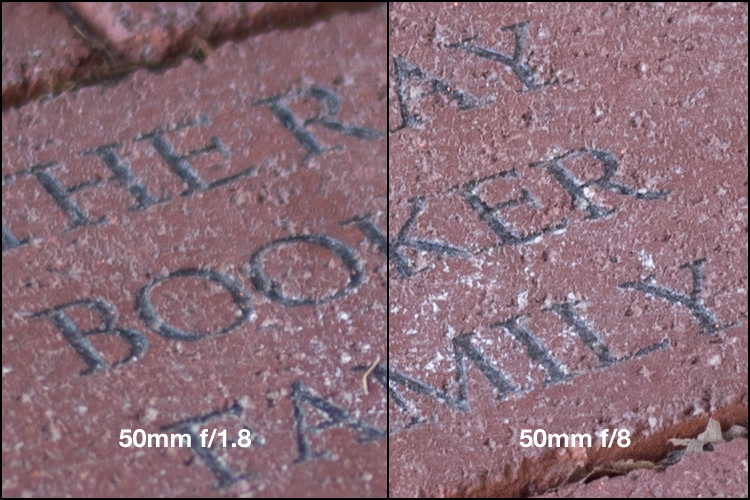
Focus was locked precisely on the letter “K” and yet the image on the left, shot at the widest aperture on my lens, is much less sharp.
Once again this sharpness problem can be corrected to some degree in post-production, but my ideal solution is to avoid shooting at f/1.8 unless I specifically need the light-gathering ability, background blur, or other effects that such a wide aperture offers. Photography is all about tradeoffs, and while closing down the aperture on my lens resulted in a picture that was sharper, it also gave me an image that had much wider depth of field, which made the overall composition less pleasing.
The Roman philosopher Marcus Tullius Cicero once said, “Never go to excess, but let moderation be your guide.” This nugget of wisdom is applicable not only to life in general, but also speaks volumes about how to approach photography. I like to treat the widest aperture on my lenses like flooring the gas pedal on my car. It’s fun, but if I went around driving full speed everywhere I went, it would quickly lose its appeal. (Though in my 1998 Toyota sedan I would probably lose a race to a skateboarder, but you get the point.)
Your lenses have wide apertures for a reason and they are meant to be used to get good images, particularly if you are aware of some of the quirks and idiosyncrasies of using them like this. If you like shooting wide open, and don’t mind some of the potential tradeoffs like a bit of vignetting and chromatic aberration, then go for it! However, my own personal rule of thumb is to only use f/1.8 when I really need it, otherwise the creamy backgrounds and bokeh balls start to lose a bit of their luster. When I’m doing a portrait session I keep f/1.8 in my back pocket for when I really need it, otherwise I shoot most pics at f/2.8, f/4, or smaller.
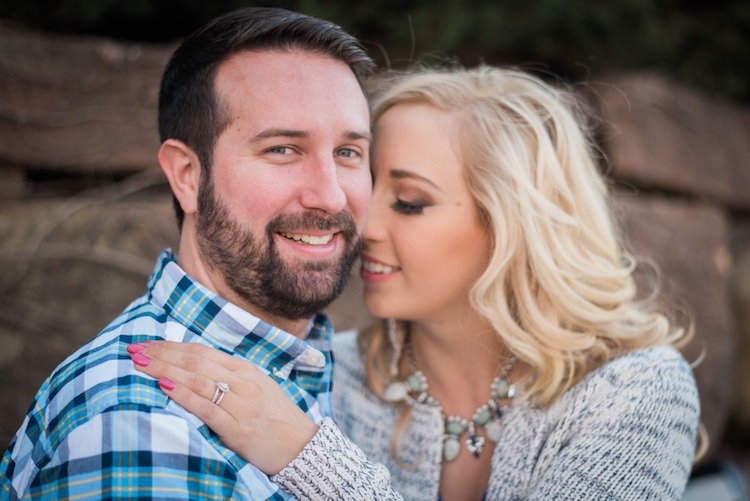
I took most photos of this couple at smaller apertures, which made this one at f/1.8 stand out among the rest.
After hearing this list of reasons to hold back a bit when shooting wide open, I almost feel like I should write a similar article about the benefits of taking photos at the largest aperture possible. I don’t want to give the impression that you should never use your equipment to the fullest of its capabilities, just that there are a few things to know before you go around taking all your pictures at the widest possible aperture your lenses can use. You might end up with a few problems, just like the ill-fated scientists of Jurassic Park, but hopefully yours won’t be quite as lethal, and along the way you could very well manage to take some incredible photos too.
I’d like to know what your thoughts are on all of this, and if you have any favorite shots taken at not-quite-wide apertures, please post them in the comments below!
googletag.cmd.push(function() {
tablet_slots.push( googletag.defineSlot( “/1005424/_dPSv4_tab-all-article-bottom_(300×250)”, [300, 250], “pb-ad-78623” ).addService( googletag.pubads() ) ); } );
googletag.cmd.push(function() {
mobile_slots.push( googletag.defineSlot( “/1005424/_dPSv4_mob-all-article-bottom_(300×250)”, [300, 250], “pb-ad-78158” ).addService( googletag.pubads() ) ); } );
The post Are You Obsessed with Shooting Wide Apertures – Here’s Why You Might Want to Hold Back by Simon Ringsmuth appeared first on Digital Photography School.
 |
Chinese company Venus Optics (Anhui ChangGeng Optical Technology Company Ltd.) is a new lens and camera accessory manufacturer started by a group of macro photography enthusiasts who design and create their own macro photography lenses. They began with the Venus 60mm 2:1 macro (which enables twice life-size reproduction), and have followed this up with the LAOWA 15mm 1:1 wide macro of this review. In addition to these lenses, they also offer a twin head macro flash unit, which we think looks quite a bit like an alien on top of a camera.
The LAOWA 15mm lens is one of the widest full-frame lenses to offer a full 1:1 magnification ratio (meaning that the object in focus is projected at actual-size onto the film or sensor). Admittedly, this magnification only occurs when the object is 0.2 inches (4.7mm) from the rather large front element of this lens, but that’s the trade off between a wide angle of view and the desire for ‘true’ macro abilities.
In addition to the headline feature, this entirely manual lens (manual focus; manual aperture; no communication to the camera body) also includes a shift mechanism to physically move the optics up or down along the lens mount. This shift provides perspective correction for converging lines, as well as a way to create seamless panoramas (though the shift direction is fixed to the frame’s vertical axis).
| Focal length | 15mm |
|---|---|
| Max. aperture | F4 |
| Min. aperture | F32 |
| Angle of view | 110° (135 frame) / 85° (APS-C) |
| Shift distances | + / – 6mm |
| Aperture blades | 14 |
| Min. focus (1:1) | 4.7mm |
| Filter thread | 77mm |
| Dimensions | 83.8 x 64.7mm / 3.3 x 2.5in |
| Weight | 410g / 14.5oz |
| Available mounts |
Nikon F / Canon EF / Pentax K / |
 |
The lens is designed around 12 elements in 9 groups, with three High Refractive elements, and one Extra-low Dispersion lens. Multi-layer coatings minimize flare and ghosting, while the overall optical design strikes a balance between close focus abilities and wide angles. Of note is the 77mm filter thread around the non-protruding front element. This allows for easy filter use without requiring the more expensive square filter systems (although for ND grads, those are recommended). Given the wide angle of view, slim filters are still required. |
 |
The body surrounding the glass elements is made from aluminum and brass, with engraved aperture and distance scales that are necessary for the all-manual operation. The aperture ring is ‘clickless’ and located toward the front of the lens, while the focus ring near the back has a relatively short throw for a macro lens (90° of rotation). |
 |
The lens comes with a shifting lens mount, allowing for perspective correction by adjusting the center of the image circle on the film or sensor. The range of adjustment is 6mm from the center, either up or down. The small lever to engage the shift mechanism is just behind the focus ring, at the rear of the lens. There are no scales or gears to finely control the amount of shift. |
 |
| 1:1 macro at F11. The flare comes from the combination of back-lighting and inability to use the hood at such close working distances. |
The LAOWA 15mm is an entirely manual lens, but still easy enough to adjust and work with. This was aided somewhat by testing a K-mount lens on a Pentax APS-C camera body and a Sony a7 II (w/ Novoflex adapter), both of which provide image stabilization (from a manually entered focal length), stop-down metering, and focus confirmation/peaking, despite the low-tech, ‘slab of brass’ lens mount.
When ordering this lens in Micro Four Thirds, Sony E, or Fuji X mount, the folks at Venus bundle an appropriate adapter with either a Nikon F or Canon EF mount lens. (For single-system Sony shooters, there is the option of a native FE mount, without adapter.) However, as our friends at Lensrentals point out, testing a wide-angle lens with an adapter (regardless of manufacturer) can introduce issues, so much of the more technical analysis in this article is based on experience of using this lens on a native Pentax (APS-C) body.
The absence of autofocus is not much of a detriment when using this lens for wide-angle macro photography, since adjusting the subject distance while looking at the LCD or viewfinder is typically a much faster way to focus at these minute working distances. Stop-down metering and looking through a dim viewfinder or noisy LCD at smaller apertures (due to the lack of automatic aperture control), on the other hand, is a bit harder to adapt to.
The focus throw is somewhat short for a macro lens, requiring only a bit more than 90 degrees of rotation to go from the closest focal distance (and 1:1 macro) to infinity. Further, the helical is biased toward the macro and close-focus end, so there is only a tiny amount of travel between 2 meters and infinity. This took some getting used to, and initially resulted in enough mis-focused shots to warrant bracketing.
The biggest ergonomic difficulty was getting used to using an aperture ring positioned in front of the focus ring. Adding to the confusion is the fact that both rings are ‘clickless’ and identically sized. Of course, the lack of hard stops on the aperture ring, along with the wide angle and availability in many different lens mounts, combine to make this an interesting option for video work, but that’s beyond the scope of this article.
The image quality of this unique lens is excellent at closer focus distances, and shows the commitment of the macro photographers at Venus Optics for getting very close and very wide. There is a high degree of sharpness in the center of the frame, even at wider apertures, and the inevitable distortion and falloff along the edges doesn’t interfere at closer focus distances. Being very well corrected for aberrations is another plus as a macro lens.
However, this lens is differentiated by its 1:1 macro focusing, which, unfortunately, comes with some inconveniences. To keep the price of the lens reasonable, the LAOWA relies on manual focus and a manual aperture without linkage (resulting in the dim viewfinder when stopped down, as mentioned above), while the wide angle optical design means a minuscule 4.7mm working distance (for true 1:1) coupled with a rather large front filter ring and hood.
The petal-shaped hood prevents many subjects from reaching the tiny minimum focus distance for 1:1 macros, and furthermore blocks out light that becomes necessary for macros with acceptable depth-of-focus (narrow aperture). After a few experiments with macro flash rigs, resulting in images that looked like ‘flash party photos’ due to the lack of beam spread across the very wide angle of view, natural light (and a tripod for static subjects) was the order of the day. Thomas Shahan, of course, could probably overcome this with aplomb.
 |
|
| Unshifted | Shifted +6mm |
The addition of a shifting lens mount is a great bonus for a wide angle lens like the LAOWA 15mm, however the optical characteristics of the lens tend to make this function most useful on APS-C or smaller format sensors. In images shot with a full frame body (the Sony a7 II w/ Novoflex adapter), the vignetting and distortion at the edge of the image circle eclipsed the value of shifting the lens (although it is unknown how much of this is due to it being an adapted lens).
One troublesome aspect of the lens shift is that it lacks the gearing and markings for fine control of the shift found on most other perspective control lenses. Press the shift release button and almost immediately the lens slides up (or down) to the maximum shift amount. There is a detent in the middle to reset the lens to an unshifted position, but getting a small or precise amount of shift requires patience and a steady hand.
 |
| Toronto skyline, as seen from the islands offshore. On the full-frame Sony, the 15mm shows significant degradation at the edges, as evident in the lights on the right side. |
When using this lens as a ‘normal’ ultra-wide angle, the results are something of a mixed bag. At close focus distances, the center is quite sharp (where most macro subjects tend to be) at all apertures, while at infinity the corner details appear smeared until the lens is stopped down significantly. Some night shots on the full-frame Sony, and attempts at astrophotography with the Pentax O-GPS Astrotracer, both show significant degradation of the lights at the edges. These examples are perhaps not quite as comprehensive as LensRentals’ OLAF system, but still illustrative. Check out the full resolution images in the gallery below.
Many macro lenses are designed to have a ‘flat field’ for the in-focus region. The LAOWA 15mm is not one of those lenses. Similar to other wide angle lenses, the field of focus curves radically, yet does not flatten out as focus is shifted toward infinity. Add in some edge distortion, and the resultant lack of corner sharpness at infinity is perhaps the biggest issue with the image quality from this lens on full-frame cameras. It requires some acceptance of the ‘dual nature’ of the lens (macro and ultra-wide) to work within this limit. Oddly enough, shifting the lens provides some relief for at least two of the corners, due to the curved field being off-center.
 |
DistortionVery few ultra wide angle lenses are free from distortion, and this 15mm is no exception. In most shots with the APS-C Pentax, curved lines were minimal (see the shift photos above) and could be corrected in processing if desired. However, on the full-frame Sony, the barrel distortion along the edges reached a point where it was almost un-correctable. The image to the left shows doors that have very straight edges, but look organically curved in the (uncorrected) photo. |
One area where the LAOWA 15mm is quite competitive is in the control of chromatic aberrations. While there definitely is some lateral CA, particularly visible at high contrast edges in the corners, it is fairly well controlled when stopped down, and quite consistent. A few clicks in most modern Raw processing software removes these distractions very easily. In addition, longitudinal CA (color fringing in the out of focus areas) is almost non-existent, which is excellent for a macro lens, even though many other wide angle lenses tend to be similarly devoid of this aberration.
(Note: none of the images in this article, or the samples, have had software lens corrections applied; whether for distortion, vignetting, chromatic aberrations, or fringing.)
 |
 |
| Close focus at F4 | Close focus at F16 |
It’s a bit unusual to discuss the bokeh of an ultra-wide lens: considering the typical design for this kind of lens provides such wide depth-of-field, there is frequently little out of focus anyhow. However, the close focus and macro abilities of the LAOWA 15mm give quite a lot of room for shifting the focal plane, so bokeh is not only visible, it can be an integral part of the image.
With a 16-bladed aperture, the blur discs produced by this lens appear round at all stops, with a slight ‘onion-ring’ artifact when examined closely. More importantly, the falloff in the blur is smooth and gradual, as one would expect from a macro lens. This combines to make the exaggerated field curvature less bothersome at closer focal distances and wider apertures, and becomes another one of the strengths of this lens.
The Venus LAOWA 15mm F4 Macro is an unusual lens, both in its pedigree (or lack thereof) and its unique features. With a relatively reasonable price and availability in many different lens mounts, there is now an ultra-wide option for anyone who likes to get really close to their subjects. The lack of autofocus and auto-aperture prevents this from being a ‘snapshot’ lens, and may make it frustrating to use on camera systems that do not support low-tech lenses very well.
There are some compromises in the optical design of this multipurpose lens, including wide field distortion, and some edge softness at infinity. However, wide-angle macro enthusiasts will definitely enjoy this lens, while anyone with patience and a desire to explore the options it provides will similarly find the Venus LAOWA 15mm to be a fun and rewarding addition to their system.
$ (document).ready(function() { SampleGalleryGridV2({“galleryId”:”8066630650″}) })


Articles: Digital Photography Review (dpreview.com)

An easy assumption to make, when shooting landscapes, is use a wide angle lens. After all, most landscape photographers favor wide angle lenses for a reason, they naturally give you the widest view and allow you to get the full landscape into the frame, from the foreground to the horizon. They have the widest depth of field, so you get the whole landscape in focus too. Their distortion enlarges objects in the foreground, letting you show off close-up details. The same distortion also emphasizes leading lines, enhancing your composition, and giving your image a more dynamic feel. But when you default to wide angle, you miss many hidden opportunities offered by telephoto lenses.
This is the most basic difference between the two lens types: wide lenses give you a wide view, telephoto lenses give you a narrow view. And while landscapes look great in their entirety, it’s a good habit to take a moment and look for details. These are beautiful elements of the landscape that might get shrunken, or ignored in the expanse of a wide-angle image. This is where your telephoto lens comes in. Its narrow field of view is perfect for trimming off the extra elements, and focusing right on small, beautiful scenes like the curve of a mountain, a reflection in a far-off pond, or the silhouette of a tree.

In the two images above, you can see this in action. They were both taken from Olmstead point in Yosemite National Park, one with a wide angle lens and the other with a telephoto. In the first image, the wide angle shows off the total landscape. It includes both sides of the valley, the up-close textures of the rocks and the far off peak of Half Dome. In the second image, the telephoto lens brings the eye right up to the mountains, showing off their shapes and the details of the geology.
Another pair of images (below), shows this effect even more dramatically. The first image is not just wide-angle, but an aerial shot as well, taken from a small airplane over the Okavango Delta in Botswana. From this vantage point all of the individual elements of the landscape become incredibly small, and your eyes pay more attention to their arrangement than their individual shapes. In the second image, also from the Okavango area, but this time on the ground, a telephoto lens is used to draw attention to the beautiful curves of a single Acacia tree.


The second major difference between wide angle and telephoto lenses is the innate size of their depth of field. Put succinctly, the higher the focal length, the narrower the area of focus. In practice, this means that when shooting wide, it’s much easier for you to get everything in focus, from the grass at your feet to the ridge on the horizon. This is especially true when you’re trying to use your lens’s sharpest apertures (the so-called sweet spot). However, a narrower depth of field is much better for isolating your subject from the background, and this is where your telephoto lens comes into play. Try shooting a close-up detail at a low aperture, using the landscape as a nice creamy bokeh backdrop.


The two images above are perfect examples of this effect. In the first image, the wide angle lens brings the whole landscape into focus, from the close-up sunflowers to the far-off mountains. In the second image, shooting with a telephoto blurs out the flowers and mountains in the background, turning them into a nice soft background for main sunflower.
It’s no secret that wide angle lenses expand the sense of depth in an image, by enlarging elements in the foreground and shrinking those in the back. This is great for creating images that make you feel like you could step right into the frame. On the flip-side, you run the risk of making towering, awesome mountains in the distance look like puny hills. Telephoto lenses, on the other hand, compress depth, causing objects near and far to appear more similar in size. A compressed sense of depth is great for abstracting a scene, and bringing out its graphical qualities. Colorful forest canopies, layered mountain ridges, and curving sand dunes, are all great subjects for this kind of shooting.

In the first of this pair above, notice how the wide angle lens exaggerates the size of the flowers in the foreground at the expense of the mountains in the background. The mountains are so tall that they’re shrouded in clouds, but the lens keeps them from looking quite as grand. But pull out a telephoto lens and you can zoom straight in on the mountain, showing off the contrast between the rugged outline of the peak and the soft wispy form of the cloud.


Here are two more images, both taken at the same location in Big Bend National Park, that show off this effect. In the first image, you can see that the wide angle lens increases the size of the plants and rocks in the foreground, while shrinking the large desert mountains in the background. In the second image, a telephoto lens flattens out the depth of the many desert ridges, calling attention to their graphic patterns and outlines.
Have a hard time remembering all these details? Here’s an easy way to summarize it with a simple idea:
Wide angle lenses show off space, telephotos show off objects.
The wide angle lens’s big field of view, ease of uniform focus, and depth-distorting abilities, are great at showing off big, expansive landscapes. However, they take focus away from individual elements within the landscape in favor of showing the whole. Telephoto lenses are naturally the opposite: they’re great at showing off the size, shape, and intricacy, of detail of individual elements within the landscape. But their narrow field of view, small depth of field, and depth-compressing qualities make it hard to capture the landscape as a whole.

You can analyze this pair of images to see exactly how all of these techniques work together. Starting with the photo above, you can see how the wide angle lens fits the whole landscape into the frame, from close-up rocks, to far off peaks and sky. Because of the lens’s large depth of field, the whole landscape is in acceptable focus as well. The lens’s depth distortion is readily apparent as well: the foreground rocks look very large, creating a pleasing sense of depth, and emphasizing the leading lines that draw the eye from the edges of the frame to the center. Overall, you get a very good sense of the space and the expansiveness of the valley.

This image was taken in the same place, but the use of a telephoto lens captures it in a very different way. The photo brings out a single element of the landscape – look closely and you can see this peak in the previous image on the top right – and allows the viewer to appreciate its subtle details. Because of the telephoto lens’s narrow depth of field, the sky is slightly out of focus while leaving the details of the peak itself perfectly sharp. And most of all, the compressed sense of depth flattens the image, showing off the rocky mass of the mountain, and calling attention to the beautiful curve of the ridge line. Overall, you get a great sense of the mountain as a solid object, rather than a bounded space.
The best way to know which lens to use is to get out there, look, and think. What part of the landscape are you most drawn to? Does the landscape’s expansiveness give it its character? Are there stunning details surrounded by less photogenic elements? Are you shooting spaces or objects?

That said, my personal strategy is to just shoot both, because almost any landscape has enough beauty that just one type of lens isn’t enough to get to all of it.
What is your approach to landscape photography? Do you use a wide or telephoto more often? Please share your thoughts and landscape images in the comments below.
googletag.cmd.push(function() {
tablet_slots.push( googletag.defineSlot( “/1005424/_dPSv4_tab-all-article-bottom_(300×250)”, [300, 250], “pb-ad-78623” ).addService( googletag.pubads() ) ); } );
googletag.cmd.push(function() {
mobile_slots.push( googletag.defineSlot( “/1005424/_dPSv4_mob-all-article-bottom_(300×250)”, [300, 250], “pb-ad-78158” ).addService( googletag.pubads() ) ); } );
The post Wide Angle Versus Telephoto Lenses for Beautiful Landscape Photography by Will Crites-Krumm appeared first on Digital Photography School.
Aukey is a mobile device accessory maker that has been in the clip-on lens business for quite some time. We’ve had a chance to try out one of the company’s latest models, the ‘Super Wide Angle’ lens which at 238 degrees offers quite an extreme angle of view. Read more
Articles: Digital Photography Review (dpreview.com)

Ein Beitrag von: Tamara Skudies
Die Lomo’Instant Wide ist das neueste Produkt aus dem Hause Lomography für Fujis „Instax Wide“-Filme. Bisher besitze ich in dem Format eine alte Fuji Instax 200 und das Instant Back für die Lomography Belair. Der Film hat mich schon immer mit seinem Format und der Farbwiedergabe überzeugt und die neue Kamera von Lomography eröffnet einem ganz neue Möglichkeiten, ihn kreativ zu nutzen.
kwerfeldein – Fotografie Magazin | Fotocommunity
Earlier this year Nikon expanded a series of F1.8 primes with the 24mm F1.8G ED, sitting alongside 20mm and 35mm models. Compact and lightweight, it hits a $ 750 price point that’s relatively reasonable, considering the F1.4 version retails for over $ 2000. We’ve spent some time shooting with the new 24mm prime – take a look at its performance out and about. Read more
Articles: Digital Photography Review (dpreview.com)
Lens manufacturer Sigma has introduced a new lens to its Art range of premium optics that it claims is the fastest 20mm in the world. The new 20mm F1.4 DG HSM | Art is designed for full frame cameras and will be available in mounts for Canon EF, Nikon F and Sigma models. Read more
Articles: Digital Photography Review (dpreview.com)
Lomography has introduced the Lomo’instant Wide camera. Using Fujifilm Instax Wide film, the camera offers a 35mm equivalent lens and Auto, Bulb, and 1/30sec Fixed Shutter Speed modes. Features cater to those who want to take a little more control over their instant prints, including a multi-exposure button and a lens cap that functions as a shutter remote control. Read more
Articles: Digital Photography Review (dpreview.com)
You must be logged in to post a comment.