RSS
 

Posts Tagged ‘Wedding’

Tips for Photographing Wedding Decor Details

26 Aug

Wouldn’t we all love to be the photographer for lavish, perfectly detailed weddings? It’s discouraging sometimes to follow the work of famous wedding photographers and feel like we’ll never measure up. The truth is that for most of us, we’re photographing weddings of average everyday people, who can’t afford those over-the-top perfect weddings.

700

That doesn’t mean that the wedding we’re photographing is any less special, or any less important. The bride and groom have put so much time, effort, and thought into every detail of their wedding. Even if their budget is a fraction of some of those perfect weddings, they’ve most likely spent what amounts to a small fortune for them.

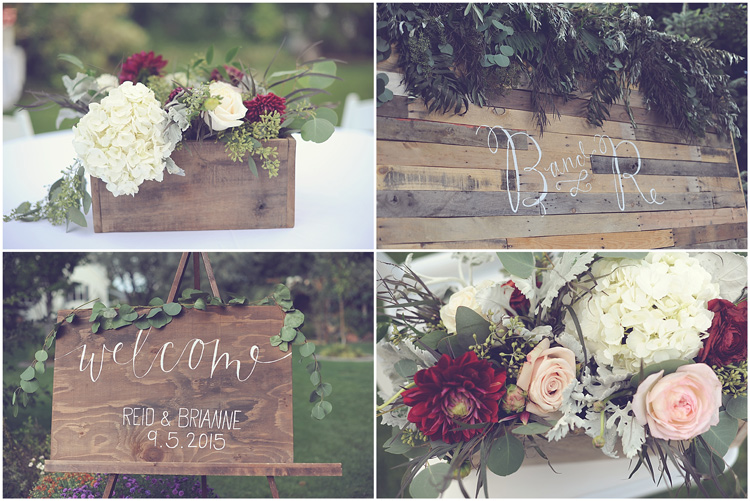
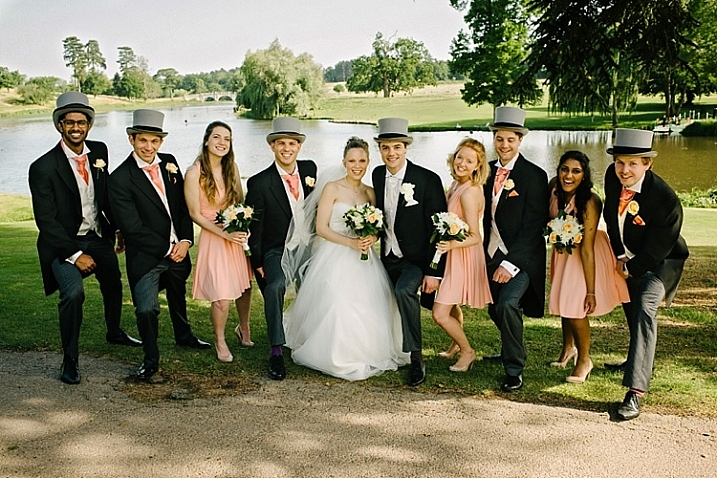
When I am hired to photograph a wedding, I want to treat each wedding as if it were the glamorous wedding of royalty. Whether you are the hired wedding photographer, or just a friend of the bride with a camera, I have a few hints to help you photograph the decor details of any wedding, and make it look like everything the bride and groom hoped it would be.

698

Get There Early

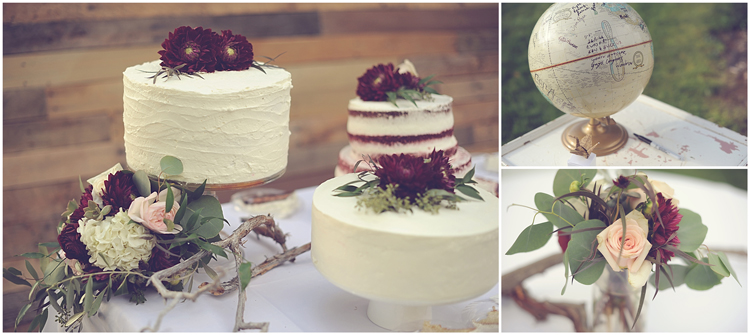
Arrive at the wedding or reception about half hour before it’s supposed to start. You will most likely have a small window of time where the decorations will be finished, but the guests have not arrived yet. You can photograph details with the guests there, but it’s harder to get clean photos without people in them, and sometimes the decorations have been moved or ruined later in the day. There are some things that you’ll need to photograph later, like if you want to show guest signatures on the guest book (or globe!), but try to get most of the details shots before the guests arrive.

696

Arrange the Details

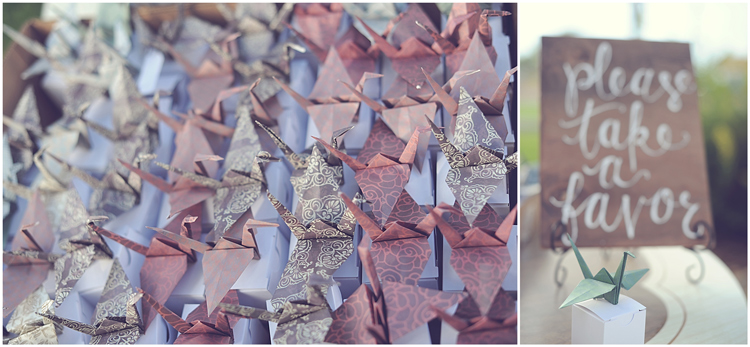
Sometimes you can move things around a little bit to get more of the story of the wedding theme. In the photo above I wanted to capture the mass amounts of origami cranes that the bride and groom had folded themselves, but I also wanted to pull one out to photograph with the sign telling the guests to “please take a favor”. Often I will open a favor box to photograph the contents inside, artfully arranged.

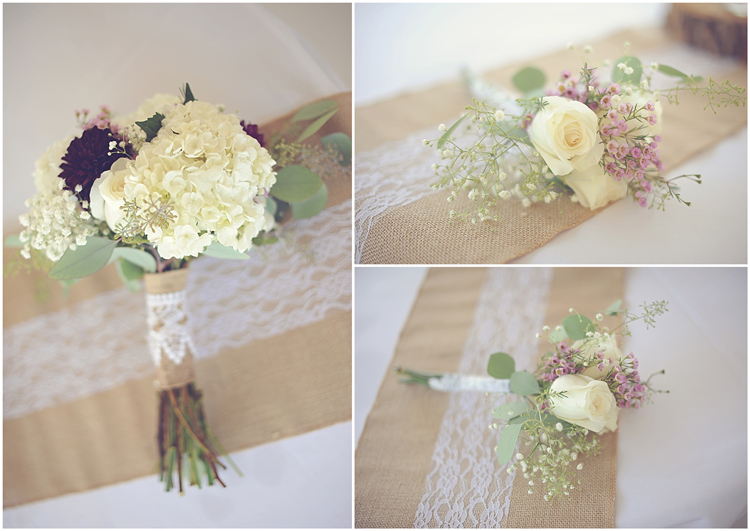
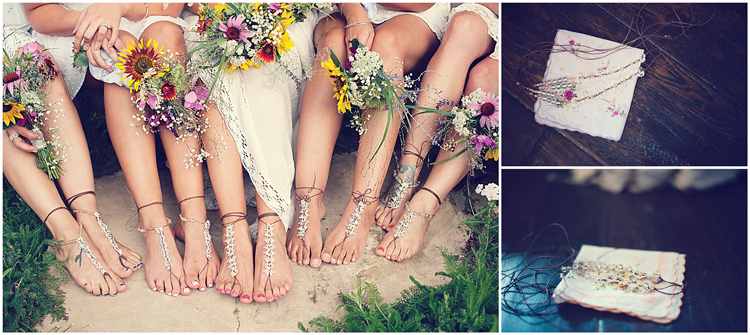
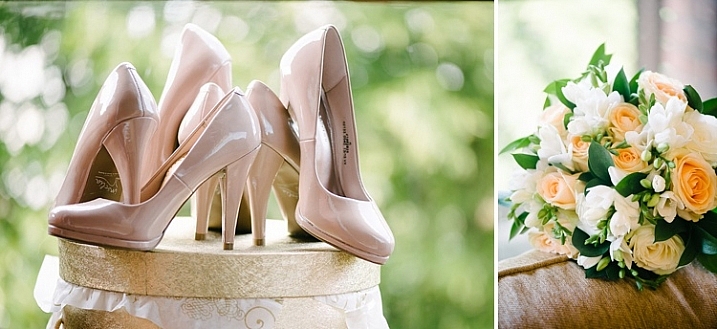
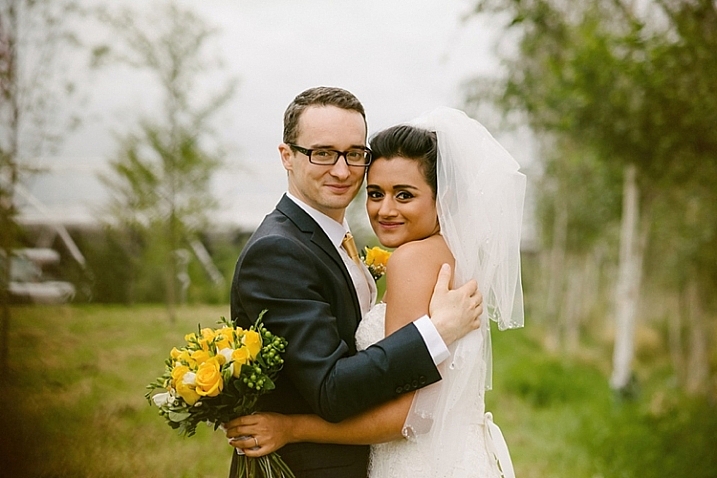
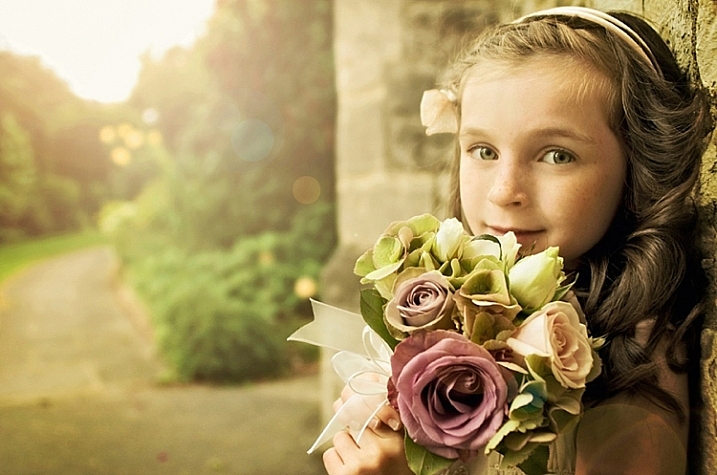
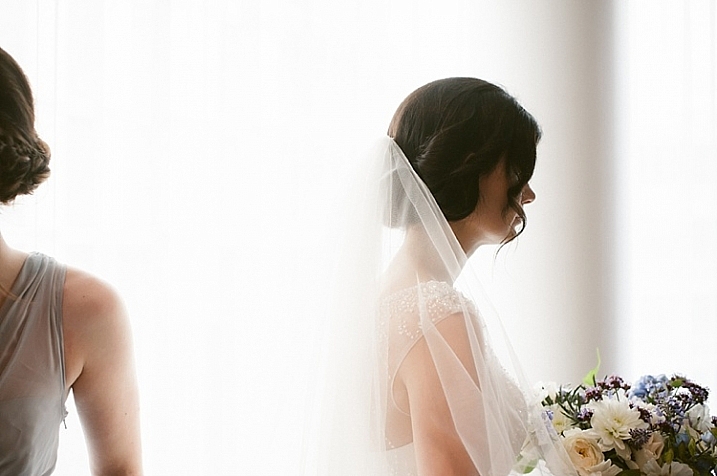
Sometimes you can photograph a centerpiece arrangement better if it’s moved slightly closer. You can borrow the bride’s bouquet if she has set it down for a bit (ask first), or borrow one of the bridesmaid’s bouquets to photograph. As long as you don’t do anything that can’t quickly be put back into place, you’ll be fine. Make sure to return everything how you found it when you’re done capturing that particular detail.
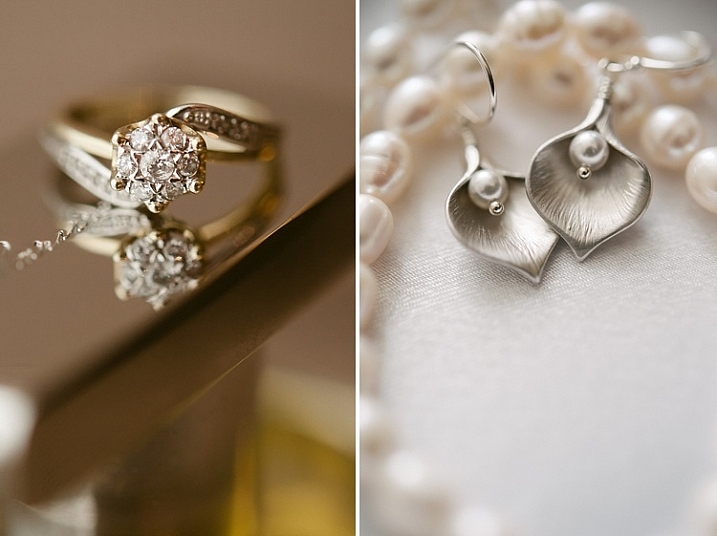
697

Shoot Wide Open

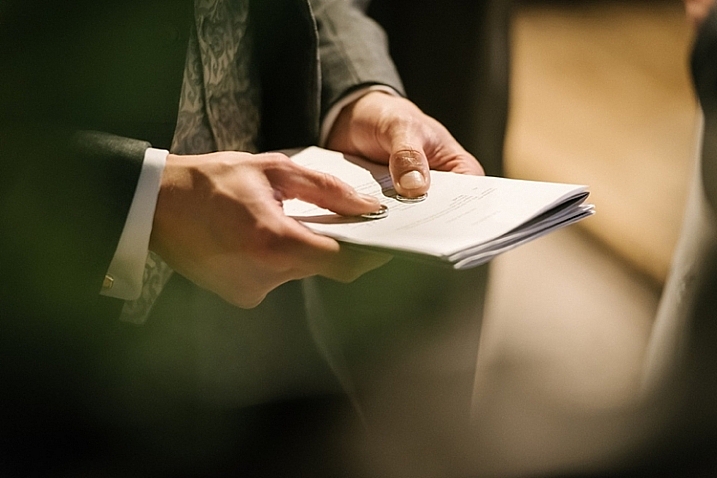
I like to photograph most wedding details with my lens almost wide open (with my aperture set between f/1.4 and f/2, usually). This can give the photograph more of an artistic feel, and help the focus be on exactly what you are photographing. If the wedding doesn’t have a lot of fancy details, or attention to perfection, you may want to blur out a lot of background.

I use a 50mm 1.4 lens, or an 85mm 1.4 lens, but most prime lenses will do. Be especially careful that your focus is exactly where you want it to be, and hold very steady. Your focus has to be tack sharp, or the whole thing will just look like a blurry mess. Shooting wide open is, of course, a matter of style and preference, and some may like an entirely different look.

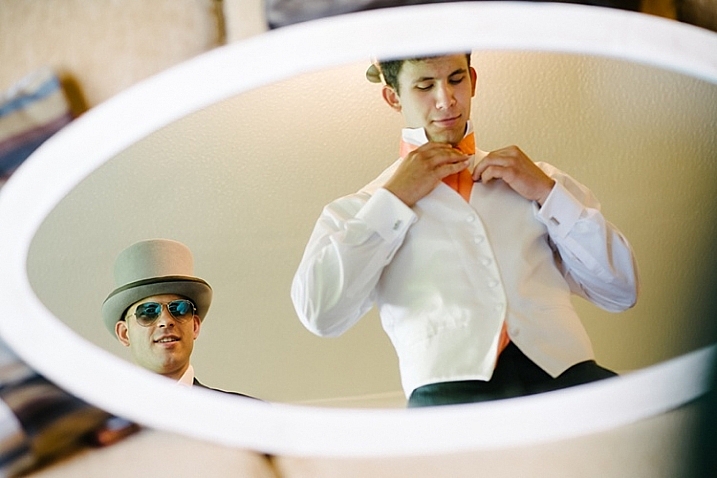
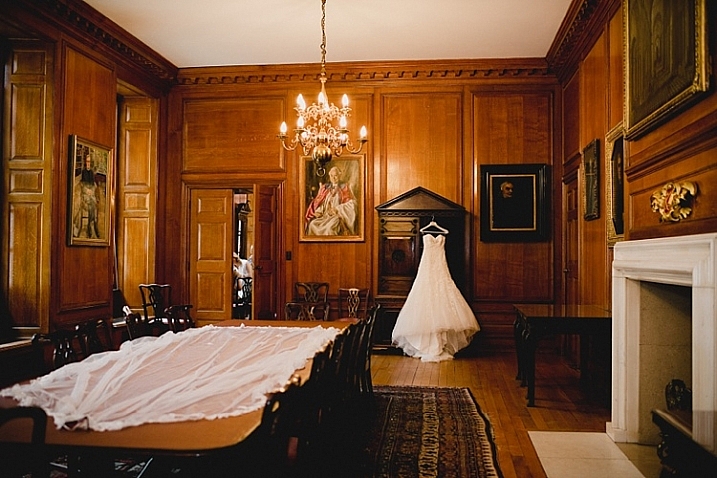
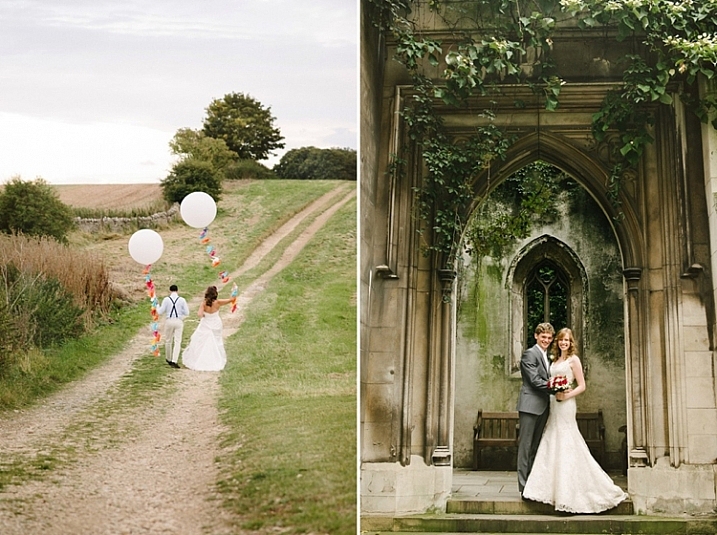
Find Different Angles

I will often stand on a chair to get the angle I want when I’m photographing details. (This is where it’s definitely better to get there before the guests!) You have to get creative with your angles, so your photos don’t look like every other guest’s pics. (This is especially important if you are the hired photographer.) Pay attention to what you can see in the background, where the light is coming from, and which parts are the most important. Even a slightly different angle can transform a photo from “meh” to “wow”, so try lots of different angles to see which one looks the best.

693

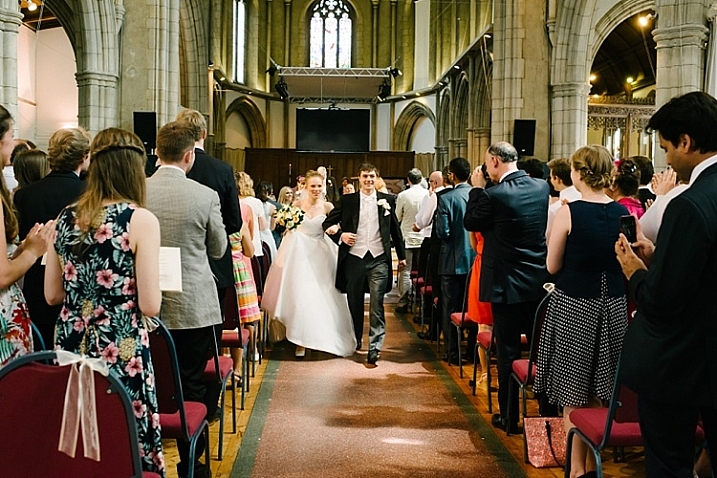
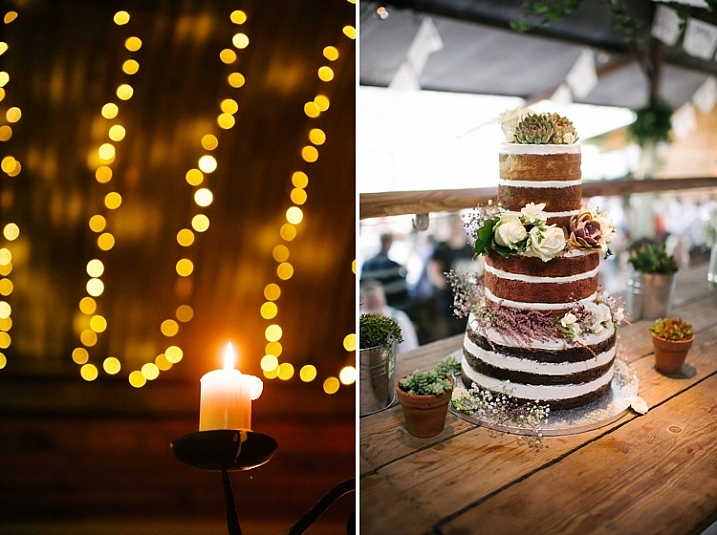
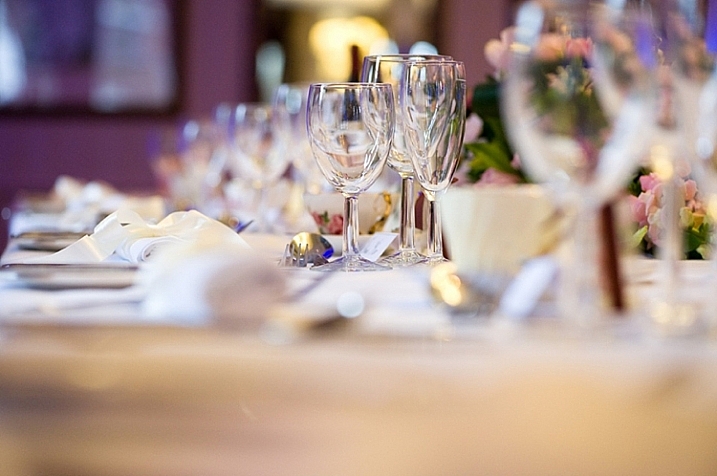
Work With Difficult Lighting

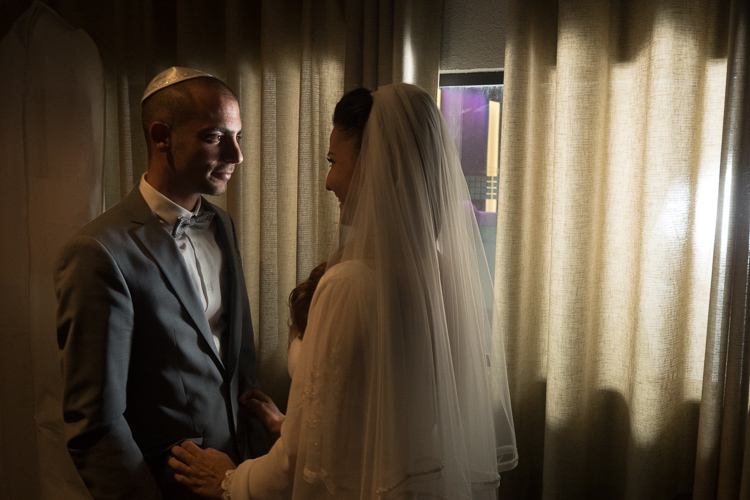
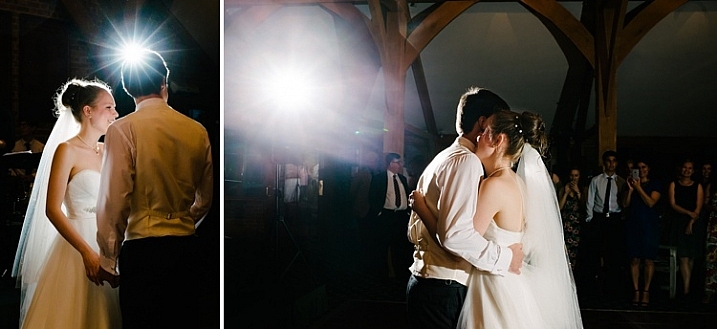
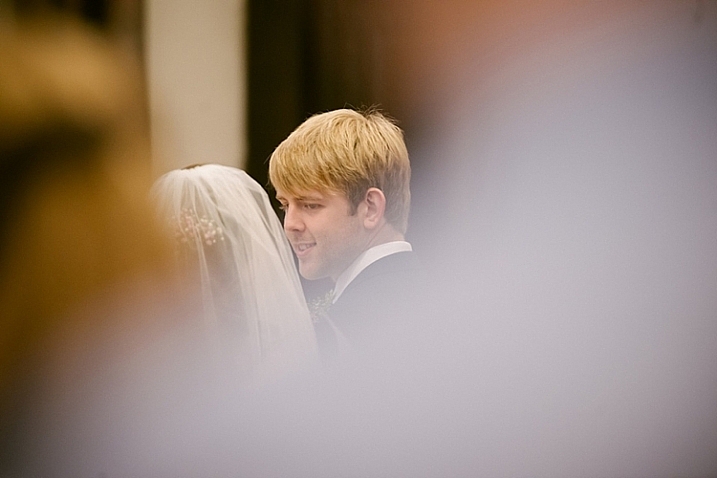
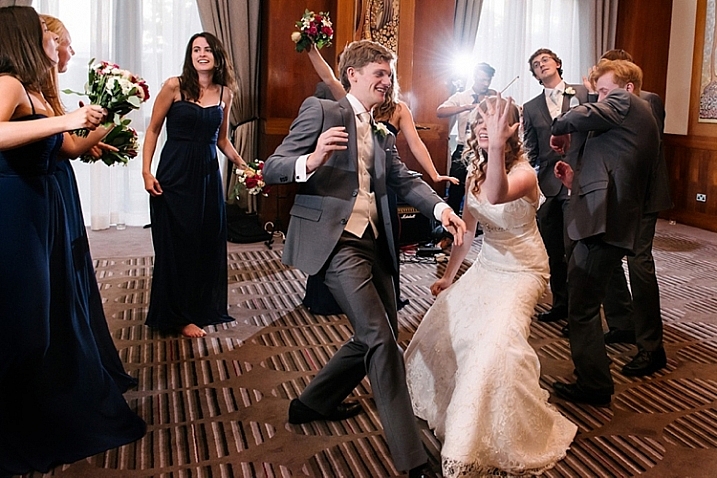
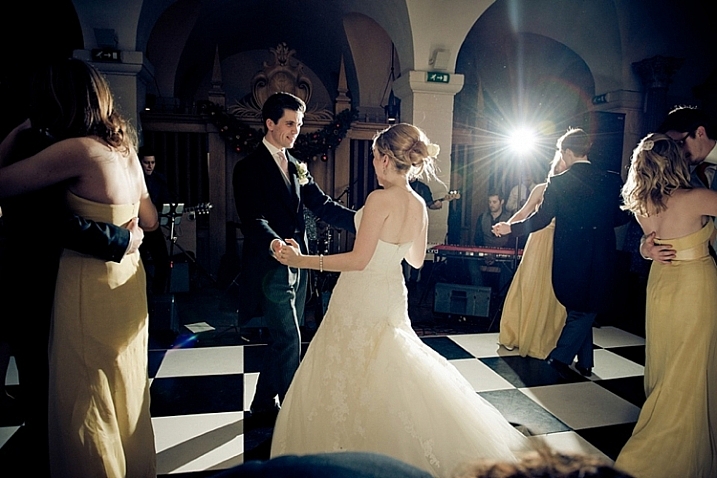
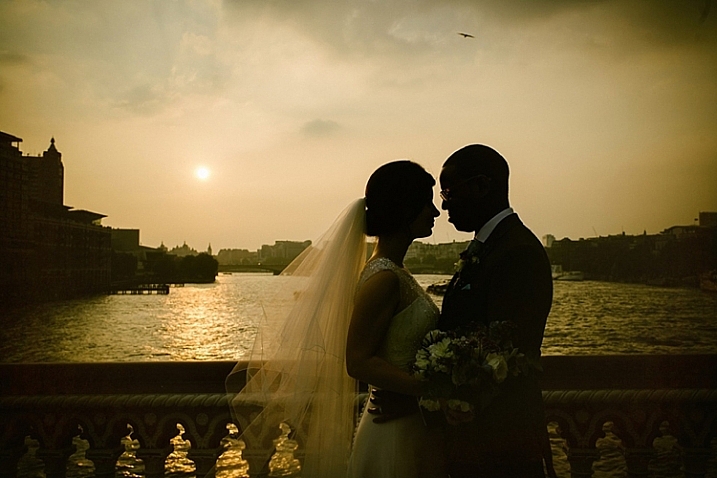
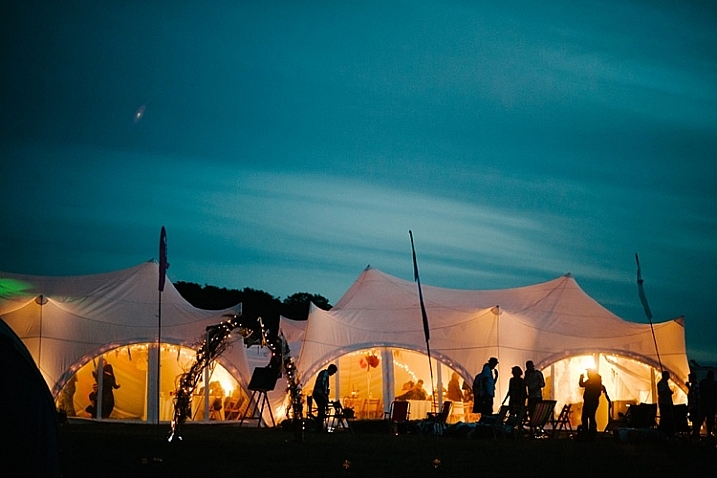
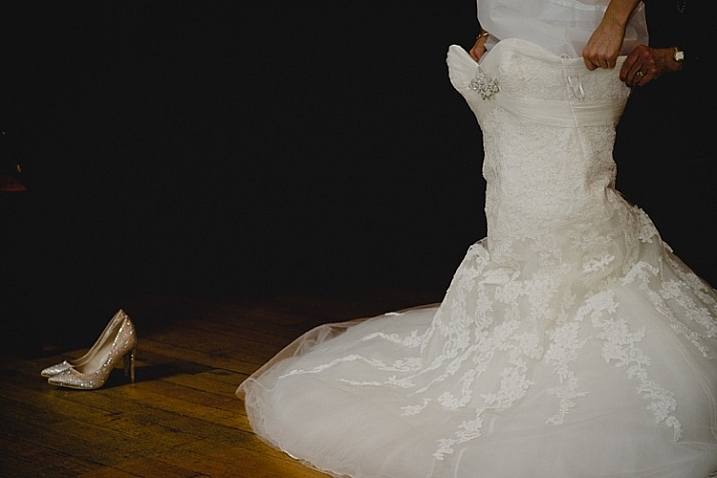
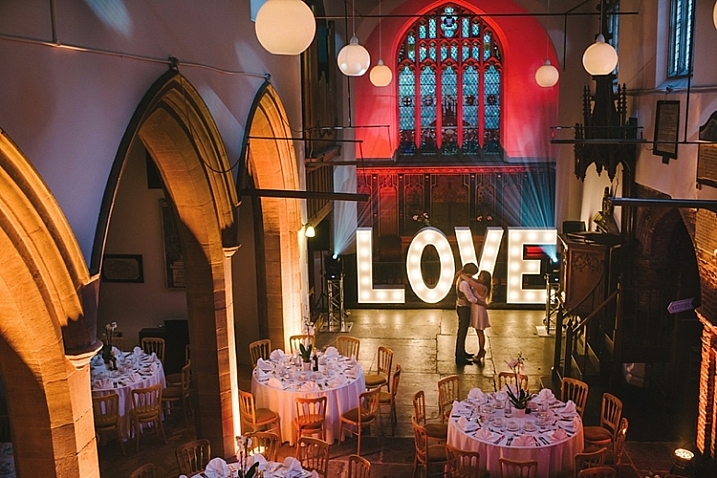
Many weddings and receptions are held indoors, and sometimes they’ve created a specific mood with low lights. This can be a challenge as a photographer, but it’s completely doable. I prefer not to use flash, because I very much prefer the look of no flash in this instance, so I’ll be sharing how I work in dim lighting without flash.

Remember how we are shooting wide open? Not only does this give us an artistic look, but it really helps when there isn’t much light. Sometimes I’ll photograph an entire reception with my aperture at f/1.4 to let in as much light as possible. You will also need to crank up your ISO; keep going higher until you can shoot with a shutter speed that can safely be handheld (for me, that’s about 1/80th, but you may have a steadier hand and be able to go even slower than that). You may have quite a bit of noise in your photos when your ISO is that high, but I like that look, especially when there’s a moody low-light ambience.

In a pinch, if the lighting is extremely low, try shooting in RAW, underexposing to allow your shutter speed to be as fast as you need it to be, and then bringing the exposure up in post-processing.

694

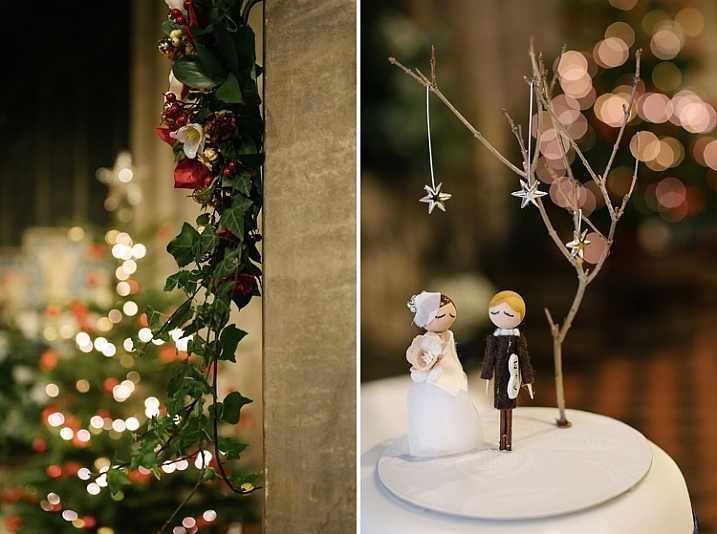
Photograph Everything

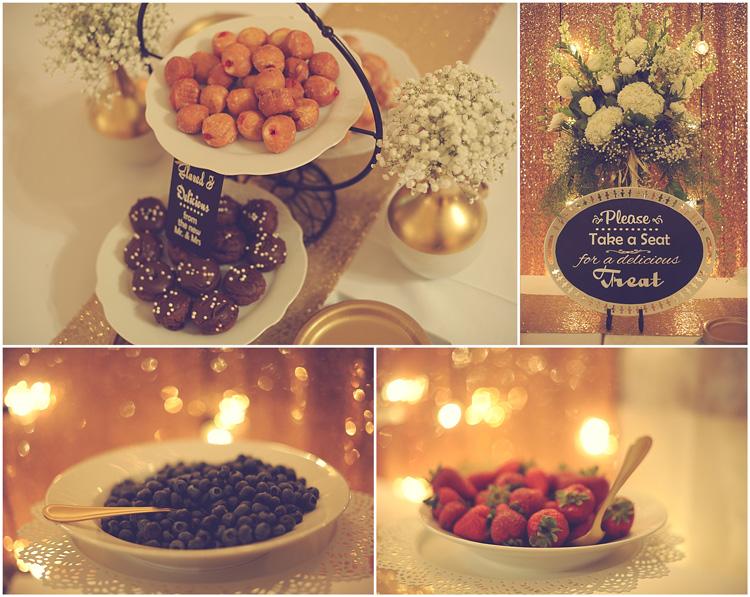
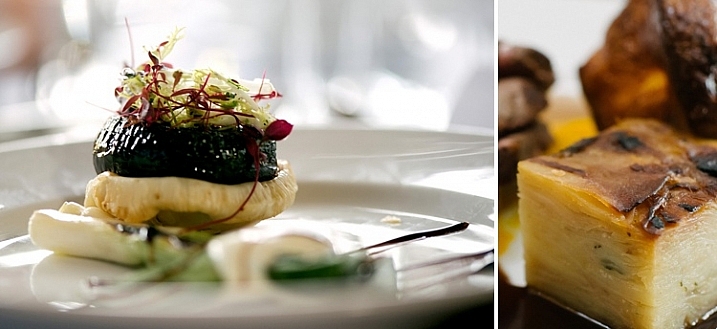
It’s guaranteed that there was a lot of thought, time, and money put into creating the bride and groom’s perfect wedding and reception. I want to capture every detail for them, because although all of the food and flowers will be gone a few days after the wedding, my photos will be there forever.

So I recommend that you photograph the food, the drinks, the centerpieces, the flowers, the favors, the guest book, and every single decor grouping around the room. It might seem silly to photograph a bowl of blueberries, but it will be so much fun for them to look back through the photos later, and remember all the little details of their wedding. If they want to make a book out of the photos, pretty detail photos can make the book have the same feel as the whole wedding did, and they really add to a collage. When in doubt, just take the photo. If their centerpieces are all the same, I’ll just photograph one of them, but if they are all different, I photograph most, or all of them.

695

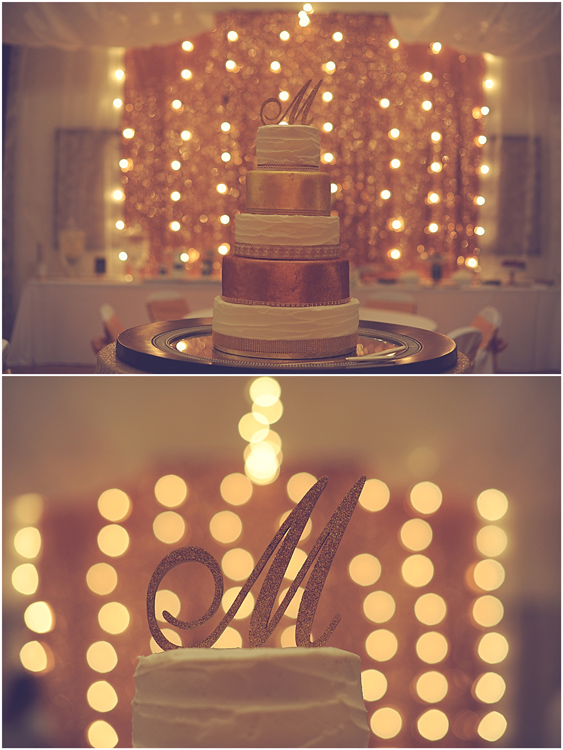
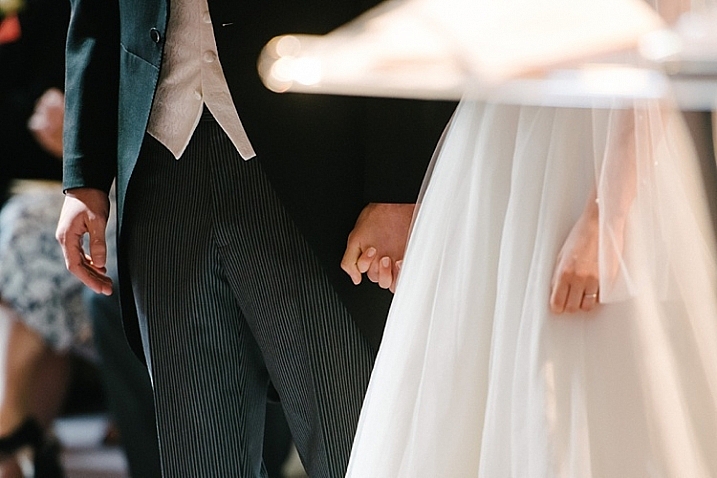
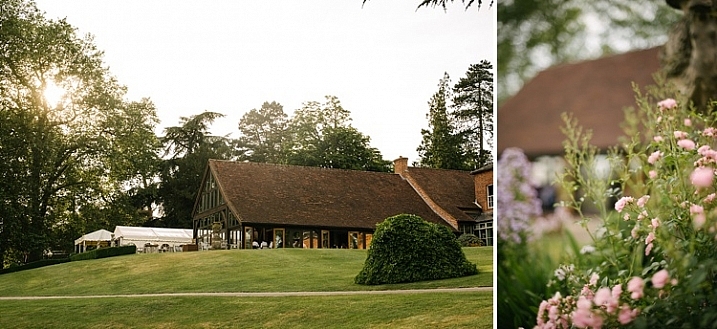
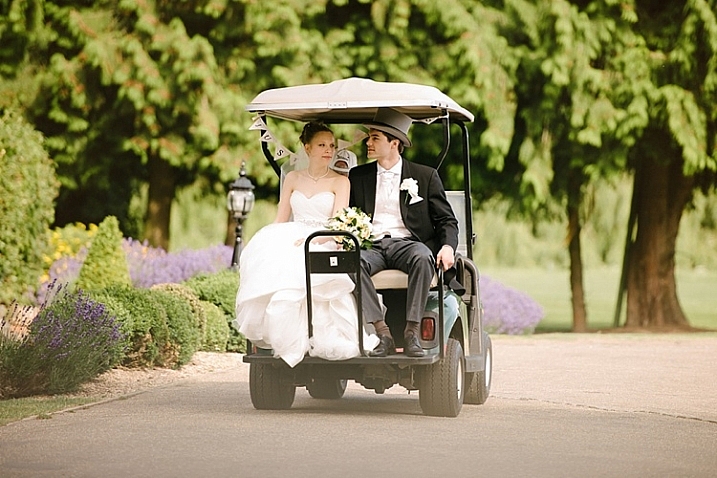
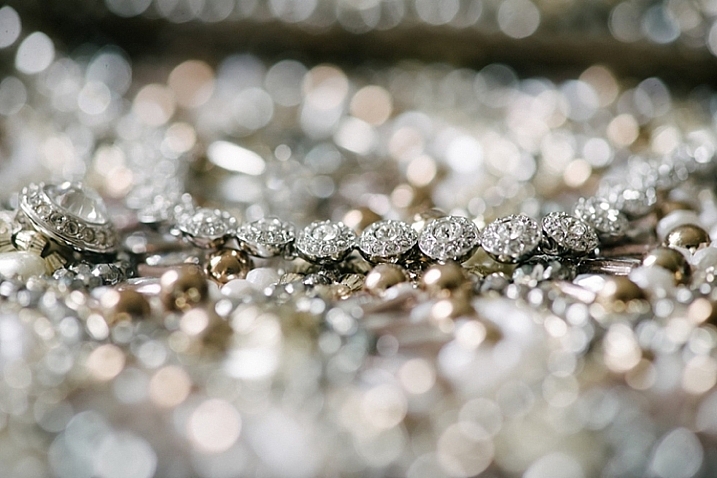
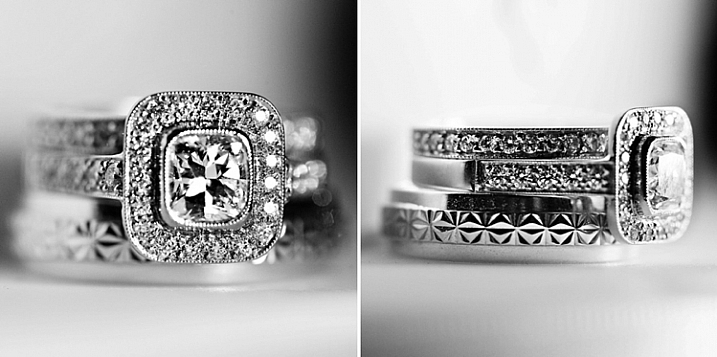
Get the Whole Picture AND the Close-ups

As you can see with the above photo, you can photograph the exact same thing, but get a whole different feel by stepping back, then getting in really close, focusing on one little detail. Get the surrounding setting, and then focus in on the parts that make it special.

If there’s a decor grouping in a corner, I’ll photograph the whole thing, and then pick parts of it to get in close. I’ll do the same thing with the centerpieces, floral arrangements, cake, food table, etc. This is a great way to really tell the story, and make your photos a lot more interesting.

Edit the Wedding Consistently

Make sure that all the photos from the same wedding or reception are edited consistently. My weddings each look different from each other, because every wedding is a different lighting and coloring situation, but each wedding is consistent with itself.

Batch editing can help with keeping things consistent, or using the same actions or presets on every photo can help too. Do not edit one photo with a “vintage” action, one photo with bright colors, and another matte. This will make them look unprofessional, and make it hard to put together a book or collage of their big day.

699

As you photograph any wedding or reception, remember that every little detail is important to the bride and the groom. They thought everything through from top to bottom, start to finish. Even if it’s not a picture perfect wedding, it still represents what they love, and everything is important to them. Help them remember their special day with photos that will last long after the last crumb of cake is eaten, and the final flower is withered.

googletag.cmd.push(function() {
tablet_slots.push( googletag.defineSlot( “/1005424/_dPSv4_tab-all-article-bottom_(300×250)”, [300, 250], “pb-ad-78623” ).addService( googletag.pubads() ) ); } );

googletag.cmd.push(function() {
mobile_slots.push( googletag.defineSlot( “/1005424/_dPSv4_mob-all-article-bottom_(300×250)”, [300, 250], “pb-ad-78158” ).addService( googletag.pubads() ) ); } );

The post Tips for Photographing Wedding Decor Details by Melinda Smith appeared first on Digital Photography School.


Digital Photography School

 
Comments Off on Tips for Photographing Wedding Decor Details

Posted in Photography


5 Ways Travel Can Inspire Your Wedding Photography

09 Aug

If you’ve shot a wedding you’ve likely had that moment where some obscure family tradition threw you off balance, you struggled to attach the right lens in time, and missed that once-in-a-lifetime shot. You can shoot a thousand weddings, but without knowing what to look for, you just might miss the biggest moments of the couple’s wedding day. But, if Continue Reading

The post 5 Ways Travel Can Inspire Your Wedding Photography appeared first on Photodoto.


Photodoto

 
Comments Off on 5 Ways Travel Can Inspire Your Wedding Photography

Posted in Photography


5 Ways Travel Can Inspire Your Wedding Photography

04 Aug

If you’ve shot a wedding you’ve likely had that moment where some obscure family tradition threw you off balance, you struggled to attach the right lens in time, and missed that once-in-a-lifetime shot. You can shoot a thousand weddings, but without knowing what to look for, you just might miss the biggest moments of the couple’s wedding day. But, if Continue Reading

The post 5 Ways Travel Can Inspire Your Wedding Photography appeared first on Photodoto.


Photodoto

 
Comments Off on 5 Ways Travel Can Inspire Your Wedding Photography

Posted in Photography


4 Ways to Get Inspiration from the Streets to do Better Wedding Photography

14 Jul

Be inspired by decisive moments on the streets to create better wedding photography.

If you are reading this article you must have some interest in street photography, or maybe you are starting as a professional wedding photographer, but most likely you are interested in both fields. This will give you some ideas on how to draw inspiration from street photography that you can use in your wedding work.

A street photographer can be anyone going out to wander the streets of a city with their camera, in order to make photographs that tell the human story of daily life as it occurs on the streets. A wedding photographer on the other hand, is one that is hired to capture memories, tell the love story, and the unfolding special day in a family’s life. The wedding photographer is a professional with enormous responsibility to find, and deliver the right frames, that will recreate trusted memories, decades after the big day is over.

A clear personal artistic voice is what separates one photographer from another. That voice is who you are, but that voice of yours needs constant care and development, in order for it to be a dominant factor in your photographic style as a professional photographer. Competition, changing trends, and the release of new gear also have their own voices that can influence your photography. Maintaining a balance between your inner world and the outer influences is key to success as a street-wedding photographer.

The following tips came from the world of street photography and are perfectly suited for the wedding photographer. If you master them on the street, you can go to a wedding with confidence, and sing your own song with your camera.

1 – Planning versus reacting

Wedding photography tips
What it takes to make great decisive moment photographs is, that first of all you need to see them before they occur. The longer before the better, it will give you the time to plan your composition, and work towards a frame that will be exciting and tell a story. In order to see things before the happen it takes looking around your subject, and constantly look at the surroundings of the bride, rather than focusing your attention only on her. This way you will be able to notice other elements and people that make your frame more interesting and communicative. Even as short as two or three seconds can be long enough for a street photographer to plan a good frame.

If you look around and plan your next shot you have a greater chance of catching the decisive moment, rather the one that follows.

2 – Create emotion

wedding photography tips motion
Freezing and blurring the movement of objects and people are two ways to communicate emotion in a photograph. It is a property that is unique to still photography, and is a big part of the photographic language. But often many photographers think that a wedding photograph has to be sharp and in focus, and the end result is often a precise documentation of reality, rather a poetic description of the moment. Give yourself the time it takes on the street to fully understand how the blurring and freezing of motion is being read and perceived by the viewers.

Master motion techniques then bring them into the weddings you photograph.

3 – Understand the way light can work for you

wedding photography tips light
Explore the way light falls on things, and the way it looks in your street photographs. When your are under the stress and responsibility of a wedding day the thinking side of your brain often takes over, and shuts down the creative side. You may see the wedding as a checklist of photographs to be taken, images of subjects, rather than decisive moments to tell a story.

One way to keep the creative brain in charge of things is to remind yourself constantly to work with the light, see light, change it if necessary, and let go of the subjects. If you are photographing the bride getting ready, she is the subject whether you think about it or not, now it’s time to think about light.

4 – Responsibility and integrity

wedding photography tips

Whether you work for yourself as a street photographer, or as a professional wedding shooter, you should be able to sleep well at night. You should never publish street photographs that might hurt someone’s feelings or cause them damage. However, that being said, you should also remember that the act of photographing people on the streets doesn’t harm them in any way, and have no fear to do your art.

There is another side to the coin of responsibility, that is integrity. when you are hired to photograph a wedding be sure to have shown only photographs that were made by you, that are a good representation of your style and voice. Be sure to let your clients know that they are going to get artistic street-wedding photographs if that is what you want to give them!

googletag.cmd.push(function() {
tablet_slots.push( googletag.defineSlot( “/1005424/_dPSv4_tab-all-article-bottom_(300×250)”, [300, 250], “pb-ad-78623” ).addService( googletag.pubads() ) ); } );

googletag.cmd.push(function() {
mobile_slots.push( googletag.defineSlot( “/1005424/_dPSv4_mob-all-article-bottom_(300×250)”, [300, 250], “pb-ad-78158” ).addService( googletag.pubads() ) ); } );

The post 4 Ways to Get Inspiration from the Streets to do Better Wedding Photography by Ouria Tadmor appeared first on Digital Photography School.


Digital Photography School

 
Comments Off on 4 Ways to Get Inspiration from the Streets to do Better Wedding Photography

Posted in Photography


4 Easy and Unique Ways to Light and Photograph Wedding Rings

10 Jun

Snapdeals Sale: If you’d like to learn more about how David and Patrick photograph weddings you may want to check out their 14 hour tutorial on all things wedding photography. It’s currently $ 100 off at SnapnDeals.

Wedding photographers are expected to capture every aspect of a wedding day and in many cases we only have a couple minutes to work. The wedding rings are an important detail that many photographers either overlook completely or over think. Over the years I’ve taught some practical ways to improve your wedding business and shooting skills. Let me show you four quick and unique ways to photograph the wedding rings.

4 Easy and Unique Ways to Lightand Photograph Wedding Rings

You’ll Need a Macro Lens

04.jpg

To capture wedding rings properly you’re going to need a macro lens. Without one, you simply won’t be able to zoom in and focus close enough. Yes, you could shoot wider and crop in but you will be losing tons of resolution. Luckily basic macro lenses are not that expensive.

If you’re shooting Nikon I would suggest the Nikon Micro 55mm f/2.8 or the Micro 60mm f/2.8. These lenses are very small and will easily fit in your bag. If you’re shooting Canon I would suggest the 100mm f/2.8L IS USM Macro. This one actually does have auto focus.

If you’re anything like me, you’re not going to use a macro lens very often, so you won’t want to spend a ton of money on extra features like vibration reduction (image stabilization). If you want to save even more money, buy the lens used. Amazon is actually great for used lenses. Simply click used at the bottom of any description on Amazon. You can get them cheap and they will hold their value for years to come.

Technique #1 Wedding Rings in Flowers

The absolute easiest shot to capture, and one that I’m sure to get at every single wedding I photograph, is one or more of the wedding rings placed inside, or on top of flowers. I don’t think I’ve been to a single wedding where flowers weren’t easily available. This shot is overdone and boring to a lot of photographers, but keep in mind that your clients will (hopefully) only get married once. So, to them, this shot is unique. It shows off the wedding rings, and it also captures the flowers, which they spent a lot of time and money picking out.

Sometimes I will use the bouquet of flowers and lay them down on the table, but I usually find it easier to work with flowers that are standing up. For this I will often use a vase of flowers, usually found in center of the tables at the reception.

For lighting this first shot I’m going to use a speedlight, any type will work. If you don’t have enough money to buy a name brand-name speedlight, then I would highly suggest checking out Yongnuo flashes, the base version is only 70 bucks. If you shoot Canon, you may want to spend a bit more, and buy the YN600EX-RT, that will communicate with radio signals for $ 129.

1 flowers direct flash

Holding the camera in one hand and the flash in the other, you can see that we can get a decent result (image above), but it would be much better if we could soften the light.

If you didn’t bring a modifier with you, you can use anything nearby that’s white. I’ve used a white plate, paper napkin, white t-shirt, and a tablecloth in the past. For this shot we will use a white paper towel. By bouncing the light off of, or through the paper towel, we can get much larger, softer light.

Having my assistant move the flash with each picture I take, ensures that we will get a lot of variety, without wasting time looking at each shot individually. Remember, this is all taking place during a wedding, so I really don’t want to spend more than a minute or two on these shots. After taking 10-20 shots in rapid succession, I can quickly review them and confirm that I have a keeper.

2 moving soft light

I consider this to be my safety shot because I can get it in under two minutes at every wedding I do, and the client always loves it. After I knock it out, if I have time, I’ll try some more complicated and creative shots.

Adding Multiple Lights and Water

For this next shot we are going to complicate things a bit in terms of gear, but we are also going to be able to do it without the help of an assistant.

First, find an interesting surface to place the rings. It could be a tablecloth, wood grain, granite, or anything you find around the reception site. We took our picture on a black, glass-top table.

First I setup the camera up on a tripod so that I could keep my hands free. From behind the ring, I added the first speedlight, to create a rim light on the back of the subject. To add a bit of interest I used a purple gel, and to confine the light, the Magmod grid.

3 Final Back Light Only

Now it’s time to light the rings from the front. Instead of using a paper towel, I decided to use the Fstoppers FlashDisc. It’s basically a collapsible softbox that can used with just one hand. When it’s collapsed down, it’s small enough to fit in your pocket, which makes it extremely convenient at weddings.

Read: Review: Flash Disc Lighting Modifier by Fstoppers for more information on this product.

4 Final backlight and flashdisc

To add one more interesting aspect to this shot, I used a miniature spray bottle to add mist behind the rings. The purple light coming from the back, lights up the water, and takes this shot to the next level.

5 Final best 1 retouched

Building Your Own Set and Using Continuous Lighting

If you like to be prepared for any situation, you’re going to want to travel with a few props that you know you can work with, if the items around a wedding aren’t cutting it as a background. I travel with a pack of metallic foils that can be used to place the rings on. I also brings along cheap reflective jewelry that I can use to create bokeh effects.

Instead of using a strobe for this shot, a cheap LED panel was used as a continuous light source. These panels can be extremely handy, but keep in mind that you will probably want to use a tripod if you are going to use them to light the rings so that you can keep everything sharp (the shutter speed may be slow). If you want extremely blurry bokeh, you’re also going to want to shoot at a wider aperture than you normally might.

6 Final Image 2

Using a Screen to Create Your Own Background

For this final shot, we are going to use a computer screen to create our own background. If you don’t travel with a laptop, you could use an iPad, or maybe even a smartphone screen instead.

I would suggest practicing this shot at home before you ever get to a wedding. You don’t want to be fiddling around with your setup, or searching for different backgrounds while the wedding is going on. If you are prepared though, this shot can be extremely easy to pull off.

First I placed the ring on bit of putty to get it to stand up. I then set my computer screen to its brightest setting, and exposed for the screen itself. At this point the shot is a silhouette of the ring.

7 Screen backlit

To light the ring itself you could use your smartphone’s flashlight, or you could use any cheap LED flashlight. If your flashlight doesn’t dim, you can simply move it closer or farther away from the ring to get a correct balance of light, with the screen in the background.

Because your background will be so blurry, it really doesn’t matter what is on the screen in the background, you are basically looking for certain colors, and large shapes that will create an interesting mood.

8 screen shot 1

9 screen shot 2

10 screen shot 3

11 screen shot 4

In the post-production you can either zoom-in past the putty (crop it out) or you can Photoshop the putty out and have a floating ring effect.

12 Final Edit 4

You can also watch us go through these techniques in the following video:

Snapdeals Sale: If you’d like to learn more about how David and Patrick photograph weddings you may want to check out their 14 hour tutorial on all things wedding photography. It’s currently $ 100 off at SnapnDeals.

googletag.cmd.push(function() {
tablet_slots.push( googletag.defineSlot( “/1005424/_dPSv4_tab-all-article-bottom_(300×250)”, [300, 250], “pb-ad-78623” ).addService( googletag.pubads() ) ); } );

googletag.cmd.push(function() {
mobile_slots.push( googletag.defineSlot( “/1005424/_dPSv4_mob-all-article-bottom_(300×250)”, [300, 250], “pb-ad-78158” ).addService( googletag.pubads() ) ); } );

The post 4 Easy and Unique Ways to Light and Photograph Wedding Rings by Lee Morris appeared first on Digital Photography School.


Digital Photography School

 
Comments Off on 4 Easy and Unique Ways to Light and Photograph Wedding Rings

Posted in Photography


Wedding Photography – Just How Specialized is it?

02 May

how-specialized-is-wedding-photography

Specializing in photography is all the rage right now. Being a specialist is synonymous to being an expert. Being an expert means you are more trustworthy, what you say and what you do carries more weight, and people can have deeper confidence in your knowledge.
A specialist focuses their ability on one area of photography, and concentrates growing their knowledge to a very detailed degree within that area. The words special and specific come from this word, and further drive home its meaning.

To specialize or not to specialize

wedding-photography-how-specialized-is-it

To specialize or not to specialize – that is the question. For many photographers wanting to stand out and be different, to be known and able to demand higher prices, this is a question they are facing. There are many genres of photography you can choose to specialize in such as: landscape, black and white, cityscape, macro photography, musicians and bands, portraits, people, events, weddings, baby, newborn, children, families, and fine art, just to name but a few. These areas vary in their specificity so that “people photography” can be as specific as it can be general – depending on how specialized you want to be. Nowadays, specialisms are being pushed into more defined niches such as…

Examples of niches

  • Weddings – outdoors only, city weddings, big weddings, intimate weddings, six hours wedding coverage only, add on a variety of wedding styles such as vintage, modern, contemporary, classic, chic, etc.
  • Family – lifestyle only, portraits only, everyday candid photography, black and white only, active families only, adventures only, sunset and golden hour only, etc.
  • Children – 0-3 years only, 4-11 years only, teens only, newborn, studio, etc.
  • Street photography – black and white only, daytime only, night time only, etc.
  • Portraits – natural light only, studio light only, on location only, etc.

wedding-photography-how-specialized-is-it

Just how much of a specialism is wedding photography?

Let’s deconstruct a wedding day to its main components in terms of the subject to be photographed, the skills that may be required, as well as the suggested lenses to use.

  • Subject: scenery and locations
  • Skills required: landscape
  • Lenses needed: wide angle zoom lenses, and fast primes; 16mm, 24mm, and 35mm

wedding-photography-how-specialized-is-it

  • Subject: bride and/or groom getting ready
  • Skills needed: candid, reportage, portraits, macro for the accessories, people skills!
  • Lenses: 24-70mm, 35mm, a good macro lens

wedding-photography-how-specialized-is-it

  • Subject: the wedding ceremony
  • Skills needed: documentary photography, creative, capturing emotions, special moments
  • Lenses needed: 70-200mm, 24-70mm, fast primes (working often in low light conditions)

wedding-photography-how-specialized-is-it

  • Subject: details of the wedding day
  • Skills needed: creativity, an eye for composition and colour, etc
  • Lenses needed: a macro lens, primes with large apertures

wedding-photography-how-specialized-is-it

  • Subject: group portraits
  • Skills required: suffice to say you really need to have a solid understanding of the exposure triangle and depth of field
  • Lenses and gear needed: wide and zooms (you may also need speedlights and other lighting gear)

wedding-photography-how-specialized-is-it

  • Subject: portraits of the bride and groom
  • Skills needed: portrait photography experience, creativity, wide scenes, night scenes, people skills
  • Lenses: 50mm, 85mm, 105mm, 70-200mm, wider primes and zooms

wedding-photography-how-specialized-is-it

  • Subject: reception and leaving
  • Skills needed: lighting and use of flash, cake and food photography, working in low light conditions
  • Lenses: 24-70mm, 70-200mm, macro, large aperture lenses like a 50mm f/1.8

wedding-specialist_0007

To be a good wedding photographer, at the very least, you need to know how to shoot each component mentioned above, to a degree better than the average person with a shiny new camera or DSLR can. You are being paid to do the job, and that’s the bare minimum expected of you. To be a great wedding photographer, you need to be confident in your skills to deliver amazing photos in all these areas.

wedding-photography-how-specialized-is-it

As a wedding photographer just how much of a specialist are you?

How many wedding photographers wake up one day, pick up a camera, decide to be a wedding photographer, and shoot an entire wedding knowing only one single thing? I would hazard a guess that many successful wedding photographers have spent hours behind the scenes, learning the ins and outs of various types of photography and the appropriate lens to use for each. Or they have done sessions in many, or all of the other areas of photography listed above, to get to a place where they can photograph a wedding and all the elements that come with it, and reach a very good, if not first-class standard.

wedding-photography-how-specialized-is-it

Wedding photography is a world of its own, and cannot be compared to something like purely wildlife photography or macro photography, and other highly specialized types of photography. Within the wedding photography world are various challenges, and you have to be a special kind of photographer to meet all those demands, while keeping cool and being on the ball throughout the entire day. Looking at this industry holistically, yes it is a specialism in itself given the amount of variety and skill required.

wedding-photography-how-specialized-is-it

But the deeper question is, do you think wedding photographers are specialists, or do they have to be a bit of everything to be considered good, high standard, or even an exceptional wedding photographer? Can someone be a specialist in all these areas and apply these specialisms into one global category such as wedding photography? Does knowing a bit of everything to fulfill the demands of wedding photography make a wedding photographer a jack of all trades, or a wedding specialist?

wedding-photography-how-specialized-is-it

wedding-photography-how-specialized-is-it

It would be interesting to know what you think. Share your thoughts here and let’s start a discussion!

googletag.cmd.push(function() {
tablet_slots.push( googletag.defineSlot( “/1005424/_dPSv4_tab-all-article-bottom_(300×250)”, [300, 250], “pb-ad-78623” ).addService( googletag.pubads() ) ); } );

googletag.cmd.push(function() {
mobile_slots.push( googletag.defineSlot( “/1005424/_dPSv4_mob-all-article-bottom_(300×250)”, [300, 250], “pb-ad-78158” ).addService( googletag.pubads() ) ); } );

The post Wedding Photography – Just How Specialized is it? by Lily Sawyer appeared first on Digital Photography School.


Digital Photography School

 
Comments Off on Wedding Photography – Just How Specialized is it?

Posted in Photography


On assignment: the Leica Q at a Portland wedding

11 Mar

Introduction

The fixed 28mm focal length you get with the Leica Q can be versatile and creative, but it can also allow for basic images like this to help set the scene. Photo by Carey Rose, processed to taste from Raw. F8 | 1/125 | ISO 320

Between the timber industry and a reputation for organized crime and racketeering, early Portland, OR is a town that, like a number of other Pacific Northwest settlements, started off a little rough. But today, Portland has grown into and is known for being one of the most progressive cities in the country. This rise from rags to prominence is at least vaguely reminiscent of the rise of mirrorless technology in cameras, though the latter has happened much more rapidly. What were once laggy, poor-focusing and incredibly power-hungry devices have evolved into technological powerhouses, playing host to some of the latest and greatest innovations in camera technology. The Leica Q is, unarguably, one such mirrorless camera.

Portland has also been nicknamed ‘Bridgetown,’ for its many crisscrossing bridges slicing through the urban landscape. Rather appropriately, then, the Leica Q is a bridge of sorts for me. It is the first mirrorless camera I’ve brought with me to shoot a wedding alongside my usual full-frame DSLRs, and the first mirrorless camera I’ve used that performs very nearly at a level I expect from my well-worn and bulky workhorses.

Keep in mind: the Leica Q was used in conjunction with two additional cameras for this wedding, but all images in this post are from the Q. The 28mm focal length it offers can be versatile, but definitely has a ‘look’ and it can’t replace a good normal or telephoto lens for some variety in the full final take.

Fitting in the kit

I will normally shoot an entire wedding on two full-frame DSLRs, and trade between 35mm, 50mm and 85mm lenses (with an 80-200mm F2.8 coming out for the ceremony only). Adding the Leica Q to the mix added a little extra bulk, sure, as I was now carrying three cameras instead of two. But it meant almost no lens swapping, as I could have the 35mm focal length covered more or less by the Q’s excellent 28mm F1.7 Summilux lens, and keep the 50mm and 85mm glued to the other cameras. The result was that I probably looked a little ridiculous to most of the guests, but having three F1.7-and-wider lenses at my disposal allowed me to make the most of any situation I found myself in.

The Q managed to nail focus on the subject’s head despite dim backlighting and fairly low contrast. Why can’t all CDAF systems work this well? Photo by Carey Rose, processed to taste from Raw. F1.7 | 1/125 | ISO 2500

I set up the Q to shoot in aperture priority with auto ISO, and a minimum shutter speed varying from 1/60 to 1/250 depending on the situation. I kept it in Single-AF and recorded RAW+JPEG for the whole shebang.

What worked, what didn’t

The Q’s autofocus system is not only accurate, but it is close to phase-detect fast (even though it’s a contrast-detect system). I kept it in Single-AF for the day because it just worked so well. The four-way controller on the rear made it a breeze to quickly change the focus point position, and with the 28mm focal length, focus-and-recompose shooting didn’t make too much of a difference in critical sharpness. The few times I wanted to use Face Detection (such as handing the camera off to somebody else to take a shot), I found it was a bit of a pain to dive into the menus to change it. This could be mitigated if you could assign something autofocus-related to either of the customizable function buttons on the rear, but you can’t. At least the menus are fairly well-sorted.

Though its DNG files may have less post-processing latitude than other camera systems, the Q can hold its own in low light as long as you pay careful attention to your exposure. F1.7 | 1/125 | ISO 5000

Speaking of buttons, the buttons, controls and dials are all easy to feel with your eye to the finder, and with enough positive action that there’s never any question of whether or not you hit something. So that’s a good start. However, for a camera focused so heavily on stills, it would be nice to at least have the option to reassign the ‘Movie Record’ button to something else. Also, when you are shooting in Auto-ISO, you can twiddle the shutter speed dial to override the minimum shutter speed you’ve selected, but then the rear control dial switches from controlling exposure compensation to controlling the shutter speed in 1/3 stops. You can mitigate this by assigning the ‘FN’ button on the back to ‘exposure compensation,’ but it would be nice if the control dial operation was more consistent or customizable. Also, the LCD and EVF will give you an accurate preview if you skew to under-exposure, but in low light, dialing in some intentional over-exposure would not adjust the preview at all, which was more a minor irritation than an impactful problem.

Skin tones (and color in general) are great on the Q in Raw mode, and the 28mm lens is well corrected to avoid tons of distortion at the edges. Even if it wasn’t, these two gents would be too distracted by their matching suit jackets to notice wide angle distortion anyway. Photo by Carey Rose, processed to taste in Raw. F1.7 | 1/125 | ISO 2000

If you prefer not to use buttons, you can use the touchscreen for a good number of functions, including swiping and zooming in playback, and touch-to-focus and shoot options. However, touch-to-focus only focuses once, where you touched. Half-pressing the shutter does not refocus, and you can’t now use the four-way controller to move the point around if you then want to shoot from the EVF. You’ll have to go back into the menus and enable another focus mode. And if you just don’t want to mess with the touchscreen (I had more than a few accidental swipes trying to enter playback mode to show images to people), there is no menu option to completely disable it.

The lens may be fairly wide-angle, but the macro functionality allows you to get up close and personal with some detail shots and still get rid of most of a distracting background. Photo by Carey Rose, processed to taste from Raw. F2.8 | 1/500 | ISO 640

Now, it may sound like I’m being hard on the camera, but in the real world, these were fairly small problems (and all could conceivably be fixed with a firmware update – hint hint, Leica). In fact, there was only one real issue that seriously plagued my experience with the Q. Although the Q’s battery life is great for a mirrorless camera, it’s not so good that I felt like I could just leave the camera on constantly. But that wasn’t the real problem because the start-up time is so fast. No, the problem was that, after shooting a burst and moving on, I would instinctively twiddle the power dial to ‘Off.’ The camera screen and live view stays on until the buffer is cleared, and only then will the camera fully shut off.

Would AF tracking have worked better than Single-AF for this shot? Maybe, but I didn’t want to dig into the menus to change it. Photo by Carey Rose, processed and cropped to taste from Raw. F2 | 1/125 | ISO 2500

However, if I wanted to resume taking photos, I would turn the switch back on, but the camera would be locked and ignore any and all inputs until it had finished the previous burst to the card. Then it would turn off, then turn itself back on. This process, despite using the fastest SD card money can buy, would take as long as 20-30 seconds.

None of this happens if you leave the camera on after you take a burst – you can resume taking photos or explore the menu system as the camera does its writing (but you can’t immediately enter playback mode when the buffer fills, as you can on many DSLRs). In the end, it’s a strange behavior that can be avoided, but was still upsetting since I’d developed this ‘switch off between shots’ habit based on the battery life of other mirrorless cameras.

The results

Despite all the little issues I discovered above, the Leica Q is a fantastic camera. The only reason I experienced all those little issues to begin with is that I gave this camera no leeway. I used it just like an established full-frame DSLR system, and expected it to perform like one. For the most part, it did. Hell, if Leica made another Q with a fixed 50mm or 85mm lens, I’d have a hard time not selling off most of my DSLR gear and switching over. If only my DSLRs were worth their weight in gold. Or maybe little red dots.

It may not be an ‘action camera’ per se, but the burst modes on the Q give it some caught-moment chops. Photo by Carey Rose, processed and cropped to taste from Raw. F2.8 | 1/500 | ISO 500

There are numerous reports to the contrary, but I found the camera quite comfortable to hold (even without the optional grip). My hands didn’t get sweaty, and the camera didn’t get too slippery. The lens is stunningly sharp, and the out-of-focus renderings are gorgeous. The sensor may not be up to Sony standards of dynamic range, but noise performance is great if you don’t mind a little grain (I don’t) and you nail your exposure. I managed almost 900 shots on the equivalent of just over one battery (I did one battery swap after a bar disappeared, out of old habits). The camera is built incredibly well, and is dense but light enough that I didn’t have a neck cramp after hours of shooting. It may not be weather-sealed, but it feels like it can take a beating.

I should also call your attention to the fact that every single image in this write-up is processed from Raw. Of course, I always shoot Raw for paying gigs, but out of curiosity, I shot Raw + JPEG (and there’s no option to shoot Raw only anyway) on the Q. I found the JPEG engine, particularly the colors and skin tones that resulted from it, to be pretty unpleasant (especially next to an adjusted Raw file). So if you’re a JPEG shooter, be prepared to start a new Raw habit. Also, using the ’embedded’ DNG profile versus the Adobe Standard profile in Adobe Camera Raw does something weird to your white balance settings – I had to boost mine about 1500-kelvin over normal when using the embedded profile.

Out-of-camera JPEG Processed to taste from Adobe Camera Raw

For the out-of-camera JPEG image above, the Q was set to sRGB color space, with contrast, saturation and sharpness all set to standard. That’s the extent of JPEG adjustment parameters in-camera. For the processed image, I used Adobe Camera Raw with the Adobe Standard color profile, making fairly controlled adjustments to the white balance, highlights, shadows, whites, blacks, clarity and vibrance. The exposure was F1.7, 1/250, ISO 320.

As far as performance, with the exception of the strange buffer / power switch issue I highlighted above, I never found myself waiting for the camera. Whether I’m shooting weddings, events, street or environmental portraits, that responsiveness in and of itself is an absolutely paramount requirement. And if you consider the cost of a pro-level (not enthusiast) full-frame DSLR and accompanying fast-wide lens of a similar caliber to this 28mm F1.7 Summilux, the Q isn’t too terrible a value proposition, either.

Party on: if you like the focal length, the Q can handle just about anything you throw at it. Except maybe a bucket of water, or a beer. Photo by Carey Rose, processed and cropped to taste from Raw. F1.7 | 1/250 | ISO 400

In short, the Q is the fixed-lens digital camera I’ve been waiting for. If you work with this focal length and can look past some of its smaller issues, you owe it to yourself to give the Q a try. 

Articles: Digital Photography Review (dpreview.com)

 
Comments Off on On assignment: the Leica Q at a Portland wedding

Posted in Uncategorized


5 Must-Have Lenses for Wedding Photographers and Why

16 Feb

Have you ever wondered which lenses are in a wedding photographer’s bag? There is a plethora of choice when it comes to lenses, and lens companies come up with new products all the time. Many photographers are attracted to these bright and shiny things and end up with a mammoth collection of lenses, many of which hardly see the light of day. If you have to pare back to the absolute necessities, and are allowed five lenses in your wedding photography bag, these are the ones that I would recommend. I have been a professional wedding photographer for seven years now, and deciding on these five took some time, and serious consideration over the course of my career.

They are:

  1. The 70-200mm f/2.8
  2. The 24-70mm f/2.8
  3. The 85mm prime
  4. The 35mm prime
  5. A macro lens (105mm or 60mm for Nikon, 100mm or 60mm for Canon)

Let’s look at each individually to see why.

5-must-have-lenses-wedding-photographer_0001

#1 – 70-200mm f/2.8

It’s big, bulky and heavy but I wouldn’t do a wedding without this lens. The 70-200 f/2.8 is my workhorse when it comes to weddings. It is a versatile lens that gives you amazing sharpness at all focal lengths. The bokeh is beautiful, especially at 200mm, even with a stopped down aperture due to the compression caused by the long focal length.

This lens makes a wedding photographer invisible. You don’t have to be so close to people’s faces; you can capture candid expressions and serendipitous moments from a fair distance away. This lens is especially useful during the ceremony, where you would rather be far away and out of sight, or hidden behind a wall or door. It allows you to capture the exchange of rings, vows, and kiss discreetly.

5-must-have-lenses-wedding-photographer

If you require a longer zoom while being at the same fair distance, you can choose to photograph in DX mode (if you shoot full frame and your camera offers this option) on your camera, and the lens will give you 1.5x distance more, making 200mm into a neat 300mm zoom. If you do this, make sure that you have enough pixels for the crop, in case you feel the need to straighten or change your composition in post-processing.

For example, of you are shooting with a 12MP camera such as the old Nikon D700 on FX mode, when you convert to DX mode the camera becomes a 5MP camera, which is below the minimum amount of pixels you can have – 6MP – to be able to enlarge prints to a decent size. If you have to crop in post-processing, this will not give you enough pixels to be able to safely do so without compromising print output sizes.

5-must-have-lenses-wedding-photographer

However, if you are photographing with a Nikon D810 in DX mode, your image goes from 36MP to 15.3MP but still leaves you enough wiggle room for minimal, and sensible cropping if necessary. If you use this functionality, don’t forget that when photographing in DX mode on a full frame camera, or when using a DX lens, the camera only uses the center of the sensor. So if you forget to compose accordingly in camera, you will get a nasty surprise after you have taken the image: cut off heads and limbs, and badly cropped compositions are some examples. When using DX lenses, the rest of the unused sensor area is blacked out but when using FX lenses in DX mode, this is not the default and you would still see the entire full-frame sensor if you don’t change your settings.

5-must-have-lenses-wedding-photographer

The 70-200mm is an excellent focal length for flattering portraits. When photographing at 200mm, I typically stop down to around f/4 or f/5.6 at a shutter speed of 1/200-1/400th, and the sharpness of the image is stunning against a creamy bokeh background. This lens also has a built-in lens collar you can use to steady it when hand holding, or attaching it to a tripod stand. Without a tripod, you can steady yourself as much as possible by leaning against something immovable like a wall, or on a stable surface such as a table, or keeping your arms pinned against something sturdy to reduce camera shake, especially when using this lens for portrait work at the longer end of the focal length.

5-must-have-lenses-wedding-photographer

5-must-have-lenses-wedding-photographer_0033

You can now get a f/4 version of this zoom lens (for Nikon, Canon has always had one) at a vastly cheaper price compared to the f/2.8. I personally do not have the f/4 version but if you’re on a budget, and you don’t mind not having the option to photograph at a wider aperture, then I see no reason why you should not get the f/4. It is lighter and smaller, understandably so because it has less glass elements compared to its more expensive counterpart, and may not only suit the budget better, but also lessens the bulk you have to carry at a wedding.

5-must-have-lenses-wedding-photographer

5-must-have-lenses-wedding-photographer

#2 – 24-70mm f/2.8

The 24-70mm f/2.8 offers the focal length versatility needed when you are photographing on the go, which is what wedding photographers need for most of the day. You can use this lens to capture wider location scenes, candid photos of people, guests arriving, people milling and chatting while waiting for the ceremony to start or during the wedding breakfast, some decorations and details, the first dance, and the leaving photos, to cite just a few.

5-must-have-lenses-wedding-photographer

5-must-have-lenses-wedding-photographer

I use this lens for photos that do not require close portrait work, although it can definitely be used as one. The 50-70mm range will yield pleasing results, like the image directly below. However, my preference is to use prime lenses for portraits. The 24-70mm lens sees a whole lot of action during the wedding day, and is definitely my other workhorse for capturing people, wider shots, and behind-the-scenes.

5-must-have-lenses-wedding-photographer

5-must-have-lenses-wedding-photographer

Many photographers include a much wider lens for location photographs such as the 14-24mm f/2.8. While I would love to add this lens to my arsenal, this is not an absolute necessity, in my opinion. With the 24-70mm, you can photograph location scenes wide enough – but should you need to capture a wider scene, you could photograph a few images and stitch them together in Photoshop as a panorama. This is easy enough to do by making sure the exposure setting for the series of shots are the same, and you stand on a fixed point, inching your way across the panorama. You can do the same for a photograph of all the guests too. These would be the only times I would need an ultra wide angle lens for a wedding, hence I cannot just yet justify adding it to the list of must-haves.

5-must-have-lenses-wedding-photographer

5-must-have-lenses-wedding-photographer

#3 – 85mm prime

This is my all-time favorite lens, and the one I use for portraits of the bride and groom, bridesmaids and groomsmen, individual guests or small groups, and the list goes on. As a fixed lens, this requires more work on your part – you have to zoom in and out with your feet. But, the extra effort is worth it – the portraits are cleaner, the backgrounds are creamier, and it is a fabulous lens in very low light conditions.

5-must-have-lenses-wedding-photographer

The best thing I love about this lens is that it is tack sharp from the sweet spot on. Accurate, light sensitive, great results on skin, this is my go-to lens, and it never leaves my bag. Being a prime lens, the 85mm is fast, small, and extremely reliable.

5-must-have-lenses-wedding-photographer

I have photographed an entire wedding of a relative (as a guest) using only this lens. I was asked on the day if I could cover the wedding and I agreed, with only the D700 and 85mm combination in hand, which I carry with me most times for personal snapshots, and photos of my family. The photos from that wedding are published in one of the UK’s top wedding blogs: proof that you can photograph a wedding with what you have, given that you know your gear well enough.

5-must-have-lenses-wedding-photographer

The 85mm for Nikon comes in either an f/1.8 ($ 479 USD) or f/1.4 version ($ 1595 USD), with a huge price difference between the two, due to the glass elements and optics (Canon also has an f/1.2 available, it’s $ 1999 USD). However, many photographers are divided between which lens is better. I have the f/1.8, and it has always performed marvellously for me. The f/1.4 has been on my lens list forever, and while I could buy it as the 85mm is on my necessity list, I have held off given that I have never felt the need to upgrade.

5-must-have-lenses-wedding-photographer

#4 – 35mm

One of my early serious lens investments was this amazing 35mm f/1.4. If there is a lens I can always rely on, it’s this one. This is an ultra versatile lens that you can use to photograph the bride getting ready – the time when wedding photographers are usually under pressure to capture everything from location, the myriad of accessories, details, candid shots, the dress, the natural interactions between the bride and her loved ones, and group portraits – in a very short amount of time and more often than not, in small spaces like cramped hotel rooms. It is also perfect for photographing wider scenes, and you get images without the exaggerated distortions that you get with the 24mm.

5-must-have-lenses-wedding-photographer

5-must-have-lenses-wedding-photographer

This lens is super fast and sharp, and has yet to fail me. With this lens you can get close, with 0.3m (11.7″) minimum focusing distance – very handy when you are in in a crowded space. As if that weren’t enough, this lens opens up to f/1.4 which can let you photograph in extremely low light, especially if you are so pressed for time and space to use off-camera flashes. Even though the 35mm focal length is already covered by the 24-70mm, the difference between f/1.4 and f/2.8, in its ability to allow more light in (two more stops of 4x the light), cannot be underestimated.

5-must-have-lenses-wedding-photographer

5-must-have-lenses-wedding-photographer

The 35mm also comes in f/1.8, a DX lens you can purchase inexpensively (under $ 200). You may wonder why the astronomical difference in price compared to the professional f/1.4 counterpart. First of all, you cannot use the DX lens on a full frame camera without losing pixels, and without the 35mm focal lens becoming a 52.5mm, which can be very limiting in tight spaces. Secondly, the 35mm view is close enough to what the eye naturally sees which people say is around 40mm in loose terms, and I like that view. As a wedding photographer, it allows you to capture images that gives the viewer the impression that they could have been there, seeing the same view themselves. This is an important element in any wedding photography, specifically that with a documentary style, in my opinion.

5-must-have-lenses-wedding-photographer

If you ever get to physically hold each lens in your hands at the same time, the enormous price difference won’t even be in question. The f/1.4 is considerably heavier, and much bigger than the pocket-sized f/1.8. But, don’t be fooled by appearances. The f/1.8 is also an outstanding lens with exceptional performance in its own right, and for crop sensor cameras may be more than sufficient, and is most definitely easy on the budget.
5-must-have-lenses-wedding-photographer

5-must-have-lenses-wedding-photographer

If you already have the 50mm and your budget is constrained, then the 50mm could replace 35mm on this list. It is also an incredible lens. Although the 50mm doesn’t give you as much room to maneuver in smaller spaces as the 35mm, the bokeh on the 50mm is stunning and it’s impressively sharp too, which is one of the top benefits of prime lenses. Like the 35mm, the 50mm is also available in f/1.8, f/1.4, and for Canon f/1.2.  The price difference is meagre between the f/1.8 and the f/1.4, then it jumps up to a whopping figure with the f/1.2.

5-must-have-lenses-wedding-photographer

5-must-have-lenses-wedding-photographer

#5 – 105mm (100mm) or 60mm macro lens

A macro lens is a must for you as wedding photographer, if you want to capture amazing images of rings in close detail. You can also use this lens for photographing jewellery and other accessories when the bride is getting ready. If the bride’s dress is adorned with jewels, the macro lens would also be ideal to photograph the details. In addition, macro lenses are also great to use for portraits if you do not require an aperture wider than f/2.8. This makes it a versatile lens to carry around, especially the 60mm which looks and feels minuscule compared to the 105mm (100mm for Canon). Both lenses can also stop down to f/32, which is handy, especially when photographing location landscapes in extremely bright sunlight.

5-must-have-lenses-wedding-photographer

5-must-have-lenses-wedding-photographer

Some photographers use the 105mm as a close substitute for the 70-200mm, if the latter is just too out of reach.  You can use the 105mm in DX mode which gives you 157.5mm, long enough to enable you to still be very inconspicuous at a wedding. It is also smaller and lighter, and opens up to f/2.8, as well as doubles up as a macro lens.

5-must-have-lenses-wedding-photographer

5-must-have-lenses-wedding-photographer

Do you have other must-have lenses in your wedding camera bag? Please share them here below.

googletag.cmd.push(function() {
tablet_slots.push( googletag.defineSlot( “/1005424/_dPSv4_tab-all-article-bottom_(300×250)”, [300, 250], “pb-ad-78623” ).addService( googletag.pubads() ) ); } );

googletag.cmd.push(function() {
mobile_slots.push( googletag.defineSlot( “/1005424/_dPSv4_mob-all-article-bottom_(300×250)”, [300, 250], “pb-ad-78158” ).addService( googletag.pubads() ) ); } );

The post 5 Must-Have Lenses for Wedding Photographers and Why by Lily Sawyer appeared first on Digital Photography School.


Digital Photography School

 
Comments Off on 5 Must-Have Lenses for Wedding Photographers and Why

Posted in Photography


10 Fundamental Tips for Newbies in the Wedding Photography Business

06 Jan

So, you’ve decided you want to enter the wonderful world of wedding photography. Now it’s time to get prepared and arm yourself with as much know-how as possible. After all, you are going to be responsible for capturing the magic of this once-in-a-lifetime event – no pressure!

Here are the top 10 things I have learned on my journey, that are valuable to anybody breaking in to the wedding photography business.

DSC 2518

1) Experience and second shooting

You’re new to the scene, and may not have any experience photographing a wedding, other than that time you used your point-and-shoot camera at your cousin’s wedding. So, how do you get experience photographing a wedding, in a professional setting? Offer your services as a second shooter!

There are a few reasons why this is a highly valuable experience if you’re thinking of becoming a wedding photographer. The most obvious being that you will gain on the job experience, as well as building a wedding photography portfolio. By becoming a second shooter, you will also meet established wedding photographers, and begin to network with other pros. A great way to begin second shooting is to research wedding photographers in your area, and contact three to five that you like the most. You can also use Facebook and search for photographer groups to advertise yourself. Offer your services for free to start, and you should hopefully land yourself a job pretty fast.

When you secure a gig with a photographer, be punctual and polite on the big day. Observe the photographer’s behaviour, and the way they have structured the big day. This will help you get a feel for how you will one day operate your own business. If there is anything you are unsure of, or want to know more about, asking the photographer once the rush of the wedding is over, is a great way to get a better insight.

DSC 2680

2) Compare and prepare

You’ve assisted a few photographers at a number of weddings, and now you want to take the reins. Good job! At this stage, there is a lot to think about, and begin preparing. You need a presentable portfolio to show prospective clients, as well as prices, packages, and a solid contract. A great way to roll two of those things together is to create your own website.

This will allow you to have an online gallery of your images, along with a page outlining all pricing and further information. If you’re not a HTML whizz or web designer, don’t fret – you can sign up to a website that will offer you pre-made themes, designs, and layouts. Wix is a great place to start, you can select a yearly plan, which will give you a domain name, and eliminate all of their advertisements from your website. Plus – their website editing tool is super straight-forward and will allow you to customize your website easily. Another low cost option is Squarespace, starting at $ 8/month.

When you are designing your packages and conjuring up your pricing, comparison is key. Take some time to think about all the expenses involved in your business and compare this to the rate you wish to charge. Depending on your expenses, it might work in your favour to price yourself slightly higher or lower. Things to consider are: your overhead costs (rent, telephone, utilities, web fees, etc.), equipment, price of goods including wedding photography albums and/or prints, and you should also think about your own salary and how much business you hope to accumulate during the year. Remember, you are a novice – clients will not be choosing you because of your years of experience, but because of your passion and artistic flair!

You will also need to think about having a contract ready to go should a client ask to see a copy. There are loads of great wedding photography contract templates online, find one you like and do some adjusting. Important things to consider when writing a contract are: model release, image copyright, illness or injury, pricing and deposits/retainers, sizing/format of images, etc. Always have a lawyer take a look at your contract. Laws vary from place to place, and sometimes it is not my place legal guidance to others. Remember, we are photographers – not lawyers.

DSC 2716

Read these related dPS articles for more on contracts:

  • The Biggest Legal Mistake Photographers Make
  • Wedding Photography Agreement (Contract) Tips

3) Sell yourself

You’ve compared, you’re prepared – now it’s time to don the marketing hat, and get your name out there. There are a few avenues you can explore, but something that always goes down well, is running a promotion or special offer. For example, you could offer a special bonus (such as 20 free 5×7 prints, or a free 16×20 wall print) on your wedding services for the first five people who make a booking. This will cost you a little to produce, but it will benefit you massively and almost guarantee you five weddings.

A great way to utilize social media (again) is to search Facebook for wedding groups in your area, and advertise yourself there. Be sure to read the rules of the group and make sure you’re allowed to advertise your services in the group, some don’t allow it and you will be blocked. Have your website ready to go, so that as soon as you get some interest, you can fire through a quick message with a link to your work and pricing.

DSC 7202

4) Communicate

By now you should have a few people enquiring about your services and wanting to know more. At this stage, quick, friendly, and professional communication is your best friend. Have a script ready, so that as soon as you receive a message, email, or phone call you have a short and informative response ready to go. Remember, this is a script – NOT a sales pitch! Keep it short, sweet, and straight to the point.

My normal script goes along the line of, “Hello! Thanks for the message. Of course, I would be interested in photographing your wedding – please feel free to head on over to my website to see more of my work and pricing (insert website here). Do you mind me asking what is the date of your big day?” By asking for the date of the wedding, you are opening a conversation which is a hugely important part of the process. Once you have had a brief conversation regarding the details of their wedding, say to them that you will be in touch in a couple of days. This leaves the ball in their court so that they do not feel pressured, but also allows you to follow up with a friendly message and hopefully secure a consultation.

DSC 7742

5) Meetings

You’ve secured a consultation with your first potential client – yay! Turn up 5-10 minutes before the scheduled time, this is your only chance to make a first impression, and being late is a BIG no-no. Once you have greeted your clients with a smile on your face, ask them a few things about themselves. This initial meeting is a chance for them to get to know you (and vice versa) and your process, so go in there with a clear mind and plan of action.

Spend five minutes briefly explaining a run-down of how their big day will work from your perspective, and also explain your pricing, packages, and deposit payments. Take a copy of the contract and give it to them to take home and look over, let them know if they have any questions to contact you.

After this initial meeting, follow up with them three days later, and ask if they want to secure a spot. Make it clear that in order for them to secure their date in your diary, the deposit needs to be paid. If the clients liked you, and books you as their photographer, well done! You should always have a follow up meeting at their wedding venue, so that you can explore the grounds together, talk about potential photographic opportunities, and let those creative idea juices flow.

DSC 3417

6) The Essential List

You’ve got your first official booking, the deposit is paid, and the ball is well and truly rolling. Good on ya! Now you need to make a list of the absolute essentials that you need for the big day. These things include:

  • Family and group shot list
  • Bridal party shot list
  • Full itinerary of the day
  • Your own photographic equipment
  • Any post-wedding preparations

Contact the bride and groom and ask them to send you a list of all the must-have group portraits that they want, and also ask them for a full itinerary of the day. Ask them to allow an hour for photos between the ceremony and reception, in order to ensure that they get all the photographs that they want. Make a list of the equipment you will be taking including SD cards, spare batteries and chargers. If you are including prints or albums as part of your package, take some time to do the research and find a reputable, quality printing agency.

DSC 4113

7) Itinerary and planning

The big day is getting closer and you’re getting nervous – use the itinerary of the wedding day to start scheduling your own plan of action. Decide which shots you want, and when is the best time of day to take them. Be mindful of the time of day and position of the sun if you are shooting outdoors. You don’t want the subjects to appear silhouetted – but you also don’t want to blind your clients with the sun, as this will make for very squinty pictures.

Be sure to also schedule your own breaks – after all, this is a job and you will need a break. I find the best time to have a break is during the lunch or dinner, when everybody is busy with the food. Nobody likes being photographed with their mouth full of food, so this is a great time for you to sit down and enjoy a well deserved break and bite to eat as well. In most cases, the bride and groom will feed you (if this is really important, you can even put it in your contract).

DSC 7929

8) Recruit the best man and maid of honour

This will make your life so much easier, and will also enhance the experience of shooting family portraits. The best man or maid of honour are usually familiar with the family members, and will help herd the groups to make sure that everyone is ready for their portrait with the bride and groom. Let the bride and groom know that you intend to do this at your second meeting, and ask for a contact phone number or email address for the maid of honour and the best man. You can then drop them a line and introduce yourself before the big day, and ask them ever so nicely if they would be willing to stick around for family portraits to help you organize the herds of family members. Hopefully, they will see you operating like a well-oiled machine and the whole experience will not be too stressful on anybody. No one likes a stressed out photographer. This will also help you get to know them a bit better before the bridal party photographs, which is a major advantage in getting more natural, down-to-earth photos of the group.

DSC 3917

9) Have a perfectly balanced attitude on the big day

The big day is here – don’t panic! Refer to your equipment check list to double, triple, and quadruple check that you have not forgotten anything. When you turn up to the first location and start shooting, you need to be prepared to wear an infectious smile for the whole day. This will help all of your subjects relax and smile during their photos. Remember – it’s fine to direct people during the staged family portraits, but do it as kindly as you can. Find the perfect balance between friendly and assertive for this part of the day.

Self-check for professionalism, there are a few things that I think of which are absolutely unacceptable. This includes: showing signs of stress, smoking (even if the bride/groom are doing it), chewing gum, spitting, or excessive drinking. Sometimes photographing a wedding can seem a bit like a party, but this is a job and it needs to be treated as such. Be approachable, and just a generally delightful person to be around. People will remember this, and you may even find another engaged couple at that very wedding who like you so much that they decide to make a booking. Word of mouth is truly the best marketing tool ever!

DSC_8003-1

10) Follow up

The big day is over, phew – you survived! Now it’s time to knuckle down and do some editing, you’ve got a whole bunch of beautiful photos that you need to begin post-processing. I use Photos on my MacBook to sort through the images, and add all my best shots to a different album – I then go through that album and spend time editing those images.

How you should follow up as communication is critical, even at this point of the process. Text or email your clients the next day, and let them know you had an awesome time photographing their big day, and that you’ve got some stunning photographs. Some people take a couple of days to edit and send their images, other people take weeks. I tend to give a timeframe of 14 days, although they are usually done within five to seven days. If the photographs are not done in seven days, drop them a line and keep them updated on your progress, something along the lines of, “Hey guys! Just to let you know I have edited around 500 of your images and only have 100 to go. As soon as these are done I will be in touch to schedule a viewing.”

DSC_8089-1

Once your edits are done, schedule a viewing time so that they can choose their favourites, and any potential prints. The final step is simple – once all is said and done, ask the client to provide you with an honest testimonial. This will give you more content to add to your website, and is also a great way for future clients to read about someone else’s experience with you.

From start to finish, the process of starting a wedding photography business takes hard work and determination, but you got there with (hopefully) no hiccups. Nice work!

Want more on similar topics? Check out these dPS articles:

  • 6 Things to Consider Before Becoming a Professional Photographer
  • What Defines an Amateur versus a Professional Photographer?
  • 4 Things You Must do BEFORE Becoming a Professional Photographer
  • 3 Questions to Ask Yourself When Starting a Photography Business

googletag.cmd.push(function() {
tablet_slots.push( googletag.defineSlot( “/1005424/_dPSv4_tab-all-article-bottom_(300×250)”, [300, 250], “pb-ad-78623” ).addService( googletag.pubads() ) ); } );

googletag.cmd.push(function() {
mobile_slots.push( googletag.defineSlot( “/1005424/_dPSv4_mob-all-article-bottom_(300×250)”, [300, 250], “pb-ad-78158” ).addService( googletag.pubads() ) ); } );

The post 10 Fundamental Tips for Newbies in the Wedding Photography Business by Jasmine Monrouxe appeared first on Digital Photography School.


Digital Photography School

 
Comments Off on 10 Fundamental Tips for Newbies in the Wedding Photography Business

Posted in Photography


Rangefinder magazine honors its annual ’30 Rising Stars of Wedding Photography’

07 Nov

Rangefinder magazine has announced its annual list of top wedding photography newcomers, now in its fourth year, highlighting the work of 30 photographers to watch. See some of their work and learn more about the list. Read more

Articles: Digital Photography Review (dpreview.com)

 
Comments Off on Rangefinder magazine honors its annual ’30 Rising Stars of Wedding Photography’

Posted in Uncategorized