RSS
 

Posts Tagged ‘Ways’

Tools That Rule: 13 Ways to Work Smarter, Not Harder

04 Aug

[ By Steph in Design & Products & Packaging. ]

tools vector scissors 1

Most of the tools we use have looked the same for decades, if not centuries, but that doesn’t mean they’re optimized to be as useful, convenient and durable as they can be. These clever tweaks on conventional tool designs can be incredibly simple, like adding a ledge to scissor handles for cutting straight lines, or unexpectedly innovative, like an illuminated glove that makes it easy to light whatever you’re working on while freeing up your hand.

Locking Aperture Wrench

tools aperture wrech

The aperture wrench eliminates the storage issues and guesswork associated with having an entire set of wrenches, with an aperture based on that of a camera lens. The metal blades of the aperture close around any given nut and automatically lock into place for perfect custom sizing and a secure fit.

Hoyo Drill

tools hoyo 2 tools hoyo 1

“You could almost keep your drill on the dinner table,” says the designer about the looks of the Hoyo, a sleek black-and-white power drill. In addition to ‘looking like a race car,’ the Hoyo has an optional stabilizer to ensure that you always enter a surface perfectly straight, dial presets to adjust the power depending on the material you’re drilling, and a built-in level.

Ruler Compass

tools compass 2 tools ruler compass

Conventional compasses typically have to be used in conjunction with rulers when you want to draw a circle of a very specific size. This one features a radius display that tells you the size of your circle as you move the leg of the compass

Portable Lighting Tool

tools lighting tools lighting 2

Ultra-portable and easy to recharge either with an outlet or an included mini solar panel, the H9 Portable Lighting Tool is a silicone sheath that wraps around your hand to provide up-close illumination for whatever job you’re trying to complete. You can direct the light exactly where it needs to be, but don’t have to sacrifice the utility of your hand.

Tool Pen by mininch

tool pen

Carrying a set of screwdrivers becomes as simple as carrying a pen with the Tool Pen, a lightweight, compact and ultra-sleek multitool solution with 18 bits. Six can fit inside the tool without making it heavy, and it comes in a variety of metallic finishes.

Next Page – Click Below to Read More:
Tools That Rule 13 Ways To Work Smarter Not Harder

Share on Facebook


[ By Steph in Design & Products & Packaging. ]

[ WebUrbanist | Archives | Galleries | Privacy | TOS ]


WebUrbanist

 
Comments Off on Tools That Rule: 13 Ways to Work Smarter, Not Harder

Posted in Creativity


7 Easy Ways to Rock Your Photo Collages

27 Jul

Sometimes one photo just isn’t enough—we know. Photo collages are gaining momentum in the social media universe, but there’s a lot of untapped potential in the art of collage making. With tons of photo collage apps out there, you can pretty much do anything you want with a smartphone and an Internet connection. With all of the different options available Continue Reading

The post 7 Easy Ways to Rock Your Photo Collages appeared first on Photodoto.


Photodoto

 
Comments Off on 7 Easy Ways to Rock Your Photo Collages

Posted in Photography


5 Ways to Create Dramatic Landscape Photos at Midday

03 Jul

Outdoor photographers are repeatedly taught to plan their scenic photography excursions early in the morning or late in the day. These magic hours we’re told, is the only light worth shooting in. Yet, what about those situations when being on location at sunrise or sunset isn’t possible? You can pack up your bags and go home with an empty memory card, or make the most out of every opportunity. Allow me to let you in on a little secret not found in most photo magazines. Some of the best landscape opportunities can be found at midday when the sun is high over head.

Here are five tips to help you create dramatic landscape photos at midday:

1) Work with the sun

Rather than avoiding the sun, use it to add visual interest in your composition. This technique is not overly complicated but does take a bit of trial and error to master. Start by setting a very small aperture opening such as f/22. Then, while looking through the viewfinder, position yourself so an object partially blocks the sun. It should not be entirely obscured, so you may have to rock back and forth ever so slightly to find the optimal point. When you see the beams of light spilling through the obstruction, take the shot. The results can be quite dramatic and potentially aided by subtle hints of colorful flare.

2) Give your wide angle lens a rest

The contrast found midday makes it difficult to hold the detail in the sky while properly exposing a foreground. Rather than resorting to an HDR shot, use the occasion to simplify your composition. Does that bright sky really add to the overall scene? If not, give your wide angle lens a break and switch to a medium telephoto lens.

Before pressing the shutter, check all four corners of the frame for any unwanted bright areas. The human eye tends to focus on these areas first. As you eliminate these distractions, the design of the photo will become more evident. Just remember, if you are hand holding the camera with a telephoto lens, opt for a slightly faster shutter speed to prevent camera shake. At these greater magnifications, even the slightest imperfections become more noticeable.

3) Find more people

Sunny days can also be useful for creating salable prints and stock photos. Images of people enjoying the outdoors are popular with a wide variety of clients; from those looking for home decor, or pharmaceutical companies, clothing lines, the parks department, etc. In the afternoon, you’ll find infinitely more people than you would at sunrise or sunset. This is a good thing, as it opens the door to a whole new series of photographic possibility. By including a human element, the image will have greater reach as viewers can relate to it personally.

4) Slow the shutter speed down with black glass

Believe it or not, you can shoot long exposures even on a bright sunny day. The trick is add a round neutral density filter to your bag. Sometimes dubbed “black glass”, these dark screw-on options block a great deal of light from entering the lens.

For example, if the proper exposure gave you 1/125, f/22, ISO 100, the water motion (below) would be largely frozen. By adding a nine stop ND filter, you can keep the aperture and ISO the same, but drop the shutter speed all the way down to four seconds. This will create that dreamy effect previously limited to low light situations.

5) Go easy on the polarizer

If you have a short layover in a distant location, you can use the opportunity to capture some of the sites mid-afternoon. Perhaps the most important tool will be the circular polarizer. Some may disagree here, but it does not need to be a multi-coated, super high-end filter. A basic model from Hoya or Tiffen will be just as effective. With it, you can take a pale blue sky and make it pop. This is especially true when the sky is dappled with clouds.

Be warned however, the technique is so powerful it’s easy to go overboard. As a tip, I’d recommend that you find the maximum strength of the filter, and then cut the intensity slightly. This will provide you with more natural results.

Do you have any additional tips for shooting at midday? Please share in the comments below.

googletag.cmd.push(function() {
tablet_slots.push( googletag.defineSlot( “/1005424/_dPSv4_tab-all-article-bottom_(300×250)”, [300, 250], “pb-ad-78623” ).addService( googletag.pubads() ) ); } );

googletag.cmd.push(function() {
mobile_slots.push( googletag.defineSlot( “/1005424/_dPSv4_mob-all-article-bottom_(300×250)”, [300, 250], “pb-ad-78158” ).addService( googletag.pubads() ) ); } );

The post 5 Ways to Create Dramatic Landscape Photos at Midday by Chris Corradino appeared first on Digital Photography School.


Digital Photography School

 
Comments Off on 5 Ways to Create Dramatic Landscape Photos at Midday

Posted in Photography


4 Ways to Make Your Photos Stand Out with the Clarity Slider

28 May

Clarity - Bay Bridge example

You want your photos to be as sharp as possible. Of course, there is no substitute for good technique in the capture phase, but you would like to add something in the post-processing to make the pictures clearer and sharper. You may already be adding sharpening, but how to add that extra crispness to make your pictures pop? The answer is clarity. This article will show you how to add that to your photos.

Clarity - before and after

What Exactly Is Clarity?

What is clarity? Clarity is a local contrast increase that focuses on the mi-tones of the image. If differs from sharpness, because whereas increasing sharpness increases the contrast between dark and light tones, clarity increases the contrast within the middle tones of the image. The effect is similar to sharpening, but it brings out textures a bit more. In addition, digital noise isn’t as much of a problem as it is with sharpening increases.

Adding Clarity in Lightroom (or ACR)

How do you add clarity to your photos? The best-known, and simplest way, to add clarity is to use the Clarity slider in Lightroom (there is an equivalent in Adobe Camera Raw – or ACR). To do that, just find the Clarity slider in the Basic panel of the Develop module. Increase the clarity by moving the slider to the right a bit. That’s all there is too it.

Clarity - Lightroom slider

The Clarity slider makes a global adjustment to your image (meaning it affects the entire image). If you want to add clarity only to specific portions of your image (referred to as local adjustments), you can do so by using the Adjustment Brush (or Radial or Graduated filters). When you select that brush, you will see clarity among the sliders that you can use. Increase the clarity to the desired amount and brush the effect where you want it, on your image.

I find it best to apply a slight, to moderate amount, when making Lightroom adjustments. Think of it as a baseline. Other areas of the image that you want to draw out can be targeted later. You may find it easier, and more precise, to make local adjustments using Photoshop, so that will be the next topic.

High Pass Filter in Photoshop

Within Photoshop, there is no Clarity slider. If you want to add clarity to your photos within Photoshop, there is still a way to do it. It is called the High Pass filter.

Why should you use this filter, and not the Clarity slider in Lightroom (assuming you have both)? Mostly because, with the High Pass filter you can take advantage of all the masking and blending tools available within Photoshop. The primary reason is the ability to mask the changes, which is a much more precise and powerful way to create localized adjustments, than using Lightroom’s adjustment brush. Use the High Pass filter for targeted adjustments to specific areas that you want to draw out in your picture.

It takes a few steps to use this tool, so follow this process:

  1. Make a copy of the background layer (Ctrl+J) of your picture.
  2. Set the blend mode of the new layer to Overlay. The picture will look terrible for now, but don’t worry about it.
  3. Select the High Pass Filter by going to Filters – Other – High Pass.
  4. Set the radius, which is the equivalent of setting the strength of the effect.

Clarity - high pass filter

Note that this process will create a global adjustment to your image. To turn it into a local adjustment, create a layer mask to apply the effect only where you want it. To do that, with the new layer selected go to Layer – Layer Mask – Hide All. That will create a black layer mask. A black layer mask hides the effect everywhere. Now use a white brush to paint (on the mask) in the effect where you want it. Use the Opacity slider to control the degree to which the effect is applied by your brush (you can also adjust the layer opacity).

Local Contrast Adjustments in Photoshop

Another way to add a degree of clarity to your photos is to increase the local contrast, with the best way being a Curves Adjustment Layer. You’ll be surprised at how much clearer and more detailed things look after you increase local contrast in this way. This is another tool for making targeted adjustments.

They key here is to select an area and then increase the contrast just within that area. Here’s how:

  1. Select the area you want to affect. Use the Quick Selection tool to select those pixels.
  2. Create a Curves Adjustment Layer (Layer – New Adjustment Layer – Curves) with those pixels selected. When you do so, Photoshop will create a new adjustment layer, but it will mask off all the pixels except those you previously selected. Therefore, the changes you make will only apply to your selection.
  3. Increase the contrast of your selected area. You can either drag in the endpoints of the curve, or you can push down the line on the left (dark) side and pull up the line on the right (bright) side of the histogram. (You can also use Levels to increase the contrast, if you are uncomfortable with Curves).
  4. Clean up with your brush tool. If there are harsh transitions, use a soft brush to feather out the change (paint ON the mask only, not on the layer). You can increase or lessen the effect using the brush tool as well.

Clarity - Photoshop curves adjustment layers

Be sure you select targeted areas and use this method to draw out the contrast. It will add clarity and texture to that portion of the picture you want only, not the entire image.

Clarity by Topaz

There is another tool you can use to add clarity to your photos. It is a plug-in by Topaz that is named, appropriately enough, Clarity. It costs $ 50 and acts as a plug-in to Photoshop or Lightroom.

Clarity by Topaz divides contrast into different components ranging from Micro contrast, to High contrast, and provides a slider for each. That allows you to reach different parts of the picture and affect contrast in different ways.

The best part of Clarity is the Micro contrast, although this often requires offsetting adjustments to other areas of contrast. That is the greatness of this plug-in: you are not confined to a simple contrast adjustment that pushes all bright areas toward white, and all dark areas toward black. It allows you to add some clarity and texture to your pictures without blowing out your highlights or losing your shadow detail. You can also effect saturation, brightness, and other controls from within Clarity.

Clarity - using Topaz Clarity

The best way to use Clarity is by creating a duplicate layer of your image in Photoshop (Ctrl+J) and then opening the plugin. That way, after you have made your changes in Clarity and you have gone back to Photoshop, you can mask in or out the effect to whatever degree, and in whatever areas of your image, you wish.

Clarity - Davenport example

Application

The best part about these tools is that you can combine them to get exactly the effect you want. For example, you might make a minor global adjustment to Clarity in Lightroom, then take it into Photoshop and make a series of Curves Adjustment Layers to bring out certain areas. You might also do the same with Topaz’s Clarity and mask off the effect. When you are done, you can use the High Pass filter to highlight key areas of your photo in Photoshop. Of course, you’ll need to be careful not to overdo the effect, which can happen quickly, especially if you use multiple tools listed here. But judicious use of these tools, in conjunction with your normal input and output sharpening, can really make your photos pop.

googletag.cmd.push(function() {
tablet_slots.push( googletag.defineSlot( “/1005424/_dPSv4_tab-all-article-bottom_(300×250)”, [300, 250], “pb-ad-78623” ).addService( googletag.pubads() ) ); } );

googletag.cmd.push(function() {
mobile_slots.push( googletag.defineSlot( “/1005424/_dPSv4_mob-all-article-bottom_(300×250)”, [300, 250], “pb-ad-78158” ).addService( googletag.pubads() ) ); } );

The post 4 Ways to Make Your Photos Stand Out with the Clarity Slider by Jim Hamel appeared first on Digital Photography School.


Digital Photography School

 
Comments Off on 4 Ways to Make Your Photos Stand Out with the Clarity Slider

Posted in Photography


5 Great Ways to Learn Photography

28 May

All images ©Gina Milicia

“Every Artist was first an Amateur”- Ralph Waldo Emerson

Learn 1

If you’re just starting out as a photographer, congratulations! There’s never been a more exciting, or easier time to learn the art of photography. Today’s market is flooded with tertiary courses, books, workshops, websites, podcasts and online courses that didn’t exist as little as ten years ago.

When I began my career 25 years ago, there were only a few options. You could learn photography at a university or technical college, you could complete an apprenticeship or internship with a photographer, or you could teach yourself through trial and error and by studying the work of other photographers. I combined all three of these techniques and found a way that worked really well for me.

Today there are dozens of ways of developing your photography skills. None of them is right or wrong; just find the one that best suits your personality and learning style. This is a surefire way to fast track your development as a photographer.

Learn 2

What is your learning style?

There are three different ways you can learn a new activity. Most people are a combination of all these styles of learning, so that’s why it’s best to try several different styles to help you learn new techniques.

1. Visual

A visual person will learn best from seeing something demonstrated and looking at photos, maps and diagrams.
Watching “how to” videos and reading books and online blogs really support your learning style if you are a visual learner.

2. Auditory

Auditory style people learn through listening to lectures or audio presentations, talking things through and listening to what other people have to say. Listening to podcasts and audio books would be a great way to support your learning style.

3. Kinesthetic

Kinesthetic people like to learn by doing activities. You prefer to be hands-on and try things out and discover how they work. Attending practical workshops would really suit your learning style

So if you really want to cover all bases read, watch, listen and do.

I know for a fact that my weakness is auditory. I can’t sit still in a lecture or presentation for very long before I get fidgety, but if I listen to information while I’m doing a menial task I find I retain far more information. That’s why I love podcasts and audiobooks so much. I’m able to learn so much while I’m out walking, driving or burning, I mean cooking dinner.

Learn 9

Here are five options worth considering:

1. University/college degree or photography diploma

This is the traditional road, and the one that many people take. You’ll learn a wide variety of photographic styles, in a structured environment, from experienced teachers and industry experts. You’ll also have access to state-of-the-art studios with all the latest cameras, lighting equipment, accessories and software.

Learning in school also has the advantage of being in a group learning environment. This will help you develop networks and social skills that you’ll use in the future. Sharing the journey with your new friends will make learning more fun.

The downside is the expense. Depending on where you live, a degree or diploma can cost tens of thousands of dollars or more. There’s also a significant investment of time. This can be difficult to manage for older students who may have families to support.

The school’s location will also be a factor. Many of the better photography courses are located in capital cities, so you’ll also need to consider travel or relocation expenses.

If you think you’re suited to this style of education, thoroughly research the schools in your area. Find out who the teachers are, who the past students have been, and what they’ve gone on to achieve. If it’s feasible, attend an open day and ask current students what they think. I’ve known students who’ve been miserable and have even failed classes because their personality didn’t match their schools’ cultures. After transferring to schools better suited to their learning styles, they thrived.

Learn 4

2. Assisting – apprenticeship – internship

Apprenticing is a traditional, and often overlooked, way of learning the ropes and breaking into photography. This is how many of my peers and I, worked our way up the ladder.

After graduating from art school, I started out as an unpaid intern with a celebrity and fashion photographer. At the end of my eight-week internship, I was offered a full time job. I couldn’t have landed such a sought-after position based on my portfolio and by cold-calling photographers alone. I learned more in my first month on the job than in four years at art school.

The 18 months I spent assisting taught me tons of lessons about how to light, direct, pose and talk to models. It also taught me how to work with makeup artists and stylists, and how to deal with difficult clients. But most importantly, I witnessed first-hand the ups and downs of running a business. Had I gone straight out on my own without working as an assistant, I never would’ve realized that ALL photographers experience downturns in their business, and that nobody — no matter how amazing or in-demand — is immune. That lesson was gold and saw me through many quiet times through my career.

In some cases interning with the right person can be more valuable than doing a course. But that person needs to be generous with their knowledge, and should be an encouraging teacher. The wrong kind of internship can find you stuck in a tiny office filing, answering phones, and performing menial non-photography jobs without the opportunity to ever learn anything.

Learn 8

3. Workshops

Workshops are a great way to refine and advance your skills. One of the advantages of workshops is that you can select the style of photography and techniques you want to improve, and the photographers you want to learn from.

Some workshops are local, and only last a couple of hours. Others last longer and are held in exotic locations. These are great for travellers who want to shoot on location, but are reluctant to travel on their own.

Whatever course you’re thinking of attending, read up on it. Read testimonials and find out how much experience the teacher has. But most importantly, find out the class size. Larger classes are fine for software workshops such as Lightroom and Photoshop, but when it comes to learning the craft of photography, smaller groups are much better. You’ll get more one-on-one time with the instructor.

Learn 7

4. Online courses

Online course are great for learning at your own pace and in the comfort of your own home. Look for courses that are taught by professionals you respect and in a style you can relate to. The more you enjoy and relate to your teacher, the easier it’ll be for you to learn. Many of the really good courses offer money back guarantees, making them a zero-risk investment.

Learn 6

“When the student is ready, the teacher appears” – Buddhist Proverb

5. Mentors

A mentor can be anyone who’s realized the goals you want to achieve. This includes both friends who can help you understand some of your camera’s settings, and professionals with five, 10, 20, or more years of experience. Their skills may vary, but anyone who’s farther down the path than you has valuable information that will save you time, money and effort in reaching your goals.

A great place to start looking for mentors is in your friendship and social media circles. It isn’t as daunting as it sounds. Look for someone whose work and working style you admire and respect. Follow them on social media and look for ways you can add value to the relationship. Retweet their posts, comment on their photos, share their work, refer clients to them, and send them links to great locations or items that may be interested in.

Give the relationship time to develop before you ask them to mentor you. That will increase the chance that they say yes, because they will have had a chance to get to know you. A mentor is far more likely to want to give up valuable time to work with you if they can see you show initiative, and are respectful of their time.

I’ve been lucky enough to work with several mentors in my career and I know their knowledge and guidance has saved me years of extra work and opened many doors I may never have walked through had I have stumbled along on my own.

Learn 5

“The journey of a thousand miles begins with a single step.” – Lao Tzu

Finally, there is plenty of great information out there, and lots of amazing teachers, but in the end it’s up to you to take the first step.

What have been the most successful ways for you to learn photography? Do you have any other suggestions I may have missed? I’d love to hear from you, please leave a comment below.

googletag.cmd.push(function() {
tablet_slots.push( googletag.defineSlot( “/1005424/_dPSv4_tab-all-article-bottom_(300×250)”, [300, 250], “pb-ad-78623” ).addService( googletag.pubads() ) ); } );

googletag.cmd.push(function() {
mobile_slots.push( googletag.defineSlot( “/1005424/_dPSv4_mob-all-article-bottom_(300×250)”, [300, 250], “pb-ad-78158” ).addService( googletag.pubads() ) ); } );

The post 5 Great Ways to Learn Photography by Gina Milicia appeared first on Digital Photography School.


Digital Photography School

 
Comments Off on 5 Great Ways to Learn Photography

Posted in Photography


3 Ways to Try Macro Photography on a Budget

21 May

Editor’s Note: This is one of a series of article on macro photography this week. Look for a new one each day. The next newsletter will have them all if you miss any!

Ranunculus1

Has Macro Week here at DPS sparked your interest, but you’re still not sure whether you’re quite ready to invest in a macro lens of your own? If so, then this article is for you! I’ll outline three different ways that you can try out macro on a budget, and possibly even with gear that you already own.

Now, before any macro-purists fall off their chairs in disgust, let me say that the techniques outlined in this post will produce pseudo-macro images. In a true macro image, the subject is projected onto the camera’s sensor at a 1:1 magnification, which means that the subject is exactly the same size in real life as it is on your camera’s sensor. That’s not the case, or the intent here. The intent here is to allow those of you who haven’t tried macro photography, the opportunity to test the waters and see if it is even something that interests you before making a big investment in a macro lens.

1.  Use a Telephoto Lens

DoubleTulip

This image was shot about two feet away from this flower, using a telephoto lens at 220mm.

My very first dslr camera came in a package with both an 18-55mm lens and a 75-300mm lens. I don’t tend to use the 75-300mm lens very often, but when I do, it’s usually in a pseudo-macro capacity. If you have a telephoto lens already in your bag, give this a try–stand about two feet away from your subject, with your zoom lens at about 250-300mm. If you have trouble getting your subject to come into focus, continue to move backwards with your feet until you find the sweet spot. It’s important to zoom with your legs rather than your lens, in this instance, so that you can keep the background nice and blurry, and the focus on your subject. Once you find that sweet spot, you may want to set your camera on a tripod at that spot to avoid camera-shake as you’re taking the photo. I’ve also tried it hand-held a few times with good results, so don’t be afraid to give that a try as well.

Pollinator

This image was shot using a telephoto lens at 300mm. This is about as sharp as I’m personally able to get when photographing living creatures with this method, and it isn’t sharp enough in my book.

One of the benefits of this method is that it doesn’t require you to get particularly close to your subject, which is ideal if you’re interested in taking macro photos of living creatures. Personally, I find that it is still difficult for me to achieve sharp focus when it comes to photographing living creatures with this method (even with a tripod),  so I usually stick to more stationary objects like flowers. Still, if you already have a telephoto lens in your bag it may be worth your time to try this method first, before buying a macro lens. I say this only because I have more than one friend who thought they’d be really interested in macro photography of insects, only to discover that they actually couldn’t stomach seeing the insects up close in all their glory.

2. Try Extension Tubes

This image was taken with an 18-55mm kit lens + manual extension tubes.

This image was taken with an 18-55mm kit lens + manual extension tubes.

An extension tube is a nifty little invention that screws on in between your camera body and your lens. They come in different widths, and can often be stacked so that you are able to use more than one at a time. They do not contain any glass, but simply allow you to get closer to your subject than you would be able to normally, while still maintaining focus. When it comes to extension tubes, you can find something for nearly any budget. More expensive versions maintain the electrical connections that allow you to use the autofocus feature on your camera, while less expensive versions will not. Additionally, some extension tubes will limit your ability to control aperture in-camera. If you have a lens that has a manual aperture ring, you can control it that way, but otherwise you’ll be shooting wide open. Personally, I have one of the least expensive sets of tubes $ 15, and even though I don’t have the capacity to use autofocus or control my aperture, I have always really enjoyed my set of tubes for creating macro images.

This image was taken with an 18-55mm kit lens + manual extension tubes.

This image of a blueberry bush was taken with an 18-55mm kit lens + manual extension tubes.

That said, before you buy, you should know three things.

First, some reviewers have reported that the less expensive tubes have gotten stuck on their camera body and/or lens. Others have reported that the tubes did not hook securely to their camera body and caused their lens to fall off during use. I have not experienced either issue, but generally use the tubes on my second body, with my kit lens, neither of which I would be devastated to lose. It is a trade-off though—using my kit lens means that I’m not able to control my aperture as I would be with other lenses, which is a bummer (but also not a major issue for me).

Editors note: buyer beware, just be sure to shop around and read reviews (the good and the bad) before you buy any extension tubes. It may seem like a great deal but if they wreck your camera or your lens it won’t be.

Second, be prepared to get close. Like, REALLY close. It will feel really strange to have the lens almost touching your subject, but that’s typically about as close as you will need to go in order to achieve focus. If you’re too close try using a longer focal length lens, that will help with this issue.

Third, there is absolutely a learning curve with extension tubes, particularly those that don’t maintain the electrical connection with the camera. It’s not insurmountable, but you probably won’t be able to use them perfectly right out of the box. Just be prepared for some trial and error.

3. Reverse Your Lens

50mm lens hand-held in reverse up to an 18-55mm kit lens.

50mm lens hand-held in reverse up to an 18-55mm kit lens.

Did you know that you can turn any lens around and use it backwards? Well, you can! There are two different ways that you can reverse a lens to use it for macro photography.

The first way to use your lens in reverse is to buy a macro reverse ring. These rings are usually around $ 15, and you would need to know which lens you plan to use in reverse (different lenses require different sized reversal rings), AND whether you’d like to reverse the lens directly to the camera, or on to another lens.

Another instance of a 50mm lens being hand-held in reverse up to an 18-55mm kit lens. Note the major vignetting in this image--that was straight out of camera.

Another instance of a 50mm lens being hand-held in reverse up to an 18-55mm kit lens. Note the major vignetting in this image, along with an almost tilt-shift effect. Both were straight out of the camera

The second way that you can reverse a lens is to simply hand-hold it in backwards. If you have both a kit lens and a 50mm lens, attach your kit lens to your camera as usual, and then hold your 50mm lens backwards, up to the end of the other one. If you can, wrap your fingers around the place where the kit lens and the 50mm lens join together to minimize any accidental light leaks. Again, you’ll have to zoom with your feet, and you’ll probably have to get pretty close in order for things to come into focus. This method works best for creative macro—you’ll find that the focus is much softer than the other methods, and often includes unpredictable vignetting. That said, if I’m trying to create a macro image that feels ethereal, this is my go-to method.

Are there any other techniques you’ve used to create macro or pseudo-macro images without a macro lens? If so, please share!


macro-cover
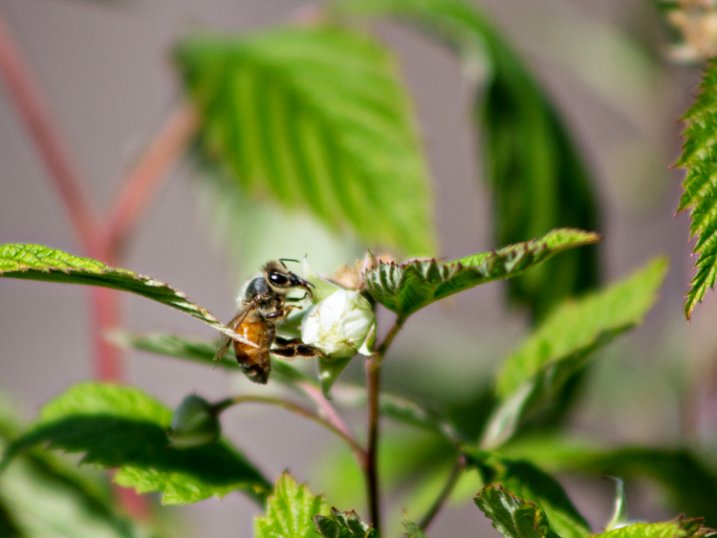
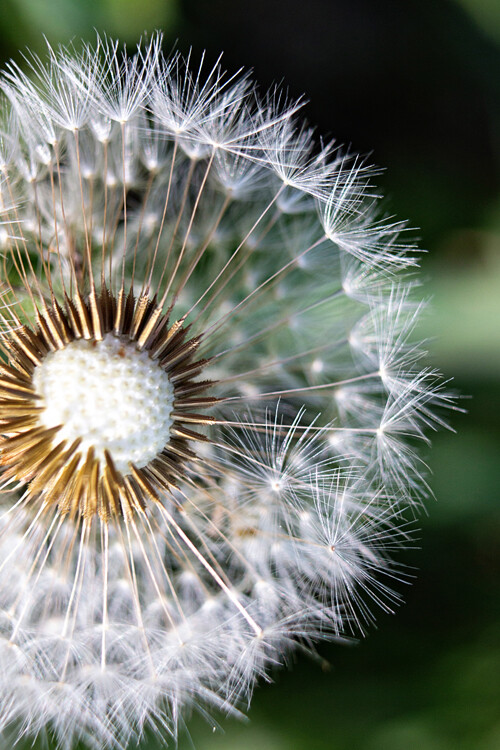
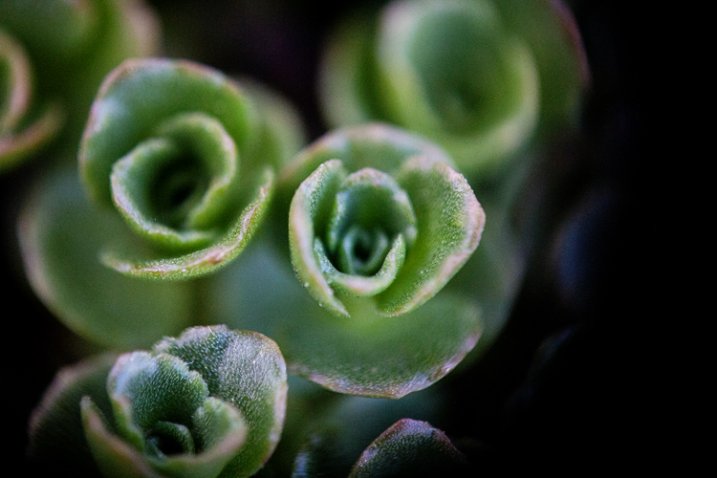
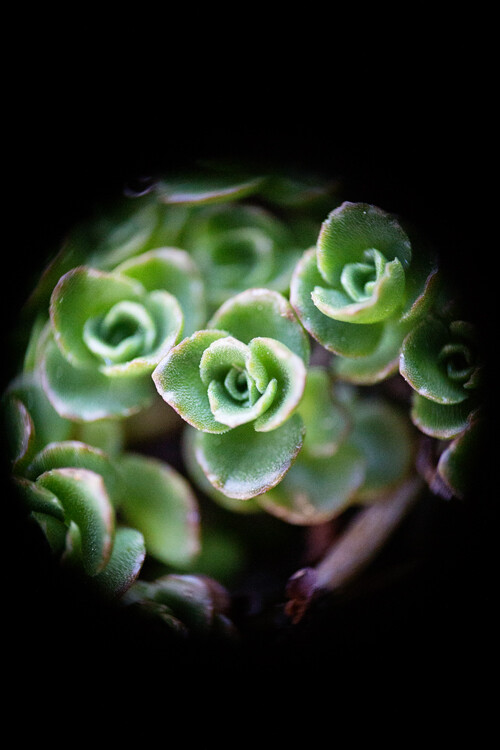
Want to learn more about macro photography? Check out Ed Versosky’s Introduction to Close-Up & Macro Photography ebook – just $ 10 (over 30% off) this week with coupon code: DPS. You will need to enter the code to apply the discount.

googletag.cmd.push(function() {
tablet_slots.push( googletag.defineSlot( “/1005424/_dPSv4_tab-all-article-bottom_(300×250)”, [300, 250], “pb-ad-78623” ).addService( googletag.pubads() ) ); } );

googletag.cmd.push(function() {
mobile_slots.push( googletag.defineSlot( “/1005424/_dPSv4_mob-all-article-bottom_(300×250)”, [300, 250], “pb-ad-78158” ).addService( googletag.pubads() ) ); } );

The post 3 Ways to Try Macro Photography on a Budget by Meredith Clark appeared first on Digital Photography School.


Digital Photography School

 
Comments Off on 3 Ways to Try Macro Photography on a Budget

Posted in Photography


Creative Ways toPhotograph FlowersIn Your Home

07 May

For many of you, the harshness of winter has finally come to a close. (Yay!)

In its place you now have the beauty of spring, which means flowers are everywhere.

We’ve already starting making the most of this new and colorful season with our recent guide on frozen flower photography.

Now we’re gonna share four more ways to get creative with flower photos right in your own home.

So go pick some flowers and let’s get shooting!

Creative Ways to Photo Flowers Indoors

(…)
Read the rest of Creative Ways to
Photograph Flowers
In Your Home (497 words)


© Taylor for Photojojo, 2015. |
Permalink |
No comment |
Add to
Photograph Flowers
In Your Home”>del.icio.us

Post tags:


Photojojo

 
Comments Off on Creative Ways toPhotograph FlowersIn Your Home

Posted in Equipment


5 Ways to Use a Beauty Dish Light for Portraits

12 Apr

The beauty dish. It’s one of my favorite light modifiers, which is why I’m so excited to share some techniques you can try with your beauty dish. Don’t have one? Not to worry. There are plenty of DIY beauty dish project plans online. I’ve actually made them out of aluminum turkey pans. When you decide to step up to a more professional beauty dish, however, they are usually not as expensive as most light modifiers and you can get them for speedlights or studio strobes.

Beautydish 2

Beauty dishes are a niche modifier usually reserved for beauty shots. These tend to be head and shoulder portraits that highlight makeup and hair, and are commonly used in the fashion industry. So why should you try it? Well, it’s fun to see if you can make images like you see in the fashion magazines, it’s also very creative. You really have to plan and construct the entire image. This may include everything from your choice of background, lighting setup, and hair and makeup.

The quality of light produced by a beauty dish is not as soft as a softbox, but it is softer than an umbrella, and not as hard as just using a 7 inch reflector. The light falloff is quite rapid, which helps to sculpt the subject’s face and to show texture in their skin. Beauty dishes often produce nice catch lights in the eyes and shadows under the jaw line. They are versatile modifiers because you can change the quality of light by choosing a dish with a silver, or white, inner surface. The white surface will produce slightly less specular highlights on the subject’s face. You can also control the spill of light by using a grid and even further soften the light by adding a sock over the front.

Beautydish 3

When you plan a shoot using a beauty dish, only use it on clients or models with very good skin because the light pattern it produces can show off imperfections like wrinkles and blemishes. It’s also helpful to find a good makeup and hair artist because you will be showing off the subject’s face in detail. If you’re not ready to pay a makeup artist for this service, you can offer them a trade for images so they can expand their portfolios; or, if you’re really lucky sometimes you can find a model that is skilled at doing her own makeup.

When setting up your camera, I recommend a lens in the 85-200mm range. I use studio strobes and an aperture around f/8 or f/11. I would also recommend using a boom arm because it will help you put the beauty dish in just the right spot, without getting in the way of your shot. The beauty dish will give you very nice light on the subject’s face. Keep in mind you often need to spice up the image with a rim (or accent) light, hair light or a background light.

Beautydish 3 2

Let’s get started with five ways to use your beauty dish:

1. One light with a reflector: Clam shell lighting)

This is the typical way you will see a beauty shot set up. The dish is positioned right above the subject’s face, pointed down slightly, so the center of the dish is aimed at the subject’s forehead, right between the eyes. The dish should be close to your subject to produce soft light, usually within two to four feet. When you set this up, make sure you can see catchlights in the top of subject’s eyes. Then add a reflector under the beauty dish to bounce light back up on to their face. This will help minimize the shadows under chin, and add a catch light at the bottom of the eyes. You will have to put your camera between the beauty dish and the reflector. Some photographers also like to add black cards on either side of the subject to help create shadows on the sides of the face.

Beautydish 1 2 Beautydish 2 2

2. Two light setup: Clam shell lighting

This is basically the same as number one above, except you use a strobe in place of the reflector. This allows you control of the power output of the fill light. I prefer to use a strip box for this purpose, set one or two stops darker (lower) than the main light.

Beautydish 7b Beautydish 8

3. Add a sock over the beauty dish

The sock is a piece of diffusion material, that looks like a shower cap, which you put over the beauty dish. This softens the light on the subject’s face, and if you are getting shiny spots it will reduce the specularity of the light. Using a sock will produce a creamy look, with less skin texture.

Beautydish 9

4. Add a grid to the beauty dish

The grid will focus the light into more of a spotlight type pattern, which can be used to create some interesting effects. Just make sure the grid is pointed directly at the subject or the light pattern will not strike the face correctly. The easiest way to check this is to make sure the subject can see directly through the grid to the light source.

Beautydish 4

5. Take it outdoors

The beauty dish is a great light modifier for outdoors because it’s more compact than a softbox, but can be used like one. The light quality will be softer than an umbrella, and won’t catch the wind as much as an umbrella or a softbox. It can be used as the main light source or as a fill light. If you use it as a main or fill light you can set it up at a 45 degree angle like you might use a softbox. When the light conditions are warm in tone such as sunrise or sunset, you may want to add a color temperature orange gel over the beauty dish to help blend the strobe’s light with the sunlight.

Beautydish 6

The beauty dish is a bit of a specialist tool that can produce wonderful lighting patterns when used correctly. However, it can also be used in many creative ways to produce interesting shots. I hope you have fun giving the beauty dish a try.

Beautydish 5

googletag.cmd.push(function() {
tablet_slots.push( googletag.defineSlot( “/1005424/_dPSv4_tab-all-article-bottom_(300×250)”, [300, 250], “pb-ad-78623” ).addService( googletag.pubads() ) ); } );

googletag.cmd.push(function() {
mobile_slots.push( googletag.defineSlot( “/1005424/_dPSv4_mob-all-article-bottom_(300×250)”, [300, 250], “pb-ad-78158” ).addService( googletag.pubads() ) ); } );

The post 5 Ways to Use a Beauty Dish Light for Portraits by Gary Detonnancourt appeared first on Digital Photography School.


Digital Photography School

 
Comments Off on 5 Ways to Use a Beauty Dish Light for Portraits

Posted in Photography


Oil Rigs Reclaimed: 7 Ways to Reuse Obsolete Platforms

02 Apr

[ By Steph in Architecture & Cities & Urbanism. ]

oil rig swimming city

Thousands of decommissioned oil rigs rotting in waters all over the globe could get a new sense of purpose as diving resorts, cruise ship port-of-calls, recreation destinations, bio-habitats or even autonomous micro-nations. Some of these concepts tow the rigs to more desirable locations – including right up to the shores of major cities. As sea levels approach catastrophic levels, some see reclaimed oil rig architecture and other floating structures as the only viable way to survive, but they’re also a great way to take advantage of beautiful oceanic settings.

Oil Rig Reclaimed As A Scuba Diving Resort
oil rig scuba resort 2

oil rig scuba resort 1

oil rig scuba resort 3

Here’s one concrete, finished example of an oil rig transformed for a new use: the Seaventures Dive Resort in the Celebes Sea between the Philippines, Borneo and Indonesia offers access to a beautiful coral reef, making it a popular spot for divers. The owners purchased the rig in 1988 and towed it to its current location to take advantage of the natural attractions. The 25-room hotel retains its industrial feel, making no attempt to be luxurious, and offers package deals that include meals, dives, equipment rentals and boat transportation.

Aquatic Village Proposal

oil rig aquatic 2

oil rig aquatic 1

The minimalist approach definitely works for a small hotel, but what if we wanted to turn an old oil rig into an attractive community that rivals any found on land? This proposal uses a rig as the basis of a ‘livable hub’ powered by solar energy, wind turbines and tidal energy collectors. The general public would live in the units located above the surface, while specialized researchers like marine biologists could work in underwater labs.

The Noah Oasis: Vertical Bio-Habitats

oil rig bio habitat 1

oil rig bio habitat 3

oil rig bio habitat 2

The Noah Oasis concept reclaims disused oil rigs for three purposes: a short-term strategy of absorbing spilled oil, a medium-term strategy of providing a habitat for marine life and migrating birds, and a long-term strategy as a shelter from future disasters when sea levels rise to a disastrous degree. Floaters at the end of the oil pipes would automatically react in the event of an oil spill, rising to the surface to start cleaning it up. It also puts that crude to an interesting use: collected oil will be converted into a plastic catalyst for coral reef growth, transported back to the pipes to encourage reef growth on the surface. “The plastic will become the building material of the plastic-twig structure with the help of 3D printing and the injector.”

Next Page – Click Below to Read More:
Oil Rigs Reclaimed 7 Ways To Reuse Obsolete Platforms

Share on Facebook


[ By Steph in Architecture & Cities & Urbanism. ]

[ WebUrbanist | Archives | Galleries | Privacy | TOS ]


WebUrbanist

 
Comments Off on Oil Rigs Reclaimed: 7 Ways to Reuse Obsolete Platforms

Posted in Creativity


5 Simple Yet Clever Ways to Impress Your Photography Clients

30 Mar

While a satisfied client is the fuel for further sales and word of mouth, an excited client is the jet engine for your marketing. Unfortunately, many photographers don’t know how to turn regular customers into fans.

In this article you’ll find five simple, time-proven techniques of impressing your photography clients and building a long-lasting relationship from an ordinary photo shoot.

1. Be Professional

01 be professional
Image by niekverlaan

You should portray a professional image of yourself right from the beginning. This doesn’t necessarily involve spending hundreds of dollars on premium graphic design services and printed materials. In today’s world we have to deal with poor customer service too often, so being quick with your replies to client requests is an old yet very effective way to impress people.

Another factor contributing to your professional image is your website. It’s the first thing your clients see when they find you on the Internet, so it’s critically important to keep your site accessible and up-to-date. Don’t forget to update your portfolio and copyright information and make sure your website is mobile-friendly. Update information on your site regularly along with the copyright, share some personal stuff on your blog and “about me” page to show that you’re an open and available person, share your interests to make potential clients feel closer to you even before you meet.

Also, take care of your outfits and your entire appearance. No matter what type of photo shoot you’re heading to, make sure you’re dressed appropriately as it will directly affect whether or not you’ll get future jobs from this shoot. A rule of thumb is to avoid busy and loud clothing in favor of smooth colors and neutral style. Consider your own comfort, but probably more importantly, make your clients feel comfortable with you walking around.

2. Be Helpful, Be an Authority

02 be authority

Image by tpsdave

Give your clients an additional reason to book your service by providing exclusive, helpful information. It can be a blog post on how to dress for different types of photo sessions, or you could organize a workshop for moms on how to take great snaps of their children using a smartphone or a pocket camera. The idea is to figure out your clients’ possible knowledge gaps and fill them.

Not only is this a great way to strengthen relationships with your current customers, but it can also help you establish the reputation of being an experienced, leading professional which works as a charm for attracting qualified leads.

3. Get Creative with Bonuses

Every business is interested in long-term relationships with their customers, and photographers should be no exception. Your loyal clients help you find new client, but what do they get in return? Develop a loyalty program for your customer base. An exclusive discount or a free mini-session just for using your services will definitely leave an impact.

03 give bonuses
Image by GLady

Another neat way to please your loyal audience with an unsolicited bonus is creating a personalized product for them. For instance, with Defrozo you can create custom downloadable client galleries for free. The albums look great on both desktop and mobile screens, and can be built within a couple of minutes. The developers of Defrozo also promise full-featured websites for clients available later this year as the project raises funds on Kickstarter. You could also create a sweet, short video showing some backstage moments using Magisto.

Remember that bonuses don’t have to be monetary. It’s attention and a personal approach that will impress people.

4. Be the guy/girl next door

In other words, get to know what interests you have in common and use this info to customize your approach to the needs of your clients.

Fortunately you can make use of social networks. Not all of your clients will use them or share a lot of their personal details, but you can still get to know people you work with better by simply following their social media updates.

04 be the guy next door
Image by Alejandro Escamilla

Another great way to connect with your clients on a personal level can be seen on the website of well-known wedding photographers Justin and Mary Marantz. They simply listed things they like presented as icons accompanied by funny comments on their About page. That’s the information that turns a “leading destination photographer” into a “guy/girl next door” that understands you in a way no other photographer does, and therefore, can be entrusted to photograph one of the most special days of your life. Genius, huh?

5. Follow Up

Following up is important. When done right, it helps you reinforce relationships with your current clients. Besides, it’s a sure way for you to be recommended more often.

05 follow up
Image by Ginger Quip

It’s not uncommon to send your clients a printed Thank You card, along with a photobook or image pack from their session. You could go further and send them an extra print about a month after. Break the mould of typical follow-up messages that are only sent when a business wants to sell something and only include a note that would remind your client about the fun time you had during the photo shoot. It can work great as a feedback request too.

If sending a physical gift does not fit your budget at the moment, writing a detailed blog post about a specific client’s session is a decent alternative. It won’t cost you a penny, but sincere words shared publicly won’t leave them cold, for sure.

Summary

It’s sincerity, passion for what you do, and commitment to quality that motivates people to stick around forever. Is that what you can say about your business approach? Congrats, then, you’ve got that wow-factor to impress your clients. Remember that when creating your next marketing campaign and it will work like a charm.

What’s your number-one marketing tactic you use to impress your clients? Share with the community by leaving a comment below!

googletag.cmd.push(function() {
tablet_slots.push( googletag.defineSlot( “/1005424/_dPSv4_tab-all-article-bottom_(300×250)”, [300, 250], “pb-ad-78623” ).addService( googletag.pubads() ) ); } );

googletag.cmd.push(function() {
mobile_slots.push( googletag.defineSlot( “/1005424/_dPSv4_mob-all-article-bottom_(300×250)”, [300, 250], “pb-ad-78158” ).addService( googletag.pubads() ) ); } );

The post 5 Simple Yet Clever Ways to Impress Your Photography Clients by Julia May appeared first on Digital Photography School.


Digital Photography School

 
Comments Off on 5 Simple Yet Clever Ways to Impress Your Photography Clients

Posted in Photography