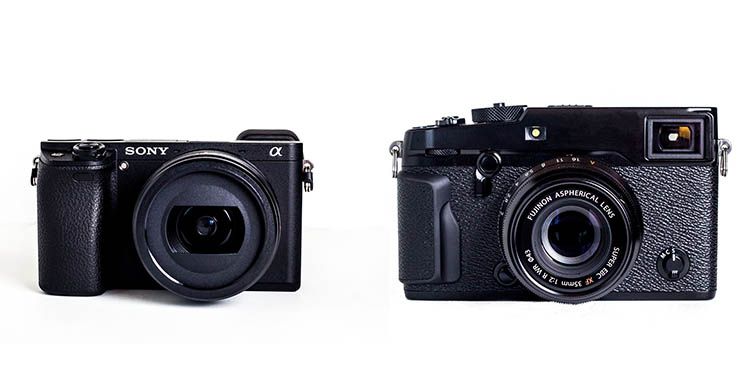
Flagships compared: Canon EOS-1D X Mark II versus Nikon D5
2016 is an Olympics year, and while Brazil may be scrambling to get everything ready, Canon and Nikon are fully prepared. Both manufacturers launched brand new flagship DSLRs this spring, just in time for the world’s sports and action photographers to learn how to use them ahead of the games, which start next month.
Having two major DSLRs launched into the same marketplace aimed at the same kind of photographers at the same time is a good opportunity to see how they compare. We’ve recently published full, detailed reviews of both the Canon EOS-1D X Mark II and Nikon D5, but in this article we’ll be highlighting the major differences between the two models.
Dynamic range
The Canon EOS-1D X Mark II offers greater dynamic range at base ISO than the Nikon D5 – and than any previous Canon DSLR. Source: Bill Claff
On the face of it, the Canon EOS-1D X Mark II and Nikon D5 offer a very similar sensor specification. And at 20 and 21MP respectively, their output resolution is indeed almost identical, but there are differences.
Unusually, in the contest between Canon and Nikon, the EOS-1D X Mark II’s sensor has the wider dynamic range at base ISO, which represents a major step forward for Canon’s pro lineup. Although not a match for the best-in-class performance offered by Sony’s current full-frame sensors, the 1D X Mark II bests the D5 by around one stop. Oddly, in terms of dynamic range, the D5 has moved backwards compared to its predecessor, the D4S.
The practical upshot of this is that the EOS-1D X Mark II is much more suitable for the sort of ‘expose for the highlights and pull the shadows up later’ approach to photography that makes sense in tricky lighting conditions. With the D5, you have to chose. Expose for highlight detail and color and lose definition in midtones and shadows, or expose for midtones and say goodbye to the brighter areas. With the EOS-1D X Mark II, while not best-in-class, Raw files are much more flexible.
High ISO performance
Even at ISO 64,000 the Nikon D5’s image quality is superb, and the AF system is capable of 3D Tracking in near darkness.
Of course, not everyone requires super-wide dynamic range from Raw files. For some photographers (and we suspect most photojournalists) high ISO Raw, and particularly JPEG, image quality will be more important. In this respect the D5 offers marginally superior performance to the EOS-1D X Mark II, although the difference isn’t that great within what any sensible photographer would consider a ‘normal’ ISO sensitivity span.
The D5 yields better quality JPEGs at ISO 409,600 (the EOS-1D X Mark II’s maximum setting) but above this, its additional ISO sensitivity settings (all the way up to 3.28 million) become progressively less useable. More useful is the D5’s backlighting of major controls, which is a huge benefit when changing settings at night.
Autofocus
The Nikon D5’s 153-point AF system is the most capable that we have ever seen.
As flagship sports and action cameras, the Canon EOS-1D X Mark II and Nikon D5 incorporate the best autofocus systems that their respective manufacturers know how to make.
In Canon’s case that’s a 61-point AF system, supported by a 360,000-pixel metering sensor to aid with subject tracking (‘iTR’ in Canon-speak) and face detection. Of the full 61 points, 41 are cross-type and the center point is sensitive down to -3EV in single-shot AF mode. Additionally, the 5 central points are dual-cross type, containing a long base-line x sensor in addition to the and + cross sensor for enhanced AF precision with F2.8 and faster lenses. Indeed, we’ve found these 5 points to have nearly mirrorless (contrast-detect) levels of precision, important for shallow depth-of-field photography.
The D5’s AF system features 153 points, 99 of which are cross-type, and of which 55 can be directly manually selected. The entire AF array is sensitive down to a rated -3EV, and the center point can still be used at -4EV. The D5’s metering sensor features 180,000 pixels, and works with the autofocus to create a ‘3D AF tracking’ system with face detection.
While the Canon EOS-1D X Mark II’s autofocus is very good, and leagues ahead of earlier-generation professional Canon cameras, the D5 leaves it in the dust. The D5’s AF system is without question the most capable of any camera that we have ever seen. The almost spooky reliability of 3D AF tracking, despite a lower resolution metering sensor for subject analysis, is a game-changer for all kinds of photography – not just fast action.
Easy to miss in the D5 (partly because Nikon hides it so well) is automatic AF point calibration. This is a massive time-saver when calibrating fast lenses for accurate focus, and a major selling point over the EOS-1D X Mark II (and earlier Nikon cameras).
Video
Both the Canon EOS-1D X Mark II and Nikon D5 offer 4K video, but the Canon is the better video camera. Its 1.34X crop in 4K mode is less aggressive and Dual Pixel AF transforms performance.
Again, in terms of video specification the EOS-1D X Mark II and D5 might appear to offer a very similar set of features. Both can shoot high-definition video, and both also boast 4K recording. But the exact breakdown of features – and how they are implemented – is quite different.
Of the two cameras, the EOS-1D X Mark II is unequivocally the better choice for video. Canon has been producing high-end video cameras for a long time (although in the DSLR market, Nikon got there first – just – with the D90) and the company’s experience in this field really shows. The EOS-1D X Mark II can shoot HD footage up to 120fps, which is great for slow-motion capture, and 4K at up to 60p. The D5 tops out at 60p and 30p respectively.
The EOS-1D X Mark II also imposes a less aggressive crop factor in 4K video mode: 1.34X as opposed to ~1.5X. This isn’t a huge difference, but it does mean that it’s easier to shoot wide-angle footage on the 1D X II. In addition, the EOS-1D X Mark II’s Dual Pixel AF system works brilliantly well in video mode, both in terms of speed and accuracy of AF acquisition, and also tracking. The combination of DPAF and touch-to-focus makes for a very refined shooting experience, and even swift and accurate AF for static subjects in stills. The D5’s contrast-detection AF system in live view and video is primitive by comparison.
There are a couple of points in Nikon’s favor though – unlike the EOS-1D X Mark II the D5 can offer zebra striping for highlight monitoring, and it can output clean 4K footage over HDMI to an external recorder. In addition, the D5’s entire ISO sensitivity span is available in 4K video recording, whereas by default, the EOS-1D X Mark II caps ISO at 12,800 (expandable to 204,800 with a custom function).
Rear LCD
The Nikon D5’s rear LCD screen offers 2.36-million dot resolution, color calibration, and a broad range of touch-sensitivity features.
The rear screens on the Canon EOS-1D X Mark II and Nikon D5 are the same size, but the D5’s display offers significantly higher resolution, at 2.36 million dots (to the 1.62 million dots of the 1D X II). Although the Canon’s screen is very sharp and detailed, the D5’s is noticeably better when compared side by side.
It’s not all about resolution though, and the D5 has a couple of extra tricks up its sleeve. If you find that how pictures look on the back of the camera is different to how they appear on a profiled computer, the D5’s rear LCD can be calibrated using a blue-amber, magenta-green color wheel.
And while the screens on the back of both cameras are touch-sensitive, the implementation of touch features on the Nikon D5 is much broader. In the EOS-1D X Mark II, pretty much the only thing you can do by touch is to set AF point in live view. In combination with Dual Pixel AF this works brilliantly, but touch-sensitivity is much more deeply integrated into the Nikon D5’s ergonomics. Move to the next slide to read more.
Operation and Handling
The Nikon D5’s touch-sensitive feature set is much more useful than the Canon EOS-1D X Mark II. In review mode, images can be scrolled or ‘scrubbed’ through and focus can be checked with a double-tap.
In terms of handling, as always when comparing cameras from different manufacturers, the question of which is ‘better’ is largely subjective. But that’s not to say that there aren’t some measurable differences between the Canon EOS-1D X II and the Nikon D5. For starters, there’s that rear LCD screen.
Canon is determined that no unwary professional photographer should ever do anything by accident. That was the logic behind the original EOS-1D’s ’press button A, press button A again, scroll, stand on your head then press button B’ control logic, and it remains a Canon obsession to this day. As such, the company has basically deactivated the EOS-1D X Mark II’s touch-sensitivity feature except for one action – AF point selection in live view.
Nikon isn’t as stingy in this regard, and on the D5, you can perform several operations by touch – possibly the most useful being scrolling through and zooming (by pinch or double tap) quickly into images in image review mode.
In terms of customization, both of these cameras are highly configurable, but the D5 is a level up from the EOS-1D X Mark II. Nearly every custom button on the D5 gets a comprehensive list of assignable functions, much more generous than that offered by the EOS-1D X II. Furthermore, nearly every custom button can be assigned to activate and initiate any AF mode – uniquely allowing for things like momentary disabling of subject tracking, or the ability to switch between tracking a subject you specify vs. one the camera automatically chooses. This makes it easy to adapt to changing scenarios, or instantly try a different AF mode when one doesn’t work.
Shooting speed
The Canon EOS-1D X Mark II can shoot at up to 14fps with autofocus. This comes in very handy for capturing fast and erratic action like this rodeo rider.
Both the Canon EOS-1D X Mark II and Nikon D5 are – probably – approaching the limit of how fast DSLRs can be made to take pictures before shaking themselves to bits. The EOS-1D X Mark II is the quicker of the two cameras, topping out at 16 fps in live view mode, while the D5 lags a little behind at 14 fps. With autofocus and autoexposure, the Canon can shoot at up to 14 fps, while the D5 maxes out at 12 fps. It’s worth noting the Canon can shoot at 16 fps and still display a review image between each shot – allowing you to follow your subject – while the screen on the Nikon stays blacked-out when firing at its 14 fps maximum frame rate.
Furthermore, the 4K frame grab feature on the EOS-1D X Mark II effectively allows for a 60 fps silent shooting – with AF. Rolling shutter is minimal, so this is actually a usable way of capturing the decisive moment when it comes to very fast action. The D5 can shoot silently at 30 fps for 5s, but you only get 5MP stills out of it in this mode.
On the numbers alone, the EOS-1D X Mark II has the edge in terms of speed – just. But frames per second is only one part of the equation when it comes to action photography. Remember what we said about the two cameras’ AF systems…
Memory cards
Both the Canon EOS-1D X Mark II and Nikon D5 support CompactFlash media, but the EOS-1D X Mark II offers an additional slot for faster CFast media. The Nikon D5 is available in two versions – one with twin CompactFlash slots, and one with twin XQD slots.
Here’s a funny thing – there are actually two Nikon D5s on the market. There’s one with twin CompactFlash slots, and another one with twin XQD card slots. There’s only one version of the Canon EOS-1D X Mark II, and it comes fitted with one CompactFlash slot, and one CFast slot. Confusingly, CF and CFast cards are not mechanically cross-compatible, but the slots for both media – and the cards themselves – look almost identical at a glance.
So the risk of accidentally jamming the wrong card into the wrong slot is certainly higher in the EOS-1D X Mark II than the D5, but which media choice is better?
Currently available XQD and CFast 2.0 cards provide roughly similar performance (400-500mb/s max read speed). The biggest practical difference right now is price: a high-speed (510mb/s read) 128GB CFast 2.0 card costs about twice as much as a 440mb/s XQD card of the same capacity.
Of course if you don’t shoot high frame-rate bursts in Raw mode and don’t want to record 4K video, all of this is academic. Just stick with good old trusty CompactFlash.
Battery life
The Nikon D5’s incredible battery life means that it can shoot for thousands of frames per charge – a huge selling point for action photographers and anyone working in remote conditions.
It goes without saying that the Canon EOS-1D X Mark II and Nikon D5 are tough, durable cameras. Maybe one is tougher than the other, but to be honest we don’t have the time (or the necessary credit limit) to test them to destruction. But there’s more to durability than just physical toughness. A major consideration when using a camera in rough conditions – especially in remote or primitive locations – is battery life.
The Canon EOS-1D X II’s battery life is CIPA rated at 1210 shots per charge. Not bad. But the D5 is rated at an incredible 3780 shots – almost three times as many pictures per charge.
Now, CIPA ratings should be taken with a pinch of salt, since they’re based on a series of use-case tests meant to approximate ‘normal’ use and in our experience, actual battery life is almost always better than the rating. We’ve shot well over 2000 frames per charge on the EOS-1D X Mark II without coming near to running its battery flat. But the Nikon D5’s endurance in normal use really is quite extraordinary. Unless they’re shooting a lot of 4K video, we suspect that most D5 shooters will never need to carry a spare battery.
How do they compare?
Obviously, very few (if any) photographers out there are seriously asking ‘which of these two cameras should I buy?’ For one thing, we suspect that a large portion of of eventual EOS-1D X Mark II and D5 shooters will have had their gear purchased by an agency or publication. Meanwhile, those who pay for their own gear have most likely been locked into one or other system for so long that a comparison between the two flagships is of academic interest only.
But that’s not the point of this article. In examining the two flagship DSLRs from the two biggest camera manufacturers, we’re effectively looking at the state of the art for DSLRs at this point in time. So in the final summing up, how do they compare?
It’s not a huge surprise that overall, both cameras perform very well indeed. Their identical scores and gold awards testify to that. The Canon EOS-1D X Mark II is slightly faster when shooting stills, and significantly better as a video camera. Meanwhile, the Nikon D5 offers a market-leading AF system (for stills, at least) and a much more satisfying touch-screen implementation, with more extensive customization options.
The D5’s extraordinary battery life means also that it can keep shooting for much longer between charges, and it can capture full-color images in conditions literally too dark for the human eye to discern anything. On the other hand, at base ISO in daylight, the EOS-1D X II’s extra Raw dynamic range makes it more useful for shooting in brighter, more contrasty conditions.
Ultimately, on the understanding that the question ‘which should you buy?’ is largely hypothetical in this case, we’d certainly recommend the Canon EOS-1D X Mark II for landscape photography and 4K video. If you need the world’s best AF system, and a camera that can shoot forever and literally see in the dark, then the D5 is the better option.
- Read our full Canon EOS-1D X Mark II review
- Read our full Nikon D5 review
Want to compare more cameras? Click here
Did we miss anything? Let us know in the comments.
Articles: Digital Photography Review (dpreview.com)


 Concept To Creation: How Professional Photographers Do It
 Concept To Creation: Turn Inspiration Into Concept
 Concept To Creation: Finding Inspiration
 Sarah DeAnna On Working With Photographers
 Lesson In Photoshop With Katie Nattrass
 Learnings Of A Model With Sarah DeAnna
 Vinpix Meets Trina Turk & Jonathan Skow
 Urban Siren With Clayton Gornichec


You must be logged in to post a comment.