
As the sun set on Massachusetts Bay, I turned and saw my buddy Joe lining up a shot. I walked around him until the sun was directly behind his head, and dialed my exposure way back to -2 stops to create the sihouette. Canon EOS 50D, EF 70-200 f/2.8L IS USM. ISO 100, 1/6400, f/2.8. Shot in Av mode at -2 exposure compensation.
For the most part, as photographers, we avoid shooting into the sun for fear that we’ll get some unsightly flaring. The sun DOES present some exposure challenges, and of course, flare is a concern, but by carefully composing your shot, and properly exposing, including the sun in your images can create stunning results.
The first secret to using the sun is about positioning. When you can, position the sun behind something else in your image. In the image of the photographer above, this gives the effect of a halo, helping create the silhouetted image. By using exposure compensation to darken the exposure, I kept the sun from blowing out, and darkened the main subject into the silhouette. I then adjusted the white balance and color saturation to get the final result. Because the image was shot at f/2.8, the sun appeared as a giant ball in the image. In another example, the image of the daisies, a wide angle lens was used to make the sun smaller in the image, and was then positioned just behind the stem of the daisy. Because the image was shot at a smaller aperture, f/22, the sun appears as a star rather than a ball. One of the cool things that happens when shooting into the sun with a wide angle lens at a small aperture is that the light falls off in the areas away from the sun, creating dramatic skies that go from near white by the sun, to deep blue in the corners.

This image of daisies was shot with the EOS-1D Mark IV and EF 14mm f/2.8L II. Exposure was 1/100, f/22, ISO 100. Aperture Priority.
Shooting into the sun does pose some exposure challenges. Shooting into such a bright light can cause underexposure. That’s not necessarily a problem if you’re going for a silhouette, but if you want some detail in the subjects that are backlit by the sun, you’ll need to dial in some exposure compensation to counter the brightness of the sun. In the image of the Elm In Cook’s Meadow, the image at what the camera said was the proper exposure was a bit dark, and devoid of shadow detail. Thankfully, for this image, I shot several images at varying exposures (also called bracketing). The image you see here was shot at +1.6 exposure compensation, in aperture priority mode. This allowed for a level of detail in the shadow areas, while not allowing the highlights to blow out.
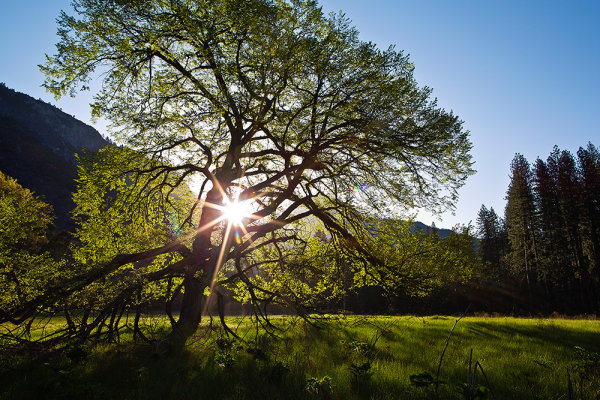
For this shot in Yosemite National Park, I shot in Aperture Priority, with exposure comensation set to +1.6. EOS 5D Mark III, EF 24mm f/1.4L II. ISO 100, 1/30, f/16.
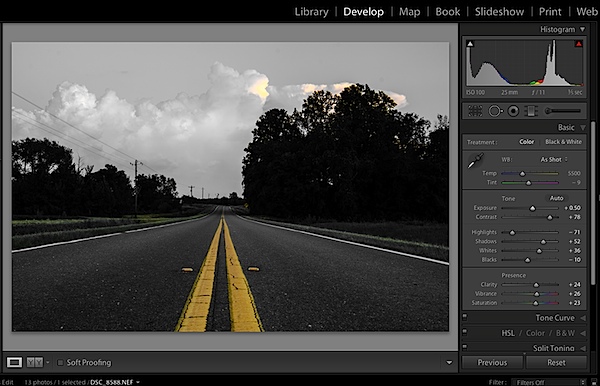
By bracketing your exposures, you can see how changing your exposure will affect the look of the image. Normally, I set my aperture and bracket my exposures by changing shutter speed, as I will generally know what I want my depth of field to be. There are times to try it the other way, setting your shutter speed and adjusting your aperture. This will affect your depth of field, however, so be aware of what’s in focus and what’s not. Your final option is to adjust the ISO. The risks here are that when you raise the ISO to achieve the overexposure, you run the risk of introducing unwanted noise into your image, depending on how high you set the ISO. This technique can give your several options when working with the contrast ranges you deal with when shooting into the sun.
Don’t be afraid to include the sun in your shots, using it as a strong compositional element. Too often we forget to use the sun in the image, simply using its light. Including the sun in the shot creates new possibilities that can make for some dramatic images.

This shot of the canopy of autumn leaves in upstate NY was taken with a fisheye lens. The sun shining through the gap in the leaves added just the touch of drama I needed. EOS-1D X, EF 8-15mm f/4L. 1/60, f/16, ISO 100.
Post originally from: Digital Photography Tips.
Check out our more Photography Tips at Photography Tips for Beginners, Portrait Photography Tips and Wedding Photography Tips.
Using the Sun As A Compositional Element

Digital Photography School
 Photo by peter bowers
 Photo by IrenaS
 Photo by Bram & Vera


You must be logged in to post a comment.