RSS
 

Posts Tagged ‘tool’

Origami Spoon: Flat-Folding Kitchen Tool Adjusts to Measure Multiple Sizes

25 Nov

[ By WebUrbanist in Design & Products & Packaging. ]

four-sizes

A clever domestic design to eliminate ungainly collections of measuring spoons and cups, Polygons is an ingenious cooking multi-tool that measures different amounts on demand and packs flat when not in use.

polygons

kitchenmultitool

The key to the device is its flexibility, and not just in terms of measuring. Its creators claim it can flex up to 100,000 times without breaking thanks to TPR-based hinges.

four-configurations

spreading-stuff

Each tool (a teaspoon and tablespoon variant) has four different measuring configurations and can also be used to spread things in its flat formation.

kitchen-tool-powder

The creators claim it works equally well with runny and viscous liquids as well as powders, then wash easily to avoid stains and smells.

kitchen-measuring-device

If the material science side of the project holds it could have a lot more applications as well for everyday-use objects that need to bend without extraneous hinging mechanisms (which add bulk to a product as well as a point of failure and cracks for dirt and debris).

Share on Facebook


[ By WebUrbanist in Design & Products & Packaging. ]

[ WebUrbanist | Archives | Galleries | Privacy | TOS ]


WebUrbanist

 
Comments Off on Origami Spoon: Flat-Folding Kitchen Tool Adjusts to Measure Multiple Sizes

Posted in Creativity


Adobe and UC Berkeley demonstrate image editing tool powered by machine learning

01 Oct

Researchers with Adobe and the University of California-Berkeley have detailed a new AI-powered photo manipulation tool that enables sophisticated photo modification using ‘target images’ and/or crude user sketches. The end result is a realistically altered photo that has been machine-modified (or, in the case of blank images, completely machine generated) to match a target image without extensive ‘natural’ user editing.

According to a newly published study detailing the technology, this tool involves a ‘generative adversarial neural network’ that works to modify images in near-real time. As one example demonstrated in the video below, drawing a general shape over a photo of a bag causes the software to automatically adjust the bag’s size to match the sketched shape without compromising its realistic nature. The software can also generate images based on crude user ‘scribbles’ – no artistic talent required.

Articles: Digital Photography Review (dpreview.com)

 
Comments Off on Adobe and UC Berkeley demonstrate image editing tool powered by machine learning

Posted in Uncategorized


EyeEm opens web uploader tool to everyone

28 Jul

Photography community and marketplace EyeEm is making it easier for photographers to join its service by opening up its Web-based image uploading tool to all new and existing users. The uploader tool first launched last year for Market users looking to sell their photos through EyeEm. Using the tool, photographers can transfer images from services like Flickr and Google Drive to EyeEm, the latter of which auto-suggests tags based on an analysis of each image.

EyeEm supports uploading images from a local computer and the Web services Flickr, Dropbox, Google Drive, and Picasa. After a photo is uploaded, users can add the photo location, manually add tags, and choose from auto-suggested tags. Users can also opt in to EyeEm Market, where they may sell photos and receive 50% of the sale price.

It’s no coincidence that EyeEm’s announcement comes on the heels of the news that Yahoo-owned Flickr will soon be owned by Verizon. A post on EyeEm’s blog appeals to those who are ‘concerned about the unclear future of Flickr’, and stresses that easy importing and auto-tagging should ease the pain of making the transition from another photo sharing community. 

Articles: Digital Photography Review (dpreview.com)

 
Comments Off on EyeEm opens web uploader tool to everyone

Posted in Uncategorized


How to Use the Text Tool in Photoshop

14 Jul

As photographers, we often swear by the mantra that a picture speaks a thousand words. Yet there are some instances when we just wish we could add a word or two to help facilitate the understanding of the image, or carry the thought process forward even beyond viewing the image. The good news is that this is fairly easy to do using most editing software on the market today.

In this article we’ll go over the basics of how to add text to an image using Photoshop.

transparent-text

The Type Tool

Photoshop’s Type Tool is an easy to use yet powerful mechanism with which you can add text to an image. The Type Tool is found in the Tools panel, normally located along the left side of the screen. It’s the icon that is the capital letter T. You can also select the Type Tool by pressing the letter T on your keyboard. The default chosen is the Horizontal type tool, but you also have the option of selecting the Vertical type tool (where text entered is displayed in vertical orientation, going down instead of to the right – just click and hold your mouse on the Type tool on the panel to access the other options).

Memorable Jaunts Article for DPS Text tool in Photoshop basics 02

When you choose the Type Tool, Photoshop automatically creates a new layer (called Type Layer) over the original background image. This is very helpful should you make a mistake and want to delete the layer to start over, or if you want to make edits after the fact. Initially the layer has a generic name “Layer 1” but once you start entering the text, the layer name changes to the text you have entered. However, this can be confusing, especially if you are entering in a lot of text in the type layer. I recommend changing the name of the Layer to something more appropriate and meaningful like Title Text or Quote Text, etc.

Memorable Jaunts Article for DPS Text tool in Photoshop basics 04

Choosing a Font

As soon as you select the Type Tool, the Options Bar along the top of the screen updates to show the options related to it, including options for choosing a font, a font style and the size among others. Front left to right (as shown in the image below) you can choose font type, font style, font size, alignment, and color. The type indicates the font you want to use. Clicking on the dropdown arrow shows a list of all the possible fonts available for use. The exact fonts you’ll see in your list will depend on which fonts are currently installed on your computer. Next up is the style. In this example, I have used italic style for the image below. Following that is the size, alignment, and color. Selecting the color opens up the color picker tool where you can either choose the color from the pallet, or enter in the HEX value of the color you want for the text.

Memorable Jaunts Article for DPS Text tool in Photoshop basics 03

Adding Type to the Image

The power of the type tool in Photoshop lies in the ability to add different types of text to a document. The first option is Point type (also known as character type), and the second is Area type (also known as paragraph type). The difference is that point type is mainly used for adding small amounts of text to a document (a few words, a title, etc.) while area type is used for adding larger amounts of text (think a quote or paragraph) inside a selected area. The Point type is the basic type tool. When the type tool is selected the default is a line of text that will keep extending as long as you keep writing text in the type box (that is Point type).

Memorable Jaunts Article for DPS Text tool in Photoshop basics 07

To add text using the Point type, simply click on your image with the Type Tool, in the spot where you want your text to begin. A blinking insertion marker will appear letting you know that Photoshop is ready for you to start typing.

By holding down the Shift key, and dragging the ends of the type box (the blinking insertion marker), and an Area type will be created. This is the area where larger blocks of text, like paragraphs, can be entered. You can also simply click and drag to make a rectangle (similar to make a marquee selection) which will be the Area type.

Memorable Jaunts Article for DPS Text tool in Photoshop basics 05

Memorable Jaunts Article for DPS Text tool in Photoshop basics 06

As you can see, the Type tool is a simple yet powerful tool to add text to your images in a creative way. It can be used to enhance the messaging on an image, as well as for other uses like creating announcements, marketing materials, etc., based on your needs. Once you have the basics of the text tool mastered, you can take it up a notch to add effects like drop shadow and an image see-through the text effect as shown in the images below. It is not complicated but you need to follow the steps carefully.

Special text effects

Memorable-Jaunts-Text-Tool-Text-See-through-effect-for-DPS-article-01b

Text tool effect with image see through

Memorable-Jaunts-Text-Tool-Text-See-through-effect-for-DPS-article-02b

Text tool with image see-through effect and a drop shadow for added impact.

To add a drop-shadow to text, follow the steps listed below:

  1. Create a new text layer and select the font, size and color you want. To see the true effect of image through text, make sure you select an appropriate font and size (something bold and wide).
  2. Double clicking on the text layer will open up the layer style panel. To add a drop shadow effect, select the drop shadow option (last option) and adjust the size, position and color of the drop shadow.
text-tool-01

Create a new text layer on a new image and adjust the font, size and color of the text layer to taste. For text see-through effect, a bold large font is preferred.

text-tool-02

Using the layer style option, you can add a drop shadow effect and adjust the size, distance and orientation/angle of the drop shadow.

Creating see-through text

To create an effect of transparent text (you can see through it) open up the Layer Style panel and click on Blending Options from the left-hand side. Look for Advanced Blending (circled below).

text-unfaded

Lower the Fill Opacity by moving the slider to the left. This is what 50% faded looks like:

text-50-faded

Text layer with the opacity lowered.

Notice that is does not lower the opacity of any of the other layer styles you have applied such as the Drop Shadow. It only fades out the inside of the text. This is a handy trick for making watermarks of your name or logo over your images so it is subtle.

Faded out to 0%

Faded out to 0%

Note: if you want to make a custom color for your text, one that complements well with the tones of your image – you can use the color picker to select a shade right from your image. Just click on the color in the top menu panel or the Character panel if you have it opened – that will bring up the Color Picker popup box. Just hover over your image and you will see a small eyedropper (I have enlarged it below so you can see it easier). Whatever color you click on will be selected and pulled right from your image.

text-tool-custom-color

Use the color picker to select a tone from your image to use for your text.

Creating and image inside text

To add an image see-through effect to the text you created, follow the steps listed below:

  1. Once you have the text you want, place an image (Select File, Place image). A new layer will be created and the image will be placed on top of the text layer. You will notice that the text layer you just created will be hidden behind the image.
  2. To create the see through effect, you need to add a clipping mask to the image layer. This causes the image to be clipped to the text.
  3. To add a clipping mask, select Layer -> Create clipping mask from the menu options.
  4. You can move the image using the transform tool, to change the position of certain elements in the image to line up to the text if needed. For example I moved the image up to show more of the red and pink flowers through the text.
text-tool-03

Select the image you want to use for the text see-through effect and use the Place function to put it on the text layer. It is automatically selected in the transform mode. Adjust the size of the image to taste.

Add a clipping mask to the image layer (Menu option - layer -> create clipping mask). The image will automatically appear behind the text and the effect will be seen through the text.

Add a clipping mask to the image layer (Menu option – layer -> create clipping mask). The image will automatically appear behind the text and the effect will be seen through the text. When you see the little down arrow (circled) you know the clipping mask is applied between those two layers.

Memorable-Jaunts-Text-Tool-Text-See-through-effect-for-DPS-article-02b

Text with see-through image effect and pink drop shadow.

Be sure to play around with various images to see what images work for you. What are some way you use the Type tool for your images? Feel free to share in the comments below.

googletag.cmd.push(function() {
tablet_slots.push( googletag.defineSlot( “/1005424/_dPSv4_tab-all-article-bottom_(300×250)”, [300, 250], “pb-ad-78623” ).addService( googletag.pubads() ) ); } );

googletag.cmd.push(function() {
mobile_slots.push( googletag.defineSlot( “/1005424/_dPSv4_mob-all-article-bottom_(300×250)”, [300, 250], “pb-ad-78158” ).addService( googletag.pubads() ) ); } );

The post How to Use the Text Tool in Photoshop by Karthika Gupta appeared first on Digital Photography School.


Digital Photography School

 
Comments Off on How to Use the Text Tool in Photoshop

Posted in Photography


Pencil + Sharpener: Redesign Solves 3 Classic Drawing Tool Problems

27 Jun

[ By WebUrbanist in Design & Products & Packaging. ]

pencil plus sharpener

Pencils require sharpening, run out of eraser and turn into unusable stubs as they near the end of their lifespan, but this clever gadget aims to change all of that, solving all three issues at once.

demo

Even in today’s digital world, artists, designers, writers and musicians still fall back on this traditional tool. The Pencil+ helps on multiple fronts, but functions first as a pencil holder, enabling the user to tuck various lengths of pencil into a central void.

eraserhead

What keeps the pencil from slipping too far in? An adjustable eraser serves as a backstop, letting you move the pencil portion backward to fit and forward as the pencil gets shorter. Meanwhile, the back of the holder (normally where one would find an eraser) doubles as a sharpener, keeping it always on hand for reworking broken or worn tips.

remove and sharpen

“Worry no more because with pencil+,” say its creators, “you can now have a sharpener, extender, eraser holder and transporter for your favorite tool” which is available in Teak, Ebony, Wild Olive, African Padauk and Indonesian Redwood”

pencil sharpener combo

A few potential critiques come to mind: first, someone employing this device will have to deal with an additional step to access an eraser. Second, the holder is necessarily wider than a pencil, so it will require some getting used to in terms of grip and function. Third, the eraser length is a function of pencil length, so storing a lot of extra eraser could be an issue (though easily longer than a normal one). Still, one can be sure, at least, never to lose track of one’s sharpener, and also that a single pencil will last a lot longer.

Share on Facebook


[ By WebUrbanist in Design & Products & Packaging. ]

[ WebUrbanist | Archives | Galleries | Privacy | TOS ]


WebUrbanist

 
Comments Off on Pencil + Sharpener: Redesign Solves 3 Classic Drawing Tool Problems

Posted in Creativity


Three’s a charm: Sony RX10 III added to studio scene comparison tool

02 Jun

The Sony Cyber-shot RX10 III has impressed us so far. Its new 24-600 F2.4-4 lens has impressed us on the trail and in our initial testing, but it does come at a pretty price. We put it in the studio for a more controlled lens, and image quality test. See how it stacks up against its nearest competitors.

Articles: Digital Photography Review (dpreview.com)

 
Comments Off on Three’s a charm: Sony RX10 III added to studio scene comparison tool

Posted in Uncategorized


How to Use the Healing Tool in Photoshop

23 May

We all have those moments in our photographic careers where things just don’t pan out exactly how we imagined them. Our image is almost exactly as we imagined it to be, but perhaps there are some spots, blemishes, marks or distractions that just don’t fit in the frame.

In most cases, all the elements of the image tend to work together to tell the story, but sometimes we just to clean the image up a tad, to get rid of some of the distracting elements that take away from that story. Luckily, most editing software, including Photoshop, have very easy, yet powerful tools, that you can use to clean up your image and get rid of the distractions.

Memorable Jaunts Landscape Image cleaned using healing brush tools Artcile for DPS 01

The Healing Tool in Photoshop

This article provides a basic explanation of the Healing Tool in Photoshop, that is very effective in removing or cleaning out distracting elements in an image. For the purposes of this article, I am using Photoshop version CS6. The Healing Brush Tool in Photoshop is made of three parts. These are probably the most used tools in the healing tool family, and 90% of the time they get the job done.

  • Spot Healing Brush Tool
  • Healing Brush Tool
  • Patch Tool
Memorable Jaunts Landscape Image cleaned using healing brush tools Artcile for DPS 07

The Healing tool in PS has the bandaid icon. When clicked, it opens up this menu. You can also click the J key on your keyboard to access this tool.

Here is an example of a simple landscape image that was cleaned up using the Spot Healing Brush Tool, and the Healing Brush Tool.

Memorable Jaunts Landscape Image cleaned using healing brush tools Artcile for DPS 02

Original Image – SOOC. I am looking to clean out some of the distracting elements here like the ‘Road curves’ sign on the right, the dead bushes on the left and the little tree on the top of the hill to the left of the image.

The first step, before any cleanup is done, is to perform any basic edits to the image. I consider adjustments in exposure, contrast and temperature to be basic adjustments. For this image, I increased the exposure and added some contrast, to highlight the browns in the hillside. This image was taken from a stopped car because I really liked the curve in the road along the small hill on the top right side. But I wanted to get rid of the road sign and the dead branches on the sides of the road leading up to the hill.

Once I brightened and adjusted the contrast of the image, I created a new layer in PS to add my cleanup edits. I called it, “Clean up layer” for easy identification. This keeps all the cleanup elements together, so I can toggle between the On and Off to see the affects of the cleanup at any time (toggling a layer On and Off is done by clicking on the eyeball symbol to the left of the layer.)

Memorable Jaunts Landscape Image cleaned using healing brush tools Artcile for DPS 06

The Spot Healing Brush Tool is used for quick, easy cleanups. Once you select the it, and adjust the size of the brush (use the left square bracket key [ to decrease size of the brush and right square bracket key ] to increase the size), you simply click on the blemish to remove it. Also set Sample to “Current & Below” or “All Layers” so it will pull pixels from your base layer (otherwise you’re just healing with a blank layer).

The Spot Healing Brush automatically selects the source area from which to clone. So sometimes it might not be completely accurate, because the software is making the judgement on where is the best source to take a sample. A good tip is to zoom in to the specific area and watch the pixels closely while making the adjustments. The Spot Healing Brush works best on small areas and easy cleanups.

Memorable Jaunts Landscape Image cleaned using healing brush tools Artcile for DPS 05

The Healing Brush Tool

I use the Healing Brush Tool is for slightly more complex cleanups, especially areas that have sharp edges, curved, or straight lines that separate areas of different textures and color. As you can see here, the top of the hill has a small tree which sticks out against the overcast sky. For more accurate editing, zoom in to the area that needs to be edited, so as to eliminate any errors. It is hard to be completely accurate if you are not zoomed in accurately to the specific area that needs to be edited.

Once selected, theHealing Brush Tool requires you to set a source point from which to heal the affected area (that is the easiest way to think about the healing action, in my opinion). I set the right size of the brush (use the [ ]  keys to increase or decrease brush size, OR click on the slider as shown in the image below), then I select the edge of the line closest in texture to the source area. Holding my cursor down (holding down the mouse button), I drag the cursor from start to finish over the object to be removed.

Memorable Jaunts Landscape Image cleaned using healing brush tools Artcile for DPS 04

After

After cleanup

The Patch Tool

I use the Patch Tool in Photoshop for any bigger areas that need to be adjusted. For example, in the image below, there are many sign posts along the road that are larger. I could use the healing brush tool but it would be a little bit more time-consuming as I would have to go over the adjustments several times, to clean it out completely. Instead I used the Patch Tool to fix the affected spot, and replace it with another area sampled from the surrounding landscape. Using the Patch Tool, select the area to be cleaned up, then select the area close to it to sample from, to do the patch.

Notes about the Patch Tool:

  • To do your editing non-destructively use the patch tool on a duplicate layer (it cannot be an empty layer).
  • You must select a Patch type as Normal or Content Aware. For most things Content Aware does a better job, so try that first and resort to Normal if it doesn’t work.
  • If you select Normal you have to choose either Source or Destination. The difference is that when Source is highlighted, the area you select will be Patched with the area you drag it over to. When Destination is highlighted the area you select will be cloned over to the area you move it to.

Final image where all the posts, signs and snow measurement sticks have been removed using a combination of patch tool, spot healing brush and healing brush tool.

As you can see, the healing tools in Photoshop are quite effective. With such a wide variety of options, any cleanup is easy and effective. One tip that I have learnt from experience is to do all the adjustments while zooming in to the affected area. This ensures that right amount of cleanup is done to all the pixels. If you find that the cleanup effect is too stark and harsh, an easy fix is to adjust the Opacity (i.e. visibility) of the cleanup layer. Especially when cleaning up blemishes on the face, this gives a more natural, blended effect. There is no right opacity percentage, simply choose the value that seems more natural to the eye.

How do you use the Healing Tools in Photoshop? Please share in the comments below.

googletag.cmd.push(function() {
tablet_slots.push( googletag.defineSlot( “/1005424/_dPSv4_tab-all-article-bottom_(300×250)”, [300, 250], “pb-ad-78623” ).addService( googletag.pubads() ) ); } );

googletag.cmd.push(function() {
mobile_slots.push( googletag.defineSlot( “/1005424/_dPSv4_mob-all-article-bottom_(300×250)”, [300, 250], “pb-ad-78158” ).addService( googletag.pubads() ) ); } );

The post How to Use the Healing Tool in Photoshop by Karthika Gupta appeared first on Digital Photography School.


Digital Photography School

 
Comments Off on How to Use the Healing Tool in Photoshop

Posted in Photography


Corel AfterShot Pro 3 launches with new touchup tool, recovery algorithm

12 May

Corel has launched AfterShot Pro 3, the latest version of its photo editing software. The newest version brings several added features and updates, including a Lens Correction Development Kit for creating custom lens corrections, an in-app plugin manager, and a few new and improved tools for touching up photos.

AfterShot Pro 3 is equipped with a completely new Highlight Recovery algorithm, and as such Corel claims the Highlight Recovery Range slider can pull more tones and details from overexposed Raw photos. Joining the new algorithm is the addition of ‘comprehensive watermarking,’ including the ability to watermark in batches, rotate the watermark’s angle, adjust its size, and alter its transparency. 

Another new editing tool is Blemish Removal & Correction, which aims to eliminate the need to use a separate app like Photoshop to remove blemishes and perform other touchups and small corrections. Photo presets can also be applied via the new in-app preset library; both premium and free presets are offered.

Finally, AfterShot Pro 3 features a new modular delivery system for providing updated and new Raw profiles more quickly than the previous software version. With this, new camera profiles are available to download in-app as soon as they’re released by the company’s development team.

Corel AfterShot Pro 3 is available in English, German and Japanese through the product’s website; Windows, Mac and Linux are supported. The price for new customers is $ 79.99 USD/CAD, while existing customers can upgrade to the newest version for $ 59.99 USD/CAD.

Via: MarketWired

Articles: Digital Photography Review (dpreview.com)

 
Comments Off on Corel AfterShot Pro 3 launches with new touchup tool, recovery algorithm

Posted in Uncategorized


How to Use the Patch Tool in Photoshop

23 Apr

There are tools in Photoshop that I use more than others, and some not at all. The Patch tool is one of my favourites. It is so easy to use and with each version of Photoshop, it has gotten even better.

title-Patch-tool-in-Photoshop

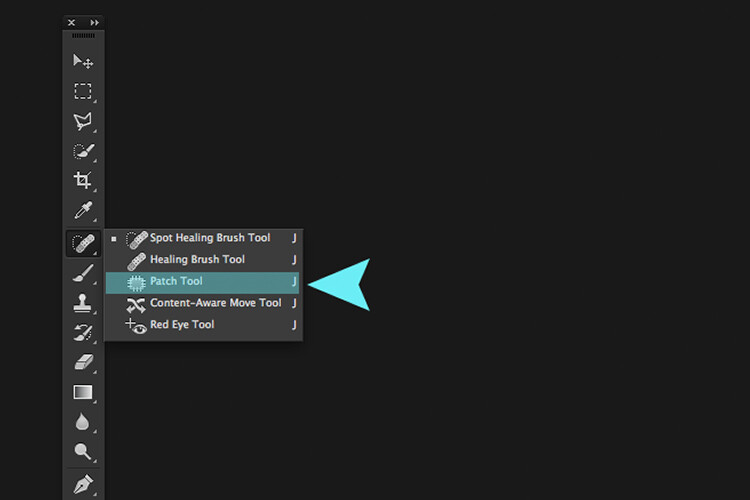
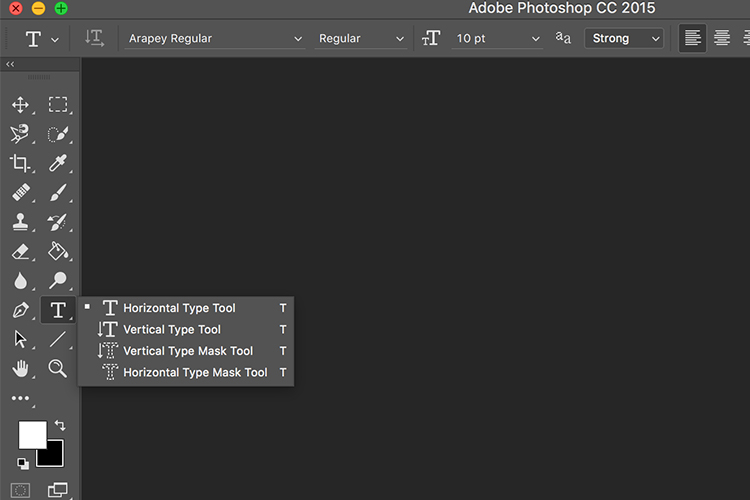
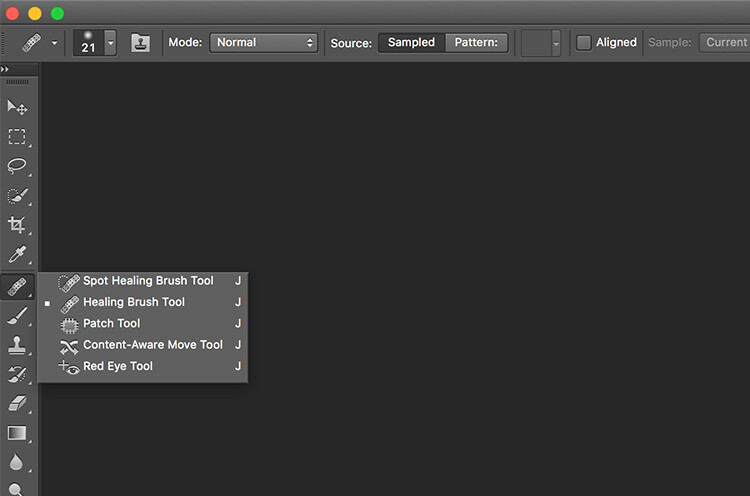
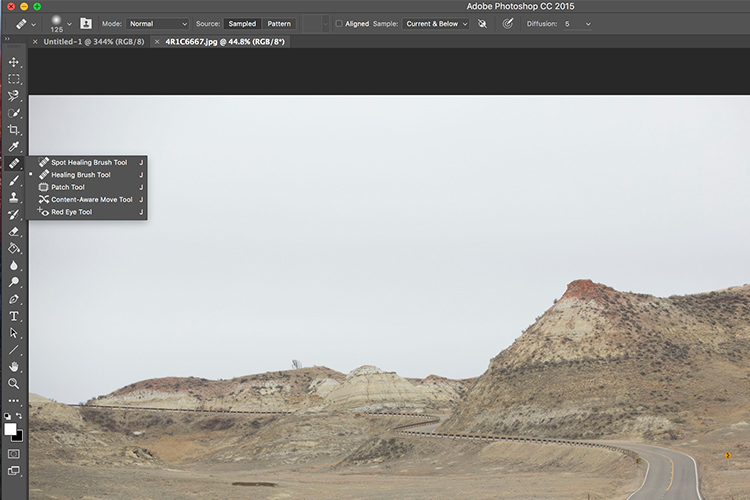
The Patch Tool is located under the fly out menu of the Spot Healing Brush.

What exactly is the Patch Tool for?

The Patch Tool is part of the healing brush set of tools. These are the go-to tools for retouching and repairing your images. The Patch Tool is primarily used to repair larger areas of an image, or get rid of any distractions or blemishes.

The patch tool was introduced into Photoshop at the same time as the Healing Brush. It is similar to the Healing Brush Tool, in that it matches the texture, lighting and shading of the sampled pixels to the source area. But, the Patch Tool uses selection-defined areas instead of a brush.

Prior to Photoshop CS6, you could not work on a separate empty layer when using the Patch Tool, unlike the Spot and Healing Brushes. This meant that you had to duplicate the layer that you were working on. However, in Photoshop CS6, Content-Aware was introduced to the Patch Tool. So you can now work on an image using an empty layer. This has made it quite powerful indeed.

What makes the Patch tool unique is that each time you use, it will give a slightly different result even on the same selection. It is great for retouching larger areas of your image, very fast and quite seamlessly. Or if you are in Destination Mode, this can also duplicate, or clone an object. Although, I rarely use it for that, it’s still an option. I will illustrate this further on in the article. There is also an option to use a pattern or Transparent, neither of which I’ve had a use for yet to date.

What does the Patch Tool look like?

The Patch Tool can be found hidden behind the Healing Brush tool in the Tools panel.

patch tool highlighted in tools panel in photoshop

By clicking on the Spot Healing brush in the tools panel. A fly out menu appears, the Patch tool is the third one down.

How does the Patch Tool work?

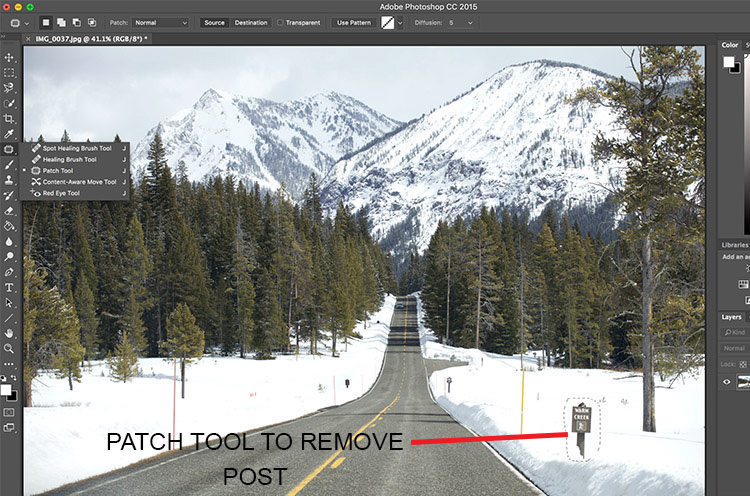
  1. Select the Patch tool and draw an area around your selection. It works in a similar way to the Lasso selection.
  2. Move the cursor over the selected area and drag it to the left, right, or in any direction.
  3. Choose whether you choose Source or Destination mode in the Options Bar. You will see a preview of the image as you drag it.
  4. When you release the mouse or stylus, Photoshop does the magic of blending the pixels from the source or the destination area, to merge the pixels with the original selection seamlessly. Deselect by hitting Cmd+D on a Mac. Ctrl+D on a PC.
original image before using the patch tool

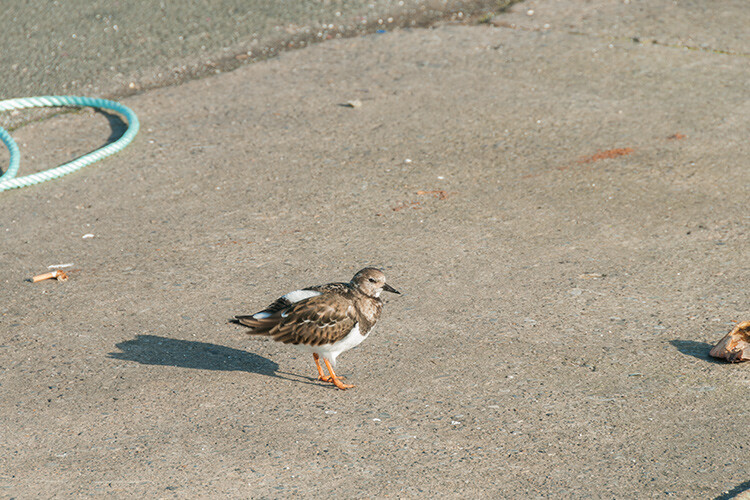
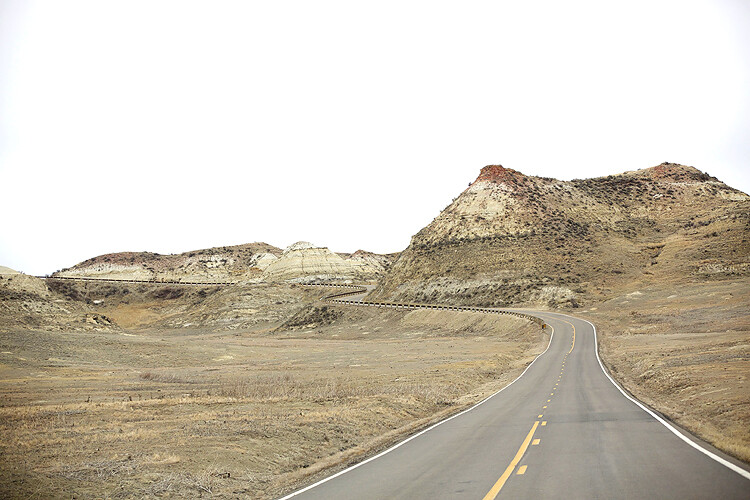
Image showing definite areas that needs to be removed.

simple-distractions-removed-patch-tool-normal-mode

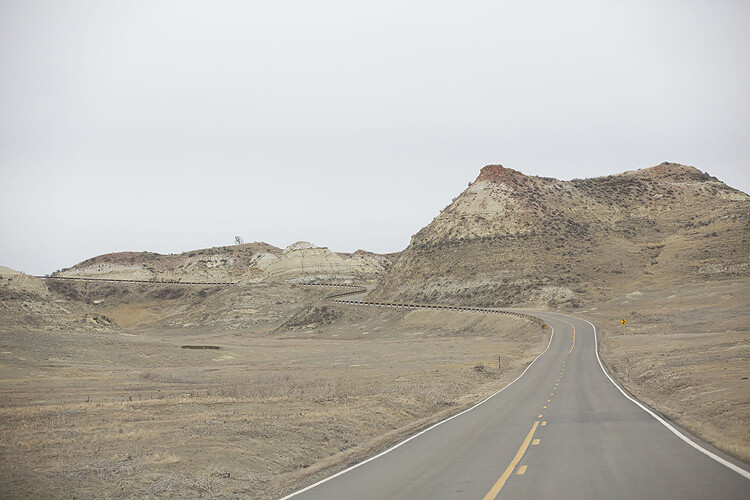
The Patch Tool in normal mode removed some unwanted things (cigarette butts) in this image very easily and quickly.

It’s that easy, but you probably won’t get a 100% accurate result every time. You may have to make a few attempts. Just make sure you are working on a duplicate background layer, or using a separate empty layer – not your original background layer.

Tip: You don’t have to use the Patch tool to define a selection. You can use any selection tool and then select the Patch tool.

Before I show you how to use the Patch Tool with Content-Aware, I want to demonstrate how the it can be used to clone an isolated area of your image.

Duplication

In the following example, I want to duplicate the bird and add another one. Similar to the steps above:

  • Make a selection around the bird.
  • Choose Destination in the Options Bar.
  • With the Patch tool selected, position the cursor over the selection and move it into place.
  • It doesn’t do a bad job, however, if you look closely the surrounding pixels of the selection haven’t blended in so well.
patch-tool-options-bar

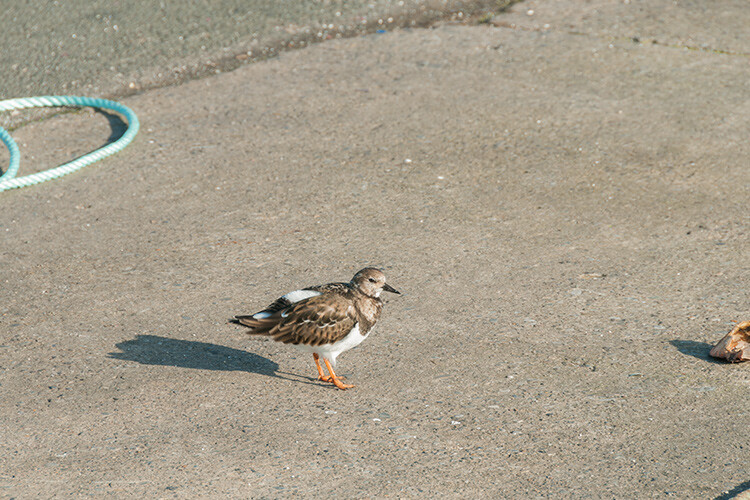
Click on the Destination radio button to duplicate or clone a specific area.

Bird3-duplicated

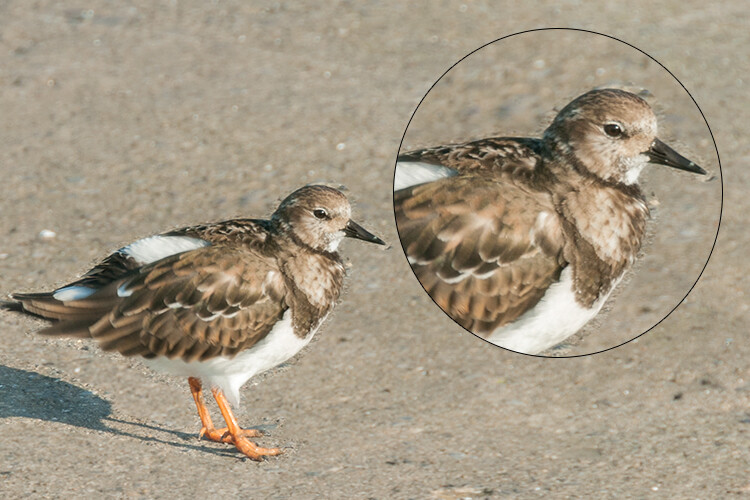
Using the Patch tool to clone or duplicate an area of an image in Destination Mode. However, the results can produce a noticeably pixelated edge.

Here’s an alternative method in getting a better result. Once you have made the selection for duplicating an area.

Press Cmd+Alt+T on a Mac (Ctrl+Alt+T on a PC). This brings up the free Transform tool. Now move the selection to a new area on the image. Click on the tick box to commit, or press Enter. The selection is still active as the marching ants are visible around it. With the Patch tool selected, move the cursor over the selection, hold down the mouse or stylus and move the selection slightly and then release. You will notice the surrounding pixels are blended better.

Bird2-duplicated-free-transform

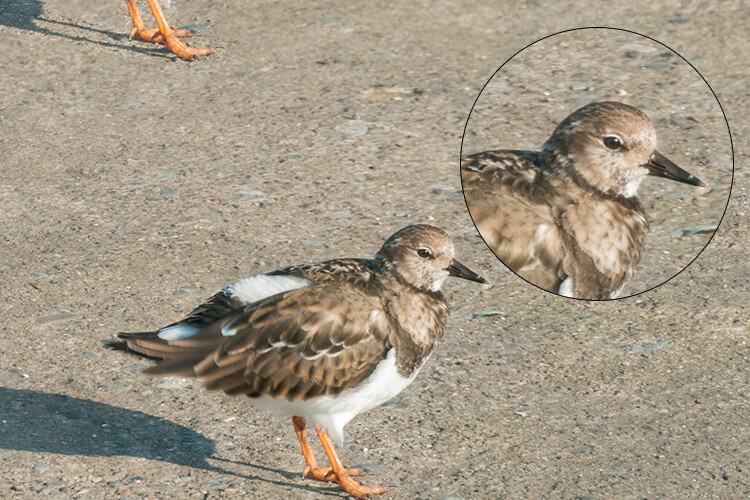
There is a definite improvement using the free transform tool, then holding down the mouse or stylus and moving the selection slightly at the same time just before releasing it.

bird-duplicatedx3-after

And voila, three birds!

Another example of using the free transform tool along with the Patch tool set to Destination Mode.

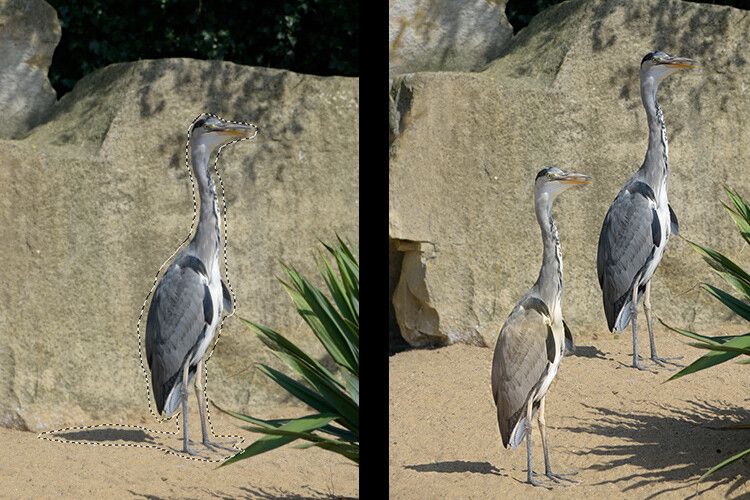
I like to use the Patch Tool in both the normal mode and content-aware. In normal mode the Patch Tool does a great job for general clean up. However, where there are areas close to the edge of the image, the Patch tool struggles to blend or repair the selection. This is where the Patch tool in Content-Aware mode really shines.

When an area has a sharp contrast, or is up against the edge of a photo, the Patch Tool in normal mode is less effective than using the Patch with Content-Aware. (notice the selection on the right here)

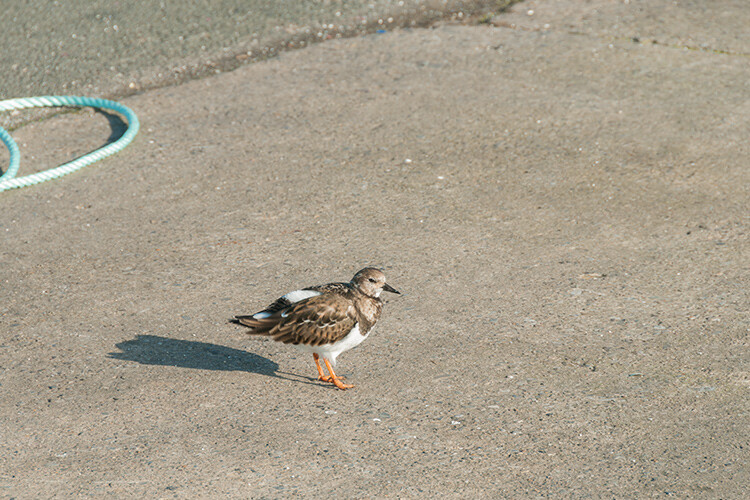
In this image. I removed the unwanted areas using a combination of the Patch Tool in normal mode and Content-Aware.

Content-Aware Mode

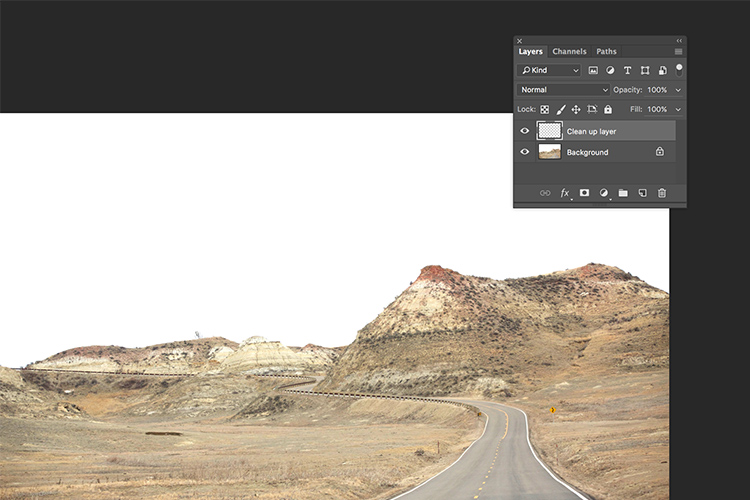
In order to use the Patch Tool in this mode, go up to the Options Bar and change it from Normal to Content-Aware. If you want to work using an empty layer above the image, make sure Sample All layers is checked. As well, in the Options Bar, you will also see Adaption.

switching-patch-tool-content-aware

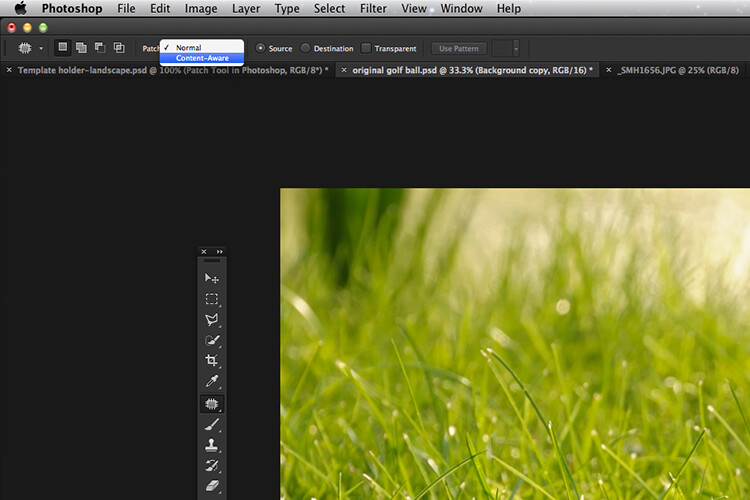
Switching the Patch Tool in the Options Bar from Normal to Content-Aware.

By clicking on this, a drop down menu appears with five options. Your choices range from Very Strict to Very Loose, depending on how much blending is required. You will need to experiment to see which one looks best. Before you deselect, press Cmd+H to hide the marching ants and toggle between each option to see which one you prefer.

Patch-tool-content-aware-5-options

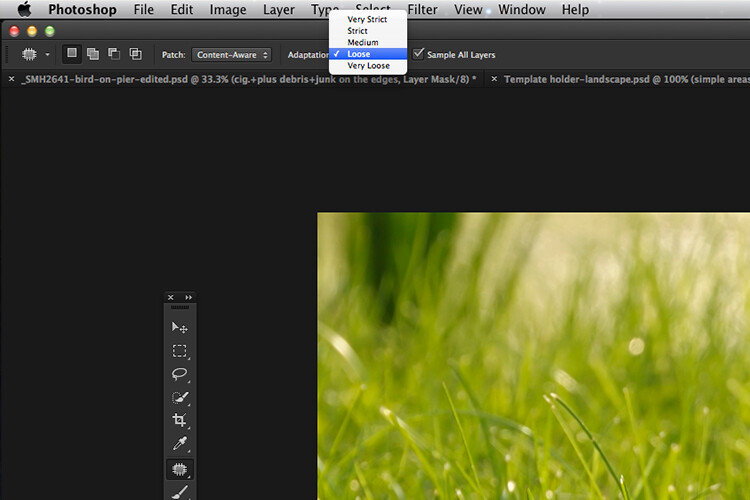
The five options for the Adaptation setting of the Patch Tool in Content-Aware.

You can see quite clearly the differences between the two modes in the images below.

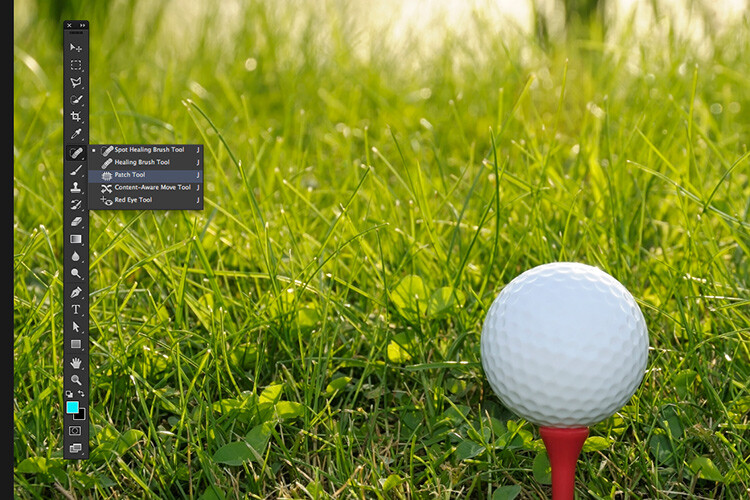
The Patch Tool in Normal Mode is trying to remove the golf ball on the tee from the image.

The Patch tool in Content-Aware has successfully removed the golf ball and tee from the image.

I hope you found this article useful. Do you use the Patch Tool in Photoshop? Please let me know in the comments below.

googletag.cmd.push(function() {
tablet_slots.push( googletag.defineSlot( “/1005424/_dPSv4_tab-all-article-bottom_(300×250)”, [300, 250], “pb-ad-78623” ).addService( googletag.pubads() ) ); } );

googletag.cmd.push(function() {
mobile_slots.push( googletag.defineSlot( “/1005424/_dPSv4_mob-all-article-bottom_(300×250)”, [300, 250], “pb-ad-78158” ).addService( googletag.pubads() ) ); } );

The post How to Use the Patch Tool in Photoshop by Sarah Hipwell appeared first on Digital Photography School.


Digital Photography School

 
Comments Off on How to Use the Patch Tool in Photoshop

Posted in Photography


How to Use the Clone Stamp Tool in Photoshop to Make Clear Skin

06 Apr

We’re all beautiful. Sometimes however, we have imperfections that can be a distraction (most often they are magnified in our minds and really not as bad as we think). In this tutorial, I am going to show you how you can use a basic Photoshop tool, the Clone Stamp, to create clear, natural looking skin in your photos.

Image 1

It’s always a good idea to work on a separate layer when editing or retouching images in Photoshop. Once you have your image open, you should create either a new layer or a duplicate layer which you will edit on. You can create a new layer by clicking the new layer button in your Layers Panel, or by selecting Shift+Ctrl+N on a PC (or Shift+Command+N on a Mac). If you prefer to create a copy layer like I have, you can right click on the image in the Layers Panel and select the Duplicate Layer option provided. If you prefer to use keyboard shortcuts, you can simply press Ctrl+J if you’re using a Windows PC, or Command+J if you’re using a Mac.

Image 2

Select the Clone Stamp tool from the tools panel, it conveniently looks like a miniature office stamp. In the options bar at the top of your screen, ensure that your brush softness is set to zero, the mode is normal, and it is set to sample Current & Below. You can keep your opacity anywhere between 10 and 30% depending on the subject. To get a natural looking result, it’s best to gradually work your way up to the final complexion or shade you are trying to attain.

Image 3

Image 4

Zoom in on the area you would like to retouch by pressing Ctrl (or Command) and the plus (+) symbol on your keyboard. In this image, I’m going to focus on the shoulders mainly. You don’t need to zoom all the way in to the area, but ensure that it’s zoomed enough for you to clearly see the area you are trying to adjust.

Image 5

The Clone Stamp tool works by allowing you to duplicate a selected area, over to another section of your image. It’s really great for removing unwanted elements from your photos. Hold down the Alt key on your keyboard and click on an area of skin close to the spot you are trying to remove. If your spot is lighter than the overall skin tone, select an area that is darker than the spot; if the spot is darker than the surrounding skin, you will make your selection from an area that is slightly lighter than it.

Play around with your Clone Stamp brush size and the opacity, until you find a combination that gives your best results. You will more than likely end up using a variety of brush sizes and opacities for the image (change the sample area frequently as well so you don’t get a repetition of patterns). The clone stamp method is very effective at clearing skin but requires patience on your part. A few other minor adjustments resulted in the final image below.

Image 6

With practice and patience you can clone your way to clear skin with the Clone Stamp tool. Have fun!

Please share any questions and comments you have about using the Clone Stamp tool to make clear skin.

googletag.cmd.push(function() {
tablet_slots.push( googletag.defineSlot( “/1005424/_dPSv4_tab-all-article-bottom_(300×250)”, [300, 250], “pb-ad-78623” ).addService( googletag.pubads() ) ); } );

googletag.cmd.push(function() {
mobile_slots.push( googletag.defineSlot( “/1005424/_dPSv4_mob-all-article-bottom_(300×250)”, [300, 250], “pb-ad-78158” ).addService( googletag.pubads() ) ); } );

The post How to Use the Clone Stamp Tool in Photoshop to Make Clear Skin by Tricia Bent appeared first on Digital Photography School.


Digital Photography School

 
Comments Off on How to Use the Clone Stamp Tool in Photoshop to Make Clear Skin

Posted in Photography