RSS
 

Posts Tagged ‘Tips’

Stop Collecting Tips and Start Practicing Photography

23 May

Young photographers are often better at digital photography than older photographers. This article will explain why this might be, and how you can improve your skills faster. You may be surprised to hear that IQ (Intelligence Quotient) apparently peaks at age fourteen.

Now, IQ is a deeply flawed measure of intelligence, and fourteen year olds certainly shouldn’t take over the world; but the young brain has incredible processing power.

young-photographers_8915-600

As we age, we lose this raw speed and (hopefully) replace it with shortcuts, experience and ‘wisdom’. This allows us to make better choices and retain the illusion of intelligence, but it also limits our creativity. Incensed? Read on…

Knowledge versus understanding

A quick mathematics question; what’s 8 squared? Ask a child and they’ll have to work it out. You probably know it’s 64 without thinking. This is knowledge; remembered facts.

Remember Pythagoras’ Theorem? Maybe you even know the same explanation, ‘the square of the hypotenuse is equal to the sum of the squares of the other two sides’. This is knowledge; a tool. Ask a mathematician and they’ll be able to prove it and explain why it’s true. This is understanding.

art-photography_1712Ask a layperson about the white balance setting on your camera. They’ll probably have no clue what you mean. Ask an average photographer and they’ll be able to tell you it controls the colour cast. Ask a physicist and they’ll understand far more deeply what’s going on and why.

Knowledge is very useful. It’s quick to learn by rote. How else can a young child pick up concepts that took the greatest geniuses years to develop? Most education equips us to slot into a role in a business. Understanding isn’t normally necessary. It’s enough to know that e=mc2 – only a few people need to understand the implications of this equation. Some of them for work; and others to satisfy a yearning to understand.

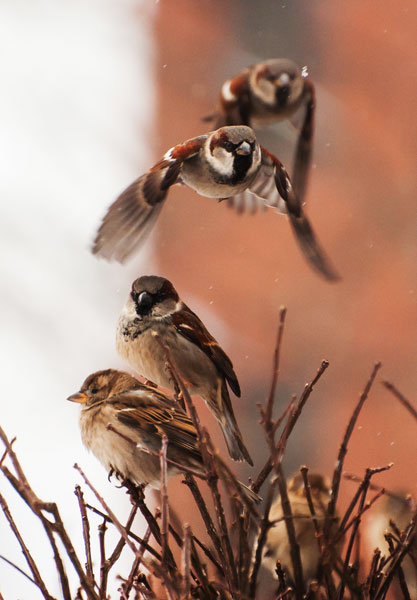
Precisely because our society values superficial understanding, it doesn’t occur to us to make knowledge our own, to transform it into understanding. We think that by knowing the name of something that we understand it. A brown-throated thrush. Satori. Light.

Make the leap from words to visuals

Words are useful; they allow us to communicate. But they’re really quite limited, and the language you speak tends to limit what you can think. Philosophers are acutely aware of this. So are mystics, and as artists, we’re always seeking to move beyond the cage that words present. Try defining love – or even the smell of fresh roses.

To communicate understandings, ideas and feelings, we have to package them up into sentences (parcels of knowledge) and share them with others, who then unpack them in the light of their own unique experience to create their personal understandings. I normally teach one-to-one, but when I teach bigger classes there’s a tendency for students to just collect the parcels and never unwrap them.

We are particularly prone to this, because Holistic Photography is both a craft and an art. We can certainly learn the first bit; apertures, shutter speeds, the inverse square law; but we often falter with the latter. The Golden Mean? That’s just another technique.

barcelona-sagrada-familia_1902

Sagrada Familia in Barcelona, from a different point of view

What ends up happening is that our head becomes so filled up with knowledge that it blinds us to the world around us. We’ll visit the famous cathedral that we read about in the guidebooks and have such a strong preconception about what it must be like that we fail to notice how it looks at the specific time that we’re there. When I’m teaching photography courses in Barcelona, the Sagrada Familia is a major attraction; but there are a myriad ways of photographing it that are overlooked. If we’re photographing people, we may get so stuck in our heads thinking about lighting ratios or the half-remembered tips of a ‘how to pose your model‘ article that we’re not available to make the human connection which leads to the poses that look best. We get stuck in our heads and cease feeling or seeing.

Stand in front of Rothko’s multiforms in a gallery if you get the chance. You can’t quite explain why, but they move you, if you let them. Van Gogh isn’t treasured (now) because of his technique, but because of the way he expressed his internal world, which happened to match our own at moments. Because while we’re all different, we’re also all the same.

There is a visual language. You can learn it in art school. Complementary colour schemes for emphasis, how different shapes can give different meanings, and where to put things in your frame and why. But to understand how to create, you’ll have to feel in your own body what works for you, and let your own mind tell you what’s right or wrong.

image-1

Theory versus action

Young photographers look for knowledge online. They have access to more information than they can ever read. Most are open to learning, so they progress rapidly. Like the zen master said, your cup can’t be full if you want to put more in it.

But they also have the benefit of few responsibilities, short attention spans and huge amounts of time. They underestimate the importance of learning from others. So they read a bit, get bored, and just play with the camera. Digital is free to experiment with, so they make thousands of mistakes and try things we never would. Then, when they reach a barrier, Google instantly provides the answer. It’s no wonder that they learn far faster.

imageCompare the contrary method. To get a big stack of books and methodically work your way through them, supplemented by overpriced photography magazines. Let’s not forget the millions of photography articles online as well. It’s addictive. Our brain rewards us for learning. We feel like we’re improving. But content is a trap, and too much information atrophies or paralyzes us.

Information with application is different. If we can immediately use what we’re learning, we’ll assimilate it faster and retain more. I studied French for almost a decade and can hardly hold a conversation, but speaking Spanish with my Peruvian girlfriend makes it much easier to learn.

There needs to be a balance. I see some photographers who learned a few techniques back when film was still popular, and have just stuck with them. If it’s not broken, don’t fix it, they reason. But no, you need to be constantly evolving, learning form others and letting your photography keep pace with your own evolution.

But chances are if you’re reading this, you’re taking in too much information without applying it. Get a little bit of relevant theory and then practice, practice, practice until you understand it well enough to integrate it with your vision. Then seek out another bit of knowledge to turn into understanding.

The takeaway from this is that we’re really not as capable as we might imagine. Nor do we understand how to best work with our psychology to make the most of our energies. We try to learn the ‘right’ settings by looking at the aperture, shutter speed and ISO used in photos we admire. But our brain hasn’t evolved to memorize numbers.

photographers_9490

It can however tell you if a drinks can is full or not just by picking it up. Far better it is then to develop the muscle memory associated with changing the settings on your camera. Work on specific areas until they’re second-nature and you’ll find your photography will improve far faster.

Go forth and practice!

So that’s enough theory for now. Here’s a test; set an alarm to ring in a couple of hours then carry on with whatever you were doing. Try and remember what this article was about. If you can’t remember what you read, then there was no point in spending your time to read it. There’s a wealth of knowledge available that can push your photography to the highest levels; but only you can unpack it into understandings. Make it applicable. Make it stick. Use it. Make it your own.

The post Stop Collecting Tips and Start Practicing Photography by Ben Evans appeared first on Digital Photography School.


Digital Photography School

 
Comments Off on Stop Collecting Tips and Start Practicing Photography

Posted in Photography


No Telephoto Lens No Problem – Tips on Shooting for the Crop

22 May

shoot-for-the-crop

Maybe your photos are better than you think. Perhaps all you need to transform your images into keepers is to simply cut out the dead wood and get ruthless with the crop tool. While I’m not against getting your shot perfect ‘in camera’, I do believe that cropping like a boss during post-production can turn a ‘meh’ shot into a ‘whoa’ shot just by carefully placing those marching ants in Adobe Camera Raw and hitting ‘crop’.

Why limit yourself to a mediocre image when there’s a little hidden gem inside your average shot, waiting to be teased out like a gleaming pearl?

Get closer after the fact

Here’s an example of a cropped shot with the full frame shot below it. During the shoot I was happy with the original composition (below), but after studying the shot at home I decided that the scene needed to be more intimate, so in I went with the scissors of brutality.

Vancouver Island Waterfall Landscape Image Crop - Gavin Hardcastle

Cropped version

How to Shoot for the Crop

Full image uncropped

Tell the story

When your image has an obvious story, it’s often wise to cut out any non-essential space to ignite a more immediate reaction in your audience. By discarding all distractions, you’ll direct their attention to what matters most. With the image below, I wanted to portray the resilience of nature under the menacing specter of toxic pollution. I knew I had the shot but the story had much more impact after I’d cropped out all of the wasted space in my image. Ideally I would have used a longer lens to achieve the same result but all I was carrying at the time was a 24-105mm and there was no way I was going to let that stop me. Shoot, crop, done, breakfast.

'Held To Ransom' by Gavin Hardcastle

held-to-ransom-full-gavin-hardcastle

Use your megapixels

You’ve doubtless heard grumpy old fossils whine on about why big megapixels are pointless unless you’re printing wall sized prints. I’m here to tell you that’s a load of old codswallop. Try cropping out a small section of a 16 megapixel image and let me know good it looks at the full size of your computer screen. Lacking in resolution, hmm? Well I guess it depends on the size of your crop, but chances are things are starting to look a little crusty if you’re not packing some heat in the megapixel department. Size, as they say, does matter.

Here’s another example of using my megapixels to get closer to my subject. As you can see from the full frame image below the crop, I made no attempt at composing a foreground because I knew I’d be cropping out everything but my main subject – the magic tree of Fairy Lake on Vancouver Island. You can even see a hideous vignette in the full frame shot caused by the polarizer rig. Crop, done, lunch.

gavin-hardcastle-fairy-lake-port-renfrew-vancouver-island-crop

gavin-hardcastle-fairy-lake-port-renfrew-vancouver-island-full

If you can’t afford a big telephoto lens but have a good quality wide-angle lens and a decent megapixel count, it’s still worth taking that shot of the bird on the other side of the lake. You can crop it later and possibly come away with a keeper. Sometimes it’s not even the cost of long lenses that puts people off using them, it’s the chiropractors bills that come from dragging them around. That being said, a top notch telephoto lens creates a specific look and for serious wildlife shooters it’s a must-have lens. This isn’t an anti-telephoto article so don’t be leaving angry comments.

A second chance at composition

When you’re familiar with a location and you’ve shot there many times before, it’s easy to plan your compositions long in advance. But what if it’s your first time and you’re shooting under pressure? Sometimes you get lucky, but sometimes you won’t spot the perfect composition until you review your images back at home on a full size computer screen.  That’s when cropping will give you that second chance at getting the perfect shot.

Butchart Gardens Vancouve Island Gavin Hardcastle

Teach yourself composition

I’m always telling my students that you can learn a huge amount about composition simply by reviewing and editing your images. Try and find two or more new compositions that are hiding in plain site right there in your existing images. This simple process teaches you a lot about balance, symmetry, framing, leading lines and whatever other compositional elements are right there in your images. Spend enough time doing this and you’ll become a better photographer when you’re out shooting. When cropping, you can start by asking yourself a few essential questions:

  • What is the main subject of my image?
  • What parts of the image do I love?
  • What parts of the image do I not like?
  • How can I focus the viewers attention?
  • What can I exclude?

By answering these five simple questions you’ll quickly identify the strongest parts of your image and transform them from stale, forgotten megabytes, into beautiful memories you can share with the world. I hope you found this article helpful and please, get cropping and then share your best cropped images with me, I’d love to see your results.

grand-canyon-crop

The post No Telephoto Lens No Problem – Tips on Shooting for the Crop by Gavin Hardcastle appeared first on Digital Photography School.


Digital Photography School

 
Comments Off on No Telephoto Lens No Problem – Tips on Shooting for the Crop

Posted in Photography


Summertime Photo Tips and Inspiration

22 May
Extra photos for bloggers: 1, 2, 3

It’s here! It’s here! It’s time to memorialize our heroes and kick off the sunniest* season of them all.

No matter how you’re celebrating this weekend, we’ve got your packing list covered:

  • Sun screen
  • Camera
  • Photo tips and Inspiration

Fresh out of that last one? Follow us to a summer inspired link roundup. We’ve got tips for folks headed to the beach, the woods, the park, the amusement park, underwater or anywhere sunny.

Find Photo Inspiration for Your Memorial Day Weekend

*Sun not guaranteed in all locales.

(…)
Read the rest of Summertime Photo Tips and Inspiration (224 words)


© laurel for Photojojo, 2014. |
Permalink |
No comment |
Add to
del.icio.us

Post tags:


Photojojo

 
Comments Off on Summertime Photo Tips and Inspiration

Posted in Equipment


Beginners Tips for Night Sky and Star Photography

21 May

Star Photography

My favorite type of personal photography is taking night shots of the stars (long exposure pictures). I am often busy shooting pictures of people at weddings, or apartments, or models, and it’s important for me to make sure I take pictures for fun regularly. Taking pictures for no one other than myself is highly rewarding, soul filling, and fun! I also love taking travel photos and HDR photos, in this article we will take a close look at exactly how you can take your own epic star photographs.

star photography

30 seconds at f/2.8, ISO 1250

What you need to take jaw-dropping pictures of stars

To take your star pictures, you only need three things:

  1. a full-frame camera (for better ISO capabilities)
  2. a fisheye lens (for the widest view of the sky)
  3. a tripod (for stability during 15 second photos)

(Note: You can do this with a cropped sensor camera, without a tripod, and without a fisheye lens. It will just be a little harder and slightly less jaw-dropping)

star photography

25 seconds at f/2.8, ISO 1600

Camera settings

You can nail this shot almost every time with these settings:  25 second exposure, f/2.8, ISO 1600

If your lens doesn’t open up to f/2.8 you can try 30 seconds at f/4 with ISO 1600.

Note: this kind of photography won’t work if there is a full moon out (or even a half moon). Don’t compete with large light sources, the stars will be over powered. The best location for star photography is way out in nature, away from city lights that cause “light pollution.”

star photography

13.0 seconds at f/2.8, ISO 1600

Why to use these settings

The most important component of these settings is the 25 second exposure. An exposure longer than about 25 seconds will start to show star trails. Photographing star trails is a legitimate type of photographyon its own, but not the type of photography you are trying to do here. Since you are limited to about 15-25 seconds max shutter speed, you still need to let in more light. The largest aperture you can find on a fisheye lens is f/2.8, and still your picture might not be quite bright enough to look stunning. So this is where the ISO comes into play. On a full-frame camera like the 5D Mark III or the Nikon D800 you can bump the ISO up to around 2000 without seeing much noise. You’ll learn how to reduce noise in Lightroom in the next section for a super clean photo.

star photography

Editing in Lightroom

I do extensive retouching in Lightroom after I take my photos. I’ll usually boost the exposure up by a stop or more and I’ll use Noise Reduction under the Detail section to reduce any unwanted “noise” (those pesky extra white, red or blue pixels that show up when you push the ISO too high). Here is a standard star photo of mine and the Lightroom settings I used to create it:

star photography

25 seconds at f/2.8, ISO 1600

Here are the Lightroom settings I used to edit the above photo:

star photographystar photography

1) You can see in the first panel that I bumped the whites up to +46 and brought the blacks down to -52. I really wanted to emphasize the stars against the dark sky and this is a good way to do that. Pushing the clarity up to +55 also helps define the stars against the sky, making them nice and crispy. I boosted the saturation to bring out any colors that are in the sky.

2) In the second panel you can see that I sharpened up the image a bit, also to emphasize the stars. At the same time, I brought up the noise reduction to 33 to smooth out some of the noise that might show up, and I brought up the color to 25 for the same reasons.

Pro tips

star photography

Here is where you can have fun with the editing. Play around with the split toning sliders to make the colors in your sky appear magical. In the photo above you can see a little bit of turquoise in the lower part of the sky, and that comes from boosting that color in the Shadows of the Split Toning slider here:

star photography

You can also affect the color of the sky by playing around with the temperature and hue sliders to get some pretty magnificent looking star photos. Take a look at this one photo rendered three different ways:

Another pro tip that you may have noticed in all of the photo examples I gave here is this – shoot your stars in context. It really tells a great story to see a silhouette of a pine tree or a house in the background, and it shows the magnitude of the scene when you have an object in the foreground to compare to the stars.

Lastly, make sure you know which direction the Milky Way is. You can use an app like Sky Map to see exactly what stars are in the sky above you.

Have fun shooting, and please share your pictures below!

star photography

The post Beginners Tips for Night Sky and Star Photography by Phillip VanNostrand appeared first on Digital Photography School.


Digital Photography School

 
Comments Off on Beginners Tips for Night Sky and Star Photography

Posted in Photography


Tips for Photographing Birds in Flight

20 May

This article introduces some key concepts to photographing birds in flight. One of the most necessary ingredients is patience; you may often photograph an entire day and not get one usable image. In most cases there is some luck involved to being in the right place at the right time. Hopefully this article will provide some information to help you improve your luck.

heron3

Choosing a Location

Let’s begin with choosing the best location for your birds in flight shoot. Near rivers or lakes are great locations, because of the abundant food sources for the birds. Find a position on a hill that will put you at eye level with the birds.  Check out the position of the sun, because you should not be shooting into it. Light coming from behind you or from the left or the right of your position is preferred. Also, birds will generally take off and land into the wind, so knowing the wind direction of your location will help you predict the flight direction of the birds you are photographing.

canadians

Lighting

Good lighting plays an important part in successful birds in flight photography. As in any other kind of outdoor photography, the golden light of morning and evening are best; however, because you are shooting at birds in the sky, these times can be extended and still have nice lighting on your subject.

Make Yourself Invisible

Some birds will not venture near a human presence, so you need to make yourself the least visible as possible.  In some cases it might be as simple as not wearing brightly colored clothing, but avid bird photographers may also want to set up some kind of blind. These can be purchased inexpensively from most hunting stores. Also, sitting will make you less noticeable to the birds than if you are standing.

Study Your Subject

Study the birds you enjoy photographing to learn their habits. This can help you predict their movements. For instance, many birds, especially the larger species like herons or eagles, will relieve themselves just before they fly. Knowing this can help you be ready to shoot when they take off.

fall-heron

Lens

Choosing your lens can be a challenge so be advised that you should use the fastest and largest mm lens you can afford. For your best chance at a great shot, you would want at least a 300mm lens, but a 500mm to 600mm prime lens is preferable. Unfortunately, these lenses don’t come cheap.

Tripods

A great tripod head for birds in flight, especially if you are using a large lens, is the Gimbal head. It balances your camera and lens and requires very little force to pan left and right, and up and down. A less expensive option is a Pan head, which also allows for movement in all directions on two different axes. The more common Ball head can be used with effect for birds in flight photography, but is not a very stable solution for very large lenses.

sparrows

Exposure

When you consider setting up your camera to shoot birds in flight, keep in mind how  the “exposure triangle” of shutter speed, aperture, and ISO each play an important part in the getting the perfect exposure.

  • Shutter speed – You need the shutter speed to be fast enough to “freeze” the bird’s wings in your photo. While small birds’ wings may flap approximately 40 beats per second, larger birds like herons and eagles flap around 2 beats per second. Many species of duck are fairly fast flappers at around 5 to 10 beats per second. So the question remains, how fast should you set your shutter speed to freeze the wing motion? Go for at least 1/1000th of a second to 1/2000th of a second. Even faster is better, if possible!
  • Aperture – In order to gain as much depth of field as possible, you want to use the smallest aperture possible. Select your F-Stop (the aperture number) based on your lens’s sweet spot (where your lens focuses most clearly), probably around f/8.
  • ISO – You want to keep your ISO setting as low as possible to avoid digital noise (graininess) in your photos, although most of the latest models of digital SLR cameras these days do a decent job with higher ISO allowing very little noise.

heron2

So how do you bring all three elements of your exposure triangle together to find the best exposure? You may consider simply using your camera’s Shutter Priority Mode feature in which you set the shutter speed and the camera sets the aperture (and ISO on some models) but try this alternative method.

  1. Set your camera on Aperture Priority
  2. Set your aperture to f/8 (the sweet spot) to capture the sharpest image for your lens
  3. Next, using your camera’s light meter, check the exposures in the space you hope to photograph your birds in flight. You will probably find that you have some areas that are darker than others.
  4. Using the exposure you get in the darkest area, adjust your ISO to bring your shutter speed up to at least 1/1000. It follows that when your bird flies by and you are panning your camera into a lighter area, your shutter speed will increase to above 1/1000, and when your subject is in the darker area your exposure will still be appropriate.

Now, one final step to tweak your exposure. Have you ever noticed how when photographing birds in flight your image will seem dark and missing detail, especially to those dark feathers? To bring out more detail in those dark areas, change your EV (exposure compensation) setting to +0.3 to add a little more light. Depending on the lighting, you may need to add more. On the other hand, what if you are photographing a white bird, perhaps a swan? The white bird’s image will tend to get “blown out”, also missing  detail, so adjust your EV value to -1.0 to -2.0 to pick up the detail in those white feathered birds. (If you are thinking your background will be underexposed, well, yes, it will be, but you are photographing the swan, not the background.)

Focusing

To keep your flying bird in focus, set your camera’s focusing mode to continuous focus. In this mode, as long as you have the shutter button depressed halfway and are focused on the bird, the camera will continuously focus with the movement of the bird. Canon calls this function “Al Servo”, while Nikon calls it “Continuous Servo” or AF-C. Also both Nikon and Cannon will allow expanding your focal points to look at adjacent points for movement to help you keep the moving subject in focus. Nikon also offers two additional options of Auto Focus – Area Modes that might work for birds in flight. Its 51-point Dynamic Area Auto Focus and 3D Tracking Mode will both search at all 51 focal points looking for the movement of your subject, though these methods may be a little too slow in focusing.

eagle-nest

Composition

Composition can sometimes be the most difficult aspect of photographing birds in flight. Not only are you occupied with keeping your bird in sharp focus, you are also trying to make a pleasing composition. All the rules of composition applying to any photo remain valid here. You always want to have more space in front of the bird than behind; a good rule is to have a least two to three times the space in front of the bird. One practice that helps maintain this space is to place your focus point in the center and try to keep it on the bird’s eye. This method works really well on large beaked birds like the heron. While most birds in flight images are just one bird, look for those occasions where you may capture two or three birds for a great image.

gull

Technique

As the bird is flying toward you, quickly get your focus lock. When the subject is close and in the position you like, fire away and keep panning even after you have stopped shooting. This follow-through motion will keep your last image in focus better than an abrupt stop. While panning as the bird flies by, you want to match your panning speed to that of the bird, and depending on your shutter speed, this will help keep the bird in focus while the background may be blurred.

It’s a wildlife photography principle that you want to keep the bird’s eye in focus and sharp. If you are handholding your camera, try to keep your left hand under the barrel of your lens and your elbows close to your body, as this will help you maneuver the camera as steadily as possible. If you are standing, keep your legs spread out to give you a good sturdy base. If you are planning to hold your location and position for a time, using a tripod is recommended to help keep you steady, especially if you are using a very heavy lens.

duck

So stay alert, and look for opportunities to capture great birds in flight images. It will take lots of practice to get that perfect image, but when you do you will be hooked.

Have you tried bird photography before? Want more bird tips, try these:

  • 10 Incredible Bird Photography Tips for Beginners
  • A Turn of the Head – Creating More Compelling Bird Portraits
  • An Introduction to Bird photography


The post Tips for Photographing Birds in Flight by Bruce Wunderlich appeared first on Digital Photography School.


Digital Photography School

 
Comments Off on Tips for Photographing Birds in Flight

Posted in Photography


Food Photography Tips – Some Video Tutorials

19 May

Photograph Want one...? by Brian Shaw on 500px

Want one…? by Brian Shaw on 500px

This weekend is a focus on food photography. Earlier I shared a collection of food images to get you hungry, and encouraged you to do participate doing some food photography in the weekly challenge.

As well two recent articles with some food photography tips:

  • 8 Steps to Create Mouth Watering Food Photography
  • 5 Tips to Seriously Improve Your Food Photography Techniques

Today I wanted to find some video tutorials on food photography for you. Here’s a few that I found.

This first one is by photographer Chris Marquardt as he photographs on location at a restaurant and shows tips for using simple gear, and what you have on hand. Watch as he gets the restaurant owner to be his assistant and uses things like a tablecloth, tin foil and some vegetable oil to help make the food look appetizing and juicy.

Marc Matsumoto, food photographer and chef, (who also has his own food blog where I found some great recipes AND food photos) gives some quick tips in this video that you can apply to take better food photos even if you just have a point and shoot camera or Smartphone.

Lastly on the other end of the scale is a studio food photography set with this video from Adorama featuring photographer Rick Gayle. He talks about lighting, composition, focus, positioning items, food styling, tools of the trade that food photographers use such as: dental tools, WD-40, oil, glycerin, water, Scotchgard, reflectors, mini-mirrors, props and more.

Have some other tips or good videos on food photography, please share in the comments below. Remember the fun of food photography is you get to eat it after you’re done.

Photograph Basil and Lime by Natasha Breen on 500px

Basil and Lime by Natasha Breen on 500px

The post Food Photography Tips – Some Video Tutorials by Darlene Hildebrandt appeared first on Digital Photography School.


Digital Photography School

 
Comments Off on Food Photography Tips – Some Video Tutorials

Posted in Photography


5 Tips to Help You Slow Down and Take Better Photos

18 May

When you go out to take photos it can be tempting to start shooting right away with the goal of getting the ideal image or capturing the perfect picture. But before you get your camera out, it might be good to take the opposite approach and slow down. Way down. Let’s take a minute to consider some lessons you can learn from the age-old tale of the tortoise and the hare. Ironically, one of the most important things you can do when inspiration strikes is to move slowly like the tortoise, rather than rush along like the hare. The tortoise might not have been the quickest animal in the meadow, but he stuck it out and made it to the finish line while the hare had long since grown weary of the race and gave up altogether. As a photographer, it’s tempting to be a hare and race to photographic perfection, but if you look to the tortoise you see a much better example to follow.

image-001-mockingbird

Here are five tips to help you slow down and take better photos:

1. Study your surroundings

One of the most important elements of a good photograph is that of framing; how is your subject positioned relative to the environment? You might have already considered the subject of your photo (your child, your vehicle, a statue, a flower, etc.) but before you start racking up those pictures on your SD card, take a few minutes or more to consider where the subject is with respect to everything else in the area. Are there buildings, houses, or man-made structures that you could use to help make your subject stand out? Are there natural elements, like trees, shrubs, or rock formations that you could use to highlight features or colors of your subject? By pausing to consider everything else aside from your subject, you will be able to make better decisions about how to get the moments you are really striving to capture.

image-002-saint-francis

When I took this picture of Saint Francis on an overcast morning I had to consider not just the bust itself, but what else might help frame the photo. The quickest and most convenient option would have been to point my camera down and snap a picture, but by slowing down and taking time to consider everything else besides the statue it resulted in a much more pleasing image. I ended up crouching down low to the ground, and using the background elements to give the viewer a sense of space and context. By considering the environment and using that to inform my choice about how to take the photo, I was able to get a much better picture than I would have otherwise.

2. Wait for the light

You might not have a giant flash, or studio-style strobes and softboxes, but you can still get amazing pictures by using the best source of light anywhere – the sun. The downside is, you have to be patient if you really want to use it to its full potential. It might not be easy, but one of the best techniques you can utilize to take advantage of natural light is be patient and wait until it suits the needs of your photograph. Bright daylight is often not the best time to be outside and shooting, as the sun’s direct rays can be too harsh and create too much contrast especially if there are trees, building, or other elements casting big shadows.

image-003-bronze-man


Instead, take the tortoise approach and wait until the sun is lower on the horizon. An hour or so before sunset is one of the best times to be out taking pictures, as the low angle of the sun creates a much more pleasing source of light than when it’s directly overhead. Another good time to be shooting in nature is right after sunrise, as you still get the low angle and warm colors. I had to get up early to take this picture of a bronze pedestrian whom someone had bedecked with a bit of garland. But by waiting for the sunlight to be what I needed, rather than what happened to be available, I was able to get a much better photo.  It might not have been the quickest option, but it certainly yielded a much better image.

3. Be part of nature

Taking photos of wildlife does not always require a telephoto lens, but it does require patience. If you want to get good pictures of the animals around you, whether it’s in your backyard or on a hike up the mountains, it’s often best to be patient and let nature come to you. Animals will hear you coming and quickly scamper off, but if you stake out a good spot to wait for them you can be rewarded with some compelling photographic opportunities. A few weeks ago I wanted to get a picture of a squirrel, so I started chasing this one around while he looked for nuts and acorns. I soon realized this was an exercise in futility, as he kept running away from me! So instead I picked out one spot and just waited. After a while he crept back and started poking around near me, and I was able to get a decent picture.

Image003 squirrel

Nature can be a fickle mistress, and will often refuse to comply with what might seem like quite reasonable requests (“Hold still, little birdie! No, don’t fly away!”). But if you take time to be part of nature, and even let nature come to you, you will often be rewarded with much better photos than you could get by rushing into things.

image-005-snake

4. Let kids be kids

Trying to get a good picture of children can take all the fun out of a birthday party or an afternoon at the park. For many of us, our instinct is to be in control: “Look here everyone! Now say cheese!” Inevitably one kid will be smiling, one will be blinking, one will be staring off to the side, and one might even be crying. It might seem like getting a good picture of kids is almost impossible! Thankfully, there is hope. Instead of rushing like the hare to construct a greeting-card-worthy photograph, try taking the opposite approach and just let the kids play. Keep your camera ready, and use it to capture the kids just being themselves. The catch is, you could be waiting quite a while, but you (and the kids) will have much more fun in the process.

Image004 girl

I took this photo of my friend’s daughter while she and my son were playing around in the dirt, and even though it took a while and I got myself rather muddy in the process, I ended up with a picture that was far more interesting than all the posed ones we took earlier. Another advantage of this approach comes months later when you are looking through your pictures. Posed photos of children smiling at the camera might seem like a good idea at the time, but afterwards you will often find that these are not nearly as interesting as the ones where the kids are just playing around and acting natural. But if you are not willing to be patient and wait for these moments to happen, they will often slip by and be lost forever without you ever even noticing.

image-007-kids2

No fancy studio, no special camera gear- just sunlight and patience

5. Learn one new camera function, and learn it well

Cameras today have so many options, buttons, and dials it’s no wonder so many people shoot in Auto mode, and I can hardly blame them for doing so! Learning to operate your camera can be a daunting task, and if Auto takes pictures that are generally good enough, why bother with all the menus and knobs? I have seen so many people try to learn how to operate their cameras to take better pictures, but give up in frustration because it’s so overwhelming. The trick is to pick one thing and learn it thoroughly, and in doing so the various elements of exposure and photography will slowly start to come together.

For example if you shoot in Auto, try choosing the Aperture Priority mode (Av or A on your camera) and learn how to control the aperture of your lens to get better shots. Don’t worry about shutter speed, ISO, white balance, AE-L, or anything else just yet. All that is important, but it can wait. Once you spend a few days, weeks, or even longer getting the hang of adjusting the aperture, then move on to something else like the Shutter Priority mode (S or Tv on your camera) where you control the shutter speed and let the camera figure out the rest. You will soon start to see how the various elements of exposure (Aperture, Shutter, and ISO) affect one another, and how to control them to produce the amazing shots that have somehow always eluded your grasp.

By sticking with just one new camera function at a time you might not learn everything about your camera as quick as you would prefer, but you will likely avoid the frustration and burnout that often comes with trying to learn too many new concepts at once. After all, the hare might have gotten off to a quick start but we all know how that turned out. In photography, it pays to be more like the tortoise: slowing down might not seem ideal at first, but it will help you produce brilliant results in the end.

The post 5 Tips to Help You Slow Down and Take Better Photos by Simon Ringsmuth appeared first on Digital Photography School.


Digital Photography School

 
Comments Off on 5 Tips to Help You Slow Down and Take Better Photos

Posted in Photography


5 Tips to Seriously Improve Your Food Photography Techniques

15 May

11 Tip05 Neutral BG

Food photography is arguably one of the most challenging types of photography out there. Like painting, you start with a blank canvas and build. Layer upon layer, you construct the photo until you reach the perfect balance of reality and art.

Everything in the photo is a decision. Every piece is perfectly placed by the photographer.

Starting out is frustrating, I know. You’re the chef, stylist, and the photographer. Once you reach technical proficiency with the camera, what’s next? I have been, and in a lot of ways still am, in that position. So, how do you improve your food photography beyond the basics? You work on the story.

Whether it is an after-party from the perfect cocktail, or the homemade roasted chicken recipe on the farm, like all photography, you’re telling stories.

Some shoots are more complicated stories than others, and it may sound like a lot of work, but it’s really not. Here are five quick tips you can use to seriously improve your food photography and tell better stories.

#1 – CHOOSE YOUR ANGLE

There are really only a few camera angles in food photography that you see again and again, but you need to make the one you choose, a conscious decision. Where you place the camera will affect the type of story you’re trying to tell.

Think of the food beforehand. Its size, shape, height and what is unique about it. Then place the camera where you think best highlights these qualities. Some dishes look great when you shoot from right in front of the food, and others are best suited when the you are looking down from directly above the table. Take a look at the cupcakes below; their spiralled and delicate toppings really stand out when shot from in front, yet the viewer doesn’t even see the size or shape when photographed from above.

01 Tip01 45 vs 90 Cupcakes

On the other hand, it’s difficult to see all the ingredients and beautiful shape of these salmon tacos when shot from the front, so the shot from above was definitely the way to tell this story.

02 Tip01 45 vs 90 Tacos

#2 – SURROUND YOUR HERO

When shooting from the front of the food try to keep a great foreground and background to play with. Use these empty spaces to tell more of a story. Surround your main dish with ingredients and props that relate to the food. Ingredients, sauces, oils, and cooking utensils could indicate how the dish was made.

Tins, jars, herbs, glasses, fabrics and linens could speak about the origin of the dish or the season in which it is served. Placing a few of these in the foreground and background will definitely elevate your story and give it depth.

03 Tip02 Props

The props in this image of baklava bring more to the story. The viewer has a sense of place that describes the Arabic origins of this delicious sweet.

#3 – NATURAL IS BEST MODIFIED

Light is king, and acquiring a few tools to help you control it will bring your food photography up to the next level. Poor use of light will ruin your story and immediately turn off your audience. So making sure light doesn’t distract will help out your food photos big time.

04 Tip03 Natural vs Diffused

Direct natural light can give really hard and defined shadows like beneath the lemon cake on the left. Where those shadows are softened in the image to the right, with a little help from a cheap diffusor.

Placing a diffusor between the window and your table is first on the list. When working with direct sunlight, a diffusor (or even a thin white bed sheet) will greatly improve the quality of light. Softening those hard, dark shadows and bright highlights caused by direct sun light.

05 Tip03 White vs BlackCard

Using white and black cards really gives you control over the shadow areas. A white card was used to brighten up that lemon frosting on the left, but if you prefer more contrast than grab a black card and you’ll get an image like the one on the right.

Next up are white and black cards. You can make these yourself using foam core boards, bought at any craft store. Size them to fit your needs, using white cards to bounce light into shadow areas, revealing important details, or black cards to make shadows stronger for more contrast.

06 Tip03 BG Blocked vs Unblocked

Nothing really changes between these two images except for a black card that was used to stop light from hitting the background, making sure the cake was the brightest area of the photograph.

Here is a little secret, when working with natural light. I call it, blocking (sometimes also called “gobos”). Sometimes that pesky natural light will fall on your background or props, causing them to be as bright or even brighter than your subject.

Since the viewer will always look at the brightest spot in your photo first, if it’s not your subject, it can harm your story. You can use your black cards to block light from hitting areas that will compete with your subject. This is also a very important technique for creating darker, low-key styled images.

07 Tip03 Final Image

Here is the final image, with a diffusor softening the window light, a white card to fill in the shadow on the lemon frosting and a black card to block the light on the background.

#4 – OUR OLD FRIENDS LINES AND LAYERS

With all these props and ingredients in the frame, how will we ever get the audience to look at our subject? Well, bring on the trusty techniques of composing with lines and layers. You can use props or ingredients to create lines and layered effects in your images. This is a compositional technique used by photographers to lead their audience’s eyes to the main subject.

You can use various props to create lines. Like this spoon, which forms a nice line, directing the viewer straight to the bowl of baked peaches and ice cream.

08 Tip04 Lines

Since shooting from above always gets you more graphic images, there are plenty of chances to create some great lines here as well. Some could be quite literal like this cutlery leading to the round of Brie – or more abstract, like how the knife and pomegranate seeds create lines, framing our subject.

09 Tip04 LeadingLines vs FramingLines

Composing images with layers is always a winner. This Brie, shot from the front, is set in the middle of various props and two large out of focus areas. This creates a layered effect, sending your eyes straight to the star.

10 Tip04 Layers

#5 – HOLD THE COLOR

11 Tip05 Neutral BG

This is my personal favorite. I love hunting for props, backgrounds and tableware to put in my images. This little tip was also the first big mistake I was making when I was starting out. It’s great to have props that are colorful, but if you’re not careful that colorful prop can easily upstage your food, and grab all the attention.

When placing items into your food images, try selecting neutral tones, something that makes the food really pop against it. Selecting a neutral background like this black metal tray and baking paper, amplifies the bright red strawberries and rhubarb inside these Crostatas, making them really steal the show.

Do you photograph food? Do you have any additional tips to share with us? Please add your comments below.

For more food photography tips, try these articles:

  • 8 Steps to Create Mouth Watering Food Photography
  • 11 Quick Food Photography Tips to Make Mouth Watering Images
  • The Ultimate Guide to Food Photography
  • SnapnGuide on Food Photography

The post 5 Tips to Seriously Improve Your Food Photography Techniques by Skyler Burt appeared first on Digital Photography School.


Digital Photography School

 
Comments Off on 5 Tips to Seriously Improve Your Food Photography Techniques

Posted in Photography


How to build a photo brand: Tips from photographer Art Wolfe

13 May

Screen_Shot_2014-05-12_at_10.34.35_AM.png

Branding is critical for a successful photography business regardless of the genre, and photographer Art Wolfe has built perhaps one of the strongest brands in his field. Wolfe has been shooting nature and wildlife images professionally for more than 30 years all over the world. This story on Photoshelter’s blog gives some insight on how he built his photography business. Learn more

News: Digital Photography Review (dpreview.com)

 
Comments Off on How to build a photo brand: Tips from photographer Art Wolfe

Posted in Uncategorized


10 Portrait Tips to Take Your Photography to the Next Level

13 May

You have all the makings of a beautiful photograph: the perfect client, an overcast day for soft natural lighting and a gorgeous landscape as the backdrop. You’re taking photos but noticing that something’s not quite right. The photos look underwhelming. Believe me, I’ve been there. Here are 10 tips to take your portraits to the next level.

Cjust_tip1

Photographing Danielle LaPorte – author

Portrait of Danielle LaPorte - author

Portrait of Danielle LaPorte – author

Tip #1 – have your subject look up at you

It’s slimming and flattering (see images above). Bring a small step stool to stand on and photograph your subjects from slightly above their eye line. Watch double chins disappear. Keep a step stool in the trunk of your car so you don’t even have to think about adding it to the list of gear to bring when you prep the night before. It’s there, ready to go.

Tip #2 – capture the moments in between poses

Cjust_tip2

Personally this is a favorite of mine. If you’re noticing the images look too posed, or your subject is uncomfortable in front of the camera, shake things up. Ask them to do the most ridiculous pose or ask them to pretend to laugh really hard. Take that photo, but keep the camera up and wait. The moment after that photo happens you’ll find their guard will come down, they will laugh authentically or give you a moment that feels much more real.

Tip #3 – turn the subject’s body slightly

Have them turn their body slightly away from the camera and their face still looking straight at you. This is not only slimming, it also gives the photograph more depth.

Tip #4 – flattery

Always tell them how beautiful they look. It’s unnerving to have someone pointing a camera at you and not know what the photos look like. Tell them. It will help calm their nerves and you will notice a difference in the photos because they will feel more confident and attractive.

cj_tip9

Tip #5 – connection

This is the key to everything really. If there’s a connection between you and the person you are photographing, there’s a magic that happens that’s unexplainable. Sure, you can have the right lens, the right camera, and the right lighting, but an authentic connection between the two of you takes it up a notch. You can see it in their eyes. They connect with you, and it shows with a different authenticity that can’t be faked. Ask questions, become curious about who they are. Get to know them on a more personal level. Keep that conversation going throughout the photo session. Laugh with them.

cjust_tip6

Tip #6 – tell your subject to flirt with the camera

Ok, that sounds weird but it can work. Ask them what celebrity crushes they have. That changes the look in their eyes and on their face. Have them pretend that the camera is that person. Seriously. It makes them laugh, which goes with tip #2, and helps them loosen up as well. If they are in a relationship, ask them when they met, how they met, or some other stories about their partner that lights them up. Watch the shift happen and take photos throughout the conversation. You’ll capture moments that are real and off guard.

Cjust_tip7

Tip #7 – have them bring a playlist of their favorite music

I bring a portable wireless speaker and play their music, which creates a mood they are comfortable with. You can also play your own music. It helps give them something else to pay attention to and can lighten the mood. Get playful with it and dance around with them. Let them express themself and just pay attention with your camera ready. You can take photos of those moments as well. You can try a longer shutter speed while they dance for some variety and movement. A little blur can add more of a story to the series of images.

Tip #8 – clothing selection is important

Have them pick out clothing from their wardrobe that makes them feel like a rock star. It must be clothing that they feel comfortable in and which allows them to move easily. No crazy patterns or bright colors. The emphasis is on their eyes and their expression not the bold neon stripes on their top.

cjust_tip10

Tip #9 – lighting

If you’re outside, open shade is extremely flattering. This is best early in the morning, late afternoon and close to sunset, when shadows are being created from trees and buildings. Have your subject stand in the shade. A great place to explore this is in doorways. Try just inside an open garage door. Stairways inside parking garages can also provide a shade that’s not too dark, with the brightness outside reflecting on them perfectly. If you’re inside, you can still use natural lighting by turning off all the overhead lights and lamps and having your subject move close to the window. When it’s overcast it’s best because again, it will be even soft light on their face without any shadows or harsh light making them squint.

Tip #10 – break the rules

cjust_tip10b

Allow the flare from the sun to fill the lens. Use alternative cameras like a Polaroid SX-70 or your iPhone. Try out the iPhone apps. It helps you expand as a photographer when you stretch yourself in new unchartered ways. Only bring one lens to the photo shoot. Bring the one you know is the most flattering. My favorite portrait lens is the Nikon 85mm 1.4 lens. ( yep, I’m a Nikon girl ). Think of this as more than a portrait shoot but as a fine art project. Have your subject create a Pinterest board of their favorite portraits before the photo session and play with those ideas. Try unconventional poses. They can lead you to unexpected moments of greatness with your portraits.

Next steps

Allow yourself to go on a journey of exploration during the photo session. There are so many ways to go from ordinary to extraordinary. Paying attention to the basics of composition, lighting, posing can help. Incorporating your own authentic personality into the session will help your client be more relaxed and open to try new things. This will bring you better results in the end.

So, what is one tip you’ve learned along the way that has helped you create better portraits? Share it with us in the comments below.

The post 10 Portrait Tips to Take Your Photography to the Next Level by Catherine Just appeared first on Digital Photography School.


Digital Photography School

 
Comments Off on 10 Portrait Tips to Take Your Photography to the Next Level

Posted in Photography