RSS
 

Posts Tagged ‘Tips’

Safety Tips for Travel Photographers (Particularly Women)

06 Mar

Let me first address the obvious that while this article talks about safety tips for women photographers, it does not mean that these tips don’t apply to men as well. Most are general tips that could be applied to both genders. Being a woman photographer who has started to venture out alone for photoshoots and solo photowalks, these are things that I notice and practice as I do travel photography.

Solo Hiking in the Appalachian Trail in Great Smoky Mountain National Park USA

Solo Hiking the Appalachian Trail – Great Smoky Mountain National Park, USA

It all started with a single trip. A couple of years ago while visiting Great Smoky Mountain National Park in the US, I decided to flex my muscles and go for a solo hike with my young kids. This was supposed to be a bonding experience as well as a confidence booster that I could do this alone. So off we went, water bottle and camera in hand to hike a two to three mile stretch of the Appalachian Trail.

Half way into the trail, my confidence took a nose dive, as I realized I had done several stupid things – I vaguely remember telling my husband the actual trail we were going to take, we only had one bottle of water among the three of us, I was carrying 20lbs of photo gear and I had no emergency kit or even a phone. My kids, then 7 and 3, were hot and cranky and there was no end in sight. In my paranoia of either being attacked by a bear or a crazy psychopath on the trail, we literally sprinted the entire way. Thankfully, my husband had started off at the other end of the trail and met up with us. While it was an adreallian pumping, nerve racking experience, it did make me realize that with a few simple tips, one can travel smart, safe and actually have a wonderful time.

#1 Research, research and then do more research

Bird Photography in Chennai India

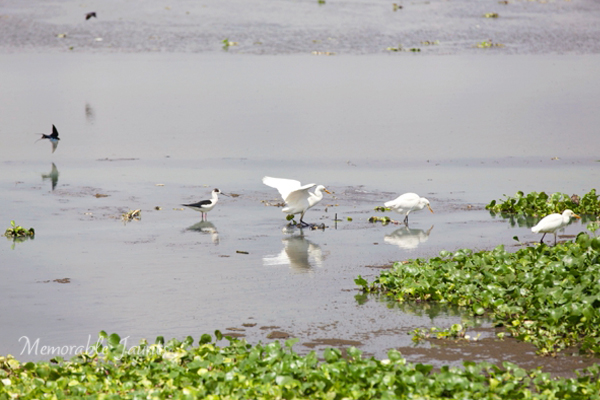
A google maps satellite search revealed a bird photographer’s paradise literally five minutes from home when I travelled to Chennai, India

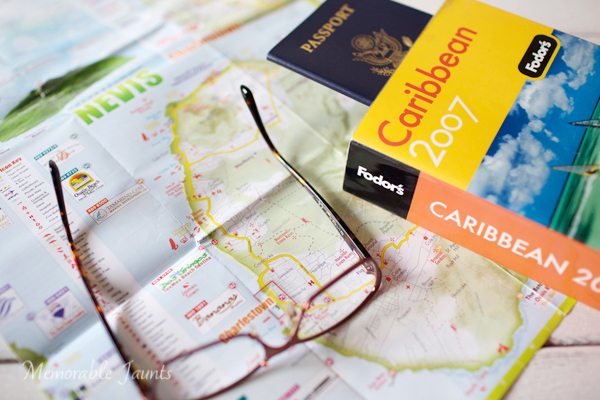
There is no lack of informational resources for someone wanting to travel anywhere in the world. Between maps, guide books and online forums we can pretty much take a virtual tour in our pajamas and not have to leave the comfort of our homes. But if you are anything like me, the wanderlust bug is very prominent and the urge to escape the clutches of everyday life too urgent to ignore. Make sure you know everything there is to know about the place you want to visit. Scope out all the possible locations that interest you in detail. There are many online photography and travel forums where you can post questions around photographic opportunities for specific locations.

#2 Record and insure your gear

This is one of those business expenses that may seem like it is discretionary but trust me, it is absolutely critical especially if you plan to travel extensively. Having that peace of mind that your gear is as protected as it can be is very liberating.

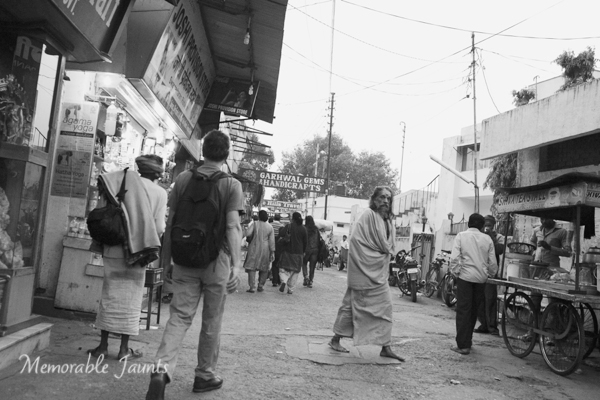
#3 Blend in as much as you can

Safe Travel Tips for Photographers DPS Article Memorable Jaunts

A simple bag pack to carry your equipment might be the best travel gear to blend in with the locals

With a camera in one hand and a map/guide book in the other, chances are you already stand out from the local crowd. Try not to make it more obvious in the way you dress or behave. The smart thing to do is to blend in with the locals. Dress like the locals wherever possible, then if you have done your research and planned out your excursion you don’t need to hold on to the map (a sure giveaway that you are a tourist).

#4 Keep an updated itinerary with family and friends at all times

Safe travel tips for women photographers DPS Memorable Jaunts Article

Have a plan of where you want to go and what you want to do and make sure you communicate that to the right people

This seems like a no-brainer but often times is easily overlooked. It’s one of those travel smart strategies that could literally save a life. This is one time when having a game plan for where you want to go, and when you want to get there is advisable particularly for solo travellers. Avoid changing plans on the fly – especially if you have taken the time to research and scope out the best photographic opportunities for your trip. If you have to change travel plans, make sure changes are communicated to the right people, at the right time.

#5 Plan for emergencies

Lets face it – this is life, not a scripted, rehearsed, movie set. Chances are things are going to go wrong – travel plans may change, equipment may malfunction, batteries may run out. Regardless, have a plan of action for some of the more obvious mishaps. Keep numbers handy for any local camera shops in case you need to use them in a pinch – definitely a much cheaper option than having things shipped or mailed to you, especially if you are out of the country.

#6 Listen to your gut

Words like “gut feeling” and “woman’s intuition” do actually exist, and more often than not, they are spot on. Trust your instincts. At the end of the day missing a photo opportunity is not as critical as being safe. Don’t do anything that you are not comfortable doing.

#7 Carry only the essentials

Safe travel tips for photographers DPS Memorable Jaunts Article

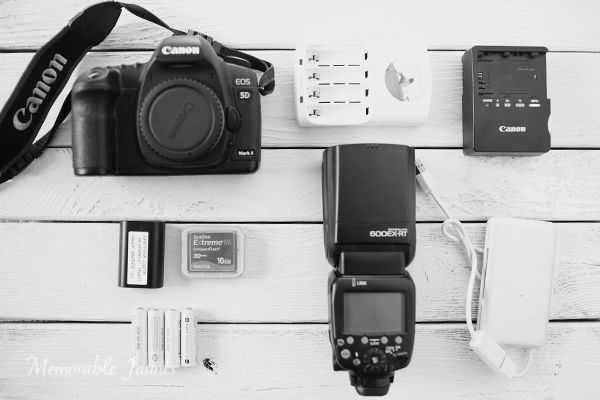
We photographers LOVE our gear and cannot imagine being away from it. Most of us feel we need every lens and gadget for every shoot for those what if situations. But challenge yourself to pack light. Maybe you only want to shoot with a wide angle lens or the nifty-fifty. Carry only what you need and not all the gear you own – your body will thank you.

#8 Carry personal protection equipment

No, I am NOT advocating carrying a gun or other such personal protection mechanisms. Personal protection can mean different things to different people and can also differ based on the situation. For a while I carried pepper spray in my purse. Then I switched to a swiss army knife. Then I decided that my 90lb german shepherd dog was my best defense mechanism especially for local sunrise and sunset photo excursions. Choose what is appropriate and practical for you.

Do you have any safe travels tips to share based on your personal experiences? Feel free to share…

googletag.cmd.push(function() {
tablet_slots.push( googletag.defineSlot( “/1005424/_dPSv4_tab-all-article-bottom_(300×250)”, [300, 250], “pb-ad-78623” ).addService( googletag.pubads() ) ); } );

googletag.cmd.push(function() {
mobile_slots.push( googletag.defineSlot( “/1005424/_dPSv4_mob-all-article-bottom_(300×250)”, [300, 250], “pb-ad-78158” ).addService( googletag.pubads() ) ); } );

The post Safety Tips for Travel Photographers (Particularly Women) by Karthika Gupta appeared first on Digital Photography School.


Digital Photography School

 
Comments Off on Safety Tips for Travel Photographers (Particularly Women)

Posted in Photography


Tips for Photographing Cars

03 Mar

tips-photographing-cars-01

The scene setup – by placing parking a car in the shade of a building on a sunny day, you can use the ambient light as your main light, illuminating the contours of the vehicle.

Photographing reflective surfaces is no walk in the park. So, as you can imagine, photographing cars, which are essentially just giant reflective objects, is really difficult. It comes with all the same challenges, magnifies them, and adds the new wrinkle of your subject being too heavy to reposition easily. Sounds like fun, right? It can be, and it can still be pulled off without the use of a commercial studio, a giant cyclorama wall, or car-sized softboxes.

Made in the Shade

Take a look at the image above, you can see that I have a Tesla Model S set up in the shade of a building, on a sunny day. By positioning the car so that the ambient light illuminates the overall contours of the car and then placing lights in the shadow areas, it treats the ambient as the main light, and uses the surroundings to advantage, rather than fighting against them. This will minimize the frustration of trying to eliminate the ambient light, which would likely be an exercise in futility, especially when using small flashes.

tips-photographing-cars-02

The ambient light reading – by exposing for the highlights on the car’s windshield, I was able to determine which areas in which to add flash.

Before setting up any lights it’s helpful to start by taking a test shot, getting an exposure of the car’s highlights, especially such as the windshield, which would typically be the brightest spots. This exposure will likely look pretty dark, not unlike the image above. It will allow you to see exactly what the ambient light is doing and whether you need to reposition the car to change the angles of the light falling on the car. This exposure will also help you to determine where to add your flashes. The diagram below shows the lighting diagram used for the Tesla shot.

tips-photographing-cars-03

The lighting diagram – after getting an exposure of the ambient light, I was able to determine where to best place my three speedlights.

tips-photographing-cars-04

The raw file – the shadow areas are filled in with accent lights, although some cleanup in post-processing was needed.

I own three flashes, and I needed all of them for this shoot. When lighting reflective surfaces, you need a large, soft light source. To accomplish this, I brought several 40×60” white foam core panels with me, along with several light stands and sand bags. I set up two panels, one at each end of the car, securing them to light stands. I then aimed a full-powered flash into each panel. Since I couldn’t set up a third panel to light the middle of the car without blocking my view of it, I set my third flash on the ground, aiming it into the tire rim. The light placement was effective, although a bit of cleanup in post was still needed.

tips-photographing-cars-05

The lightroom settings – I chose to desaturated the image, one color channel at a time (rather than toggling over to Black and White mode or lowering the global saturation) in an effort to retain the mood in the photo.

The most obvious issue that needed taken care of was the unsightly reflection in the car door. Though the white panel served in lighting the contours of the side of the car, it left a garish reflection. Eliminating it required something a bit more powerful of a tool than the what Lightroom’s Spot Removal tool offered. Instead, I used Lightroom to color grade the image as well as bring up the highlights in a few areas, (see above). The red highlighted areas show where I painted in a brush adjustment, raising up the Exposure, Brightness, and Clarity sliders.

I also chose to desaturate the image, since it was already essentially monochromatic, except for the grass. Note that I kept the file in Color mode, rather than toggling over to Black and White mode or lowering the global saturation, and opted to instead desaturate the individual color sliders in the HSL panel. This is because I wanted to preserve the dark, moodiness in the image, and for reasons I don’t didn’t quite understand, the overall brightness of the image increases when I toggle over to Black and White mode. I also used the Luminance sliders to control the highlight and shadow portions of the image. For example, by lowering the Yellow slider in the Luminance panel, I dimmed the highlights in the grass, which had yellow in it, and shifted the focus back to the car.

tips-photographing-cars-06

The final shot – once the image was color graded and minor spots had been removed, I opened up the file in Photoshop to remove the white-board reflections, specifically the white panels at the base of the building in the background and the edge of the roof, (Figure 6). If specialized cleanup is not your forte, it’s totally acceptable (if not recommended) that you send the file off to a retoucher to finish it up for you.

Attention to Detail

Tips photographing cars 07

The setup – I am not a car person. By that I mean that I couldn’t tell you one old hot rod from another. That said, I find them to be absolutely gorgeous objects to look at. So, when the owner of this beautiful machine led me back to the spot where his latest project sat, I got really excited when my eyes caught sight of the immaculately restored, 1932 Ford Roadster (I only know the name because he told me). The details were phenomenal. Though I knew nothing of its history, and didn’t even really care about driving it or even riding in it, I knew that I had to photograph it. The owner pulled out a vintage magazine photo of a similar car and asked if I could make a photo that looked like that. I smiled and said, “We can do better than that.”

But first, the car needed to move. He had parked the car in front of a large, white door, in full view of the morning sun. This meant harsh, direct light, which was unflattering and boring. I quickly scanned the area, spotting a one-story brick building across the street, with a wall, still in the shade. I asked if he could drive the car over there, positioning it just inside the shade (see above).

Tips photographing cars 08

The lighting diagram – similar to the previous Tesla scenario, I used two of my lights to illuminate the front, and back ends, of the car. This time, however, I placed my third light between the car and the back wall, creating a nice separation between them.

Since I had come to the shoot prepared to photograph portraits and not cars, I didn’t have white panels to bounce light off of. I still only had three flashes that I could use to light an entire car. But just like the previous scenario, I used the ambient sunlight as the main light, adding accent lights to the front and back portions of the car. It helped that I had less car to light. This was a two-seater roadster, and thus was about three feet shorter than the Tesla. This meant that the back rear flash was able to light both tires this time, freeing up my third light to be placed between the car and the building behind it. That created a nice separation between the car and the wall. It also served to highlight the amazing detail of the open-air hood, which allowed you to see straight through to the wall (see below)

Tips photographing cars 09

The final shot – my favorite part is the open-air engine that allows you to see straight through to the back wall.

Do you have any other tips for photographing cars? If you’ve tried it share your ideas. If you haven’t give it a try and share your images and any questions you may have.

googletag.cmd.push(function() {
tablet_slots.push( googletag.defineSlot( “/1005424/_dPSv4_tab-all-article-bottom_(300×250)”, [300, 250], “pb-ad-78623” ).addService( googletag.pubads() ) ); } );

googletag.cmd.push(function() {
mobile_slots.push( googletag.defineSlot( “/1005424/_dPSv4_mob-all-article-bottom_(300×250)”, [300, 250], “pb-ad-78158” ).addService( googletag.pubads() ) ); } );

The post Tips for Photographing Cars by Nick Fancher appeared first on Digital Photography School.


Digital Photography School

 
Comments Off on Tips for Photographing Cars

Posted in Photography


Tips for Using Tilt-Shift Lenses for Correction and Creativity

01 Mar

If you’ve ever wondered about the effects of using a tilt-shift lens this video with host Vincent Laforet will show you some of uses such as:

  • Correcting distortion caused by wide lenses and converging lines
  • Create stitched images without distortion
  • Creating miniature looking scenes by shifting the focus plane
  • Achieving maximum focus on your subject using shift

Here are some of the Tilt-shift lenses mentioned in the video.

Obviously these are specialty lenses and not everyone has a need for, or can afford them. But perhaps if you have the ability you may want to rent one and play around. Check with your local camera store or online with places like Borrow Lenses. Or you can try the less expensive Lens Baby for making some fun effects.

Have you ever tried one out? Do you do the type of photography that requires a tilt-shift lens? Or is it a luxury for the wish list? Share your thoughts in the comments below.

googletag.cmd.push(function() {
tablet_slots.push( googletag.defineSlot( “/1005424/_dPSv4_tab-all-article-bottom_(300×250)”, [300, 250], “pb-ad-78623” ).addService( googletag.pubads() ) ); } );

googletag.cmd.push(function() {
mobile_slots.push( googletag.defineSlot( “/1005424/_dPSv4_mob-all-article-bottom_(300×250)”, [300, 250], “pb-ad-78158” ).addService( googletag.pubads() ) ); } );

The post Tips for Using Tilt-Shift Lenses for Correction and Creativity by Darlene Hildebrandt appeared first on Digital Photography School.


Digital Photography School

 
Comments Off on Tips for Using Tilt-Shift Lenses for Correction and Creativity

Posted in Photography


7 Uncommon Tips for Winter Sunrise Photos Near Water

26 Feb

DPS3

There are few things in photography that people love more than dreamy sunrise shots full of bold oranges, big suns, washing waters, and burnt horizons. The dawn of a new day is a spiritually significant event as our past misdeeds of yesterday are forgotten under the promise of fresh beginnings. Sunrise also affords us some of the best light to work with in photography.

However, if you live near the coast and you plan to get up early to take some sunrise shots that involve you being in or around rocks on the water’s edge, there are some key things you must remember, especially in the cold, winter months.

1. Set the alarm earlier than you think.

This is stage one. You’ve calculated that the sun rises at 6:00 a.m., you want to get there by 5:30 to set up, it takes you 10 minutes to get there, so you set the alarm for 5:10. But be honest, it never works like this does it? The alarm goes off at 5:10, it’s cold, you’re snug in bed, it’s dark outside, you were in the midst of a dream, and you roll back over. Missed sunrise. How often do you ever jump straight out of bed at 5:10 to take photos, in the midst of winter? By learning this mistake, I set the alarm for 4:40 then give myself three hits on the snooze button to take me to 5:10. It never fails (unless it’s cloudy!!)

2. Make sure you have shoes with spikes on the bottom.

Think about it – you’re an avid photographer who has set up a kit to your liking with lenses, filters, batteries and your camera. You put it in your bag, put your shoes on, head to the wet, rocky location then bammo, you fall over on the freezing, slippery moss. Either you or your bag gets wet, and neither is a desired result. There’s nothing scarier than trying to keep your bag on your back and out of the water as you slip around the rocks on ill-equipped shoes.

I have fisherman’s boots that cost $ 40. They have small metal spikes on the sole, perfect for getting across the rocks, and for scurrying to new locations quickly. They’re waterproof too. Alternatively, you could try the little clamp-ons that hikers use in icy conditions. They work well too, but your shoes will get cold and wet.

3. Use a head torch (headlamp).

The first time I brought mine I felt utterly ridiculous, like I was a miner heading down into the pits. Now, I wouldn’t dream of not having one. The convenience of having both hands free to see where you’re going, to open and close your bag, and set your camera up in the dark is without comparison. Especially if you are trying to get filters and holders attached to the ends of lenses.

DPS5

4. Have at least two lens cloths and other lens cleaners or pens.

Imagine this scenario: you are changing your lens out on the rocks and you put your cleaning cloth down to free your hands. There is a little bit of residue on the rocks so when you pick up your cloth and started wiping the lens, it gets coated in a film of goo. You may be able to clean the lens with different parts of the cloth (depending on the type of rock goo!) but it will likely leave most of the cloth dirty. Therefore, you will be unable to clean other lenses later on when they inevitably get hit by sea-spray.

How can I picture such a scenario? Sadly, I have lived it, and there is nothing worse than getting up early to a prime location, only to have your single cleaning cloth ruined before your shooting appetite has been satisfied, leaving you unable to do anything with other lenses that need cleaning. Now I always carry at least three cleaning implements in my bag.

5. Study the tides.

Ideally, you should know exactly what you want to shoot, so you can frame the shot before you go and know where the water will be. This is not always possible, but at least you should know what the tide will be at sunrise. You might go somewhere the day before and see a perfect shot in your head, only to return at dawn the next day and find those beautiful rocks covered in two metres of water. There’s no point setting the alarm for 4:40am if the subject you want in your shot is submerged like a sunken ship.

DPS1

6. Know where the sun rises. This may seem ridiculous – east you say! Well yeah, the sun rises in the east, but exactly where on the horizon will it rise for you? The angle changes every day. I once woke at 4:00 a.m. to get a shot in at sunrise only to realize after setting up that even my Sigma 10-20mm couldn’t get the sun and subject in my frame. East isn’t just east. Know exactly where the sun rises on the horizon in order to frame the shot you want.

DPS2

7. Mittens not gloves.

In the wintertime, near the coast, you need something to cover your hands. But not gloves. Mittens are those cute, little gloves that have all the tops of the fingers cut off. The very reason you need mittens is to keep the tips of your fingers free to play with the camera and to get everything set up. This is very difficult with padded, woolly gloves on. Also, don’t make the mistake of buying woollen gloves, then cutting the tops off yourself. This leaves threads hanging that get longer and longer every day, and more and more annoying.

DPS6

The joy of getting those early morning shots makes a perfect start to the day. Follow these tips and all you’ll have to worry about is framing that perfect shot.

googletag.cmd.push(function() {
tablet_slots.push( googletag.defineSlot( “/1005424/_dPSv4_tab-all-article-bottom_(300×250)”, [300, 250], “pb-ad-78623” ).addService( googletag.pubads() ) ); } );

googletag.cmd.push(function() {
mobile_slots.push( googletag.defineSlot( “/1005424/_dPSv4_mob-all-article-bottom_(300×250)”, [300, 250], “pb-ad-78158” ).addService( googletag.pubads() ) ); } );

The post 7 Uncommon Tips for Winter Sunrise Photos Near Water by Iain Stanley appeared first on Digital Photography School.


Digital Photography School

 
Comments Off on 7 Uncommon Tips for Winter Sunrise Photos Near Water

Posted in Photography


Tips for Setting up a File Management System

23 Feb

As much as we love the art of photography, the organization of it is just as important. Yes, organization. It’s important that you have a system in place to access your photos when you need them. A few key things to consider are: date, genre, occasion, and subject. You also want to be careful of the locations that you are storing your images.

Save location

This is an example of a way to organize your photos. This is an external drive with various years. There is also a folder for miscellaneous photos and a folder for personal photos. Your system may not have as many years or may include different folders. It’s important to develop a system that works for you.

This is an example of a way to organize your photos. This is an external drive with various years. There is also a folder for miscellaneous photos and a folder for personal photos. Your system may not have as many years or may include different folders. It’s important to develop a system that works for you.

MDFileManagement-02 DayFileManagement-02

This is an example of a way to organize your photos. This is an external drive with various years. There is also a folder for miscellaneous photos and a folder for personal photos. Your system may not have as many years or may include different folders. It’s important to develop a system that works for you.

It’s important to have your image files saved in a safe place. You should consider using an external drive of some sort. External drives are ones that sit outside of your computer (some are portable for travelling), on which can store various amounts of data. Some people choose to store a backup of their files on their external drive, and a working copy on their computer hard drive. Either way is fine, just make sure you have your final copies saved and backed up in a safe place.

DayFileManagement-03

You’ll want to create a folder, or series of folders to save your photos. Your organization system should work for your specific needs. Start with a top level that describes your contents. For example, if you shoot fine art as well as portrait work, you might want to create two folders; one for your fine art work and another for your client work would be an option. Within those folders you could then sort your photos by year, then by project or client name. You’ll also want to create folders that represent the different states of your process. An example is to have a downloads folder, a retouched folder, a final images folder, and a blog folder.

File Naming

DayFileManagement-06

This is what the file structure looks like when open. This set of photos was shot in 2015. The date comes before the client name. There is also a designation that these are headshots. This makes it easy to find when looking at the folders. The term headshots was also used as a keyword during import. These images were being used to submit to a casting agency so the file name includes the description of the subject.

Your file names should be descriptive and concise. You want your filenames to be easy to read. A great file structure should include the name of your project, and the date it was shot. You can add any additional descriptive information if you think it’s needed. An example would be Wedding-Johnson-May2014.jpg or Johnson-51414.jpg (inside the Weddings folder). These are just examples. Take into consideration the order you like to view your files. Having the date at the front might be a better option for you if you like to see them in numerical order.

DayFileManagement-05

Keywording

You want to make sure to keyword your photos. This is usually done at import. Both Adobe Bridge and Lightroom have the option to keyword. Most file organization systems have a keyword feature, so familiarize yourself with that. This is an important part of the file organization process that is often overlooked. Your keywords should describe your images and any details you might want to reference later. Think about the types of photos you might be asked to submit, or even want to blog about. An example is using the keyword “sunshine” as part of your family portrait import. You might not immediately think that this is something you even care about, but it will be helpful when you’re ready to submit to a call for photos that show sunshine.

MDFileManagement-03

Here is an example of a complete set. Notice there are folders for the original images, final images, sharing, and social media. Each of these folders leads with the date and client name. The image filenames continue this pattern and are numbered.

File organization can be as simple or as complex as you want it. The important thing is to just have a system in place. You may not have a lot of shoots to sort through, but in time they will add up. Your system will make it easier to find what you’re looking for in the future.

googletag.cmd.push(function() {
tablet_slots.push( googletag.defineSlot( “/1005424/_dPSv4_tab-all-article-bottom_(300×250)”, [300, 250], “pb-ad-78623” ).addService( googletag.pubads() ) ); } );

googletag.cmd.push(function() {
mobile_slots.push( googletag.defineSlot( “/1005424/_dPSv4_mob-all-article-bottom_(300×250)”, [300, 250], “pb-ad-78158” ).addService( googletag.pubads() ) ); } );

The post Tips for Setting up a File Management System by Monica Day appeared first on Digital Photography School.


Digital Photography School

 
Comments Off on Tips for Setting up a File Management System

Posted in Photography


Improve Your Photography in 10 Days with These 10 Tips

18 Feb

For beginners, learning the ins and outs of the fundamentals can often seem daunting. Intermediate photographers might feel confident of their grasp of the photography basics, but find themselves lacking inspiration. Even seasoned photographers might occasionally find themselves stuck in a rut. So we put together a list of tips you can use to get your shutter firing and improve Continue Reading

The post Improve Your Photography in 10 Days with These 10 Tips appeared first on Photodoto.


Photodoto

 
Comments Off on Improve Your Photography in 10 Days with These 10 Tips

Posted in Photography


10 Portrait Composition Tips to Frame Your Subject Perfectly

16 Feb

How you compose and frame your portrait is important for creating visual impact and connection with the viewer. It can dictate the mood and feel of the portrait, making it feel inviting or uncomfortable. Knowing a few rules, and how to break them effectively is a good place to start. In this article I’m going to give you some general Continue Reading

The post 10 Portrait Composition Tips to Frame Your Subject Perfectly appeared first on Photodoto.


Photodoto

 
Comments Off on 10 Portrait Composition Tips to Frame Your Subject Perfectly

Posted in Photography


Vital Tips for Photographing and Editing Interiors

15 Feb

Shooting interiors can be tricky. Spaces tend to either look cold and empty, or warm and inviting. While we always strive to capture what the eye sees, the complexity of the human eye will never be matched by the lens of any camera. Still, there are things you can do before, during, and after shooting an interior space that will go a long way in improving your chances of ending up with stellar photos.

Not sure where to start for improving your architectural photos? Here are my favorite tips for photographing interiors, plus some tricks for touching them up with Adobe Lightroom.

Interiors1

How to Shoot Your Best Interior Photos

Grab your favorite camera and use these tips for snapping more professional-looking photos every time.

1. Prepare the space

Set the stage by taking the time to de-clutter and open up the space. Clear all flat surfaces and floor areas. Open all blinds and curtains. Clean any dirty dishes in the sink and put them away. Be sure to clean the space much more so than you would for yourself. We get used to clutter and become blind to it, but a bit of clutter in a photo goes a very long way.

2. Add warmth and life with personal touches

The space should feel lived-in and inviting, like the kind of place you can imagine yourself spending your days.

You can create those feelings in your photos, by adding personal touches. Set the dining table for two and place a vase of fresh flowers in the center. Transform an empty breakfast nook into a great spot to lounge by adding a newspaper, coffee cup, and a plate or bowl of light (and pretty) snacks. Hang a fluffy bathrobe on a hook next to the bathtub.

When it comes to decorations or color palettes, you want to either fill the space with personality to play up the uniqueness of it, or keep everything neutral with pops of bright color.

Interiors2

3. Fill the room with light

All interior lights MUST be on. While they’re not necessarily helpful in actually lighting the space, they help to create the ambiance. The absence of interior lights will give the space a cold, empty feel.

When using flash, never directly point it into the space. Instead, bounce it off the ceiling or walls, depending on what the space offers. If you can help it, always use flash as a source to fill in shadows, rather than as a main source. That said, if there is enough ambient light (which is your ultimate goal), skip using flash altogether.

Also, play with the strength of your flash. For my Canon, I like to slightly overexpose by about 1/3 of a stop and push the flash to about +2/3 in ETTL mode. Each camera can be different, so don’t be shy about experimenting with what works best with yours.

For outdoor shots, consider setting your flash to manual mode and using it as the fill light. I tend to set mine at 1/16th of full strength, but again, experiment with what works with your camera’s setting and your personal preference.

4. Shoot low

Keep verticals as truly vertical as possible by shooting from a slightly lower camera angle. If you’re going for a graphic composition, watch your horizontals as well. It’s quite easy to fix these issues in Lightroom during your final edit (see more in the first editing tip below).

5. Strike a balance

When composing your shot, focus the viewer’s attention on where you want it to go. Consider using staged items to add depth and interest in the foreground. Try blurring the background to make foreground objects really pop. Avoid flat looking photos by contrasting different elements in the foreground, middle-ground and background. Remember to aim for balance, not distraction.

Using the background to show a connecting room is also a great way to give the viewer a sense of space. This will add interest and make the viewer feel like they can visualize walking through the home.

Interiors3

How to Edit Your Interior Photos

Import your photos to Lightroom and follow these basic editing steps to create more powerful images. Tip: You can also use Photoshop for many of the steps laid out below.

1. Straighten out the lines

Doing this will instantly polish up your photos. If you shot at a height of roughly five feet from the floor and kept the camera level, the amount of straightening you have to correct should be minimal. In Lightroom, you can find this tool under Lens Correction under the Manual section (tab).

2. Fill in and even out the light

Screen Shot 2015 02 10 at 2 01 28 PM

Before doing any adjustment to brightness or exposure, be sure to correct any lens vignetting that may have happened. This is when the corners of the image are a bit darker, and is a common effect in wide lenses. You can find the slider for this setting in Lightroom under Lens Correction, Manual, then Vignetting.

Once your corners are corrected, use the Adjustment Brush to correct the exposure in bright or dark areas. This is your time to “dodge and burn.” I find that erring on the side of overexposure actually has a more natural feel to the space. I recommend pushing the overall exposure up slowly, then when it feels too bright, start pulling back.

You can also lighten dark areas slightly with the shadows slider in the top (Basic panel) section. However, be careful not to lighten so much that you bring out grain (noise) or that the image looks fake.

3. Perform color corrections

Adjust the overall temperature as needed. You’re aiming for warmth, not yellow. Also, bump up the Vibrance a bit instead of messing with the saturation. Oversaturating can quickly make a photo look too fake, while Vibrance is a more subtle tool that helps give the color a little extra kick. Again, playing with the sliders on these settings, and seeing what your eye is comfortable with, will go a long way toward honing color-correcting skills.

Interiors4

4. Adjust the clarity and sharpness

Push the Clarity slider up (to the right) slowly. Clarity is a great way to polish up a photo without going overboard on contrast; plus, it gives the photo an overall crisp look. Depending on the image, you may want to simultaneously play with darkening the blacks a bit, too.

Lightroom has two great presets built-in for sharpening: faces and scenic. I use scenic for architectural mages because it sharpens a bit more than the preset for faces. It’s a subtle, but vital, touch.

5. Clean up with spot removal and cloning

Use the Spot Brush tool to remove any dust spots or other anomalies that may have gotten onto the photo. You will see two options in Lightroom for the brush: Clone and Heal. Healing is a great option when correcting small spots, as it will have a softer blend to it. Next, use the Cloning tool to remove any glares or reflections of you in the photo. You can also use it to remove address numbers, if requested.

While I typically use Lightroom for editing photos, my personal preference for cloning is Photoshop’s stamp tool. It seems to allow for more control over the brush itself, therefore making it easier to clone in a way that looks natural.

How do you shoot and edit interior spaces? Share your tips and photos in the comments section below.

googletag.cmd.push(function() {
tablet_slots.push( googletag.defineSlot( “/1005424/_dPSv4_tab-all-article-bottom_(300×250)”, [300, 250], “pb-ad-78623” ).addService( googletag.pubads() ) ); } );

googletag.cmd.push(function() {
mobile_slots.push( googletag.defineSlot( “/1005424/_dPSv4_mob-all-article-bottom_(300×250)”, [300, 250], “pb-ad-78158” ).addService( googletag.pubads() ) ); } );

The post Vital Tips for Photographing and Editing Interiors by Natalia Robert appeared first on Digital Photography School.


Digital Photography School

 
Comments Off on Vital Tips for Photographing and Editing Interiors

Posted in Photography


Valentine’s Day Photography Tips for Your Inspiration

09 Feb

Ahhh, Love. It can be giddy, maddening, complacent, jealous, warm and gooey, and downright crazy, usually all in the same day. And the weirdest day for love? Valentine’s Day, The Amateur Night red headed step child of New Years Eve, but instead of drinking too much and waking up pantsless while in a pool of your own vomit, you’re forced Continue Reading

The post Valentine’s Day Photography Tips for Your Inspiration appeared first on Photodoto.


Photodoto

 
Comments Off on Valentine’s Day Photography Tips for Your Inspiration

Posted in Photography


Landscape Photography Tips & Tricks: Getting the Big Picture

04 Feb

Of all the different types of photography, capturing images of landscapes is one of the most popular.   The compulsion to capture breathtaking images of sweeping vistas, crystal shorelines and towering mountains comes on especially strong whenever people travel to new places. You’ve probably noticed this whenever some of your friends go on vacations. Their Facebook walls become flooded with Continue Reading

The post Landscape Photography Tips & Tricks: Getting the Big Picture appeared first on Photodoto.


Photodoto

 
Comments Off on Landscape Photography Tips & Tricks: Getting the Big Picture

Posted in Photography