RSS
 

Posts Tagged ‘Tips’

6 Tips for Protecting Your Gear from Any Hazard and Being Prepared

03 Nov

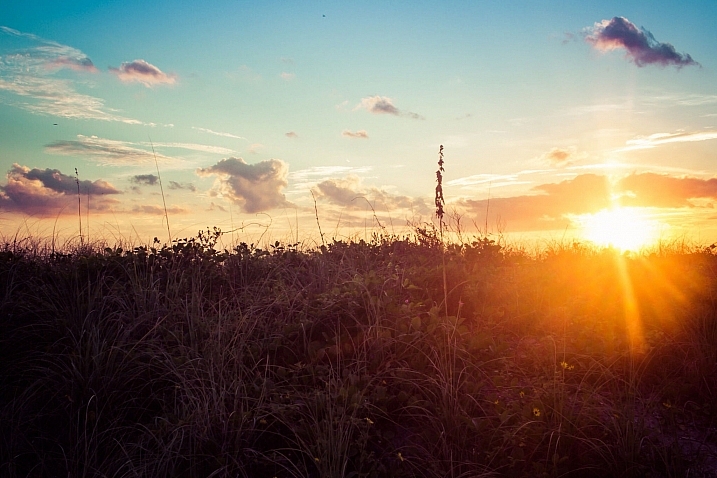
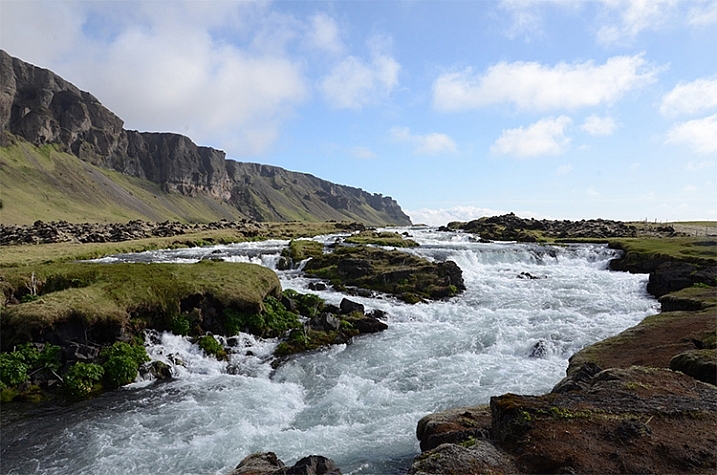
There is no such thing as a magic camera, lens, filter, flash, or tripod that does it all – hence the variety of brands, focal lengths, composite materials, etc., that are available is endless. Actually, part of the fun is not just having what you need, but sometimes what you want. Like something different, even though it doesn’t have the best reviews and specs by others, or something to experiment with, to broaden your creative horizons.

Tiffany Joyce

By Tiffany Joyce

But, there is one thing we all must consider when going out for a shoot, and that is what to bring, or even more importantly, what NOT to bring. Oh that agonizing decision of going through the pros and cons of each widget you could bring. There countless variables depending on personal tastes, what you will be shooting, and how long you will be on your photo shoot, just to mention a few.

There is one constant though, stuff goes wrong, things break, bags get lost, and it is not always easy to get a replacement in time, or even at all. Most of us don’t have sponsors who pay for our gear, and that last lens you just picked up was a financial hardship (that you were happy to endure). So, there are some simple pieces of advice that I have picked up from my own stupid mistakes, and from others, professionals and avid amateurs alike, which might save you and your gear in a pinch.

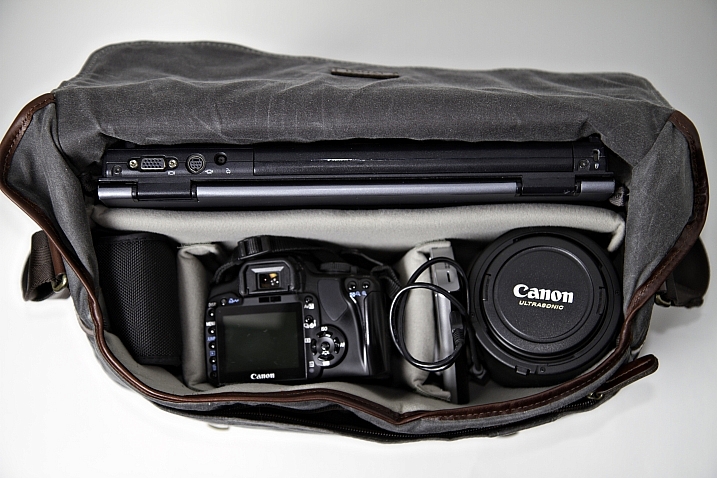
There are many articles on, what’s in my bag, and while it is fun to see what others are doing, the real question is what should you be doing? How much of everything do you want, and what specifics are you really going for? Do you want to bring your best gear, or will something more average do just fine with much less worry? Here are some tips for protecting your gear and being prepared for anything.

001 UV filter

In the far NE of China this longing village was cutting down full trees, and making them into dowels to be shipped to the US to make hammers. With all the flying wood chips and dust, a UV filter was added protection.

1 – UV Filters

Better than me telling you the answer here, you can google, “Should I Use a UV Filter on my lens?”. You will find results galore, and many varying opinions. But, let me show you a picture and it may just persuade you to use one.

My lens hood was on, but I had just turned it backwards to save space while I was going to eat. My lens cap was also on. Sitting down on a street market bench to indulge, I brushed the lens cap pinching the hinges just enough that the cap popped off. Then, as momentum carried me down, a steel bench post smashed into my camera and I heard glass break. My heart sank, as horrible thoughts of my lens dying raced through my head.

It could have been my front lens element, but it wasn’t! It was my $ 35 UV filter, not my $ 900 dollar lens. For casual use, keep a UV filter on! If it breaks like mine did, a circular polarized filter can be a great backup too. Just don’t forget to turn it, to make sure you are getting the best out of your filter.

002 UV filters

This is the glass that broke and saved my front lens element. I was in a small mountain town in central Guatemala with no possibility of replacing the lens.

2 – Lens Hoods

When I generally think of my lens hoods, image quality is what first comes to mind. Less glare, less flair, better saturation and contrast, etc. Sometimes the tulip hoods look nice on a lens, so cosmetically it can be pleasing as well. But they do add significant length, and even when screwed on backwards, not protruding outwards, they increase the diameter, especially on larger lenses, making it tough to cram into your travel bag.

Recently, in Cuba I ran across another amateur photographer, and one of his first comments after exchanging pleasantries was, where is the hood for your lens? The 70-200mm f2.8 IS is a big lens, and making it 25% longer while trying to not impose on subjects, was my deciding factor for leaving the hood at the hotel. I replied, “I have my UV filter on.” He quietly said to me that he was a glass engineer, and he politely suggested, with total altruistic intention, to keep my lens hood on. It has been on ever since.

Protection value is even better than a UV filter and image quality improvements are worth it!

003 lens hood

In a seafood market in a coastal city in NE China, squirming fish, spitting clams and twitching shrimp will definitely get salt water on your lens. Only a UV filter would leave you with water spots, but a lens hood helps keep the salt water off of the front element.

004 lens hood and UV

In New York State during the 2015 super snow year, following this plow, that lays gravel and salt, with my camera out the window is dangerous for a front lens element. Having all the protection of a lens hood and a UV filter is important to protect your gear.

3 – Lens Cap (front and rear)

The little lens cap: This one goes out to amateurs more than the enthusiast. If you are not shooting, keep your lens cap on. This is a very good line of defence for your front lens element. A doctor doesn’t examine a patient without protective gloves, nor should a photographer leave his lens exposed, while enjoying carnival rides or waterfalls. Keeping your lens protected is most important, but clean is essential as well.

Also, if you are switching lenses, keep an extra cap for the back of your lens in your bag. They are all the same size, unlike the front lens cap, so if you lose one it is no big deal as one size fits all. Cleaning dust, dirt, hair or oil from the inside of the lens is a nightmare.

4 – Extra things to think about when travelling

Access to your camera shop or online retailer is not possible when you’re away from home. Maybe your favorite online shop could overnight you something in any developed country, but outside the US, Canada, and some parts of Western Europe, you are out of luck.

UV filters can be found at many small electronic stores at a 20% markup or so, but the sizes available may be limited. Kit lenses these days usually have a 58m or 67mm thread size, and maybe you might get lucky if they have a 72mm filter. Anything in the 77mm or higher range will be near impossible to find. Underdeveloped nations don’t have the ability to hold stock for the occasional guy who smashed his fancy gear, (that which could feed a whole village for a week). Thus, don’t bring more, simplify. Think how you can adapt if something breaks? Like using a polarized filter or an ND filter if your UV filter bites the dust. Using an ND filter and bringing your tripod might just help you broaden your portfolio for the trip; a little blessing in disguise.

5 – CF cards

It used to be no film, no picture. Now it is no memory, no picture. Recently, I was in Central America and one trip got cancelled, and another one came up. It was a photographer’s delight, Cuba! I didn’t have my computer, and didn’t want to plug my gear into a sketchy internet bar computer. The solution in a developed country is to just stock up on a few more CF cards.

The reality is that in developing markets CF cards are not available. Finding a name brand CF card that will have 30mb/second or more, is near impossible. Developing nations are still using basic point and shoot cameras, if they have any at all, and even more popular are mobile phones with mini SD’s in them. SD cards are abundant, along with mini SD cards with adapters, but that does you no good for the higher end DSLRs. CF cards are relatively cheap and tiny compared to lenses, camera bodies and flashes. Stuff a couple extra in your bag.

IMG 9188 bw

In northern Ethiopia this was the one of two stores that carried electronic goods. Most items are mobile phone related.

Getting into other parts of the world, like SE Asia and China, both of which are still in the developing stage, you will find much better luck. CF cards are available, and SD cards are going to be much cheaper. UV filters will also be available for any size. If they don’t have them in that store, ask them to get you one by the end of the day, and they will call up partner stores and send them over on the back of a moped. But you know the catch, it might not be real despite how legit it looks. In a bind, strike a deal, and you will have solved your solution at least temporarily.

006 Electronic store 2bw

This was my second option for electronics. A desktop computer which was used for burning pirated movies and music. No possibility of finding higher end camera supplies.

6 – The Lens Pen

A final item that is a must is the lens pen. These are so compact, and convenient, to keep your front and rear lens elements clean. Make sure you use the brush first, then the moistened concave end for smudges. Ideally you would have air to blow off the lens first, but don’t use your mouth. No matter how careful you are particles of your saliva will appear on the lens giving you double duty. The lens pens are tiny and do wonders. Keep one in your bag, and one in your pocket, so you can get up close and personal to the crashing waves, market activity, or the big sports event. By the way, these lens pens can be found all over the world now. Grab a couple before you go, but if you lose one, or give one away to a local photographer, you may be able to find another.

Bottom line

So, when you are off on your next photo shoot, be prepared. You can’t anticipate everything, but even combined, all of the items on this list could easily fit in your pant’s pocket. Put all of them in a sturdy Ziploc bag, and you just added another element of protection. Wrap your camera or lens in the bag in really treacherous situations.

These tips provide a pretty good insurance policy for keeping your gear safe, and in proper working condition. Keeping your gear protected in harsh environments lets you focus on your creative ability to see and capture your favorite photographic styles, and do it with confidence too. Now, you still need to decide what major pieces of gear you want: super wide angle lens, telephotos, primes, single flash or multiple flashes, tripod, and the list goes on.

But be sure you have your UV filters screwed on, your hoods attached, your front and rear lens caps, and some extra memory, along with the most portable and simple cleaning lens pens.

What essentials do you have in your bag when you leave for a long photo shoot out of your home range?

googletag.cmd.push(function() {
tablet_slots.push( googletag.defineSlot( “/1005424/_dPSv4_tab-all-article-bottom_(300×250)”, [300, 250], “pb-ad-78623” ).addService( googletag.pubads() ) ); } );

googletag.cmd.push(function() {
mobile_slots.push( googletag.defineSlot( “/1005424/_dPSv4_mob-all-article-bottom_(300×250)”, [300, 250], “pb-ad-78158” ).addService( googletag.pubads() ) ); } );

The post 6 Tips for Protecting Your Gear from Any Hazard and Being Prepared by Branson Quenzer appeared first on Digital Photography School.


Digital Photography School

 
Comments Off on 6 Tips for Protecting Your Gear from Any Hazard and Being Prepared

Posted in Photography


3 Tips for Waterfall Photography Beyond Just Using a Long Exposure

30 Oct

JacksonFalls-3

Of course, shutter speed plays an essential role in creating silky smooth waterfall photographs, but does it get a little too much attention in tutorial articles? I think so.

In this article you’ll learn about three other key elements to creating a successful silky smooth waterfall photograph, and when you put it all together, all you’ll need to do next is find a waterfall to photograph.

JacksonFalls-5

ISO 100 | 62mm | f/16 | 1/3

Composing waterfall photographs

Like many landscape photographs, composition plays a huge role in whether or not the final photograph you capture is more than just a snapshot. Even if you nail the shutter speed, have perfect lighting, and just the right amount of depth of field, a poorly composed image will still fall flat.

In the video below I take you through the thought process behind a waterfall photography session I went on last year. I try to drive home the point that getting the best composition of a scene involves more than just moving the camera, but also includes thinking about why the choices you make matter to the photograph itself.

When composing a waterfall scene you’ll have to take into account not just the waterfall itself, but the direction of water flow, the rocks and debris that make up the foreground, the trees in the background, and everything in-between. Next time you’re photographing a waterfall, try just moving the camera around, get high, get low, pay attention to what you see through the viewfinder, and take as many different photographs as you have time for.

Importance of light in waterfall photography

As with most photographs, light is key in setting a tone or mode of the scene, however with waterfalls it can arguably be even more important.

Not only does light determine the mood of the scene you’re photographing, but it may downright determine whether or not you can get a slow enough shutter speed on your camera for the silky smooth water that you want to create. On top of that, you’ve got to absolutely watch out for photographing on a sunny day or this might happen – look at all those hot spots!

trapfallssun-2

ISO 100 | 11mm | f/11 | 0.5 sec

There’s no amount of highlight recovery or post production magic that will bring this image back, and give it a more refined tone. The light simply makes the photograph feel harsh, and while the snapshot showcases the falls, it does little to make the photograph interesting.

Due to the nature of waterfalls often being off the beaten path, and being dangerous to get to, it can be difficult to photograph at sunrise or sunset if you’re not a seasoned hiker. Therefore, as a second best option, I’d highly recommend planning your waterfall adventures for cloudy day. At the very least this will reduce the occurrence of hot spots on the water, and at best it will give you a few extra stops of shutter speed to work with if you need it.

dianesbaths-2

ISO 100 | 11mm | f/14 | 0.4 secs

Don’t forget about water flow

When it comes to creating the silky smooth waterfall effect, the amount of water actually flowing through the waterfall plays an important role in the end result. A powerful current has more movement to it than a small stream, and as a result this high flow waterfall may not require an exposure as long to achieve the desired result.

Take a look at the following two photographs, they are from the same waterfall one year apart. the first image is during a drought resulting in a waterfall that had almost no water flowing over it, while the second image was taken after Hurricane Irene came through the area dropping more than 10 inches (25cm) of rain in some locations. As you can see, the two images offer quite a different view of this waterfall.

Trap-Falls

ISO 100 | 11mm | f/11 | 5 seconds

Trap-Falls-2011

ISO 100 | 11mm | f/11 | 0.5 secs

In most cases it’s probably better to photograph smaller waterfalls with a light flow of water when you’re looking to create the silky smooth waterfall effect, as it tends to work best with those. Often, high flow waterfalls, will simply overpower the look that you’re trying to achieve, and as a result are often better photographed at a faster shutter speed in order to freeze the motion, and showcase their power.

Overall, waterfall photography is a lot of fun, the experience of hiking to the waterfall is often just as rewarding as the photographs themselves, so be sure to enjoy the entire experience.

googletag.cmd.push(function() {
tablet_slots.push( googletag.defineSlot( “/1005424/_dPSv4_tab-all-article-bottom_(300×250)”, [300, 250], “pb-ad-78623” ).addService( googletag.pubads() ) ); } );

googletag.cmd.push(function() {
mobile_slots.push( googletag.defineSlot( “/1005424/_dPSv4_mob-all-article-bottom_(300×250)”, [300, 250], “pb-ad-78158” ).addService( googletag.pubads() ) ); } );

The post 3 Tips for Waterfall Photography Beyond Just Using a Long Exposure by John Davenport appeared first on Digital Photography School.


Digital Photography School

 
Comments Off on 3 Tips for Waterfall Photography Beyond Just Using a Long Exposure

Posted in Photography


Pro Portrait Tips

28 Oct

When snapping portraits, it can be difficult to fulfill your vision with so many variables. The options of lighting, background, makeup, clothing and poses seem overwhelming at times.

Thankfully, we found a few stellar portrait tips from celeb photographer, Greg Gorman. They work great for pros and enthusiasts alike.

  • Learn body language – For instance, if the head is angled in opposition to the body, it creates a look of insecurity.
  • Minimize the lighting situation – Try perfecting portraits with a single light source.
  • Get a bigger boat screen – Review your test shots on a screen larger than the back of your camera. Download them first onto a laptop, or even a tablet with good resolution. (Eye-fi much?)

Read all the tips, and get an eyeful of pretty celebs (hey, Jared Leto) in Greg’s article here.

Photo of Sofia Loren by Greg Gorman


© Erin for Photojojo, 2015. |
Permalink |
No comment |
Add to
del.icio.us

Post tags:


Photojojo

 
Comments Off on Pro Portrait Tips

Posted in Equipment


Tips for Pre-Planning City Photography When Travelling

26 Oct

You have finally arrived. After all the planning and decisions you are in one of the most beautiful places in the world. You have rested, and now you’re ready to go out to see what you can photograph.

You look around and realize you’re overwhelmed, and you’re experiencing sensory overload. You can’t figure out what to photograph, as there are too many options, and you don’t know what will make a good image.

leannecole-city-manhattan-skyline

Manhattan at dusk from Brooklyn Park

This is a common problem when you find yourself somewhere that has so many amazing places to look at, and to photograph. It happened recently in New York to someone I was travelling with. She couldn’t work out what to do and how to approach where she was. She felt lost in a world of so many beautiful things to take photos of.

If you find yourself in a similar situation, here are some tips to help you get past that.

Figure out what you want to see

Think about why you have travelled to this destination. There have to be reasons why you wanted to go there. It might be a good idea to do some research and get an idea of what you would like to see ahead of time.

Make a list

Once you have that, the next thing to do is to make a list of the places you want to visit. For example let’s say you are in New York City. Some examples of places to visit and things to do include:

  • Empire State Building
  • The Flatiron Building
  • Walk over the Brooklyn Bridge
  • Times Square
  • Take a ride on the subway
  • Explore Central Park
  • Pay your respects at the 9/11 Memorial

Of course a city like New York is full of amazing places to go and photograph, these are just a few.

Work out on a map, or, if you have internet access, Google Maps, where they all are and how many of them are near one another. You don’t want to see them all on the same day, so divide them up over a few days.

What is the best time of day to shoot your chosen locations?

leannecole-newyork-flatiron-whole

The Flatiron Building in New York just after sunrise.

It’s good to see where they are on the map as well for orientation. Can you see where they will be according the position of the sun each day? Take the Flatiron Building for example, would it be better to photograph it in the early morning, or in the late afternoon. Early morning during the sunrise could give you a lovely colour in the sky, but it will also mean that there will be less people around. If you are anything like me and don’t like people in your photos, then early morning can be the best time to see and photograph places.

Then again, if you want to photograph Manhattan after walking over the Brooklyn Bridge then late afternoon is going to be a better time. You get the sunset and then the lights coming on in the city.

The number of people at these places is also something to consider. New York is full of tourists, though many popular cities around the world are the same, so you need to think about whether or not you want them in your images. You can get photos without them, but that can take patience.

How are you going to photograph your chosen spots?

This is the part that can baffle a lot of people. Once you have narrowed down what you want to take photos, next you have to decide how to do it. There are several options, these might help you decide.

It is very easy to walk up to a building, hold the camera up to your face, click, and then you’re done. That is often what you see tourists doing, the “I’ve been here and done that” type of image, but as photographers we usually want more than that. You can get a lot more from a location- here are some tips to help you get better images:

1 – Photograph everything

leannecole-city-grand-central-station

A close-up of the clock at Grand Central Station or Terminal

With the age of digital, not having to worry about how much film is going to cost to buy or process, you really can photograph everything. If something catches your eye, then take a photo of it.

Don’t analyze why, just do it. You can think about things too much, but keep in mind that you are there to take photos and it doesn’t matter, just snap away.

2 – Focus on the details

leannecole-newyork-flatiron-detail

Detail of the Flatiron Building in New York.

Sometimes if you just look for the little things, the shape of a door, or some ornate decoration above a window, it can make a big difference.

Old buildings are great for giving you lots of details. They were often built using heaps of ornamental decorations around doors or windows. Besides taking photos of the whole building or location, think about smaller things, and how a close-up of a certain aspect can help give more of an idea of what it looks like.

If you look at the Flatiron Building, first you see the oddity of its shape, how it is placed within its environment, and then you start to see the stonemason’s work on the sides. It is covered in lacework and small sculptures.

New buildings don’t have the type of stonework as the older ones, but you can still get some interesting images. Often instead of small things, the buildings themselves are one large shape. It can be good to find that shape and the best way to take an image of it.

Take the new World Trade Centre, or, as it is commonly called, the Freedom Tower. It is an incredible shape which stands out all over the city. There is no denying it when you see it. Look at its form, and see if there is anything unique about it.

3 – Consider its position in the environment

leannecole-manhattan-bridge-empire-state

Looking through Manhattan Bridge to the Empire State Building.

The situation of the object you are photographing can help tell the story of it. Look around and see what else is there. Is it a busy street? Do people use it a lot? Is there a strange juxtaposition of what it is and where it is located?

Central Park is so big, yet it seems almost a contradiction to see it inside a city of steel and glass. It can be seen as an escape, yet in certain places you can see the city above the line of trees.

4- Look inside

leannecole-city-newyork-public-library

The staircase and ceiling in the New York Public Library.

There are many buildings that you can also photograph inside. Just make sure you have permission to do so first.

Once inside don’t use the flash on your camera, it will give your a strange look and, if it is a big room, will have little affect. Most public buildings frown on the use of flash as well.

Once you go into a building you will need to make your ISO higher, so don’t forget to raise it when you go inside.

Staircases are wonderful to photograph in both directions. Old buildings often have wonderful light fittings and very ornate ceilings, try to capture those.

leannecole-city-central-park

New York appearing above the trees in Central Park and the Bow Bridge.

Before you head out the door

Remember what you want to do when you are out taking photos. If you make a list of what you want to photograph, or a summary of this list, then you will get what you want.

If you are going to the Flatiron Building your list might look like this:

  • From across the street and straight on
  • From the left looking down the side street
  • Do the same on the right
  • Stand at the bottom and look straight up
  • Zoom-in on some of the different details on the building
  • Move to one side and have the building on the left or right and then show the street it is on

This can be a good way to get the shots you want. You don’t want to get back home and wish you had done something else.

If you think about all of these aspects of travel photography then it should help you to get over your feelings of being overwhelmed. It will help you focus on what you want to photograph, and how you want to see the city through your camera.

googletag.cmd.push(function() {
tablet_slots.push( googletag.defineSlot( “/1005424/_dPSv4_tab-all-article-bottom_(300×250)”, [300, 250], “pb-ad-78623” ).addService( googletag.pubads() ) ); } );

googletag.cmd.push(function() {
mobile_slots.push( googletag.defineSlot( “/1005424/_dPSv4_mob-all-article-bottom_(300×250)”, [300, 250], “pb-ad-78158” ).addService( googletag.pubads() ) ); } );

The post Tips for Pre-Planning City Photography When Travelling by Leanne Cole appeared first on Digital Photography School.


Digital Photography School

 
Comments Off on Tips for Pre-Planning City Photography When Travelling

Posted in Photography


9 Tips for Adding a Warm Sun Flare to Your Image

21 Oct

Photography, as an art form, is simply the capture of light on either a sensitive physical medium or, in more recent times, an electronic sensor.

What makes a photograph unique and attractive to the eyes is the distribution of that light. Shadows, highlights, and varying levels of warmth and tone evoke emotion when viewing them, emotionally investing you to the picture you’re viewing.

One of the most dramatic instances of light that can occur in a photo is flare, and more specifically, a sun flare. You’ve no doubt seen spectacular images with beams of light radiating through the photo, giving you a wonderful sense of warmth and brilliance.

21474625629_1dd03156ae_k

I remember about three years back, a friend asked me to how to produce the warm flares that were visible in many of my photographs. I tried to explain, but realized I really didn’t know the exact combination of properties that worked. I just knew the sunlight coming through a camera lens at the right angle created a beautiful artifact, and that I was able to achieve it pretty consistently in my beach, landscape, and nature shots taken at sunset.

Over time, I learned the details of what it takes to incorporate this effect, and how to use it to my advantage to get a warm, dreamy feel that amps up the viewer’s connection with the photo. This is what I’d like to share with you, as it’s one of the easiest ways to inject emotion into your photography.

In this article, we’ll cover what flare is, what artistic and aesthetic benefits you can derive from it, and finally, how to produce and use it effectively in your photography.

What is sun flare?

Lens flare, as described in its most basic form, is the result of a bright light source entering the lens and producing artifacts, shapes, and effects in the resulting image.

Technically, lens flare and sun flare are different entities, but for the purpose of this article, we’ll treat them the same. We will be talking about the effect created in-camera by having bright sun as a light source in, or near, the edge of the frame.

21629871846_47b2c9c4fa_b

On many occasions this is an unwanted effect. For this reason a lens hood is often used to prevent flare, when bright light shines on the lens opening from outside the frame. Flare often reduces cleanliness and clarity in a scene that requires it, such as with architectural or commercial photography.

But flaring has a beautiful side as well, as you know. Some of us strive for the warmth and haziness that flared light from the sun can provide. Environmental portraiture is an example of an area that utilizes this effect. So how can we create and use flare to our advantage?

21036819798_41e380f648_h

Creating the flare

1. Don’t try this on a cloudy day

The main requirement to create flare is of course, the sun. If you’re shooting on an overcast day and there isn’t any sun poking through, you won’t be able to create a flare.

2. A low angle is best

Although you can create flare at any time during the day, it’s much easier, and much more dramatic, to shoot the sun when its low on the horizon – in other words, at sunrise or sunset, during the golden hours.

This is because you’ll need the sun in the frame, or just outside the frame, and this will usually coincide with your subject positioning.

21469116409_265a1699e2_k

3. Drop the lens hood and pick your lens

If you’re using a lens hood, remove it. Lens hoods are intended to reduce glare and flare from light sources outside the frame, which is exactly opposite of what you’re looking for in this case..

To amplify the chances of getting a good flare, try using a zoom lens, as opposed to a prime. The additional spaces and mechanical parts inside the zoom give the sunlight more room to bounce around and do its thing.

4. Shoot in Manual Mode

This particular discipline is based on the principle that the slightest change in orientation, composition, or aperture can make a pretty big difference in the end result. Shooting manually will allow you to have finer control over these factors and make things much easier for you.

Shooting with Live View can help even more, as you’ll be able to monitor changes in your scene in real time.

5. Settings: Aperture and more

You can use any aperture you wish when creating flare effects, but the look will differ depending on what setting you choose. At smaller apertures (f/11 and smaller), any visible part of the light source will create more of a starburst effect, while a larger aperture (f/8 and larger) will diffuse and disperse the effect, and you’ll end up with a much smoother distribution of the light.

Shutter speed also affects the final result, as more light streams into the lens when using slower speeds; therefore, you’ll have more of a flaring effect.

20950860109_026cca9525_o

6. Focus first

The large amount of light coming into your sensor will affect the autofocus on your camera if you’re using it. So, focus on your subject first by blocking the sun somehow, whether it be your hand, a reflector or a piece of cardboard. Then, once you’ve focused (and lock it or use back button focus), you can shoot normally knowing you are focused correctly for the given distance.

7. Don’t forget to light your subject

If you’re photographing a portrait, don’t forget the negative effect the flare can have on the proper lighting of the face and body. If you find the subject’s face, or other important areas, are washed out too much from the high light levels, use a reflector or other methods of fill light to compensate, and ensure your subject is well illuminated.

Alright, let’s get to shooting!

8. Method one:  In the frame

There are two primary methods of creating the flare effect. The first is by having the sun actually within the frame of the image. Naturally, just having it centered and completely uncovered will result in a washed out photo. You’ll want to have something to partially block the light, so that a flare can be achieved without washing out the subject of your photo. Trees, a distant treeline or building, and your subject can all provide enough cover to produce the desired effect.

16777527017_5540bf7379_b

Take care not to capture too much light. Sometimes the resulting flare can be so pronounced that your image is completely washed out. Shoot several frames, and check the amount of flare you’re getting. If it’s too much, compose the sun a little more out of frame (or more hidden) to reduce the effect.

9. Method two: out of the frame

For an even more pronounced and diffused flare, you can compose your image with the sun partially, or completely out of frame. Usually the best results come from having the sun just outside the camera’s view. Experiment with position to find the correct angle and amount of flare necessary for the shot you’re after.

This method produces more a diffused and smooth flare, especially in the early morning and late evening hours, when the sun is very low on the horizon.

16642785747_fd851ca392_k

That’s it! 

Adding a nice looking sun flare to your image really isn’t tough at all. Following a few rules is all you have to do, and like everything else in our wonderful world of photography, the result is always subjective. Add a little, add a lot, all that matters is that you’re happy with the final image! There’s no wrong way to do it.

So get out there and get your flare on! Of course, we’d love to see some examples of what you can do with this effect, let’s see your best shots!

googletag.cmd.push(function() {
tablet_slots.push( googletag.defineSlot( “/1005424/_dPSv4_tab-all-article-bottom_(300×250)”, [300, 250], “pb-ad-78623” ).addService( googletag.pubads() ) ); } );

googletag.cmd.push(function() {
mobile_slots.push( googletag.defineSlot( “/1005424/_dPSv4_mob-all-article-bottom_(300×250)”, [300, 250], “pb-ad-78158” ).addService( googletag.pubads() ) ); } );

The post 9 Tips for Adding a Warm Sun Flare to Your Image by Tim Gilbreath appeared first on Digital Photography School.


Digital Photography School

 
Comments Off on 9 Tips for Adding a Warm Sun Flare to Your Image

Posted in Photography


20 Tips to Improve Your Travel Stock Photos

20 Oct

Here are 20 tips to help you take the best stock photos while traveling or around your hometown. Even if you don’t do stock photography, you can use these tips to help you get better images.

NEAR SKOGAR, ICELAND - JUN 19:  Skogafoss waterfall on June 19, 2015, was in the film The Secret Life of Walter Mitty in 2013.

NEAR SKOGAR, ICELAND – JUN 19: Skogafoss waterfall on June 19, 2015, was in the film The Secret Life of Walter Mitty in 2013.

1. Check stock photo websites to see popular locations

In addition to doing some web searches for areas of interest, a great way to know which locations are popular is to check popular stock photo websites, such as Shutterstock or iStockphoto. You’re not looking to recreate any existing shots, but it helps to know what’s been done well already and, more importantly, what is missing.

2. Check the itinerary of sightseeing buses

A great way to see what popular locations are is by reviewing any websites for sightseeing buses. Make a note of their stops and add them to your shot list.

3. For international travel, learn the basic words of the language

Iceland rushing water 750 px

Learning some key words like, “please”, “thank you”, and “Okay?” can make communication much easier abroad, and help spur friendships. uTalk is a terrific app to learn a new language, and Duolingo is great to refresh a language you are already familiar with.

4. Check out popular postcards

Taking a peek at postcards in tourist shops will give you an idea of the popular sites. Again, you are not looking to recreate shots, but you might be able to add a few locations to your shot list.

5. Get recommendations from locals

Check with the clerk at the grocery store, or gift shop, at your current stop for nearby locations that would be worth photographing. You may learn about some lovely hidden gems that will enrich your experience.

6. Consider renting a car to have greater control of your travel plans

Iceland goats 750 px

You never know what you’ll encounter on the road

Public transportation is fine within many cities, but if you’re going between towns renting a car allows you to pull off by the side of the road, and take those random shots that were not on your itinerary.

7. Take photos when you have a chance, you might not go back the way you came

Don’t figure you’ll catch something on your way back, you never know when serendipity will take you in a different direction than you intended. Get the shot now.

8. Take the sightseeing bus (or boat)

A sightseeing bus is a great way to get to the popular destinations, and if it’s a double decker bus, or a boat, you get views you couldn’t get otherwise.

9. If shooting for editorial stock always note the location of the photo

An editorial stock photo is going to require a location in the caption, so always note the name of the town. Take a quick shot of the welcome sign as you enter the town, or take a photo of a store with the town’s name. Of course having the location saved on your photo itself helps a lot too, but having it embedded within your photos makes it easier to quickly remember where you were. As another reminder, save all handouts from tourist spots, maps, and travel guides you pick up along the way to refer to later when processing your photos.

Iceland car GPS 750 px

10. Check your photo settings frequently

You don’t want to look back on your photos for the day and realize you had set your ISO to very high for an indoor shot, and forgot to reset it when you went out into a sunny location so your outdoor photos are grainy. Or you set your photo size to small when you need a big file to get photos large enough to be accepted by the stock photo sites. If this sounds like the voice of experience, it is. We all make these mistakes – don’t be too tough on yourself if you make them too, just live and learn.

11. Ask the experts

You’ll sometimes find professional photographers taking shots. If they seem approachable, ask them, politely, what they are photographing. Some will be very eager to discuss what they are doing, others not so much, but it’s worth a shot. You might get some great insights.

12. Give yourself time to get the shot right

You’ve traveled thousands of miles to get there, you won’t be able to go back and reshoot, so give yourself the time to get the shot right. Work the photograph to clean up the background, to remove distractions so the focus is on the area of interest. Sometimes just taking a few steps to the side, or turning a bit can make a dramatic difference by removing distracting elements in your background, or focusing the eye on the area of interest.

Iceland Glacier Lagoon big blue side 750 px

Glacier on the side, not noticeable

Iceland Glacier Lagoon big blue 750 px

Glacier is the main focus of the shot

Hanging around also allows you to absorb the atmosphere of the place, and keeps you from rushing from photo to photo.

13. Think layers

While you’re waiting for that right shot, think in terms of three layers: The area of interest as the middle layer, with a clean background layer to set it off. Wait for an interesting foreground to present itself, maybe people, or animals in this case, going past your area of interest. This makes the photograph come alive, gives it some depth, adds to the interest.

Iceland Glacier Lagoon geese 750 px

Geese add a sense of proportion to the glacier and bring the scene to life

14. Think like a guidebook author or a nature artist, or…

Pretend you are writing for a tourist guidebook – what kind of shots do you want in your guidebook? What would your potential readers like to see? How about if you were an artist preparing for a nature exhibit – what photographs would you want as part of your exhibit? Look at each location from different perspectives to get new ideas.

15. Take a variety of shots

Give your clients as many options as possible. Take 15-20 shots at any one location, walk around and check different positions, try different angles, think close-ups, wide shots, vertical as well as horizontal shots. You’ll then have plenty of options to choose from for your final photographs.

Iceland puffin with fish left 750 px

Iceland puffin with fish and buddies 750 px

Close-up and wide shots gives you and your clients options

16. Look behind you as you leave your location

Don’t leave the best shots behind your back. As you leave a location turn around and see what shot you might be missing.

Iceland Seljalandfoss exit side 750 px

Don’t miss the great shot behind you

17. Offer to take photographs for others

Share your skills – if you see a group of people taking a group photograph, offer to take the shot for them. It makes for another chance to interact with people, and if you learned a bit of the language, all the better.

18. Be mindful of other people’s desire for privacy

People will make it pretty clear whether they are okay with being included in your photographs. Stay away from editorial photos of little children, and if you accidentally take a photo of someone who clearly doesn’t want to be in your photo, let them know you have erased the shot. On the other hand, many people will be eager to have you take their picture, and oblige happily.

19. Back up your photographs every night and cull as you go

Upload your photographs to your laptop and/or to the cloud, you’d hate to have your camera stolen or lost mid-travel, and lose all those shots. While you’re at it, delete the photos you know are not going to work out, those with people blocking the view, or out of focus, etc. Don’t wait until you get home to the daunting task of sifting through thousands of photographs.

20. Process your photos right away upon your return

The longer you wait to process your photos the harder it will be to get to it. Unprocessed photos tend to get heavier with time and sink to the bottom of your to-do list. It’s best to process them while you remember what the sights really looked like, so you remember to uncover that rainbow you know was there but might not be so visible before Photoshop.

Iceland Gulfoss rainbows 750 px

Don’t forget to uncover the rainbow.

Best wishes on your photography adventures. Please share in the comments below if you have any questions or additional tips.

googletag.cmd.push(function() {
tablet_slots.push( googletag.defineSlot( “/1005424/_dPSv4_tab-all-article-bottom_(300×250)”, [300, 250], “pb-ad-78623” ).addService( googletag.pubads() ) ); } );

googletag.cmd.push(function() {
mobile_slots.push( googletag.defineSlot( “/1005424/_dPSv4_mob-all-article-bottom_(300×250)”, [300, 250], “pb-ad-78158” ).addService( googletag.pubads() ) ); } );

The post 20 Tips to Improve Your Travel Stock Photos by Susan Montgomery appeared first on Digital Photography School.


Digital Photography School

 
Comments Off on 20 Tips to Improve Your Travel Stock Photos

Posted in Photography


5 Tips for Using the Blend If Feature in Photoshop

18 Oct

In this video Blake Rudis, from EverydayHDR, shows five really useful tips for using the Blend If feature, which is available in Photoshop when working with layers.

The five methods for using Blend If:

  1. Adding sharpness to your image
  2. Removing noise
  3. Adding saturation
  4. Vignetting
  5. Adding a texture to your photo

Get the downloads he mentions in the video here:

Using the Blend If sliders allow you to really control where you want the affects to apply, without complicated masking and brushing in and out details. Give it a try, it may save you a ton of time editing!

googletag.cmd.push(function() {
tablet_slots.push( googletag.defineSlot( “/1005424/_dPSv4_tab-all-article-bottom_(300×250)”, [300, 250], “pb-ad-78623” ).addService( googletag.pubads() ) ); } );

googletag.cmd.push(function() {
mobile_slots.push( googletag.defineSlot( “/1005424/_dPSv4_mob-all-article-bottom_(300×250)”, [300, 250], “pb-ad-78158” ).addService( googletag.pubads() ) ); } );

The post 5 Tips for Using the Blend If Feature in Photoshop by Darlene Hildebrandt appeared first on Digital Photography School.


Digital Photography School

 
Comments Off on 5 Tips for Using the Blend If Feature in Photoshop

Posted in Photography


Tips for Doing Fall Portraits

16 Oct

Autumn provides photographers with an abundance of colours and amazing light. When captured right, autumn can create images which are the envy of everyone.

For family photos, autumn can provide you with amazing backdrops, and a variety that can be matched by no other season. For this article, I took my own two children for a walk in the woods to do some fall portraits. Photographing other people’s children is always easier than your own, so I thought it would be a great exercise, and we may also even get some nice pictures of our own children for once. So here are some fall portrait tips to get you started.

Gannon-Studios-2

Autumn Portraits 4

Preparation

Preparation is the key to any successful shoot. Of course ensuring your camera equipment is charged, you have clear cards, and your gear is clean seems like a no brainer, but it’s often the fundamentals that we overlook. Clearing cards can be daunting for those starting out, but just double check that you have downloaded everything, then use the Format function (in the camera) that will give you a completely clear card. There are rumors that deleting single images in-camera can lead to corrupting the card, so it’s best to use the Format function.

Make sure you check the weather. Here in the UK, as well as many other parts of the world, it can change quickly at this time of year. Check with a few sources about local weather. It’s such a pain to get everyone together, get in the car and travel for some time, only to be rained out. Although, even rain in autumn can provide some great image opportunities, if you are dressed correctly.

Gannon-Studios-1

Sunrise and sunset can give us the best light. However, dragging your family out of bed for a photo shoot is always going to be tough. Aim to start your shoot about an hour before sunset. This Golden Hour is favored by many professional portrait photographers, as the light is more flattering and you may even get a great sunset. You can look up sunset times for your local area. It can be surprising how early it gets dark, and you want at least a good hour of shooting before the sun goes down.

Make sure everyone dresses appropriately. It’s getting colder, and it’s one less thing to worry about if everyone is warm during the walk back to the car. While we still think it’s lovely and warm outside, believe me, it gets cold pretty quick when the sun starts to go down. Also have a change of clothing available for everyone. It can be wet and muddy and some of us are prone to falling over!

Make sure you bring snacks and drinks. Especially if you are photographing children. They will get bored and hungry way before you do, so anything to help keep them going while you master that perfect shot the better.

Editor’s note: if you are photographing other people’s kids have the parents bring snacks that the kids like. Never give food to other people’s kids without asking the parents, there may be allergies or special diets.

Clothing advice for portrait photographers:

Clothing choices are always important for portraits, but in fall it can really make a difference to your image. Try and have everyone wear natural tones that will either compliment the colours of the leaves and trees, or blend in. My son wore a dark red sweater, as we knew the area had very vivid reds in the trees. My daughter wore black and white which is a timeless combination that blends in well. My son also wore a grey hood that coordinated with his sister.

Autumn Portraits

Try and avoid clashing patterns or colours amongst your subjects by discussing it in advance, and maybe come up with a colour theme that everyone can include. Also avoid t-shirts or sweatshirts that have dominant logos. If he could, our son would have Star Wars logos on everything. This can of course date an image, and is also very distracting.

Try and have a few changes of clothes available. This will not only provide variety in your images, but in the wet and possibly muddy conditions, you may well need them, especially for any children.

Location

Location is essential for any shoot, but for autumn you want to find the best colours and textures you can. Things can change really quickly. The leaves can change over a couple of days, but it often doesn’t happen until later than you think. For this article, we actually struggled to find autumn colours despite it being early October. You also need to check that the leaves are still there. A heavy wind can take them down overnight, so don’t wait too long after you have scouted your spot to shoot.

We searched online for arboretums, these are great places that have collections of interesting trees. Of course, your local forest would be great too.

Autumn Portraits 2

Use social media for location tags to see what other people have photographed over the last few days, at or near the same location. Instagram, Twitter and even Trip Advisor are fantastic for this. You may also get to see a great place that you may not have found otherwise.

The technical bits

For my shoot, I was using a Canon 5D Mark 3 and took the 24-70mm f/2.8 Mark 2, and the 70-200mm f/2.8 Mark 2. These of course are professional cameras and lenses, but any modern camera whether a DSLR, point and shoot, or even a smart phone should provide great images. In fact, I find the iPhone 6 has great range of colours and light.

If you are using a DSLR, you can really play with the aperture (f-stops) to get a range of looks without moving location. To get a super blurry background, set your aperture to the lowest number. On my lens, this is f/2.8. Some lenses can go lower and some are limited to higher setting. Even with a kit lens that comes with your camera, you should be able to get to around f/5. If you want the leaves and your family in focus, try increasing the aperture to f/8 or even f/22. Do be careful though because at f/22 your shutter speed will be significantly slower, and you may well need to increase your ISO to compensate.

Depth of field guide f2 8

Depth of field guide f8

Depth of field guide f22

I photographed the images above in Aperture Priority (AV on a Canon, and A on a Nikon). This is when you decide the aperture and the camera sets the shutter speed. Keep an eye that the shutter speed doesn’t geet too slow (1/60 as a minimum). If it does, increase your ISO.

Personally, I always shoot in RAW. For me it just allows me that flexibility afterwards. However, with modern cameras, JPEGs are very versatile, and don’t break up as much as they used to. Some cameras allow you to capture a RAW and JPEG at the same time. This is great so you have the RAW to go to if need be.

White Balance: for these images, I shot in cloudy White Balance. It warmed up the colours, although I did alter these in Camera RAW processing later, it did give me a great starting point. If you are using your manufacturer’s own software, you should be able to change the white balance quite easily.

Getting natural smiles and reactions from children

You know your own children very well. You know the songs they like and what gets them interested. However, they are also very comfortable around you, and may decide to walk off just as you get your camera settings right. Here are a few tips to get a natural reaction.

As in the images in this article. I asked my children to laugh hysterically for no reason at all. This got a huge overreaction which although is a great animated image, is not what we were after. What did happen is that as they calmed down from that, they had natural smiles. They thought it was funny and continued smiling naturally.

Posing Idea 1

If you have more than one child, ask one to tell the other a secret. This will always get them giggling.

Posing Idea 2 Posing Idea 3

With just one child, ask them to tell you or the camera anything that they are interested in. Our son will talk for hours about anything Star Wars or Marvel. With our daughter we can ask her math questions, which gets a range of reactions.

Sing them a song but get it wrong. For some reason, this is the funniest thing ever to kids. Basically, do anything to distract them or get a reaction, but not by saying CHEESE!

Editing your images

For editing, I used Camera RAW processor which is part of Photoshop. However, most cameras come with editing software, or you can use something like Lightroom which is quite affordable. I actually kept the editing quite simple. The main thing I did was to go to the saturation panel and increased my Reds, Greens and Yellows. This really brought some punch to the image.

Before and After Editing

And finally…

Please print your images in some way. As parents, we are great at taking images, but not doing anything with them. Don’t worry about capturing the most amazing image, just get something that captures your family and print it some way.

googletag.cmd.push(function() {
tablet_slots.push( googletag.defineSlot( “/1005424/_dPSv4_tab-all-article-bottom_(300×250)”, [300, 250], “pb-ad-78623” ).addService( googletag.pubads() ) ); } );

googletag.cmd.push(function() {
mobile_slots.push( googletag.defineSlot( “/1005424/_dPSv4_mob-all-article-bottom_(300×250)”, [300, 250], “pb-ad-78158” ).addService( googletag.pubads() ) ); } );

The post Tips for Doing Fall Portraits by Sean Gannon appeared first on Digital Photography School.


Digital Photography School

 
Comments Off on Tips for Doing Fall Portraits

Posted in Photography


3 Tips for Taking Photos of Flowers

16 Oct

Flowers are everywhere, and sometimes just the thought of going out to take pictures of their pretty petals can seem downright cliché, because so many people do it. However, one reason flower photography is so popular is because these kinds of pictures can capture incredible beauty, without a great deal of effort. It’s fun to go outside and document the incredible array of colors that can be found in flowers, but it’s just as common to look at your photos later and discover that they might not be as good as you had hoped.

Fortunately there are a few easy steps you can take to not only improve your own flower photography, but help you get out and enjoy the beauty of nature while you’re at it.

3-tips-flower-photos-coneflower

50mm f/1.8, 1/640 second, ISO 200

Everyone has their own unique style when it comes to photography, and taking pictures of flowers is no exception. Some people like flowers in isolation, whereas some like to see a whole field of blossoms in one shot. Some like to use techniques such as over-saturation or selective coloring, while others find these approaches distasteful. Therefore the following tips are not to be considered universal, or the be-all-end-all when it comes to taking pictures of flowers. They are a few lessons I have learned over the years that work for me, and hopefully they will give you something to think about the next time you step out to capture the beauty of nature.

Give your image a clear focal point

All good photos have a subject, or something on which the viewer’s attention is to be fixed. Some pictures can have multiple subjects, but rarely will you find a good image (flower or otherwise) with no subject at all. Where flowers are concerned, you might want to focus on just one flower, or have your viewers see many of them at once, but at the end of the day it should be readily apparent to anyone who sees your photo just what they are supposed to be looking at.

For example, the following image is decent, but as a viewer it’s difficult to notice the flower in the center amidst all the other blooms in the background. In essence, there is no one clear focal point even though there is a flower in the center of the frame.

3-tips-flower-photos-dof-wide

50mm f/4.8, 1/60 second, ISO 100

There are several things that can be done to fix the problem, but one of my favorite techniques is to simply use a wider aperture on my lens. I re-shot the same image using a much bigger aperture, which resulted in a shallow depth of field, rendering the flower in focus while the rest of the background shows up as a silky smooth blur. Looking at the second image, there is no doubt at all as to what the subject of the photo is, and what viewers are supposed to focus their attention on.

f/1.8, 1/350 second, ISO 100

50mm f/1.8, 1/350 second, ISO 100

Another way to make sure your image has a clear focal point is to utilize colors that complement or contrast with one another. The purple flowers in the image below stand out because they contrast quite nicely with the green background, which draws the viewer’s attention immediately and creates a nice focal point for the picture as a whole.

NEED EXIF

50mm f/1.8, 1/200 second, ISO 100

You can use multiple techniques to achieve the desired effect, such as the picture below of an orange lily that stands out clearly from the background thanks to contrasting colors, while also using a wide aperture to make the background appear blurrier. Be careful not to use an aperture that is too wide, though: depth of field can be a fickle mistress, and shooting at f/1.8 or f/1.4 might seem like a good idea, until you realize that only half of your flower is in focus and the rest is a fuzzy mess.

NEED EXIF

50mm f/2.8, 1/400 second, ISO 200

This last picture (below) is similar to the one above, but ultimately fails because there is no obvious focal point. Notice how the flower itself almost blends in with the background, and the inclusion of two additional blossoms just behind the red one and in the bottom corner of the frame. These problems cripple the image and keep it firmly in my “Rejected” category in Lightroom, but I’m using it here as an example of what not to do.

NEED EXIF

50mm f/1.8, 1/1000 second, ISO 200

I could have easily fixed this picture by looking at the flower from a different perspective, but alas, I did not and am left with an image that is almost unusable because the subject, what should be the focal point, blends in so much with the rest of the image that it’s difficult for the viewer to know what to see. Finding a clear focal point for your images might take a bit of practice, but the results will be well worth your efforts.

Find the right camera angle

It’s not uncommon to see people taking pictures of flowers with their cameras pointed down from eye level. While doing so may produce decent results from time to time, you will often find that selecting a different angle will yield much more interesting results. The red blossom in the picture below was a few feet off the ground so I did what most people would do: I pointed my camera down and pressed the shutter button.

f/1.8, 1/320 second, ISO 100

f/1.8, 1/320 second, ISO 100

There’s a couple of things wrong with this picture, but to me the most critical problem is that it’s just not very interesting. Looking at flowers from your normal eye level can sometimes produce pleasing photos, but often you will get better results if you move around a bit, and seek out a more interesting angle. After taking the initial picture I crouched down and shuffled among the plants for a bit until I found a better perspective from which to shoot the photo.

3-tips-flower-photos-angle-comparison-side

While not perfect, this is certainly a much better composition than the original shot, and it shows the flower in a whole new light. You can not only see more detail on the petals, but it stands out more from the background, and even utilizes a bit of foreground elements to add depth. The drop of water on the left side which is an afterthought in the original, is now featured quite prominently, and adds a nice accent to the rich red tones of the flower petals. All this was made possible because of a quick and simple change in my perspective. While this doesn’t always guarantee better photos it is a fun way to try something new, and even explore a bit more of your surroundings than you otherwise might.

Shooting macro-style pictures is another fun way to get creative with choosing the angles on your shots, provided you are willing to look for some unusual perspectives. My cousin Beth took the following picture of a cosmo flower with nothing more than her iPhone 5s, and a $ 50 Olloclip lens attachment, that lets her get extraordinarily close-up photos of just about anything. By shooting from a creative perspective instead of straight down, and using complementary colors of yellow and purple, she was able to take a gorgeous picture that might otherwise have looked quite mundane and ordinary. Her Instagram account is filled with images just like these that she took with her phone, which also illustrates that you don’t need to spend a great deal of money to get incredible photos of flowers.

3-tips-flower-photos-iphone

Compose with the whole scene in mind

Taking good flower pictures is about more than just a few pretty petals, but everything in front of and behind them as well. Finding creative ways to avoid conflicting colors between your subject and the background or foreground is nice, but you can step things up a notch by actively using these elements to enhance your shots.

For example, I had many options available when I took the following shot of some yellow kosmeyas. I could have just focused on the flower in the foreground, but by taking all the other elements of the scene into account, I was able to create a much richer and more interesting picture. I shot into the early morning sun, before the dew had evaporated, so I could make creative use of backlighting, and was so pleased with the result that a large print of this is now hanging in my living room.

3-tips-flower-photos-morning-sun

50mm f/2.8, 1/750 second, ISO 100

Even the background elements themselves can add interesting colors and patterns that you might not otherwise consider, as long as you pay attention when shooting, and use a careful eye with regard to composition. As I took the photo below, I saw a sidewalk running through the background, so I spent several minutes not just adjusting my camera settings, but also looking at the sidewalk and using that as an intentional compositional element. I like the way it cuts horizontally through the image and serves to accentuate the oranges in the flower at the center.

3-tips-flower-photos-bokeh-dark-orange

50mm f/1.8, 1/8000 second, ISO 100

I want to leave you with one final example when I did not use this technique, and was quite disappointed with the photo that I almost got. Several months ago I spent a while following a butterfly around on a sunny day. When it finally landed on a flower and let me get close enough to take a photo, I eagerly snapped away without taking the rest of the scene into account.

3-tips-flower-photos-insects-butterfly

50mm f/2.8, 1/3000 second, ISO 200

If only I had scooted mere inches to the right I would have isolated the flower and the butterfly against a nice green background, but instead I did not take the whole scene into account, and got an image with no clear focal point and a big splotch of blurry orange right behind my subjects. I could have used the background elements to my advantage, but instead I was careless and overeager. This was actually a good learning experience for me though, as it helped me take much better photos in the time since.

As I mentioned at the outset, these are just a few examples and tips that you could employ to get better flower pictures but I’m curious to find out what has worked for you. What are your favorite tips and tricks to get better images of flowers? Leave your thoughts in the comments below.

googletag.cmd.push(function() {
tablet_slots.push( googletag.defineSlot( “/1005424/_dPSv4_tab-all-article-bottom_(300×250)”, [300, 250], “pb-ad-78623” ).addService( googletag.pubads() ) ); } );

googletag.cmd.push(function() {
mobile_slots.push( googletag.defineSlot( “/1005424/_dPSv4_mob-all-article-bottom_(300×250)”, [300, 250], “pb-ad-78158” ).addService( googletag.pubads() ) ); } );

The post 3 Tips for Taking Photos of Flowers by Simon Ringsmuth appeared first on Digital Photography School.


Digital Photography School

 
Comments Off on 3 Tips for Taking Photos of Flowers

Posted in Photography


Photography Tips for Absolute Beginners

12 Oct

So you have decided you might like to try getting into photography, you have either just acquired a new camera or are about to, where do you begin?

Here are some photography tips for absolute beginners to help get you started:

absolute-beginner-photography-tips-1r

Buying gear

Your gear does not make you a good photographer. If you are just starting out, a top of the line camera is likely to not ony be be a waste of money for you, but also make your learning process a bit trickier. A bit like buying a formula one race car to learn to drive.

When you do want to buy gear, research first. It’s really helpful to take a look at some photography forums or articles here on dPS to find tips on beginner cameras. Once you find something that sounds viable and fits your budget, read reviews, and again look to forums such as Flickr, where there is a chat group for nearly every brand or model of camera, and they are often more honest about any issues.

The same applies to other gear like lighting. You don’t need to set yourself up with professional soft boxes to try studio lit portraits, you can try some of these DIY lighting tips, or find some cheap beginner setups on Amazon or Ebay.

Take lots of photographs

“Your first ten thousand photographs are your worst” – Henri Cartier-Bresson

As with any skill, the more you use it, the better you get. As you progress with your photography and look back on those early beginner shots you thought were fabulous, you’ll be able to see Mr. Cartier-Bresson was very right.

Read the manual

Camera manuals are at best, the most boring thing you have ever read in your life, with the possible exception of that friend that wanted you to read all 600 pages of their poetry about love and skin rashes.

Wile not an exciting read, going over the manual is very helpful.

Camera manuals are not exactly a riveting read.

It’s a good thing both in the beginning, and to refresh down the track, to know how this wonderful instrument (your camera) actually works. Even if you don’t recall all of it, that doesn’t matter, you will learn or be reminded of something helpful.

Yet it’s such a hard thing to read that manual! So it’s best to place it somewhere where you can push through it in small instalments while you are passing some time such as: the bathroom, in the car if circumstances have you often sitting there waiting for the kids, or at work during lunch break. Just as long as you give that thing a good going over.

Workshops and courses

So you’ve got the photography bug. You might be thinking, “Ooooo! I’ll sign up to a bunch of courses, workshops, buy online courses.” It might seem like a good idea and while they can be fantastic, I don’t recommend going nuts with your enthusiasm, and signing up for courses and workshops the moment you get the photography buzz.

You are currently reading one of the most useful photography sites on the entire internet. There is more information, tips and tutorials on this site, and others, than you will ever need to get you started and beyond. Once you get the hang of things, then you will have a better idea of the type of courses and workshops that would suit you. So I’m not saying don’t take a course – just wait until you know what suits your needs.

Connect with other photographers

This is invaluable, whether you sign up to an online group that use your brand of camera, or join a local camera club, your photography will progress faster, and it will be more fun with the help of fellow shutterbugs.

Even other beginners can help you learn new photography skills.

Connecting with other photographers is a great way to learn more and get inspired.

Camera clubs often have monthly competitions to practice with and sometimes organize photo tours, exhibitions and other activities. Talking with knowledgeable photographers or even fellow beginners can not only inspire, but also keep you motivated.

Sign up to some reputable photography newsletters and Facebook pages, or even approach photographers you admire to ask questions. Most professional photographers don’t mind answering a few questions, as long as you are respectful and polite, and don’t demand too much of their time.

Try everything

You may have taken up photography with a certain style or subject in mind, but it can be helpful to try all styles. You never know what you might have a knack for, or what you will learn along the way.

Getting feedback

Your friends and family may love you but they will lie to you about your photography. Unless you have a very honest friend or family member who actually knows a bit about photography, it’s often more beneficial to get feedback from strangers.

Signing up to a photo sharing site where others can comment on your work will get you mostly honest feedback, sometimes brutally so. I posted the image below on a feedback site some years ago. Aware the image had faults, I was keen to hear what someone else could point out for me, that I might not have seen after working so closely on the image.

72102_442536687028_1346935_n

A fellow submitted a lengthy comment , basically pulled it apart, pointing out several (million it seemed) faults, he really went to town on it. But while the comments were brutal and borderline unkind, it was useful advice. All of which I ignored in regards to that image, but was useful for later attempts.

Enter free competitions

If you have loads of money to spend, and confidence in your work, by all means as a beginner enter some of the big competitions. You wouldn’t be the first to take out a major prize in the first few months of picking up a camera. But there are loads of free competitions out there for you to throw some images, at and see how they go. Have a read of this helpful guide to entering competitions.

Aim to get off Auto settings

If you really want to be a good photographer, this is vital. No rush though! Just enjoy photographing in Auto Mode, and experiment with the settings as you go. Manual settings are not nearly as difficult as some beginners think. It can be a bit like learning to drive. In the beginning, it can be challenging to manage gears, indicators, and steering, all the while trying not veer off the road. But, with a bit of patience and practice, it becomes second nature. When you are ready to try manual settings there are plenty of beginner guides and cheat sheets here on dPS.

The digital darkroom

If you are really into your photography, you will need some sort of editing program. In the days of film photography you needed a darkroom and the use of heavy chemicals. But these days, thanks to modern technology, you can edit almost anywhere.

With today's digital darkroom you can edit your photo's pretty much anywhere and chemical free.

These days your darkroom can even be in bed with some accompaniments.

There are free and simple programs like Picasa, which have their limits, but are good for those just starting out. Then there are the big guns like Photoshop and Lightroom, which can be daunting for beginners, but it’s worth learning even just the basics of these programs, if you intend to get serious about your photography at some point. As with getting off Auto settings, it’s not as difficult as it may seem at first, and the internet is bursting with free tutorials on pretty much any program you choose.

Have fun

This is the best and most important part of photography, the enjoyment of it.

Don’t get bogged down by unsuccessful attempts, or by comparing yourself to professionals. Even the best photographers in the world were beginners at some point. Just keep taking photographs, keep learning, keep challenging yourself, and above all keep enjoying the fun you can have with photography.

googletag.cmd.push(function() {
tablet_slots.push( googletag.defineSlot( “/1005424/_dPSv4_tab-all-article-bottom_(300×250)”, [300, 250], “pb-ad-78623” ).addService( googletag.pubads() ) ); } );

googletag.cmd.push(function() {
mobile_slots.push( googletag.defineSlot( “/1005424/_dPSv4_mob-all-article-bottom_(300×250)”, [300, 250], “pb-ad-78158” ).addService( googletag.pubads() ) ); } );

The post Photography Tips for Absolute Beginners by Lea Hawkins appeared first on Digital Photography School.


Digital Photography School

 
Comments Off on Photography Tips for Absolute Beginners

Posted in Photography