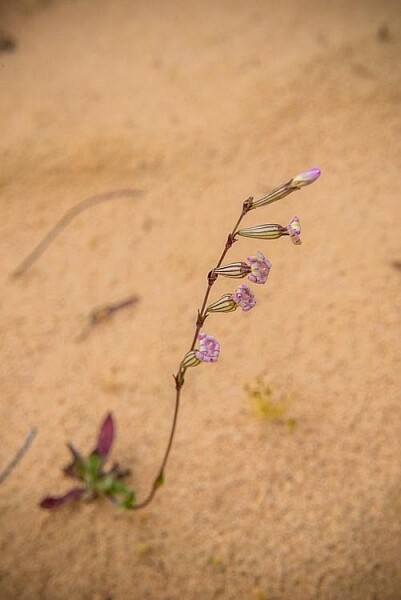
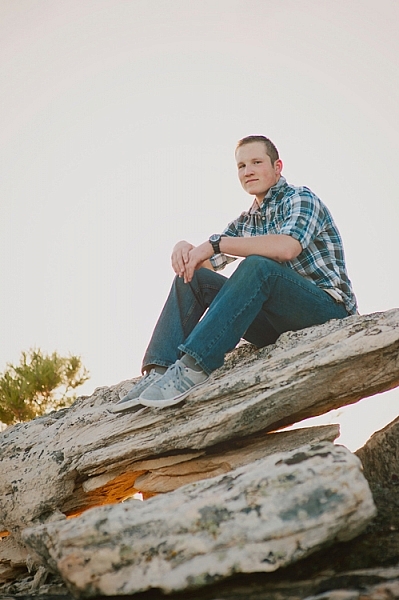
Taken at ISO 800 (shutter speed of 30 seconds and aperture at f/8.0)
ISO has long been called the third corner of the exposure triangle, but was it really? In the film days you couldn’t even change your ISO, except by changing your film. In the early days of digital, you could change your ISO after each shot, which was a definite improvement. But, if you dared to increase the ISO, your picture would probably end up with a lot of digital noise in it. The reality is that most of us were confined to a very narrow range of ISO values when making our exposures.
Times have changed though. Newer cameras offer a lot more flexibility when it comes to ISO. First of all, they are capable of taking pictures at higher ISOs. Cameras now will routinely shoot at ISO 25,600 (and higher), which was almost unheard of just five or six years ago. Secondly, when newer cameras do shoot at higher ISOs, they produce less digital noise. Check out this chart from DxO Mark showing the ability of cameras to shoot at higher ISOs without being ruined by noise:
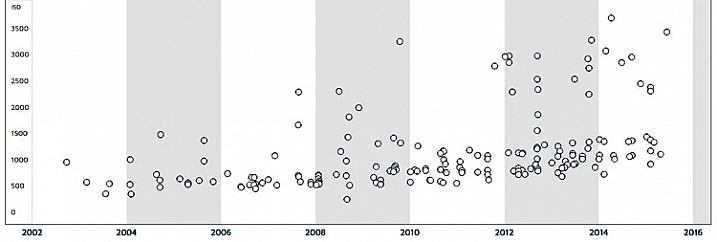
The chart shows the maximum useable ISO for given cameras introduced over the last 12 years. Notice how the dots are higher on the chart the further you go to the right. The newer cameras are to the right of the graph and the tests show that they can shoot at higher ISO values with less digital noise.
In addition, seemingly mindful of the desire of photographers to change their ISO more frequently, camera manufacturers have made it easier to change ISO on the fly. Some, like Fujifilm, have even put ISO on par with shutter speed and aperture by giving ISO its own dial. As a result, it is easier to change the ISO and it truly has status as an equal partner in the exposure triangle.
Even beyond cameras, however, we now have a much greater ability to remove digital noise from our pictures. Much of this improvement is thanks to Lightroom. With a quick slider adjustment, we can eliminate much digital noise from our pictures, without making them blurry. Further, if you have a severe noise problem, there are dedicated plug-ins like Noiseware and Photo Ninja, designed to reduce noise in your pictures, which have continued to improve.
As a result of all of this, you have a lot more flexibility when it comes to ISO. But how does this really impact your photography? And where should you set your ISO in different situations?
If you are just getting started, you might be bewildered by the numbers, or perhaps don’t even know where to start. If you have been shooting for a long time, you may be locked into some habits that were engrained before all these changes in technology. Either way, here are some tips to help you put ISO to work, to improve your photography.
Tip 1: Start with ISO 200
If you have been shooting for a long time, you might be in the habit of keeping your ISO at 100 to keep noise out of your pictures. As mentioned above, given the state of camera technology, this was a prudent practice. Now, however, there is almost no discernible difference between a shot taken at ISO 200 and ISO 100 in most cameras. You may as well use ISO 200 as a default to give yourself an extra stop of light. It will result in better pictures. How so? In one of two ways:
- It will allow you to use a faster shutter speed, which will make your photos sharper if you are hand holding
AND/OR - It will allow you to use a larger aperture to increase your depth of field
By using ISO 200 instead of 100, you will enjoy a little extra flexibility in your exposure settings, without an increase in digital noise. It is pretty much a case of something for nothing.
Tip 2: Use ISO 400 for clouds or dusk
Do not hesitate to move the ISO up to 400 (or even higher depending on your camera) when the need arises. If you are outdoors and there are any clouds, or if the sun is starting to move toward the horizon, go ahead and move to ISO 400. You will find there is very little increase in digital noise in most cameras at this level.
Even though this was a bright, sunny day, the need for a super-fast shutter speed meant that I needed to increase my ISO to 400 to get this shot. Exposure info: 1/8000th, f/2.8, at ISO 400
Tip 3: Crank it up to stop the action
Previously, you faced a dilemma when trying to stop the action. Should you:
- Increase the ISO and risk having the picture ruined by noise, or
- Keep the ISO low and risk having the picture ruined by blur because of the slower shutter speed you would be forced to use?
Obviously, neither choice was ideal. But now, with better cameras and noise reduction tools, there is no reason not to increase your ISO when you are photographing action (assuming you are not trying to blur it). In that case, start by moving the ISO up to 800.
Tip 4: Start with ISO 1600 indoors
As soon as you move indoors, increase your ISO to 1600 if there is reasonably good light. Move it even higher if the lighting is poor. There is a lot less light indoors, even though it often doesn’t look that way to you (your eyes adjust very quickly).
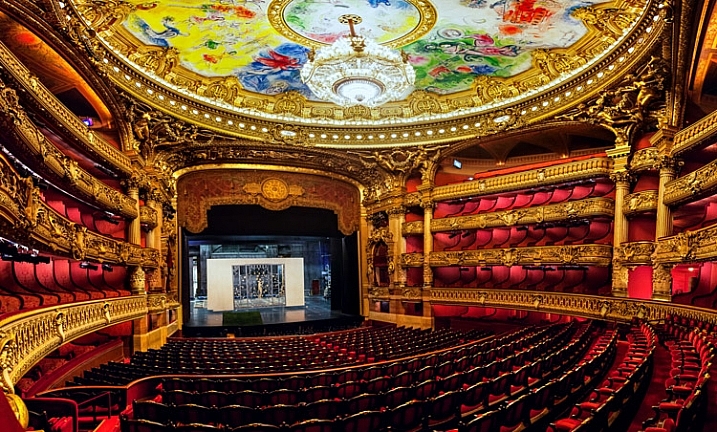
It was not possible to use a tripod in the Opera Garnier in Paris. Hence, ISO 3200 for this picture (actually pictures, since it is many pictures stitched together)
Note: If you have, and can use a tripod then keep your ISO lower if possible (there is no moving subject).
Tip 5: Don’t be afraid to use 6400
I was recently trying to take pictures of a high school play, featuring my daughter. I faced a toxic combination of extremely low light, and a moving subject (flash was not allowed). I had a pretty fast lens, opened all the way up to f/2.8. To keep the subject from being blurred, I needed to use a shutter speed of at least 1/400th of a second. To get a proper exposure, I required ISO 6400. I used it, and then gave it a dose of Lightroom noise reduction later, to get the following picture.

Exposure info: 1/500th, f/2.8, at ISO 6400
Perfect? No. But if I had hedged at all, it would have been blurred and completely ruined. The point is that ISO 6400 might not get you perfection, but it will get you a shot, when the alternative is no shot at all.
Tip 6: The same applies for higher ISOs
Nobody wants to use very high ISO values. But when you’re faced with the choice of a shot at ISO 6400 or 12,800 (which will probably have a noise problem), versus a blurry shot from using too slow of a shutter speed, take the noisy picture every time. You have some hope of curing a noisy picture in Lightroom. You have no hope of fixing a blurry subject.
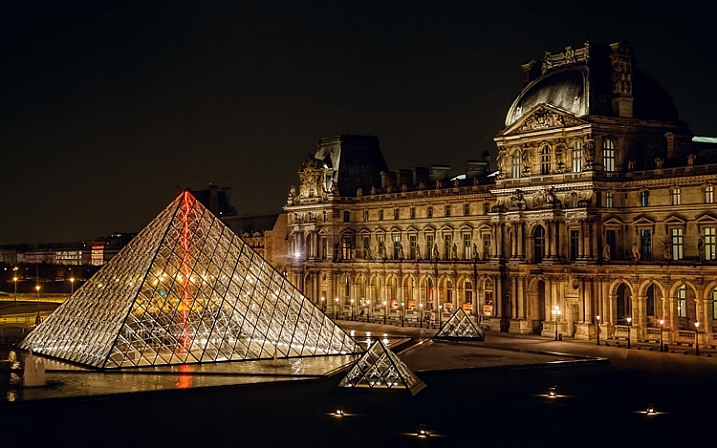
This was shot through a window from inside the Louvre, and using a tripod was not possible. Since I was hand holding, I needed to use ISO 3200. I didn’t like using an ISO that high, but it beats not getting the shot at all (or having it blurry from too slow of a shutter speed). Exposure info: 1/8th, f/4, at ISO 3200
Conclusion
I recognize that, in a sense, this entire article could be summarized as: It is okay to increase your ISO. There is more to it than that though, and that is particularly true if you are just starting out, or getting used to a new camera. I have used hard values in this article to give you default numbers, for some different scenarios. That said, of course, every situation you will face as a photographer is different. Just use these as starting points and adjust from there. In time you will get your own starting points.
Further, your use of ISO will depend on your camera as well. Obviously, newer and more expensive cameras have better low-light performance. How does yours stack up? You can check the DxO Mark rating to start. The best thing to do is to test your camera, which is easily done by taking the exact same picture at different ISO values (while adjusting shutter speed to keep the exposure the same) and then comparing them on your monitor (at 100%). Having done so, you will be well poised to use ISO to improve your pictures.
googletag.cmd.push(function() {
tablet_slots.push( googletag.defineSlot( “/1005424/_dPSv4_tab-all-article-bottom_(300×250)”, [300, 250], “pb-ad-78623” ).addService( googletag.pubads() ) ); } );
googletag.cmd.push(function() {
mobile_slots.push( googletag.defineSlot( “/1005424/_dPSv4_mob-all-article-bottom_(300×250)”, [300, 250], “pb-ad-78158” ).addService( googletag.pubads() ) ); } );
The post 6 Tips for Using ISO Effectively With Your Camera by Jim Hamel appeared first on Digital Photography School.


You must be logged in to post a comment.