RSS
 

Posts Tagged ‘Tips’

8 Tips to Help Make People Comfortable for Their Portrait Session

04 Feb

Portrait photography is an incredibly complex subject to master. You have to worry about a variety of technical matters, including your lighting, location, time with subject, color temperatures, and your composition. In many situations you will be moving around an environment quickly and changing your lighting on the fly. It is a lot to pay attention to, and coordinate at the same time.

Business Portrait Session

On top of all of this, you must figure out how to make, and keep, your subject comfortable throughout the entire session. No matter how much is going right or wrong, or what is going through your head, your primary attention must always be on your subject.

Keeping the subject comfortable and natural is an art form in itself. Obviously, it’s not always possible. Some subjects will be impossible to get through to no matter what, but most of them will rise to the occasion if you can foster the right environment. There are many different ways that portrait sessions can vary, but here is how I like to approach photographing my portrait subjects.

1. Assess the subject’s personality

Each subject will have a different relationship with the camera. Some will have done this before, and will be all business. Some will be extroverted and will love the attention. Some will be uncomfortable at first, but will open up easily after a little time together.

Business Portrait Session

The toughest group are subjects that come in incredibly uncomfortable and stiff, to them you are worse than the dentist. Seriously, there are many people that would much rather go to the dentist than to be photographed by you. These subjects will be the toughest to work with because they, “know I look terrible in front of the camera.” They know this because they know how uncomfortable they get, but they only get uncomfortable because they know they photograph badly. This is a catch 22 that you will have to scratch and claw your way out of, so to speak.

Is your subject extroverted or introverted? Do they like to joke and talk, or are they more reserved. Are they in the middle of a busy day, or do they seem more relaxed. Do they give you a stiff smile? These are all cues that you can pick up on, to help you figure out the best way to get through to them. The better you can understand your subjects, the better you will be able to get them to enjoy working with you, and to eventually feel comfortable with you and the camera.

2. Talk with your subject before the session

Whenever possible, when you first meet your subject, introduce yourself first. Ask them how their day is going to get them talking, then tell them about what you will be doing together. Many subjects will have no idea what to do, or what is about to happen, and will become stiff, nervous, and awkward.

Business Portrait Session

Explain how the session will go, and what you would like them to do. Maybe tell them that you are looking for natural images, casual smiles, and comfortable poses. Let them know that you will tell them what to do over the course of the session, but also mention that if they have ideas that they should bring them up. Is there a way that they feel comfortable standing? Tell them to speak up. Do they want to try something? Tell them to speak up. The best shoots are ones that turn into a collaboration between the photographer and the subject.

3. Help them pose, then change it often

Tell the subject that you will do some posing but that you also want them to stand in a way that is comfortable for them. You can have your subjects play a part in the posing (a few will be bad at this, but most will be good). Ask them, “How would you naturally stand or lean here?” Give them a couple suggestions of what to do by demonstrating a pose. If necessary, put a few example images on your phone or tablet to show them. Keep them moving. Ask them to slightly change their pose every few shots. This will keep them fluid and comfortable, instead of stiff and standing still.

The hands are just as important as the body pose, if not more so. If the subject’s hands feel comfortable, there is a good chance the rest of them will fall into place. Some subjects can get very stiff with the hands if you don’t give them direction. Do you want the hands in front of them, in their pockets, or crossed arms? I usually start by giving these suggestions, and asking them to place their hands in a way that they would normally stand. This often yields a very comfortable pose. Then when I have exhausted that, I will ask them to cross their arms to break them into another comfortable pose, then go from there.

DPS_business_portraiture_2

Changing the pose at the right times is a very important tool. The second your subject starts to look uncomfortable, get them to do something different. Change their hands or their stance. Move them to another location. Every time you break the stiffness is another chance for them to reset themselves into a comfortable pose.

4. Tell them what they are doing right

If your subject is doing something right, tell them! Give them positive reinforcement. Never tell them they look awkward, or they will freeze up even more. I constantly say some variation of, “This looks great” or a more specific compliment. The positivity just keeps things flowing and going in the right direction.

If you like someone’s smile, let them know that. They will instantly feel good, and it will help them recreate that look when you need it. For a few people, when you say something like that, it will kill their natural smile. Pay attention for these people, and obviously stop saying that to them, but for many this will help them recreate that look constantly as you need it. You can say, “Give me that smile from before.” Then if they have trouble doing it, plead and beg them for it in a funny way so they feel comfortable again.

Business Portrait Session

You can tell subjects not to do specific things, but be careful with how you do that as it can kill your momentum. Instead of saying, “Your hands don’t look right,” say, “I think your hands might be a little better this way.” Even your constructive comments can be made in a positive way.

5. Have conversational topics and jokes prepared

Ask lots of questions of the subjects that do not seem to be in a rush. For the ones that need to run out of there, you can only do so much. Even for these people, I will ask a couple simple questions at the beginning, such as, “Are you from New York” or “How has your day been.” Just these alone will give them a chance to talk, and you can go from there. For most people who are not in a rush, I will go a lot further and try to hone in on a topic that of of interested to them. I find that a good conversation over the course of a session, can make the whole session much more comfortable. The more you get them talking, the more they can break out of their shell. At the very least, they will like you.

Business Portrait Session

You do not need to write knock-knock jokes, but think of some funny things ahead of time to talk about, or to use in situations where you are desperate. When a subject begins a session by telling me how much they hate being photographed, I try to say something like, “Well you’re going to hate me then.” A dentist joke will work as well. I then comfortably tell them that they are in good hands, and not to worry. A quick and funny comeback for something like this will make them feel like you are prepared.

Sometimes when I need a smile, I will tell a subject to give me their most uncomfortable smile. This is only in certain moments though. I will never, ever tell the subject directly that they look uncomfortable. That is a road you do not want to go down, but I will make a joke about a stiff smile before they start trying to smile to make a point, and to make it a little humorous.

Have them smile with their whole body. Show them the difference between a smile just with their mouth, and then one with their entire face and body. There’s a big difference between the two, and framing it in this way can explain to them what they should be doing. The shutter click is such a finite moment that it helps if they think of the session as one long video where they are moving into their smiles, and not just turning them on suddenly.

DPS_business_portraiture_3

Often you will have to make slight tweaks to the way a subject is posing. Having a subject put their chin up slightly can be a very good way of getting rid of a double chin, but it also ruins the spontaneity of the moment. The same thing goes when posing people in a chair. Sometimes, the most flattering way to sit is the most awkward. When I have to do any of this, after I will say something like, “Now look natural.” Just the idea of how stiff they are once you do these poses, mixed with that comment, has the frequent effect of relaxing them and bringing out a smile, even with their chin up.

Besides that, I will have conversational topics that I try to bring up on the fly when needed, such as current events, sports, or random stories that I can think of.

6. Use the strengths of your personality to your advantage

Business Portrait Session

Are you an extrovert that can charm and joke with anyone? Then you should have an easier time getting your subjects to laugh and open up, but at the same time you will need to be careful not to overdo it. By talking too much, and commanding the attention in the session, you risk stopping the subject from having their own personality show through. All your images can end up looking the same, as they are the expressions of your subjects laughing at your jokes or comments. If this is naturally you, make yourself ask questions, and stop and listen a little bit more. Making them laugh is fantastic, but it is also different from creating an environment where they feel comfortable enough to open up to you.

Are you an introvert who gets uncomfortable trying to joke and talk with subjects that you have just met for the first time? This can actually be an advantage when you play your cards right, but this is a situation where gaining experience working with people is necessary. In this case, your advantage is your ability to listen and react. Ask your subjects questions, then play off what they say. Pay more attention to their emotions. Get them talking about interesting things that they are passionate about; have them open up that way.

Business Portrait Session

Still be confident and explain what you are doing, but play a more reactive role. Watch videos of other portrait photographers, both the talkative and the quieter ones, and pay attention to what they say to help you improve. Work on funny things to say that you will have in your pocket when you need them, as this will be your initial disadvantage. You will need to work more at first to be good at all of this, but after enough experience, the advantages can swing back in your favor due to your adept listening ability.

7. Don’t show them the images while you are shooting

Sometimes subjects will insist on seeing the images, and you will have no choice, but I always try to get out of having to show the subject the images until the end. I will often say that we can look at the images after, as a way to put them off. Having the subject look at a photo of themselves, especially if they seem self-conscious, can ruin their ability to feel comfortable later on in the session. In addition, two out of 10 shots are usually good anyway and the other eight will never see the light of day. But if they are looking at the back of that camera they will sure as heck see those eight!

Business Portrait Session

For the most uncomfortable subjects, often there is no chance that the photos at the very beginning will be that good. You are just going through the motions as you are trying to make them comfortable over the course of the session. There are not that many situations where the subject seeing the photo is better, unless the subject seems very comfortable from the start.

8. Know that you can’t win them all

You will probably lose a few. You can only do the best with what your subject gives you. Portrait photography can be stressful so always keep that in mind. You can only work with what the subject is able to give you. Do your best for all your subjecs and push and spend more time with the ones that are having trouble, but let’s be frank, some subjects are just better that others.


fastflash_bookStrikingThePose2If you want to learn more about portrait posing and working with people, pick up one of the dPS ebooks by Gina Milicia Portraits: Striking the Pose (left) or her brand new one called: Fast Flash for Portrait Perfection (right).

googletag.cmd.push(function() {
tablet_slots.push( googletag.defineSlot( “/1005424/_dPSv4_tab-all-article-bottom_(300×250)”, [300, 250], “pb-ad-78623” ).addService( googletag.pubads() ) ); } );

googletag.cmd.push(function() {
mobile_slots.push( googletag.defineSlot( “/1005424/_dPSv4_mob-all-article-bottom_(300×250)”, [300, 250], “pb-ad-78158” ).addService( googletag.pubads() ) ); } );

The post 8 Tips to Help Make People Comfortable for Their Portrait Session by James Maher appeared first on Digital Photography School.
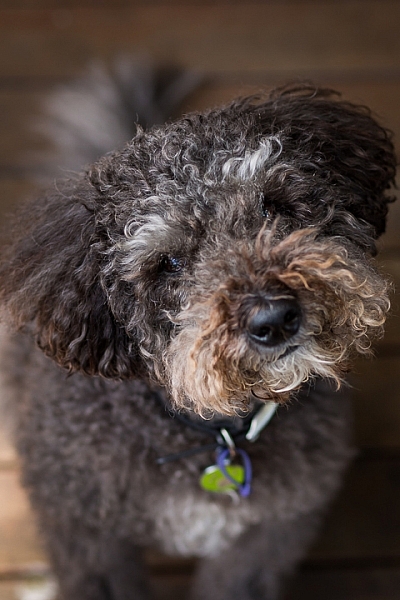

Digital Photography School

 
Comments Off on 8 Tips to Help Make People Comfortable for Their Portrait Session

Posted in Photography


8 Tips to Stay Motivated and Inspired by Your Photography

25 Jan

Taking photos is one of the most inspiring and exciting of pursuits. It can encourage you to have adventures, see the world in a newer, fresher way, meet interesting people – all while creating something that is totally unique to you.

“We are born makers, and creativity is the ultimate act of integration – it is how we fold our experiences into our being.” – Brene Brown

DPS AnthonyEpes 01

But what happens when your well of inspiration runs dry, when you can’t get excited by your images or you feel stuck in a rut? Most photographers, even professionals, have periods when creating feels like wading through glue. You get tired or bored with your own images.

So, why do you (we all) get stuck?

The destructive habit of habit

As most of us, you are probably immersed in habit – you do almost the same things each day, every day. Making your coffee in the same way at the same time, going to work on the same route at the same time, eating the same kind of food each evening. It’s almost like you stop thinking and just do.

“As long as habit and routine dictate the pattern of living, new dimensions of the soul will not emerge” – Henry van Dyke

Your brain has made a great effort to get you into the state of habit. It makes life easier for you so that you don’t have to make tonnes of new decisions every day. But, if you are lost in habit you aren’t seeing new things, doing new things, or trying things in new ways. Habit will strangle your creativity.

So how do you get out of this cycle?

The way to fill your life with inspiration and motivation will be different than others – depending on how you create and what drives you. Here are some ideas:

DPS AnthonyEpes 02

1 – Leave your camera at home

If you’re someone who is always out and about with your camera, taking lots of photos – abandon it for a while. It’s easy to get carried away. Instead of taking time to see and compose, you are likely just taking shot, after shot, after shot. If you are bored with the photos you are taking – this is probably what’s happening to you.

I would encourage you to start examining the world in a different way – not as a photographer, but as someone who hears, feels, smells, and absorbs the atmosphere around you. Using all of your senses is a wonderful way to help experience the same world, but in a different way. It will help you gain a different perspective.

Sound is a particularly evocative sense for me – the crackle of dry autumn leaves under my feet, the low hum of trains on a railway line in the distance behind me, the vibrating thump of music in a bar, a conversation drifting past me. Tuning in to senses that you usually don’t prioritize (because we photo lovers tend to put our sight first, don’t we) will also help you anchor yourself into the present moment, pulling you away from your busy mind, and into the world so you can eventually see more interesting and unique things.

Challenge: When you are ready to start taking photos again, set yourself the challenge of taking just three photos a day, for 15 days. If this sounds hard, then it’s the perfect challenge! This will help you be more precise and thoughtful in your approach. You will work harder to create a smaller number of better photos. So – what will you take with your three images?

DPS AnthonyEpes 03

2 – Make taking photos a habit

Now, let’s consider the reverse. You are someone who doesn’t take photos very often – maybe you wait for an occasion like a walk in a lovely area, good light, or a holiday – then my advice is the opposite. If photography is something that you pick up only now and again, you’ll never get into the rhythm of creating, you’ll never develop the skills of really seeing the world and composing great images. The act of creating is like a muscle – the more you do it the stronger it becomes.

“You can’t use up creativity. The more you use, the more you have.” – Maya Angelou

By creating a habit of creating, you are making a declaration to yourself that photography is a very important part of your life. It also helps to get your subconscious organized in a way that it knows you are going to be calling on it more regularly. It starts preparing. I know this sounds strange but it’s like anything you do regularly, your body and your mind get used to doing it. You are in the mood and the wonderful act of creativity starts to energize you in new and exciting ways.

Challenge: If getting into the habit of taking photos is tough for you, then this is the challenge for you – take 50 photos every day, for 15 days. That will kick start your creativity, and imbue your day with the looking and seeing and noticing that is necessary to take great photos.

3 – Take photos not to see the result, but to enjoy the process

DPS AnthonyEpes 04

When you see small children making art there is a beautiful joy that they get by just doing it. From feeling the feathers before they glue them on an egg box, to painting wild splashes of colour on a sheet of white paper. In fact going out with kids, and watching them look at the world in such an open way, is great training on how to be present with the world around you.

With kids there is a complete enjoyment in the process of making – and that is something we, as photographers, sometimes forget. Perhaps because the act of creating is so instant – the click – we forget that it’s our whole creative process which leads up to that click.

“What moves me about… what’s called technique…is that it comes from some mysterious deep place. I mean it can have something to do with the paper and the developer and all that stuff, but it comes mostly from some very deep choices somebody has made that take a long time and keep haunting them.” – Diane Arbus

I do my best work when I am totally present, totally in the zone, not thinking about emails, or jobs, my to-do list, or my kids – but looking with wonder at a beautiful cloud, or some rain dripping off of a leaf. And if you need encouragement – isn’t it just great to cut yourself off from all of your responsibilities and absorb yourself in the wildness, the peace, the craziness, the beauty of the world?

4 – Start a project

DPS AnthonyEpes 05

Sometimes I find my attention gets fragmented – with all of the work I do, my family, etc., so that I’m jumping from task to task, and not getting deeply involved in anything. A few photos here, a few photos there. This is when I like to jump into a project.

Key advice for projects: Choose a subject that you are blown-away passionate about. It could be anything – the colour violet, armpits, salt mines, trees, your kids, men with mohawks – it doesn’t matter what it is, you can bring something new to a subject if you make the effort.

“I wanted to photograph clouds to find out what I had learned in forty years about photography. Through clouds to put down my philosophy of life – to show that (the success of) my photographs (was) not due to subject matter – not to special trees or faces, or interiors, to special privileges – clouds were there for everyone…” Alfred Stieglitz

The key point is that it’s not so much about technique, but the passion. Why? Because:

  • When you hit a roadblock or life distracts you, you’ll be less likely to abandon the project if you are really excited about it.
  • Passion will help drive you to create a new and interesting perspective on your subject.
  • When you feel something when you are taking photos, you are more likely to take a photo that contains feelings. Why is that important? Because you want people to notice your photo, to feel a connection with it. Most images we look at are flat and devoid of feeling. The best photos communicate both a visual idea and a feeling, we are moved in some way by it.

“Photography for me is not looking, it’s feeling. If you can’t feel what you’re looking at, then you’re never going to get others to feel anything when they look at your pictures.” – Don McCullin

DPS AnthonyEpes 06

5 – Do something completely different

I’ve talked about how habit can be a force of good for your photography – by making you commit to a regular practice, and exercise that creativity muscle. But it can also be a negative force – you get so used to your ways of doing things, or your lifestyle, that you don’t push yourself in new ways.

Think about the kind of things you normally photograph. Now think of some you’d be terrified to photograph, and go and photograph them. So maybe you’re great at landscapes. You like photographing the odd person if they happen to be in the shot. But the idea of taking a close-up or a portrait of them terrifies you. So do that. Or you’ve always wanted to get up onto some rooftops and photograph your city from up high. But the idea of asking for permission, etc., makes you feel nervous. Just go for it!

“You may never know exactly what you need to do, or exactly where you’re going. But if you are willing to start taking tiny steps, and keep going, the dots will connect over time to create something beautiful and fulfilling.” – Lori Deschene

6 – Remind yourself why you take photos

DPS AnthonyEpes 07

It can be easy with your photography to get into that should way of thinking – “I should take more photos! I should be better!” But scolding yourself rarely gets you anywhere (with anything). Instead, I encourage you to think about what photography really means to you, what are the benefits beyond the fun of taking that photo. How does it enrich, energize and enhance your life?

Ask yourself:

  • What does photography give me?
  • How do I want to be creative in my every day?
  • Which of my photos or projects am I really proud of?

When you connect with the reasons why you do things, it’s so much easier to stay committed and motivated.

7 – The trap of perfectionism

Often we stop taking photos, or we start slowing down or moving off on a tangent when we are working on a project, because the feeling of not being good enough starts to insidiously infect us.

“Perfectionism is the voice of the oppressor, the enemy of the people. It will keep you cramped and insane your whole life” – Anne Lamott

Who cares if you try things that don’t work. Who cares if some of your photos aren’t great? Stopping yourself from doing something you love, before you’ve done it, is crazy. Recognize you have the fear, but don’t let that stop you. Fear goes away eventually.

Be aimless and wander. Resist those urges to make your photo explorations productive. Ignore the output and focus instead on what you see. Listen. Follow things that spark your interest.

DPS AnthonyEpes 08

8 – Get inspiration – indirectly

I really believe that inspiration for your photos can come from all kinds of places. It just so happens that my favourite photographer of all time, Ernst Haas, agrees (if you don’t know him, look him up). He said:

“Beware of direct inspiration. It leads too quickly to repetitions of what inspired you… Refine your senses through the great masters of music, painting, and poetry. In short, try indirect inspirations, and everything will come by itself.”

So fill your life with creative inspiration of anything that moves you. Beautiful music, looking at bizarre paintings, reading wild adventure books – it doesn’t matter what it is, if it excites and moves you then it’s right for you. The more you remind yourself what feeling excited and creative feels like, the more your body and mind will imprint that into yourself.

Along that vein, I also like to remind myself of times when I have felt super creative, super in the flow, and I was taking great photos. It’s all too easy to fall into the trap of thinking that you’ll never take a good photo ever again (happens to me all the time, especially when I am starting a new book), but just think back to a time when you were taking great photos and in the zone. Remind yourself of that, and it will be easier to get back into that space.

I hope those ideas help. I’d love to know if they do – and what you do when you get stuck. Comment below, I’d love to hear.

googletag.cmd.push(function() {
tablet_slots.push( googletag.defineSlot( “/1005424/_dPSv4_tab-all-article-bottom_(300×250)”, [300, 250], “pb-ad-78623” ).addService( googletag.pubads() ) ); } );

googletag.cmd.push(function() {
mobile_slots.push( googletag.defineSlot( “/1005424/_dPSv4_mob-all-article-bottom_(300×250)”, [300, 250], “pb-ad-78158” ).addService( googletag.pubads() ) ); } );

The post 8 Tips to Stay Motivated and Inspired by Your Photography by Anthony Epes appeared first on Digital Photography School.


Digital Photography School

 
Comments Off on 8 Tips to Stay Motivated and Inspired by Your Photography

Posted in Photography


Tips for How to Find Lost or Missing Photos in Lightroom

23 Jan

Lightroom is a popular choice for post-processing software for many photographers. There are many common mistakes newbies make when using it – and losing some of their photos is one of those.

In this video Phil Steele will show you how to find lost or missing photos and prevent it from happening again:

If you enjoyed that and want to learn even more about Lightroom you can check out Phil’s Lightroom course here.

googletag.cmd.push(function() {
tablet_slots.push( googletag.defineSlot( “/1005424/_dPSv4_tab-all-article-bottom_(300×250)”, [300, 250], “pb-ad-78623” ).addService( googletag.pubads() ) ); } );

googletag.cmd.push(function() {
mobile_slots.push( googletag.defineSlot( “/1005424/_dPSv4_mob-all-article-bottom_(300×250)”, [300, 250], “pb-ad-78158” ).addService( googletag.pubads() ) ); } );

The post Tips for How to Find Lost or Missing Photos in Lightroom by Darlene Hildebrandt appeared first on Digital Photography School.


Digital Photography School

 
Comments Off on Tips for How to Find Lost or Missing Photos in Lightroom

Posted in Photography


9 Tips that Make Couples Happy During a Portrait Session

22 Jan

Whenever a camera appears, you can bet your caboose that there are emotions swirling for 99% of the human population. From fear and disdain, to reverting to the classic Chandler Bing smile, people tend to exaggerate or warp their behaviour in front of the camera in endlessly inventive ways. But unless you’re going for a Sears portrait look, your job as a photographer is to not only deliver an end-product that thrills your clients, it’s to make the shoot an awesome experience as well.

Here are nine of my favorite, tried-and-true strategies for helping clients forget about the camera, and have a good old time on their shoot.

DpsCouplesimage1

1 – Model the behaviour you want

A shoot can be fraught with stress, so for the love of Annie Leibowitz, don’t add to it. When people arrive at a shoot, they are almost invariably nervous, and will be looking to you for all their cues. Take the lead in creating the atmosphere you’re hoping for, and your clients will follow suit almost subconsciously. You have a huge opportunity to model the relaxed, joyful, behaviour you want to capture, simply by setting the tone and mood of the shoot from the get-go!

This is so simple, but laugh. Crack jokes, if that’s your thing. Show them you’re willing to get weird, and it’ll liberate them to fall into a relaxed zone that brings out great images. It’s not about putting on a performance, but about being so yourself and comfortable in your own skin, that your clients can’t help but do the same.

DpsCouplesimage2

2 – Learn to read people

On that note, hone in your ability to read your clients so they really feel seen as individuals, and not two-dimensional subjects, and adapt to their specific personality. In many ways you have to be a chameleon, ready to provide to whatever the client might need from you to make them comfortable. We usually talk a lot throughout our shoots, and have found that most people react well to constant positive feedback, but not everyone wants a running commentary. There’s a fun balancing act to figure out what your client will respond to, and this is a good life skill as well.

DpsCouplesimage3

3 – Find an in

Whether it’s talking baseball, vintage cars, or Japanese flower arranging, finding some common ground can put even the stiffest of the stiff more at ease. They’ll loosen up, see you as a teammate, and get more invested in following whatever direction you have for them. We’ve established trust with clients by talking with them about everything from beers in Thailand, to Tom Brady’s throwing motion. Chat it out, listen for non-sequiturs and when you find an in, go for it.

4 – Treat your camera like a commonplace object

By treating your camera like it ain’t no thang, with no more emotion connected to it than a chair or a mailbox, you can help couples forget that it’s there (well, almost). When starting a shoot, spend as much time as possible chatting, and relaxing with the couple before you ever lift the camera. Hold it in your hand as if it’s no more consequential than a cup of coffee. This action may seem subtle, but your clients are looking to you for their behavioural cues, and treating the camera like something to not think twice about, will allow them to consider it equally as casually.

DpsCouplesimage4

5 – Have the subject help you design the shoot

Giving your clients plenty of say in the terms of how the shoot goes, is a huge key to making them relaxed. Doing extra legwork ahead of time, like guiding them with their outfits and locations, allows them to show up already feeling invested and in control over much of their experience. The old relationship advice that “communication is key” could not be more apt. Spending time before the shoot helping people feel like their voice is being heard, is central to great images.

DpsCouplesimage5

6 – Tell a better story

We’ve all been that novice photographer who, in a desperate attempt to capture a mirthful photo of unrehearsed laughter, says something panicked like “okay, now make each other laugh”. That’s not funny, y’all! You gotta be more creative than that. If you’re photographing a couple, ask one of them to tell the other about their most embarrassing childhood moment, using only interpretive dance. Tell them to reenact their first meeting, using emotive eye contact, instead of words. Get detailed and ridiculous in these requests, because then you’ll be able to fully leap into #7.

DpsCouplesimage6

7 – Shoot between the lines

You likely won’t keep the image of the poor guy interpretive dancing, but you’ll probably keep the one of the couple cracking up together in between moves. Here’s the real secret to natural looking photos – the in-between photos ARE the photos. The unposed, unrehearsed, laughing at fart jokes, or because your photographer told you they were “just going to test the light” but really you’re capturing them enjoying life together. Those are the images that end up being keepers. Keep that camera at the ready and shoot between the lines to get the good stuff.

DpsCouplesimage7

8 – Keep those hands moving

Every once in a while, we’ll leave the open-ended coaching behind and give a people a very specific pose to try. And no matter what the pose is, no matter how natural it felt when they first tried it, it’s going to get clunky-looking if you make them hold it for long enough. There are a few reasons why someone might need to keep a general pose for a bit — if you’re grabbing different angles, shooting with unique lenses, etc. — but our big piece of advice for them is to always keep their hands moving. With the free-reign to move their hands in whatever way feels natural to them, they’ll avoid the stiff prom-pose look, while still keeping the general idea of the pose you gave them. It sounds silly, but this one seriously works.

9 – Get your own photo taken – often

If you are amongst the hordes of photographers and humans who hate having their own photo taken, this piece of advice goes double for you. You MUST MUST MUST put yourself in your clients’ shoes! Be uncomfortable! Learn what strange tics you have. Know how to comfortably have your photo taken, so you know firsthand how to coach your clients. Standing in their shoes is our number one piece of advice, because as you teach yourself to be in photos comfortably, it’ll become ever-easier to coach your clients to do the same. Get thee in front of a lens. You’ll be a better photographer for it.

So while you may not be able to alleviate someone’s multiple decade love/hate relationship with having their photo taken, focusing on making each client’s shoot experience stellar is the first step on the road to the beautiful, natural, photos you and your client are aiming for. Because if you aren’t having fun, why bother?

googletag.cmd.push(function() {
tablet_slots.push( googletag.defineSlot( “/1005424/_dPSv4_tab-all-article-bottom_(300×250)”, [300, 250], “pb-ad-78623” ).addService( googletag.pubads() ) ); } );

googletag.cmd.push(function() {
mobile_slots.push( googletag.defineSlot( “/1005424/_dPSv4_mob-all-article-bottom_(300×250)”, [300, 250], “pb-ad-78158” ).addService( googletag.pubads() ) ); } );

The post 9 Tips that Make Couples Happy During a Portrait Session by Tim Sullivan appeared first on Digital Photography School.


Digital Photography School

 
Comments Off on 9 Tips that Make Couples Happy During a Portrait Session

Posted in Photography


8 Tips for Better Pet Photography

20 Jan

Pets have always been a big part of my life, and are important members of many of the families I photograph. I encourage my clients to include pets in their photo sessions wherever possible. Animals bring a whole new dynamic to a family photo shoot, providing a focus for the children, and a great icebreaker for all parties.

My interest in pet photography widened when a colleague invited me to join a group called Photographers for Animal Rescue. It is a group of professional photographers who, outside of their paid work, provide pro bono photographs to animal shelters. The theory behind it is that a good photograph greatly improves an animal’s chance of being re-homed, but few shelters have the budget for professional photography.

Image A

During my time with this group, I have been lucky enough to photograph dogs, cats, rabbits, and even pet rats. All of these animals have different characteristics and behaviour, and each needs to be approached differently by the photographer.

Tip #1: A word on safety

All pets, no matter how docile, have the capacity to bite or scratch. This is especially true of rescue pets, who may have experienced abuse by humans in the past, and can be mistrusting and unpredictable.

When photographing an animal for the first time, spend time getting to know each other. Allow the animal to sniff you, your clothing, and the camera. Offer treats, and gentle petting if the animal will allow you. Sudden movements or loud noises may startle a timid animal and cause it to retreat or attack.

Image ETip #2: Dogs

Humankind’s best friend is the most cooperative of all pets. Generally, dogs respond to verbal commands and treats, and can be physically positioned to take advantage of lighting and optimal shooting angles.

There is an entire article here on dPS devoted to photographing running dogs, so here I will share some tips for capturing other endearing expressions and moments.

Tip #3: My best friend

Dogs are very much part of the human families to which they belong. The most treasured photographs are often the ones in which dogs are interacting with family members. Consider when those moments of connection might occur, so that you can be ready to capture them. It may be in the moments when your child arrives home from school to a joyful canine greeting, or when your mother sits in her favourite chair with her dog on her lap.

Image B

As with human portraits, setting and lighting help to convey mood and emotion. The photo above, shot with an 85mm lens, illustrates the bond between my youngest daughter and a family dog. Light reflected off the pavement below them, and shallow depth-of-field achieved with an aperture of f/1.8, creates a soft dreamy image that evokes quiet trust and friendship.

This photo of a boy and his dog was part of a family photo shoot for a client, who lives by the beach. I wanted to capture the beach environment, but the afternoon sun was too harsh to shoot. I found shade behind a beach bathing-box, and positioned my subjects to use light reflected off the surrounding sand. Boy and dog are on different focal planes, so I selected an aperture of f/5.0, which allowed me to keep both in focus while softening the background.

Image C

Tip #4: The doggy smile

Dogs often smile during, or after, vigorous exercise. If you don’t want to photograph the dog in motion, you can throw a ball, or run around with him for a few minutes, before coaxing him into position. The image below shows our dog smiling as he cools off in the shade, following a manic ball-throwing session. The shade provides even lighting on the dog, and f/2.2 turns the leafy background into lovely bokeh.

Image D

Tip #5: The tilted head

Have the dog sitting on the ground, so that you are shooting at a slight downward angle. Make whining sounds or cat noises – any sound that will pique the dog’s curiosity. Most dogs will cock their head to one side and look at you.

Image E head tilt

Tip #6: Cats

Cats, with their striking eyes and long whiskers, make rewarding photographic subjects. Unlike dogs, they won’t sit where they’re told, and will only favour you with eye contact when it suits them. Photographing cats requires patience and stealth!

Cats are natural predators, and even adults usually respond to a pom-pom, or toy dangled from a thread. Play peek-a-boo with the toy around corners, or furniture, to coax the cat into the position you want. If possible, confine the cat to a room where you can close the door.

Use your fingernails to make scratching sounds on carpet, walls, or even your camera body, and the cat will look in the direction of the sound.

The photos of the kittens below were shot in a small room, with one window. The cats were on a multi-level climbing post, which I pulled close to the window. I stood between the window and the climbing post, and coaxed the cats to look towards the window so that I could get catch-lights in their eyes. These images were shot using ISO 2000, at f/4.0 with a 35mm lens – my go-to lens when working in tight spaces.

Image G

Image I

Image F

Image H

Backlighting can also be effective in highlighting fur, which creates a halo effect and frames the cat’s face.

Image J

Tip #7: Rabbits

There are few things cuter than a rabbit washing its face. Rabbits love to be clean, and if you wait long enough, most will wash themselves without prompting. You can speed up this process by holding and petting the rabbit. When you put it down, it will usually be in a hurry to wash away the people smells you have left behind, so get down low and have your camera ready.

The photos below show Latte and Zeus, two rescue rabbits, photographed first in their default sitting position, and then washing their faces. Both are shot at f/4.0 using a 35mm lens.

Image K Image M
Image L Image N

Often when placed in a new environment (e.g. taken from inside the house, to an outside enclosure) rabbits will stand on their hind legs and check out their new surroundings. Be ready to start shooting as soon as you place the rabbit in the new area. In the photo below, Latte looks like he is begging to be taken home.

Image O

Tip #8: Small critters: mice, rats and hamsters

Even some of the most dedicated animal-lovers are squeamish about rodents. I love them! Most appealing are their long whiskers, and the way they hold food in their paws while they’re eating.

Small creatures move fast. The easiest way photograph these animals is to have someone hold them. Not only does a human hand keep the animal in place, it also conveys scale. Use a macro lens if you have one.

The photographs below show off the rat’s beautiful long whiskers. They also show how small and vulnerable they are, and that they are comfortable being handled.

Image P

Like the kitten photos, these photos of pet rats were shot using only window light. It was a dull day and the light was poor, so we brought the rats as close as possible to the window, and used a very high ISO of 8000 to 10,000. Since the images were only going to be used online, the graininess (noise) was not a problem in this instance.

Image Q

Give the animal a treat, and she will sit still as she holds it in her paws to nibble.

Image R

I hope these tips have given you some ideas for photographing the pets in your life. Please share any other tips and your pet photos in the comments below.

googletag.cmd.push(function() {
tablet_slots.push( googletag.defineSlot( “/1005424/_dPSv4_tab-all-article-bottom_(300×250)”, [300, 250], “pb-ad-78623” ).addService( googletag.pubads() ) ); } );

googletag.cmd.push(function() {
mobile_slots.push( googletag.defineSlot( “/1005424/_dPSv4_mob-all-article-bottom_(300×250)”, [300, 250], “pb-ad-78158” ).addService( googletag.pubads() ) ); } );

The post 8 Tips for Better Pet Photography by Karen Quist appeared first on Digital Photography School.


Digital Photography School

 
Comments Off on 8 Tips for Better Pet Photography

Posted in Photography


Tips for Using Legacy Lenses and Shooting in Full Manual

19 Jan

Shooting Manually

Full manual. Two words. Ten letters. Yet those words can be some of the most discouraging for new photographers to ingest. There has long been a perceived over complication concerning shooting in Manual Mode. Personally, I always leave my camera set to manual. Granted, I dont shoot many fast-paced sporting events that require speedy autofocus, or many situations where there is constantly fluctuating light. Still, the idea of controlling the aperture, shutter speed, ISO, and focus, all independently of your camera’s computer, unsettles even experienced photographers at times. Happily though, not only is there a swelling community of photographerss who are embracing the somewhat challenging, but highly organic and rewarding, benefits of shooting manually…but also upping the ante by adapting completely analog legacy lenses for use with their cameras.

image

In this article, you will learn how to enjoy what might be considered a devolved methodology of making photographs using legacy lenses, and shooting in full manual mode. Full manual lenses, are generally built to exacting quality standards, but are relatively low-priced, which makes them great for beginners, and those shooting on a budget. Furthermore, adapters are available for virtually all mirrorless and digital SLR camera systems, so that you can start making great photographs using these low-tech lenses. Let’s jump right in.

What are Legacy Lenses?

Lenses that were geared for use with older film camera (35mm or medium/large format) systems are called legacy lenses. Glass of this type are non-motor driven, and operate autonomously of your camera. This means that the focus and aperture selection are all accomplished inside of the lens, which is controlled by you. There is no electronic communication between the lens and the camera. You must use the lens’s aperture, and focusing ring, to produce the desired depth of field and focus. Legacy lenses are generally made of metal, making them relatively heavy, but heartily constructed.

Which lenses are fully manual?

Full manual lenses does certainly not include all legacy lenses. Many manufacturers still make completely manual lenses, engineered specifically for the digital camera market. A lens is designated as being fully manual when there is no control being provided by the camera. However, there are quite a few fully manual lenses which have incorporated focus indicator chips into their design. While remaining fully manual, these types of lenses will communicate with your camera when focus has been achieved.

image

Adapting lenses to your camera

In a previous article on dPS we discussed how easy it really is to use legacy lenses (and other non-native glass) with your digital camera. The same holds true. All that is needed to enable the use of fully manual legacy lenses to be used with your modern digital camera body is a simple adapter.

image

These adapters vary in capability from simple adapter rings, to advanced electronic contraptions, with focus indicator chips of their own. Keep in mind though, there are a few things to consider before adapting any non-native lens to your camera. More on that shortly.

Using your camera in full manual mode with manual lenses

image

You’ve found an elegant legacy lens and located the appropriate adapter for your particular camera system. You’re excited and ready begin shooting completely manually, so now what? Well, take a breath and exhale a well deserved sigh of relief, because all of that was the hard part. Now all that’s left are a few quick steps. The first of those steps is to switch your camera into Manual Mode. This is almost always done by moving your selector wheel to M for manual mode. This will give you, the courageous photographer, complete control over all aspects of the shot. If you are using a completely manual lens, or a legacy lens, everything except the shutter speed will now be manipulated using the lens. The aperture will be controlled using the aperture selector ring, and so too will be the focusing.

This is a breakdown of the essential features found on an adapted, full manual legacy lens (in this case a Nikkor 50mm f/1.8).

image

Here are a few tips for using your camera in full manual mode, in conjunction with a fully manual or legacy lens:

Focus Peaking Function

Some cameras now incorporate a technology called focus peaking which visually outlines the edges of the most in-focus area of a scene,, before the shutter is ever released. The technology detects the area of the most contrast between pixels, thus determining what region is most in focus. Though not perfect, this a great option to aid with manual focusing.

Focus Magnifier

Not all camera bodies come equipped with the focus peaking feature, but most modern digital cameras are capable of focus magnification. This lets you digitally magnify the scene, and inspect areas for proper focus. I use focus magnification in all of my landscape work. It is a great way to achieve pin point focus on the areas where precision is a necessity. (Note: this is usually available in LiveView mode).

Shoot RAW

Yes, the old shoot RAW lecture again. Even though focus correction can’t be achieved, even in RAW format files, it will however give you much more room to work on contrast and clarity. This will sometimes help to salvage an image that may otherwise be culled.

Things to consider before using legacy lenses

Along with all the benefits of shooting manually with legacy and full manual lenses, there are also some things to remember before, and during shooting times.

Complete Autonomy of the Camera

There is of course no electronic communication between the lens and the camera, unless you have chosen an adapter or lens equipped with focus indicator technology. So there will be no way to use your shutter priority or aperture priority modes.

Physical Considerations

Some lenses will obstruct the mirror function of digital SLRs. This is one of those things that carries a little bit of buyer beware baggage. Make absolutely sure that the lens you are adapting to your camera does not physically occlude the operation of the mirror, this will damage your camera, possibly beyond repair. This becomes less of an issue with mirrorless camera systems.

Crop Factor

The crop factor of any lens is dependant on the size of the image sensor (or film) being used. Always be mindful of the interactions between your lens, and whatever size sensor you are using, be it full frame of APS-C (cropped). Most legacy lenses were intended for use with 35mm film. This will play a major role in your practical focal length, when shopping for lenses of the prime variety.

image

Fully manual and legacy lenses have a firm grasp on today’s digital world. Though viewed as antiquated by some, the essential elements of this type of photography can produce exceptional images. Shooting in Manual Mode gives you ultimate generalship over your work, and allows you to take every aspect of photo making into your own hands. Not only is the use of legacy and manual lenses a cost efficient way to make photographs, but it is also a reflection of a time when the buck stopped with the photographer, not the camera.

Newer isn’t always better. And even though manual shooting might not be the most effective course in some situations, there is no reason why it should be discounted in today’s modern era. Full manual shooting allows you to use lenses of extremely high quality to fully realize your creative vision, in ways you may not have otherwise been able to accommodate. Take your photography back to the future, and go beyond the realm of the automatic.

Do you have a favorite manual setup that you use regularly? Share it in the comments below!

googletag.cmd.push(function() {
tablet_slots.push( googletag.defineSlot( “/1005424/_dPSv4_tab-all-article-bottom_(300×250)”, [300, 250], “pb-ad-78623” ).addService( googletag.pubads() ) ); } );

googletag.cmd.push(function() {
mobile_slots.push( googletag.defineSlot( “/1005424/_dPSv4_mob-all-article-bottom_(300×250)”, [300, 250], “pb-ad-78158” ).addService( googletag.pubads() ) ); } );

The post Tips for Using Legacy Lenses and Shooting in Full Manual by Adam Welch appeared first on Digital Photography School.


Digital Photography School

 
Comments Off on Tips for Using Legacy Lenses and Shooting in Full Manual

Posted in Photography


Tips for Using a Handheld Light Meter

17 Jan

In modern DSLRs they all have a light meter built-in to the camera. But sometimes you want a more accurate reading, or to measure the amount of light when using flash (your camera can’t do that), in which case you would turn to a handheld light meter.

Check out this video from Adorama TV (host Daniel Norton) for some light meter basics.

This second video is more advanced. Once again from Adorama TV, with host Mark Wallace, this one covers how to meter for light ratios. Read more about ratios here: Lighting Ratios to Make or Break your Portrait.

In the video above he is using the Sekonic L-358 light meter. Here are a couple other choices, also made by Sekonic. I personally use the L-308 and it works just fine. You don’t need one that’s really fancy but the one he used does have the memory storage for comparing the light, the L-308 does not. So if you want that feature you may want to opt for the L-358.

Have you used a light meter before? If you are shooting with speedlights or studio lights you may find it necessary, but if you shoot landscapes and use mostly natural light you probably do not need one. Let us know your experience in the comments below.

googletag.cmd.push(function() {
tablet_slots.push( googletag.defineSlot( “/1005424/_dPSv4_tab-all-article-bottom_(300×250)”, [300, 250], “pb-ad-78623” ).addService( googletag.pubads() ) ); } );

googletag.cmd.push(function() {
mobile_slots.push( googletag.defineSlot( “/1005424/_dPSv4_mob-all-article-bottom_(300×250)”, [300, 250], “pb-ad-78158” ).addService( googletag.pubads() ) ); } );

The post Tips for Using a Handheld Light Meter by Darlene Hildebrandt appeared first on Digital Photography School.


Digital Photography School

 
Comments Off on Tips for Using a Handheld Light Meter

Posted in Photography


Tips for Photographing Football (Soccer)

17 Jan

Football (called soccer in some parts of the world) can be a very challenging sport to photograph. The ball is constantly moving quickly around the pitch, which may make it somewhat of a challenge to capture the action if you don’t have the right knowledge on how to do so. This simple guide will point you in the right direction to get more success at your next football match.

football or soccer photography action

Players contest the ball. © Daniel Smith / Getty Images.

First, let’s start off with equipment, because heading to a game with the wrong kit is definitely not going to help you.

Equipment

For best results, an 18-55mm or similar lens will not be sufficient to cover a game of football; the players and the action will be too far away, and you will most likely end up being disappointed with the results. Using a 70-200mm or equivalent is a great starting point, and will be a fantastic range for areas closer to goal. However, if you do have anything longer in your bag that is always helpful; anything up to about 400mm will be perfect. Anything longer than that can get a little too tight on a football field, unless you want to photograph players at the other end.

If you find that you’re current lens isn’t quite long enough, don’t feel like you need to run out and buy a longer one; cropping can always help quite a lot. With newer cameras having such high resolutions now, you won’t find too much of a drop in final image quality. Renting a lens for a day or two is always an option you may want to consider as well.

Also, bringing a small camping stool will be of great comfort to you, and because you will be closer to the ground than standing, it will help you get less of the field in the frame.

Fig 3

Players competing for possession of the ball. © Daniel Smith / Getty Images.

Settings

If you’re comfortable with using Manual mode, the below will be a helpful guide to getting you started. If you’re not too comfortable with Manual mode just yet, using shutter speed priority set to 1/800th, or faster, should do the trick.

Shutter Speed

Football (soccer), as with the majority of sports, is fast paced. To be able to freeze the action you will need to use a fast shutter speed; 1/800th as a minimum, is a great starting point for more advanced players as they tend to move much faster than younger, junior players. If you’re photographing a very young age group match, you may find that 1/500th could be fast enough, however 1/800tj would be a safer option.

Fig 5b

A fast shutter speed was used here. © Daniel Smith / Getty Images.

To add some variety, slower shutter speeds can create some fantastic images when done correctly. Shooting at around the 1/30th mark is a great starting point. If you find that there is too much blur in your images, then speeding the shutter speed up slightly will help. Conversely, if there is not enough blur, you may need to slow the shutter speed down.

Fig 4b

Try using a slower shutter speed to create motion blur showing speed. © Daniel Smith / Getty Images.

Aperture

For single player shots, f/2.8 would be ideal as it will isolate the player nicely. However, if photographing tackles, etc., where there is more than one player, it is best to use f/4 as this will give you a slight increase in depth of field (DoF), without sacrificing too much shutter speed. If your lens cannot got as wide as f/2.8 or f/4, that’s perfectly fine, just use the widest aperture your equipment offers.

ISO

Now that you have your aperture and shutter speed set, use the ISO to fill in for the exposure, or brightness, you want to have. Depending on what shutter speed/aperture combination you have, you may find ISO 400 on a bright day works, or on the other hand, if you’re in a low-light situation such as at dusk, night, or on a heavily overcast day, ISO 800 or higher may be required. Just be careful with how high you go on your particular camera as each model can perform differently at higher ISO’s. This is something that you may need to play around with a bit to explore.

Autofocus

Using the correct autofocus function on your camera will be a key element in ensuring you capture a sharp shot! Because you will be photographing moving subjects, One-Shot AF on Canon, or AF-S on Nikon, is not an appropriate focus mode to use, as it will not continually track the moving subject. In this situation, using AI-Servo on Canon, or AF-C on Nikon, would be the best solution as it will continually track a moving subject, so long as you keep the autofocus engaged. If you’re comfortable with manually selecting AF points, that will further help you control your camera’s focus even more; just select whichever autofocus point you wish your subject to be placed in the frame.

Positions

As with any sport, sitting in the right position will increase your chances of getting the shot. For football (soccer), this is generally around the corners of the pitch or field.

Fig 1

An overview of a soccer pitch with a guide of seating positions. © Daniel Smith / Getty Images.

  • Position 1: Looking down the pitch (field) will give you some great shots of players as they run with the ball toward you. You can also get some great shots of goals here, too. This position is also the most versatile position as you can get a good mix of everything.
  • Position 2: Looking around the pitch (field) is fantastic for shots at goal, as you will generally be able to get the goal shooter, and keeper in the frame. From here, you will also be able to capture players running down the pitch (field), but they will not be as head-on if running down the wings.
  • For some variation, try shooting at position 3, as from there you will be able to get some great panning shots of players with the ball, as they run the length of the pitch. You generally won’t be able to get many great goal shots from here but you may find some great tackle opportunities if they happen around mid-field.

Do not be tempted to run around the pitch following the ball – you will be forever running, and not photographing! It is much better to sit in one location and wait for the action to come to you. You can always move locations, such as at half-time, if you’re wanting to photograph a particular team.

Fig 10

A nice tackle here. A player hslid right under the other for the ball. © Daniel Smith / Getty Images.

What to look for

Here are some things for you to look for at your next game.

Celebrations – This could be of the team that just scored a goal, or after the final whistle, capture the team that won the match.

Fig 6

Teammates celebrate scoring a goal. © Daniel Smith / Getty Images.

Fig 12

A player shows the toll of losing a match. These images are also quite powerful, as the players can often have great expressions.

Action – This will be a major part in the game. Football (soccer) has a lot of tackles, headers, dives, slides, not to mention goals, and goal deflections by the keeper. Staying focused is key to capturing these moments. Also bear in mind, that older players will generally play with a higher intensity than the younger players, so capturing dramatic tackles will happen more often. But be aware that older players also move a lot faster!

Fig 2

Players falls from a push. © Daniel Smith / Getty Images

Fig 7

A player took a shot at goal. Having the goal keeper, and the front goal posts in the frame, clearly illustrates that this is taking place at goal. © Daniel Smith / Getty Images.

Fig 9

Players heading the ball. Getting the ball close to their heads is key with these types of images. If the ball is too far away, it can get lost. Also, the players expressions are generally better when the ball has just hit their head! © Daniel Smith / Getty Images.

The crowd – If the game you’re covering has a lot of supporters, don’t forget to get some shots of them, too, they can add some great atmosphere. Look for emotions on their faces; maybe they’re excited as their team just scored a goal, or they may be very quiet as their team is about to lose. The crowd is a great place for emotions.

Conclusion

Football (soccer) can be a very rewarding sport to photograph. As with any sport, the more you understand about the game, the more you know where to look for action, and will be able to follow it easier. However, if you’re not all that familiar with football (I’m not an expert on it by any meaning of the word) practice makes perfect.

One thing I would suggest is if you are planning on heading down to your local club to photograph a game, as a courtesy ask any match officials or club president if they are okay with you doing so. They will appreciate it, and it will make it easier for future photographers. Happy shooting!

googletag.cmd.push(function() {
tablet_slots.push( googletag.defineSlot( “/1005424/_dPSv4_tab-all-article-bottom_(300×250)”, [300, 250], “pb-ad-78623” ).addService( googletag.pubads() ) ); } );

googletag.cmd.push(function() {
mobile_slots.push( googletag.defineSlot( “/1005424/_dPSv4_mob-all-article-bottom_(300×250)”, [300, 250], “pb-ad-78158” ).addService( googletag.pubads() ) ); } );

The post Tips for Photographing Football (Soccer) by Daniel Smith appeared first on Digital Photography School.


Digital Photography School

 
Comments Off on Tips for Photographing Football (Soccer)

Posted in Photography


10 Fundamental Tips for Newbies in the Wedding Photography Business

06 Jan

So, you’ve decided you want to enter the wonderful world of wedding photography. Now it’s time to get prepared and arm yourself with as much know-how as possible. After all, you are going to be responsible for capturing the magic of this once-in-a-lifetime event – no pressure!

Here are the top 10 things I have learned on my journey, that are valuable to anybody breaking in to the wedding photography business.

DSC 2518

1) Experience and second shooting

You’re new to the scene, and may not have any experience photographing a wedding, other than that time you used your point-and-shoot camera at your cousin’s wedding. So, how do you get experience photographing a wedding, in a professional setting? Offer your services as a second shooter!

There are a few reasons why this is a highly valuable experience if you’re thinking of becoming a wedding photographer. The most obvious being that you will gain on the job experience, as well as building a wedding photography portfolio. By becoming a second shooter, you will also meet established wedding photographers, and begin to network with other pros. A great way to begin second shooting is to research wedding photographers in your area, and contact three to five that you like the most. You can also use Facebook and search for photographer groups to advertise yourself. Offer your services for free to start, and you should hopefully land yourself a job pretty fast.

When you secure a gig with a photographer, be punctual and polite on the big day. Observe the photographer’s behaviour, and the way they have structured the big day. This will help you get a feel for how you will one day operate your own business. If there is anything you are unsure of, or want to know more about, asking the photographer once the rush of the wedding is over, is a great way to get a better insight.

DSC 2680

2) Compare and prepare

You’ve assisted a few photographers at a number of weddings, and now you want to take the reins. Good job! At this stage, there is a lot to think about, and begin preparing. You need a presentable portfolio to show prospective clients, as well as prices, packages, and a solid contract. A great way to roll two of those things together is to create your own website.

This will allow you to have an online gallery of your images, along with a page outlining all pricing and further information. If you’re not a HTML whizz or web designer, don’t fret – you can sign up to a website that will offer you pre-made themes, designs, and layouts. Wix is a great place to start, you can select a yearly plan, which will give you a domain name, and eliminate all of their advertisements from your website. Plus – their website editing tool is super straight-forward and will allow you to customize your website easily. Another low cost option is Squarespace, starting at $ 8/month.

When you are designing your packages and conjuring up your pricing, comparison is key. Take some time to think about all the expenses involved in your business and compare this to the rate you wish to charge. Depending on your expenses, it might work in your favour to price yourself slightly higher or lower. Things to consider are: your overhead costs (rent, telephone, utilities, web fees, etc.), equipment, price of goods including wedding photography albums and/or prints, and you should also think about your own salary and how much business you hope to accumulate during the year. Remember, you are a novice – clients will not be choosing you because of your years of experience, but because of your passion and artistic flair!

You will also need to think about having a contract ready to go should a client ask to see a copy. There are loads of great wedding photography contract templates online, find one you like and do some adjusting. Important things to consider when writing a contract are: model release, image copyright, illness or injury, pricing and deposits/retainers, sizing/format of images, etc. Always have a lawyer take a look at your contract. Laws vary from place to place, and sometimes it is not my place legal guidance to others. Remember, we are photographers – not lawyers.

DSC 2716

Read these related dPS articles for more on contracts:

  • The Biggest Legal Mistake Photographers Make
  • Wedding Photography Agreement (Contract) Tips

3) Sell yourself

You’ve compared, you’re prepared – now it’s time to don the marketing hat, and get your name out there. There are a few avenues you can explore, but something that always goes down well, is running a promotion or special offer. For example, you could offer a special bonus (such as 20 free 5×7 prints, or a free 16×20 wall print) on your wedding services for the first five people who make a booking. This will cost you a little to produce, but it will benefit you massively and almost guarantee you five weddings.

A great way to utilize social media (again) is to search Facebook for wedding groups in your area, and advertise yourself there. Be sure to read the rules of the group and make sure you’re allowed to advertise your services in the group, some don’t allow it and you will be blocked. Have your website ready to go, so that as soon as you get some interest, you can fire through a quick message with a link to your work and pricing.

DSC 7202

4) Communicate

By now you should have a few people enquiring about your services and wanting to know more. At this stage, quick, friendly, and professional communication is your best friend. Have a script ready, so that as soon as you receive a message, email, or phone call you have a short and informative response ready to go. Remember, this is a script – NOT a sales pitch! Keep it short, sweet, and straight to the point.

My normal script goes along the line of, “Hello! Thanks for the message. Of course, I would be interested in photographing your wedding – please feel free to head on over to my website to see more of my work and pricing (insert website here). Do you mind me asking what is the date of your big day?” By asking for the date of the wedding, you are opening a conversation which is a hugely important part of the process. Once you have had a brief conversation regarding the details of their wedding, say to them that you will be in touch in a couple of days. This leaves the ball in their court so that they do not feel pressured, but also allows you to follow up with a friendly message and hopefully secure a consultation.

DSC 7742

5) Meetings

You’ve secured a consultation with your first potential client – yay! Turn up 5-10 minutes before the scheduled time, this is your only chance to make a first impression, and being late is a BIG no-no. Once you have greeted your clients with a smile on your face, ask them a few things about themselves. This initial meeting is a chance for them to get to know you (and vice versa) and your process, so go in there with a clear mind and plan of action.

Spend five minutes briefly explaining a run-down of how their big day will work from your perspective, and also explain your pricing, packages, and deposit payments. Take a copy of the contract and give it to them to take home and look over, let them know if they have any questions to contact you.

After this initial meeting, follow up with them three days later, and ask if they want to secure a spot. Make it clear that in order for them to secure their date in your diary, the deposit needs to be paid. If the clients liked you, and books you as their photographer, well done! You should always have a follow up meeting at their wedding venue, so that you can explore the grounds together, talk about potential photographic opportunities, and let those creative idea juices flow.

DSC 3417

6) The Essential List

You’ve got your first official booking, the deposit is paid, and the ball is well and truly rolling. Good on ya! Now you need to make a list of the absolute essentials that you need for the big day. These things include:

  • Family and group shot list
  • Bridal party shot list
  • Full itinerary of the day
  • Your own photographic equipment
  • Any post-wedding preparations

Contact the bride and groom and ask them to send you a list of all the must-have group portraits that they want, and also ask them for a full itinerary of the day. Ask them to allow an hour for photos between the ceremony and reception, in order to ensure that they get all the photographs that they want. Make a list of the equipment you will be taking including SD cards, spare batteries and chargers. If you are including prints or albums as part of your package, take some time to do the research and find a reputable, quality printing agency.

DSC 4113

7) Itinerary and planning

The big day is getting closer and you’re getting nervous – use the itinerary of the wedding day to start scheduling your own plan of action. Decide which shots you want, and when is the best time of day to take them. Be mindful of the time of day and position of the sun if you are shooting outdoors. You don’t want the subjects to appear silhouetted – but you also don’t want to blind your clients with the sun, as this will make for very squinty pictures.

Be sure to also schedule your own breaks – after all, this is a job and you will need a break. I find the best time to have a break is during the lunch or dinner, when everybody is busy with the food. Nobody likes being photographed with their mouth full of food, so this is a great time for you to sit down and enjoy a well deserved break and bite to eat as well. In most cases, the bride and groom will feed you (if this is really important, you can even put it in your contract).

DSC 7929

8) Recruit the best man and maid of honour

This will make your life so much easier, and will also enhance the experience of shooting family portraits. The best man or maid of honour are usually familiar with the family members, and will help herd the groups to make sure that everyone is ready for their portrait with the bride and groom. Let the bride and groom know that you intend to do this at your second meeting, and ask for a contact phone number or email address for the maid of honour and the best man. You can then drop them a line and introduce yourself before the big day, and ask them ever so nicely if they would be willing to stick around for family portraits to help you organize the herds of family members. Hopefully, they will see you operating like a well-oiled machine and the whole experience will not be too stressful on anybody. No one likes a stressed out photographer. This will also help you get to know them a bit better before the bridal party photographs, which is a major advantage in getting more natural, down-to-earth photos of the group.

DSC 3917

9) Have a perfectly balanced attitude on the big day

The big day is here – don’t panic! Refer to your equipment check list to double, triple, and quadruple check that you have not forgotten anything. When you turn up to the first location and start shooting, you need to be prepared to wear an infectious smile for the whole day. This will help all of your subjects relax and smile during their photos. Remember – it’s fine to direct people during the staged family portraits, but do it as kindly as you can. Find the perfect balance between friendly and assertive for this part of the day.

Self-check for professionalism, there are a few things that I think of which are absolutely unacceptable. This includes: showing signs of stress, smoking (even if the bride/groom are doing it), chewing gum, spitting, or excessive drinking. Sometimes photographing a wedding can seem a bit like a party, but this is a job and it needs to be treated as such. Be approachable, and just a generally delightful person to be around. People will remember this, and you may even find another engaged couple at that very wedding who like you so much that they decide to make a booking. Word of mouth is truly the best marketing tool ever!

DSC_8003-1

10) Follow up

The big day is over, phew – you survived! Now it’s time to knuckle down and do some editing, you’ve got a whole bunch of beautiful photos that you need to begin post-processing. I use Photos on my MacBook to sort through the images, and add all my best shots to a different album – I then go through that album and spend time editing those images.

How you should follow up as communication is critical, even at this point of the process. Text or email your clients the next day, and let them know you had an awesome time photographing their big day, and that you’ve got some stunning photographs. Some people take a couple of days to edit and send their images, other people take weeks. I tend to give a timeframe of 14 days, although they are usually done within five to seven days. If the photographs are not done in seven days, drop them a line and keep them updated on your progress, something along the lines of, “Hey guys! Just to let you know I have edited around 500 of your images and only have 100 to go. As soon as these are done I will be in touch to schedule a viewing.”

DSC_8089-1

Once your edits are done, schedule a viewing time so that they can choose their favourites, and any potential prints. The final step is simple – once all is said and done, ask the client to provide you with an honest testimonial. This will give you more content to add to your website, and is also a great way for future clients to read about someone else’s experience with you.

From start to finish, the process of starting a wedding photography business takes hard work and determination, but you got there with (hopefully) no hiccups. Nice work!

Want more on similar topics? Check out these dPS articles:

  • 6 Things to Consider Before Becoming a Professional Photographer
  • What Defines an Amateur versus a Professional Photographer?
  • 4 Things You Must do BEFORE Becoming a Professional Photographer
  • 3 Questions to Ask Yourself When Starting a Photography Business

googletag.cmd.push(function() {
tablet_slots.push( googletag.defineSlot( “/1005424/_dPSv4_tab-all-article-bottom_(300×250)”, [300, 250], “pb-ad-78623” ).addService( googletag.pubads() ) ); } );

googletag.cmd.push(function() {
mobile_slots.push( googletag.defineSlot( “/1005424/_dPSv4_mob-all-article-bottom_(300×250)”, [300, 250], “pb-ad-78158” ).addService( googletag.pubads() ) ); } );

The post 10 Fundamental Tips for Newbies in the Wedding Photography Business by Jasmine Monrouxe appeared first on Digital Photography School.


Digital Photography School

 
Comments Off on 10 Fundamental Tips for Newbies in the Wedding Photography Business

Posted in Photography


6 Tips for Doing a Successful 365 Photo Project

04 Jan

Happy 2016, welcome to the start of a new year. This is a great time to start new projects – be it losing weight, getting fit by regularly exercising, committing to eating right, or improving and growing your photography knowledge and skill.

We all have many different goals when it comes to our passion for photography. A great way to get started is by working on personal and professional photography projects. One simple yet effective way to work on your photography skills is to participate in a 365 Photo Project. Quite simply, a 365, as it is most often called, is a commitment to take a photo a day for 365 days straight. You can get as specific or as general as you like in terms of what you photograph, when you photograph, or even how you photograph. There are no set rules – the only requirement being you must take at least one photo each day, that counts towards your 365.

365 Photo Collage

A small collage from my 365 project done in 2014.

That being said, there are some basic guidelines to successfully complete a 365 – a sort of dos and don’ts list, if you will.

#1 Be honest about why you want to do a 365

Talk to anyone, and you are bound to hear many different reasons why you should do a 365 photo project. Some people feel it improves your photography because you are consistently taking at least one picture a day. Others feel it is a fun way to document and record a year in your life. It is also a great way to experiment and learn about light, composition, subject, equipment, and develop and hone in on your observation skills.

Since you know you have to take at least one photo every day, you are constantly looking for good photo opportunities everywhere, and tend to become more observant of your environment. No matter what your reason, be very clear on exactly why you want to start a 365, and document that as part of the process. This will help clarify your goals, and make the process more enjoyable.

Processed with VSCOcam with t1 preset Memorable Jaunts DPS Article 365 Photo a day article 03

#2 Create a routine for your 365

Just like anything else in life, having a routine provides a sense of organization. Figure out when is your best time to photograph, and stick to that routine. For me, the best time is around 9:00-10:30 a.m. It is early enough in the morning when my brain is quite active, there are no distractions, and the morning light is quite clean and bright. Of course that is not to say that I don’t photograph at other times of the day, but when I am working on a project, or an assignment, that’s my go-to time. And yes, I do treat my 365 as an assignment. The only difference is that I am my own client!

Memorable-Jaunts-365-Example

My general task list for my 365 -generally, all it takes is 10 minutes of my time:

  • Shoot 365 photo – five minutes
  • Edit photo – two minutes
  • Load to Dropbox – 30 seconds
  • Post on Instagram – 30 seconds
  • Write a caption and one line description for the image – one minute
  • Add hashtags – one minute
  • Total – 10 minutes approximately

#3 Set your own prompts or join a 365 group

In my opinion, this is the hardest part of doing a 365. The proverbial, “What do I photograph?”. Luckily there are so many of us doing 365 projects, that there are online groups you can join to get daily or weekly prompts sent to your inbox. Here are a few:

  • Project 365 Flickr group
  • 365 Project website
  • The 365 Make 1 shot per day, for 1 year – Flickr group

The other option is to completely customize the project, and work from your own prompts, or inspirational triggers. You might only want to photograph your breakfast, your pet, or your children. You may want to focus on modes of transportation. No matter what the prompt, I recommend creating a list or a journal to document them. That way you know what you have already photographed, and what comes next.

Memorable Jaunts DPS Article 365 Photo a day article 07

I try to follow this general prompt weekly for my 365. Sometimes, I deviate from it, and for me that’s okay!

  • Monday – Inspire
  • Tuesday – Food
  • Wednesday – Nature of the outdoors
  • Thursday – Indoors
  • Friday – Family
  • Saturday – Personal
  • Sunday – Fun day (anything goes)

Memorable Jaunts DPS Article on 365 photo series 05

#4 Choose the tools of the trade

Choose a camera – any camera! If you want to improve on your mobile camera skills go for it. Did you get a new camera for Christmas? Use a 365 photo project as a great way to learn the workings of your new toy. After all, practice makes perfect, and there is nothing like practicing everyday to get you comfortable with using that new camera.

Regardless of what tool you use, makes sure that it is something achievable. I find my DSLR to be cumbersome at times, and not easy to carry around with me for smaller errands in town. So instead, for my 365 photo project, I use a combination of iPhone and DSLR, which gives me the flexibility I need.

The other common question that most people want to know is how to document the project. My 365 medium of choice is Instagram. I love this platform, as it brings forth a great sense of community and creativity. By posting my images, and using the #365 hashtag, I am instantly part of a large group of people who are in the same project. It keeps me motivated and on track. I know a lot of people who post a collage of images on their social media channels, rather than a picture a day. This does not mean they don’t photograph one picture a day, but rather they just share their images once a week, or a month at a time.

Memorable Jaunts Gear for executing a 365 photo a day series article for DPS

These are the only two tools I use for my 365. When an image is from my DSLR, I can use the #dslr365 in Instagram to separate the two (not a required step but I like to do it just for my reference).

#5 Learn to forgive and move on

Who knew that doing a 365 can also be a great way to learn basic life lessons! The age old adage to forgive and forget is very relevant while participating in a 365. Sometimes things happen and you end up missing a day, or several days in a row. It is not the end of the world. Acknowledge it, accept it and move on. Either you can catch up, and post more than one picture the next day, or just mark it off as missed and go forward. The key here is to keep moving forward. Otherwise days turn into weeks, that turn into months, and before you know it, the 365 has long been forgotten and abandoned.

Memorable Jaunts Photo a day 365 example article for DPS

One of my favorites from my last 365. I did miss a few days here and there but the memories that I was able to capture still make me smile to this day!

#6 Success, completion, and what’s next

A 365 photo project is definitely a commitment. One that takes time and effort on your part, but the rewards are quite satisfying. To me, completing a 365 photo project provides a sense of achievement and accomplishment. In my mind it’s not an easy task, and I do celebrate my success!

Print all, or some of your best images, and create a collage of photos. Create a photo book specific to your 365. The possibilities are endless. My 365 photo project lives on my Instagram feed only, and I like printing my favorites. There are several companies that also provide the option of printing Instagram images. I have used Artifact Uprising in the past, but Blurb and Shutterfly are a few other companies that come to mind.

Memorable Jaunts DPS Article 365 Photo a day article 08 Memorable Jaunts DPS Article 365 Photo a day article 05

Note: If you use Lightroom you can create a Blurb book and order it directly from within the software, all right from your original camera files.

Once you have completed your 365 photo series, my recommendation would be to take a break. Jumping right in to another 365 can be a bit much. That’s not to say that people don’t do it, and be successful. Many people absolutely love doing 365 photo projects, and have consistently done it for several years at a stretch.

Personally, I like a variety of challenges in my photographic journey. After completing a 365 photo project in 2014, I took a break and focused on other things. Now I am ready to get back into the game and will be starting a 365 photo series in 2016 on my Instagram. Join me if you want to and lets motivate each other to take a photo a day for 365 days!

googletag.cmd.push(function() {
tablet_slots.push( googletag.defineSlot( “/1005424/_dPSv4_tab-all-article-bottom_(300×250)”, [300, 250], “pb-ad-78623” ).addService( googletag.pubads() ) ); } );

googletag.cmd.push(function() {
mobile_slots.push( googletag.defineSlot( “/1005424/_dPSv4_mob-all-article-bottom_(300×250)”, [300, 250], “pb-ad-78158” ).addService( googletag.pubads() ) ); } );

The post 6 Tips for Doing a Successful 365 Photo Project by Karthika Gupta appeared first on Digital Photography School.


Digital Photography School

 
Comments Off on 6 Tips for Doing a Successful 365 Photo Project

Posted in Photography