RSS
 

Posts Tagged ‘Tips’

Tips for Better Forest Photography

24 Oct

Humans have always been drawn to forests. We have found food, building and clothing materials, and inspiration in forests. There are innumerable stories told about them, the creatures that live there, and the dangers that lurk inside them. But it’s not all mythology and ancient history. Peace, adventure, colour, that perfect light – whatever you’re looking for, you can find in a forest.

Are you yearning for a place that will offer you something new to photograph? Let’s take a look at the opportunities these magical places can offer an open-minded photographer!

Forest photography 01

So what exactly is a forest?

Once a student told me that there are no threats to forests in Finland (where I was teaching) because they have so many trees. It might seem like a logical conclusion, but it’s sadly wrong. As anyone who has spent time in forests will tell you, they’re much more than just an aggregation of trees; each forest is a collection of innumerable organisms and interactions. Sure, trees are an essential part of a forest, but the whole is much more than that.

Forest photography 02

Without microbes, earthworms, and plants there would be no nutrient-rich soil for trees to grow in. Without insects, birds, and mammals there would be no one to spread their seeds – without everything else, a collection of trees is not a forest, it’s a plantation. And that richness is what makes forests such a fantastic place for photography.

Forest photography 03

For some humans, forests are also places for recreation and the creation of fond memories. What a forest is might seem like a silly question, but it’s not as easy to answer as one might initially think.

What is there to do in the forest?

So let’s cut to the chase: what does all of that have to do with you as a photographer? Well, forests offer opportunities for many different kinds of photography, thanks to their unique light, animal and plant life, and atmosphere. Nature will always be present in whatever photo you take in a forest, but as you will see, it doesn’t have to be the only thing. Let’s begin.

Forest photography 04

The big picture

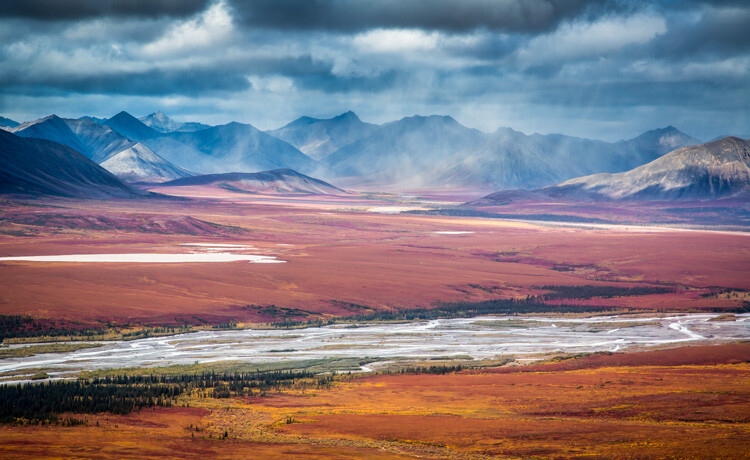
The most obvious photos to take in a forest are wide-angle shots of the forest itself. Ones which give an overview of the kind of forest it is, what kinds of creatures live there, what season it is, what state the forest is in, and so forth. But obvious, doesn’t have to mean boring. Try to find an angle that tells a story, has unique atmosphere or mood, or can surprise the viewer. Don’t just point and shoot, but think, plan, and frame your photo (as always).

Forest photography 05

Photographing trees is also a pretty self-evident thing to do in a forest. The longer one looks at trees, the more personality they seem to have, and the more impressive they seem to be. If a particular tree catches your fancy, observe it, let your imagination roam free, and then try to find a way to capture that in a photograph.

Forest photography 06

Large wildlife is another wonderful thing that forests offer eager photographers. The tricky thing here, apart from coming across such wildlife (remember to be careful) and not having it run away right when you’re bringing the viewfinder to your eye, is that forests are often quite dark.

If you have something exciting and highly mobile in your view, don’t hold back on the ISO so you can make that shutter speed as fast as possible. Otherwise, you’ll end up with just a blur and disappointment (unless a blur is what you were aiming for).

Forest photography 07

The smaller picture

For those more interested in detail and the richness of life in the undergrowth, forests are an unending source of treasure. A plethora of wildlife can be found on this scale: small mammals, amphibians, insects, spiders, worms, reptiles, millipedes, centipedes, and so forth. And those are just the animals! If you’re willing to look a bit closer, maybe lie down in the moss, you’ll also find stunning mushrooms, intriguing plants, handsome lichens, and yes, all that moss you’re lounging on.

Forest photography 08a

Forest photography 08b

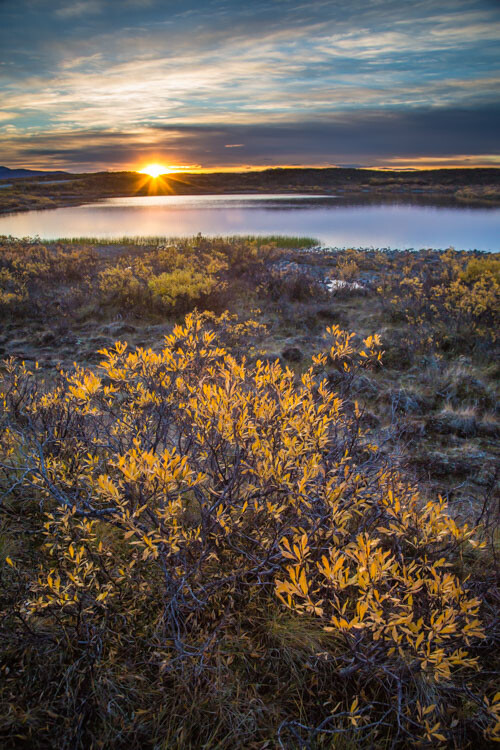
Don’t forget the beautiful leaves, especially in the fall. In short, forests are marvelous for macro photography.

Forest photography 09

Experimental photography

If you’re not actually interested in nature photography and you were dragged out to a smelly forest full of biting insects and other nuisances, don’t despair. There’s something to do, even for you.

Forest photography 10

Forests offer great opportunities for trying out different kinds of experimental photography. The generally low light conditions and diverse scenery work well for techniques that require long shutter speeds, such as ICM (Intentional Camera Movement) and light painting. Give it a shot!

Forest photography 11

Portraiture

Last, but in no way least, forests provide plenty of possibilities for portrait photography. It’s easy to find a flattering background in a different kind of setting. With patience, the light, albeit difficult at times, can be used to your advantage. You might be able to create some beautiful bokeh, interesting light patterns on your subject, or just have pleasant, diffuse light fall through the treetops.

Forest photography 12a

Forest photography 12b

If you don’t have a willing model to photograph, do not despair – pet portraits are also fun, as are creative self-portraits.

Conclusion

What does the forest mean to you? Do you have a special relationship with forests and do you like photographing them? I’d love to see your photos and hear your thoughts in the comments below.

The post Tips for Better Forest Photography by Hannele Luhtasela-el Showk appeared first on Digital Photography School.


Digital Photography School

 
Comments Off on Tips for Better Forest Photography

Posted in Photography


6 Simple Tips to Capture More Expressive Images of Your Children

22 Oct

Images of your children are probably THE most important images you will ever make, even if it doesn’t feel like it. But for the longest time what I did was make very superficial images of my kids, until I started applying a few of the tips below. Follow along to get more intimate and expressive images of your children too.

6 Simple Tips to Capture More Expressive Images of Your Children

1 – Ditch your portrait lens

The first thing to do, weirdly enough, if you have a go-to portrait lens that you use to photograph your family – is to ditch it. The reason is simple. Most of the time when we think of images of our children, we immediately think portraits.

I have nothing against portraits (there are a few on this page), but there’s more to your child than their portraits. At the end of the day, it’s really not about portraits, posing, making them pretty/handsome in the image, it’s about capturing snippets your child’s life as a whole.

6 Simple Tips to Capture More Expressive Images of Your Children

2 – Have a camera with you always

Life goes on whether you are ready to shoot it or not. One of the things I recommend is to get a small pocket camera that goes everywhere with you. Photographs present themselves

Photographs present themselves whether you have one with you or not, so having a small camera makes you ready for any situation. And let’s face it when you have enough bags (diapers, snacks, etc.) as-is you REALLY don’t want to be lugging around your DSLR.

6 Simple Tips to Capture More Expressive Images of Your Children

Great images can be made while going to the grocery store, at the wee hours of the morning, or just going to the park. In other words, when you least expect them. Like one time we had to call 911, my camera was with me. That is one of the times when you NEED your camera, it allows you to be present in the moment and yet detached enough not to lose your mind.

But besides those stressful times, the best images of my kids have been made when I least expected them.

6 Simple Tips to Capture More Expressive Images of Your Children

3 – Think in terms of LIFE

In order to make more intimate photographs of your kids, you need a mindset for it. Here is the question to ask yourself: “What are the images that only I could make?”

Imagine you just hired someone for a family shoot, what are the types of images that the hired photographer can’t get? If you think about it, these are the most intimate moments. Ones that can only be made in the process of living life itself.

6 Simple Tips to Capture More Expressive Images of Your Children

Photos of the kids sleeping peacefully, or that time where one was crying their eyeballs out…or when they finally scored a goal. It’s all about trying to find the majesty in the mundane parts of life when there are no special vacations planned, just plain old LIFE. Here are a few ideas to get your mind working:

  • Kids while playing
  • Kids recovering from sickness
  • When they are sad
  • When they are happy
  • While they are sleeping
  • What they look like right after waking up
  • Unwrapping a toy
  • Them being amazed at something

It’s all about photographing them while they are living their life. Capturing moments of intimacy that only YOU could capture because no one else is capable of getting that close to them.

The other part of the equation is to photograph your kids in this way as if you are doing a fine art project. That will help your mind find images that are not only intimate to you but also have inherent artistic value to them. Make art out of your family images.

6 Simple Tips to Capture More Expressive Images of Your Children

Why? Because between you and me, great photography outside of the home starts inside the home. So give your family photography the star treatment, and trust me, at the end of the day these images will have more value and be more meaningful to you than any other photographs you have created.

I would know, I once completely lost my hard drive. I was on the bed, tripped on the wire and BAM! Lost everything. I believed my best images were those of my street photography, that simply was not the case. I didn’t care at all about those images, all I wanted was to get my son’s birth pictures back. The hard drive is somewhere in storage, but I don’t know if I can ever recover the images.

6 Simple Tips to Capture More Expressive Images of Your Children

4 – Shoot for your eyes only

One way to make more personal images of your kids is to make photos that you will never show anyone. Images of their first shower, on the potty by themselves, you get the point. Of course, you will NEVER show them to anyone else ever, but it starts training your mind that not every image needs to be shared or have external thumbs up to be meaningful to you.

So start making the kinds of images you know will never be seen by any other set of eyes, maybe theirs when they grow up. If they are nice that is!

6 Simple Tips to Capture More Expressive Images of Your Children

5 – How to get them to be REAL

Let’s face it, when you deal with kids and children, they have already been spoiled rotten by the camera. You just point your camera towards them and you will hear “chhhhhheeeeeeese” with a fake smile to boot. That will only lead to uncomfortable looking kids in your images. So what do you do? Simple – you fake it.

Kids are themselves right before and right after you take the photo. So you either have to be quick and take the image BEFORE they start putting on their picture face. Or you have to do so after.

If your camera makes a CLICK sound, just wait for it, and say “Okay, done!” and about half a second later take another image. That one is always better because that’s when the kids let their guard down.

6 Simple Tips to Capture More Expressive Images of Your Children

Also sometimes it’s better to do two images, one for you and one more for them. For example, I like dark, moody, pensive images. My first son is all about smiles, fun, and giggles.

So sometimes what I do is direct him to make the image I have in my mind. Then once I have done that, I just tell him to do whatever he wants, and I usually end up with a grimace and shoot that. The first image would be more of a reflection of me and the second is more of a reflection of him. It’s win-win in my book.

6 – Give them the greatest gift ever

Imagine this: Your son (or daughter) is getting married. It’s your turn to make a speech. You can’t contain your emotions, and you want to cry. Yet you muster up the courage to give the speech and all of a sudden you take hold of the remote control and start a slideshow for everyone to see. It’s your son, his baby pictures, that time he was 6 and lost his tooth, times of sadness, happiness, and more.

6 Simple Tips to Capture More Expressive Images of Your Children

Make a photo project out of your children’s lives. And when it’s time…give them a book with the best images you’ve ever made of them. I think the greatest gift you can give them – besides the basics, like character – is an album of their life.

How important is this? Very! I can’t show my kids any photos of myself growing up. All of those images were lost to an earthquake that happened in Haiti a few years back. I can’t show them when I was sleeping with some spaghetti in my mouth, or my first tooth falling out.

6 Simple Tips to Capture More Expressive Images of Your Children

I think it makes it easier for our kids to relate to us when we can show them we were kids too. My kids? I’ll make sure each one gets an album of their life when the time is right…if they don’t make me lose my mind first that is!

6 Simple Tips to Capture More Expressive Images of Your Children

Conclusion

Your most important work as a photographer is family work. It may not feel like it now, but don’t wait until a hard drive crash to figure it out. Always have your camera at the ready and photograph their life as it happens.

When it’s time you will have a collection of impactful images you can give them and they, in turn, can share with their family. Be yourself, stay focused and keep on shooting.

The post 6 Simple Tips to Capture More Expressive Images of Your Children by Olivier Duong appeared first on Digital Photography School.


Digital Photography School

 
Comments Off on 6 Simple Tips to Capture More Expressive Images of Your Children

Posted in Photography


Video Tutorial – Tips for Making Dramatic Black and White Landscape Photos

21 Oct

Shooting for black and white requires you to see a scene and think a little differently. You’re looking for a contrast of tones, not color, and it can be hard to “see” in black and white if you’re new to shooting in monochrome.

Here is a short video with some practical tips you can apply to create more dramatic black and white landscape photos.

If you want more help with your black and white here are a few more dPS articles on the topic:

  • How to Enhance your Black and White images with Infrared Photography
  • 3 Simple Steps to Craft Better Black and White Photos
  • 6 Tips to Help You Make Better Black and White Landscape Photos
  • Avoid These 5 Common Mistakes in Black and White Photography
  • A Guide to Black and White Conversion in Photoshop

The post Video Tutorial – Tips for Making Dramatic Black and White Landscape Photos by Darlene Hildebrandt appeared first on Digital Photography School.


Digital Photography School

 
Comments Off on Video Tutorial – Tips for Making Dramatic Black and White Landscape Photos

Posted in Photography


4 Tips for the Minimalist Photographer

18 Oct

Tips for the Minimalist Photographer

I’ve photographed countless sessions in the past nine years. Weddings, families, children, newborns, seniors, huge extended family groups, community events, products for companies, bike races, fine art, birth stories. . . You name it, I have probably photographed it. Knowing that you might be a little bit surprised when I tell you what equipment I have in my bag:

  • Nikon D700 body
  • 50mm f/1.4G  lens
  • 85mm f/1.4D lens

That’s everything, besides two 8GB Compact Flash cards, two 4GB Compact Flash cards, three camera batteries, a couple of business cards, and some lip balm. All of this fits inside one Kelly Moore Westminster Camera Bag. I use Photoshop CS6 with Adobe Camera Raw to edit my photos on a 27″ iMac. That’s it!

Tips for the Minimalist Photographer

I started nine years ago with a Nikon D90, the kit lens, and a 50mm f/1.8 lens. A couple of years later I upgraded to my full-frame body, better lenses, and haven’t felt a need for anything different, or anything more since that day. I’d say I’m very much a minimalist photographer, and it works well for me.

Could it also work well for you? Is it possible to have so few pieces of equipment and be satisfied? I’d like to share some thoughts with you, and maybe you’ll find that it’s a system that could work for you. You also might think I’m just insane, and add an additional lens to your collection just to spite me. Don’t worry! I won’t judge you harshly either way.

Tips for the Minimalist Photographer

#1 – Let Go of Keeping Up

All too often in life, we get caught up in what everyone around us has, and what they are doing. We feel that in order to be good enough, we have to have and do all of that stuff too. Photography is no different.

Your best photographer friends are telling you about the latest and greatest lens they just purchased. Your photography competition just switched to a different brand and bought entirely new everything. The blogger you follow online just ordered the most life-changing new camera bag and is urging you to buy it too. You are surrounded by it every day, but you don’t have to keep up. You don’t have to do what everyone else is doing to be your best self. Likewise, you don’t need to have everything they have to compete.

Tips for the Minimalist Photographer

If it’s hard for you to see what others have and be satisfied with your own life, then stop looking at what they have. Stay away from social media for awhile, and quit looking at the blogs that are trying to sell you things. Get out and photograph something real with the equipment you have, and you might just forget that other photographers even exist. Eventually, you will be able to congratulate a friend on a new acquisition without feeling even a bit of jealousy.

#2 – Quit Thinking “Stuff” Will Change Everything

Have you ever told yourself that if only you had a certain camera, if only you had a few more lenses, you would be an amazing photographer? While equipment does make a difference, it doesn’t make the photographer. Great photographers can make beautiful photos with anything they have, and a not-so-great photographer could have the highest-end equipment with every lens imaginable and still come up with nothing.

Tips for the Minimalist Photographer

That said, it’s great to work towards purchasing quality equipment because if you’re only going to have very few things, you might as well make sure they’re very nice. You can get a nicer camera body and lens if you know that you’re going to use it all the time, and you won’t be spending your money on a lot of other “stuff”.

Practicing your photography, getting out there and actually taking photos, reading articles and books from the library about photography, and talking with other photographers will help you become a better photographer. And those things don’t cost you anything. Work on yourself instead of your stuff.

Tips for the Minimalist Photographer

#3 – Try Before You Buy

At some point in your life, I’m betting that you thought you had to have something, you got it, then realized that it wasn’t what you really needed or wanted after all. I’m pretty sure it’s happened to you, because I know it’s happened to me, more than once.

So before you buy another piece of photography equipment, see if you can borrow it from someone (or rent it), or at least watch it in action before you take the plunge and put down your hard-earned money for it. I’m very careful about what I purchase, but even I have had a few misses throughout the years.

I bought a reflector that I’ve used exactly two times in my entire career. UV lens protectors were purchased for peace of mind, then I decided that I liked my photos better without them, and I am a cautious person. I trust myself, so I don’t need them. A camera bag that sounded great in theory but lifting a flap every time I wanted to get my camera didn’t work for me. I bought a lens cleaner that the cap never stayed on. These are little purchases, but they’re just money and space wasters to me.

Tips for the Minimalist Photographer

Test Drive

I heard so often that Lightroom was amazing, and that there were so many things that you could do with it, and that I needed it along with Photoshop. I sat down one day with a sweet photographer friend and asked her to show me everything she loved about it, and why I needed it. Every single thing that she showed me could be done with Adobe Camera Raw and Photoshop. I felt content with my workflow, and I went home satisfied that I didn’t need to buy another program.

The great thing about trying something out, or watching it in action, is that you can see if it will truly work for you or not. You can read or listen to lots of other photographer’s opinions, but they aren’t you. The things that are important to them may not be important to you. You ultimately have to make that decision if it’s something you truly need and if it’s a good fit for you.

Tips for the Minimalist Photographer

#4 – Let Your Limited Resources Expand Your Abilities

It’s strange to me that someone like me, with such limited equipment, could be so much more content than the photographer who owns suitcases full of equipment and still wants more. Some types of photography truly require more than what I have, and more equipment could be necessary, but you’d be surprised how innovative you can be when you need to make do with what you have.

There is a certain freedom that comes when you have everything you need in your hands and in your head. You don’t need to carry around rolling luggage full to the brim with equipment because you use everything available to you to create something beautiful. If you can’t shoot something that comes to mind because you don’t have the right lens, you either find another way to shoot it, or you find something else to shoot. That something else might be even better than the first thing that came to mind.

You won’t be wasting time, or risking dust and dirt in your sensor, by changing lenses constantly. You won’t be weighed down by multiple camera bodies swinging from your neck. No more worrying about where you put that third bag full of your lighting equipment. Your mind is freer to capture real life.

Tips for the Minimalist Photographer

Decide What Works for YOU

Please don’t read this article as a criticism of photographers who own a lot of equipment. I like things simple in my life, inside and outside of photography. I don’t like to have more than I need, and an excess of anything makes me feel uncomfortable. Being a minimalist photographer works for me, and whether your reasons are that you like simplicity too, or your budget requires simplicity, you might find a few things to think about after reading this.

Tips for the Minimalist Photographer

Are there other photographers out there like me? I’d love to know what equipment you find most essential. And, for all of you who have everything, I’d love to know if you had to cut your equipment down to five or fewer items, what would you keep? What could you give up?

The post 4 Tips for the Minimalist Photographer by Melinda Smith appeared first on Digital Photography School.


Digital Photography School

 
Comments Off on 4 Tips for the Minimalist Photographer

Posted in Photography


Tips for Taking Documentary Style Travel Photos

14 Oct

Documentary style photography has long been of great fascination to me. The sheer act of photographing people and places to document spontaneous moments and the imperfections associated with it gives such photography, and the photographer, a sense of being authentic, real, and free to exercise his/her creative freedom.

Officially, documentary style photography has many technical definitions. As per Wikipedia, documentary style of photography is used to chronicle events and environments in a naturally occurring state very much like photojournalism. I like to think of a documentary style of photography as the letting go of my inhibitions and preconceived notions of perfection. That I’m documenting people and places in their natural environment – being or doing what they do on any given day.

Tips for Taking Documentary Style Travel Photos

This scene literally happened right in front of me in Jaipur, India – the classic story of the billy goats!

I find that by approaching travel photography in a documentary fashion, I am able to have a richer travel experience. Because I can relieve my mind of the pressures of photographing just like everyone else and also walk away with some unique frames that speak to my own experiences.

To that end, here are a few tips to keep in mind for a documentary style approach towards your travel photography.

#1 – Be present in the moment

Being present in every moment of every day is a life lesson we all can benefit from. It doesn’t just apply to travel photography. Great moments happen every day around us that are worth documenting not just for our clients but also for ourselves so that we can live a richer, fuller life.

Tips for Taking Documentary Style Travel Photos

People watching is a great exercise in training your eye to really catch that which is unusual and unique to a place – these boys in the market in Jaipur were observing me just as much as I was observing them!

By training your mind to really live life in the moment and not worry about all the other distractions will also help you really “see” what is around you. More often than not, you likely travel with a very tight agenda and timeline. No sooner than you get to your destination, you are already mentally prepared to move on to the next stop. Instead, try and plan a single excursion for a day and really focus on learning and experiencing that place or activity before moving on.

#2 – Be observant of your surroundings

Life is happening all around you all the time. People interacting with each other, people interacting with nature, nature putting on a grand show during sunrise, sunset, or even during a thunderstorm. But don’t wait for some preconceived notion of the perfect moment to take your camera out and take a photo.

At the same time, don’t see the world simply through your viewfinder. Observe the scene, anticipate the shot that you really want to get and be ready to take the shot. Don’t just fire away at every situation only to get home to realize that you completed missed the moment and hence missed the shot as well.

Tips for Taking Documentary Style Travel Photos

I once found myself in the middle of a village festival/ritual when I was traveling in India. I had no idea what was going on but knew I had to document this. Luckily a female photographer was somewhat of a rarity in this village and I was given a special seat in the middle of all the action (without a word spoken amongst me and these women)! It was fascinating to see and experience.

Tips for Taking Documentary Style Travel Photos

I later found out that these women were taking one of the female members of their family to each house to get blessings as she was supposed to be possessed by a female deity and have god-like powers…certainly an experience I will never forget!

#3 – Be real about your travel photography goals

A very famous travel quote says, “We travel not to escape life, but so that life does not escape us” really hits the nail on the head for me. Be real about why you travel and what you want to gain out of each travel experience. If you are traveling to a marketplace and want to get a true sense of local lifestyles and customs, then look for naturally occurring scenes. Don’t look for people that you can pose or stage to get your shot.

Tips for Taking Documentary Style Travel Photos

This is by no means a perfect shot but I love the fact that this angle shows just how crazy transportation choices can be in smaller villages and towns in some countries!

#4 – Be aware of your gear choices

Packing for any sort of travel is an art in itself, especially if you are going away for an extended period of time. Documentary style travel photography requires a slightly different mindset in terms of gear than say perhaps wildlife or portrait photography.

I find that for documentary style travel photography a zoom lens like the ultra-wide angle focal length like the Canon 16-35mm f/4 or one like the Canon 24-70mm f/2.8 works well for me. While a fast lens is ideal, I don’t usually find myself photographing at an aperture lower than f/4 or f/5.6. More often than not, I have more than one subject in the scene and also want to capture some of the background in order to provide content to the shot.

Tips for Taking Documentary Style Travel Photos

I was in Rome for three days this past summer but couldn’t get the famous Spanish Steps without people no matter what time of the day I tried. So instead, I chose to embrace the crowds and showcase this famous monument as the tourist attraction it really is!

#5 – Be confident in your skills

Documentary style photography is generally quite fast paced. You are trying to capture a scene as it is playing out in front of you. You don’t really have the time or the opportunity to re-compose the shot and then click the shutter. However, this does not mean

However, this does not mean that you have to just fire away at the maximum fps (frames per second) that your camera can handle, then pick the best of the lot in post-processing. Instead, use your technical as well as artistic skills to read the scene, analyze the light, assess the right camera settings, imagine the outcome, anticipate the shot and then take the picture. Oh, by the way, bear in mind that you will not likely get a redo.

Portland Mountains from the flight - Tips for Taking Documentary Style Travel Photos

I had almost no time to really plan this shot out…I knew I wanted to try and get all three of the famous peaks of the Pacific Northwest in one frame while at about 35,000 feet in the air.

Conclusion

I hope these tips convey my love for documentary style photography and do not scare you away from it. This style of photography has its own charm. Even though it may appear to be highly unplanned and random, it is also a good mix of carefully anticipated planning and authenticity. Give it a try the next time you travel and let me know how it goes.

The post Tips for Taking Documentary Style Travel Photos by Karthika Gupta appeared first on Digital Photography School.


Digital Photography School

 
Comments Off on Tips for Taking Documentary Style Travel Photos

Posted in Photography


Video Tips – Two Light Painting Techniques for you to Try

13 Oct

I personally love night photography and one of my favorite things to do at night is light painting. There are a few ways to do it depending on the look you want. Here are two completely different techniques for you to try out.

Make a Light Spiral

In this first video photographer Jason Rinehart shows us how to create a light painted spiral. So there is no subject you are adding light to, the light itself ends up being the subject. See how he does it here:

Light Paint an Old Barn

In this second video, you see a different approach where a flashlight is used to light paint the subject, in this case, an old barn in Ireland. There is a right and a wrong way to do this, and they give good examples of both.

Have you tried light painting before? Which of the two methods do you like better, or do you enjoy doing both styles? Tell us in the comments below.

The post Video Tips – Two Light Painting Techniques for you to Try by Darlene Hildebrandt appeared first on Digital Photography School.


Digital Photography School

 
Comments Off on Video Tips – Two Light Painting Techniques for you to Try

Posted in Photography


3 Tips to Help You Take Better Autumn Photos

13 Oct

I’ve recently returned from leading a photography workshop in the Alaska Range, south of my home in Fairbanks, Alaska. The trip was timed with the peak of fall colors. My students and I spent dozens of hours over the week, exploring the vibrant colors, and trying really hard to make the weird orange, red, and yellow landscape look the way we wanted it to in our autumn photos.

It occurred to me that autumn, photographically speaking, is weird. It throws our perception of colors through a loop. The world, normally a mix of blues and greens, suddenly shifts to crazy warm tones of yellow, orange, and red.

4 Tips to Help You Take Better Autumn Photos

To effectively photograph autumn colors, you need to refocus not just your camera, but also your brain. The standard compositional “rules” of landscape photography shift quite a bit during the fall. The background, which for much landscape work is the actual subject of the image (think big mountains) becomes the setting rather than the subject in the autumn. Our attention falls to the foreground, where the colors are exploding.

In this article, I’m going to cover three composition types for autumn: details, broad landscapes, and local landscapes. When mixed together, these three types of images will help you tell a compelling visual story of your autumn experience.

#1 – The Details

4 Tips to Help You Take Better Autumn Photos

Photographing details lies in the fuzzy gray area between macro and landscape photography. Sometimes it’s one or the other, sometimes it is a little bit of both. In general, however, I see photographing the details as another part of landscape work. These images tell a small, but important part of the story.

Mentally, details give us a starting point for seeing the way a landscape will come together, and they also play an important role in providing a sense of scale. The small bits of the scene are rarely captured in a big landscape photo, and yet they are a very important part of our experience in the field. The details too should be an important part of the story we are telling our audience.

4 Tips to Help You Take Better Autumn Photos

Lens choice

Close-up work requires a lens capable of a relatively close focus, or a powerful telephoto. I’ve used big 500mm and 600mm for this kind of shot and I’ve used wide angles that have the ability to focus a few inches away from the lens. But most often I use a moderate telephoto with decent macro capabilities. Nothing fancy, just a good lens that lets me get close to the subject.

4 Tips to Help You Take Better Autumn Photos

Whichever you choose, these kinds of images rarely have a great deal of depth. Even photos from a low perspective only show a few inches from front to back. Therefore detail shots are usually about pattern and color. Here are a few things to look at as you compose:

  1. Consider how the lines in the image interact. Do they cross distractingly or guide your eye around the frame in a pleasing way?
  2. Which color dominates? In the autumn, colors like red can be overwhelming and often need to be balanced by cooler greens or blues.
  3. Isolate your subject by cropping out extraneous details, or using a shallow depth of field.
  4. Embrace the autumn colors, but don’t overwhelm your viewer with too much of the same thing. Good images usually show a variety of textures and colors.

#2 – The Local Landscape

4 Tips to Help You Take Better Autumn Photos

When you zoom back a bit from the details, you get local scenes within the landscape. This type of image is rarely shot wide, rather you apply medium to strong telephotos to isolate compelling parts of the scene. I really like these kinds of shots. They allow enough space to apply the elements of both depth and scale, and yet are tight enough that distractions are more easily avoided and make great autumn photos.

4 Tips to Help You Take Better Autumn Photos

This type of shot is particularly suited to autumn photography because the fall colors are by nature, patchy. Using a short to moderate telephoto, you can select the patches of dramatic color that may be surrounded by brown in late autumn or green early in the season.

Consider using focal lengths in the 70-200mm range, and select a part of the landscape that draws your eye. Find lines that guide your image through the frame, not out of it, or look for juxtapositions of color and texture.

#3 – The Grand Scene

4 Tips to Help You Take Better Autumn Photos

I’m going to be honest here. In the fall, when the colors of my home state are going off like fireworks, it is rarely the wide open scenes that draw my eye. However, sometimes the scope and size of the landscape cannot be ignored. It is in those rare moments that I reach for my wide angle lenses.

And yet, my focus often remains close to me. The foreground in the autumn, perhaps even more than other times of the year, is vital. When shooting wide, I will often get low, using my background not as the subject, but as the setting for something bright, flashy and interesting close by.

4 Tips to Help You Take Better Autumn Photos

Use the foreground

I was shooting in late August in Denali National Park. The colors were bright and beautiful, and on one sunny day, the mountains of the Alaska Range, including Denali itself, had emerged from behind the clouds to loom, white and glaciated, over the landscape. It was beautiful, and yet my focus kept falling on the colors in front of me. I didn’t ignore that dramatic backdrop, but I used it as just that, a backdrop.

When shooting wide, don’t forget about the details I noted earlier, nor the patterns of local landscapes. Those two are integral to the wide scene and will help you understand how the elements of the landscape fall together.

4 Tips to Help You Take Better Autumn Photos

I once heard it said that wide-angle landscapes were easy. I disagree entirely, wide angles are the hardest because there is so much space for distraction. Understanding and including compelling foreground subjects, like a splash of fall color will take you a long way toward creating a dynamic wide angle landscape.

Bonus tip – Bring it all together

In a world where most of our images end up on Facebook and Instagram, the art of a photo story is fading. Stand-alone shots get the most attention, the most likes, hearts, or whatever, on social media, but they do a lousy job of telling the whole story. Details, local scenes, and wide landscapes in combination are far superior.

4 Tips to Help You Take Better Autumn Photos

In conclusion, I encourage you to tell the whole story by embracing numerous shots. Use the focal lengths available to you, all of them. Through your lens, explore the fall landscape, and share your autumn photos in the comments section below.

The post 3 Tips to Help You Take Better Autumn Photos by David Shaw appeared first on Digital Photography School.


Digital Photography School

 
Comments Off on 3 Tips to Help You Take Better Autumn Photos

Posted in Photography


7 Tips for Capturing the Decisive Moment in Street Photography

09 Oct

There is probably no other term as often cited as “The Decisive Moment” in Street Photography. Yet there is no real agreement what a decisive moment defines.

The street is normally a very chaotic place. People are walking in every direction and there isn’t much “sense” when putting everything together. The decisive moment is different. Suddenly every single detail that is captured in the photograph has a meaning. Subjects that are normally not connected are in a relation to each other, they don’t know it, but the picture clearly shows it.

Dog Days What is the Decisive Moment

Creating such images is not an easy task in a candid genre. While some state luck as the most important factor, I believe that you can work towards the Decisive Moment and capture it more regularly. Here are seven tips to help you.

#1 – Become Quicker

The street is not a place where you can slack off and take all the time you want to take a shot. There is no second chance to catch candid moments. A decisive moment can last for a few seconds and be gone forever. If you don’t catch it in time, you lose it for eternity.

Photographing is a 2-step process. First, You have to be familiar with your gear. After spotting a beautiful scene, there is no time for adjusting the camera or learning how your equipment actually works. Take your time to experiment with different settings beforehand so you know what works and what doesn’t. Use the technique of zone-focusing and you will be a lot faster capturing interesting subjects too.

Decisive moment street photography 01

The second step is spotting potential scenes in time and developing an instinct even before something interesting happens.

#2 – Get in The Zone

To spot interesting scenes instinctively, you need the right mindset for street photography. Just going out with your thoughts somewhere else, won’t land you the money shot very often. Concentration is needed to absorb the chaotic environment and scan it for potential decisive moments.

There are a lot of distractions in the modern world. Smartphones and your camera are two of the main distractions that can keep your mind away from the street. Before going out on the street, make sure to not have anything important scheduled for the time being and for the best results, turn off your smartphone.

Decisive moment street photography 02

Also, don’t get too distracted by your camera. It is just a tool that helps you to display your vision. You don’t need to have a look at every image that you have taken at the very moment. If possible, try out an analog camera and see how pure minimalism can help you to get in the zone.

#3 – Overcome your Fear

Spotting a scene is only the first step to capture the decisive moment. Afterwards, you have to translate your vision into the form of a photograph. When you still have fear to get close or take an image, it will limit your creative freedom.

There is no need to be afraid of the street and strangers. After years of experience, I can assure you that with a minimum of common sense nothing truly bad will happen to you. In reality, the worst that can happen is that someone asks you to delete the picture, but that’s pretty much it.

Decisive moment street photography 03

The fear on the street is mostly irrational and your mind is playing tricks on you. Part of it is socialization and I will admit, that every social being feels this way, when starting in street photography. Not invading the “private space” of others has been beneficial for forming social groups, historically speaking. But it doesn’t make much sense in our modern world and is only a hindrance for street photography.

To overcome your fear, you could try to get rejected purposely by asking for posed portraits pictures. It will show you that most people are actually very relaxed and even if you do get rejected, it isn’t the end of the world.

#4 – Perfect the Composition

There are a lot of situations happening on the street that you aren’t able to display to their full potential. This is heavily dependent on the way you frame the image and display it.

Decisive moment street photography 04

Lots of images are destroyed because the composition is simply off. I know that street photography is often seen as a genre of freedom. But when it comes to aesthetics, there are natural formulas that are more pleasant than others.

The rule of thirds is not a myth, but a fact. To embrace this in your photography will make your images visually more profound than ignoring your natural instincts.

Additionally to the rule of thirds, I would also focus on leading lines, not pointing away from the main subject. For an even more interesting picture try to fill every layer from the foreground to the background with interesting details.

#5 – Be Inspired

Decisive moment street photography 05

The right mood can also influence you in finding a potential scene that can lead to an outstanding image. Inspiration can stem not only from other photographers that you admire but from any creative source.

Listen to music, watch your favorite movie or read a good book. Anything that helps you to open your mind for creating something outstanding, is suitable to bring you closer to the decisive moment.

#6 – Dedication

Decisive moment street photography 06

Street Photography is not a discipline where you can expect quick results after following a simple guide. It takes years or even decades of dedication to street photography to be able to create the decisive moment, seemingly out of nowhere.

Developing a photographer’s eye takes a lot of training. Therefore, I would recommend forming a group of other photographers who have the same goals in mind. Walking the street with multiple photographers can also open your eyes to their vision. They are able to point out scenes that wouldn’t even cross your mind on your own.

#7 – Stay Curious

Decisive moment street photography 07

Whatever you do, don’t lose interest in your environment and mankind in general. Curiosity can lead you to interesting scenes that otherwise would seem as if they had no potential. Embrace the tourist in your town.

Do you remember the last time you were on vacation and took some holiday pictures? Suddenly even the most mundane places can become interesting when you are in a foreign location. The little ice parlor might be totally boring to the residents, but for you, it was worth a picture.

Follow the same instincts in your own neighborhood. Rather take an image too much, than missing out on the decisive moment. But most importantly, keep the fun. Don’t force yourself too much.

Conclusion

The process of doing street photography should always be fulfilling even when the results might not satisfy you. Get out on the street, be mindful, have fun, and over time the results will follow.

The post 7 Tips for Capturing the Decisive Moment in Street Photography by Sebastian Jacobitz appeared first on Digital Photography School.


Digital Photography School

 
Comments Off on 7 Tips for Capturing the Decisive Moment in Street Photography

Posted in Photography


3 Powerful Tips for the Perfect Vignette in Lightroom

08 Oct

The vignette is one of the most powerful ways to boost your photos. It reduces your photo’s brightness at corners and sides compared to the image center. It’s mainly used to highlight elements in the center even more. Besides, you can also use it to cover distracting details on the sides of your image.

As popular as it is, it’s just as common to not apply vignettes properly using Lightroom or Adobe Camera Raw. Let me show you three powerful tweaks to squeeze out 100% of its potential and present your photos in a better light!

1) How to decide which photo is suited for a vignette

The vignette shifts the focus to the center of your frame. That’s why you’ll ideally have a photo where your subject is placed in the middle. Otherwise, the vignette will make your subject darker and take away the spotlight.

To make the vignette even more powerful, it really helps to have the light in the center of the frame as well. Your subject is either lit up from the front or illuminated by some backlight. Of course, it depends on how strong you apply the vignette. If you use it lightly around the sides and corners, then the subject can also be a bit to the top, bottom, left or right of the frame.

3 Powerful Tips for the Perfect Vignette

Take a look at the two photos above. The one on the left has the subject on the far left. The vignette not only covers the subject, it also highlights the less important wall in the middle. The right photo, however, has the subject in the center. The vignette blends out the unimportant details of the office and highlights the person and the view in the center. Do you see how the vignette works much better in the example on the right?

Whether you are capturing buildings in a city, trees in the countryside or animals in the zoo, the same rule of thumb applies: place the most important element in the center.

2) How to make the vignette as smooth as possible

The best vignette in the world is the one you barely notice. That’s why you always need to make sure that the transition is as gentle as possible. Once you notice the transition from dark to bright, it’s not done right. Do you see the circle of the vignette in this photo?

3 Powerful Tips for the Perfect Vignette

The reason for this is generally that the feather slider is too far to the left side. As you can see in the screenshot below, it’s at 33. The more you go to the left, the more visible the transition will be.

Transition Bad - 3 Powerful Tips for the Perfect Vignette

Always make sure to move the feather slider to the right side. For most of my vignettes, I slide it all the way to 100. That way, you will achieve the smoothest transition for your photos.

Transition Bad - 3 Powerful Tips for the Perfect Vignette

Once you’ve applied the feather more generously, the vignette’s border will largely disappear. As a result, your vignette will blend more smoothly into the natural light of the scenery. In case the transition remains too strong, you can always reduce the amount a bit as well.

3 Powerful Tips for the Perfect Vignette

3) How to create a custom vignette

Although the post-crop vignette works best with subjects in the center, you will also use different placements. Luckily, you can always create a custom vignette that is tailored to your composition. The easiest way to do this is to use the Radial Filter.

The following photo could really need a vignette. That way, we could highlight the sunset and the silhouette even more. In order to create a custom vignette, open the Radial Filter (Shift + M) first. Then you decrease the exposure to a level between -0.20 and -1.0. In this case, I set it to -0.64.

Radial 3 Powerful Tips for the Perfect Vignette

Click on the subject in your photo, hold and drag the circle around your subject. Everything outside of the circle will become darker.

3 Powerful Tips for the Perfect Vignette

Remember the first tip how the transition always needs to be smooth? We will do the same for the custom vignette. With the feather slider, you can make the transition from dark (outside the circle) to bright (inside the circle) smoother. The further you slide it to the right, the gentler the transition becomes. For this photo, I changed it to 81 instead of 50.

Radial 3 Powerful Tips for the Perfect Vignette

When you compare the original photo (left) with the custom vignette (right), you can clearly see the difference. The light atmosphere in the right photo is more intense and the vignette guides the viewer to the subject.

3 Powerful Tips for the Perfect Vignette

Conclusion

I hope these three tips for better vignettes will you take your images to the next level. Of course, practice makes perfect. Play around with the sliders as much as possible to get a feel for the right amount. If you have any questions, let me know in the comments and I’m more than happy to help you out!

The post 3 Powerful Tips for the Perfect Vignette in Lightroom by Marius Vieth appeared first on Digital Photography School.


Digital Photography School

 
Comments Off on 3 Powerful Tips for the Perfect Vignette in Lightroom

Posted in Photography


Tips for Shooting in Low Light Without a Full-Sized Tripod – Video Tutorial

07 Oct

Shooting in low light without a full-sized tripod can be tricky to do and get a sharp image. In this short video from Adorama TV, Gavin Hoey goes over several things you can do to help you in this situation.

Low light photography tips

Some of the things he mentions in the video include:

  • Using image stabilization
  • Use a large aperture
  • Choose a higher ISO
  • Making the camera stable
  • Using the self-timer

Editor’s note: Ironically, I was just in London in May and got a pretty similar shot to what Gavin shows in the video. I did, however, use a full-sized tripod. But notice how both his shots and mine are really purple? Interesting, thought it was just the light that night – apparently, London is purple. 

Darlene’s image of London bridge, taken with a tripod.

If you want more tips for shooting in low light check out these dPS articles:

  • How to Shoot in Low Light – 9 Commonly Asked Questions
  • Low Light Photography: How to Shoot Without a Tripod
  • 5 Tips for Better Concert Photography in Low Light Conditions
  • 5 Tips for Photographing Wildlife in Low Light Conditions
  • 6 Tips for Getting Consistent Results Shooting in Low Light

The post Tips for Shooting in Low Light Without a Full-Sized Tripod – Video Tutorial by Darlene Hildebrandt appeared first on Digital Photography School.


Digital Photography School

 
Comments Off on Tips for Shooting in Low Light Without a Full-Sized Tripod – Video Tutorial

Posted in Photography