RSS
 

Posts Tagged ‘Tips’

How to Capture Motion Blur in Photography (6 Tips)

19 May

The post How to Capture Motion Blur in Photography (6 Tips) appeared first on Digital Photography School. It was authored by Darren Rowse.

capture motion blur in photography

Are you looking to capture motion blur in your photography?

While photographing motion blur might seem difficult, it’s actually pretty easy; with a bit of camera know-how, you’ll be taking stunning photos like a pro.

capture motion blur photography

And that’s what this article is all about: giving you the tools and techniques you need to get beautiful results!

Note that motion blur can look great in any photography genre, so don’t try to limit yourself. Instead, embrace the power of the blur!

1. Slow down your shutter speed

Here’s the fundamental motion blur tip:

Use a slow shutter speed.

You see, the reason for motion blur is simply that your camera’s shutter remains open for a significant period of time. In other words: you get motion blur when your shutter speed is long, whereas you freeze the action when your shutter speed is short.

So the number one tip for capturing movement is to select a longer shutter speed.

motion blur in front of buildings

If your shutter speed is too fast (e.g., 1/4000s), you’re not going to capture much movement. But if you dial in a lengthy shutter speed (e.g., five seconds) you won’t need your subject to move much at all before you start to see blur.

How long should your shutter speed be? Here, the speed of your subject comes into play. A moving snail and a moving racecar will give you very different results at the same shutter speed. The slower your subject, the slower the shutter speed needs to be to create blur.

The other factor that comes into play when determining shutter speed is how much light exists in the scene. A longer shutter speed lets more light into your camera and runs the risk of blowing out or overexposing your image. Below, we’ll cover some ways to let less light in (so you can use long shutter speeds without overexposure concerns).

Bottom line:

There’s no one-size-fits-all shutter speed for motion blur. It’ll depend on the speed of your subject, the brightness of the scene, and how much motion blur you want to capture. The key is to experiment!

2. Stabilize your camera

There are two ways to get a feeling of motion in your images:

  1. Have your subject move.
  2. Have your camera move.

But for the type of photo we’re after today, it’ll be the subject that’s moving. In such cases, you need to do everything you can to keep your camera perfectly still. Otherwise, you’ll capture a blurry subject – but you’ll also end up with a blurry background.

How do you stabilize your camera?

boats in the water

A tripod is ideal, but you can also place your camera on some other steady object (e.g., a table or a bench). I’d recommend using a remote shutter release or a self-timer mechanism; that way, you can trigger the shutter without touching your camera (because the more you touch your camera, the more likely it is that you’ll introduce blur).

3. Try Shutter Priority mode

As you know, the shutter speed is crucial to achieving a beautiful blurred look. Even small changes will have a big impact upon your shot – so you should use a camera mode that gives you full control over your camera’s shutter.

You have two options. First, you can switch your camera to full Manual mode. It’ll work well, and it’s a good idea for more experienced photographers – but in Manual mode, you’ll also need to select your aperture and ISO (and you’ll need to make sure that the shutter speed, aperture, and ISO interact to create a perfect exposure). So if you don’t yet feel confident working in Manual mode, you have another option:

Shutter Priority mode.

With Shutter Priority, you set the shutter speed (and the ISO, if you so choose), but your camera will set the aperture to ensure the shot is well exposed. It’s a very handy mode for motion blur photography because it ensures you get the movement effect you’re after while also capturing generally well-exposed images.

motorcyclist motion blur photography

How to compensate for long shutter speeds when there is too much light

Remember what I said about a long shutter speed?

The longer the speed, the more light that will get into your camera, and the brighter your photos will be.

So unless you compensate for this, whenever you try to capture motion blur, you’ll end up with overexposed shots.

Below, I’ll suggest three easy methods for preventing this overexposure.

(Note: A fourth method is to simply wait for the light to change – i.e., for it to get darker. Many shots that incorporate blur are taken at night or at dawn/dusk for this reason.)

1. Use a small aperture

Here’s the first, and simplest, method of preventing overexposure:

Narrow the aperture.

Because the narrower the aperture, the less light that will hit the camera sensor.

If you’re shooting in Shutter Priority, your camera will actually narrow the aperture for you. As soon as it detects a slow shutter speed, it’ll close down the aperture and deliver a well-exposed shot.

But if you’re shooting in Manual mode or Aperture Priority, the aperture can generally be changed via a dial on your camera.

One thing to bear in mind:

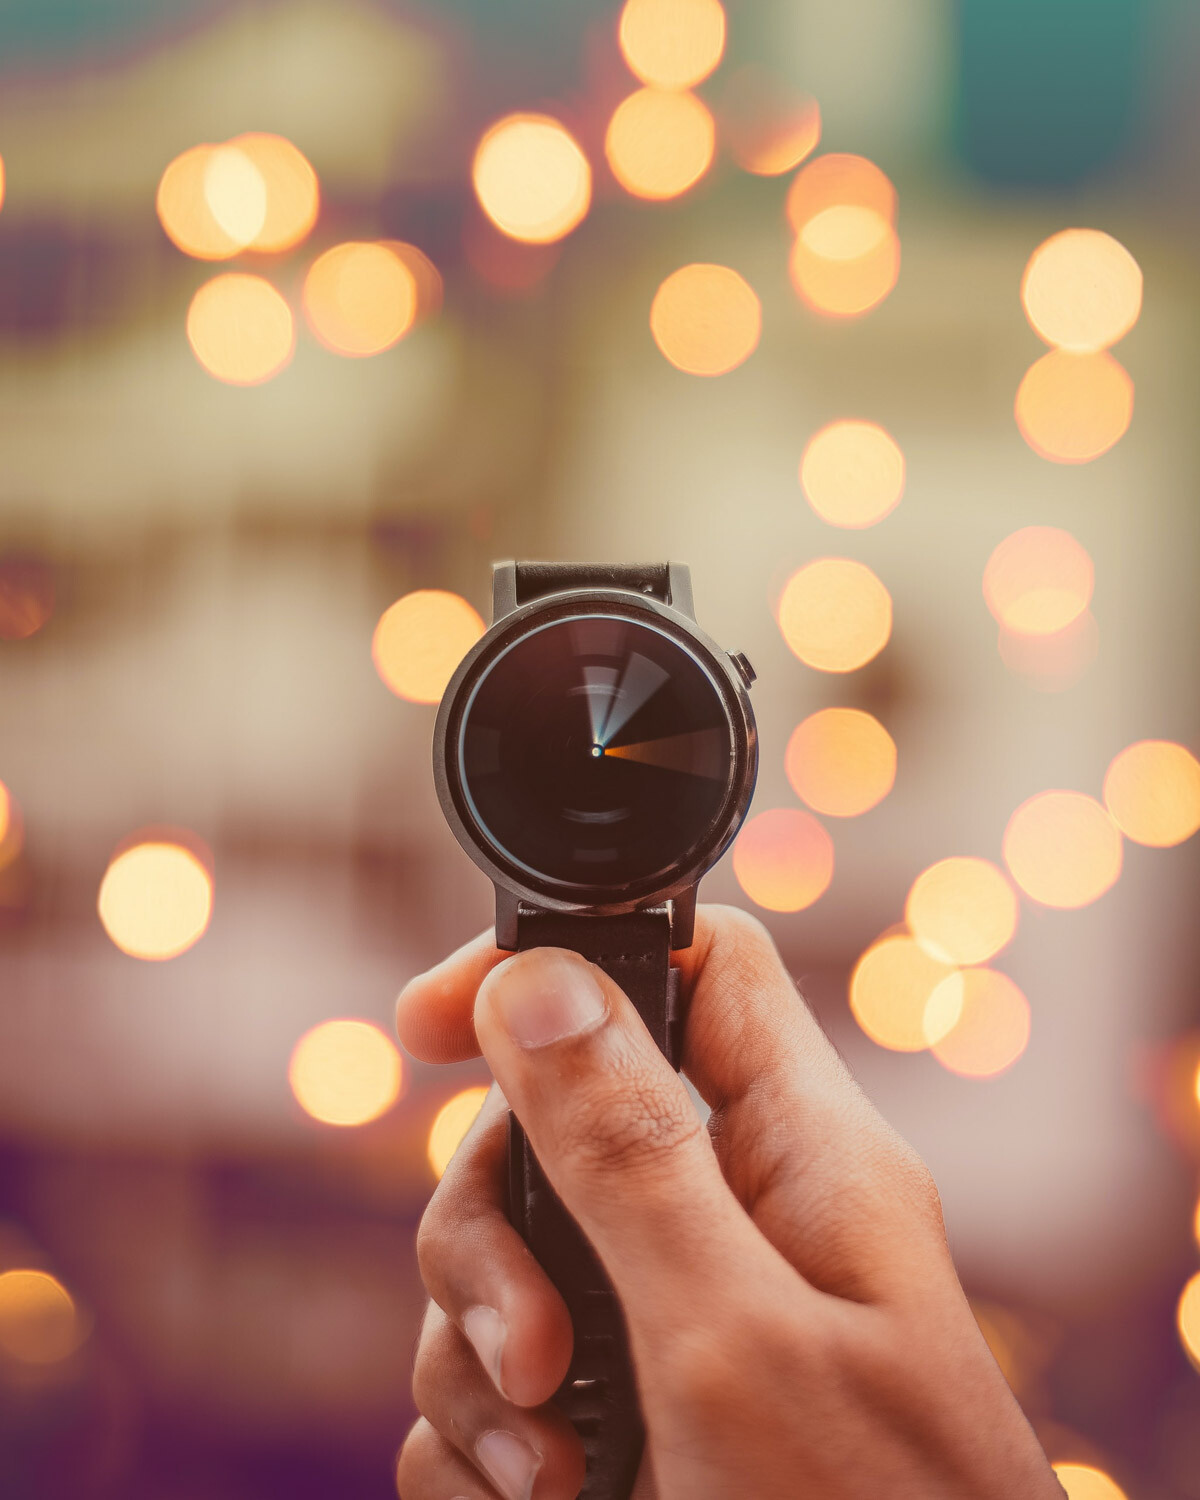
Adjusting the aperture won’t just affect your photo’s exposure. Aperture also affects the depth of field, which refers to the amount of the scene that’s sharp. A wide aperture creates a limited depth of field, like this:

watch with spinning hands capture motion blur photography

Whereas a narrow aperture ensures the entire scene is sharp throughout:

capture motion blur photography car driving

So while it’s easy to combine a deep depth of field with a well-exposed motion blur image, working with a shallow depth of field while also ensuring well-exposed motion blur can be tough. If you’re after a shallow depth of field effect, you’ll need to counteract overexposure another way, as I explain in the next section:

2. Decrease your ISO

If you’ve tried narrowing your aperture and still aren’t getting you the results you need, or if you’re after a shallow depth of field, here’s an alternative method for preventing overexposure:

Drop your ISO.

ISO impacts the sensitivity of your digital camera’s sensor to light, where a higher number will induce greater sensitivity (and therefore a brighter exposure) and a lower number will induce less sensitivity (and therefore a darker exposure).

train moving fast with platform

You can adjust your ISO in Manual mode or Shutter Priority mode, so simply dial in a low ISO (such as 100) and watch as your exposure decreases. Of course, there’s a limit to how low you can drop your ISO; once you get to ISO 100 or ISO 50, your camera won’t allow you to go any further. But it’s always worth checking whether a lower ISO is an option because it’s a simple way to prevent overexposure.

3. Try a neutral density filter

Say you’re after a motion blur photo, but you just can’t get the exposure dark enough. You’ve narrowed the aperture, you’ve dropped the ISO, but your shots keep coming out overexposed.

You still have another, more dedicated option:

A neutral density filter. It’s a piece of glass that blocks light from passing through your lens – sort of like sunglasses – and lets you use a long shutter speed while preventing overexposure.

For example, if you’re shooting a seascape in bright sunlight and you want to blur the water, you’ll end up with a blown-out, overexposed scene – even with a narrow aperture and low ISO. But pop a neutral density filter over your lens, and you can slow the shutter speed right down while keeping a perfect exposure.

long exposure seascape blur

(By the way, a polarizing filter can have a similar effect, though it’ll also impact the look of your images by cutting out reflections.)

Note that neutral density filters come in many strengths. You can get a basic, subtle ND filter, one that’ll slightly darken the scene. Or you can buy an ultra-powerful, 10-stop ND filter, which will allow you to dramatically lengthen your shutter speed in bright sunlight.

A quick note: two more creative techniques to try

If you want to capture images with motion blur but you’re looking to come away with uniquely artistic results, here are two other techniques to consider:

  • Slow sync flash. This lets you capture a relatively sharp subject while creating a moving, blurry background, and it’s a great way to create in-your-face shots.
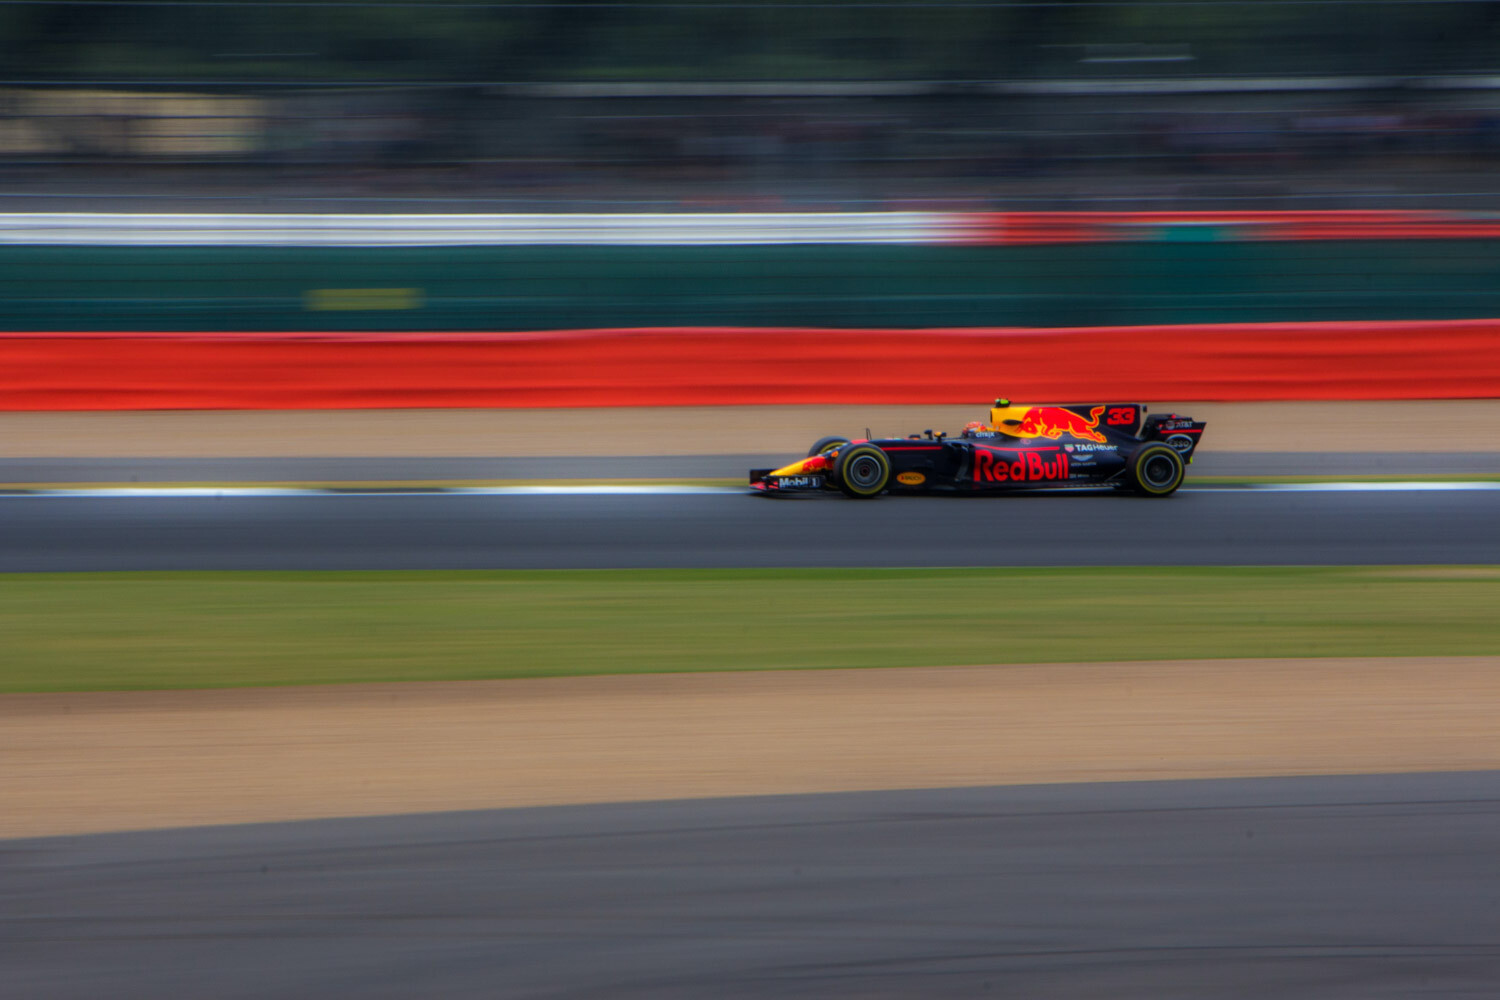
  • Panning. Here, you simply follow a moving subject with your camera; the subject will generally come out nice and sharp, while the background stretches and blurs.
panning with motorcycle

Motion blur in photography: conclusion

Well, there you have it! Six easy tips to capture motion blur in photography.

So remember these tips. And the next time you’re after some creative motion blur photos, you’ll get stunning results!

Now over to you:

Have you tried taking motion blur photos? Did it go well? Do you have any tricks or tips? Share your thoughts (and images!) in the comments below!

capture motion blur photography racecar

The post How to Capture Motion Blur in Photography (6 Tips) appeared first on Digital Photography School. It was authored by Darren Rowse.


Digital Photography School

 
Comments Off on How to Capture Motion Blur in Photography (6 Tips)

Posted in Photography


How to Take Great Group Photos: 12 Easy Tips

15 May

The post How to Take Great Group Photos: 12 Easy Tips appeared first on Digital Photography School. It was authored by Darren Rowse.

how to take group photos

If you’re looking to take beautiful group photos, you’ve come to the right place.

In this article, I’m going to share 12 simple tips for capturing stunning photos of groups. Specifically, I’ll discuss:

  • How to pose a group like a pro
  • A simple trick to capture everyone in the group looking their best
  • How to pick the perfect group photo location
  • Much, much more!

So if you’re ready to become a group photography expert, then let’s get started!

1. Prepare ahead of time

There is nothing that will make group photo subjects turn on you faster than you not being prepared. People don’t like to be kept waiting, so plan ahead.

Here’s what I recommend you do several hours (or days) before the photo:

  • Scope out the location of your shot beforehand
  • Think about how you will pose people and frame your shot

Then, a few minutes before the photo:

  • Make sure everyone you want in the shot knows that you want them in the shot
  • Make sure your camera is on and has charged batteries
how to take group photos three women

2. Carefully choose the location

The group photo location is important for a number of reasons.

First, it can give the photo context. For example, a shot of a sports team on their playing field says more than a shot of the team in front of a brick wall.

Second, the location can help emphasize your group – or it can draw the eye. To make the group stand out, you’ll need a location with no distractions.

So choose a place where your group will fit, where there is enough light for the shot, and where there are no distracting surroundings. Also, avoid setting up a group shot directly in front of a window where the light from your flash might reflect back in an unpleasant way.

group posing on a mountain

3. Take multiple shots

Sometimes, it’s tough to get everyone looking just right at the exact same time.

That’s why I highly recommend you take multiple photos quickly; I often switch my camera to continuous shooting mode and photograph in short bursts. The first shot is often no good – but the shot or two directly after gives a group that looks less posed and more relaxed.

On a related note, shoot some frames before everyone is ready. Sometimes, the organization of a group shot can be quite comical and image-worthy (as people tell each other where to go and jostle for position).

kids in a group waving

Also, mix up the framing of your shots a little. If you have a zoom lens, try capturing some shots at a wide focal length and some shots that are more tightly framed.

4. Get in close

Try to get as close as you can to the group you’re photographing (without cutting out group members, of course!). The closer you can get, the more detail you’ll capture in their faces – something that can really elevate a shot.

If your group is small, step in and take some head and shoulder shots. Another effective technique is to get everyone to lean in; that way, you can move even closer without cutting out subjects. You might also try moving everyone out of a one-line formation and placing some people in front and behind.

5. Pose the group

how to take group photos people in uniforms looking up

In most cases, your group will pose itself pretty naturally (after all, we’ve all been in a group shot at some point). Tall people will go to the back, short people to the front. But there are other things you can do to improve the photo’s composition:

  • If the event is centered around one or two people (like a wedding or a birthday), make the hosts the focal point by putting them right in the middle of the group (you can add variation by taking some shots of everyone looking at the camera and other shots of everyone looking at the person/couple).
  • For formal group photos, put taller members toward the back center of the shot, with shorter people along the edges.
  • Try not to make the group too deep (i.e., keep the distance between the front line of people and the back line of people as small as you can). This will help keep everyone in focus. If the composition does end up being deep, use a narrow aperture.
  • Tell everyone to raise their chins a little; they’ll thank you later when they see the shot without any double chins!

6. Time your group shot well

Carefully pick the moment for your photo. Try to choose a time that works with what is happening at the gathering. I find it best to do a group shot when people are already close together and when there is a lull in the proceedings.

The start of an event can be a good time to shoot; everyone is together, they all look their best, and if there is alcohol involved, it hasn’t significantly affected the group yet.

girls on a hill

7. Think about the light

In order to get enough detail in the final shot, you need to have sufficient light. The way you should do this varies from situation to situation – but consider using a flash if the group is small enough and you are close enough for it to take effect, especially if the main source of light is coming from behind the group.

If it’s a bright, sunny day and the sun is low in the sky, try not to face your subjects toward the light – otherwise, you’ll end up with a collection of squinting faces.

group in the ocean

8. Take control

I’ve been in a number of group photos where the photographer almost lost control of their subjects. It happened for two reasons:

  1. They weren’t quick enough.
  2. They didn’t communicate well with the group.

When shooting a group photo, it’s important to keep talking, let the group know what you want them to do, motivate them to smile, tell them that they look great, and make clear how long you’ll need them for.

It’s also important to give your subjects a reason to pose for the photograph (and to listen to you). At a wedding, you might motivate people by saying “The happy couple has asked me to get some group shots.” At a sporting event, you could say, “Let’s take a group photo to celebrate our win.” When you give people a reason to pose, you’ll find they are much more willing to stand for a few minutes while you snap photos.

Here’s another very useful line to use with a group: “If you can see the camera, then it can see you.” This one is key if you want to be able to see each person’s face in the final image.

If there are other photographers, just wait until they’ve all finished their shots, then get the attention of the full group. Otherwise, you’ll get everyone looking in different directions.

Of course, you don’t want to be a dictator when posing your group – otherwise, your group shots will include some very angry expressions. The best photographers know how to get people’s attention and communicate what they want, while also keeping people relaxed and having fun.

how to take group photos girls in a line

9. Get up high when photographing large groups

Large groups of people can be very difficult to photograph. Even with careful staggering and tiering, you’ll struggle to fit everyone into the shot.

One solution is to elevate yourself. If I’m photographing a wedding and the couple wants one big group shot, I’ll arrange for a ladder to be present, or I’ll find some other way to get up high (I’ve even climbed up onto church roofs!). A high vantage point lets you fit a lot of people into the frame while still remaining quite close to the group. It also gives an interesting perspective, especially if you’re using a nice, wide focal length.

10. Use a tripod

kids posing for a group photo

There are a number of reasons why tripods are great for group photography.

First, a tripod communicates your seriousness and can help get the group’s attention (it’s amazing what a professional-looking setup can do!).

Second, a tripod gives you more freedom to pose your subjects. Simply set your camera on a tripod, set the exposure, and set the focus. Then guide your subjects through different poses – and when everything looks just right, you can quickly press the shutter button!

11. Use an assistant

If you have a very large group, an assistant can be super helpful. For one, they can get the group organized – tell people when to come, where to stand, etc.

An assistant is also incredibly handy if you are taking multiple group shots (like at a wedding when you’re photographing different configurations of a family). In such a case, I often ask the couple to provide me with a family member or a friend who can ensure we have everyone we need in each shot.

Having a family member act as your assistant ensures you don’t miss anyone (assuming they’re related to members of the group). Plus, the group will be familiar with them and will therefore respond well when the “assistant” orders them around.

12. Smile

Yes, you should smile! During a group session, there’s nothing worse than a grumpy, stressed-out photographer. Have fun and enjoy the process of getting your shots, and you’ll find the group will, too.

In fact, after photographing a wedding, I usually come home with an incredibly sore face from all the smiling I’ve done! I find the best way to get the couple and their family to relax and smile is to smile at them. It really does work.

business group photo

Bonus tip: Let your imagination run wild!

One more quick tip. Get a little creative! You don’t always have to use standard compositions; instead, you can capture more imaginative, unusual photos.

women posing in a bathtub

How to take great group photos: conclusion

Group photos might seem difficult, but they’re really not!

Just follow the tips I’ve given you, and your group photos will turn out stunning.

Now over to you:

Have you had success taking group photos? Share your shots in the comments below! Also, if you enjoyed this article, subscribe to the dPS newsletter!

The post How to Take Great Group Photos: 12 Easy Tips appeared first on Digital Photography School. It was authored by Darren Rowse.


Digital Photography School

 
Comments Off on How to Take Great Group Photos: 12 Easy Tips

Posted in Photography


7 Tips for Colorful Landscape Photography

09 May

The post 7 Tips for Colorful Landscape Photography appeared first on Digital Photography School. It was authored by Rick Ohnsman.

7 tips for colorful landscape photography

Color evokes emotion – so if you can become a master of color, then your colorful landscape photography will affect viewers on a deep level.

You may understand exposure, control your camera like a wizard, have the best equipment, get to the most exotic locations, and excel with editing. But if you don’t purposely imbue your images with intentional emotion, they will never “speak” to your viewer (or if your photos do speak, they might say the wrong thing).

That’s where color comes in handy. Let’s learn the language of color and how to use it – through seven colorful landscape photography tips (that’ll take your images to the next level!).

Colorful Landscape Photography - How does it feel?
A big reason we love sunset photos is the colors and the way they make us feel. Understanding the psychology of color is beneficial to color landscape photography; it will help you better communicate with your viewer.

1. Learn the psychology of color

The human brain is hardwired to respond to different colors. Psychologists have studied this, advertisers use it masterfully, and to be a good photographer, you need to understand how different colors will make your viewer feel.

colorful landscape photography examples
Each of these images works with one primary color. Note how the color of each makes you feel. Learn how to communcate with color in your photos.

Here are the feelings that colors produce:

  • Red: Exciting, important, passionate, angry, call to action
  • Purple: Beauty, exotic, royal, luxurious, sensual
  • Blue: Calming, serene, trustworthy, cold
  • Green: Peaceful, tranquil, natural, alive, growth
  • Orange – Fun, warm, energizing
  • Yellow – Happy, sunny, bright
  • Brown – Earthy, grounding, strength, dependability
  • Black – Mysterious, elegant, bold, powerful, edgy
  • White – Clean, healthy, pure, sterile, cold

2. Color relationships and the color wheel

In colorful landscape photography, we usually can’t choose our subject’s color. That said, if we understand the different color relationships, we can produce better photos.

You’re likely familiar with the color wheel (displayed below). Take a look at it as we discuss key color relationships:

the color wheel
  • Complementary colors – These colors sit opposite each other on the color wheel. They can work nicely in a photo; for example, blue (often a sky color) and orange/brown (often an earth color). Thus, a sky/land photo can be pleasing because the colors are complementary. Look at some of the examples below!
colorful landscape photography wheat fields
The blue sky and the golden wheat are complementary colors; they’re opposites on the color wheel.
colorful seascape
Here, you see blue water/sky and the complementary golds in the clouds/reflections.
sunrise reflection
Here, golden hour has just begun. The rising sun catches the peaks of the Idaho Sawtooth Range, giving a nice complementary orange to the blue scene.
compositions with complementary colors
Good compositions are further enhanced by the use of complementary colors.
  • Analogous colors – These are what we might call “color families.” For example, blue, blue-green, green, and yellow-green are adjacent to each other on the color wheel and therefore analogous. We can often make pleasing, colorful landscape photos with scenes comprised of analogous colors.
river with green and blue
The lush greens and blues in the Columbia Gorge in Oregon are analogous colors, adjacent on the color wheel. Note how the colors create a calming effect.
  • Color triads – These are three colors equally spaced out on the color wheel. For example, green, violet, and orange. If you look carefully, you will find color triads in nature, and they can help create impactful photos.
colorful landscape photography sunrise
The rolling hills of eastern Washington’s Palouse Country are magical enough on their own. Add a spectacular sunrise with the triad colors of orange, green, and purple, and how can you go wrong?
sunrise hills
Another shot from the same morning as the one above.

3. Pay careful attention to the time of day

You won’t be involved in landscape photography for long before you’ll hear the terms “golden hour” and “blue hour.” Golden hour is the time of the day when the sun is rising or setting. The color of the light is very warm and golden.

Arches National Park colorful landscape photography
The color of the rocks in Arches National Park is further enhanced by golden hour light.
colorful landscape photography trees in a field
These shots were taken about 10 minutes apart. The first shows the warm morning colors of golden hour. As the sun got higher, the light cooled and became bluer. Of course, I also used different white balance settings later in editing. That’s a big reason to shoot in RAW – you can adjust the white balance later without problems.
Yellowstone geyser
These shots of Great Fountain Geyser in Yellowstone National Park were taken the same evening. The first was earlier when the daylight was still bluish. Later into the golden hour, the sky color warmed up. Again, adjusting the white balance enhanced the look I was going for.

Well before sunrise or later in the evening after sunset we have the blue hour. The sky is not dark and black. Instead, it’s very cool and blue in tone. Blue hour can produce interesting light and color with a whole different mood.

blue hour scenes
Leave right after the sun goes down and you’ll miss the blue hour, the time just before dark when the light gets very blue in color. The shot at the bottom right shows two different light sources, the blue hour sky and the warm incandescent lights of Swan Falls Dam. The complementary colors play nicely together.

I’ve seen new and inexperienced landscape photographers come to shoot a sunset and make shots right up until the sun dipped below the horizon. Then they’d pack up and leave. That’s a mistake! The best sky color often comes well after the sun is already down. And if you wait even longer, the blue hour comes and continues until it gets truly dark.

Do enough colorful landscape photography during the sunrise/sunset/blue hour times and you run the risk of becoming a “light snob,” only wanting to make photos when the light and colors are “pretty.” (Shooting during midday? You must be joking!)

However, you won’t always have the luxury of getting to places during great light. Plus, even if you do, conditions won’t always cooperate. Many photographers can make nice photos of a spectacular sunset, but it’s the great photographers who can create impactful images at any time of day in any kind of light (and in any kind of weather).

4. Think about the season

Colorful landscape photography knows no season. There are great images to be made year round. But when planning a photo outing, you may want to consider how to take advantage of the colors of the season.

In the spring, colorful flowers and fresh green fields make for great subjects. Summer brings bright golden days, the sun and sand colors of the beach, bright colors and sunny scenes. Autumn is often a photographer’s dream with fall colors that delight the eye. Winter might be the least colorful season, but brilliant whites and deep cold blues are still impactful.

Colorful landscape photography in the summer
Colorful landscape photography knows no season. These are summer shots, such as “Sailing the Sea and Sky” (left), a midday shot playing to the cool blue colors. The sunset reflection (right) was taken during the golden hours; the warm colors are more pronounced thanks to a smoky sky (the result of nearby forest fires).

In any season, you can use color to communicate with your viewer. How do you want the photo to make them feel? Use color to carry that message: the cool blue tones of a winter’s day, the bright and happy yellow color of a field of flowers, the peaceful greens of a forest, or the fiery reds and oranges of a summer sunset.

When composing, shooting, and editing, give conscious thought to the colors you’re trying to bring out and what they say to your viewer.

cold, snowy barn
Does this shot make you feel cold? That was the idea! I edited to emphasize the blue tones.
Yellowstone trees
This was a bitter-cold, sub-zero day in Yellowstone National Park. The blue sky and stream contrast nicely with the brilliant white snow. The word I want this photo to communicate is “crisp.”

For the best colorful landscape photography, make sure to consider what’s in season. When do the camas flowers bloom? When are the aspens at peak yellow color? When are the fields in the Palouse Country deep green or golden? What is the best time to get a moonless dark night and have the Milky Way high in the sky?

camas fields in Idaho
Late May is when the camas fields usually bloom in Centennial Marsh near Fairfield, Idaho. They only peak for a week or so – and many years the display is not nearly as nice as this.

Knowing when to be at a location for the best colorful landscape photography takes good research and a large measure of luck. It all came together this evening several years ago. It’s never been quite as good since, but each year I still go back.

fall in New England
For great colorful landscape photography, it’s tough to go wrong with autumn in New England. Even then, finding the best locations and hitting them during peak color takes some research.

If you hope to get the very best colorful landscape photos, you need to do your homework, develop good information sources, and be ready to go when things are just right.

The old saying holds true: “Luck happens when preparation meets opportunity.”

5. Shoot when the weather is bad

If you’re a “fair-weather photographer,” someone who only gets out when the skies are clear and the weather is comfortable, then you’re missing some of the best colorful landscape photography.

Here’s another saying for you: “When the weather gets bad, the photos get good.” It may not be pleasant, but I’ll take a cold, stormy day with dramatic clouds, interesting light, and striking color over a clear, cloudless, warm bluebird day (if my goal is impactful landscape photography).

snowy bridge
When the weather gets bad, the photos get good. It was cold and snowing hard when I made this shot of the Rainbow Bridge over the North Fork of the Payette River in central Idaho.

The same goes for rainy, foggy, or snowy days. Don’t think that good color always means contrasty, heavily saturated scenes. Watch for the more muted color and low contrast provided by inclement weather conditions.

Bright, saturated colors might be more impactful, but soft pastels and muted colors create mood and carry a completely different feel and message.

stormy Columbia River Gorge
Stormy, cloudy, and rainy; that’s how I’d describe this day at Vista House overlooking the Columbia River Gorge in Oregon. Fair-weather photographers won’t get the same moody shot on a beautiful sunny day. The blue and purple colors enhance the mood.

Once again, ask yourself, “How do I want to make the viewer feel?” Capture photos that speak your message and use color as your “words.”

6. Carefully edit colors for the best results

There are many good articles about how to edit color. That is not my intent here. Instead, I’ll offer some general things to keep in mind when editing colors in your photos.

selectively edited images
Learn to selectively edit color. The blue areas in the shade and the warmer colors in the sunny clearing (left) were purposely enhanced here. And I gave the red flowers in the foreground some extra pop (right). Use color to draw attention to objects and communicate with your viewer.
  • Shoot in RAW. You greatly limit your options if you only shoot and save JPEG images. The most obvious reason to shoot RAW is the flexibility to adjust the white balance later in editing rather than trying to get it right when shooting. Warming or cooling an image by adjusting the color temperature slider becomes much more difficult if you’re trying to overcome the wrong white balance baked into a JPEG.
colorful landscape photography lake
There was more editing and working with color here than meets the eye, but that’s the idea. Your colors in landscape photography can be vibrant, but they should not look unnatural or scream for attention. If they do, you went too far.
  • Understand the difference between global and local adjustment tools. Sometimes, you might want to adjust the color of the entire image – so global adjustment sliders and controls work fine. Other times, you might want to make the sky bluer without affecting the land below or bring up the saturation of just the red flowers in a landscape; such edits will require the use of local adjustment tools. If your objective is to communicate with color, knowing how to carefully and precisely control specific colors in your image is an important skill to master.
  • Don’t overprocess. How much is too much? That’s a judgment call, but let me express a personal bias. Just as you can over-salt a meal, you can also oversaturate a color photo. Glowing “postcard color” is not a good look if you want to be taken seriously as a landscape photographer. Neither is a grungy HDR. I believe in using color to creatively speak a message, but I don’t want it to shout.
red barn in the snow
Where does your eye go in this shot? Red is a powerful color, and in an almost monochrome scene, the red barn immediately draws attention. (It also complements the cold blue.)

7. Make it monochrome

Sometimes, color is not the best way to give your image the most impact or communicate your message. Here are some reasons you might want to go monochrome instead:

  • The image is more about the “bones” of a good image: shape, form, tone, and texture. The color is an unnecessary distraction.
  • The image is almost monochrome anyway and the color isn’t adding anything.
  • Black and white might better capture the old, nostalgic, or period feel of the image.
  • In some genres of photography such as photojournalism or street photography, black and white offers a gritty reality.
bristlecone pines
These gnarly bristlecone pines in eastern California’s Sierra Nevada mountains are thousands of years old. I knew before I even clicked the shutter that this would be a black and white image. Color would be a distraction, hindering rather than helping the story.
  • You want to create a lot of drama. You can often push a monochrome edit far, whereas the same amount of processing on a color image might look garish or just plain bad.
  • You are unable to get good colors, so you save your image with a black and white conversion. It’s the last reason to favor monochrome, but it happens. That said, the choice to go color or black and white should be intentional rather than a rescue mission. Good photographers know their intent for a shot before they make it. But realistically, the fix for a bad color image might be a conversion to monochrome. While editing, you might think, “I wonder how this will look in black and white?” Also, this circles back to something I said earlier: Always shoot in RAW. Your images will be in color – but should you later decide black and white is preferable, it’s an easy conversion.
black and white versus color comparison
Color or black and white? It often depends on what you want to communicate.

Help your images speak: conclusion

Imagine your photograph is printed and hanging on the wall of a gallery. You are not there, only the image and the viewer.

Now, what do you want the viewer to see, think, feel, hear, smell, and experience when looking at your photo? You are not there to interpret, explain, justify, or defend. Your photo must speak for itself.

Once you determine what you want the image to say, apply all the “visual words” at your disposal, many of which use the language of color. Do it well, and you’ll be a master of colorful landscape photography.

colorful landscape photography silhouetted trees
How does this image feel? What does it say? What’s one word that describes it? Use the power of color to speak to your viewer, and you’ll be on your way to mastering colorful landscape photography.
How can I use color theory in photography?

Understand the relationships between colors, such as complementary colors, analogous colors, and color triads. That way, you can create pleasing color photos.

How can I create better color landscape photos?

When you make a color landscape photo, consider what you want it to communicate to your viewer. Then work with the colors in that image when composing, capturing, and editing – so that the colors of the image “speak” to your viewer. Understand how different colors carry different feelings. Use the feelings to create more impactful images.

Should my landscape photos be color or black and white?

The answer is that it depends. If the idea is to concentrate on the basics, such as the shapes, forms, tones, and textures of an image, sometimes color becomes a distraction. Other times, a color photograph can communicate things a black and white image cannot. Photographers and artists have long debated the merits of each approach. Here is a quote worth considering: “To see in color is a delight for the eye but to see in black and white is a delight for the soul.” – Andri Cauldwell

The post 7 Tips for Colorful Landscape Photography appeared first on Digital Photography School. It was authored by Rick Ohnsman.


Digital Photography School

 
Comments Off on 7 Tips for Colorful Landscape Photography

Posted in Photography


When to Use a High ISO (+ Tips for High-ISO Photography)

04 May

The post When to Use a High ISO (+ Tips for High-ISO Photography) appeared first on Digital Photography School. It was authored by James Maher.

when to use a high ISO in photography

Are there times when a high ISO makes sense? When should you consider using a high ISO? And what ISO can modern cameras handle?

In this article, I’ll explain everything you need to know about high ISOs, including:

  • Whether high ISOs are ever a good thing (spoiler alert: they are!)
  • Tips and tricks for working with high ISOs for great results
  • How to determine the maximum acceptable ISO for your camera
  • Much, much more!

Let’s get started.

When (if ever) should you use a high ISO?

Raising the ISO is one of the most common photographic fears. Photographers – especially beginners – are afraid to boost the ISO past 400 or so, lest they ruin images with ugly, unwanted noise.

Ten years ago, these fears were justified. Raising your ISO to 1600 or 3200 was a no-go for the majority of cameras.

But no longer. Things are changing. These days, it often makes sense to boost your ISO to get better images. In fact, the improvements in camera technology have been such that you can now comfortably photograph at ISO 1600, 3200, and even 6400 with most DSLRs, Micro Four Thirds cameras, and mirrorless cameras.

Here are three simple situations when shooting with a high ISO makes sense:

1. When you’re photographing indoors or at night

If you take your camera indoors, or you shoot at night, you’ll quickly run into a problem:

Your images will be dark and lacking detail.

In such situations, you have three solutions:

First, you can widen your aperture. Often, this can help (and it’s the reason why many night photographers and event photographers work with an ultra-low f-stop). But it’s rarely enough.

Second, you can drop your shutter speed. But unless your subject is completely still and you’re shooting with a tripod, you’ll end up with lots of blur. Not ideal, right?

Which brings me to the third solution:

You can raise your ISO.

when to use a high ISO in photography concert

Will it introduce some noise? Yes. But the noise produced by modern cameras at high ISOs just isn’t that bad; as I mentioned above, you can comfortably boost your ISO to ISO 3200 and ISO 6400 without much loss of quality.

And by raising the ISO, you’ll end up with much brighter images, even indoors and even at night.

2. When you’re photographing fast-moving subjects

The faster your subject, the faster the shutter speed required to render it with zero blur.

For instance, if you’re photographing a runner, you might need a shutter speed of 1/500s. If you’re photographing a moving car, 1/1000s might be more appropriate. And if you’re photographing a diving falcon, 1/3200s is a safe bet.

Unfortunately, even in relatively good light, boosting your shutter speed to 1/3200s will result in a too-dark exposure – unless you raise the ISO, that is.

After all, better to end up with a slightly noisy image than a completely blurry one, right?

So don’t be afraid to increase your ISO when faced with a fast-moving subject.

when to use a high ISO in photography people walking at night

3. When you’re using a long lens

The longer your lens, the easier it is to end up with blur – because subject movement and camera movement are magnified. So with a long lens, you need a fast shutter speed, just the same as if you were shooting a moving subject.

That’s why boosting your ISO is so essential when working with telephoto lenses; it allows you to boost the shutter speed, too, and capture a sharp image.

Sure, when the light is bright, you can keep the ISO at 100 or 200 and end up with sharp, well-exposed images.

But as the light begins to drop, you’ll need to raise your ISO with confidence. That way, you can capture bright and clear photos at 300mm, 400mm, and beyond.

when to use a high ISO shadowy man with briefcase
Canon 5D Mark II | 135mm | f/6.3 | ISO 1600

The high ISO allowed for a 1/320s shutter speed; this accounted for both the motion in the scene and for the longer focal length used.

But doesn’t a lower ISO give better image quality?

Well, yes – and no.

Yes, if you are setting up a studio shot and controlling the lighting. Yes, if you are using a tripod, if you are a landscape photographer, or if there is very strong natural light. Yes, if you don’t have to compromise your shutter speed or aperture settings to expose the shot correctly. A photo taken at ISO 100 will always be significantly sharper and cleaner than a photo taken at ISO 1600, assuming the aperture and shutter speed are the same, and you have complete control over the subject and the lighting.

In every other case, however, the answer is no; a lower ISO will not give better image quality.

Raising your ISO will help you capture a higher quality photograph in many situations. Why? Because it lets you use a faster shutter speed and a smaller aperture to get a sharper result. When creating a technically great photograph – one with minimal blur and proper exposure – getting the aperture and shutter speed settings correct is much more important than using a low ISO.

If you want to know how great event photographers consistently create such bright and beautiful images, it’s not only because they use fast lenses and flashes. It’s because they are not afraid to raise the ISO.

Plus, the look of grain at high ISOs in digital cameras has become more pleasing. The newer camera models have not only reduced the strength of grain (noise) at high ISOs, but they have also created noise that looks more artistic.

ISO has now become a luxury instead of an obstacle. We can photograph in dark areas while handholding the camera when we need to.

crop of the man with a briefcase
Cropped version of the above (ISO 1600) shot. Note the minimal, pleasing grain.

Tips for working with high ISOs

Now that you know when and why high ISOs are important, let’s take a look at some easy tips for improving your high-ISO images:

1. When shooting at a high ISO, get the exposure right

car at night

Here’s the major problem with photographing at a high ISO:

Raising the exposure in post-production will ruin the look of the grain.

Raising the exposure a small amount is usually okay, but if you are photographing with a high ISO, you need to be even more diligent than usual about exposing your images correctly in-camera.

2. Pay attention to color noise versus black and white noise

when to use a high ISO woman smoking at night
Fujifilm X100S | f/2 | 1/125s | ISO 6400

You should carefully evaluate how your camera handles the look of noise in your color images. My Fujifilm X100S, for instance, handles color noise exceptionally well. But other cameras don’t do so well with color noise at high ISOs. 

In many cases, however, the problem can be solved by converting the photo to black and white.

Take a look at the image above. This was taken a while back with a compact mirrorless camera at the very extreme end of its ISO range, 6400. Yes, there is a lot of grain, but it still looks good. I prefer not to go over 3200 with my Fujifilm X100S whenever possible, but without using ISO 6400, I probably wouldn’t have been able to capture this image.

crop of the woman with a cigarette
Cropped version of the woman with a cigarette (above). Very significant grain, but excellent color noise.

3. Test your camera’s ISO to determine acceptable noise levels

While I’ve talked in generalizations up to this point, I do think it’s important to evaluate the ISO capabilities of cameras you own (or cameras you’re thinking of purchasing). You should determine their ISO range, as well as the quantity and quality of noise at different ISOs.

If you’re considering particular cameras but can’t get your hands on a copy to test, there are plenty of in-depth reviews, both on this site and elsewhere. Nearly all of these reviews will discuss high-ISO capabilities, and they’ll often provide sample images.

Of course, if you own the camera already, test it out yourself. Make sure you are using a fast shutter speed and an aperture of somewhere between f/8 and f/16; that way, each image you take is guaranteed to be sharp.

Focus your lens on a nearby object, then take a series of shots, going from ISO 100 all the way to your camera’s maximum ISO. 

Then pull up the images on your computer and zoom into 100% (both in black and white and in color). And decide which ISOs you’re pleased with, and which ISOs you just can’t handle.

If you have a photo printer, I highly suggest printing out your test images to see how the grain looks in real life and to see the differences between images.

It is also important to remember:

If you are regularly printing at smaller sizes, such as 5×7 or 8×10, then you will likely not notice a significant difference between ISO 200 and ISO 1600. But if you prefer to print at larger sizes, such as 20×30, then there will be a noticeable difference. So test it out.

Here are a few examples of noise levels at different ISOs on my old Canon 5D Mark II and Fujifilm X100S:

birds flying around a building when to use a high ISO
Canon 5D Mark II | 28mm | f/9 | 1/500s | ISO 800
crop of birds flying around a building
Cropped version of the above shot. Insignificant grain at ISO 800.
people sitting in the park
Fujifilm X100S | f/9 | 1/250s | ISO 1600
crop of people sitting in the park
Cropped version of the above photo. Note the insignificant and pleasing noise.

Noise can be beautiful!

Now that you’ve finished this article, you know why high ISOs can be useful. And you know when you should consider working at a high ISO.

So don’t be scared. Embrace the noise/grain and create some stunning photos!

Now over to you:

What ISO do you generally shoot at? And how high do you go? Share your thoughts in the comments below!

when to use a high ISO in photography street at night

The post When to Use a High ISO (+ Tips for High-ISO Photography) appeared first on Digital Photography School. It was authored by James Maher.


Digital Photography School

 
Comments Off on When to Use a High ISO (+ Tips for High-ISO Photography)

Posted in Photography


35mm Street Photography Pros and Cons (+ Tips)

03 May

The post 35mm Street Photography Pros and Cons (+ Tips) appeared first on Digital Photography School. It was authored by Kevin Landwer-Johan.

35mm street photography pros and cons

With a 35mm prime lens on a full-frame camera, you’ll capture a field of view a little broader than what you see. This is what makes 35mm street photography so attractive.

Street photography is most impactful when it is realistic – but with a twist. That twist is the photographer’s creative influence. Rather than relying on tricky post-processing, extra long or wide lenses, or any other gear to make an image stand out, a good street photographer will aim to capture life on the highways and byways as they experience it.

In this article, I’ll take a look at some of the pros and cons of 35mm street photography and offer some easy-to-follow tips!

Performers in a street parade 35mm street photography
Nikon D800 | 35mm | f/5.6 | 1/400s | ISO 200
© Kevin Landwer-Johan

5 reasons to use a 35mm lens for street photography

Wondering whether a 35mm lens will work for your street shooting? In this section, I share five reasons to love the 35mm focal length, starting with:

1. It’s how we naturally see (almost)

A 35mm lens on a full-frame camera provides a field of view a little wider than the field of view offered by our eyes. So it takes photos with a natural look.

With wider lenses or longer lenses, distortion can creep into your compositions. Wider lenses tend to distance elements in a composition. Longer lenses have the effect of compressing whatever appears in the frame.

2. A 35mm lens is wide, but not too wide

For street photography, a 35mm lens is wide, but not too wide. It allows you to back away and capture a broader perspective. Generally, it does not introduce distortion.

The very popular 50mm prime can be too tight for a lot of street photography. It narrows your field of view, which can make it harder to capture the full scene.

My first camera, a Nikkormat FTN, came with a 50mm f/1.4 lens. It was a great lens, and I continued using it for 27 years until it would not focus anymore. Then I replaced it with a 35mm f/1.4. I loved the f/1.4 feature on my 50mm, but it never gave me a wide-enough perspective.

Chinese new year parade
Nikon D800 | 35mm | f/5.6 | 1/640s | ISO 200
© Kevin Landwer-Johan

3. 35mm lenses are often physically compact

A 35mm prime can be a relatively small, compact lens. My 35mm f/1.4 is not so small, but it’s also not too big compared to many popular zoom lenses.

And using a less obvious camera and lens for street photography can often help. You and the people you’re photographing can feel more confident because bigger gear can be intimidating. For instance, you may not feel so comfortable with a full-frame body and a 24-70mm f/2.8 zoom lens.

With mirrorless cameras and pancake lenses, you have an even greater advantage. The gear is so much smaller and less conspicuous!

4. You have to “zoom with your feet”

Photographers who love their zoom lenses can scoff at the notion of having to zoom with your feet. But being forced to move often helps me see my subject in more creative ways than if my feet were to remain in one place. This is another positive aspect of using a 35mm prime lens for street photography.

When you have to move, you’ll see the world from different points of view. This will show you more angles, and you’ll see how the light plays differently off your subject depending on your position.

Man with a mask at a Chinese new year parade 35mm street photography
Nikon D800 | 35mm | f/4 | 1/1600s | ISO 200
© Kevin Landwer-Johan

5. You can get gorgeous results at f/1.4

Did I already mention that I love my 35mm f/1.4? Using the widest aperture setting for street photography is not always practical. Focusing is more challenging. But when you want the loveliness of a very shallow depth of field, an f/1.4 lens is perfect.

Many street photographers prefer to work with a narrower aperture setting. I often do. But when I want that background blur, I open up my aperture and maybe get in a little closer.

35mm street photography at night with a tuk tuk
Nikon D800 | 35mm | f/1.4 | 1/60s | ISO 1000
© Kevin Landwer-Johan

5 reasons to avoid a 35mm lens for street photography

While 35mm lenses are great, there are some important drawbacks worth considering. For instance:

1. They’re too standard

As I pointed out earlier, a 35mm lens on a full-frame camera produces a very natural field of view.

But this may not be to your liking.

A wider lens will capture more of a scene. When you can’t back up any farther, it becomes necessary to attach a wider lens to your camera. And a longer lens will get you closer to the action (it may keep you safer, too).

2. You can’t zoom with a prime

Zooming in or out is often the quickest and easiest way to recompose a photo. With a prime 35mm lens, recomposing takes longer because you have to physically move.

A zoom lens is sometimes much more convenient because it lets you stay where you are and keep taking photos.

Tricycle taxi rider and a passing monk for 35mm street photography
Nikon D800 | 35mm | f/1.4 | 1/400s | ISO 100
© Kevin Landwer-Johan

3. You can’t always get what you want

With a 35mm prime lens, you can’t always capture those perfect street photography moments. You may find yourself needing a longer lens to get you closer to the action or to remain inconspicuous.

4. The focal length is long on an APS-C camera

A 35mm lens on a crop-sensor camera is about 50mm. This is restrictive and not so flexible to work with – it’s often just too tight for street scenes.

5. f/1.4 is expensive

A 35mm f/1.4 lens is a serious commitment; it is not cheap.

When I needed to upgrade from my 50mm lens, the price difference between replacing it with another 50mm or buying the 35mm was significant. In the end, though, the 35mm f/1.4 was well worth the investment.

Chiang Mai street scene in the evening with a 35mm lens
Nikon D800 | 35mm | f/2.5 | 1/20s | ISO 200
© Kevin Landwer-Johan

Tips for using a 35mm lens for street photography

Now that you’re familiar with the pros and cons of 35mm street photography, it’s time for some quick-and-easy street photography tips!

1. Know your lens characteristics well

If you work with a lens long enough, you’ll get used to its characteristics. You’ll become intimately familiar with its capabilities.

You’ll get to know intuitively how much depth of field you’ll have in a scene, given your f-stop and distance from the subject. This is a great advantage when capturing images that require a deep depth of field and you need to work quickly.

Bike at a wet market in Korea
Nikon D800 | 35mm | f/2 | 1/320s | ISO 400
© Kevin Landwer-Johan

2. Get in close

Don’t be shy about getting close to your subject when using a 35mm lens for street photography. With a 35mm lens, street photography can be more personal. Getting in close allows you to produce photos with a greater sense of intimacy.

Here’s a fun little exercise to try:

Photograph the same scene with a 35mm lens and a 200mm lens. The photos taken with the 35mm lens will have a different, more intimate feel – simply because you’re closer to your subject when you hit the shutter button.

Portrait of a woman with a 35mm lens
Nikon D800 | 35mm | f/1.4 | 1/100s | ISO 100
© Kevin Landwer-Johan

3. Make street portraits that connect

A 35mm lens helps you truly connect with your subjects. You can be close enough to have a natural conversation. If you are farther back with a long lens on your camera, you will not be conversing from a position that you’d naturally have a conversation in.

Also, a 35mm lens is lovely for street portraits and is not so wide that it produces distortion on your subject’s face.

Street portrait with a 35mm lens
Nikon D800 | 35mm | f/5.6 | 1/160s | ISO 400
© Kevin Landwer-Johan

35mm street photography: conclusion

Whatever style of street photography you love, if you haven’t yet tried a 35mm lens, I highly recommend it.

Even if you often work with a standard zoom, I suggest you go out a few times, set your zoom to 35mm, and don’t change it. You may even learn to appreciate this restriction.

35mm street photography may not suit everyone’s style, but I certainly love it.

Now over to you:

What’s your favorite street photography focal length? Do you use a 35mm lens for street shooting? Share your thoughts in the comments below!

The post 35mm Street Photography Pros and Cons (+ Tips) appeared first on Digital Photography School. It was authored by Kevin Landwer-Johan.


Digital Photography School

 
Comments Off on 35mm Street Photography Pros and Cons (+ Tips)

Posted in Photography


11 Tips for Photographing High School Senior Portraits

01 May

The post 11 Tips for Photographing High School Senior Portraits appeared first on Digital Photography School. It was authored by Guest Contributor.

11 tips for photographing high school senior portraits

Looking for some senior portrait tips to take your photos to the next level?

In this article, I’m going to give you plenty of helpful tricks, techniques, and advice – so you can capture stunning portraits, consistently. Specifically, I’ll share:

  • A handy trick that guarantees you never run out of poses
  • A few easy ways to get seniors feeling comfortable in front of the camera
  • A step-by-step process for generating plenty of satisfaction and free advertising after your session
  • Much, much more!

Sound good? Let’s get started.

What to do before the senior portrait session

When it comes to planning for sessions, seniors are some of my favorite people to work with. Don’t get me wrong, I love families, children, engaged couples, and wedding ceremonies, but seniors are close to the top of my list.

senior portrait tips

Why, you may ask? It’s simple: seniors are excited to model, seniors are some of my best marketing tools, and seniors know what they want. They also have a great sense of style, which translates well in their photographs.

When a high school senior books a session with me, I get started immediately. I don’t wait for the actual photoshoot; instead, I take several steps right away to let my client know I am excited about working with them. I have found that if you do these things, your session will not only run smoothly, but you will have a client who loves to refer you to their friends.

So here are the key items to do prior to the photoshoot:

1. Communicate your excitement

First things first, before doing anything else:

Let the senior know how excited you are about working with them. Since seniors are all about social media, I send out a tweet explaining how excited I am to work with them and to plan their session – and I make sure to do this within a few days of the booking.

senior with guitar in woods

2. Really get to know your client

After sending out the tweet (above), I give the senior a tailored questionnaire so I can get to know them better.

Some of the questions found in the questionnaire include:

  • What are some of your favorite features about yourself?
  • What do you want to remember most about this time in your life?
  • Are there any specific locations you have in mind for your shoot?
  • How would you spend your ideal Saturday?
  • How would you describe your personal style?

This helps me tailor the photoshoot to their personality, interests, and needs.

3. Give clothing suggestions on a Pinterest board

Even though seniors are on top of the latest styles, they often need help deciding what to wear to their session.

So a week before the session, I send them a link to a Pinterest board – one that’s full of clothing and prop examples. This gives the senior specific ideas of what to bring. It helps your client, and it also helps you achieve the look you want in your own portfolio.

senior portrait tips black and white

What to do during the senior portrait session

In this section, I explain my session workflow – what I do to make the hours I have with my senior memorable and stress-free (and fun!).

You can have a great experience by following these tips:

1. Have a real conversation

Many seniors don’t feel totally comfortable in front of the camera. So to break the ice, talk to them, ask them questions, and find out what their plans for the future are.

Seniors are at an awesome stage in their lives; they have their whole future ahead of them. So encourage them and invest in them when you have the chance.

They will feel appreciated, valued, and confident after hearing reassuring words from an adult who isn’t their parent.

senior portrait girl laughing

2. Praise your client (and show them photos)

Most seniors have never been in front of a professional photographer other than for the cheesy pictures their parents had them take when they were younger. So make them feel comfortable.

Praise them when they look good in front of the camera. I love to turn my camera around and show them some little peeks of how well they are doing. They love this! It will encourage them to keep up the good work, and it will give them confidence in their appearance.

3. Keep plenty of posing examples on hand

You may have some go-to poses you use for your seniors. But since each person is different, you need to have several tricks up your sleeve.

Enter the smartphone.

Before your session, simply browse the web and take screenshots of poses you like.

Then, when you hit a rut during your senior portrait shoot, just whip out your phone and look at your saved poses.

It might feel like cheating at first, but seniors love this approach. They think it’s so cool that you’re invested enough that you planned for their poses. It makes them feel valued.

senior portrait tips

4. Make sure to bring props

I love to bring small props for my seniors to hold or sit on during the photoshoot. This could be an old folding chair, a cute beach hat, an old quilt, or even some books.

Props are a great way to spice up your senior portraits. Plus, some people feel really awkward in front of the camera at first, so little props will give them something to do with their hands while they adjust to your presence.

What to do after the senior portrait session

After a session, you can keep your clients excited, satisfied, and ready to recommend your services with these senior portrait tips:

1. Post a teaser

The day after a senior portrait session, I post a “teaser” or “sneak peek” photo from their session on Facebook.

Your senior will share that teaser with all of their friends through social media, which means more publicity for you and your business. (That’s another reason why I love seniors!)

2. Send out a handful of photos in advance

The following week, after I have edited all of the images, I will send ten files to them through PASS.

The senior will also share these images through Facebook, and it will help them understand why they should purchase a disc with all of their high-resolution images.

3. Give the senior a great gift bag

As soon as I have all of the images edited, I will order a custom book and send it to the senior – along with a really appealing package.

The package includes a handwritten note, business cards, and other little goodies. My seniors always love how personal I make the gift bag for each of them (another great reason to send them a questionnaire and to get to know them well during the session).

4. Post on your blog

After you’ve delivered all the final images, blog about the session, including images you didn’t include in the original ten.

This blog post will also be shared on social media with their friends and family (more free advertising!).

senior by the ocean

Bonus tip: Edit for longevity

When post-processing senior photos, always remember that you are photographing for the parents as much as you are photographing for the senior client. I keep “fad” type editing out of the equation because I know ten years from now the parents will want a solid (i.e., not overly processed) image on the wall.

Instead of using “fad” editing techniques, I always let style come from the locations I choose. You can do this by choosing old brick buildings, abandoned farmhouses, fields of cotton, etc. The seniors love this, and their parents will appreciate the timelessness of the photographs they receive.

senior portrait tips girl in forest

Senior portrait tips: final words

It is not hard to rock a session with your seniors. It just takes some extra things to go above and beyond – so the seniors know you appreciate them.

All of these extra things will make your client feel special and will translate into those coveted word-of-mouth referrals for you!

Now over to you:

Which of these senior portrait tips do you like most? Which will you try the next time you’re doing senior portraits? Share your thoughts (and photos) in the comments below!

This post was written by guest contributor Meghan Newsom. Meghan is a lifestyle and wedding photographer located in northern Alabama. When she’s not writing for her lifestyle blog, cooking up gluten-free recipes, or taking pictures, you can find her exploring outside with her husband and pup.

The post 11 Tips for Photographing High School Senior Portraits appeared first on Digital Photography School. It was authored by Guest Contributor.


Digital Photography School

 
Comments Off on 11 Tips for Photographing High School Senior Portraits

Posted in Photography


8 Tips for Perfect Moon Photography Settings

29 Apr

The post 8 Tips for Perfect Moon Photography Settings appeared first on Digital Photography School. It was authored by Simon Ringsmuth.

8 tips for perfect moon photography settings

Many people have attempted to capture a picture of the bright ball of light that governs the night sky, but getting your moon photography settings just right can be quite tricky. It’s easy to get frustrated when taking photos of the moon, especially when so many moon shots online look crisp and clear.

Fortunately, capturing great moon shots isn’t too difficult once you wrap your head around a few basic elements. With a little patience and practice, you’ll be taking excellent photos of the moon in no time at all!

Moon photography settings: the basics

The first thing to know about shooting the moon is that it’s deceptively bright. You might not think of this giant ball of rock as particularly luminous when compared to the sun, but it puts out way more light than you might think. This makes it tricky to calculate exposure and get your other moon photography settings just right.

The other important item to keep in mind is that the moon is not a slow celestial body. In Greek mythology, Selene, the goddess of the moon, speeds across the night sky in a glowing chariot. Our ancient ancestors knew what they were talking about! If you take a picture of the moon, you have to keep its constant movement in mind; otherwise, you’ll never get a great shot.

Moon Photography Settings Moon Behind Trees
Nikon D7100 | Nikon 70-200mm f/2.8G ED VR II | 200mm | f/8 | 1/180s | ISO 640

The final part of the equation to remember is that the moon, while relatively close in a galactic sense, is pretty far away when you look at it from the perspective of a photographer. If you want a good picture of the moon, you need at least a 200mm lens – and even then, it’s best to use a crop-sensor camera for a bit more reach. So a focal length of 300mm or greater is recommended, and photographing the moon is one time when megapixels really do matter. Unless you have a very long zoom lens, you’ll be cropping your images quite a bit.

If you want a simple answer to the question of what moon photography settings to use, here’s my advice:

  • Shoot with a fast shutter speed of at least 1/180s.
  • Use a small aperture like f/8.
  • Keep your ISO low – so that when you crop, your picture will remain clean and not noisy.
  • Use a telephoto lens.
  • Always shoot in RAW; that way, you have plenty of room to edit the colors, sharpness, and other elements of your photo afterward.
Moon Photography Settings Clouds and Foreground Trees
Nikon D500 | Nikon 70-200mm f/2.8G ED VR II | 200mm | f/4.8 | 1/200s | ISO 640

While the above advice is a good starting point, you will need to experiment and figure out which settings are right for you. It’s a good idea to dive a little deeper into aperture, shutter speed, and ISO to find out what effect they have on your moon photos so you can get the shots you’re aiming for.

Now let’s take a closer look at the best moon photography settings:

1. Use Manual mode

This might be intimidating if you’re used to letting your camera make exposure decisions for you, but moon photography is a great way to learn Manual mode.

Your camera knows what to do in most well-lit situations, but shooting the moon isn’t one of them. You have to take control, and Manual mode lets you choose the aperture, shutter speed, and ISO – all of which are critical to getting good pictures of the moon. You must be very specific about your exposure settings, and Manual mode lets you dial in the precise values you need.

Crescent Moon with Trees in Foreground
Dim morning light meant I had a bit more freedom to adjust my exposure settings, which was very easy to do in Manual mode.

Nikon D500 | Nikon 70-200mm f/2.8G ED VR II | 200mm | f/4 | 1/180s | ISO 200

2. Shoot in RAW

You have enough to worry about when taking pictures of the moon: exposure settings, weather concerns, cloud cover, foreground obstructions…and that’s just the beginning.

Setting the right white balance and making sure your highlights and shadows are perfectly captured is almost impossible to do in the moment. Thankfully, RAW can save the day.

Crescent moon Unprocessed RAW
This is the unprocessed RAW file straight out of my camera.

Nikon D500 | Nikon 70-200mm f/2.8G ED VR II | 200mm | f/4 | 1/180s | ISO 200

Shooting in RAW gives you ultimate flexibility when editing your moon photos in a program such as Lightroom. You can adjust the exposure, tweak the sharpening, bring out details you might have missed, and of course, adjust the white balance to your heart’s content.

The JPEG format is fine for many photographic situations, but not moon photography. For best results, use RAW.

Crescent moon processed RAW
The exact same image as above, but after the RAW file was processed in Lightroom. Adjustments include white balance, boosted exposure, and tweaks to the highlights/shadows.

3. Use a fast shutter speed

Shutter speed is a good place to start when thinking about moon photography settings because of how fast the moon moves across the sky. Similar to sports photography, you’ll need a fast shutter speed to freeze the motion.

1/180s is a good starting point, but if you can go higher without increasing your ISO, I recommend doing so. 1/250s is good and so is 1/300s (go beyond that, and you start to get diminishing returns).

full moon
My 1/10s shutter speed was much too slow, and the picture is blurry as a result. 1/10s lets in a lot of light, but the moon moves too much to get a crisp, sharp picture at that shutter speed. Compare this to the image at the end of the article, and you will notice a huge difference!

Nikon D200 | Sigma 120-300mm f/2.8 | 300mm | f/11 | 1/10s | ISO 200

4. Keep your ISO low

Cameras have come a long way, and what used to be considered a crazy high ISO – like 3200 or 6400 – is now easily achieved without a huge loss in image quality. Things are a bit different when taking photos of the moon, though. Lower ISOs are always preferable, and that holds doubly true for photos of our nearest celestial neighbor.

ISO 100 or 200 is best, but that might not be realistic given the lens you’re using. Generally speaking, you should be fine with ISO 800 or lower, partly because you will get a cleaner image, but also because you will have more leeway when editing your RAW files afterward.

5. Use a small aperture, but not too small

Most lenses have what’s known as a sweet spot, where the image isn’t too soft and chromatic aberration is well-controlled. This sweet spot isn’t usually at the widest or smallest aperture, but somewhere in the middle.

For that reason, I like to take pictures of the full moon at an aperture between f/4 and f/8. However, the optimal aperture will depend on your particular lens and the type of photos you’re taking.

Moon Photography Settings Crescent and Venus
A crescent moon is very dim! Normally, I recommend a smaller aperture, but for this shot, I needed all the light I could get. I used a large aperture of f/2.8 and an unusually slow shutter speed to capture this celestial dance between the moon and Venus.

Nikon D7100 | Nikon 70-200mm f/2.8G ED VR II | 180mm | f/2.8 | 1/90s | ISO 100

Honestly, of all the moon photography settings to worry about, I would put aperture at the bottom of my list. Before you consider the aperture, make sure you have a fast shutter speed and the lowest possible ISO. Finally, adjust your aperture until you get a picture you like.

Even if your photos are not tack-sharp because you had to shoot wide open, it’s a trade-off I recommend making. I would rather have a slightly blurry result than a higher ISO setting that will result in noise, especially in the deep blacks of the night sky.

6. Underexpose slightly

It might seem counterintuitive, but when taking pictures of the moon, you don’t want your images to be as bright as possible. I get my best results when underexposing by one stop or more, depending on the situation.

The easiest way to do this is to set your aperture, shutter speed, and ISO so your light meter indicates a properly exposed picture. Then drop the exposure by one or two stops. The result is a picture without any blown highlights and plenty of room for editing (as long as you make sure to shoot in RAW).

Full Moon with Power Lines in Foreground
My light meter told me this photo was properly exposed – but in the end, the moon was too bright. I should have dropped the exposure to darken the image.

Nikon D500 | Nikon 70-200mm f/2.8G ED VR II | 200mm | f/4 | 1/200s | ISO 360

I also recommend using spot or center-weighted metering when doing moon photography. The moon is extraordinarily bright compared to the dark sky around it, which causes all sorts of confusion for your camera’s light meter. Telling your camera to meter based on one small portion of the scene (i.e. the moon) will help you get a better initial exposure value, one that you can then fine-tune.

7. Get creative

Taking pictures of the moon is enthralling, especially if you have never done it before. But after a few shots of that big bright ball of light in the sky, start thinking of a new approach. Try putting trees, buildings, or other objects between you and the moon. Experiment with taking pictures during the waxing or waning crescent phase.

Moon Photography Settings Lunar Eclipse
Instead of taking one single picture of the moon during a lunar eclipse, I took 20 and combined them in Photoshop. The end result was much more visually interesting than a single shot would’ve been.

Also, try getting shots at dawn or dusk when you can catch the sky in a rich blue or purple. These are simple, fun ways of taking pictures of the moon that can produce some unexpected results.

8. Manually focus to infinity

Your camera’s autofocus might struggle when it comes to getting pictures of the moon, but you can take care of this by adjusting your lens’s focus point manually.

Make sure your lens is focused as far out as it will go (this is often indicated by an infinity symbol on the lens barrel).

Moon photography settings: conclusion

Moon Photography Settings Full Moon
Nikon D200 | Sigma 120-300mm f/2.8 | 300mm | f/2.8 | 1/250s | ISO 200

There’s no magic or secret sauce when it comes to getting great shots of the moon. The only real trick is to get the right moon photography settings and to keep practicing until you’re happy with the results.

Try some of these tips as a starting point, and then branch out and see what you can come up with. You might be surprised at the pictures you’re able to take!

Moon photography settings FAQ

Can I take a picture of the moon with my phone?

It’s possible, but this is an area where a DSLR or mirrorless camera with full manual controls really has the edge. A mobile phone can’t zoom in very far, and even those that do have optical zoom lack the light-gathering ability required for good moon shots. That’s not to say it can’t be done, but you’ll likely get significantly better results with a dedicated camera.

Do I need an expensive zoom lens to get a picture of the moon?

A zoom lens helps, but it doesn’t have to be expensive. Even a basic 55-250mm kit lens, like the one that might have come with your camera when you bought it, is fine. Just make sure to follow some of the tips in this article, and you can get some good moon pictures.

What white balance setting should I use to get a picture of the moon?

That really depends, and there’s not always a good answer. Some people like to use the Daylight setting because the moon is reflecting the sunlight and has no actual light of its own. Just make sure you shoot in RAW so you can adjust your white balance after you take the picture.

How do I keep both the moon and the foreground in focus?

First, make sure you are using a small aperture like f/8 or f/11, which will give a much wider depth of field. In addition, you need to put a lot of space between you and your foreground objects. If you’re shooting through tree branches in your own backyard, they will always end up far too blurry. Position yourself so the trees, buildings, or other foreground objects are farther away; this will help make sure they are more in focus.

How do I get the moon to look so big? My moon pictures never look like the professional shots I see online.

Many people have asked me this, and it all comes down to your lens. A longer focal length will make the moon appear larger. If you don’t have a long lens, you can rent one for the few days that a bright full moon is visible. Many professional moon pictures are also cropped, and if you use a very high megapixel camera, you have a great deal of freedom to crop without a huge drop in quality.

The post 8 Tips for Perfect Moon Photography Settings appeared first on Digital Photography School. It was authored by Simon Ringsmuth.


Digital Photography School

 
Comments Off on 8 Tips for Perfect Moon Photography Settings

Posted in Photography


11 Surefire Landscape Photography Tips (+ Stunning Examples)

18 Apr

The post 11 Surefire Landscape Photography Tips (+ Stunning Examples) appeared first on Digital Photography School. It was authored by Darren Rowse.

11 surefire landscape photography tips

Want tips for stunning landscape photography? You’ve come to the right place.

In this article, I’m going to share 11 easy landscape photography tips – which are guaranteed to get you taking beautiful images, no matter your experience level. I’ve also included plenty of example photos, so you can see the tips in action (and know that they really do work!).

Let’s get started.

tree in a field landscape photography

1. Maximize your depth of field

In landscape photography, a deep depth of field is almost always the way to go.

In other words:

You want as much of your scene in focus as possible. The simplest way to do this is to choose a small aperture setting (i.e., a large f-number, such as f/11 or f/16). Because the smaller your aperture, the greater the depth of field in your shots.

landscape photography tips sand dunes

Do keep in mind that smaller apertures mean less light is hitting your image sensor. So you’ll need to compensate for the narrow aperture either by increasing your ISO or lengthening your shutter speed (or both).

PS: Of course, there are times when you can get some great results with a very shallow depth of field in a landscape setting. It’s just a tricky technique that requires a lot of finesse.

2. Use a tripod

clouds below the mountains

To maximize your depth of field, you’ll be using a small aperture – and you’ll also likely shoot with a long shutter speed.

But unless you’re careful, you’ll end up with an unusably blurry image.

That’s where a tripod comes in handy. You can use it to stabilize your camera and keep your photos tack sharp for 1-second, 5-second, and even 30-second long exposures.

In fact, even if you can shoot at a fast shutter speed, a tripod can still be beneficial. It’ll force you to slow down and consider your composition more carefully.

Also, to prevent camera shake from pressing the shutter button, consider a remote shutter release.

3. Look for a focal point

house by the ocean

Pretty much every shot needs some sort of focal point, and landscape photography is no different.

In fact, a landscape photograph without a focal point ends up looking rather empty. And it’ll leave your viewer’s eye wandering through the image with nowhere to rest.

Focal points can take many forms in landscape photos. They can range from a building or a structure (such as in the photo above) to an eye-catching tree, a boulder or rock formation, a silhouette, or something else entirely.

Also, think not only about what the focal point is, but where you should position it within the frame. The rule of thirds can be useful here.

4. Think foregrounds

landscape photography tips beach

Here’s one key tip that can make your landscape shots stand out:

Think carefully about the foreground of your composition…

…and include clear points of interest.

When you do this, you give those viewing the shot a path into the image. And you create a sense of depth, which is always a nice bonus.

5. Consider the sky

sunset colorful sky

In landscape photography, you should always think about the sky.

Most landscapes will either have a dominant foreground or a dominant sky. And unless you include one or the other, your shot will end up looking boring.

Start by observing the sky. If it’s bland and lifeless, don’t let it dominate your shot; place the horizon in the upper third of the image (though you’ll want to make sure your foreground is interesting).

But if the sky is filled with drama, interesting cloud formations, or colors, then let it shine! Place the horizon in the bottom third of the frame to emphasize the heavens.

(Also, consider enhancing skies, either in post-production or with filters. For example, you can use a polarizing filter to add color and contrast.)

6. Use lines to lead the eye

road in the desert

One of the questions you should always ask yourself as you do landscape photography is:

“How am I leading the eye of those viewing this composition?”

There are a number of ways to lead the eye (and including a clear foreground subject works well). But one of my favorite ways is to provide viewers with lines that lead them into the image (such as the road in the photo above).

Lines give an image depth and scale. Plus, they can offer a point of interest by creating patterns in your shot.

7. Capture movement

water rushing in on beach

When most people think about landscapes, they think of calm, serene, and passive environments. However, landscapes are rarely completely still – and if you can convey this movement, you’ll add drama and mood to your image. You’ll also create a point of interest.

But how can you convey movement in a landscape?

You can focus on wind in the trees, waves on a beach, water flowing over a waterfall, birds flying overhead, moving clouds, etc. Capturing this movement generally requires a longer shutter speed (sometimes a shutter speed of many seconds!).

Of course, a slow shutter speed means more light hitting your sensor, so you’ll either need a narrow aperture or an ND filter. You might also choose to shoot at the start or the end of the day when there is less light.

8. Work with the weather

mountain rainbow

A scene can change dramatically depending upon the weather, so choosing the right time to shoot is of major importance.

Many beginner photographers see a sunny day and think that it’s the best time to go out with their camera. However, an overcast day that is threatening rain might present you with a much better opportunity – you can create an image with real mood and ominous undertones.

Look for storms, wind, mist, dramatic clouds, sun shining through dark skies, rainbows, sunsets and sunrises, etc. And work with these variations in the weather rather than just waiting for the next sunny, blue sky.

9. Photograph during the golden hours

landscape photography tips snow at golden hour

I chatted with a landscape photographer recently who told me that he never shoots during the day. His only shooting times are around dawn and dusk because that’s when the light is best, and that’s when the landscape comes alive.

These golden hours, as they’re often called, offer great landscape photography for a number of reasons.

For one, you get gorgeous golden light. I also love the angle of the low sun; it creates interesting patterns, dimensions, and textures, all of which can enhance a landscape photo.

10. Think about horizons

landscape photography tips winding mountain road

This is an old tip but a good one. Before you take a landscape shot, always consider the horizon on two fronts:

  1. Is it straight? While you can always straighten images later in post-production, it’s easier if you get it right in-camera.
  2. Where is the horizon positioned in the frame? A natural spot for the horizon is along one of the rule of thirds gridlines rather than in the middle of the frame. Of course, rules are meant to be broken – but I find that, unless you’re photographing a very striking scene, the rule of thirds usually works here.

11. Change your point of view

mountain astrophotography

You drive up to the scenic lookout, get out of the car, grab your camera, turn it on, walk up to the barrier, raise the camera to your eye, rotate left and right a little, zoom a little, then take your shot – before getting back in the car and driving to the next scenic lookout.

We’ve all done it. However, this process doesn’t generally lead to the “wow” shot that many of us are looking for.

Instead, take a little more time with your landscape photos. Find a more interesting point of view.

You might start by finding a different spot to shoot from than the scenic lookout.

You can also look for new angles; this could mean getting down onto the ground to shoot from below, or heading up high to gain a nice vantage point.

Explore the environment and experiment with different viewpoints. You might find something truly unique!

Landscape photography tips: conclusion

landscape photography tips waterfall in Iceland

Now that you’ve finished this article, you’re ready to capture some stunning landscape photography!

So grab your camera, head out, and find a subject to shoot.

It’ll be a lot of fun!

Now over to you:

Which of these landscape photography tips are you going to try first? And do you have any landscape photo tips of your own? Share your thoughts (and images!) in the comments below.

The post 11 Surefire Landscape Photography Tips (+ Stunning Examples) appeared first on Digital Photography School. It was authored by Darren Rowse.


Digital Photography School

 
Comments Off on 11 Surefire Landscape Photography Tips (+ Stunning Examples)

Posted in Photography


15 Mountain Landscape Photography Tips for Stunning Images

16 Apr

The post 15 Mountain Landscape Photography Tips for Stunning Images appeared first on Digital Photography School. It was authored by John McIntire.

15 mountain landscape photography tips for stunning images

Of all of the undertakings you can make with your camera, mountain landscape photography can be one of the most rewarding. Apart from the fact that mountains are straight-up beautiful, their imposing nature makes them a great landscape photography element. 

This article will give you 15 quick tips – so you get better results the next time you go chasing after mountains. 

1. Fill the frame

Mountains, by nature, are huge. You don’t have to get the entire thing in the frame. It’s just as acceptable to fill the frame with a certain element that draws your attention. This will make the mountain the background in your images.

Yes, it can be tempting to try and get a huge vista in the frame. But if you take a moment to look for smaller details that could make an interesting photo, you might find something unexpected.

15 mountain landscape photography tips
Although the entirety of the mountain isn’t in the frame, it is still clear that the background is a mountain, and the tight crop gives a clue to just how big it is.
Canon 5D Mark III | Canon EF 70-200mm f/4L IS USM | 200mm | f/5.6 | 1/2000s | ISO 200

2. Use reflections when possible

mountain landscape photography lake reflection
Using reflections in your compositions is a great way to show off mountains.
Canon 7D | Canon EF 35mm f/2 | 35mm | f/16 | 1/50s | ISO 100

If the mountains you are photographing are near a body of water, you already have a ton of visual interest to use in your foregrounds.

If you can, wait until the water is still. Then you can use the reflections of the mountains in your composition. This may be personal taste, but it is always a winning combination in my book. 

3. Show scale with smaller elements

village on a mountaintop
This tiny village near the top of a mountain in Spain shows just how enormous the landscape is.
Canon 7D | Canon EF 35mm f/2 | f/11 | 1/60s | ISO 100

Again, mountains tend to be huge, but when you shoot with an ultra-wide-angle lens, you wind up pushing the perspective back. And this makes it difficult to give your viewers a true sense of just how large things are within your frame.

You can combat this by including an element that shows the scale of things in the scene. Buildings, people, and animals all work well.

4. Include people in the landscape

As with the previous point, putting people in your mountain landscape photography can convey just how big the mountains are.

It does more than that, however. Because with the inclusion of a human element, you are adding something that your viewers can relate to. 

5. Try a panorama

lake reflection with mountains
Stitching several images together into a panorama is a great way to ensure that you capture the entire scene.
Canon 7D | Canon EF 35mm f/2 | f/16 | 0.4s | ISO 100

When you are photographing mountains, don’t be afraid to take a sequence of shots that you can stitch together as a panorama.

Mountain ranges tend to suit the panorama format especially well because there is just so much to see!

6. Fill your foreground

This may be standard landscape photography advice, but it still applies when shooting mountains. If you’re using a wide-angle lens, you will have plenty of space in your foreground – and you’ll need to fill it with something interesting.

So pick a foreground subject and get up close to it. This could be flowers, an interesting rock formation, or something simple like a sign. 

Then take a shot that combines the interesting foreground and a beautiful mountain background, like this:

mountain landscape photography foreground flowers with mountains in the background
Having lots of visual interest in the foreground of your images can help your viewers stay engaged.
Canon 7D | Sigma EF 10-20mm f/3.5 | 10mm | f/11 | 1/60s | ISO 100

7. Include a human element

mountain landscape photography village
Not all mountains are wild places. Including signs of human habitation can be a good way to capture something interesting.
Canon 5D Mark III | Canon EF 70-200mm f/4L IS USM | 169mm | f/11 | 1/60s | ISO 100

By human element, I don’t mean people. Instead, I advise you to find something human-made that will show your viewers how the people that live nearby incorporate the mountain into their lives.

On their own, mountains are impressive. But as part of our world, they are also part of our lives. If you can show this in your images, you might be able to convey an interesting narrative.

8. Use a different focal point

mountain landscape photography
In mountain landscape photography, the mountain doesn’t need to be the focal point of your image. Even in this case, where there’s a mountain, a glacier, and a volcano!
Canon 7D | Canon EF 35mm f/2 | 35mm | f/11 | 0.5s | ISO 100

In your mountain landscape photography, the mountain does not need to be the focal point of your image. Instead, you can find a different focal point and use the mountain as environmental information.

Of course, you can still take a photograph of the sweeping vista. But once that is done, look smaller – and see if there are other subjects to be found in the scene.

9. Use your GND filters

mountain with farm fields
Graduated neutral density filters are a great way to control your exposures.
Canon 7D | Sigma EF 10-20mm f/3.5 | 10mm | f/16 | 0.3s | ISO 100

To help you get good exposures while in the field, don’t forget to pack your graduated neutral density filters. These will allow you to even out your exposures at the time of capture, making it easier to process your images when you get back home. 

10. Wait for the light

foggy mountain lake
Here, I waited from 4 AM to 8 AM for the fog to break. If you can, always, always try to wait out the weather.
Canon 7D | Sigma EF 10-20mm f/3.5 | 11mm | f/16 | 0.5s | ISO 100

This tip cannot be understated. If you want the best-looking mountain landscape photography images that you can produce, wait for the light to be at its best. If you get on location early and find the composition that you want, don’t be afraid to stay until the light shifts – even if it takes a couple of hours.

Yes, I know it can seem boring, and it’s hard to justify the effort, but please, trust me. It is very much worth the time and effort. 

11. Use longer lenses

When you are packing for your trip into the mountains, don’t forget to take your longer lenses with you. Standard-length primes can be great for panoramas, but telephoto lenses can help you pick out smaller details in your scenes.

In other words:

There is a lot of room in landscape photography for lenses aside from the wide angles that dominate the genre.

12. Plan for the light

With the technology available to us, it’s easier than ever to know exactly which direction the light is going to come from on any given day of the year.

So once you know when and where you are going, do your research and figure out where the sun is going to rise or set. Then plan your shots based on that. 

13. Plan for the weather

Like planning for the light, it’s also a good idea to plan for the weather. Knowing the weather will help you determine if you need to pack any extra gear like rain covers and waterproof clothing.

Of course, it’s also in the best interest of personal safety to have an idea of when snow or rain might appear. This is even more important if you intend to be on the mountain, especially after golden hour. 

14. Don’t avoid bad weather

moody mountain landscape photography
After an entire day of low visibility, the fog broke for a total of five minutes, just long enough for a shot. Don’t avoid bad weather, even if you ultimately fail to get a photo.
Canon 7D | Sigma EF 10-20mm f/3.5 | 20mm | f/16 | 1/30s | ISO 100

While planning for bad weather is good, you don’t always need to stay indoors. Many times, the most interesting photos will come in the worst weather.

In fact, some of the best light I have ever seen has been during a break in a storm; these breaks allow just enough light to make things look like a fairytale.

And if you lock yourself away when the weather is bad, you’ll never get to experience such moments.

15. Be safe

Above all, strive for safety. Mountain landscape photography can be incredibly rewarding, but don’t risk your personal well-being for a great shot.

Watch where you’re going, take weather-appropriate clothing, be aware of the forecast, and tell somebody where you are going to be. And if you’re going to stay out until after blue hour, make sure you know exactly how to get back. 

Mountain landscape photography: the end

I hope this article has inspired you to get out and create your own mountain landscape photography.

The next time you’re out shooting mountains, remember these tips – and have fun!

Have you photographed mountains before? Do you have any tips of your own? Share them in the comments below!

What type of lens is best for mountain landscape photography?

All lenses have their uses. Wide-angle lenses are the most popular, but standard and telephoto lenses can work, too.

What’s the best time of day to photograph mountains?

It entirely depends on where the light is hitting the mountain. The golden hours are best as long as the sun isn’t behind your mountain.

How do you show how big a mountain is in a photograph?

You include an element that is easy for the viewer to identify, such as a person. This will give your images a sense of scale.

Why do the mountains in my photographs look so far away?

Wide-angle lenses distort perspective, and this can push everything back in the frame. Use a standard focal length (35mm to 50mm) for a perspective close to the human eye’s. To include more in the frame, consider shooting in a panoramic format.

The post 15 Mountain Landscape Photography Tips for Stunning Images appeared first on Digital Photography School. It was authored by John McIntire.


Digital Photography School

 
Comments Off on 15 Mountain Landscape Photography Tips for Stunning Images

Posted in Photography


Triangle Composition in Photography: A Quick Guide (Plus Tips)

13 Apr

The post Triangle Composition in Photography: A Quick Guide (Plus Tips) appeared first on Digital Photography School. It was authored by Megan Kennedy.

triangle composition in photography a quick guide

Speaking about triangle composition, artist Wassily Kandinsky once said, “The impact of the acute angle of a triangle on a circle produces an effect no less powerful than the finger of God touching the finger of Adam in Michelangelo.”

Recognizing the momentum within a triangular shape, painters have regularly capitalized on the visual drama of triangular structures. But painters aren’t the only ones to utilize triangles; photographers have also made extensive use of the shape to add impact, lead the eye, and emphasize spirited angles unfolding within the photographic frame.

In this article, we’ll take a look at the dynamics of triangles in photographic composition.

What is triangle composition in photography?

Triangle composition relies on the use of triangular shapes or concepts to create a better image.

Triangles can be found everywhere. Signs, architecture, geography, sailboats, food, arrows, aviation, wallpaper, optical illusions (see the Penrose triangle); the list goes on!

Why are triangles useful?

Triangles are useful in composition for many reasons. Perhaps one of the most obvious selling points of triangles is their striking versatility.

For instance, triangles can represent direction and orientation; they can signal stasis or momentum. A triangle that recedes into the horizon creates the impression of perspective and depth. Off-kilter triangles paired with vivid colors create impactful shapes that express energy and dynamism. And depending on whether a triangle is facing left or right, it can represent progress, forward motion, or backtracking (just think of the symbols on a TV remote!).

Triangles in composition can also create order in chaos. That’s why triangles can be helpful in planning a photograph or figuring out why an image works the way it does.

Over time, artists have developed different compositional concepts to help create appealing imagery. The golden triangle is a visualization that divides the frame into four triangles, like this:

A diagram of the golden triangle composition rule

The golden triangle suggests one of three approaches:

  1. Fill one of the triangles with a main subject.
  2. Align some diagonal subject matter with at least one of the diagonal golden triangle lines.
  3. Line up a significant point in the composition with a point of intersection.
A web with the golden triangle composition rule overlay
Canon 5D Mark IV | Canon EF 50mm f/1.8 II with extension tubes | f/2.5 | 1/50s | ISO 100

Triangles found in both the natural and modern landscape can visually unite or disrupt a photograph.

And by incorporating triangles or the golden triangle overlay into a photographic composition, you can control the energy and focus of an image.

Common triangle types

There are several types of triangles you should know:

Self-contained triangles can be found throughout the natural and urban environment. These distinct shapes can command attention and often serve as a key component or structural element within a photograph.

(Interestingly, some triangles do extend beyond the frame, thus becoming more indirect triangular compositions.)

Other triangular formats include triangles with rounded edges, which deliver a softened visual effect.

Triangle composition leaves in the rain
Triangular patterns found in nature.
Canon 5D Mark IV | Canon EF 24-105mm f/4L IS USM | f/5 | 1/160s | ISO 100

Implied triangles are more subtle arrangements of subject matter that can generate the impression of a triangle composition. Implied triangles aren’t a single specific triangular subject. Instead, they borrow from different elements in an image to form a triangle-like arrangement.

Out of focus lights arranged in triangle patterns
Implied triangles formed from points of light.
Canon 5D Mark IV | Canon EF 24-105mm f/4L IS USM | f/4 | 1/100s | ISO 250

The type and behavior of triangles can significantly impact a photograph.

To create stability or instability within an image, triangles can teeter on a point or rest firmly on a vertical line. Symmetrical triangles can signal equilibrium whereas asymmetrical triangles can represent an object to overcome or act as a symbol of intensification.

A triangle pointing at the sky can represent the peak of a goal or journey toward success. A triangle pointing at the ground can represent direction, a downfall, or a lessening of intensity.

Other triangles can point to specific subjects or even represent the main subject.

Tips for working with triangles

Triangles are intriguing shapes, and working with them doesn’t have to be hard.

Here are a few tips for creating beautiful triangle compositions in photography:

1. Use variety

Triangles come in many shapes and forms. To add variety to your photos, include different triangle sizes, types, and orientations (this will also help you develop an eye for the shape).

triangles on a sidewalk
Triangles can disrupt patterns and direct the viewer.
Canon 5D Mark II | Canon EF 24-105mm f/4L IS USM | f/8 | 1/125s | ISO 100

2. Try the golden triangle rule

As I explained earlier, the golden triangle is a visual device used to help create harmonious compositions.

While the golden triangle takes practice to visualize (see the overlay displayed above), it encourages you to make the most of the available subject matter. The rule also draws attention to areas in a composition that might otherwise be ignored.

3. Rules can be broken

Although triangle composition is an engaging approach to photography, compositional rules can be bent and broken.

The golden triangle serves as a guide or exercise rather than a definitive rule – and can therefore be manipulated or ignored.

And using triangular subject matter in a composition is pretty flexible. For example, rounded points or points that extend off the edge of the photograph can still suggest engaging and cohesive triangle-based compositions.

Triangle composition in photography: final thoughts

Over the centuries, triangles and triangle composition have come to represent strength, vitality, energy, and momentum.

By incorporating triangles (and the golden triangle rule) into your compositions, you can create dynamic, eye-catching photos.

So the next time you’re out with your camera, look for triangles – and create some powerful compositions!

A utility pole with triangle composition
Canon 5D Mark IV | Canon EF 24-105mm f/4L IS USM | f/9 | 1/250s | ISO 100

Triangle composition FAQ

What is triangle composition?

Triangle composition is either the incorporation of triangular shapes into photographic work or adherence to the golden triangle compositional rule.

What is the golden triangle?

The golden triangle is a compositional device. By mentally dividing an image into triangular sections, you can arrange elements to create beautiful compositions.

Where can I photograph triangles?

Triangles make up our world in many ways. Triangles can be found in the urban landscape as well as the natural environment. Once you start looking, you’ll find plenty of opportunities to photograph triangles.

How can I use triangle composition?

There are several ways to incorporate triangular compositions into a photograph. The most obvious ways involve photographing triangular shapes themselves and using the golden triangle rule to guide your compositions. You can also use implied triangles to loosely organize subjects in a triangular format.

The post Triangle Composition in Photography: A Quick Guide (Plus Tips) appeared first on Digital Photography School. It was authored by Megan Kennedy.


Digital Photography School

 
Comments Off on Triangle Composition in Photography: A Quick Guide (Plus Tips)

Posted in Photography