Photographer Jason P. Odell explains the basics of teleconverters and their limitations on your photography.
Photographer Jason P. Odell explains the basics of teleconverters and their limitations on your photography.
Full guide at: www.dslrtips.com / DSLR Tips: How to take perfect sunsets
Shadow photography is a simple, yet effective way to create stunning images of just about any subject. All you need to get started in shadow photography is a light source and a subject who casts a shadow – that’s it! If you are interested in trying out shadow photography, here are some tips to get you started: 1. Look down, Continue Reading
The post 5 Quick Tips for Awesome Shadow Photography Images appeared first on Photodoto.
www.PhotoTips.biz – I share the top ten ways to get a sharp image. – Comments are locked. All comments, questions, and concerns should be directed to the website. I do not answer questions here.
Video Rating: 4 / 5
Music/flipping starts at 0:30 if you want to skip the sappy stuff! Video: Recorded on a crappy point-and-shoot Nikon Audio: Your Hand In Mine – Explosions In The Sky (edited). (Band site: www.explosionsinthesky.com )
As we approach the end of our ‘Best of 2012 series‘ of posts it is time for another mixed bad of hot posts from the last year that cover a wide array of topics.
In this batch you’ve got some opinion posts, some challenges/assignments, an inspirational story of how one organisation uses photography to change lives and some ‘how to’ tutorials. Enjoy!

How to Transfer Prints to Wood (a Great DIY Photography Project & one of our hottest posts of 2012)
Post originally from: Digital Photography Tips.
Check out our more Photography Tips at Photography Tips for Beginners, Portrait Photography Tips and Wedding Photography Tips.
11 Hot Photography Tutorials, Projects, Stories and Tips to Improve Your Photography
 Extra photos for bloggers: 1, 2, 3  |
|||
New Years means three things: dancing, champagne, and lots of photos to record the blurry memories.
If it weren’t for your trusty flash, those photos would turn out just as blurry!
Have no fear fellow party monsters because we’ve put together a guide to flash photography guaranteed to keep your photos sharp as a tack and shiny as a disco ball.
Check out these 7 simple tips, and by midnight we’ll have you ready to kiss blurry goodbye.
7 Simple Tips for Great Flash Photos
p.s. We’re having our first ever sale today in the shop! Hurry on over before we change our minds 😉
 Flash tends to get a bad rap.
Many people associate it with dark shadows and washed out colors.
In a perfect world we could use ambient light all the time, but nobody wants to miss capturing the party just because the light’s gone low.
In this guide we’ll show you how flash can help avoid motion blur, balance for unusual lighting, fill in dark shadows, accentuate movement, and offer tons of creative control.
And what’s awesome is that when done just right flash looks really good!
In fact, most people won’t even be able to tell you’re using it.
 Direct flash can be over-bright, harsh, and create some nasty shadows.
But, flash diffusers help soften the light from your flash by either shooting it through some transparent material or bouncing it off a reflective surface.
We like the Lightsphere from Gary Fong for even soft light, and The Flash Bender and Diffuser when you want a little more creative control with your lighting.
For this shot, we angled our flash slightly backwards so that light popped forward through the diffuser to shine on our subject and also kicked off the wall behind us to spread our light evenly.
 When the ball drops, don’t drop the ball with blurry pics, use your flash to freeze the action!
To take advantage of flash’s action grabbing potential, make sure you set a minimum shutter speed of at least 1/60th of a second.
Because of a fancy rule called the inverse square law (which basically says the power of your flash doesn’t travel very far), you will want to get as close to your subject as possible.
A wide angle lens will help capture your entire scene.
We took this shot at 1/250th of a second, f/4, and ISO 1000, fast enough to keep background light from messing up our freeze.
Also, a super wide 21mm focal length helped keep the camera close and still squeeze it all in.
 The slow sync setting leaves your shutter open longer, and lets your camera pick up the ambient light in your surroundings.
This helps keep color natural instead of just picking up the light from your flash which is tinted a little blue.
Slow sync can open a pandora’s box of possibilities, from light painting with sparklers to incorporating background movement into the mix.
Our example was shot using rear curtain sync option.
This means the shutter will open, gathering ambient light and allowing anything moving to blur, and then right before the shutter is about to close the flash will fire, freezing the action.
If we had used first curtain sync instead, the flash would’ve fired as soon as the shutter opened and then stayed open to gather light.
Notice the ghostly light passing through our subjects, and the glowing trails of their movement.
 Coloring doesn’t have to stop when you outgrow your 24 pack of Crayolas.
Flash filters are super easy to use and can be a fun way to add creativity to your shots.
Using flash filter can also help balance for ambient lighting conditions.
For instance, a yellow flash filter balances for the amber tint of candlelight.
We used a couple filters from The Universal Flash Filter Kit for this shot.
To use these filters, simply snap the included rubber band around your flash head and attach the colored gels.
Cranking up the saturation in your settings will make these guys shine, and for extra creative points try combining flash filters with double exposures.
 Bouncing is a technique for diffusing the light from your flash.
Instead of pointing your flash directly at your subject, you tilt your camera’s flash so it bounces off another surface such as the ceiling, which illuminates your subject with the reflected light.
Bouncing flash keeps your subjects from looking like a deer in headlights, and gives you super creative powers.
For this technique, imagine you are playing a giant game of light pinball.
Aim your flash forward, backwards, or to the side, to bounce your ball of light off different surfaces and at different angles, creating unique looks and eliminating harsh shadows.
For this shot, the flash was angled up and just a little forward so that the light bounced off the ceiling just in front our subject and filtered down onto her face.
 With this technique, you’ll be taking your flash on safari with an off camera excursion.
You will need an external flash unit for this one. If you don’t already have one, this flash from Sigma can be picked up for a pretty good price and is made for all major camera manufacturers.
Many external flashes can be triggered wirelessly by the pop up flash built into your camera.
To do this, simply set your flash into slave mode, set your camera’s flash as the master commander (Muhahaha), and make sure they are on the same channel.
You can set your camera’s built in flash just to trigger the external flash unit or to fire along with it.
This shot was created with the flash pointed straight at the camera and placed behind the disco ball. When fired, it created shiny sparkles and consequently reminded us of our middle school dances.
Off camera flash can also be used to fill in dark shadows and balance for other light sources that are striking your subject.
 Round pupils, round face, portraits were just made for circular flash!
Ring flashes attach around your lens and light up like a big glowing halo for glitzy circular catch lights in the eyes.
We used The Ring Flash Adapter for our example, which attaches to the flash you already have saving you some solid buckeroos.
To use the Ring Flash Adapter, you will probably need to turn up the exposure compensation on your flash as it works by bouncing light down a mirrored tube.
We found between +1.3 and +2 stops worked best for a nice bright exposure.

Related posts:
Macro photography is the art of capturing the fine detail of very small subjects that may not be able to be seen by the naked eye. Technically, to fall under the term ‘macro’, the subject should be captured with a reproduction ratio of 1:1, i.e. the subject will be captured on the sensor at 100 % life size.
Macro lenses are specially designed to minimise the focussing distance, allowing the photographer to get closer to the subject and so increase the reproduction ratio. There are a number of other techniques that can be used to help achieve the desired magnification without a dedicated lens (extension tubes, close-up filters, reversing rings), however, one of less often considered techniques is to use something that you probably already have in your kit bag: a telephoto lens.
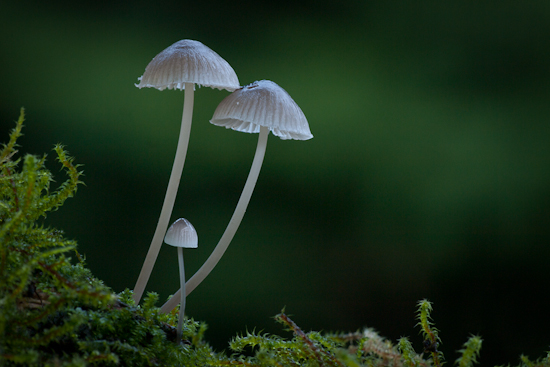
Milking Bonnet Fungi (Mycena galopus)
Telephoto lenses offer extreme magnification but generally have much larger minimum focussing distances pushing the photographer further from the subject and so reducing the reproduction ratio. Some telephoto lenses, when combined with camera systems utilising smaller sensors, are able to offer 1:1 magnification (‘true macro’) however, typically, telephoto lenses are limited to close-up photography, at near-macro reproduction ratios.
Using a telephoto lens for this kind of work offers a couple of advantages over a dedicated macro lens that are a direct result of the large minimum focus distance. Because the working distance to the subject is in the region of 1 metre (compared to 15 – 30 cm of standard macro lenses) the risk of disturbing your subject as you compose your shot is much reduced. Also, given the extra distance between the camera and the subject, you are much less likely to cast a shadow over your subject and have a lot of freedom with the lighting you can employ to light the subject – both natural and flash.
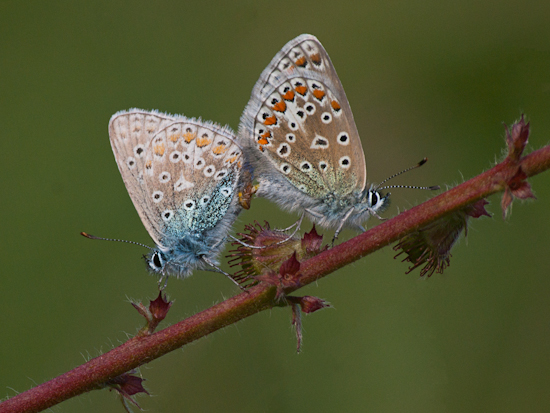
Common Blue butterflies, mating (Polyommatus icarus)
Using a telephoto lens for such precise work is not without challenge, so here are a few tips to help maximise your chances of getting that near-macro shot, with your telephoto lens:
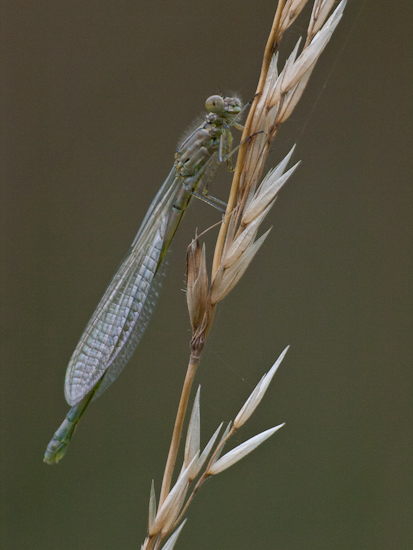
Common Blue Damselfly (Enallagma cyathigerum)
Using a telephoto lens for near-macro photography will typically not allow you to magnify your subject as far as if using a dedicated macro lens, but you will be able to test the water to see if macro photography is something you enjoy, without having to splash out on any additional kit. If you do decide that macro photography is for you, by putting this technique to practise you will learn a lot of good field craft that will be of benefit when you get around to picking up that new macro lens.
Post originally from: Digital Photography Tips.
Check out our more Photography Tips at Photography Tips for Beginners, Portrait Photography Tips and Wedding Photography Tips.
6 Tips for Near-Macro Photography with a Telephoto Lens
www.Berger-Bros.com One of the most frequently asked questions posed by students new to the world of digital photography is this “What is the difference between a jpeg file and a raw file?” Yvonne Berger, head photography instructor at Berger Bros Cameras in long Island, New York, explains the difference between jpeg and raw files and breaks it down in a simple and easy to understand explanation. A jpeg file is a basic file that every digital camera is capable of taking. So, whether you’re using a point and shoot or a digital slr, chances are the default setting is a jpeg file. The jpeg file gets processed within your camera. However, a raw file gets processed “post process” with an editing software program. Why shoot jpeg vs. a raw file? A jpeg file is easier to use and can be emailed, etc. A raw file needs editing software, like Adobe Photoshop Elements, Photoshop CS5, Lightroom…even Picasa…in order to be read. Benefits of jpeg 1) it’s quick 2) easy to use, and 3) ready to go Benefits of raw files 1) better quality than jpeg So, which one should you use? Well, if you’re using a lower end point and shoot camera then chances are you can’t use raw…so you’ll need to go with jpeg files. Some of the higher end point and shoot cameras can shoot raw by using the setting “jpeg plus raw”.
Video Rating: 4 / 5
Nikon D4, AF-S Nikkor 85mm f/1.8G lens, Wireless Transmitter WT-5 are now officially announced! Large close Up pics: www.kentyuphotography.com The New 16.2 Megapixel Nikon D4 Wields a Formidable Fusion of Swift Performance, Battle-Tested Technologies and Innovative New Features to Create High Caliber Photo and HD Multimedia Content 51-point AF System has been further enhanced for maximum speed in a variety of challenging shooting situations, even at 10 frames per second (fps). Considered the new Nikon flagship, the D4 renders supreme image quality, a feat accomplished with a new 16.2-megapixel FX-format CMOS sensor, coupled with the latest generation of Nikon’s EXPEED 3 image processing engine to help produce images and videos with stunning clarity and color. Photographers are also able to shoot in even the most challenging environments and lighting conditions with the assistance of Nikon’s new 91000-pixel 3D color matrix meter and a broad ISO range from 100 to a staggering 204800 for low-light capture like never before. The Nikon D4 is engineered for the modern professional and incorporates never before seen HD-SLR video features for those who also need to capture multimedia content from the field. Image Quality That Hits the Mark The heart of the new D4 is the Nikon-developed 16.2-megapixel FX-format (36 x 23.9mm) CMOS sensor that provides amazing image quality, brilliant dynamic range and vivid colors in nearly any lighting condition.
Video Rating: 4 / 5
live.pirillo.com – You’re buying a camera, but you have absolutely no idea what is best suited to your needs. Even for a seasoned photographer, it can be tough. Try to keep these tips in mind next time you’re shopping for a new camera.
SmokingStrobes.com – I connected the dots between the DSLR hd video features and the growing market for microstock video. In the process I found a cool way to overcome my challenges with recording high quality hd video – and the awesome photographer Drew Gardner played a majore role in that. In this video I am going to tell you how I go about to take this chance as a photographer. The DSLR video capabilities make it possible for us to produce video in absolutely brilliant cinematic quality on a shoestring budget. This has never been possible before. I guess those of us who take this chance and develop this discipline will seriously clean up. And even if it is not about the commercial intent, I found that shooting video is actually a lot of fun, once I knew certain tricks.
Video Rating: 4 / 5
Exposure Compensation www.elitevideo.com . When do you use it? The answer is, When you are taking a series of photos in a setting that has a lot of darkness around a subject, or a lot of brightness around your subject. If it is too dark or bright around your subject, then every picture you take will be over exposed or under exposed, because the camera does not know what light level to concentrate on. With exposure compensation, You are telling the camera, “Give me a little more or a little less light that you have been in this situation- on every shot.” The best way to determine if you need exposure compensation is to do a test shot in the enviornment that you will be shooting. For example Snow (lots of white), a theater (lots of dark), etc.
Video Rating: 5 / 5
You must be logged in to post a comment.