RSS
 

Posts Tagged ‘Tips’

5 Tips for Staying Infatuated With Photography

25 Jul

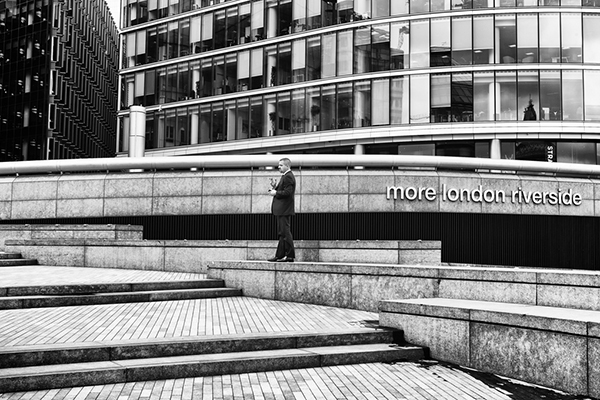
It takes a lot to hold my interest.  Scratch that—it takes a lot to get my interest, then hold it, and finally (and especially) to keep it.  This makes my dating life quite hard.  And sometimes my relationship with photography even harder.  And with less Happy Hours and coffee dates.  One bad shoot and I’m ready to sell my equipment and call it good.  And go work at Starbucks, where there are benefits and free coffee and cool mandatory aprons.  In my career that has spanned a decade, I have quit, retired, and ran away more times than Brett Farve.  (This comparison really only makes sense if you live in the States, but if you don’t just imagine David Beckham retiring a bunch of times, changing his mind and coming back, and you get the general idea.)

I always come crawling back to photography.  Like a moth to a flame.  Or a crazy ex-girlfriend to your doorstep in the middle of the night, begging for another chance.  Since I’m trying not to do that anymore (both the faux retirement and the crazy ex-girlfriend thing), I have come up with a couple of things that allow a little reset to my photography passion.  Or a jolting wake-up call to remind me of exactly what I love about photography.  Here are 5 of my favorites.  My 6th favorite: completely freak-out and skip town in the middle of the night never to be heard from again, is pretty self-explanatory.

PHOTO ONE

1. Take a Photography Vacation

Not the kind where you take your camera with you for beach sunsets and lively Main Street scenes of locals.  The kind where you go nowhere and your camera gets locked up safe and sound in a closet.  It may sound extreme, but a good week (or two…..or three) away may be just what the doctor ordered.  And what’s fair is fair: this means no Photoshop, no point and shoots, and no saying “if only I had my camera”.  Instead you get to think: how cool that I am seeing this with my own eyes this time and not through a lens.  I will permit an occasional cell phone photo, but only because if I make that off limits, you’ll just rebel anyway.  A week or two away and you’ll crave photography again with rested eyes and fresh ideas.

PHOTO TWO

2. Donate your Services and Skills

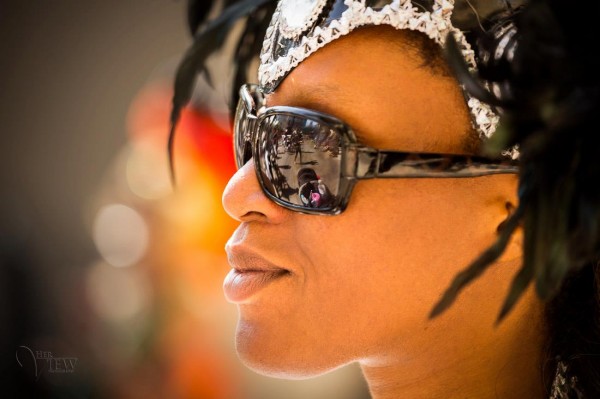
This one is my go-to and not only recharges me, but almost always brings me back good energy in some form.  There is no wrong way to do it—compassionately and with great tact, offer up your services to a family that is going through a rough time and may not be able to afford to document their lives at this time.  Or call a non-profit service and brainstorm a way that you taking a few shots could help their efforts in marketing.  Contact a nursing facility and ask if they would like you to donate an hour of your time on their next family day to photograph loved ones with people they don’t get to see often for free.  Hospice organizations, humane societies and animal shelters, and wildlife rehabilitation centers are always thrilled when a photographer is willing and interested in donating their special skill set to their cause.  The photo above is an Executive Director of a homeless outreach program and one of her beloved clients.  It has been featured in gallery shows, used for marketing collateral for their organization, and been auctioned for donation.  I did not receive a penny in compensation for it, but what I did get out of it both personally and professionally is vast and grand and worth more than any fee I’ve ever charged.

PHOTO THREE

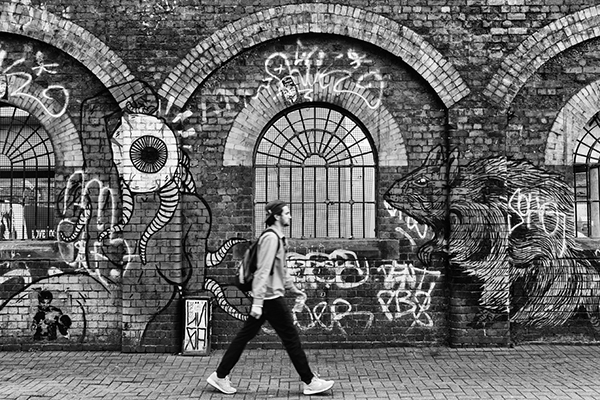
3. Flip to the other Side

I am fascinated by this cell phone “selfie” phenomenon on social media right now.  And by “fascinated”, I mean terrified.  I’m not a fan of the other side of the lens in the first place, but you can darn well bet I sure don’t want to be on that other side, blindly taking a self-portrait with a bad camera phone in a bar or a car or whatever.  Not in a house, not with a mouse, not in a box, not with a fox.  However (and I hope you said that “however” with a big giant sigh like I wrote it), not only can it be helpful to getting back in a solid mindset but beneficial in many other ways.  I find that I seem to need a recent photo of myself often as a photographer.  And, let’s be fair here; if I’m not willing to have my picture taken once in a while how can I justify asking others to let me take theirs?  It’s a bit humbling, but also gives me new ideas to try when I’m on the other side.  The photo above (and also by my byline below) was taken by my 9 year old son.  He is darling and thoughtful and creative and perfect and takes after me.  Photography is just a basic part of our lives, so when I asked him to take a picture of me I could use professionally, it wasn’t that big of a deal to hand over two thousand dollars in equipment to a kid that had just used my hair dryer to try to power some Lego contraption he made.  I ended up with a couple of pictures that I like very much, but more than that, I got a bit of confidence and a lovely reminder of how great it feels to look at a picture of yourself you like.  I have the ability to do that for people.  And sometimes I need a little smack in the face to remind myself to stop being a whiney brat and be grateful for my abilities.  Or at the very least, to start renting out my kid.

PHOTO FOUR

4. Photograph something Different than you usually Do

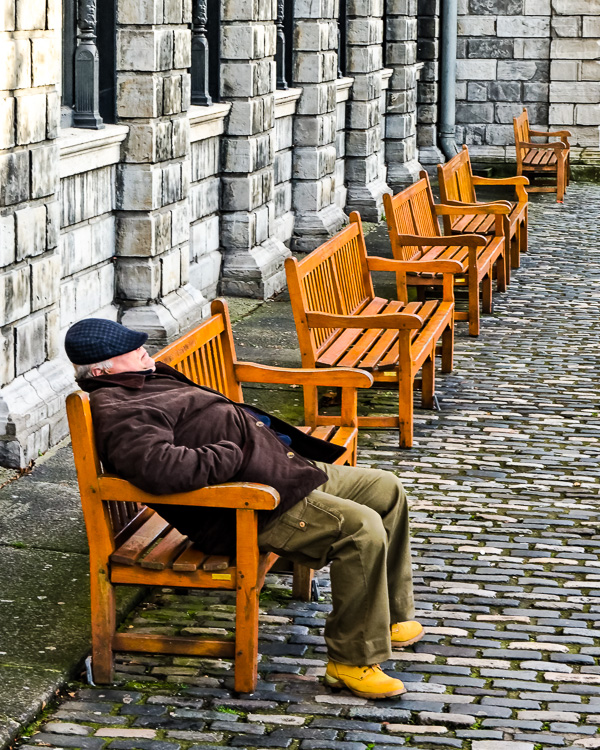
This is a tough one for me, as I got into photography only because I like photographing people.  If you asked me how to take a great picture of a sunset, I would likely try to tell you a very long story about sunsets in hopes that you forgot what we were talking about in the first place.  I have zero interest in taking pictures that don’t involve people.  But I do have a pretty fancy camera and more editing knowledge stored in my brain than song lyrics and that’s saying something.  I also have a need to challenge myself.  For all I know, my best abilities lay in photographing bugs, but I’m never going to find that out if I don’t try.  (But let’s just assume I don’t have any abilities in bug photography and move on, you know?)  One time in a desperate attempt to detour a throwing-my-camera-out-the-window moment of frustration, I came across the picture above.  Taken on vacation a few years ago in Oregon.  And while the raw image is nothing that a true landscape photographer would even look twice at, a little editing and it’s become a photo I’m proud of.  It hangs in my home as the only non-people image allowed to grace the walls and I smile every time I walk past it.  It’s not fancy art.  But it serves as a great reminder that I have a good eye.

PHOTO FIVE

5. Get an Assignment

I’m not what you would call a “self motivator”.  I need things like deadlines and the promise of a cookie when I’m done to get me to actually finish a task.  I actually have to utilize an app that keeps my internet frozen for set times just so my mind doesn’t wander a bit while I’m waiting for a word to come to me and then BAM: I just blew an hour on Pinterest looking at pulled pork recipes and I don’t even eat pork.  When I find myself in a little photographic coma, I sometimes ask a friend to give me an assignment.  Maybe they need a picture of a yellow flower for their yellow flower bathroom.  Maybe they want a picture of their house for a keepsake.  Maybe they can’t think of anything either but know me well and are kind enough to lie to me and come up with something.  Either way, getting an assignment from someone else feels important.  It’s no longer about not feeling like shooting today; it’s about this friend needs this from me and I want to come through for them.  And usually what happens in this little scenario is that I realize I take terrible flower pictures and I need to get back out there and take the kind of pictures I’m good at.

And just like that, I’m recharged, ready, and back in the saddle.  Because to keep retiring gets exhausting.

Post originally from: Digital Photography Tips.

Check out our more Photography Tips at Photography Tips for Beginners, Portrait Photography Tips and Wedding Photography Tips.

5 Tips for Staying Infatuated With Photography


Digital Photography School

 
Comments Off on 5 Tips for Staying Infatuated With Photography

Posted in Photography


Royal photographer shares tips on photographing babies, #royalbaby etc…

23 Jul

AES-WILLIAM-BABY-.jpg

As Prince William and the Duchess of Cambridge celebrate the birth of a baby son (OMG! #shinynewprince), official Royal photographer for The Sun (that’s the British tabloid newspaper) has shared some tips for photographing babies. Arthur Edwards knows what he’s talking about, having photographed the proud father, William, when he was an infant. Click through for some of Edwards’ top tips for photographing babies – assuming of course that you’re not utterly bored of the whole thing by now. 

News: Digital Photography Review (dpreview.com)

 
Comments Off on Royal photographer shares tips on photographing babies, #royalbaby etc…

Posted in Uncategorized


3 Tips for Creating Outstanding Portraits, Inspired by the work of Dutch Artist Van Gogh

17 Jul

A Guest Post by Oded Wagenstein

Few months ago I visited the Metropolitan Museum of Art in NYC. Upon arriving there, I immediately ran to see the work of the artist who influenced me the most: Vincent Van Gogh; the artist who changed the way we look at color as a tool for telling stories; an artist who had nothing in his pockets but had a never-ending passion for creativity and innovation.

In this post I decided to share some work methods and tips that I have learned from the portraits of this great artist. Methods I TRY, just try, to apply in my work as well.

3 Things I learned about Portrait Photography from Vincent Van Gogh’s Work

Tip 1: Use Light as a Tool for Telling Stories in Your Portraits:

You can treat “light” in one of the two ways below:

  • Something that just illuminate your subjects. An existing fact, which you cannot control
  • A creative tool. Something to be aware of, as being aware of the lens or the camera you are using

Source of Inspiration

Notice how the light affects the story in this drawing of a Peasant from Nuenen.

Vincent van Gogh Head of a Young Peasant in a Peaked Cap

The choice to create the peasant’s portrait at night (or a dark room) under the pale light of a single bulb, which forms many shadows on his face, strengthens the dark feeling coming from this image- a feeling of a hard working man. You can imagine that creating the portrait of the same guy, in daylight, in an open space, would create a completely different story.

My Interpretation:

F11A3438
In this image of Apollo-mo, a 61 years old farmer and village shaman from the Akha community in Laos, I tried to create the same “hard working” feel as in the “Peasant from Nuenen”. I chose to capture Apollo indoor (keeping him also very compressed inside the frame) with this dark background and dramatic, single source light coming from his right side, creating very deep shadows on his face. Of course I could photograph Apollo at any other time: Laughing with his family and grandchildren, working under the soft light of the sunset and so on. Yet,I chose to show him as I perceived him – as a hard working man with a difficult life story.That’s exactly what I wanted the viewer to feel.

Tip 2: Harnessing the Power of Complementary Colors

Van Gogh’s use of color was groundbreaking and many books and theses already examined the issue in depth. What I would like to present here is a small fraction of his approach on color: Understanding the power of complementary colors.

You can think of the complementary colors (and this is going to be a very shallow way of putting it) as two colors, sitting side by side, and by doing so, creating a great impact on the viewers.

Color star en svg

Van Gogh often used complementary colors in his works. Green and red, orange and blue, purple and yellow – he’s done it all.

In my work, I try to keep this principle of complementary colors in mind.

Source of inspiration:

Van gogh

My interpretation:
Red and green or orange and blue are working together to create a stronger portrait.

Monk

Tip 3: The Power of the “Off Camera” Gaze

In Most portraits, either photographs or paintings, the person looks straight at the viewer. Van Gogh’s work taught me that sometimes, when a person is looking “off camera”, it can give my image some sort of natural feeling, sometimes melancholic, yet always powerful.

Source of inspiration:

409px Van Gogh 2

The artist made this painting during the last months of his life. And although the situation appears seemingly nice (woman standing in a field) the sadness and hardship is certainly present, mainly due to the off camera gaze.

My interpretation:
So when I want to convey a feeling of hardship or sadness I will try to capture my subject in an unguarded moment, looking off camera.

Woman in field A

This off course can be done only if you get a good relationship with your subject, enabling you to work in a close distance and still be “transparent”.

I will not tell the subject what to do (“now, look off-camera and act sexy”). I will just wait for the right time to click the shutter.

Conclusions

Using light as a creative tool: Try to match the story you want to tell to the light being used. One possibility is to control the light: flash, reflectors, etc. the more simple option is to just choose the right time to shoot. Dramatic story? Choose a time when there is a harsh or dramatic lighting situation. A story about the happy moments in life? Let your light to convey this feeling by working in a soft, full of color light, like in the golden time (before sunset or right after sunrise)

Watch for complementary colors: in order to create powerful portraits.

Think about the subject’s looking direction as a creative tool: Sometimes an off camera gaze can give your story outstanding emotional impact.

The story of Vincent van Gogh Is sour – sweet. On one hand, an artist whose paintings are known by everyone and sold today for millions of dollars. On the other hand, an artist who had a great financial and emotional struggle over his life-time.

Oded Wagenstein is a Travel photographer and writer. He is a regular contributor to the National Geographic Traveler magazine (Israeli Edition) and he is known for his intimate culture portraits. You can join his Portrait & Travel Photography blog and continue to discuss on travel and people photography and get more amazing tips!

Post originally from: Digital Photography Tips.

Check out our more Photography Tips at Photography Tips for Beginners, Portrait Photography Tips and Wedding Photography Tips.

3 Tips for Creating Outstanding Portraits, Inspired by the work of Dutch Artist Van Gogh


Digital Photography School

 
Comments Off on 3 Tips for Creating Outstanding Portraits, Inspired by the work of Dutch Artist Van Gogh

Posted in Photography


Sigma blog posts tips for photographing 4th of July fireworks

04 Jul

fireworks.jpg

Sigma has posted an informative article on its blog by photographer Jack Howard, sharing tips on how to photograph fireworks. The article comes just in time for the 4th of July celebrations in the USA, but is equally relevant to various festivals, year-wide, all over the world. Tips include obvious pointers like making sure you have a good, sturdy tripod, but also more detailed advice about how to set up your camera’s exposure and focus modes, as well as how to trigger exposures. Click through for a link to the article at blog.sigmaphoto.com.

News: Digital Photography Review (dpreview.com)

 
Comments Off on Sigma blog posts tips for photographing 4th of July fireworks

Posted in Uncategorized


10 Travel Photography Tips to Help Avoid Regrets When You Get Home

03 Jul

By Hélio Dias.

I have lost count of how many times I’ve came home and regretted not having done something to get better pictures when I was traveling.

Luckily, each time that happened I learned from my mistakes. Now I want to share them with you so you don’t need to learn the worst way.

The tips apply for professional jobs and for your vacation pictures.

1. Make a List

Search on the internet – Google, Flickr, 500px, etc. – for images of the places you are going to visit and have a first look on them. Pay attention to the light, the colors, the possibilities to explore in the field and find out the best locations to take your photos.

On Flickr, for instance, it’s even possible to check the time in which the picture was taken, so you can know how the light is in that particular site at that time. A little geeky, but really helpful for me.

The possibilities of the research on the web are pretty amazing and endless. For food photography, for example, you don’t need to find a restaurant with pictures on the menu, or spend some time inspecting what people around you are eating before ordering your meal. You can find information and pictures of local food in advance and choose the best looking dishes, so when you go to a restaurant you know exactly what to order to take photos of.

Don’t run the risk of finding out later about a great place you missed when you where there.

Moon Valley, a beautiful place I missed in my first visit to La Paz, Bolivia.

Moon Valley, a beautiful place I missed in my first visit to La Paz, Bolivia.

2. Take your Time

Definitely not something you haven’t heard yet, but sure the most important photography advice I’ve ever got: work the scene.

Spend some time trying to make the best possible photo from something you see potential on. Always remember: it’s not about getting 200 nice snapshots. It’s about 5 to 10 great photos. Invest your time and effort on these few ones.

Don’t rush. Never get satisfied with your first shot. There is a 99,9% chance you will get a better one if you study the scene more carefully.

Try different perspectives and angles. Walk around, get closer, get further. Try other lenses. Pay attention to details – they might be the center of interest you are looking for. Find the best background.

Drain your possibilities to the last drop. Then move on to the next shot.

There’s nothing more disappointing than looking at your photos when you are home and wish you had shot that particular picture from a different perspective.

Dublin, Ireland. This one was about my 15th try. Totally worth the time and the shots.

Dublin, Ireland. This one was about my 15th try. Totally worth the time and the shots.

3. Wait for It

Kind of the same advice as the previous one. Just this time I want to point out the time you spend in a certain location after finding your best angle. You worked the scene, you found your composition. Now it’s time to add a little sugar to it.

There are 2 situations in which you may wait some time to get the best shot.

1) The scene is great, but you think it would be perfect with some random person walking by. Or a dog. Or a bird flying. Or a crowd passing by. Or a woman dressed in red. Wait for it until you get it.

Chefchaouen, Morocco. I wanted to portray someone wearing the same outfit as the people in the painting, so I waited until the perfect subject passed by.

Chefchaouen, Morocco. I wanted to portray someone wearing the same outfit as the people in the painting, so I waited until the perfect subject passed by.

2) Many times you will have to wait for the best light. If that’s the case and it is too soon, take a picture, memorize your position and come back later.

Sachsenhausen Concentration Camp - Oranienburg, Germany. I noticed the potential for a good picture when I arrived there earlier. So I calmly visited the site and, by the time I finished, the light was already perfect.

Sachsenhausen Concentration Camp – Oranienburg, Germany. I noticed the potential for a good picture when I arrived there earlier. So I calmly visited the site and, by the time I finished, the light was already perfect.

In both cases, you will need even more patience than when you were looking for the best framing. Now you just wait there, as long as it takes.

It’s really hard to keep the concentration while you are waiting there. But it’s really easy to regret not having waited when you are home sorting your photos later.

4. Don’t be Lazy

Wake up early and take advantage of the early morning light.

It will sound like the worst possible idea when your alarm clock beep at 5 AM, but you will be pleased with the awesome pictures you will take – a lot better than the ones you’d take around noon.

By shooting in the morning and in the afternoon on both golden hours, you raise 100% your photography time with good light. Plus: Other tourists may take pictures at the same sites, but as most of them won’t wake up early and because the sun in the morning lights up everything from the opposite side, your pictures will look different from theirs. Also, you can take advantage of the fact that it’s usually quieter in the morning than it is in the afternoon.

"Bored Stone" - Jericoacoara, Brazil. Many friends question me why this place looked so different when they visited and why their pictures look so dull. The "big" secret is to go there in the morning.

“Bored Stone” – Jericoacoara, Brazil. Many friends question me why this place looked so different when they visited and why their pictures look so dull. The “big” secret is to go there in the morning.

You will never regret having woken up so early when you get home and see the beautiful pictures you brought.

5. Have Options
It’s always good to explore some possibilities and to have more options when you are sorting and cropping your pictures.

For example, even after composing carefully and finding the best image, shoot a horizontal and a vertical photo of the same scene.

If you are using a random person to help composing a shot, do it with a man, a woman, a kid, a couple, etc.

Don’t shoot too tight. It’s better to have a wider picture and crop afterwards if needed – to adequate the picture to the available format in a magazine, for example. Give your editor (and yourself) room to edit.

Choose the best option later, when you can look carefully at each image, or let your editor choose if it’s a paid job.

Essaouira, Morocco. I waited many minutes in front of this colored plastic boxes wall and took the same picture with other men, women, couples and kids. In the end, the guy in a white dress with a bicycle seemed like the best choice.

Essaouira, Morocco. I waited many minutes in front of this colored plastic boxes wall and took the same picture with other men, women, couples and kids. In the end, the guy in a white dress with a bicycle seemed like the best choice.

6. Ask Strangers to take their Portrait

How many times I have regretted not having asked someone to take his picture!

It’s a big think to step up and go ask a stranger to take his photo. I’ve lost count of the many thousands of great portraits I’ve lost in the past because I was too shy to ask permission.

But what has to be done has to be done. At one point you stop being silly and go ask the first stranger.

The second one will be almost as difficult as the first one. And the third just a little less. But by the 100th time you do it, it will be as easy as 1, 2, 3. The first no’s are very disappointing, but at some point you get used to it. Trust me.

Peruvian man. "Can I take your picture?". "It's my pleasure!".

Peruvian man. “Can I take your picture?”. “It’s my pleasure!”.

7. Check it out Before Moving On

When you finally make that great picture, check carefully on your LCD screen if it’s not shaky or out of focus.

Also check the histogram and observe if the picture isn’t under or over exposed (don’t trust the image on the LCD to check this, especially in a bright day).

8. Always Keep your Gear Clean

Sometimes you’ll only find out how dirty your camera’s sensor or lenses’ glass were when you tweak the contrast of your photos while editing and see the dark spots pop out.

Ahu Tongariki, Easter Island. It's been a while, but I'm still cleaning out all the dirty spots on many pictures from that trip.

Ahu Tongariki, Easter Island. It’s been a while, but I’m still cleaning out all the dirty spots on many pictures from that trip.

Use a bulb blower, a brush or proper cleaning fluid to clean your camera’s sensor, and a clean cloth to clean your lenses’ glass and filters.

You could clean those spots later on Photoshop, but it’s really annoying and will take some time. Better to avoid the extra work.

9. Take Notes

When you get to the PC to sort and organize your travel photos you will want to know the names of the places and landmarks you photographed, especially when you find yourself uploading a picture and need a caption for it.

Take notes or, if it’s possible, take a picture of a sign or plaque related to the subject.

Sometimes you can find the information you need later on the internet, but even then it’s more time consuming than just writing it down in a small notebook.

10. Take Care

Be safe. Watch your stuff.

You can buy new equipment, but the pictures on your stolen memory card are lost forever.
Reduce the risks. Be prudent.

The best picture I've ever taken, from my trip to Colombia. Lost by carelessness. Put the memory card in my pocket, and when I looked for it, it was gone.

The best picture I’ve ever taken, from my trip to Colombia. Lost by carelessness. Put the memory card in my pocket, and when I looked for it, it was gone.

What about you? What have you already regretted?

Hélio Dias is a Brazilian photographer and travel writer. Visit his website and follow him on Facebook and on Twitter at @diashelio.

Post originally from: Digital Photography Tips.

Check out our more Photography Tips at Photography Tips for Beginners, Portrait Photography Tips and Wedding Photography Tips.

10 Travel Photography Tips to Help Avoid Regrets When You Get Home


Digital Photography School

 
Comments Off on 10 Travel Photography Tips to Help Avoid Regrets When You Get Home

Posted in Photography


6 Tips for Getting Better Parade Photos

27 Jun

My last article I went over 15 tips for successful fireworks photography. This week I’m following up with 5 tips for better parade photos. I figured it is the season for parades and they’re so much fun I want to give you a few quick tips to help you get more engaging, stunning photos at any parade.

#1 Location, location, location

Find a good spot by getting there early and checking out the parade route. This seems like a no-brainer, but the lighting can be tricky especially if you’re in a spot where the floats and people are half in the sun, and half in the shade. So select a spot where you can either get them all in the shade (and have a shady background too), or all in the sun. Don’t be afraid to move if you find the location you selected isn’t working, for whatever reason. Maybe the lighting is bad, or the background is too busy or too bright. Then see tip #2 below!

#2 Use your feet

Unless this is prohibited by parade marshals or the local police (check first if you aren’t sure so you don’t get in trouble), don’t be stuck to sitting on your butt on the curb.  Get up and move around. Most people that attend parades find a spot and basically camp out there for the duration. But what do you see the real photojournalists doing? The guys and gals that work for the newspapers? Right, you see them following the parade and getting right out on the street.

use-feet-parade

Notice where I am standing here? In between the dancers, they literally walked around me!

**NOTE: do not get yourself in trouble, if the parade marshal or police tell you to cease and desist please listen to them and follow their guidelines. Perhaps find out ahead of time if you need special permission to walk the parade route.**

#3 Join the parade and a part of it

I followed this float for 5 blocks because their music was so good!

I followed this float for 5 blocks because their music was so good!

Joining the parade either officially, or unofficially can get you closer to the action. Volunteer to be security, or help out and ask if you can bring your camera along. You may get access to backstage areas, or being on the street in places that you might not otherwise get to go.  Many parades, at least here anyway, encourage people to get up and join in and march along behind the bands, or dance behind the floats with the great music. That’s part of what makes parades to universally fun. We have a parade called “Cariwest” which is a celebration of Caribbean culture and music. They highly encourage people to follow them and dance along the entire parade route. I love to attend this parade because it’s so colorful and I can get close to the action. Try to find ones like this, often in smaller cities or towns the rules are more relaxed, so get out of the big city if need be.

#4 If in doubt, back-light your subjects

As I mentioned earlier you can encounter some really tricky lighting situations at a parade. I tend to like to put the sun behind my subjects, then I expose so they are well lit and the background gets overexposed or blow out. I’m fine with that as opposed to the opposite of drab photos in the shade with no sense of drama and separation. The sun creates a rim light (outline on the subject) and separates them from the usual boring buildings behind them.

back-lighting1 back-lighting2

#5 Use a telephoto lens but get in close

Often in my beginner photography classes my students assume that the longer telephoto and zoom lenses are for photographing things far away. While that is sometimes the case, as in wildlife or birds, they have other great uses as well. See my article on “How to achieve blurred backgrounds in portraits” as those tips apply here as well. Using a longer lens and large aperture, will help you get the distracting background of the parade route more out of focus.

get-closer

I also suggest you get physically closer to the people you’re photographing. This will do two things . . .

First it let’s them see you’re taking their photo, and allows interaction with them if only by eye contact. They know they’re on display in the parade and expect to have their photo taken many times. So if you are hesitant or tentative taking people’s photos this is a perfect opportunity because you have a whole stream of willing subjects literally parading in front of you (sorry pun intended). Sometimes you’ll get a great reaction when they see your camera like the series of images below. She turned, saw me, and I captured a few shots as she rotated and pointed right at me. If I were out on the street edge, likely that wouldn’t have happened.

Second, it will simplify your images and allow you to focus more on one thing at a time. Parades can be visually stimulating, and overly busy so getting in closer will help solve those problems. Pick one person, or one part of a float and get closer.

Float details

Float details

#6 Try to create a series of images that tell a story

Over on my own site I wrote “What is your message? Storytelling photography” and gave some examples. As you photograph the parade try and create a series of images that tell the story of the event, and relate it to someone that wasn’t there. What do you see, hear, feel, taste and touch? What is the main thing you want tell people that see your images of the parade? Journalists will say that you need to cover: wide, medium and long. What that means is show the big picture by shooting some wide shots; show the medium range like one person or one float; and show long or tight shots like details of costumes of floats or musical instruments.  Try to also capture some action images, dancers in mid-bounce, drummers with hands or drumsticks all a blur in motion. A story also needs a beginning, middle and end. Think of those things while you photograph and you may surprise yourself with the results.

peak-parage-action

Hmm, is it just me or are these firemen enjoying the parade just a little too much?!

Hmm, is it just me or are these firemen enjoying the parade just a little too much?!

Bonus tip

Don’t forget to drink lots of water, stay hydrated, and have some FUN with it!

Have a great summer (if you’re in the northern hemisphere) and enjoy it while it lasts.

Post originally from: Digital Photography Tips.

Check out our more Photography Tips at Photography Tips for Beginners, Portrait Photography Tips and Wedding Photography Tips.

6 Tips for Getting Better Parade Photos


Digital Photography School

 
Comments Off on 6 Tips for Getting Better Parade Photos

Posted in Photography


11 Tips for Photographing Senior Portraits

25 Jun

A Guest Contribution by Meghan Newsom.

When it comes to planning for sessions, seniors are some of my favorite people to work with. Don’t get me wrong, I love families, children, engaged couples and wedding ceremonies.. but seniors are close to the top of my list.

Dps1Ashleyedited21

Why, you may ask? It’s simple: seniors are excited to model, seniors are some of my best marketing tools, and seniors know what they want. They also have a great sense of style, which translates well in their photographs.

When a high school senior books a session with me, I do several things right from the start to help them know I am excited about working with them. I also do my best to get to know them so I can tailor their shoot to fit them perfectly. I find that if you do these things, your session will not only run smoothly, but you will have a client who LOVES to refer you to their friends.

Dps2Ashleyedited52

Before the Shoot

1. First things first, let them know how excited you are to work with them. Since seniors are all about social media, I tweet about how excited I am to work with them and plan their session a few days after they book with me.

2. Next, I send each senior I book a tailored questionnaire so I can get to know them better. Some of these questions found in their questionnaire include:

  • What are some of your favorite features about yourself?
  • What do you want to remember most about this time in your life?
  • Are there any specific locations you have in mind for your shoot?
  • How would you spend your ideal Saturday?
  • How would you describe your personal style?

3. Even though seniors are on top of the latest styles, they often need help when it comes to deciding what to wear to their session. So, a week before their session I send them a link to a pinterest board I have created to help give them specific ideas of what to bring with them. This small act not only helps your client, but it will also help you achieve the look you want in your own portfolio.

Dps3edittaryn17

Dps4elamgirls2012christmas112

At the Shoot

The morning of the session, I contact my client to make sure they know what time and where we are meeting up. I make sure they have their outfits picked out, and give them one more opportunity to ask me any questions they see fit.

During the session I do several things to make the couple of hours I have with them memorable and stress free (and fun!!) for my senior client. You can do this too by doing the following things:

1. Seniors are at an awesome stage in their lives, they have their whole future ahead of them. Talk with them, ask them questions, find out what their plans for the future are. Encourage them and invest in them while you are with them. They will feel appreciated, valued, and will feel confident hearing assuring words from an adult that isn’t their parent.

2. Most seniors have never been in front of a professional photographer other than the cheesy pictures their parents had them take when they were younger. Make them feel comfortable. Praise them when they look good in front of the camera. I love to turn my camera around and show them some little peaks of how well they are doing. THEY LOVE THIS! It will encourage them to keep up the good work, and will give them confidence in their appearance.

3. Posing. You may have some go-to poses you use for your seniors. But since each person is uniquely different, you need to have several tricks up your sleeve. Enter my i-phone. Recently I have been taking screen shots of poses I am inspired them and putting them into albums on my i phone. When I hit a rut, I whip out my phone and look at my posing guides. At first I thought this was like “cheating” during a shoot, but my seniors LOVE IT! They think it is so cool that I thought of them enough before hand to plan for their poses during their session. Again, this makes them feel valued. I have a great Pinterest board to help you out if your stuck in a rut.

4. Props. I love to bring small props for my seniors to hold or sit on during their session. This could mean an old folding chair, a cute beach hat, an old quilt.. or even some books. Some people feel really awkward in front of the camera at first, so these little props give them something to do with their hands while they are adjusting to your presence.

Dps5katie44

After the Shoot

After their session, you can keep up the “hype” by doing several things:

1. The following day post a “teaser” or “sneak peak” photo from their session onto facebook. This is another reason why I love seniors. They will share that teaser with all of their friends through social media, which means more publicity for you and your business!

2. The following week, after I have edited all of their images, I will send ten images to them through PASS. They will also share these images through facebook, and it will give them a great idea of why they should purchase a disc with ALL of their high-resolution images from me.

3. As soon as I have all of their images edited, I will order a custom book for my seniors and send it to them along with a really appealing package. The package includes a hand written note, business cards, and other little goodies I sneak in for them. They always love how personal I make these for each of them (another great reason so send them a questionnaire and get to know them well during the session!)

4. After they have their images, blog all about their session, including images they haven’t seen in the ten I sent them. This blog post will also be shared through social medial to their friends and family (more free advertising!).

Dps6kirk8

In post processing senior photos, always remember that you are photographing for their parents as much as you are your senior client. I keep “fad” type editing out of the equation because I know ten years from now their parents will want a solid (not overly processed) image on their wall.

Instead of using “fad” editing techniques, I always let the style speak through the locations I choose. You can easily do this by choosing old brick buildings, abandoned farm houses, fields of cotton etc. The seniors love this, and their parents will appreciate the timelessness of the photographs they receive.

Dps7kamieditedw

It is not hard to rock a session with your seniors, it just takes some extra things to go above and beyond so they know you appreciate them and want to know them. All of those extra things will make your client feel special, and will translate into those coveted word of mouth referrals for you and your growing business!

Meghan Newsom is a lifestyle and wedding photographer located in Northern Alabama. When she’s not writing for her lifestyle blog, cooking up gluten free recipes, or taking pictures, you can find her exploring outside with her husband and pup.

Post originally from: Digital Photography Tips.

Check out our more Photography Tips at Photography Tips for Beginners, Portrait Photography Tips and Wedding Photography Tips.

11 Tips for Photographing Senior Portraits


Digital Photography School

 
Comments Off on 11 Tips for Photographing Senior Portraits

Posted in Photography


Wired.com shares tips on photographing the Supermoon

22 Jun

supermoon_2.jpg

This Sunday, June 23rd, the moon will be closer to earth than at any point during the year. It just so happens that on Sunday the moon will be full, too, creating what is commonly known as a ‘Supermoon’ which if there are no clouds in the way, will appear larger and brighter than normal. A great opportunity for some backyward astrophotography, in other words. Wired.com’s Raw File blog has published a short article containing tips for capturing this Sunday’s Supermoon in all its glory. Click through for extracts and a link to the full article. 

News: Digital Photography Review (dpreview.com)

 
Comments Off on Wired.com shares tips on photographing the Supermoon

Posted in Uncategorized


Life With A Rangefinder, Plus Street Photography Tips.

19 Jun

Shoes

These days you are most likely to find me wandering the streets of London with a Leica M Monochrom hanging from my neck. Street photography and Leica have been inextricably linked for decades and this is solely down to Leica’s M system camera and its rangefinder focus mechanism.

This is not to say that you cannot be a street photographer without a rangefinder camera or, transversely, that you cannot shoot anything but the streets with a Leica. It is simply that this style of camera is the preferred tool of the serious street photographer.

If you’re unfamiliar with Rangefinders, the name is simply a reference to the distance oriented method by which you focus the lens. You are presented, within the viewfinder,  2 overlapping versions of the scene and as you turn the lens to find focus, the overlapping images merge together into one, at which point you are focused!

Can you hear me?!

It does raise the question of why use a Leica rangefinder once you realize the camera is pretty much manual. Focusing, especially, is an entirely manual exercise. My camera will struggle to reach 4 fps. The viewfinder is essentially just a viewing frame where the image does not travel through the lens and is not related to the focal length either. It is just a ‘window’ for you to frame the shot. Side stepping image quality, there’s more and improved functionality out there in the DSLR world. And the cost?! US$ 13000 for a Camera, lens, spare battery and a strap!

It just doesn’t make sense, does it?!

I actually traded my entire ‘bag’ of Canon bodies and lenses for this camera, never more convinced this was the system for me. I have always been a manual photographer, actively disliking AF for its constant need to slave my compositions to specific points in the frame. The mirror system means bodies are big and lenses, good quality lenses, are bulky too. Compare a Canon 5D Mark II and a Leica Monochrom, each with a 35mm f/2 lens, and the Leica is 2/3s the weight and I dare say the size too. Factor in shutter noise and you are a lot more conspicuous in a crowd with a DSLR.

Rangefinder cameras, generally much smaller, quieter and inconspicuous than their DSLR counterparts aren’t just the subjective opinions of a few desperate fans. I recently read that quite a few US court rooms dictate that cameras, “… shall produce no greater sound than a 35mm Leica “M” Series rangefinder camera.”.

For most of you, I concede, not the right camera. For me? Definitely. I want lightweight, quiet, inconspicuous and excellent image quality.

On the streets

I plan exactly where I will take photographs. My style is slightly minimalist and the contextual environment is paramount. With a history oriented to architecture photography, I am picky about my backgrounds.

Tourists

Of course many locations are new to me and, once I get there, I have to establish the best vantage points. How and precisely where are the people interacting with this place?

So I wait. And watch. I am largely ignored and, for all intents and purposes, I don’t look the least bit ‘professional’ just have a compact camera around my neck.

After a few minutes I know where to focus and do so in readiness.

And… nothing!

I can’t count the occasions where the people who are at the scene or walking through it are simply doing just that. If the scene is extraordinary, then the people ignoring it make a good composition. How dare they not notice how wonderful the building behind them is?! Otherwise it will just make a dull photograph.

Patience does pay off and, eventually, you are rewarded with a great image.

Run!

I did mention the downsides of using an entirely manual set up, but there are distinct advantages. The boy, in the image above, ran through the fountains only once. He didn’t think he’d be caught by the water jets as they erupted and he reacted so quickly and ran to escape, but I got the shot. I’d already focused my lens and was just hanging around needing only to point at my chosen scene and press the shutter.

Did you realize that, with a full frame camera, set an aperture of f8 focused to a distance of 3m away and everything will be in focus from 2m to 10m? This is called zone focusing and allows me to focus without lifting camera to eye. Very stealthy! Why 3m away? I am frequently around this distance from a subject when I want to take their photo.

Cigar Break

This business man was clearly checking his phone, probably for emails, whilst smoking his fat cigar. He couldn’t stand still, so I waited, wondering whether he’d step on the larger steps. A good result!

How do I improve my street photography

Whatever your camera, there is some helpful advice I can pass on after learning some hard lessons.

Have a plan, even if it is, “I’m going to walk from place A to B”. Before I head out, I put together a list of interesting places, items, or a theme. When it has rained, I will always look for reflections in puddles. Either way I look for reflections in the windows of buildings. Lately, I have been interested in phone boxes and graffiti.

Just. Keep. Walking.

Be like the tourist, walk confidently, look and stare. Whilst everyone seems to be able to see the skulking photographer, camera clutched at chest height, no one pays the tourist attention… unless they get in your way, which they quite frequently do! Be bold, see your shot, stand firm and take it. If the subjects see you, wave and smile and walk away. Like a tourist!

Look around you. Simply taking random snapshots of ordinary people in normal life situations is not going to be rewarding for very long. Additionally, think about the viewer of your photograph too – what will they see from your image? As I walk around I look at the buildings and signs,  graffiti, bill boards and giant posters. People in front of these can be a great juxtaposition. So look around you and mentally picture a person, or a group, as a foreground subject. Is it worth waiting a few minutes to see if anyone interesting turns up?

I hope this article gives a glimpse into life with a rangefinder camera which, for me at least, is the perfect camera.

Post originally from: Digital Photography Tips.

Check out our more Photography Tips at Photography Tips for Beginners, Portrait Photography Tips and Wedding Photography Tips.

Life With A Rangefinder, Plus Street Photography Tips.


Digital Photography School

 
Comments Off on Life With A Rangefinder, Plus Street Photography Tips.

Posted in Photography


Killer Tips for Photographing the Moon That You Can’t Pass Up

17 Jun

The moon has long been a source of deep fascination for mankind. As long as anyone can remember, human beings have stared up into its source of light in the pitch black of night and wondered about it. Some have even gone a bit batty thanks to the moon’s effects (at least, some would have you believe). But hardcore photographers Continue Reading

The post Killer Tips for Photographing the Moon That You Can’t Pass Up appeared first on Photodoto.


Photodoto

 
Comments Off on Killer Tips for Photographing the Moon That You Can’t Pass Up

Posted in Photography