RSS
 

Posts Tagged ‘Time’

Review of The Promote Control for Time Lapse and Focus Stacking

20 Aug

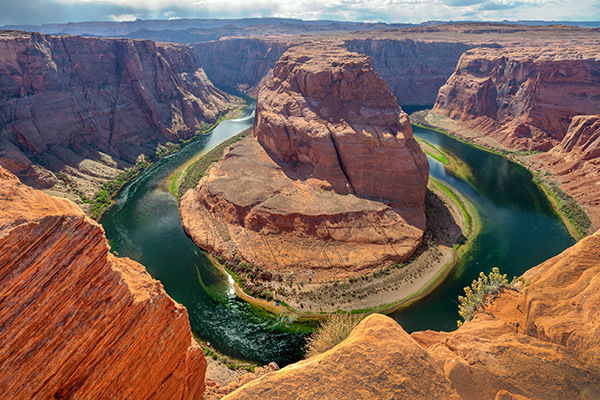
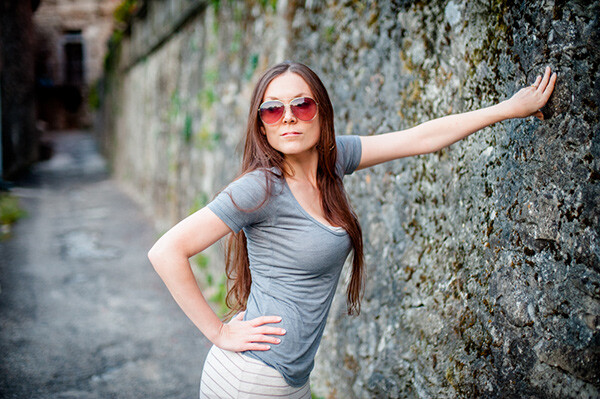
Want to take super sharp “focus stacked” photographs that boast corner to corner sharpness with perfect focus? Want to shoot spectacular ‘holy grail’ time lapse sequences that capture the change from day to night? How about advanced bracketing for HDR shooting? Do you fancy getting shots like this?

Horseshoe Bend Focus Stacked Gavin Hardcastle

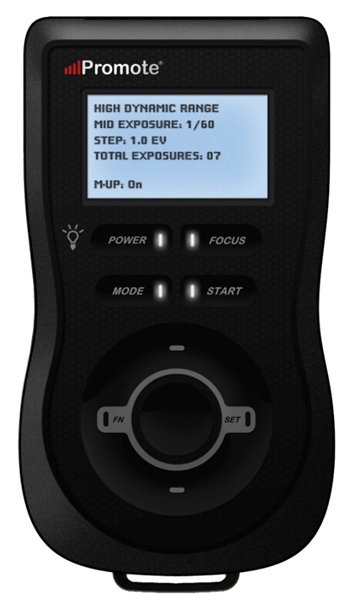
The Promote Control from Promote Systems delivers very precise control over DSLR cameras to open up new creative possibilities. Here’s a list of things that the Promote Control can do:

  • Promote Control ReviewHyperfocal Distance Calculator
  • Remote Shutter (One Shot)
  • Time Lapse Intervalometer
  • HDR Bracketing
  • BulB HDR Bracketing
  • Bulb Ramping for Time Lapse
  • Focus Stacking
  • Video Control
  • Manual Shutter for long Bulb Exposures

This device is like a Swiss Army Knife for photographers who want to get the most out of their DSLR cameras. Currently priced at $ 299, it’s an accessory that will appeal to the more hardcore shooters, but for those photographers that regularly need advanced HDR bracketing, focus stacking or bulb ramping, the Promote Control is worth every penny.

Rather than go into every single function of the Promote Control, I’m going to highlight its three most powerful features, which I believe merit the asking price themselves.
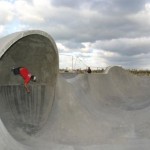
Focus Stacking

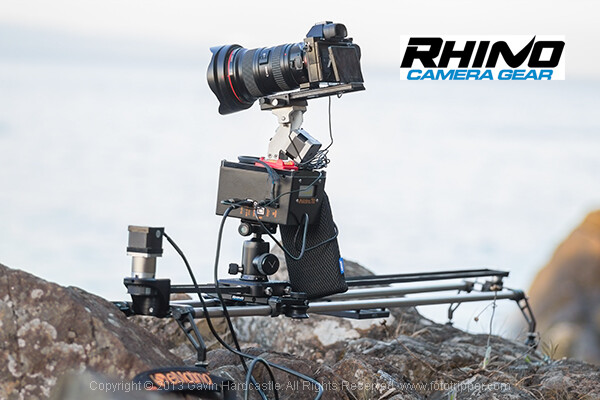
As a landscape shooter, I mostly want corner to corner sharpness in my images and sometimes I’ll use focus stacking to achieve maximum sharpness throughout the frame. This really only works when your static subjects are perfectly still, with little to no breeze. If you’ve ever tried focus stacking the manual way, you’ll know that there is some margin for error and it can take practice to do it well. The Promote Control takes all the guess work out of focus stacking by incrementally adjusting your focus from start and end points that you specify.

Once you’ve done this a couple of times you’ll never be able to go back to doing it manually. When you see the results of your focus stacked image and the lack of weird looking artifacts that can sometimes result from inaccurate focus adjustments done manually, you’ll be hooked.

Macro and small product photographers will love this feature.

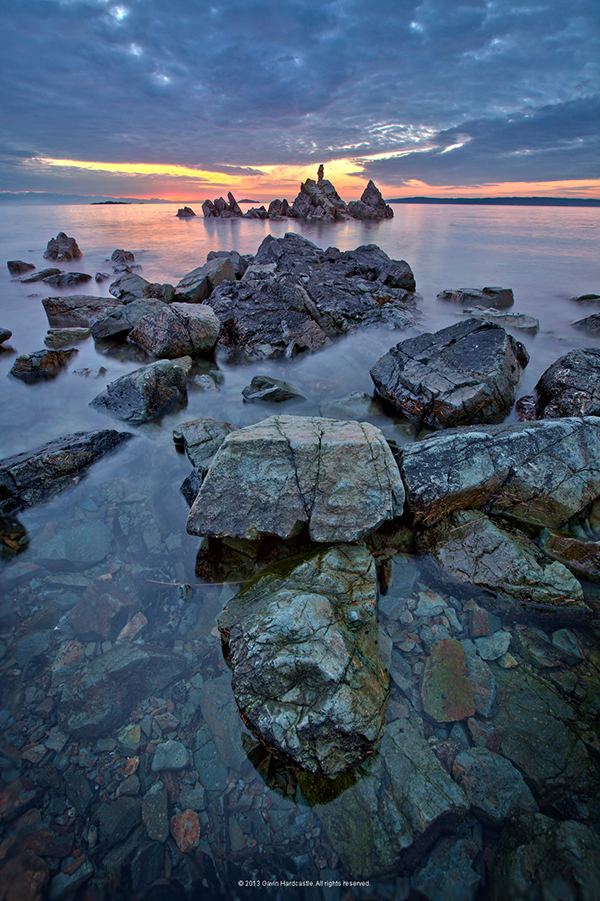
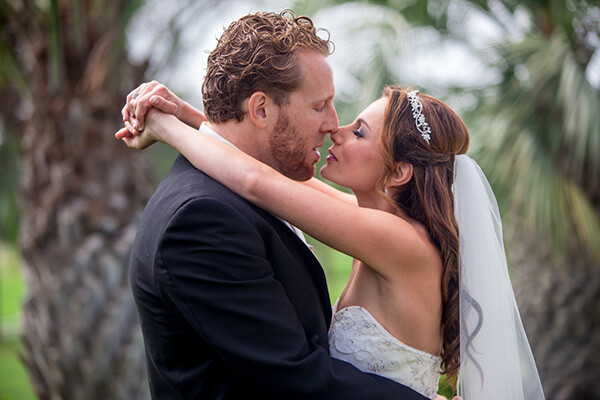
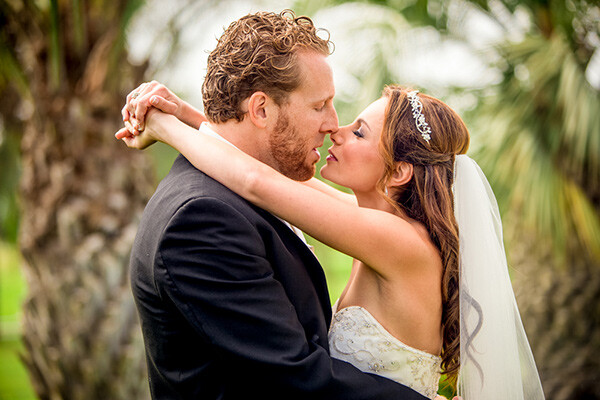
Here’s an example of a focus stacked shot with corner to corner focus using a mid range aperture.

Focus Stacking with the Promote Control

Here’s a video demonstrating how this works with the Promote Control.

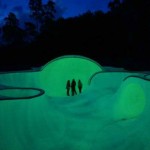
Bulb Ramping for day to night Time Lapse

If you’ve ever tried to shoot a time lapse sequence of the setting sun, you’ll know that there are only two ways to capture the correct exposures as the light changes. You either adjust the shutter speed manually while shooting (which introduces terrible flicker) or you use a bulb ramping device that can gradually and smoothly alter your shutter speed over time.

This technique is known as Bulb Ramping, and there really aren’t that many devices out there that do a good job. The Promote Control has become something of a “go to” bulb ramping solution for quite some time now, because it simply does such an excellent job of adjusting your DSLR camera’s shutter speed in tiny increments, over a set period of time. You tell the Promote Control how long you’d like to shoot, and when you’d like it to begin increasing or decreasing the exposure time.

Of course, it can’t know exactly when the changes in light occur, you have to know in advance by casing your location the night before, and making a note of the sunset time. The Promote  Control simply does what you tell it to do, and it does it well. Here’s a video of Joel Schat explaining how to achieve bulb ramping with the Promote Control.

HDR Bracketing

If three or five bracketed exposures simply aren’t enough to capture the dynamic range of your scene, how does 45 exposures sound? Simply tell the Promote Control what shutter speed to use for the middle (or correct) exposure, then tell it how many EV steps to use and the number of total exposures. The Promote Control will do the grunt work while you look around for the next shot.

A jack of all trades

Everything that the Promote Control does, it does well. I expect that most users will only use two to three of this device’s powerful features but at $ 299 it’s worth every penny.

Build quality

weather sealed promote control

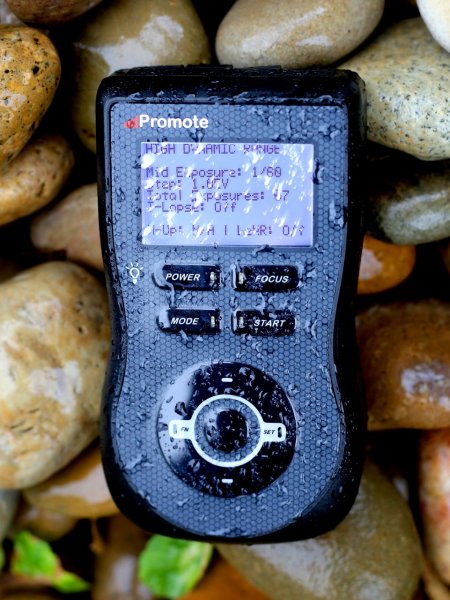
The Promote Control is very well built. It’s a solid little unit that’s about the same size as a Smartphone, but is just under an inch thick. The backlit LCD screen is easy to read and there are only eight buttons on the entire unit. It’s small enough to pack into any mid-sized camera bag, and comes with a tidy little carry case. It even comes with a lifetime warranty for manufacturing and workmanship defects. How often do you see that?

The device is powered by two AA batteries which last a long time. You can also power the Promote Control with an external DC power jack for taking super long exposures, or lengthy time lapse shoots.

What I’d like to see in the next update

To me, there is one glaringly obvious function that is missing from this device. HDR Focus Stacking. Why not combine the advanced HDR bracketing feature and the focus stacking feature? When I focus stack manually, I often have to bracket in order to capture the dynamic range. I can’t imagine why this feature is not available with this device.

My only two complaints

The Promote Control is such a simple little device that there’s not much to complain about, it either works or it doesn’t. My only gripe isn’t with the unit itself, but with the hotshoe attachment, required for bulb ramping when shooting time lapse sequences. I found that the cable fell out of the hotshoe attachment at the slightest nudge, not something I would trust out in the field when shooting a lengthy time lapse.

Hot Shoe Cable

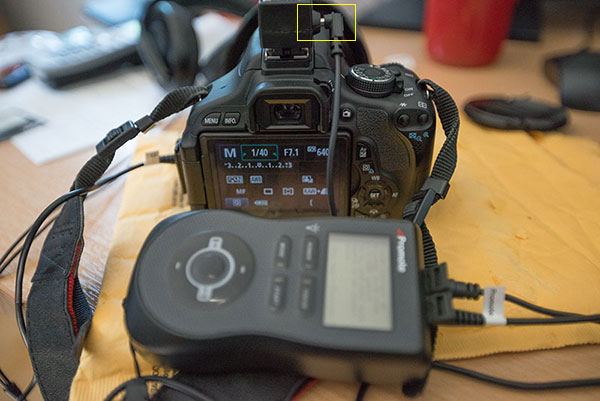
I had problems with the cable that attaches to the hotshoe accessory.

My other complaint is that the Promote Control is not compatible with mirrorless cameras like my Sony A7R. Full compatibility only extends to Nikon and Canon, with limited compatibility for Sony and Sigma cameras. This is the only reason I decided not to buy the Promote Control. But if Promote Systems manages to catch up with the mirrorless movement, I’ll be unleashing the credit card.

I asked Promote Systems about it and this was their response:

We get a lot of requests for compatibility with the A7/A7R and we would love to support the cameras, but unfortunately Sony doesn’t make that possible. They implemented a tethering protocol on A7 cameras, but just as with earlier cameras, it refuses to save images on the card – you MUST pick them up and save them elsewhere, or all subsequent USB image acquisition commands will fail. Until Sony resolves the issues with not saving images on to the in-camera card when tethered, we can’t do much about it, unfortunately.

Why can’t my camera do all this?

When you look at what the Promote Control does and the results that it achieves, there’s obviously a demand for this level of functionality. There’s no reason why digital cameras can’t have all of this functionality built in, and with cameras like the Sony A7R able to run Apps that users install, it’s only a matter of time until all of this can be done in camera. Until then, Promote Systems are filling a gap in the market and they are doing it very well. I’m going to award the Promote Control 4 stars.

Would you buy this clever little device?

The post Review of The Promote Control for Time Lapse and Focus Stacking by Gavin Hardcastle appeared first on Digital Photography School.


Digital Photography School

 
Comments Off on Review of The Promote Control for Time Lapse and Focus Stacking

Posted in Photography


Time in Color: Skatepark Graffiti Acts as a Working Sundial

16 Aug

[ By Steph in Architecture & Cities & Urbanism. ]

Skatepark Graffiti 1

Skaters at this park in Lugano, Switzerland don’t have to pull out their phones to check the time – they can just glance down at a series of colored lines painted right onto the concrete of the bowl as a modern sundial. A ribbon of rainbow hues curves up and down the undulating surface, the sun and shadows revealing the current hour.

Skatepark Graffiti 2

Skatepark Graffiti 3

A different line of color indicates each hour of the day, marked off as the sun passes overhead. Designed by Moscow group Zuk Club, the vibrant park is like an abstract modern mural customized specifically to the shape of the bowl and the surrounding area.

SKatepark Graffiti 4 Skatepark Graffiti 5

It’s an interesting and visually resting concept, though perhaps no match for the largest and most complex skate parks around the world. Skaters who find ordinary skate parks unimaginative should check out 13 examples of highly skateable architecture, ranging from the specially renovated interior of a hunting lodge to Zaha Hadid’s futuristic science center in Germany.

Share on Facebook


[ By Steph in Architecture & Cities & Urbanism. ]

[ WebUrbanist | Archives | Galleries | Privacy | TOS ]


WebUrbanist

 
Comments Off on Time in Color: Skatepark Graffiti Acts as a Working Sundial

Posted in Creativity


Time Lapse Videos Made Easy

21 Jul

Extra photos for bloggers: 1, 2, 3

If you had the power to speed up time you could have romantic sunsets in under a minute or knit a scarf in just 30 seconds.

The Digital Time Lapse Camera gives you that magic! It takes high quality wide angle photos and smashes them into a ready-to-watch video at the touch of a button.

The latest version of our beloved Time Lapse Cam sports better quality optics, low light recording capabilities and a wide angle lens for more interesting shots.

Set it up on a shelf at a hoppin’ party or on a tripod in your growing garden and let it snap tonso pics and stitch them together for you.

Say buh-bye to intervalometers, complicated settings menus and hours of post processing. The Digital Time Lapse Cam is all the magic you need.

Make Time Lapse Vids at the Touch of a Button
$ 249 at the Photojojo Shop


© Britta for Photojojo, 2014. |
Permalink |
No comment |
Add to
del.icio.us

Post tags:


Photojojo

 
Comments Off on Time Lapse Videos Made Easy

Posted in Equipment


Actionable Tips to Get Sharper Photos Every Time

11 Jul

There’s almost nothing (besides maybe losing a memory card) that hurts more than having a great shot that ends up poorly focused! And even though sometimes we can blame our equipment, there are other factors that come into play when focusing. Sharper and crisper photos are the goal of every photographer, so it’s time we cover  the basics to achieve Continue Reading

The post Actionable Tips to Get Sharper Photos Every Time appeared first on Photodoto.


Photodoto

 
Comments Off on Actionable Tips to Get Sharper Photos Every Time

Posted in Photography


Making a splash: Photos capture colorful liquids frozen in time

28 Jun

Jeremy Floto and Cassandra Warner are the husband-and-wife duo behind Floto+Warner, a New York-based photo studio. Their aptly titled ‘Colourant’ series features Western and Midwestern US landscapes with – literally – a splash of color. Fast shutter speeds freeze the action and give them the appearance of sculptures, suspended in time for only a moment. They answered some questions about the series – see more of their work and find out how it came together. See gallery

related news: Digital Photography Review (dpreview.com)

 
Comments Off on Making a splash: Photos capture colorful liquids frozen in time

Posted in Uncategorized


Step into Edgar Martins’ Time Machine

20 Jun

01-Caldeirao-Water-Tower.jpg

Edgar Martins is drawn to documenting off-limits places. This was part of the appeal for him in a project titled ‘The Time Machine,’ in which he gained access to hydro-electric power plants in Portugal, the country where he was born. Built between 1950 and ’70, these facilities were designed to accommodate dozens, even hundreds of employees working side-by-side with state-of-the-art technology. They’re now operated with only a handful of personnel and are largely disused. He answered a few questions for us about the project. See gallery

News: Digital Photography Review (dpreview.com)

 
Comments Off on Step into Edgar Martins’ Time Machine

Posted in Uncategorized


Rhino Slider PRO 4ft Review – Camera Rail System for Time Lapse and Video

02 Jun

If you’re into Videography or time lapse photography, chances are you’ve either already got yourself a slider or are considering making that purchase. Smooth camera movement can really add major production value to your footage and the key word here is ‘smooth’. Having your camera glide through space like it’s floating on air gives a huge boost to any kind of footage.

Enter the Rhino Slider Pro 4ft from Rhino Camera Gear, currently priced at $ 550. As the name suggests, this is a four foot wide slider, onto which you can attach your camera or take things a step further and add a robotic tripod head for a three axis solution of motion control awesomeness.

Rhino Slider PRO 4ft

How Smooth is the Slide?

The most important thing to consider when thinking about buying a slider is the smoothness of the sliding action. This is where the Rhino slider excels. The sliding motion of the carriage on to which you place your camera is as smooth as silk. Once you’ve set the tension on the outer wheels of the carriage, you’re good to go and you can rely on a super smooth slide every time.

Rhino Slider Pro Review

Build Quality

There is a huge difference between the build quality of a sub $ 300 slider and what you’re getting with the Rhino. This is a sturdy, well built unit, that performs well in all kinds of conditions. Sliders are a bit like tripods, if you buy a really cheap one –  it’ll probably end up in the trash. Spend a little more and you’ll get a unit that delivers the goods and lasts a long time. All of the Rhino slider parts are well machined and have that solid, reliable feel to them.

Rhino Slider Review PRO 4ft - Gavin Hardcastle

Heavy is Good Right?

Of course, all of that stability comes at a cost of added weight. The product page on the Rhino Camera Gear web site says that the Rhino Pro 4FT Slider weighs around 10 pounds (4.54 kg). That might not sound like much but by the time you’ve strapped on your camera bag, tripods and any other gear, you’ll be carrying the Rhino slider in its case and holding it in your hand. Talk about a forearm workout. Turns out you can’t have your cake and eat it.

For those concerned about the weight, you might want to consider the carbon fibre rails or two foot rails to keep things more portable on long bush hikes.

Rhino Slider Carbon Legs

Rhino Slider Pro shown with Carbon fibre rails which weigh much less than the stainless steel ones.

The Rhino Gear Carry Case

The test unit I received from Rhino Camera Gear came with the Rhino Armor – Slider Carrying Case 4ft, which is an additional $ 100. Let’s be honest, you’re not very likely to be dragging a 4ft slider into the bush without the carry case so you might as well consider it a foregone conclusion that your total cost will be $ 650. On the plus side, the carry case has space for extra rails so that you can extend the length of your slide. Having more rails means more weight, so I’d definitely opt for the carbon rails.

I found the case to be just a little too short. It was difficult and fiddly to fit the slider back in the case due to the four legs on the ends of the slider. If the case had been an inch longer I reckon this would have been much easier. I’m guessing they make it super tight so that the slider doesn’t shift in the case during transport but there’s tight, and then there’s this.

Rhino Armor Carry Case

Pros for the Rhino Slider PRO 4ft

  • Super smooth sliding action
  • Build quality
  • Value for money
  • Ease of use

Cons against the Rhino Slide PRO 4ft

  • Carry Case could be an inch longer to make it easier to pack the slider
  • Stainless steel rails are heavy – consider buying carbon rails if you are going on long hikes
  • End plates could have been taller. I found that the carriage hit my tripod plates long before it hit the rubber brakes.

Rhino Slider PRO Review

Would I Recommend It?

Having looked at the prices of similar sliders that boast the same build quality, the Rhino slider is looking like a bargain at $ 550 (+ $ 100 for the carry case). Before shelling out the dollars though I’d like to test out the carbon fibre rails to see if they perform as well. If the whole rig could be made lighter, that would eliminate my worst grumble and make this a near perfect product. If you’re not too bothered about the weight of those stainless steel rails, I think you’ll be extremely satisfied with the build quality and smooth sliding action of the Rhino Slider Pro 4ft from Rhino Camera Gear.

The post Rhino Slider PRO 4ft Review – Camera Rail System for Time Lapse and Video by Gavin Hardcastle appeared first on Digital Photography School.


Digital Photography School

 
Comments Off on Rhino Slider PRO 4ft Review – Camera Rail System for Time Lapse and Video

Posted in Photography


Filmmaker links 50 Lumia 1020s to create ‘bullet time’ effect

24 May

Arc-of-Wonder-feat1.jpg

Filmmaker Paul Trillo has teamed up with Microsoft to build an apparatus which they call the ‘Lumia Arc of Wonder’. It consists of 50 Nokia Lumia 1020 smartphones fixed to a custom-built metal arc on casters, some networking equipment and external power sources. Click through to read more, and see the results on connect.dpreview.com

News: Digital Photography Review (dpreview.com)

 
Comments Off on Filmmaker links 50 Lumia 1020s to create ‘bullet time’ effect

Posted in Uncategorized


Save Tons of Editing Time with Lightroom Presets

21 May

On now at SnapnDeals you can get 100 of my custom Presets 50% off. Deal ends soon, don’t miss out so grab it here. 

before-after-lightroom-presets

Photographers don’t have a lot of extra time to edit. As a full-time photographer myself, I rely heavily on any tools that save me time in the editing process. One of the tools I use is Lightroom presets.

What are Lightroom presets?

A preset is a pre-determined position all (or some) of the of sliders in Lightroom (they are pre-set, get it?) In other words, you can edit a photo to your liking, and then save that exactly combination of slider positions for future use on another image.

First things first: how do you create a Lightroom preset?

Very easily! Once you have a photo edited the way you want it you need to save those settings.

Step 1:  Click “Develop” then “New Preset”

presets-step-0

Step 2: Give your preset a title

Lightroom Presets Tutorial

Name your new Preset

Step 3: Choose the folder you want the preset stored in, or create a new folder.

This is a good idea to separate your presets by type. You would be surprised how many random presets you end up with over a few years. Consider creating folders based on the type of edits they are.

Lightroom Presets Tutorial 3

Choose the folder to save it in

You can see I’ve named my presets by color blast (big colors), night, old school color, and black and white. Now I can quickly find the preset I’m looking for based on what type of edit I want to do.

preset-step-3-web

Or make a new folder and give it a name

Step 4: Click the boxes you want applied to this preset and click “create” to create your preset

Sometimes you don’t want every box checked when you create a preset. Imagine you just edited an underexposed photo and had to increase the exposure two full stops (+2 on the exposure slider) to get it correct. This preset would look great on underexposed photos in that set, but would overexpose photos that had the correct exposure.

Another scenario is that you create a preset that only applies a slight vignette to your photos. Unchecking every box except the “vignetting” box would create a preset that would keep the ‘look’ of any photo you are editing and only apply that vignette to it. Pretty cool!

Step 5: You’re done, the preset is complete.

preset-step-4-web

There’s your new Preset

The preset is complete and waiting in the folder you just created. Just open the folder and click the preset title to apply it to future photos.

Lightroom presets save time by enabling batch editing

Imagine shooting 300 images in an area where the lighting isn’t changing and stays consistent. You edit the first image to your liking and save the settings as a preset. Instead of individually editing the remaining 299 images one by one, you can apply that preset and achieve the same ‘look’ as the previous photos. 

The next time you want that type of ‘look’ on a photo with a similar lighting setup you can just apply a preset in one click. It will move all the sliders to those exact positions so the edit style stays the same.

The best part about this is batch editing your photos all at once. You can edit a single image and then apply that preset directly to as many photos as you would like in just one click.

How do you batch edit photos?

Select all the photos you want to apply the preset to, right-click the any of the photo thumbnails, and follow this path:

Lightroom Presets Tutorial 5

That will apply the preset automatically to all the images you selected in one click.

For a walk through on how to do this watch this video as I go through all the steps:

Lightroom presets also save time with the live preview feature

When you hover over the preset names the image thumbnail in the top left corner will give you a preview of what that image will look like with that preset. As you scan your mouse over the list you will be able to tell if a certain preset will look good or not. If it does, you can click once and be done with the image.

Lightroom presets give you a great starting point

Instead of manually editing a photo from scratch, you can apply a preset to make a big change and edit from there. It’s like getting a big head start.

Lightroom presets can do a one-click edit

If I’m hitting a blank spot on where I want to take an image I will hover over my presets and see if I like any of the previews. Sometimes I love it and it’s a one-click edit.  Sometimes I like the look but know it needs a little tweaking. Either way it can save a lot of time. Check out a few one-click edits below from some of my presets.

Straight out of camera

Straight out of camera

After one-click Preset

After one-click preset

before-5968

Straight out of camera

After one-click Preset

After one-click preset

Hacking-Photography-Color-Pop-Presets---Fill-Light-Smooth-Pre

Straight out of camera

After one-click Preset

After one-click preset

I hope you’ve seen how much Lightroom presets can help speed up your editing time and supply you with some very creative edits. I’d love to hear your thoughts in the comments below.

For more information on Lightroom presets check out these:

  • A Concise Guide to Lightroom Develop Presets
  • 4 Quick Tips For Getting The Most Out of Lightroom Presets
  • How to Add an Opacity Slider to Lightroom Develop Presets with The Fader Plug-In

Don’t want to make your own presets? On now at SnapnDeals you can get 100 of my custom Presets 50% off. Deal ends soon, don’t miss out so grab it here. 

The post Save Tons of Editing Time with Lightroom Presets by Mike Newton appeared first on Digital Photography School.


Digital Photography School

 
Comments Off on Save Tons of Editing Time with Lightroom Presets

Posted in Photography


The Ultimate Photographer’s Guide to Photo Contests That Are Worth Your Time

14 May

The Internet has brought an influx of photo contests. It seems like every blogger, photographer and “momtog” is putting up a photo contest. As a serious photographer, how can you know which ones to submit to, and if you do choose to submit to one, how to maximize your chances of winning? Here is everything you need to know about Continue Reading

The post The Ultimate Photographer’s Guide to Photo Contests That Are Worth Your Time appeared first on Photodoto.


Photodoto

 
Comments Off on The Ultimate Photographer’s Guide to Photo Contests That Are Worth Your Time

Posted in Photography