RSS
 

Posts Tagged ‘Test’

MagMod and MagBeam Speedlight Modifiers – Thoughts and Field Test

07 Apr

MagMod made their debut on the photography scene in 2013 with their original speedlight flash modifiers. Recently, they debuted their latest lighting product for photographers, the MagBeam. Functioning as a fresnel lens for your flash, the MagBeam provides a creative boost by easily adding a blast of color or patterns to your images. This article will highlight some of MagMod’s newest products with a special emphasis on the new MagBeam.

What is MagMod?

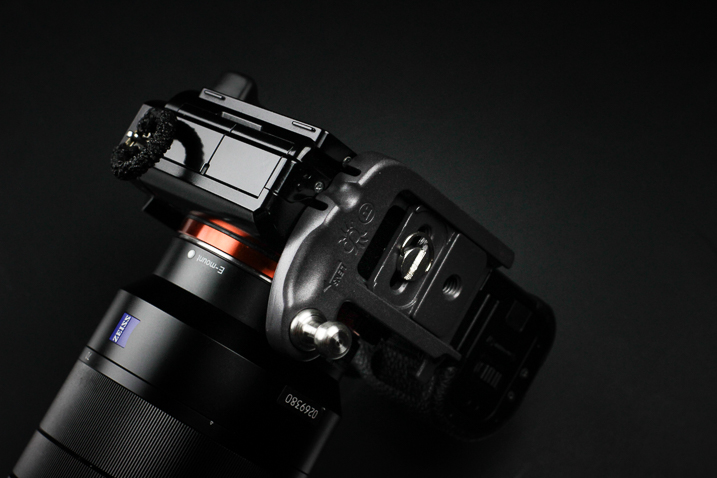
MagMod (short for MagnetMod) is a company which offers a series of compact, super durable flash modifiers that easily attach to your speedlight flash via ultra strong magnets. The magnets make it super simple to switch out modifiers, or even add color gels without having to pause and interrupt your photo shoot for too long. We first introduced this unique speedlight modifier in a MagMod review awhile back (read it to learn more about the MagGrip, MagGrid, and MagGels).

Since that initial review, MagMod has expanded its product line to include the products below (the MagSphere, MagSnoot, MagBouce, and MagGrip). All of them have a built-in slot for easily adding color-correcting gels.

MagMod and MagBeam Speedlight Modifiers - Thoughts and Field Test

Basic MagMod kit with MagSphere, MagSnoot, MagBouce, MagGrip, and color gels.

MagSphere

MagSphere is an omnidirectional modifier that transforms your speedlight’s harsh flash into a bare-bulb light source by increasing the size of your flash over 250%. Use it like a small bounce card or on-camera diffuser.

The MagSphere

MagMod and MagBeam Speedlight Modifiers - Thoughts and Field Test

Food photo, taken with the MagSphere.

MagBounce

Made from a large piece of silicone, the MagBounce increases the size of your flash by 300%. It delivers incredibly soft light and is akin to having a small softbox that is super easy to setup.

MagMod and MagBeam Speedlight Modifiers - Thoughts and Field Test

A portrait, taken with the MagBounce.

MagSnoot

This unique, collapsible snoot can easily be expanded or contracted to deliver a focused beam of light. MagSnoot is perfect for using as a hair light or highlight in product or portrait photography.

MagMod and MagBeam Speedlight Modifiers - Thoughts and Field Test

Left to right: MagSnoot (collapsed), MagBounce, MagSphere.

MagBeam

If you’ve ever wanted to project a variable spotlight pattern as a photography supplement or background, MagBeam has you covered. This compact system gives you a portable Fresnel spotlight that produces an even light with soft edges and a soft shadow. Since this product is a little more complex that the above-mentioned modifiers, we’ll be doing a deeper dive into its features.

Two main uses of the MagBeam

MagBeam can be paired with one of two different lenses that produce very distinct effects. The MagBeam Tele Lens is used to project a focused beam of light, similar to a spotlight. It also gives you two to three extra stops of usable light. This is handy for wildlife photographers to light subjects in the distance. You might also use this Tele Lens to get a tight, concentrated, beam of light for creative portrait or product photography.

The other option is a MagBeam Wide Lens. Use it in conjunction with custom-made metal disks known as MagMasks and you can create projected light patterns for creative backgrounds or lighting effects. You can also stick MagMod color gels into the MagBeam to add a blast of color.

MagMod and MagBeam Speedlight Modifiers - Thoughts and Field Test

MagMod and MagBeam Speedlight Modifiers - Thoughts and Field Test

Taken with MagBeam, wide fresnel lens, MagMask, and creative color gels.

What’s in the MagBeam Kit box?

The MagBeam can be purchased in several different ways, but the most comprehensive way is to order the whole MagBeam Kit. It comes with the MagBeam itself, a tele lens, wide lens, and MagMask Standard Set. You can add on extra MagMasks as accessories, and load up on colored artistic and creative gels as optional accessories.

MagMod and MagBeam Speedlight Modifiers - Thoughts and Field Test

What’s in the box of the MagBeam kit.

MagBeam in Practice

The MagBeam itself is like a bigger, wider version of the MagSnoot. It’s made of black silicone and can be easily collapsed or extended. When collapsed, the MagBeam is super compact and easy to stick in your camera bag. Using the MagBeam is simple. All you have to do is attach the magnetic end to your speedlight flash via a MagGrip (NOTE: this is not included with the MagBeam you need to buy it separately), then stick a plastic fresnel lens on the wide end.

MagMod and MagBeam Speedlight Modifiers - Thoughts and Field Test

Collapsed MagBeam with a patterned MagMask and red color gel attached on one end. The wide fresnel lens is on the other end.

Speaking of the two Fresnel lenses, they look identical but are actually quite technical, so you must use them correctly to get the right effect. As an example, the wide fresnel lens must be used when the MagBeam is fully collapsed in order to use the included MagMasks (described in detail below) to create a light pattern. It’s not complicated, but you might have to do some experimenting and read some manuals before jumping right in.

Pratt_MagMod MagBeam Review_001

Things to Consider

There is only one possible thing to consider about the MagMod before investing in this system. MagMod magnets that attach to your flash are impressively strong. Once you attach the modifier, it certainly isn’t going to fall off by accident. But sometimes the magnets are a little too strong. I often have to use two hands to carefully pull the MagMod modifiers off to avoid accidentally breaking my flash. I also have to make sure the MagMod units aren’t too close to other magnetic items in my camera bag otherwise, they’ll stick together.

NOTE: If you have any concerns about using magnets next to your electronic equipment this video should answer your concerns. Items they do say to keep away from magnets include: 

  • Older spinning hard drives
  • Credit cards and bank cards
  • Older televisions
  • Speakers
  • Most importantly, pacemakers!

In Conclusion

Overall, I love the MagMod system and always have it in my on-the-go photography kit. In particular, I’ve been using the MagSphere for event photography and the MagBounce as a replacement to my Westcott Rapidbox softbox for food and portrait photography. In both cases, I appreciate how compact the modifiers are. They’re so convenient that I can stash them in my camera bag and simply pull them out whenever I need them.

While the MagBeam took a little more trial and error to figure out, I’ve also been using the wide fresnel lens and gobos to add a splash of color and creativity to my product and food shots.

If you shoot a lot with speedlights and are looking for compact and flexible lighting modifiers to add to your kit, I highly recommend the MagMod system!

The post MagMod and MagBeam Speedlight Modifiers – Thoughts and Field Test by Suzi Pratt appeared first on Digital Photography School.


Digital Photography School

 
Comments Off on MagMod and MagBeam Speedlight Modifiers – Thoughts and Field Test

Posted in Photography


Fujifilm GFX 50S added to our studio test scene

14 Mar

Our latest test scene simulates both daylight and low-light shooting. Pressing the ‘lighting’ buttons at the top of the widget switches between the two. The daylight scene is manually white balanced to give neutral grays, but the camera is left in its Auto setting for the low-light tests. Raw files are manually corrected. We offer three different viewing sizes: ‘Full’, ‘Print’, and ‘Comp’, with the latter two offering ‘normalized’ comparisons by using matched viewing sizes. The ‘Comp’ option chooses the largest-available resolution common to the cameras being compared.

$ (document).ready(function() { ImageComparisonWidget({“containerId”:”reviewImageComparisonWidget-9354923″,”widgetId”:480,”initialStateId”:null}) })

The GFX 50S’s resolution capture is, as you might expect, impressive. That said, the Canon EOS 5D SR, shot with the relatively lowly 85mm F1.8 lens is able to do a similar job. All four cameras, with good prime lenses on are exhibiting moiré$ (document).ready(function() { $ (“#icl-3455–1483316096”).click(function() { ImageComparisonWidgetLink(3455); }); }) in the finest detail in the scene.

In terms of high ISO noise$ (document).ready(function() { $ (“#icl-3448–639071291”).click(function() { ImageComparisonWidgetLink(3448); }); }), the GFX 50S performs fairly similarly to the Pentax 645Z and, as sensor size alone would lead you to expect: better than the Canon EOS 5DS R. However, because Sony’s a7R II sensor uses a more modern BSI design, it’s able to be more efficient, which means it’s able to close the gap to the bigger sensor cameras. 

The GFX 50S’s JPEGs are every bit as pleasant as they are in the company’s smaller cameras. Color response$ (document).ready(function() { $ (“#icl-3450-1730714412”).click(function() { ImageComparisonWidgetLink(3450); }); }) is bright and punchy, with both skies and skintones well represented. And, of course, the Film Simulation modes mean there are a selection of good-looking options available. Default sharpening$ (document).ready(function() { $ (“#icl-3451-1453109520”).click(function() { ImageComparisonWidgetLink(3451); }); }) is quite strong but is effective at emphasizing fine detail in the scene: taking the level of apparent detail ahead of its rivals, without adding too much in the way of haloing at high contrast edges$ (document).ready(function() { $ (“#icl-3452-1793342050”).click(function() { ImageComparisonWidgetLink(3452); }); }).

Similarly, noise reduction$ (document).ready(function() { $ (“#icl-3453-1547554799”).click(function() { ImageComparisonWidgetLink(3453); }); }) does a good job of balancing the retention of detail with the suppression of noise. We’re not sure many people are looking to buy a medium format camera to shoot JPEG but they’re very usable even at the camera’s highest setting$ (document).ready(function() { $ (“#icl-3454-1348031583”).click(function() { ImageComparisonWidgetLink(3454); }); }). Which just makes it seem more peculiar that Fujifilm limits the camera to a relatively modest ISO 12,800.

Dynamic Range

Looking at our ISO Invariance tests, we can see that an image shot at ISO 100 and pushed six stops looks noisier than one with the same exposure, shot at ISO 6400. This shows that the sensor is still contributing a little noise to its images (enough that you’ll see it, if you multiply it 64 times!). However, the 5EV push of an ISO 200 shot looks a lot like the ISO 6400 image, which suggests it’s a very good sensor.

However, the exposure latitude test, where we lift the shadows in images shot at progressively lower exposures shows that its performance is only slightly better than that of the D810, despite receiving more total light (double the exposure time and half the light per square cm, captured on a sensor with more square cm of area). Now consider the fact that the D810 has an ISO 64 mode, which would allow you to use a 2/3EV brighter exposure before the sensor clips. We expect this will give a real-world result similar to when we pitted the Pentax 645Z against the Nikon.

However, Fujifilm does claim to have increased the ‘Photic Saturation Point’ (by which we assume they mean ‘full well capacity’), by 1/3EV so we’ll need to conduct a full expose-to-the-right side-by-side test to be sure.

Articles: Digital Photography Review (dpreview.com)

 
Comments Off on Fujifilm GFX 50S added to our studio test scene

Posted in Uncategorized


Field Test: The Hasselblad True Zoom Camera and Moto Z Smartphone

09 Mar

It’s impossible to ignore the fact that camera phones are becoming increasingly better. With impressive image quality and the ability to add on and shoot with mobile phone lenses, the case for replacing your dedicated camera with your cell phone is becoming more compelling by the day. However, one aspect of camera phones really hasn’t seen much improvement: ergonomics. Shooting with a camera phone is for some still pretty awkward and difficult to get used to. Here’s where the Hasselblad True Zoom comes into play.

Below are some notes and observations from a week-long experiment of shooting with the Hasselblad True Zoom and Moto Z smartphone.

Field Test: The Hasselblad True Zoom Camera and Moto Z Smartphone

What is the Hasselblad True Zoom?

The Hasselblad True Zoom makes your smartphone feel and function like a point-and-shoot camera. It is one of many Moto Mods available to add extra features to Motorola Moto Z smartphones, so all mods are limited to use on the Moto Z phones only. All Moto Mods attach to the phone via extra strong magnets, and can easily be detached.

To be perfectly honest, the Moto Z smartphones have superb native cameras. The Moto Z Force Droid, in particular, is very impressive and it even outperforms the Apple iPhone 7. This is to say that image quality is great with or without the Hasselblad True Zoom mod, but it is certainly nice to have some of the mod’s extra features.

Field Test: The Hasselblad True Zoom Camera and Moto Z Smartphone

Hasselblad True Zoom Specs

  • Compatible phones: Moto Z Droid, Moto Z Force Droid, Moto Z Play Droid
  • Dimensions / Weight: 152.3 x 72.9 x 9.0 – 15.1 mm / 145g
  • Sensor resolution: 12MP
  • Video resolution: 1080p Full HD at 30fps
  • Sensor size / Pixel size: 1/2.3-inch / 1.55 um
  • Aperture: f/3.5-5.6
  • Zoom: 10x optical/4x digital
  • Flash: Xenon flash
  • Capture modes: Photo, panorama, video, professional, night landscape, night portrait, sports, day landscape, back light portrait
  • Storage Internal phone: 32GB-64GB microSD
  • Price: $ 250
  • Carrying case included

best smartphone photography camera

The good

By far the best part of about the Hasselblad True Zoom is the fact that it allows you to use a phone (somewhat) like a real camera!

Physical camera controls

For those of us who despise having to pinch to zoom on a mobile phone, the Hasselblad True Zoom is a welcome relief. The mod is complete with a physical shutter release button and a physical zoom switch to operate the mod’s 25-250mm-equivalent range. There’s also an on/off button to turn the camera off and on without having to first unlock the phone.

Field Test: The Hasselblad True Zoom Camera and Moto Z Smartphone

Ability to control the camera via a touchscreen

After the mod is attached, the phone’s stock camera app switches over to “Professional mode.” This mode allows for manual camera control via the phone’s touchscreen. While you don’t have true manual control over every aspect of the camera (more on that below), you can adjust certain features such as ISO, capture mode (e.g. Action, Portrait mode, etc.), and choose to shoot in RAW or JPG format.

Field Test: The Hasselblad True Zoom Camera and Moto Z Smartphone

Professional mode options.

Comes with a carrying case

While you can operate your phone as usual even with the mod attached, you’ll probably want to remove it occasionally. Luckily, a solid carrying case with a wrist strap is included so you can keep your mod safe when you aren’t using it.

What could be improved

For every positive feature listed above, there’s an aspect that could be improved.

Limited manual control

Manual camera control on the Hasselblad True Zoom mod is still pretty limited. While it’s nice to be able to adjust the ISO, it’s not possible to adjust aperture or shutter speed. It’s a real shame, considering the native f/3.5-5.6 aperture available.

Field Test: The Hasselblad True Zoom Camera and Moto Z Smartphone

Extra physical features missing

The addition of a physical shutter button and zoom toggle is very welcomed and makes it easier to operate your phone like a true camera. However, two key features are missing.

First is a wrist strap that attaches to either the phone or camera. Considering how expensive the devices are and how bulky they can get, a strap would add a sense of security.

Second is a tripod thread. Since you don’t have full manual control over the camera, many low lighting shots revert to settings with incredibly slow shutter speeds, resulting in blurry images when shot handheld. Also, trying to take advantage of the mod’s 10x zoom feature while also holding the camera steady is incredibly tricky. There are some sample images below that demonstrate these focusing problems. The ability to shoot with a tripod would greatly enhance the resulting images.

Field Test: The Hasselblad True Zoom Camera and Moto Z Smartphone

Size

It’s impossible to ignore the allure of being able to shoot and carry a Hasselblad camera that fits into your pocket. The only problem is this camera won’t quite fit in your pocket unless you’ve got exceptionally large ones. While the bare Moto Z phone is slim enough to be tucked into most pockets, the camera mod adds just enough bulk to make the device difficult to carry. The carrying case is nice for protecting the mod, but it’s an awkward size that won’t fit into most pockets or purses.

Uncertain future

Moto Mods are a brand new concept for Motorola, a company recently taken over by Lenovo. Thus, the future of the Moto Z phone line and Moto Mods as a whole is pretty uncertain. No one knows if the next generation of Moto Z phones will be compatible with the Hasselblad True Zoom, or if the Moto Z line will continue at all. As a result, this can be a risky investment.

In Conclusion

The Hasselblad True Zoom is a step in the right direction for mobile photography. Having physical controls to better control smartphone cameras are welcome additions, but there is certainly room for improvement in future iterations.

What do you think about the idea of the Hasselblad True Zoom? Would you pick one up to try for yourself?

Hasselblad True Zoom Sample Images

The post Field Test: The Hasselblad True Zoom Camera and Moto Z Smartphone by Suzi Pratt appeared first on Digital Photography School.


Digital Photography School

 
Comments Off on Field Test: The Hasselblad True Zoom Camera and Moto Z Smartphone

Posted in Photography


DxOMark image quality test report released for Huawei Mate 9

24 Dec

The Mate 9 is Huawei latest flagship smartphone and comes with a Leica-powered dual-camera that combines a 20MP monochrome sensor with a 12MP RGB chip. Image data from both sensors is combined for optimized image quality.

The test engineers at DxOMark have now put the new technology through its paces and with a score of 85 the Mate 9 performs respectably but cannot take one of the top spots. It slots in at a joint 12th position, just behind the LG G5 and iPhone 7. It shares this spot with the LG V20, which was also recently added to DxO’s mobile rankings.

In still image mode the testers liked the good detail preservation, accurate white balance and good exposure of the device but deducted points for inconsistent color in cloudy conditions, color casts with flash use and some ghosting artifacts. Video footage also showed good detail and exposure and was well-stabilized. On the downside, there is a noticeable jello effect when recording while walking and visible noise and reduced detail in low light. You can read the full report on DxOMark.com.

Articles: Digital Photography Review (dpreview.com)

 
Comments Off on DxOMark image quality test report released for Huawei Mate 9

Posted in Uncategorized


GoPro HERO cameras undergo torture test: a dip in liquid nitrogen

20 Dec

Industrious YouTube user Grant Thompson recently subjected the GoPro HERO5 Session and HERO5 Black cameras to a chilly torture test: dunks in liquid nitrogen. He first tested the experiment with an older Session camera, hoping to avoid the destruction of two perfectly good new cameras if death proved swift. However, the older Session held up surprisingly well, and so he put the two new cameras to the test, literally freezing them solid. See the results in the video above.

Via: PetaPixel

Articles: Digital Photography Review (dpreview.com)

 
Comments Off on GoPro HERO cameras undergo torture test: a dip in liquid nitrogen

Posted in Uncategorized


Review and Field Test of the New SpiderLight Holster

23 Nov

Since 2010, Spider Holster has produce camera carrying systems which are intended to create a more innovative method for carrying your camera with you while working. Their carry systems are designed to offer a convenient and comfortable way to access your camera quickly while still managing to store it securely within easy reach when not in use.

SpiderLight Holster Close Up

Recently, Spider Holsters has launched a brand new Kickstarter campaign for the latest addition to their line of quick-draw type camera carry systems; the SpiderLight Holster. The SpiderLight is intended specifically for those shooters who carry a mirrorless or smaller SLR camera setup. Being a recent convert to a mirrorless camera system myself, I was excited to try out this newest offering from Spider and see if I would truly “Ditch the strap” in favor of this inventive way of carrying my camera while in the field.

First Impressions of the SpiderLight Holster

My cameras are more like extensions of myself than just pieces of metal and plastic. I love my cameras. So naturally I was, shall we say, somewhat hesitant to place their welfare in the hands of a new type of carry system instead of my heavy-duty leather camera strap. All those fears were genuinely soothed as soon as I handled the SpiderLight Holster for the first time. The product is solid, beefy, and extremely substantial. More so than I expected it to be based on the product photos from Spider Holster’s website.

SpiderLight Holster_Plate_2.jpg


The construction of the SpiderLight is all stainless steel and aluminum, subdued in a professional-looking matte finish. The holster itself is constructed of aluminum with a stainless steel insert to prevent wear with the belt clip on the back, being made from spring steel. The camera plate is crafted from heavy aluminum as well, while the Spider pin (the part that slides into the holster) is CNC machined stainless steel.

SpiderLight Holster Plate

SpiderLight Holster Release

All the screws were tight and the entire mechanism moved smoothly with no burrs or imperfections appearing to be found. Even the markings on the product are etched into the metal instead of being painted onto the surface. The belt clip itself is substantial and provides a heartily robust grip to a wide range of belt widths.

Real World Use

The majority of my work focuses on wilderness and adventure photography with a little bit of everything else thrown into the mix. I spend lots of time in the outdoors chasing light so I was extremely curious to see how well the SpiderLight would perform during hiking and fast movements. I tested the mechanism using my main camera body, the Sony A7r Mk1 fitted with Zeiss Vario-Tessar 24-70mm F4.

SpiderLight Holster 3

Functionally, the SpiderLight is deceptively simple. There is a steel peg that slides into a groove on the holster in such a way that the camera hangs inverted from the holster. However, looking more closely reveals evidence of some fairly impressive engineering at work.

A well placed two-stage locking switch secures the camera in one of two ways depending on your needs. This switch is invaluable. It locks the camera in place until the user disengages it with a subtle flick. More importantly, it can be completely disengaged to facilitate quick retrieval of your camera.

SpiderLight Holster 4

SpiderLight Holster 5

I was extremely surprised at just how versatile the SpiderLight could be in practice. I walked, jogged, bent down, and did all the epic things photographers do without any real encumbrance caused by the device. The only adversity I encountered was to remember the camera was by my hip when passing through doorways. After a little practice, I completely forgot that I carried the camera at my side. It worked, for lack of a better word, beautifully.

SpiderLight Holster 2

SpiderLight Holster 1

Using a tripod with the SpiderLight Holster

The SpiderLight still allows for the attachment of your own tripod’s quick-release plate, so it does not interfere with your normal workflow if you find yourself shooting with a tripod. It’s not guaranteed that the holster will work with your specific tripod, though. Notice I have to mount mine backward. Still, the function was not hindered in any way by the Spider.

SpiderLight Holster Tripod 1

SpiderLight Holster Tripod 2

One caveat

The only possible reservation I have with the SpiderLight is that even with a lightweight camera kit (Sony A7r and 24-70mm Zeiss) the one-sided weight distribution sometimes sags the pants. I wouldn’t consider wearing the system without a sturdy belt. This wasn’t something that deterred me from using the holster but it is definitely a point of consideration. If you carry a heavier camera I would highly recommend the Spider Holster Pro.

Final Thoughts

The SpiderLight Holster works great for use with a lightweight kit such as mirrorless cameras and smaller DSLRs. From the perspective of a first time user, the SpiderLight performed admirably, in spite of my reservations. The overall build is sturdy enough for heavy-duty use and the complete concept works well. If you are considering the idea of trying the SpiderLight or any other of the products in Spider Holster line you won’t be disappointed.

That being said, give yourself enough time to get to know the holster. Some will love it, some not so much. One of the biggest obstacles I faced was learning to actually trust the holster to securely carry my camera. In my case, breaking 10 years of absolute camera strap reliance takes some time. Still, you never know until you try it and it very well could become your favorite method of carrying your camera.

googletag.cmd.push(function() {
tablet_slots.push( googletag.defineSlot( “/1005424/_dPSv4_tab-all-article-bottom_(300×250)”, [300, 250], “pb-ad-78623” ).addService( googletag.pubads() ) ); } );

googletag.cmd.push(function() {
mobile_slots.push( googletag.defineSlot( “/1005424/_dPSv4_mob-all-article-bottom_(300×250)”, [300, 250], “pb-ad-78158” ).addService( googletag.pubads() ) ); } );

The post Review and Field Test of the New SpiderLight Holster by Adam Welch appeared first on Digital Photography School.


Digital Photography School

 
Comments Off on Review and Field Test of the New SpiderLight Holster

Posted in Photography


Field Test: Wedding Photography with the Fujifilm X-T2

09 Nov

When it comes to special occasions, weddings are about as special as it gets. Special for the couple getting married, of course, but also for their families and guests. And from candid portraits to group shots, to simple details and private moments, weddings provide endless opportunities for creative photography.

For this field test, we’ve brought the Fujifilm X-T2 to Guemes Island to shoot the wedding of our friends Tim and Erin, with DPReview’s Editorial Manager and professional portrait and wedding photographer Wenmei Hill.


This is sponsored content, created in partnership with Fujifilm. What does this mean?

Articles: Digital Photography Review (dpreview.com)

 
Comments Off on Field Test: Wedding Photography with the Fujifilm X-T2

Posted in Uncategorized


Overview and Field Test of HoldFast Gear’s Money Maker Leather Camera Strap

02 Nov

The camera strap is one accessory that has definitely evolved along with the photography industry. While the default strap that comes with every camera might suit your basic shooting needs, there are plenty of options available with enhanced features (and style). Some help you shoot more ergonomically by better balancing heavy gear across your body, and some just give you the appearance of looking like a more polished professional. This product review is a camera strap that meets both ergonomic and stylistic needs of today’s photographers: the Money Maker leather camera strap by HoldFast Gear.

best leather camera strap Holdfast Moneymaker Review

About the MoneyMaker strap

The MoneyMaker is one of several camera strap products created by HoldFast Gear founder Matthew Swaggart. As a photographer himself, Swaggart created his line of camera straps to efficiently carry his own camera gear and pocket items, while also maintaining a nice aesthetic. Beginning with his very first product, the RuckStrap, Swaggart’s brand is perhaps best known for the MoneyMaker leather dual camera strap. Based in Tulsa, Oklahoma, every single HoldFast product is made in the USA, and Swaggart has been known to openly collaborate with customers to design custom straps.

best leather camera strap Holdfast Moneymaker Review

Benefits of Dual (or Double) Camera Straps

While dual (or double) camera straps are already very popular among photographers who carry multiple camera bodies, many of them such as the popular Black Rapid Double have designs that resemble tactical SWAT team gear. As a petite female photographer using these dual camera straps, I’m frequently met with raised eyebrows and asked if I’m getting ready for battle.

This is where the HoldFast MoneyMaker comes into play. Once I switched from Black Rapid to the MoneyMaker, I noticed even more raised eyebrows, but this time with the question, “Where did you get that beautiful camera strap?”

best leather camera strap Holdfast Moneymaker Review

MoneyMaker Basics

Crafted from high-grade leather and metal fasteners and buckles, the MoneyMaker is worn like suspenders, with a camera suspended from each end. The design balances the weight of the cameras so they both hang down by your hips, and you can even attach a third camera to the front by using an optional attachment leash. One of the best features, that is lacking from competitors such as BlackRapid, is the MoneyMaker’s inclusion of a Safety Catch clip that adds an extra layer of security to your camera.

best leather camera strap Holdfast Moneymaker Review

If you’ve ever used a Black Rapid camera strap, the mechanics of the MoneyMaker will be very similar.

  1. Start by first putting on the MoneyMaker Straps, then fasten the HoldFast screws to the tripod mount of your camera.
  2. Next, attach the circular split ring from the Safety Catch to your camera. This can be a bit tricky for Canon DSLRs.

best leather camera strap Holdfast Moneymaker Review

MoneyMaker Options and Variations

Textures

There are several standard variations you can choose from with the MoneyMaker to make it more comfortable and stylish. First, the MoneyMaker comes in several different materials including English Bridle, Water Buffalo, Great American Bison, and even Genuine Python. Prices and color options vary according to the material you choose, with Bridle Leather being the lowest priced, and Genuine Python costing the most.

best leather camera strap Holdfast Moneymaker Review

For those preferring camera straps not made of leather, HoldFast offers the Camera Swagg collection featuring the same MoneyMaker design crafted from high-grade nylon. Slightly lighter in weight and more affordable in price compared to leather options, this ultra-light option also comes in a wider array of colors including copper, navy, red, and black.

pratt_holdfast-gear-camera-strap_16

If you want a truly unique, one-of-a-kind camera strap, you can even opt for the hand tooled, hand painted leather MoneyMaker. Each is custom made to order and results in a beautiful, functional piece of art that embodies the art of leather craftsmanship.

Sizes

All of the leather straps can be ordered in the Original (1 1/2″ wide) or Skinny (1″ wide with 1 1/2 inch removable shoulder pads) version. They also come in Small, Medium, or Large, depending mainly on your height and build, with optional D-ring metal loops that can add extra attachment options. As a 5’2″ petite female, I opted for the Bridle Leather MoneyMaker in Chestnut color, size Small, and the Skinny version with no D-rings (they are’t recommended if you have long hair). It was a perfect fit!

best leather camera strap Holdfast Moneymaker Review

My Experience Shooting with the MoneyMaker

While the MoneyMaker is very popular among wedding photographers, I found it to be perfect for shooting concerts and corporate events as well. At concerts and music festivals, in particular, where leather camera straps aren’t yet prevalent, the MoneyMaker proved to be an excellent conversation starter among other photographers and concert-goers.

best leather camera strap Holdfast Moneymaker Review

When I shoot big concerts and events, I typically have the following camera setup:

  • (1) Canon 5D Mark III (B&H or Amazon pricing) with a 70-200mm f/2.8 attached  (B&H or Amazon pricing)
  • (1) Canon 6D (B&H or Amazon pricing) with a 24-70mm f/2.8 attached (B&H or Amazon pricing)
  • (1) 580 EXII Flash (B&H or Amazon pricing)
  • (1) Wallet with extra memory cards, batteries, and business cards

Using the MoneyMaker to carry my two camera bodies, I also used a lightweight ThinkTank belt pack to carry my flash and wallet. This combination helps balance the weight in my upper body and allows me to emerge with zero back and shoulder pain after shooting a multi-day music festival and two corporate conferences.

best leather camera strap Holdfast Moneymaker Review

best leather camera strap Holdfast Moneymaker Review

Things to Note

While my experience with the MoneyMaker was highly positive, there are a couple things about this camera strap system to note.

First, the use of all authentic leather makes the MoneyMaker heavy compared to the all-nylon systems of Black Rapid and other competitors. This isn’t a problem when you’re wearing and using the camera straps, but it can feel and appear somewhat intimidating right out of the box.

best leather camera strap Holdfast Moneymaker Review

Second, leather takes some time to break in, so the straps aren’t the softest and most supple at first. That doesn’t mean the straps aren’t comfortable, but you’ll need to use them frequently over time to get them to loosen up. Also, you’ll want to take extra care of the material if you go with a genuine leather camera strap option so it retains high quality.

Over to you

Do you have a certain camera strap that you prefer to use other than the default strap you automatically receive when you buy a camera? Is style as important as function when it comes to your ideal camera strap? What do you look for in a strap?

Please share in the comments below.

best leather camera strap Holdfast Moneymaker Review

googletag.cmd.push(function() {
tablet_slots.push( googletag.defineSlot( “/1005424/_dPSv4_tab-all-article-bottom_(300×250)”, [300, 250], “pb-ad-78623” ).addService( googletag.pubads() ) ); } );

googletag.cmd.push(function() {
mobile_slots.push( googletag.defineSlot( “/1005424/_dPSv4_mob-all-article-bottom_(300×250)”, [300, 250], “pb-ad-78158” ).addService( googletag.pubads() ) ); } );

The post Overview and Field Test of HoldFast Gear’s Money Maker Leather Camera Strap by Suzi Pratt appeared first on Digital Photography School.


Digital Photography School

 
Comments Off on Overview and Field Test of HoldFast Gear’s Money Maker Leather Camera Strap

Posted in Photography


Overview and Test of the New Cactus V6II Wireless Flash Trigger for High-Speed Sync

28 Oct

Cactus Image recently launched a new version of their radio trigger for speedlights and strobes, the Cactus V6II. In this review, I’ll go over the features of this trigger, how to use it, and do some example photo shoots to test it.

Features of the Cactus V6II Wireless Flash Transceiver

This is a 16 channel system with 4 groups. That means 16 systems can run concurrently, and each photographer could have four sets of flashes of which they can control the power (and zoom for the RF-60/TTL Flashes). It runs off two AA batteries, mini-USB 2.0, or a 5v DC input. Like most modern flash triggers, it runs at 2.4Ghz, which helps it work reliably up to 100 meters. It supports High-Speed Sync up to 1/8000 sec (if your camera goes that high).

The mini-USB port also allows you to update the firmware on the device, giving it a certain amount of future proofing. The main difference between the V6 and the V6II is that the latter allows you to use High-Speed Sync across a range of cameras and flashes, including that of the Fuji X series (which lacks the ability normally). The V6II HSS is based on the use of camera and flash profiles. This allows both Cactus and the photographer to make profiles for flashes they may not already have in the system.

Cactus Wireless Flash Transceiver V6 II - box

The Cactus V6II transceiver box.

This means there’s practically universal support for any flash you may have. The exception is flashes that have a high sync voltage. The units are cross compatible between systems, so you can use Pentax cameras with Olympus flashes, etc.

Camera and flash compatibility list for the v6II

Camera and flash compatibility list for the v6II

There are two High-Speed Sync modes; Normal and Power. Normal High-Speed Sync works up to 1/8000th of a second and uses a pulsing flash fire. Power Sync uses the full power flash as a normal fire, but allows you to exceed the normal sync-speed of the camera.

Getting started with the Cactus V6II

The trigger comes in a nicely designed box, containing the user manual, the trigger, and a hotshoe foot. Unlike other hotshoe feet, this one doesn’t have a screw thread for a lighting stand. It’s not an issue as I wasn’t expecting one anyway. The unit can be configured as either a transmitter or a receiver by selecting Tx or Rx from the power switch.

When it is on-camera as a transmitter, you have the four groups visible on the camera left-hand side. Marked A, B, C and D, pressing one toggles it on and off. This way you can select a specific group of flashes to change settings on. This works especially great with Cactus’ own flash, the RF60. Using the dial on the back you can change the power of the flashes on the group, or by pressing in the dial, swap to the lens zoom setting and change that instead.

The unboxed Cactus V6II

The unboxed Cactus V6II

On the right hand side at the front is the test button. You can press it to test that the signal is going to either the RF60, or to another V6II set to receiver mode. One other useful feature is that there’s a hotshoe on the trigger, where you can add your existing trigger system, or another flash. Using your current triggers will allow the High-Speed Sync signal to pass through the V6II and into your flash system.

Setting up

My main portable system is based around Godox v850 flashes (more precisely, the Neweer versions rebranded as the TT850 – it’s the same flash). I also have the more powerful AD360, which responds to the same trigger (the older FT-16), so I find it a really useful system. All of the flashes are High-Speed Sync capable and have profiles in the trigger. I don’t actually use the built-in profiles for High-Speed Sync with Fuji cameras.

The Gear Setup for HSS

Using the older triggers, I set up the flash as normal. Once it’s all working I take the trigger off the camera and put the Cactus V6II on instead (switched to Tx mode). Next I put the old (FT-16) transmitter on top of the hotshoe on the V6II. Finally I set the flash to HSS mode by pressing a two button combination on the back. Each system has its own way of turning on HSS. Yes, this does mean you only need one Cactus V6II trigger with this system to get HSS working.

To get started, press the Menu button on the back right of the V6II unit. Turn the dial to Camera and Flash Setup. Set Camera to Auto, then set Flash to the brand that you use. Next use the Auto Profile for your Flash. For Fuji, you have an additional step, where you make the trigger learn the HSS response of the flash. For the AD360, I set the Flash to Nikon and the Profile to Auto (Nikon).

The Beta Test

So I set it all up, and with my trusty Godox 120cm Octabox on the Ad360, I sweet-talked my son into posing on his bike. That’s roughly three minutes of attention span before boredom hits. I’ve included some behind the scenes shots as well. The exposure was 1/4000th, f/2.8, ISO 200 with a 35mm f/1.4 lens. Even the nearby trees are out of focus. I absolutely love the bokeh in my first shoot with the trigger.

Cactus image v6ii review matt

Test Shoot #1

Testing means dragging out a range of people to shoot with. It also means working around their schedule. So this next shoot happened a little later than I would’ve liked, but I still got some good shots.

Once the trigger is set up, your main issue is dealing with power. Normally with manual flash, only the aperture has an effect on the apparent power of the flash. Below sync-speed, you can change the shutter speed to your heart’s content, and it won’t affect the flash. Not so with High-Speed Sync. Any change of shutter speed changes the flash power. The faster the shutter speed, the more flash power you need. It’s a new experience if you’ve gotten used to normal manual flash. Each stop increase in shutter speed requires about a stop of increase in the flash power.

Here’s the first setup and the resulting image.

Cactus image v6ii review sunset 1

Behind the scenes shot showing the Godox AD360 flash with Godox 120cm Octabox. Taken by Ola.

The shot with HSS. The background is beautifully out of focus. ISO200 f1.8 1/4000sec 35mm on Fuji X-T10

The shot with HSS. The background is beautifully out of focus. ISO 200, f/1.8, 1/4000th, 35mm on Fuji X-T10.

I still managed to blow out the sun slightly, but the flash was at full power, so I couldn’t change the aperture to compensate. The octabox was just out of frame too. Normally, I shoot vertical portraits but for articles, horizontal looks better, so I just recovered this highlights in Lightroom.

Test Shoot #2

For the second shoot, I had more time, better planning, and less wind! Due to the model’s availability, it was later than I’d have like, but still had enough light to get shots using HSS (out of want rather than need!).

Here I’ve used my typical short lit Godox Octa setup for this using the Fujifilm X-T10 with a 35mm f/1.4 lens. I wanted to create tension and go for a cinematic feel to the image. The grass at the bottom is well out of focus and gives a slightly ethereal feel to the shot. The black clothes and the model peering out of frame seem to reference things in the past as if a loved one has passed.

cactus-v6ii-review-emma-1

ISO 200, f/1.4, 1/1600

For the second shot, I wanted to bring in an additional element – a back light. I could’ve used one of the 850’s, but instead, I opted for the Cactus RF-60 flash. This has the receiver built-in and communicates directly with the Cactus V6II receiver. I set this to Group B and zoomed the flash to 105mm to allow it to throw the light further. Once in HSS mode, it triggered every time along with the AD360. I also went for the 50-140mm lens to get further back and compress the background more.

ISO200 f2.8 1/500sec. Shot with the 50-1400 f2.8 lens

ISO 200, f/2.8, 1/500th. Shot with the 50-140mm f/2.8 lens.

Here’s how the gear looked behind the scenes:

Cactus image v6ii review emma 3

Headshot variation

For the final look, I went for a headshot, so the Octa was moved to give her a soft loop light. I got the model to hold a reflector (in this case a California Sunbounce silver-white mini, using the silver side for contrast). It’s very similar to the last setup with the Cactus RF-60 acting as a kicker.

cactus-image-v6ii-review-emma-3

ISO 200, f/2.8, 1/500th.

Here’s the setup shot:

Cactus image v6ii review emma 5

By swapping the side the Octa is on, so the kicker and the key are on the same side, you get a very different look for only a few minutes work.

cactus-image-v6ii-review-emma-5

Cross Platform Test: Fuji Camera – Canon Flashes

Using a second Cactus V6II trigger, I added a Canon 580EXII Speedlite to the setup to use with the Fuji camera. In this case, I set the flash up as Canon with an Auto Canon Flash Profile. Again with the flash set to HSS, I went through the learning process for HSS, and the flash worked perfectly with the Fujifilm in HSS mode. The 580EXII was set to ETTL, and I could control both the flash power and the flash from the V6II transceiver on the camera.

I still have my Canon 5D MarkIII (not for much longer), so I did a quick test with that as a system check. Again I used the Canon 580EXII Speedlite on ETTL, set to HSS. Because both transceivers were set to Auto, switching the units off and back on began a new detection cycle, successfully recognizing both flash and camera as Canon. After one or two test fires, it all worked perfectly. No pretty models for this demo, but something close to my heart instead.

Shooting the X-T2 using a Canon 5DIII. The 580EXII flash was set up off camera, with the trigger set to auto detect camera, and the receiver set to auto detect flash. Set to ETTL mode, both power and zoom can be controlled from the trigger. The flash was bounced into the ceiling. ISO200 1/500sec f1.8.

Shooting the Fuji X-T2 using a Canon 5D MarkIII. The Canon 580EXII flash was set up off-camera, with the trigger set to auto-detect the camera, and the receiver set to auto-detect the flash. Set to ETTL mode, both the power and zoom of the flash can be controlled from the trigger. The flash was bounced into the ceiling. ISO 200, 1/500th, f/1.8.

Firmware Updates for the V6II

Another feature of this trigger is you can update the firmware as new features and profiles are added. During my testing period, two firmware updates became available. I also had the chance to test a beta version of the new Fuji X-T2, another testament to Cactus’ support for their product. For the public updates, I simply downloaded the updater app, ran it, and followed the instructions.

Cactus Firmware Updater

Cactus Firmware Updater

Pros of the Cactus V6II Triggers

  • Gives you High-Speed Sync ability across a range of camera systems and flashes.
  • Firmware upgradeable.
  • Works directly with the Cactus RF-60 flash.
  • Good range of channels and groups.
  • Power Sync allows additional sync speed options for non-HSS flashes.
  • Can work with only one transmitter and your existing triggers.

Cons of the Cactus V6II Triggers

  • Clunky – the shape isn’t as elegant as many others with a hotshoe passthrough.
  • One of the units I had suffered from a really tight battery clip. It’s more an annoyance than a real con as the batteries last a really long time. The clip on the other unit was perfect.
  • For Fuji users, there’s more work to get it going. For everyone else, no problem.

Verdict

I’m delighted with the Cactus V6II wireless flash trigger. It really works.

During the short time I’ve had the trigger, I’ve used it on a few magazine shoots, as well as the fun shoots I did to test it. It’s been great. Their support has been fabulous, and there’s a lot of information on their community page.

Would I recommend these triggers? Absolutely. They bring a new dimension to shooting portraits outdoors that can change your style completely.

googletag.cmd.push(function() {
tablet_slots.push( googletag.defineSlot( “/1005424/_dPSv4_tab-all-article-bottom_(300×250)”, [300, 250], “pb-ad-78623” ).addService( googletag.pubads() ) ); } );

googletag.cmd.push(function() {
mobile_slots.push( googletag.defineSlot( “/1005424/_dPSv4_mob-all-article-bottom_(300×250)”, [300, 250], “pb-ad-78158” ).addService( googletag.pubads() ) ); } );

The post Overview and Test of the New Cactus V6II Wireless Flash Trigger for High-Speed Sync by Sean McCormack appeared first on Digital Photography School.


Digital Photography School

 
Comments Off on Overview and Test of the New Cactus V6II Wireless Flash Trigger for High-Speed Sync

Posted in Photography


Google Pixel XL added to mobile studio test scene comparison

26 Oct

Google’s Pixel and Pixel XL have garnered plenty of interest for their imaging capabilities since they were launched in the beginning of October. They each offer a 12.3MP camera with an F2.0 lens and a 1/2.3″ sensor – the same size used in yesteryear’s compact cameras – sporting 1.55µm sized pixels. The Pixel phones also utilize gyroscope-based stabilization for some seriously smooth video recording.

We got our hands on a Pixel XL review unit, and while we wait for the clouds to part outside for some real-world samples, we put it in front of our studio test scene. Take a look below at its JPEG and Raw performance in daylight and low light. It’s quite impressive: the lens is relatively sharp across the frame, and our low light Raw shots show that despite receiving 1.33 EV less light than the iPhone 7, the Pixel shows only slightly more noise, meaning it comfortably outperforms the iPhone camera in low light.*

$ (document).ready(function() { ImageComparisonWidget({“containerId”:”reviewImageComparisonWidget-20506681″,”widgetId”:423,”initialStateId”:null}) })

Related: Google’s Pixel phones: what you need to know

*Multi-frame noise reduction – used in low light by both the Pixel and iPhone 7 – may skew results in either direction for either camera, providing better performance for static subjects, or potentially blurry images for moving ones.

Articles: Digital Photography Review (dpreview.com)

 
Comments Off on Google Pixel XL added to mobile studio test scene comparison

Posted in Uncategorized