RSS
 

Posts Tagged ‘TECHNIQUES’

Four Techniques For AddingCinematic Polish to Your Videos

07 Oct

Extra photos for bloggers: 1, 2, 3

We’ve found the secret to making your video footage downright moving! The (not so) secret, is moving your camera as you shoot.

The Mobislyder makes it easy to add dimension to your videos with pro level pans and epically smooth pulls.

This gizmo is a shrunken down version of the big ‘ol sliders used on movie sets.

It’s made of precision cut aluminum and fitted with an adjustable clamp to hold tight to any camera phone.

We’ve been having a ball with this gadget and are here to share our four fave techniques for adding professional polish to your next videographic masterpiece.

Check Out The Mobislyder
$ 95 at the Photojojo Store

Why It’s Cool

Moving your camera while you shoot gives your videos a more movie-like quality simply because that’s what the pros do when they’re making movies!

Use any (or all) of the following techniques to give your vids that Hollywood look, no matter where you’re filming.

Track the Action

With a simple left to right (or right to left) push, follow your subject across a scene.

The effect is subtle and feels very natural because a smooth pan is precisely how humans take in a scene when they’re watching through their eyeballs, not a camera.

PRO-TIP: To give your viewers the feeling of scanning the scene at eye level, mount your Mobislyder to a tripod like we did for this vid.

Surprise! Master the Reveal

When your camera is on the move, you get to control what part of the scene your viewers are privy to.

Just wait till you see what’s around this corner, over this fence, behind this pole…

The possibilities are endless.

PRO-TIP: Use your slide behind an obstruction to change up the scene. When you slide back to the action, you’ll give your viewers a surprise!

Movin’ on Up (or Down)

The tide does it, pogo sitcks do it, even see-saws do it. Let’s do it. Let’s go up and down!

A vertical slide lets you smoothly scan an object that’s too tall to fit in a single frame or follow action that’s changing in elevation.

PRO-TIP: Meld together tracking the action and the art of the reveal, like we did in this video!

Zoom to Focus

Lock the focus on a specific object then pull away or move in close to throw it out of focus.

With an iPhone you can lock the focus by tap-and-holding on your subject until the focus box pulses.

Locking the focus on Android phones varies from model to model. Google your phone model and “focus lock” to find out how it’s done.

PRO-TIP: The Mobislyder lets you move your phone very smoothly, more quickly than your auto focus can handle. Leave your phone in auto focus mode to see your subject lose focus, then snap back into focus as your AF catches up.

Taking It Further

  • Mount a Photojojo Cell Lens onto your phone to shoot video with a fisheye, telephoto, wide angle or even macro view.
  • Slide your camera diagonally for a fun if somewhat wonky look. Wonky can be good!
  • Tie a string to your Mobislyder to slide your phone during filming, while you’re in the shot! Our pal Margo did that in this video here.
  • Head over to the Photojojo Shop and learn everything you’ve ever wanted to know about the Mobislyder and more!

Related posts:

  1. Pro-Tips for Shooting Better Instagram Videos Extra vids for bloggers: 1, 2, 3 “Well that’s weird,”…
  2. 10 Editing Tips for Making Killer Instagram Videos Extra vids for bloggers: 1, 2, 3 When it comes…
  3. Bubble Photography: 3 Insanely Cool Techniques Frolicking about the garden chasing butterflies and bubbles with camera…


Photojojo

 
Comments Off on Four Techniques For AddingCinematic Polish to Your Videos

Posted in Equipment


How to Reduce Camera Shake – 6 Techniques

26 Sep

Pin It

In this classic DPS post (now updated) photographer Natalie explores 6 ways you can hand hold lenses at low apertures and low shutter speeds and still avoid blurry images caused by camera shake.

avoid-camera-shake

I’m a mover and a shaker in general, and this is particularly true when I’m on a shoot. I’m twistin’ and turnin’, climbin’ and jumpin’ and to top it all off, I DO NOT have a steady hand, plain and simple.

As often as possible I opt for lenses with VR (Vibration Reduction) or IS (Image Stabilization). You pay a pretty penny for this feature. For me, it’s worth the extra cost, and for the point I’m at in my photography it’s a reasonable expense. But that wasn’t always the case, and what about uber slow shutter speeds with no tripod. No IS or VR can hold up under pressure like that. . .no matter how magical they may be. . . and magical they are, trust you me.

6 Techniques to Reduce Camera Shake

Here are 6 options for avoiding camera shake and achieving crisp, delicious images no matter the length of the lens, no matter the shutter speed.

Shooting wide open? NO PROBLEM; I’ve got your back!! Enjoy!

1. Elbows In

As often as possible pull your elbows in to your body and exhale completely before depressing the shutter. When you’re working with a wide aperture or low shutter speed (or both), even a breath can introduce shake. Pulling your elbows tight to your body can really help keep you steady. I also press my elbows firmly into my chest for even greater stability.

Avoiding-Camera-Shake-1

2. Raise Your Left Shoulder….

I am definitely a right eyed photographer, but this tip that I learned from “The Moment It Clicks” by Joe McNally, requires that I shift for a moment to my left eye. What I’m doing here is raising my left shoulder, and bracing my left elbow into my rib-cage (no arrow for this one). For further stability, you can pull your right elbow in to your chest. As always, exhale completely before depressing the shutter to avoid introducing shake.

Avoiding-Camera-Shake-2

3. Create a Tripod With Your Knee

You can create your own tripod by resting your elbow on your knee while in a seated position. Again, bring that other elbow in for greater support.

Avoiding-Camera-Shake-3

4. Lay Down

These two images illustrate perhaps the most obvious way to avoid shake without a tripod. Lie flat and let the lens sit directly on the ground. The problem with this is that you’re likely to have quite a downward tilt to the lens and unless you’re aiming to photograph the pavement, you probably won’t end up with the shot you’re hoping for. In the first image you’ll notice that I placed my hand flat against the cement and balanced the lens on top of it to give myself some height. In the second image you’ll see that I created a fist with my hand to give myself even greater height.

How To Avoid Camera Shake-1

5. The Machine Gun Hold

This next technique is sometimes referred to as the machine gun hold. I rarely use this technique as I find it awkward and difficult to maintain for more than a second or two. Just because it doesn’t work for me, doesn’t mean it won’t for you. . . give it a try.

Avoiding-Camera-Shake-6

6. Cradle It

In this next image you’ll see that I created a sort of cradle for the lens between my shoulder and my wrist. I also stabilized the hold by balancing my elbow on my knee.

Avoiding-Camera-Shake-7

Well there you have it. That’s how I avoid “The Shake” (I’ve named him that because he’s like an evil monster who comes in and ruins my otherwise perfectly delicious images). Please share YOUR tricks and techniques in the comment section below, and as always. . .

Happy Shooting! – Get more daily tips like this one by subscribing to Digital Photography School

Further Reading on Camera Shake

  • How to Tell the Difference Between Camera Shake and Poor Focussing?
  • How to Hold a Digital Camera

Post originally from: Digital Photography Tips.

Check out our more Photography Tips at Photography Tips for Beginners, Portrait Photography Tips and Wedding Photography Tips.

How to Reduce Camera Shake – 6 Techniques


Digital Photography School

 
Comments Off on How to Reduce Camera Shake – 6 Techniques

Posted in Photography


Discover These Stunning Creative Lighting Techniques That Will Electrify Your Photos

03 Jul

Light is photography.. Without it, photographs would make for some of the dullest looking objects; as pointless an activity, as that of watching a documentary on the beauty of rainbows on a black and white television set! Many first time photographers struggle with the fundamentals of lighting, I certainly did, as there are so many options and choices available to Continue Reading

The post Discover These Stunning Creative Lighting Techniques That Will Electrify Your Photos appeared first on Photodoto.


Photodoto

 
Comments Off on Discover These Stunning Creative Lighting Techniques That Will Electrify Your Photos

Posted in Photography


Expand Your Arsenal with the 5 Most Popular Photography Techniques Today

13 Jun

Photography is like anything else in our culture; it tends to hold certain trends for periods of time, then changes based on variables around us.  Some trends can reappear, such as we’ve seen with the influx of “vintage” post-processing in the last few years. The style wasn’t imposed directly during the 60′s and 70′s, it was a result of the Continue Reading

The post Expand Your Arsenal with the 5 Most Popular Photography Techniques Today appeared first on Photodoto.


Photodoto

 
Comments Off on Expand Your Arsenal with the 5 Most Popular Photography Techniques Today

Posted in Photography


Abstract Photography Techniques Worthly Of The Gods

08 Jun

Photography has been used as a medium for artistic expression since its initial inception some hundred or so years ago. In this digital age, photography offers not just great picture taking open access to all, but it can also unlock the bounds of an artist’s imagination, incorporating the natural and synthetic world around them to produce images of stunning artistic Continue Reading

The post Abstract Photography Techniques Worthly Of The Gods appeared first on Photodoto.


Photodoto

 
Comments Off on Abstract Photography Techniques Worthly Of The Gods

Posted in Photography


6 Secret Photography Lighting Techniques For Capturing A Good Photo

22 May

Everyone loves to take pictures. With the easy availability of cheap DSLR cameras on the market and the advent of affordable photography gadgets, who wouldn’t right? If you are one of those who loves photography, then you probably are already aware of one or two techniques to make your pictures look awesome! But if you’re looking to further improve your Continue Reading

The post 6 Secret Photography Lighting Techniques For Capturing A Good Photo appeared first on Photodoto.


Photodoto

 
Comments Off on 6 Secret Photography Lighting Techniques For Capturing A Good Photo

Posted in Photography


10 Techniques for Amazing Portraits

06 Mar

A guest post by San Diego Wedding Photographer, Wayne Yuan

As full-time photographers shooting 30+ weddings a year, we have to admit, sometimes it’s easy to fall into the same old formulas when it comes to portraits. Even with new poses, taking portraits can become very mundane if the same compositions and angles are used for every couple–we’ve definitely been through that creative rut where our pictures start looking very familiar. Throughout the years, we’ve challenged ourselves to stay on top of our game with a few useful techniques. Here are some of our best tips to help keep things fresh and unique for each couple.

1. Use a longer lens.

A lot of photographers out there say that their 50mm is a “must-have” portrait lens, but what a mid-range lens offers is a very familiar perspective, something that our eyes are used to seeing all the time. To create a more interesting image, we avoid shooting portraits in mid-range because the images look too ordinary. Most of our portraits are shot at 200mm or 85mm to create beautiful image compression that a 50mm would not be able to produce. The compression will not only flatter your subjects with less feature distortion, but shooting at a longer focal length will also create more dramatic background blur (bokeh) and brings the background closer to your subject. It may be more difficult to communicate with your subjects while shooting at 200mm, but the difference will be apparent and well worth it. Our solution to this problem was to have one of us interact with our couples at close range while the other shoots from a distance.

best_wedding_photos_01.jpeg

best_wedding_photos_02.jpeg

best_wedding_photos_03.jpeg

2. Find angles that aren’t eye level.

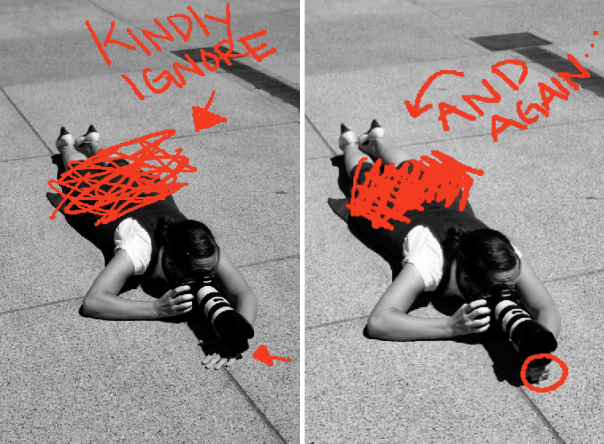
Many times we are stuck seeing what is right in front of us. It is, after all, the easiest answer to everything. Challenge yourself to find a different angle from above or below eye-level to bring a new perspective to the image. This technique can also be used to flatter subjects of different body types and heights. In the image below, we asked the bride to sit on the ground in order to focus on her face and hair ornament while blurring out the rest of her body. It makes a more interesting image than the typical straight-on bridal portrait.

best_wedding_photos_04.jpeg

3. Use off-camera flash.

During a wedding, our speedlites are never on-camera, even during the reception. Flash rarely flatters a person’s face when it is straight on, and the image looses its dimensionality. Using flash to light our subjects from the side, we are able to create both light and shadow on our subjects, flattering their features and bringing a greater range of highlights and shadows to the image. It also helps us bring out details in the background to create a more dramatic landscape.

best_wedding_photos_05.jpeg

4. Overpower the sun with flash.

Shooting at mid-day is no easy task when using natural light. But with some artificial lights, something as simple as a couple of speedlites can diminish the power of the sun and darken the image for better exposure. We use this technique especially when we are trying to create environmental portraits that focus on the landscape. Using our speedlites, we are able to overpower the sun and underexpose the sky while only lighting up the subject. To create this amount of artificial light, we have to use 2-4 off-camera speedlites (with no diffuser) in order to generate enough light to overpower the sun. Holding the speedlites closer to the subject (to the side) also helps put more light on the subject and allows us to underexpose the background even more for dramatic effect.

best_wedding_photos_06.jpeg

best_wedding_photos_07.jpeg

best_wedding_photos_08.jpeg

5. Find back-light.

It takes time and practice to train your eye to find great light. Once you learn how to “find the light” in any situation, it will help you master taking some amazing portraits. Lighting is, after all, the essence of photographic images. Whether you are using the sun, a window, or an ordinary light bulb, these light sources can be used to create beautiful edge light (a.k.a. hair light, rim light) when the light source is place behind your subject. The effect that rim light creates can enhance the dimension of your image by separating your subject from the background, outlining and focusing on your subject.

best_wedding_photos_09.jpeg

best_wedding_photos_10.jpeg

6. Look for silhouettes and reflections.

Learning to look for reflective surfaces and silhouetting opportunities will greatly enhance your images both visually and in depth. For silhouettes, it is key to find a strong light source and place it behind your couple; this could be anything from the sky to a window or even a patch of light on a wall. For reflections, try to be creative with the different types of reflective surfaces; sometimes, the best reflections are found in unexpected places like floors, glass, puddles, and granite walls.

best_wedding_photos_11.jpeg

best_wedding_photos_12.jpeg

best_wedding_photos_13.jpeg

7. Shoot through objects.

When objects are in our way, we like to use them to our advantage. In fact, many times we are purposely trying to find elements to place in the foreground of our image. Learning to find holes between tree branches, abstract objects, or even ordinary household items are simple, everyday things that will help enhance your images by bringing an interesting, and sometimes colorful, element to your composition. Using a longer lens will help blur out the foreground objects to frame the subjects in a more intimate way.

best_wedding_photos_14.jpeg

best_wedding_photos_15.jpeg

8. Use the sun as a light source.

It is not uncommon for photographers to avoid shooting in the sun and run for the open shade for an easier and even exposure. We covered back-lighting earlier as a solution for shooting in harsh sun-lit situations. But sunlight can also be used as a direct spotlight on your subject. By exposing for the areas directly in contact with the sun, the background and surrounding shadows will dramatically darken, drawing focus and light to your subjects. Applying this technique to different lighting situations will create varying visual effects.

best_wedding_photos_16.jpeg

best_wedding_photos_17.jpeg

9. Use video light for night portraits.

Video lights are very useful when no light source is available to light up your subject in dark situations. The great thing about video lights is that they are a constant light source so you can see what the image will look like in camera. We use LED video lights, which give us enough power to last 2+ hours. They are a great alternative to speedlites for low light situations and are quicker to adjust for dark situations.

best_wedding_photos_18.jpeg

best_wedding_photos_19.jpeg

10. Use gels on your speedlites.

Adding CTO (orange) or CTB (blue) gels to your speedlites will change the mood of your image. Sometimes shooting in an environment which is overcast and very blue, adding a CTB gel will warm up the whole environment if you adjust the white balance correctly. CTO gels can also be used to emulate sunlight.

best_wedding_photos_20.jpeg

For more examples of on how to take great images, check out our website: San Diego Wedding Photographer – Wayne Yuan

Wayne and Angela are photographers/owners of Wayne Yuan Photography. They live in San Diego and New York area, but shoot weddings worldwide.

Join our Facebook Fanpage | Ask a question on our Formspring | Contact Us

portrait-tips.jpg

Post originally from: Digital Photography Tips.

Check out our more Photography Tips at Photography Tips for Beginners, Portrait Photography Tips and Wedding Photography Tips.

10 Techniques for Amazing Portraits


Digital Photography School

 
Comments Off on 10 Techniques for Amazing Portraits

Posted in Photography


Darkroom Photography Techniques : How to Use a Photo Enlarger

17 Jan

Using a photo enlarger depends on the size and style, but generally the negative is placed under the light, the image is focused and the paper is set in place for exposure. Use an enlarger to create photograph prints with helpful tips from a fine art photographer in this free video on darkroom techniques. Expert: Deborah Gray Mitchell Contact: www.dgmfoto.com Bio: Professional Photographer, Deborah Gray Mitchell has been in business since 1981 as both a fine art and commercial photographer. Filmmaker: Paul Muller


Set Your Photographs Apart with These Incredible Pro-Lighting Techniques

10 Jan

This is the trailer for our Fashion and Beauty Lighting Secrets DVD. Part out our Pro Photography Masterclass DVD series. Get More FREE Training at my website: www.photography-tips-online.com See how these stunning shots were created from start to finish. Broaden your knowledge of studio and location lighting for Beauty Portraiture and Fashion Photography as Karl Taylor reveals some of his incredible lighting secrets. In this programme Karl shows you 9 incredible lighting set-ups and model shoots in an easy to understand format that will give your images that professional edge. On this DVD you will learn: * Beauty Studio Lighting * Soft Light on Location * Lighting Panels * Soft Dish Techniques * Fashion Lighting * Mixed Lighting Sources for Drama * Fashion Lighting on Location * Beauty Dish and Backgrounds Get More FREE Training at my website: www.photography-tips-online.com
Video Rating: 4 / 5


DSLR Tutorial: How to shoot an interview! (3 film techniques)

01 Jan

Facebook: facebook.com More DSLR Tutorials only here: youtube.com In this “how to” video we show you our three styles how to shoot an interview / conversation. It doesn’t matter if you have a tripod or not – there is always a nice solution to film an interview. Voice Over: Moritz Janisch Copyright 2012 by Fenchel & Janisch Filmproduktion GbR Twitter: twitter.com More DSLR videos on our channel: www.youtube.com Official website: www.fenchel-janisch.com
Video Rating: 4 / 5