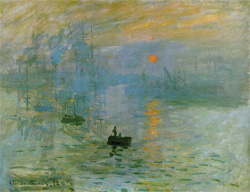
Impressionism is an art movement that began in the 19th century with the works of Monet whose painting "Impression, Sunrise" gave rise to the name of the art movement.
I often think of photography as two different art forms.
There is the traditional style that depicts a literal representation of a scene by showing how it actually appears to the person who is present – the style used in photojournalism and travel images.
Then there is another style when the photographer tries to convey the feeling of a scene, a general impression, or suggestion of a scene.
Lacking in detail these impressionist images emphasize colour over line and are often soft, dreamy, and have a painterly feel.
Think of the impression a scene leaves in your mind when you glance at it quickly and then look away before giving your eyes a chance to focus. Usually it is an impression of colour and shapes and maybe an idea of some things that were in the scene with little detail – just the essence of a subject.
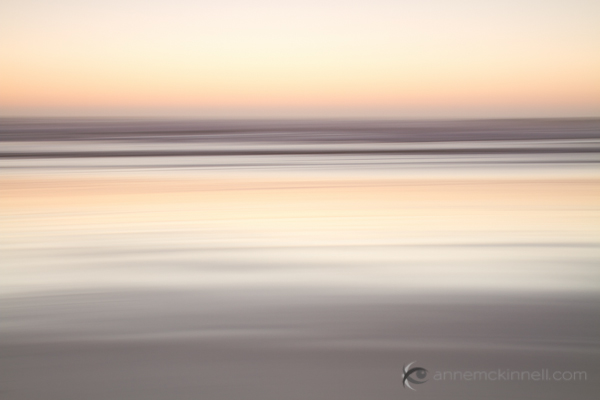
Beach blur using the intentional camera motion technique.
When it comes to creating these dreamy sorts of images where things are out of focus it should be obvious to the viewer that the photographer intended it to be out of focus. If it’s only out of focus a little bit it looks like a mistake.
Try to capture the feeling or mood of the scene rather than a literal representation.
Now, on to the techniques.
1. Intentional Camera Movement
For this image I moved the camera in a diagonal direction. I also sharpened the image in post-processing which is what gives it the appearance of brush strokes.
This technique works great on landscapes with strong lines such as the horizontal lines in a beach scene (shown above) or the vertical lines in a forest scene but you can do it anywhere.
You will need to experiment quite a bit before you get a result you like but that is all part of the fun. Every frame will turn out differently.
- * Start on shutter priority and pick a long shutter speed such as 1/20 to 1/2 a second.
- * Point your camera at the middle of the scene and hold the shutter half way down to lock in the exposure.
- * Pan in the same direction as any strong lines that exist in the scene.
- * Start the panning before you completely press the shutter and continue after the shutter closes. That will make the movement smoother.
- * Experiment with shutter speeds.
2. Zooming
Similar to the above technique, this one is intentional camera movement too, but instead of panning you zoom your lens in or out during the exposure. I like how this technique looks on city lights.
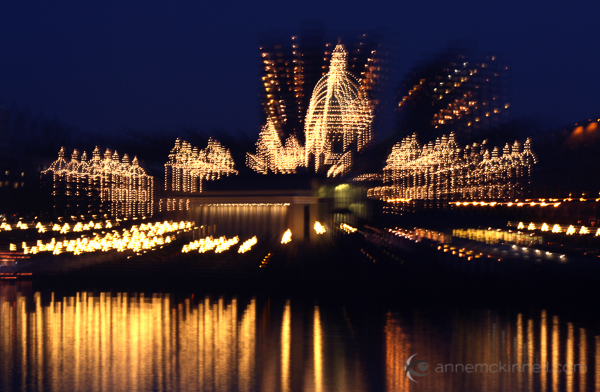
The Legislature in Victoria, British Columbia using the zoom blur technique.
- Set your camera to shutter priority and pick a shutter speed of at least a couple of seconds.
- I find it easier to do this technique at night to allow for a really long exposure. If you do it during the day you might need to use a neutral density filter to block out some of the light to allow for the long exposure time.
- While the shutter is open slowly zoom the lens. Try to make the zoom as smooth as possible.
- You will probably have to try a number of different exposure times and try zooming quickly and slowly for different results.
3. Selective Focus
With this technique only a very very small portion of the frame will be in focus. The rest will be extremely soft and painterly. You will need to use a lens that has a very wide aperture opening (f/1.8 or 2.8 for example). It will work best if you move away from your subject and use a telephoto lens to zoom in.
Or you can use a specialty lens like a Lensbaby.
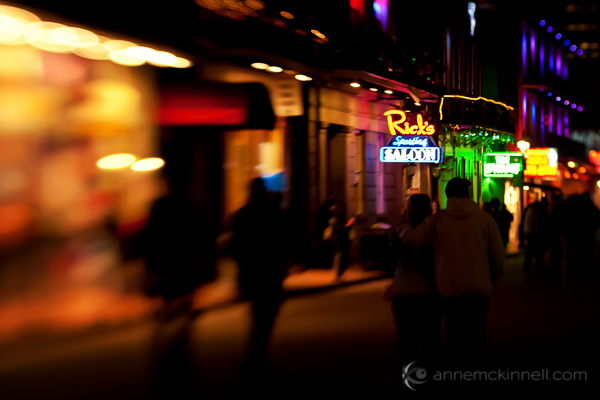
Bourbon Street, New Orleans during Mardi Gras captured with a Lensbaby.
- Use the aperture priority setting on your camera and set it for the widest aperture (lowest F stop number).
- You might have to focus manually to get the right part of the frame in focus.
- This technique tends to works best when you have good colour in the frame.
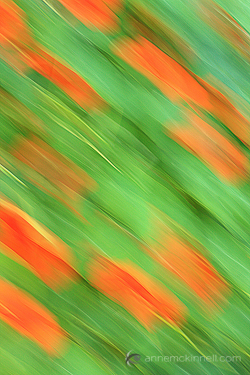
4. Long Exposures
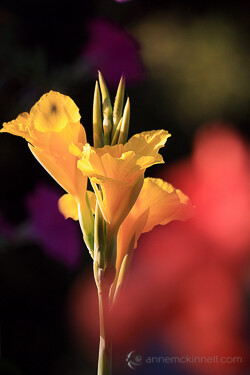
I always remember the day I made this image because what I really wanted to do that day was the selective focus technique. But when I got to the location it was super windy and there was no way I was going to get anything in focus.
At first I was disappointed until I decided to go with the flow. The flowers blew all over the place while the shutter was open for half a second and I was delighted with the result.
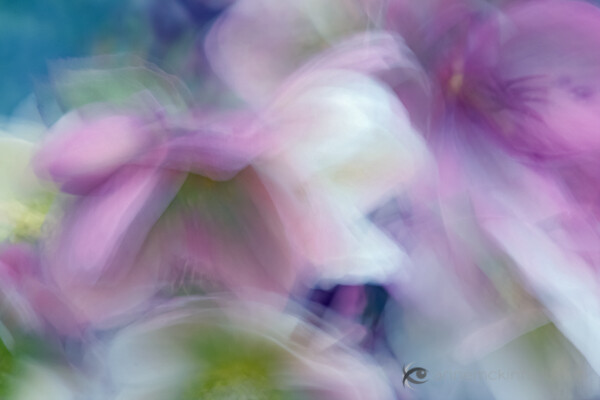
- Set your camera to shutter priority and pick a long shutter speed like half a second or longer.
- Find a subject that is in motion.
- You will probably have to try lots of different shutter speeds before you get one that is just right depending on how quickly your subject is moving. I like it when the result is very abstract yet there is still enough detail to identify the subject.
5. Focus Through
This technique works great with flowers because the petals are semi-transparent and light shines through them. What you want to do is focus on a flower that is a couple of feet away and allow another flower to be extremely close to the end of your lens, so close that it could never be in focus.
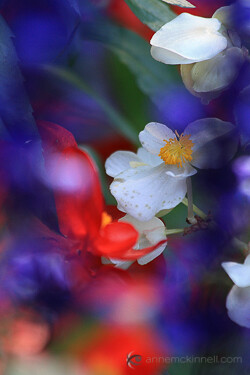
- Use a telephoto lens.
- Find an object that is semi-transparent that you can place in front of the subject which is in focus.
- Use manual focus so your camera isn’t confused by the object in the foreground.
The reason I like these techniques is because it gives me a real sense of freedom when there are no rules and I can play around as much as I like.
Even if these sorts of images aren’t your thing, I really encourage you to try it out for a day just for fun, just to release yourself from the obligation of making everything super sharp all the time.
Remember – you are the artist and you can do whatever you want.
I would love to hear about your experience with these techniques! Let me know how it worked out for you in the comments.
Post originally from: Digital Photography Tips.
Check out our more Photography Tips at Photography Tips for Beginners, Portrait Photography Tips and Wedding Photography Tips.
5 Impressionist Photo Techniques


You must be logged in to post a comment.