RSS
 

Posts Tagged ‘Take’

5 Trends to Take Your Photography Business to the Future

04 Oct

As an owner of a photography business, you need to have the ability to wear many different hats; you need to be a marketer to promote your brand, a designer to create and update your site, and a tech-savvy person to understand the innovation and new products that are constantly appearing on the market.

In this article you’ll learn some of the trends in digital marketing, web design, and mobile technologies that any smart photographer needs to be familiar with.

Sergey Galyonkin

By Sergey Galyonkin

Digital Marketing

In the following years we can expect a growing number of desktop and online software solutions geared at photographers. Tough competition in this market constantly gives birth to many interesting offerings.

For instance, Defrozo is looking to be a one-stop, free platform for photographers to update their website and blog, proof images and sell prints online, as well as manage their client base in a built-in CRM (customer relations management). Snapizzi is another interesting tool which uses a smart QR-code scanning technology to enable photographers to automatically upload and sort out event photos for online sales, literally in minutes. And if you’re looking for an album proofing tool that could be integrated with your existing website AlbumParrot is here to help.

These are just a few of the new apps and services worth your attention, you can discover more photography startups on Betalist.

Dickson Phua

By Dickson Phua

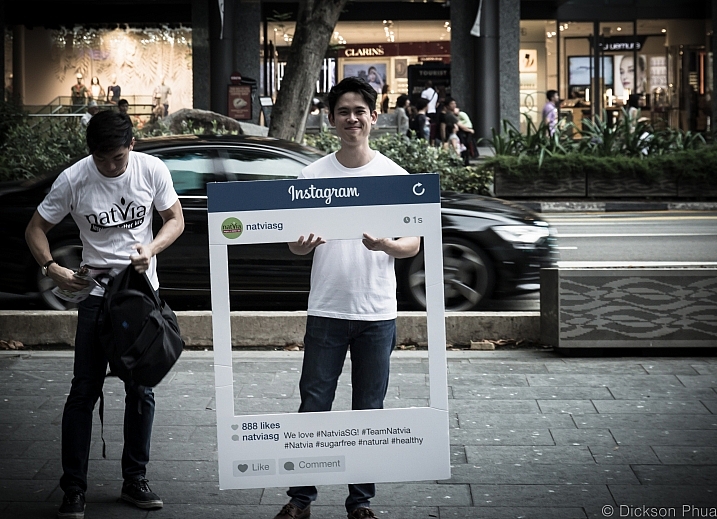
With advertising coming to Instagram, and Facebook limiting its organic reach in favor of paid-for posts, email marketing becomes even more attractive for small business, and photographers are no exception. Some of the major trends in this area are personalization and automation, with most services like MailChimp and MadMimi extending and improving their functionality in this area. As a result, it gets quite easy to create a sequence of emails that will be triggered when someone subscribes for your updates, or send out your special offers to small segments of your contact list in order to maximize relevancy and click-throughs.

The popularity of visual storytelling will continue to grow which is obviously great news for photographers. Big companies will be employing professional photography to communicate their brand philosophy and aesthetics. So consider adjusting your proposition to accommodate corporate clients.

Web Design

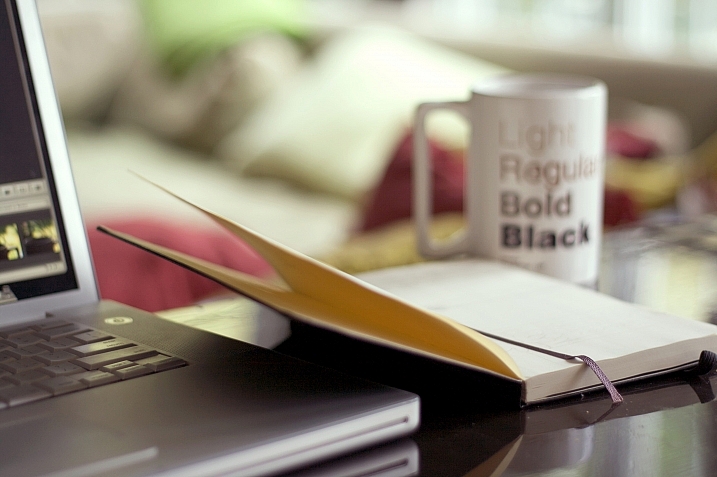
Talking about web design, there are a few standards you might want to take into account while updating your photography portfolio.

Image-focused design featuring clean typography and ghost buttons is going to be a winner, just like last year. Sticking to the storytelling trend in content marketing, full-size videos and images will take the world by storm contributing to a website’s interactivity, and increasing return visits.

David Joyce

By David Joyce

Moreover, custom photo galleries and slideshows available for mobile viewing will become more and more popular. Don’t forget to make your site mobile-friendly this year, if you have not done it yet. In 2016 a mobile version of your portfolio will rock, otherwise you run the risk of losing over 40% of your potential clients.

Mobile

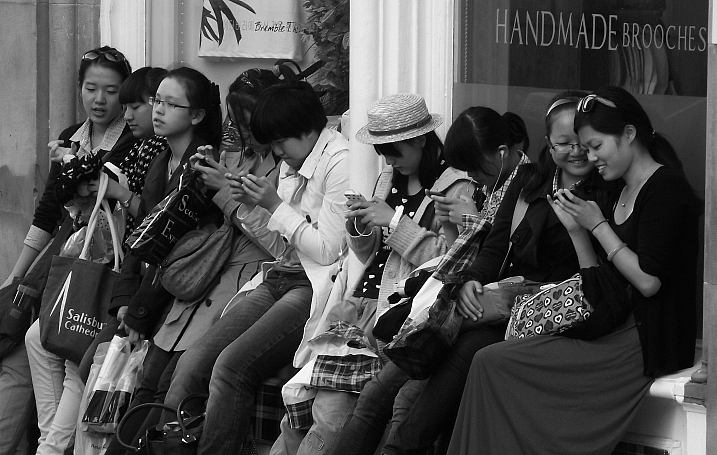
While there’s a lot of buzz around the revolutionary potential of mobile payments, it’s unlikely that the photography industry is going to adopt this trend too soon. However, mobile payments are definitely something to keep your eye on since mobile is conquering nearly every sphere of our life.

Mobile usage is going to increase even more. For example, the latest data shows that the U.S. users spend 51% of their media time on mobile compared to 42% on desktop.

Byronv2

By byronv2

This means mobile Internet users should be kept at the forefront, whenever you start a marketing campaign. Planning to print a solid pack of flyers for an upcoming tradeshow? Consider putting a QR code on it. Do you know image editing inside out? Think about creating your own mobile app, or figure out a mutually beneficial arrangement with app developers. Smartphones and tablets will keep their leading position in the coming years, so make the most out of this growing trend.

Technology

Wearable devices are by far one of the most exciting trends to follow. With the competition fuelled by Apple Watch, this market is about to bring photographers a lot of neat capabilities via wearables.

Sdu7cb

By Sdu7cb

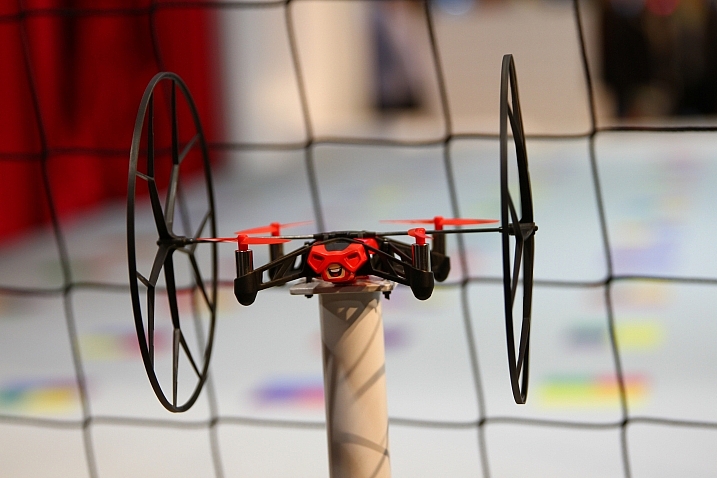
Drones are another major trend in the tech field. A lot of models with features ranging from built-in cameras shooting 12 megapixel RAW, to smartphone app remote control, were on display at this year’s CES.

CES 2015 also brought a few interesting solutions to the ever-increasing problem of image storage. Thus, Canon has introduced Canon Connect Station CS100 that connects wirelessly to phones and Wi-Fi enabled cameras, and uploads images to be displayed on a TV. Another potentially interesting technology was presented by Toshiba. The new memory cards from this manufacturer can be read with a NFC-enabled Android phone. This invention is rather raw at the moment, but it hints at advancing possibilities in the near future.
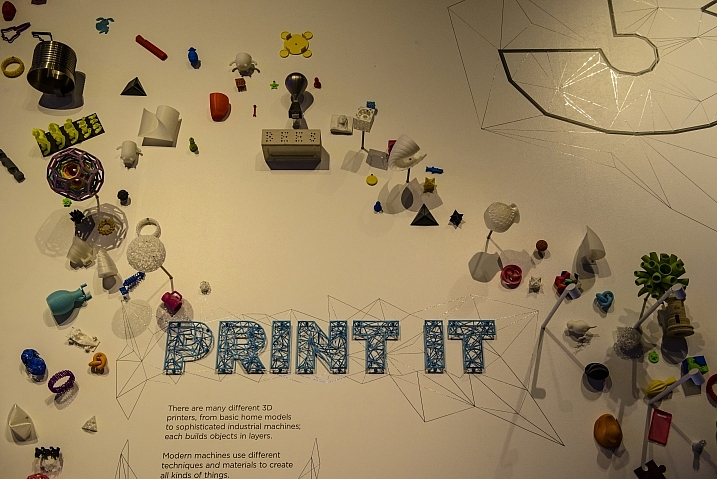
Printing

A printer about the size of a smartphone, that doesn’t require ink, and is controlled via your smartphone? Any event or wedding photographer could utilize a thing like that. Well, it’s actually a reality now. Meet Polaroid Zip. Presented at the CES 2015, this neat device is a glance into the future of compact printers which definitely moves towards compactness, wireless connection, and fast work.

Son Of Groucho

By Son of Groucho

3D printing is becoming more accessible for end consumers and opens new opportunities for photographers. For instance, Amanda Ghassaei created amazing 3D prints that feature subtle texture and high precision, when backlit with a diffused light. If you’d like to utilize this one-of-a-kind method before it hits the mainstream, the artist shared the instructions on how to do it.
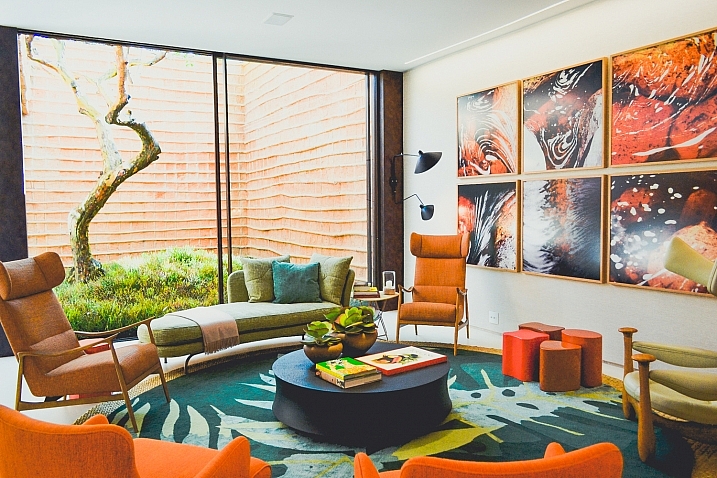
Interior Design

The meeting room climate can make or break your deal, so knowing what design elements get people hooked these days is a must for a savvy photographer, no matter whether you meet clients in your studio or apartment.

Paulisson Miura

By paulisson miura

In 2015 electric modern vibe and unexpected textures are finding their way out. More sophisticated looks featuring natural textures, gold hardware, and mid-century modern undertone are the latest fashion. For example, one sophisticated idea of the kind is a cowhide rug, which would be a perfect decoration for your meeting room.

Wallpapers with natural flowers and textures have come back this year too. Blue seems to be one of the most popular colors for interior decorations. Taking into account the latest trends, you can create a cool, impressive look for your office or spice up your home interior.

Bottom Line

Staying informed about the modern novelties and trends in different areas of our life can be a great way to single out your photography brand, and differentiate you from the competition while taking your career to the next level.

What recent trends do you find most exciting and promising? Let us know your thoughts by leaving a comment below.

googletag.cmd.push(function() {
tablet_slots.push( googletag.defineSlot( “/1005424/_dPSv4_tab-all-article-bottom_(300×250)”, [300, 250], “pb-ad-78623” ).addService( googletag.pubads() ) ); } );

googletag.cmd.push(function() {
mobile_slots.push( googletag.defineSlot( “/1005424/_dPSv4_mob-all-article-bottom_(300×250)”, [300, 250], “pb-ad-78158” ).addService( googletag.pubads() ) ); } );

The post 5 Trends to Take Your Photography Business to the Future by Julia May appeared first on Digital Photography School.


Digital Photography School

 
Comments Off on 5 Trends to Take Your Photography Business to the Future

Posted in Photography


7 Ways to Take Advantage of Autumn in Your Portrait Photography

29 Sep

Fall is my favorite. At least it used to be before it was Pumpkin Spice Everything. I’m so tired of Pumpkin Spice Everything, but I’ll never tire of chilly weather, or scarves, or leaf piles. Or even shorter days, mainly because long summer days are just too much pressure for me.

lynseymattingly1

I like everything about fall including, maybe especially, that it’s ripe for portraits. Here are seven ways to help you take advantage of all of autumn’s goodness in your portrait photography.

lynseymattingly2

1) The light is phenomenal 

Yes, there is less of it, but it is so golden and delicious. I’m sure there is a very scientific reason for that, which of course I know and understand exactly, but I don’t want to bore you. I like a warmer image, so to get one without having to add a filter is fantastic. I prefer to shoot in the morning and early evening hours but in the fall, the light reflecting off of the warmer tones in the trees make even the deadest of shady patches come alive.

While people don’t normally wear yellows and oranges for picture day, the golden tones found in nature compliment all skin tones. This is why I always tell my clients to dress in colors that are found naturally outside—not only does it keep people from showing up in lime green, but the palette works for whatever background we find that day, and this time of year dressing in earth tones can really make a portrait pop.

lynseymattingly4

2) Clients dress in their finest

I’m not big on fancy clothes, but even I agree that flip flops take a back seat once we can bust out boots and scarves. Fall is when people tend to take it up a notch, plus it’s layering season. Layering is the best way to achieve portraits that look high-end or even fashion shoot-like. You won’t ever find me in boots, a t-shirt, a jacket, a skirt, tights, a scarf and a hat in real life….but on picture day, I’ll happily dress everyone in five layers and make them stick with it for 20 minutes if it makes my ragamuffin family look like we bathe regularly. I’ve found that my clients feel the same. Which is not to say that my clients are ragamuffins, I’m sure they always look as sharp as they do on picture day.

lynseymattingly3

3) Fall adds a playful feature to portraits

I don’t like traditional posing so fall adds so many more options: throw leaves, lay on leaves, climb in colorful leaves, throw leaves at me! (Try to watch out for sticks please) You get the idea. The colors are almost like an extra family member that matches everyone, and isn’t making things more difficult. Use it to your every advantage. It’s not possible to look like you’re miserable in five layers of fancy-pants clothes when you are having a leaf fight. I know, I’ve done the research.

lynseymattingly5

4) Don’t forget black and white

While the changing fall season offers colors, it also offers texture. Black and white portraits can still feel the magical spell of autumn through texture, tone, and playfulness. Plus, that phenomenal light thing goes for black and white too (see #1). I love black and white portraits, and while I am likely to do more color this time of year, I still proof a few black and whites for all of my clients.

lynseymattingly6

5) Compensate for the warmer tones

Sometimes if I am hitting the light just right, and my subjects are in perfect clothes, and the moon isn’t void of course, I find that images can get too warm. I know that sounds crazy, but it can happen. A custom white balance can help you on the front end, but if you didn’t notice it until after, don’t despair. An auto color run (under Image in Photoshop) or a cooling filter can fix everything. For as much as warm tones are flattering, no one wants to look like a seasonal gourd.

lynseymattingly9

6) Fall weather is perfect for cuddling

Now I’m not one to cuddle, much to my husband’s dismay; I can’t take people in my personal space for an extended period of time. Last weekend a client that knows how I feel about hugging and all that, giggled at how often I tell people to “snuggle up” when I’m shooting family portraits. I guess I figure that most people enjoy it. Or are at least willing to pretend they do for the sake of the pictures (even I am willing to do that for a good Christmas card), especially if it’s not 100 degrees F (30c) outside. And a snuggle feels like a lot less pressure than cuddling, now doesn’t it?

lynseymattingly8

7) The holidays are around the corner

In the US, the changing colors of the trees means that winter is almost here, which puts portrait photographers square into Holiday Card Season. Most of the clients I photograph this time of year are planning on using their images for sending out cards, or even creating holiday gifts.

So this is the only time of year I’m likely to offer a sale or special on portrait sessions, and every time I do, they sell out. That also means that this is the time of year that I can lose my mind in a pile of editing if I am not careful. To try to prevent both a nervous breakdown and spending a month staring at my computer screen, I usually offer mini sessions—10 to 15 minute shoots where I promise five or so pictures that I deliver as high resolution files. This takes any printing or card creating out of the equation, and also limits the amount of images I promised, rather than a full session which for me can be 50 or more. In turn, my clients get a few choices of images for their holiday cards and gifts, including that one great picture that was likely the whole reason they wanted portraits anyway. And I don’t have a nervous breakdown. Probably.

lynseymattingly7

So throw back a pumpkin spice latte and put on a pair of boots and go shoot some portraits, even if you usually don’t. Everything is on your side in the fall – great light, fabulous surroundings, and more clients than any other time of year. That doesn’t happen very often (well, it happens once a year, but still).

lynseymattingly10

googletag.cmd.push(function() {
tablet_slots.push( googletag.defineSlot( “/1005424/_dPSv4_tab-all-article-bottom_(300×250)”, [300, 250], “pb-ad-78623” ).addService( googletag.pubads() ) ); } );

googletag.cmd.push(function() {
mobile_slots.push( googletag.defineSlot( “/1005424/_dPSv4_mob-all-article-bottom_(300×250)”, [300, 250], “pb-ad-78158” ).addService( googletag.pubads() ) ); } );

The post 7 Ways to Take Advantage of Autumn in Your Portrait Photography by Lynsey Mattingly appeared first on Digital Photography School.


Digital Photography School

 
Comments Off on 7 Ways to Take Advantage of Autumn in Your Portrait Photography

Posted in Photography


How to take more Photography Gear through Airports

23 Sep

Have you ever wondered how you can get more gear onto a plane without paying an excess baggage fee?
We found this interesting video from photographer Peter Leong, a wedding photographer in Japan who travels regularly for overseas weddings, describing how he carries camera gear on board.

Have you worn a photography vest before? What has your experience been when traveling with photography gear and taking it through airport security?

googletag.cmd.push(function() {
tablet_slots.push( googletag.defineSlot( “/1005424/_dPSv4_tab-all-article-bottom_(300×250)”, [300, 250], “pb-ad-78623” ).addService( googletag.pubads() ) ); } );

googletag.cmd.push(function() {
mobile_slots.push( googletag.defineSlot( “/1005424/_dPSv4_mob-all-article-bottom_(300×250)”, [300, 250], “pb-ad-78158” ).addService( googletag.pubads() ) ); } );

The post How to take more Photography Gear through Airports by Darlene Hildebrandt appeared first on Digital Photography School.


Digital Photography School

 
Comments Off on How to take more Photography Gear through Airports

Posted in Photography


Using the Histogram to Take Better Pictures

20 Sep

You might have seen some articles here on Digital Photography School about using the histogram when editing pictures in Lightroom and Photoshop, but it can also be a very handy tool when you are out shooting images as well. Most cameras have the ability to show you the histogram when you review your photos on the rear LCD screen, and some even allow you to see a real-time histogram in Live View. While this might seem a bit intimidating at first, learning to use the histogram when out shooting pictures can have a dramatic impact on your photography and help you understand how to get the right exposure for the photos you are taking.

histogram-sorority-bid-day

Sorority Bid Day brought to you by the magical properties of the histogram.

In a nutshell, the histogram shows how much data is recorded for various Red, Green, and Blue color values in a picture. While you can usually see data for all three colors separated into discrete graphs, the one I find most useful for general shooting is the histogram that combines all three RGB values into one visual representation. A histogram shows how much data has been recorded across the tonal range of a photograph from very dark to very light. A spike in the graph means a lot more data has been recorded for those particular values of darkness or lightness, and a dip means that not much data has been saved. In general, a properly-exposed picture should have a histogram that looks something like this:

histogram-example

An example of a hypothetical histogram for a properly exposed photo.

A histogram similar to this example would mean that most of the color data is concentrated in the middle: the greatest quantity of pixels is neither too dark nor too light. Most photos will have some darker pixels and some brighter pixels, but in general all the information captured by a camera’s image sensor should fall somewhere between the darkest of darks (i.e. very black) and the lightest of lights (i.e. very white). A histogram that is skewed to the right would indicate a picture that is a bit overexposed because most of the color data is on the lighter side, while a histogram with the curve on the left shows a picture that is underexposed. This is good information to have when using post-processing software because it shows you not only where the color data exists for a given picture, but also where any data has been clipped: that is, it does not exist and, therefore, cannot be edited. It’s also good information to have out in the field, such as in the following example:

histogram-quidditch-overexposed

Most cameras allow you to overlay the histogram on top of a given photo during playback, or as you shoot the photo when using Live View.

I could tell right away that this picture of some college students playing Quidditch was a little overexposed, but looking at the histogram data right on my camera gave me additional information that helped me adjust my shooting on the spot. The large curve on the right-hand side tells me that most of the color information is concentrated on the lighter side, which is actually a good thing because more data is actually collected in the highlight portions of the image which can then be brought down later in a program like Lightroom. (This is a technique called expose to the right, which is a fantastic way to get a little more out of your photography if you are willing to put in a bit of time editing pictures on your computer.)

The problem with this image, as you can see in the above histogram, is that the graph literally goes off the chart on the right-hand side. This means that some of the highlights have been clipped: there is no longer any data that can be recovered, and no matter what I do in Photoshop or Lightroom there are some portions of my image that show up as pure white and can’t be edited. An example histogram from a photo that is clipped on both the darkest and lightest areas would look like this:

histogram-example

After taking the first photo and realizing that some of the data would be lost due to clipping, I was able to adjust my exposure settings and get a much better image:

histogram-quidditch-properly-exposed

Quidditch isn’t only played at Hogwarts.

The histogram for this picture was also concentrated a bit more to the right-hand side, but right after I shot it I was able to see that no data had been lost due to clipping. This didn’t help much in the immediate moment, but it meant that I had plenty of information to work with later when editing the picture in Lightroom. As another example, here’s a picture of a unique building on the Oklahoma State University campus:

histogram-example-building-exterior

The Noble Research Center on the campus of Oklahoma State University.

When I looked at the back of my camera it seemed as though the photo was pretty good. The sky was a bit bright, but I thought everything would be just fine overall. This is similar to many situations I have been in when I thought I could tell simply by looking at the photo on my camera’s LCD screen if it was exposed properly, but a quick check of the histogram can yield much more information. Even though the above image seemed decent at first, the camera histogram told another story:

histogram-example-noble-center-D7100

The histogram for the above photo indicated severe clipping on the highlights, meaning some parts of the photo were so bright that I wouldn’t be able to fix it in Lightroom.

Had I not looked at the histogram I would have never seen that a good chunk of the sky was clipped which meant there was no color data at all for the brightest portions of the photo. This would be a serious problem for my post-processing when I bring my pictures into Lightroom and adjust various parameters to get the image to look like I want. After looking at the histogram I re-adjusted my exposure settings and took another photo which had an improved balance of color data across the spectrum:

histogram-example-noble-center-D7100-proper

The same composition, but with different exposure settings that resulted in a better exposure with no clipped data.

One curious aspect of this image is that while the sky is now properly exposed, the glass panels on the building appear to be too dark. Looking at the histogram you can see that while there is certainly a lot of data on the darker portions of the image (hence the spike on the left-hand side of the graph), no data has been lost due to clipping. This means I had a lot of flexibility to improve the image in Lightroom, which resulted in the following finished photograph:

histogram-example-building-exterior-proper

One nice thing about most mirrorless cameras, as well as some DSLRs when shooting in Live View, is their ability to give you a real-time indication of any areas of the image that will be over – or under – exposed. This is normally referred to as a zebra pattern and it essentially overlays a series of stripes over any portion of your image where data is going to be clipped. And remember, as I stated earlier, many cameras today have the ability to show you a live histogram that updates in real-time so you can see not only where the color data on your image is concentrated across the light/dark spectrum, but also alert you to any clipping that will happen when you take the photo.

These are just a few examples of how the histogram can be useful when you’re out shooting photos, not just when you’re editing them on your computer. How do you use the histogram, and what other tips and tricks do you have to share about using it to enhance your photography? Leave your thoughts in the comments below.

googletag.cmd.push(function() {
tablet_slots.push( googletag.defineSlot( “/1005424/_dPSv4_tab-all-article-bottom_(300×250)”, [300, 250], “pb-ad-78623” ).addService( googletag.pubads() ) ); } );

googletag.cmd.push(function() {
mobile_slots.push( googletag.defineSlot( “/1005424/_dPSv4_mob-all-article-bottom_(300×250)”, [300, 250], “pb-ad-78158” ).addService( googletag.pubads() ) ); } );

The post Using the Histogram to Take Better Pictures by Simon Ringsmuth appeared first on Digital Photography School.


Digital Photography School

 
Comments Off on Using the Histogram to Take Better Pictures

Posted in Photography


Wish you could take Amazing Photos? Now you can with our Brand New Course

17 Sep

Wish you could take amazing photos with that camera that rarely comes out of Auto Mode?? Now you can.

With our brand new photography course – presented on video – Photo Nuts and Shots.

It’s a follow up to the incredibly popular Photo Nuts and Bolts course released earlier this year and complements our best-selling ebook of the same name (and author, Neil Creek).

If you already know your way around your camera but want to gain real skills that you’ll use in every shot you take, then this creative photography course is for you.

And for a limited time, it’s available at the special introductory price of just USD $ 39 – which is a saving of 33%.?

What you’ll learn

In 10 easy-to-understand video lessons, Neil reveals the tools, techniques and thought processes for producing amazing photos:

  • Learn to harness light to convey emotion
  • Understand the impact of great composition and how to achieve it
  • Take the sharpest possible photos
  • Discover how to adapt your camera’s exposure to get the shot you want
  • Master the concepts of shot perception, planning and execution – in any setting
  • Know when to break the rules for creative effect
  • Tap into your creativity to be the best photographer you can be
  • Because the videos are streamable and downloadable, you can go through at your own pace and in any order.

And the best part is that Neil’s teaching is practical and immediately actionable, so you’re guaranteed to see an instant improvement in the quality of your shots.

Take a look…

For a quick video preview, or to find out more, head here and check out the full details of this great new course.

Great photography CAN be learned – and Photo Nuts and Shots will show you how.

So get your camera ready and take this all-new dPS course today/

googletag.cmd.push(function() {
tablet_slots.push( googletag.defineSlot( “/1005424/_dPSv4_tab-all-article-bottom_(300×250)”, [300, 250], “pb-ad-78623” ).addService( googletag.pubads() ) ); } );

googletag.cmd.push(function() {
mobile_slots.push( googletag.defineSlot( “/1005424/_dPSv4_mob-all-article-bottom_(300×250)”, [300, 250], “pb-ad-78158” ).addService( googletag.pubads() ) ); } );

The post Wish you could take Amazing Photos? Now you can with our Brand New Course by Darren Rowse appeared first on Digital Photography School.


Digital Photography School

 
Comments Off on Wish you could take Amazing Photos? Now you can with our Brand New Course

Posted in Photography


Dark Water: Take a Boat Ride Through a Flooded Museum

15 Sep

[ By Steph in Art & Installation & Sound. ]

boat ride art installation 1

In order to take in the new, dimly lit installation at Palais de Tokyo by artist Céleste Boursier-Mougenot, you’ll have to pilot a small boat through dark waters inside the flooded museum. Taking its name from the annual flooding event that sees the water levels in Venice rise so high that walkways disappear, the ACQUAALTA exhibition envisions the concrete interiors of the Palais as they would be if the forces of nature were similarly unleashed upon Paris.

boat ride art installation 4

boat ride art installation 6

Visitors sit or stand within their rowboats, using oars to paddle themselves around the nearly pitch-black space and disembarking to explore jagged foam landscapes.The hallucinatory voyage is reminiscent of souls crossing over to the underworld via the River Styx, with the ferryman Charon to guide them.

boat ride art installation 2

boat ride art installation 3

As they take in the subtle figurative silhouettes projected onto the black walls, the guests themselves become part of the exhibition, like actors in a play. As they navigate the waters, they are filmed, their movements projected onto one of the walls. The foam ‘island’ is a place of refuge, allowing deeper immersion into the work without fear of drifting.

boat ride art installation 5

boat ride art installation 7

Boursier-Mougenot believes that creating an atmosphere is integral to art, so that the work is not just disconnected imagery hanging on a wall, but rather an interactive experience that envelops onlookers and makes them active participants. The hope is that as a viewer, you temporarily forget who you are, falling headfirst into a dreamworld via an artificially constructed series of hypnotic images, movements and sounds.

Share on Facebook


[ By Steph in Art & Installation & Sound. ]

[ WebUrbanist | Archives | Galleries | Privacy | TOS ]


WebUrbanist

 
Comments Off on Dark Water: Take a Boat Ride Through a Flooded Museum

Posted in Creativity


5 Tips to Take Your Landscape Photography from Good to Great

15 Sep
The beauty of the scenery in Antarctica

The beauty of the scenery in Antarctica

Landscape photography is one of the most favoured genres of photography. It also happens to be the one genre that is not easy to master. The reason is simple, to become really good at landscape photography, you need to spend hours trying to master it. Most photographers are not able to dedicate that amount of time, so it becomes frustrating. Many photographers end up being disappointed with their images, but there are few things that you can do to make sure you get better results, in a short space of time.

1. Foreground interest

This is a common tip, but one that makes a lot of sense. Having a subject in the foreground, anchors the image. It tells the viewer where to look first and once they have looked at that, their eye will explore the rest of the image.

You can place your foreground subject anywhere in the lower third of your image, but it might be a good idea to put it more to the left side of the frame. This is not a rule (I really don’t believe there are any rules in photography), but rather a suggestion. We read text from left to right, so if your foreground interest is on the left hand side, it makes it feel easy for the viewer to interact with the image. The foreground interest could be anything, a piece of driftwood, a rock, a tree, anything that works for the scene.

Foreground interest anchors a scene

Foreground interest anchors a scene

2. Color in your scene

Your image will have inherent color based on the time of day and subject you are shooting. If you are shooting a forest, your scene might be predominantly green, if you are doing a seascape, there may be lots of blue because of the colour of the water.

Be aware of the colour in your scene and work with the opposite colors on the visual colour wheel. As an example, there are three primary colors that your camera sees, they are: Red, Green and Blue. The additive colors (opposite colors) are Cyan, Magenta and Yellow. To be clear, Cyan is the opposite color to Red, Magenta is the opposite to Green and Yellow is the opposite to blue. These opposing colors can work well in a scene, particularly yellow and blue.

Look at the colors in your scene and decide what you want to emphasize. To make sure you have great colours to work with, you will want to shoot during the golden hours and emphasize the warm colors.

Rich colours will enhance the drama in your image

Rich colors will enhance the drama in your image

3. White Balance

When you are shooting landscapes, you will want to be shooting at golden hour, or the blue hour. These are the times of day when the light works really well for dramatic landscape shots. In the golden hours, the light will be warm tones of yellow, orange, or red. Check your white balance setting when you are shooting at this time. If your camera is set to Auto White Balance, it will cancel out much of the warm tones in your image as it tries to neutralize any color casts you may have in your scene.

If the golden hour light is really strong in your scene, Auto White Balance will make the scene look really bland and colorless. Try and shoot on Daylight White Balance instead. That way, the camera will be capturing the light as it truly is in the scene. You could even turn your white balance to cloudy or shade to enhance the warm tones even more. Use this settings as a creative tool, it can really make a good impact on your image.

Use white balance creatively, this image was shot using shade white balance

Use white balance creatively, this image was shot using the Shade preset.

4. Movement

Some of the best landscape images have some form of movement in them. The movement can be caused by water, wind, or both. Subjects that work well with movement are rivers, waterfalls, seascapes and even stars. A long exposure image of the sea with water looking all silky and wispy is ethereal, and adds drama to the image. We don’t see this smooth silky water naturally with our eyes, it is only possible with the camera. The results are often very appealing, and it gives a serenity to the scene that is almost magical. You will need a tripod to get this right, you will also need to use a longer exposure of a few seconds. Timing is also important, particularly with seascapes. You may have to time the shot for when the water comes rushing over the rocks, or up the beach. That way, the image will be filled with silky streaks of water and it will look amazing.

Movement in water can make a scene look dramatic

5. Less is more

Landscape images become more dramatic if there is a very clear subject in them. If you are unsure about what should be included in your scene, ask yourself this question as you look around the scene, “Does that rock, tree, river, etc., add to the scene or not?” If you think it is not adding to your scene, remove it. Even if you are unsure, remove it and take a shot to see how the image looks. In many images, less is more. If you have less items in your scene, there is less to distract the eye, there is less that can make the scene confusing, so give it a try. Set up a shot, take a photo and then start minimizing the distracting elements.

Sometimes, less is more

Try these five tips and share your results in the comments below. Do you have any other tips to add?

googletag.cmd.push(function() {
tablet_slots.push( googletag.defineSlot( “/1005424/_dPSv4_tab-all-article-bottom_(300×250)”, [300, 250], “pb-ad-78623” ).addService( googletag.pubads() ) ); } );

googletag.cmd.push(function() {
mobile_slots.push( googletag.defineSlot( “/1005424/_dPSv4_mob-all-article-bottom_(300×250)”, [300, 250], “pb-ad-78158” ).addService( googletag.pubads() ) ); } );

The post 5 Tips to Take Your Landscape Photography from Good to Great by Barry J Brady appeared first on Digital Photography School.


Digital Photography School

 
Comments Off on 5 Tips to Take Your Landscape Photography from Good to Great

Posted in Photography


Take Better Pics Through Windows

01 Sep

The windows of high rise buildings offer the best city views. Capturing that view, without reflections that make the city look like it’s under alien attack, can be a frustrating venture.

QT Luong, a photog famous for capturing all 59 US National Parks in large format, offers up some advice on avoiding window pain.

We love his “oh duh” tip of cleaning the window as well as the more advanced advice like ensuring the window is shaded from sunlight, using a rubber hood or dark cloth to make a seal with the window and removing your polarizing filter. Techniques that work well for DSLR and phone cameras alike!

Photo by QT Luong


© Erin for Photojojo, 2015. |
Permalink |
No comment |
Add to
del.icio.us

Post tags:


Photojojo

 
Comments Off on Take Better Pics Through Windows

Posted in Equipment


How to Take Creative Landscape Shots using Intentional Camera Movement

19 Aug

Many photographic situations rely on keeping your camera as still as possible during exposure for pin-sharp images. You may have practiced hard to develop a steady hand and you’ve probably used tripods, remote shutter releases or image stabilisation to reduce the risk of camera shake. But, is keeping your camera still always a good thing? Every now and again, why not throw caution to the wind, move your camera while the shutter is open, and explore the range of creative opportunities this offers you as a photographer.

Bluebellwoodsblur750

What is Intentional Camera Movement and why use it?

Intentional Camera Movement (or ICM for short) is a photographic technique where the camera is moved as the image is being taken. One example is panning. The camera movement mimics that of a moving subject to keep the subject sharp and the background blurred. However, moving your camera during exposure can open up a lot more creative options for you to try out. In particular, ICM can be used to take some truly unique landscape shots. The technique can be exceptionally liberating and, by reducing the amount of sharp details in a landscape, it allows you to concentrate on lines, form and colour in your images. A scene that you may ordinarily consider too cluttered, might just come to life through ICM by letting you blend colours and shapes for an interesting abstract shot.

One of the reasons that I have grown to love ICM is that it enables you to capture a landscape in a unique and personal way that cannot easily be reproduced. It can even breathe new life into overly familiar landscapes, letting you see and capture something new about a location you may have photographed many times before. If you are struggling to find inspiration for your next photographic project, or you want to get your creative juices flowing, this is a technique that you should try at least once. It is relatively easy to take some striking shots, you are sure to end up with a unique set of landscapes and it can also be a lot of fun.

ICMburtonbshorejul15750

Slow Shutter Speeds

A key factor to get right when using ICM is the shutter speed. It needs to be long enough to capture significant motion blur; anything from 1/3 or 1/2 second exposure times, up to multi-second exposures. Because of these slow shutter speeds, shooting in low-light conditions is ideal for ICM. During the daytime, it may be harder to achieve the required shutter speeds even at the lowest ISO setting and the smallest aperture (highest f-stop number). You may need to use a polarizing filter, a neutral density (ND) filter, or a combination of both. Personally, I prefer to use a polarizing filter as a starting point as this helps to boost colours and cut down on reflections and glare. I will then add a 2-stop or a 4-stop ND filter if the shutter speed needs to be slowed down any further.

When starting out with ICM, it may help to shoot in Shutter Priority mode. Set the shutter speed to around half a second to start, and turn the ISO to the lowest available setting on your camera. Once you have practiced at this shutter speed, you can then get longer exposure times by using a combination of low-light and/or filters. Focus manually and turn off the autofocus to prevent the camera searching for focus during exposure. Also, if you are using a lens that has image stabilization, remember to turn it off.

RockpoolsportlandICM750

Moving the Camera

Once you have taken control of the shutter speed, how you move the camera is totally up to you. Get creative, there are no rules. You could move the camera vertically, horizontally, or diagonally – fast or slow. Alternatively, you could rotate the camera 360 degrees during exposure to create a spiral effect, or change the focal distance on a zoom lens during exposure to create a zoom effect. With practice, you can combine two or more of these movements to create something truly unique. The look and feel of your final images will be determined by the speed, direction, and smoothness of your chosen movements. If you wish, you can use a tripod to control the camera movement. This will help you to capture a smoother movement, which can be useful if you wish to retain a straight horizon line. I prefer to work hand-held when moving the camera, as it offers greater flexibility and provides more opportunities to experiment with different movements.

Bold movements can sometimes be more effective as there is a risk that too subtle a movement may end up looking like camera shake in the final image. Waving your camera around may not come that naturally, and it may result in you getting some funny looks from amused onlookers, but the end results definitely can make it worthwhile.

ICMwarehamtreesunset750

What to Shoot

A good place to begin using ICM in your landscape shots is to look for locations that offer striking colours, lines, or patterns. Woodland is a favourite ICM subject of mine, particularly during the spring and autumn seasons. Clean, parallel lines provided by the trees and vibrant colours of nature (provided by bluebells in the spring and fallen leaves in the autumn) lend themselves to a vertical camera movement. This can be from the top-down, or from the bottom-up and can be a quick or slow movement. It really just depends on the effect you wish to capture, and how experimental you want to be. Seascapes can be a good starting point for side-to-side camera movement, panning the camera in line with the horizon.

Alternatively, in rougher waters, you could try to match the movement of your camera to the movement of the waves for an altogether different effect. Shooting at sunrise or sunset could provide you with a greater variety of colours to work with, and shooting city lights after dark can also offer a wide range of creative options.

Once you have found a suitable location, you will probably find yourself taking multiple shots with various different movements. (I should warn you that this technique can sometimes be quite addictive, and you may find your memory cards filling up quite quickly!) You may find it useful to set your camera to shoot in Continuous Shooting Mode so that you can take a series of shots in quick succession, while moving the camera in a particular direction.

Bluebellaction750

Final Tips

As with any type of photography, images created using this technique are not going to be to everybody’s taste. It is highly subjective and what works for you will not work for others. Just keep in mind basic principles of photography such as composition and exposure – these are still just as important. Also, while this technique will render much of the landscape abstract, you may find it helps to have at least one element of the landscape sharp, or recognizable in the final image.

There is an element of trial-and-error when starting out with Intentional Camera Movement. You should soon find out what works for you and what doesn’t; this will help you to develop your own style. Don’t be too concerned if you do not get an effect you like right away – the technique can be quite hit-and-miss sometimes. Take a lot of shots, and don’t be too quick to delete shots that you feel haven’t quite worked out as you had hoped. There is a chance that, after a few days, you may take another look and see something that you like in there after all.

One of the great things about this technique is that it is all about how you express yourself through photography – think of your camera as your paintbrush. Get creative, have fun, and start seeing landscapes in an exciting new way.

RiverweedsICMblandford750

I have included several of my attempts at ICM landscape shots. Please feel free to share your own in the comments section.

googletag.cmd.push(function() {
tablet_slots.push( googletag.defineSlot( “/1005424/_dPSv4_tab-all-article-bottom_(300×250)”, [300, 250], “pb-ad-78623” ).addService( googletag.pubads() ) ); } );

googletag.cmd.push(function() {
mobile_slots.push( googletag.defineSlot( “/1005424/_dPSv4_mob-all-article-bottom_(300×250)”, [300, 250], “pb-ad-78158” ).addService( googletag.pubads() ) ); } );

The post How to Take Creative Landscape Shots using Intentional Camera Movement by Richard Beech appeared first on Digital Photography School.


Digital Photography School

 
Comments Off on How to Take Creative Landscape Shots using Intentional Camera Movement

Posted in Photography


Opinion – Erez Marom: Whatever it Doesn’t Take

08 Aug

One of the common ways landscape photographers seek to set themselves apart from others is to shoot from hard-to-reach locations. The notion that a ‘good’ photographer is one that pushes his or her physical boundaries – hikes farther, climbs higher, endures pain – all to get a unique shot. In this opinion piece, photographer Erez Marom calls this idea into question. Read more

Articles: Digital Photography Review (dpreview.com)

 
Comments Off on Opinion – Erez Marom: Whatever it Doesn’t Take

Posted in Uncategorized