Tag: Street

  • A Street Photographer’s Guide to New York City

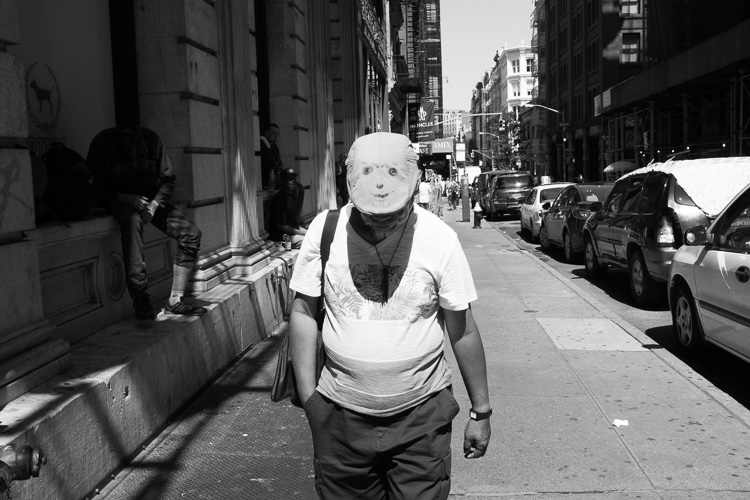
    Smiley Face, SoHo, NYC.

    Smiley Face, SoHo, NYC.

    Street photography and New York City are terms that often go hand in hand. New York is a diverse city of nearly 8.5 million eclectic and vibrant souls, all packed into a tiny island and its surrounding boroughs. Each area of the city has its own unique character and flavor, and there are so many interesting, unique moments that you can see here on a daily basis. It is one of the great locations in the world for this genre of photography.

    As a lifelong New Yorker, let me state that it can also be very easy to overrate this city. Street Photography can, and should, be done everywhere and the fact that an image has been taken in New York does not make it any more interesting than an image taken anywhere else. The fact that millions of images are taken here each day makes it that much more difficult to create an one that stands out from the rest, but that is also part of the appeal.

    If you live in a less populated place, or are tentative about trying street photography, New York is one of the best places to come to get over those fears. The streets are packed with people who are all in a rush, tourists are constantly photographing so you will not stand out, and most importantly, a lot of people move to, or visit this city, to be noticed. It is an environment ripe to practice and improve street photography.

    Here are nine suggestions to keep in mind for doing street photograph in New York City (keep in mind these tip can be applied elsewhere as well).

    1. Slow down and don’t try to photograph it all at once
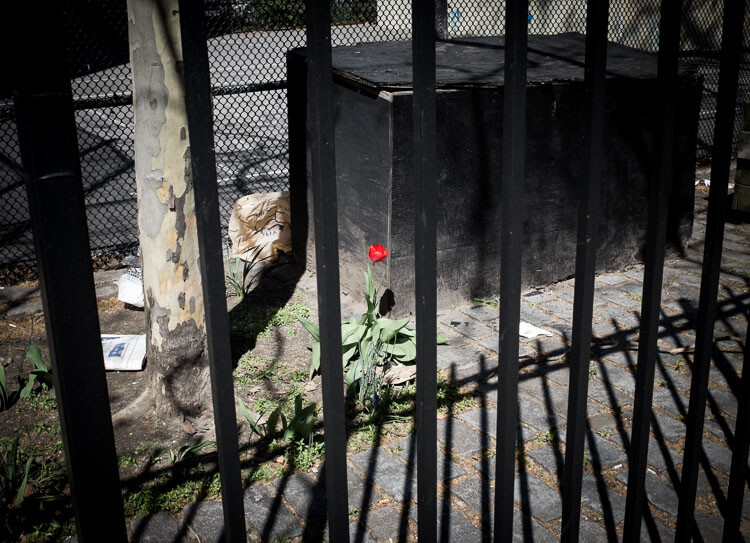
    Red Flower, East Village, NYC.

    Red Flower, East Village, NYC.

    Up, down, left, right, tall buildings everywhere – it is so easy to become trigger happy here. You should experiment and take a lot of images, however, that is also one of the easiest ways to miss the most interesting moments. Sometimes the best moments will be subtle, or they will come upon you in an instant. Look with your eyes first and locate something of interest, then capture it with the camera. Don’t just stick your head in the viewfinder and start shooting away.

    Watch your surroundings and take it all in. Explore. Find interesting compositions, look at the light, and get a feel for the people walking around. Try to go beyond only capturing the grand or iconic aspects of the city. Go beyond the images that you have seen in books. Seek out the little details and let the streets surprise you.

    2. Put yourself in the middle of the commotion and take what comes to you
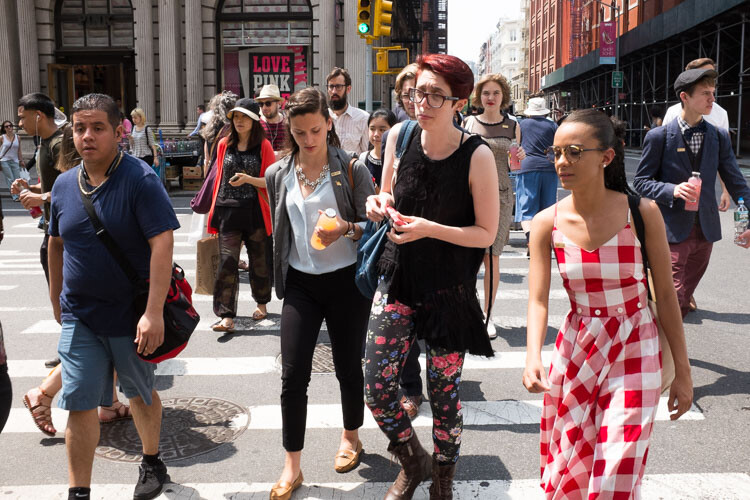
    The corner of Prince and Broadway, SoHo.

    The corner of Prince and Broadway, SoHo.

    Busy street corners are a beautiful thing. Head to one, pick a spot, and suddenly people will start coming at you from every direction. They will start intersecting and interacting with each other. It is what Jane Jacobs referred to as a ballet,

    “The ballet of the good city sidewalk never repeats itself from place to place, and in any once place is always replete with new improvisations.”

    It you are tentative, choosing a spot in this manner will allow your subjects to enter your personal space, instead of you entering theirs. Since you will not be walking, and your camera will be ready in your hands, it will also make you more able to notice interesting moments and able capture them before they disappear.

    Each street corner has a different flavor to it. If you go to SoHo, you will find the trendier crowd. If you go to Wall Street, you will get businessmen. If you go to Times Square, you will get the tourists and people in cartoon costumes harassing young children. Usually, you will get a mix of all types of people, but each corner will have its own identity. Spend a little time each day on a few corners capturing what happens around you.

    3. Cut out the preconceived notions of what the city should look like
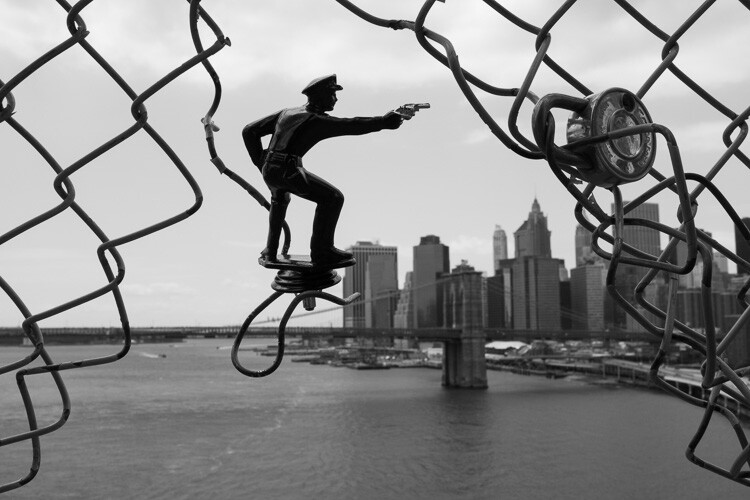
    Police, Manhattan Bridge.

    Police, Manhattan Bridge.

    You’ve probably seen movies and read books about the city, and have expectations for how it is supposed to look and act. The TV shows Friends and Sex and the City are just not realistic interpretations of what New York is actually like.

    It can be a good idea to scout images ahead of time, to have an idea how an area looks. It’s also fun to try and recreate images that you love. But on a day to day basis, try to also get those images out of your head. A once in a lifetime image is one that will surprise you, it will be different in some way from all the rest. Allow yourself to notice those serendipitous moments.

    There is so much to see here. No matter how much time you have, you can’t see it all. But you haven’t truly seen New York City until you’ve spent at least half a day wandering around, with no end point. Carve out some time, pick a direction or a location, and just walk.

    4. Rent a small camera or a prime lens
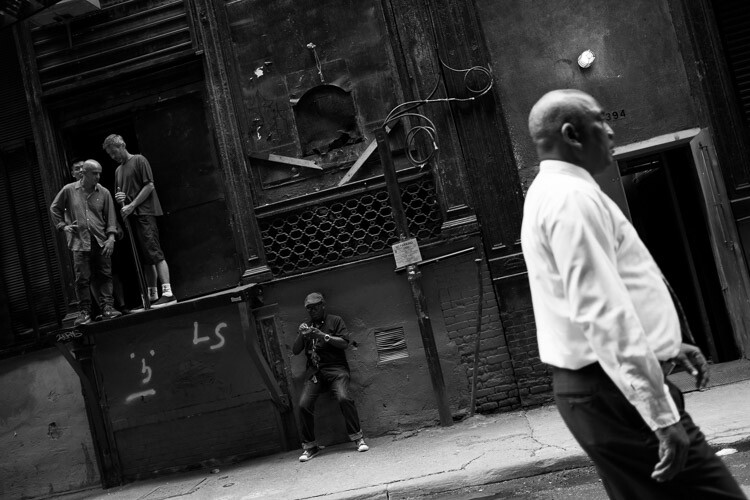
    Cortlandt Alley, NYC.

    Cortlandt Alley, NYC.

    Note: If you have a larger DSLR and a zoom lens, I shot street photography for a long time this way, and it is very possible to do so successfully. However, larger cameras can make it more difficult and cumbersome, and can make things more uncomfortable for your subjects.

    New York has an array of great camera shops where you can rent either a light prime lens for your DSLR or am entirely different smaller camera. A light 35mm lens is my favorite tool for street photography. Go for the f/2.8 version over the f/1.8, since it is much smaller and lighter. If you are very nervous about getting close to your subjects, rent a 50mm so you can shoot from a little further away. (Note: If you’re using a cropped or APS-C sensor a 50mm f/1.8 and an 85mm f/1.8 would be equivalent).

    Consider trying a mirrorless or micro four thirds camera. See how you like it, and you may never go back. I suggest the Fuji X100 line, but there are a variety of cameras that will do the trick.

    Some recommended camera rental shops in NYC are: Foto Care, CSI, and Adorama.

    5. Set up your camera to catch fast moving scenes

    The streets of New York move quickly. Interesting moments will appear, and disappear, all around you that is why it is important to set up your camera so that it can freeze scenes successfully. You want to set it up in such a way that you no longer have to worry about the settings, and can just shoot with ease.
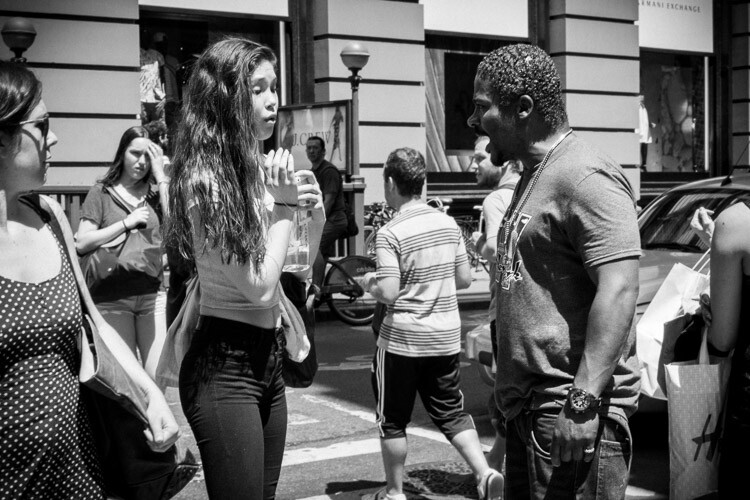
    Encounter, SoHo.

    Encounter, SoHo.

    I prefer using shutter priority for street photography. Many people prefer aperture priority, but the reason for shooting in shutter priority is to have the most control over your aperture. I know that sounds counter-intuitive, but hear me out. To freeze motion, I will usually set the camera to 1/320th or 1/250th of a second. In the bright sun of summer my shutter speed is usually at 1/320th or 1/400th, otherwise I am usually at 1/250th. At dusk and into the night I will go all the way down to 1/125th if it is absolutely necessary. The next step is to raise your ISO. I usually shoot anywhere from ISO 800 to ISO 3200 (and ISO 6400 outside at night). In bright summer sunlight, I am usually around ISO 400.

    The goal is to be able to use the smallest possible aperture, while still having a shutter speed that is fast enough to freeze the scene. The smaller the aperture, the more depth of field you will have. This will give you a lot of flexibility if you happen to miss focusing on the subject, which happens frequently. In addition, if you are combining multiple subjects or complex scenes with interesting elements all over the frame, it will make sure that as much of the scene as possible is sharp. Whenever the light is strong enough, I prefer to be at least at f/8, and ideally between f/11 and f/16.

    When you become comfortable with all of this, the next step is to try zone focusing. I would suggest that you start with your normal method of focusing until you get comfortable, then give zone focusing a try. When I walk out the door with my Fuji X100S I usually turn the autofocus off and have the camera pre-focused to 2.7 or 3 meters (8.75-9.75 feet). I will then adjust with the focusing ring accordingly (closer or further away) as I come across images, or turn on autofocus to capture scenes where nothing is moving.

    6. Try street portraiture

    Did I mention that New Yorkers like to be noticed? Find people that catch your eye, and tell them you are creating a photo project of the city. You will be surprised at how many people will allow you to photograph them. This is a great way to get more comfortable on the street, and with portraiture in general. Once you get a couple people to say yes, you will find yourself feeling so much better.

    Flattery is always a good idea when asking to take a portrait, and I usually try to spend about 30 seconds getting my shots. Don’t take just one quick photo and run away, but don’t take too long either. Take a quick look at the lighting and the background to make sure that you get a complete image, and try to capture them with an interesting expression if possible.

    7. Photograph at night
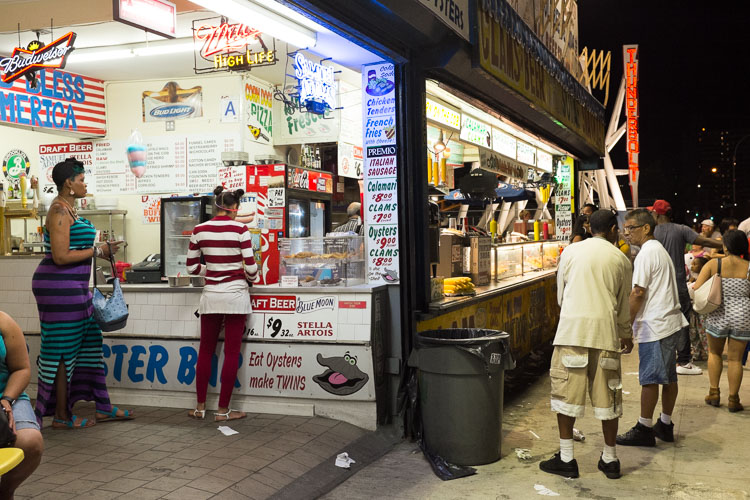
    Coney Island at Night.

    Coney Island at Night.

    Set your camera on 1/160th of a second and ISO 3200 or 6400 and wander. The city glows at night and everything looks more interesting. Forget the heavy tripod unless you are doing architecture images. Instead, find areas that are lit by store signs or street lights, and create your images that way.

    New York is extremely safe these days and I photograph at night by myself all the time, but be smart about it. Particularly if you do not know where you are going, it can’t hurt to take a friend along or to stick to high traffic areas. But the areas where most people visit in Manhattan are all very safe at night.

    8. Some areas to explore
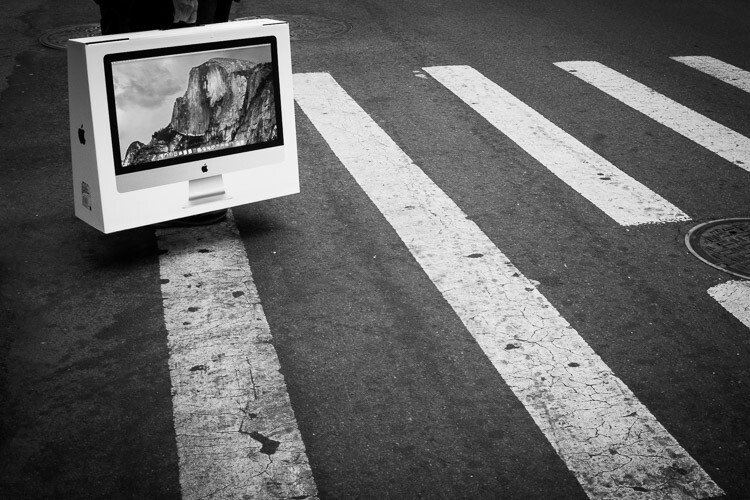
    Yosemite, SoHo.

    Yosemite, Corner of Prince and Broadway, SoHo.

    My favorite locations in NYC are:

    • SoHo: Stop on the corner of Prince and Broadway, one of the busiest and most fashionable corners in the city, and then walk over to Greene Street and head south to see some gorgeous cast-iron architecture.
    • 5th Avenue below Central Park: Stop on each corner from 58th Street to 53rd Street for some of the busiest and most interesting corners in the city. You might bump into the famous fashion street photographer, Bill Cunnigham.
    • The East Village and Lower East Side: Young hipsters, old punk rockers, and about a hundred other demographics gel together in these vibrant neighborhoods. The buildings are old and beautiful, and the streets are interesting and weird. Some great street art is there as well. Stop at VolaVida gallery on 4th Street and Avenue B to purchase an affordable and authentic street art piece.
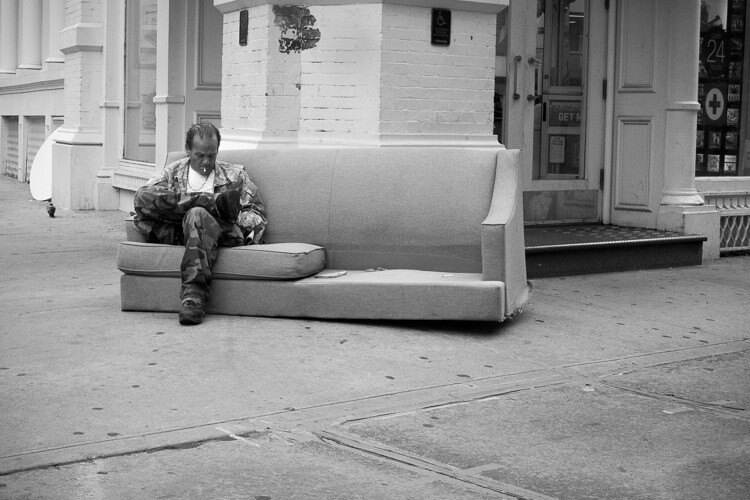
    East Village, NYC.

    East Village, NYC.

    • Anywhere on Broadway: Literally anywhere. Start at Columbus Circle and walk all the way down Broadway until your feet hurt.
    • Chinatown and Columbus Park: Chinatown has some of the most beautiful streets in New York. Eat dumplings while you photograph and visit Columbus Park, where people go to gamble. Be respectful while you photograph there. Afterward, visit Pell Street and Doyer’s street (nicknamed The Bloody Alley for its nefarious past). These are two of the most beautiful streets in all of New York.
    • Coney Island: One of the most vibrant places in the city, particularly in the warmer months. Photograph the boardwalk and beach, eat a hotdog, and go on a few rides.
    • Grand Central and the 42nd Street subway station: Photograph in Grand Central, then take the shuttle to the 42nd Street station. Walk back, stopping to photograph at Bryant Park and on the steps of the New York Public Library. Pop into the lobby of the Chrysler Building while you are there.
    • Bushwick (Brooklyn): This is one of the centers of street art in New York. Take the L train to Morgan Avenue and explore a handful of blocks in every direction. When you get hungry, stop at Roberta’s for some pizza.

    9. Take the typical tourist photos
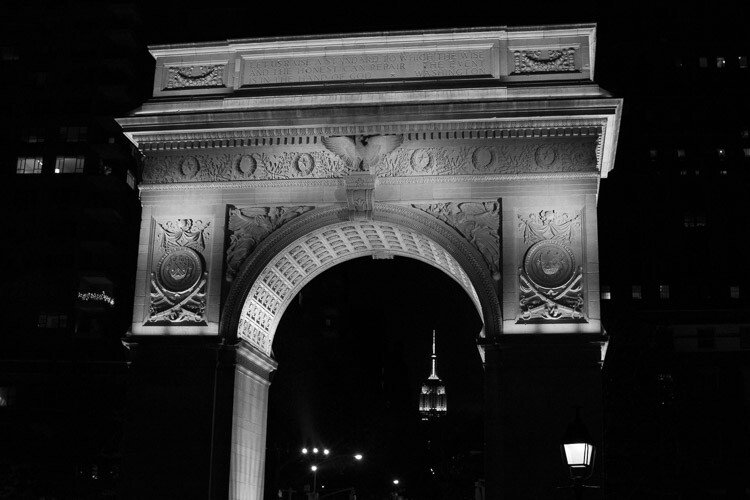
    Arch and Empire State Building, Washington Square Park.

    Arch and Empire State Building, Washington Square Park.

    You are visiting the city for a reason. The architecture and the sites are awe-inspiring, beautiful, and they deserve to be photographed well. History is around every corner. Do not apologize or feel bad, for taking the typical tourist and architecture images of the city. However, whenever possible, try to think of a way to make them stand out in some way. This is not always possible, but occasionally it is, and when you are able to figure out how to take an image like that, it is a special moment.

    Just don’t take a selective color photo of a yellow taxi with a black and white background. I beg you. Please, please don’t do that!

    googletag.cmd.push(function() {
    tablet_slots.push( googletag.defineSlot( “/1005424/_dPSv4_tab-all-article-bottom_(300×250)”, [300, 250], “pb-ad-78623” ).addService( googletag.pubads() ) ); } );

    googletag.cmd.push(function() {
    mobile_slots.push( googletag.defineSlot( “/1005424/_dPSv4_mob-all-article-bottom_(300×250)”, [300, 250], “pb-ad-78158” ).addService( googletag.pubads() ) ); } );

    The post A Street Photographer’s Guide to New York City by James Maher appeared first on Digital Photography School.
    Digital Photography School

  • Guerrilla Grammarians Fix Street Graffiti Spelling & Punctuation

    [ By WebUrbanist in Art & Street Art & Graffiti. ]

    street art signed stamp

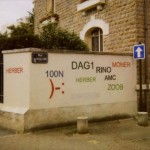
    Calculated correctors, this team of vigilante street art fixers patrols for grammatical mistakes then regroups to decide on edits before hitting the streets of Quito, Ecuador, to deploy them.

    street art grammar nazis

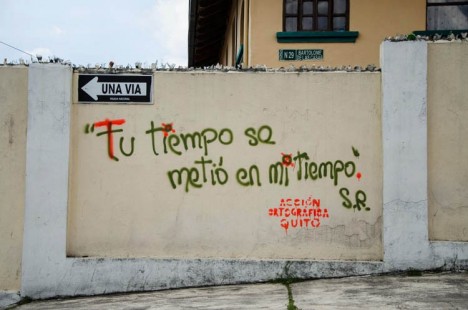
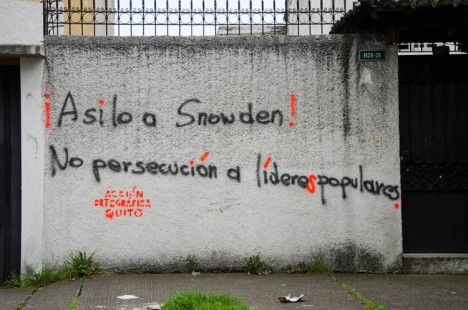
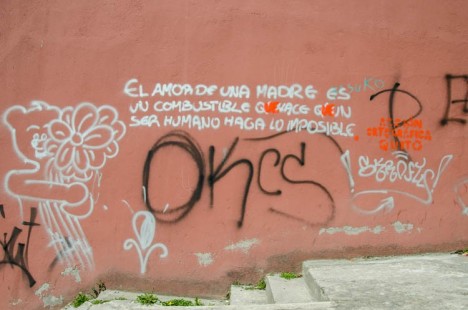
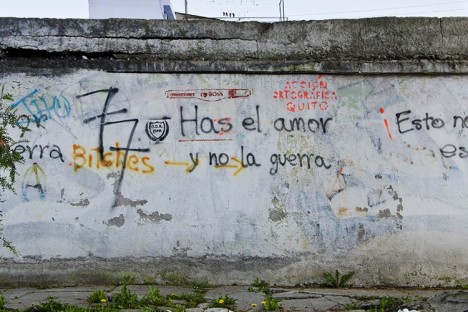
    Known as Acción Ortográfica Quito, the group consists of a trio who share a strange set of common interests including street art copy editing. Like rogue professors, they use red to highlight their changes or suggestions, but their good intentions do not render their actions legal, hence their strictly maintained anonymity.

    street art emphasis added

    “There’s a big difference in saying: ‘No quiero verte’ (I don’t want to see you) and ‘No, quiero verte’ (No, I want to see you),” notes one of the members in an interview with COLORS, “Many times, someone does not realize how a comma or an oversight can completely change the meaning of a sentence. It can change your life.”

    fixing street art spelling

    The task can be daunting – their first fix had thirteen errors in two lines of text. Whether serious or silly, they suggest “it’s a public service and a moral obligation. We’re against spelling vandalism and we won’t break nor give up until we see a society free of spelling mistakes.”

    street art spelling fix

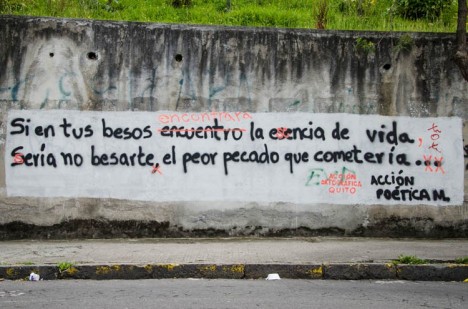
    Above, the phrase: “If in your kisses I met the essence of life, then not kissing you would be the worst sin I could commit,” for which these graffiti activists turned the verb into conditional, added and deleted commas, turned ellipsis into full stop and capital letter into lower case.

    grammar graffiti correct fix

    The group is also broadening its scope and mandate over time; they are aiming to add a hotline where people can phone in mistakes they spot and have begun correcting grammar on Twitter posts as well. When time permits, they also leave their name stenciled at the scene in red, like a grader signing their work for students.

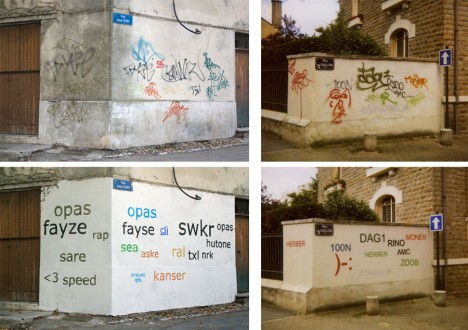
    tag-clouds-before-after

    Meanwhile, a similarly unconventional yet equally geeky German street artist is out to fix tags, turning them into tag clouds – it would seem this group is not alone in its quest to clean up yet preserve the essential meaning of everyday graffiti.

    Share on Facebook


    [ By WebUrbanist in Art & Street Art & Graffiti. ]

    [ WebUrbanist | Archives | Galleries | Privacy | TOS ]


    WebUrbanist

  • Painted Praise: Street Art Honors Asia with Iconic Imagery

    [ By Steph in Art & Street Art & Graffiti. ]

    pejac street art 2

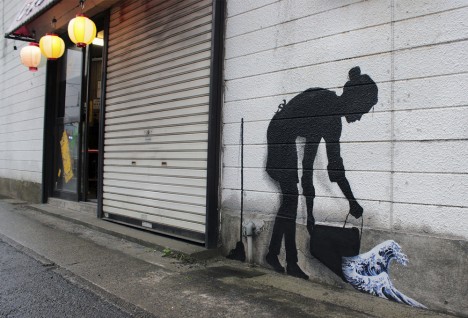
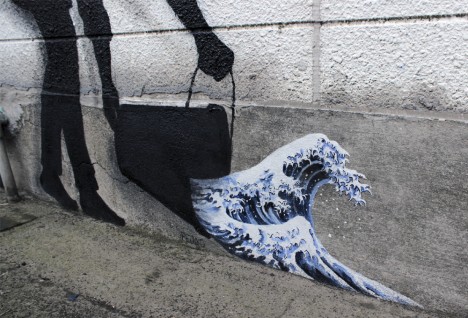
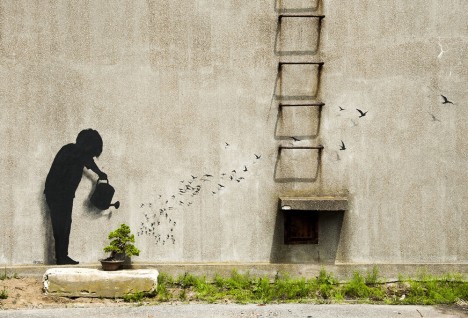
    Spanish street artist Pejac both praises and criticizes elements of various Asian cultures in a new series of outdoor paintings making use of iconic traditional imagery and symbols. Human figures are represented as mere silhouettes, allowing reproductions of The Great Wave off Kanagawa or three-dimensional elements like bonsai trees to take center stage in each work.

    pejac street art 3

    pejac street art 7

    pejac street art 5

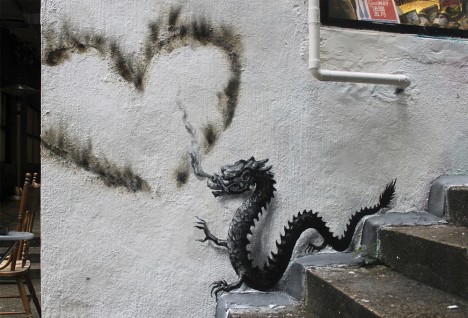
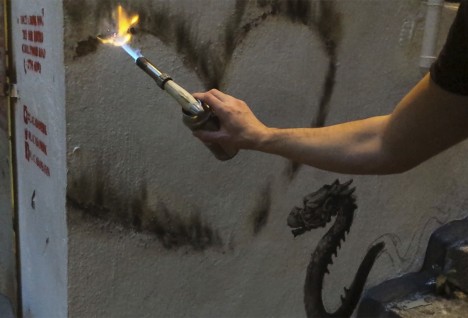
    The works may say just as much about how a foreign artist perceives the culture of cities like Tokyo, Seoul and Hong Kong as they do about the places themselves. Pejac makes use of some of the most common symbols that outsiders associate with Asian cultures and traditions, like a Chinese dragon beside a heart-shaped scorch mark.

    pejac street art 8

    pejac street art 9

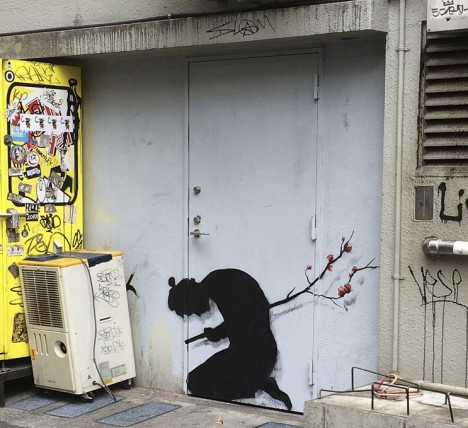
    A piece entitled ‘Seppuki’ in Tokyo depicts what looks like the silhouette of a samurai doubled over as if mortally wounded, impaled by a cherry tree branch instead of a sword. “I couldn’t help but make this sort of tribute as a manner of thank you to the Japanese culture for the inspiration that drove me to create in the first place.”

    pejac street art 11

    pejac street art 4

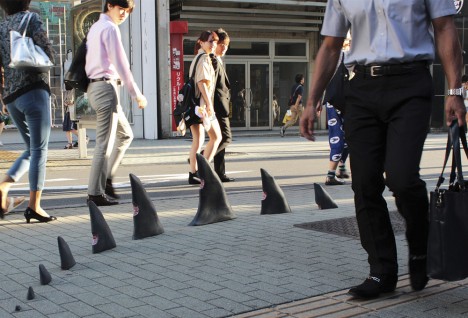
    A three-dimensional installation of shark fins sticking out of the pavement in Tokyo is a tad harsher in its appraisal, with human bite marks taken from each one. Pejac makes use of “classic anime aesthetics” to calla attention to the environmental impact of shark fin soup, which is popular in Japan.

    Share on Facebook


    [ By Steph in Art & Street Art & Graffiti. ]

    [ WebUrbanist | Archives | Galleries | Privacy | TOS ]


    WebUrbanist

  • 7 Street Photography Rules That Should Be Broken

    There is an all-too-common path that many people follow when they begin to practice street photography. They grab their camera, go to the busiest place they can find, and capture people head-on over and over again.

    While this is certainly something that you should do, it is not the only thing. I want to dispel a few myths about street photography to help broaden the content that you photograph. There is a wide range of ways to capture interesting street photographs for you to try.

    Plant, Chase Bank

    Plant, Chase Bank

    1. People need to be present in the image

    Street photography is about people, but it does not have to include them. This type of photography is about life, and you do not need to smack a person in the middle of a frame to have it be a street shot.

    The goal for this type of photography is to capture unique and interesting moments that mean something to you. There is no rule for how to do this without people in the frame, but the goal is to go beyond the typical pretty landscape shot, and foster some sort of meaning and uniqueness within the image.

    No matter where you live, but particularly if you live in a less populated area, it can be good to focus on this idea. Explore your surroundings and try to explain it through your imagery. Include people when you can, and when it furthers your aim, but look for unique shots of your surroundings at the same time.

    If you find a great area with beautiful light, then capture it like it is. It is a typical mistake for photographers to mess up a really interesting scene by including any random passerby. Often people seem to think that this passerby is what makes the image a street image, but that could not be further from the truth. If you find a good background and want a person to be in the shot, that person needs to be able to add to the photograph. Otherwise, try to just capture the scene as it is.

    2. You can only photograph on busy city streets

    Front Yard, Burbank, California

    Front Yard, Burbank, California

    Explore the work of Martin Parr, Lee Friedlander, William Eggleston, Stephen Shore, Robert Frank, and Trent Parke, among others. Some of these photographers have photographed prolifically in very busy places, but all of them photographed, at some point or another, in areas devoid of people. Whether it is a shot of a busy beach/resort scene or a shot of a British pastry, you can still identify an image that was created by Martin Parr. Lee Friedlander’s images all have an eerie and dark quality to them (at least that’s how they make me feel) no matter if they were taken on a New York street corner, in a hotel room, or on an empty street in the suburbs. Study the works of these photographers taken in less populated areas and figure out which images appeal to you the most and why.

    Street Photography can be done almost anywhere. Great photographers have a knack for learning how to take strong photographs in areas that others may think of as lacking content. Go to areas that you think would be terrible for photography, and try to figure out how to take a good photograph there. This is a very powerful exercise for your growth.

    3. Never photograph a person’s back / You must always include the face

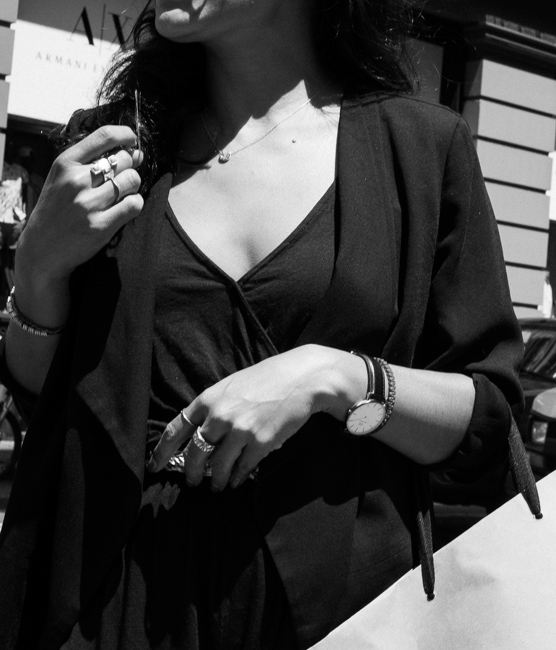
    Hands, SoHo, NYC.

    Hands, SoHo, NYC.

    While the face is one of the most powerful ways to show emotion in an image, it is not always necessary to include it, particularly if it has a boring expression. Missing a person’s face because of bad technique or fear is one thing; if the face is good, you should capture it. But gestures, hands, a pose, clothing, or a specific element on a person can all be the most interesting part of an image. In these cases, it might be best to get close and capture just that interesting element. Doing that, and getting in close to the details, can also give an image a graphic quality that makes shapes, lines, and colors stand out.

    4. You need a lot of depth and many different things happening in the scene for it to be effective

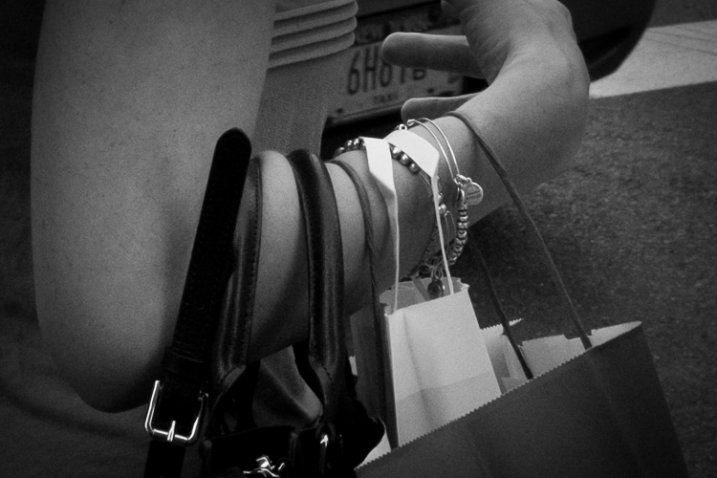
    Bags, SoHo, NYC.

    Bags, SoHo, NYC.

    I very much like shooting this way and if you are a fan of Alex Webb’s work, you probably already understand the allure of a complex image that shows multiple levels of interest, all put together in a single frame. When done well these images can be incredible. They are wow images. These are situations that you should seek out.

    However, compositions like this do not make the photograph good. What makes a photograph good is what is happening in it. Search for that first, and then you can figure out whether it will be better to create a complex image with a lot of supporting elements, or whether it will be better to just focus on the main element. It will be counterproductive if you walk out the door looking to create only images like Alex Webb. Look for interesting things and then figure out the best way to frame them.

    5. Great street photographs are all about luck

    As photographers we create our own luck. There is an element of randomness to every candid photograph, but the reality is that thousands of these “lucky” moments occur around us everyday that we don’t see.

    Photography is both about waiting for these moments and about seeking them out. If you put in the time to shoot, you will come across many moments, no matter where you are. As you improve as a photographer, more moments will not occur around you, you will just get better at noticing them.

    6. Street photography is about being bold

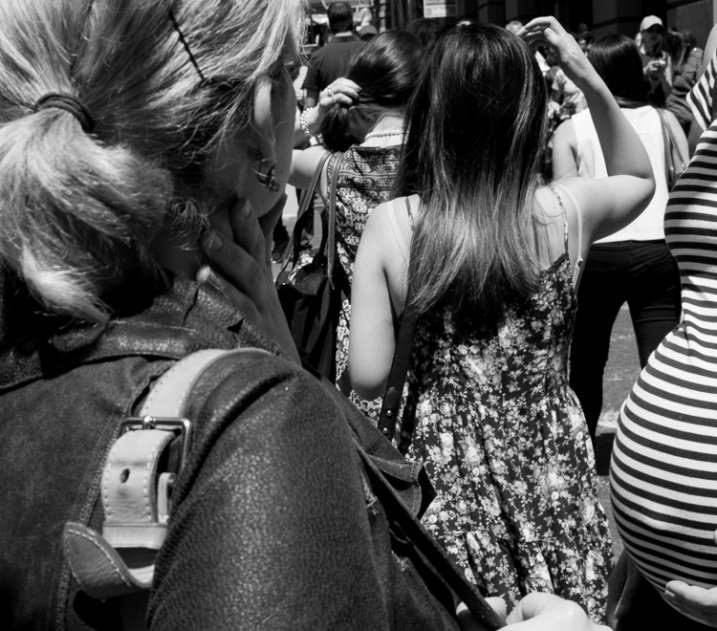
    Hair Tug, SoHo, NYC.

    Hair Tug, SoHo, NYC.

    Some street photographers are very extroverted and bold. Some are quiet and timid. Some get in your face with a flash, and some wait carefully for something to happen in front of them. Work around whatever personality you have. If you are an introvert, then there is a good chance that getting a running start as you pounce on a person with a flash like Bruce Gilden will be tougher for you to pull off. It’s important to create a strategy of shooting that feels comfortable for you. Otherwise, if you are not having fun out there, then you are not going to want to put in the time necessary to get good images.

    No matter what, you are going to have to bring yourself out of your comfort zone. You are going to have to figure out what you want your images to look like, and what you need to do to pull that off. If you want to use a zoom lens, use it because you like the look of a telephoto image, not because you are afraid to get close. If you are afraid to get close, use a light wide-angle lens, pick a spot, and let people come to you. Inch a little closer each time. You do not have to jump in there with cameras blazing to capture a good image. Figure out how to locate moments that are interesting and then develop your way of being able to put yourself in the right spot to capture them. Over time you will improve and feel like you belong there.

    7. Street photography is about the extraordinary

    There is a typical moment that I come across when teaching. I will be photographing with a student and suddenly a person with red, blue, or green hair, or covered in tattoos, will pass by. The student will take that shot faster than any shot they’ve taken the whole day. That hair or the tattoos just clicked as an interesting street image in their minds. Red hair can be interesting, but it is just one element. While it stands out and feels extraordinary and different, it’s not actually that unique.

    Street photography can focus on anything. It can be colorful, mundane, ordinary, or something overt. A lot of the most incredible street photography actually captures ordinary moments in ways that feel extraordinary. Street photography is about finding the extraordinary in all types of moments. Do not just sit there looking for red hair. Seek out people and scenes that fly below the radar, and capture what makes them interesting.

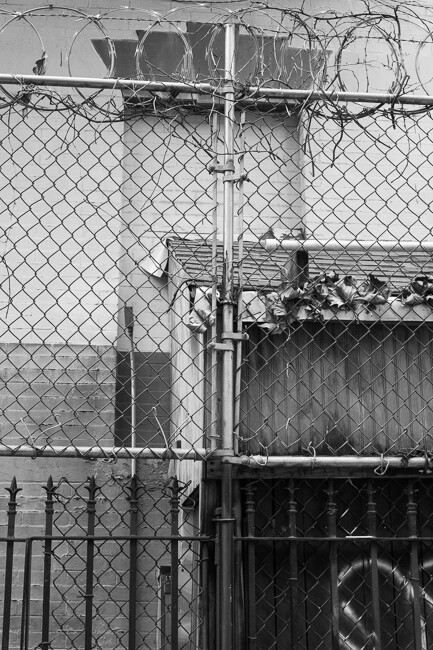
    Fence, East Village, NYC.

    Fence, East Village, NYC.

    googletag.cmd.push(function() {
    tablet_slots.push( googletag.defineSlot( “/1005424/_dPSv4_tab-all-article-bottom_(300×250)”, [300, 250], “pb-ad-78623” ).addService( googletag.pubads() ) ); } );

    googletag.cmd.push(function() {
    mobile_slots.push( googletag.defineSlot( “/1005424/_dPSv4_mob-all-article-bottom_(300×250)”, [300, 250], “pb-ad-78158” ).addService( googletag.pubads() ) ); } );

    The post 7 Street Photography Rules That Should Be Broken by James Maher appeared first on Digital Photography School.

    Digital Photography School

  • NCTech announces single-shot 360 camera for Google Street View applications

    UK imaging systems firm NCTech is to introduce a four-sensor, single-shot camera that it says can create a 360 degree image of a street scene or an interior in less than two minutes. The iris360 uses four lens units in front of four 10MP sensors arranged at 90 degree intervals, and images can be uploaded directly to Google Street View. The lenses are triggered simultaneously and the resultant images are stitched together automatically in-camera. Read more

    Articles: Digital Photography Review (dpreview.com)

  • Weekly Photography Challenge – Street Photography

    In this previous post I shared a bunch of street photography images. But not just any old random ones. They are images that were taken all around the world, but yet still have a common thread, a connection. They included:

    • Photographers shooting other photographers
    • Subways, taxis and transportation
    • Markets and vendors
    • And buskers or street musicians
    Fabrizio Maestroni

    By Fabrizio Maestroni

    Weekly Photography Challenge – Street Photography

    Now the challenge is over to you. Go do some street photography, and if you want to take the challenge up a notch then try to work with the themes mentioned above. See if you can add to the body of work in those categories and let’s see how far and wide dPS readers reach. When you post you photo please tell us where it was taken.

    Ben Fredericson (xjrlokix)

    By Ben Fredericson (xjrlokix)

    Alex

    By Alex

    Abhilash C

    By Abhilash C

    Luca

    By Luca

    Share your images below:

    Simply upload your shot into the comment field (look for the little camera icon in the Disqus comments section) and they’ll get embedded for us all to see or if you’d prefer upload them to your favourite photo sharing site and leave the link to them. Show me your best images in this week’s challenge. Sometimes it takes a while for an image to appear so be patient and try not to post the same image twice.

    If you need some tips for street photography try these:

    • There is no bad light for street photography
    • 7 Tips for a More Anonymous Approach to Street Photography
    • Using Humor In Street Photography
    • Practical Tips To Build Your Street Photography Confidence

    googletag.cmd.push(function() {
    tablet_slots.push( googletag.defineSlot( “/1005424/_dPSv4_tab-all-article-bottom_(300×250)”, [300, 250], “pb-ad-78623” ).addService( googletag.pubads() ) ); } );

    googletag.cmd.push(function() {
    mobile_slots.push( googletag.defineSlot( “/1005424/_dPSv4_mob-all-article-bottom_(300×250)”, [300, 250], “pb-ad-78158” ).addService( googletag.pubads() ) ); } );

    The post Weekly Photography Challenge – Street Photography by Darlene Hildebrandt appeared first on Digital Photography School.

    Digital Photography School

  • 39 Street Photography Images That Have Common Threads

    Street photography is a popular genre which many photographers enjoy, just for the sake of doing photography. You can find many articles on it here on dPS. Let’s look at a few street photography images from around the world and see if we can’t find similarities, as well as differences between them all.

    I got carried away selecting images for this collection because I found the inter-connections intriguing and it inspired me. I hope you can see it too.

    Photographers shooting other photographers

    Photograph Working the Scene by Shamas Malik on 500px
    Working the Scene by Shamas Malik on 500px

    Photograph He is nikon photographer. How long have you been doing photography? by Zachary Voo on 500px He is nikon photographer. How long have you been doing photography? by Zachary Voo on 500px

    Photograph The spy by Alexander Dragunov on 500px
    The spy by Alexander Dragunov on 500px

    Photograph Strike Back by Vichaya Pop on 500px Strike Back by Vichaya Pop on 500px

    Photograph Violinist And Photographer by Juha Roisko on 500px
    Violinist And Photographer by Juha Roisko on 500px

    Photograph fellow photographer by Nico Ouburg on 500px fellow photographer by Nico Ouburg on 500px

    Photograph spring frame... by Konstantin Vodolazov on 500px
    spring frame… by Konstantin Vodolazov on 500px

    Subways, taxis, and transportation


    Photograph Don't Forget to Smile by Liz Leeb on 500px
    Don’t Forget to Smile by Liz Leeb on 500px

    Photograph Subway In Lisboa by Damien Dohmen on 500px

    Subway In Lisboa by Damien Dohmen on 500px

    Photograph Munich Subway in Yelow by Darío Sastre on 500px
    Munich Subway in Yelow by Darío Sastre on 500px

    Photograph Waiting by Fabio Vittorelli on 500px

    Waiting by Fabio Vittorelli on 500px

    Photograph some day, the man of your dreams... by laurent aublé on 500px
    some day, the man of your dreams… by laurent aublé on 500px

    Photograph Youth by Olga Bekker on 500px

    Youth by Olga Bekker on 500px

    Photograph Taxi by Steffen Richter on 500px
    Taxi by Steffen Richter on 500px

    Photograph Paris Taxi by Manuel Orero on 500px

    Paris Taxi by Manuel Orero on 500px

    Photograph Trinidad Cuba - The Green Taxi by John Barclay on 500px
    Trinidad Cuba – The Green Taxi by John Barclay on 500px

    Photograph tuk tuk by Eo NaYa on 500px

    tuk tuk by Eo NaYa on 500px

    Photograph Tuk Tuk by Drew Hopper on 500px
    Tuk Tuk by Drew Hopper on 500px

    Photograph Pedicab by Kent Atwell on 500px

    Pedicab by Kent Atwell on 500px

    Photograph rickshaw by avenish jain on 500px
    rickshaw by avenish jain on 500px

    Markets and vendors

    Photograph Enlightened Colours by Daniel Bosma on 500px

    Enlightened Colours by Daniel Bosma on 500px

    Photograph Under the Bridge by Michael Steverson on 500px
    Under the Bridge by Michael Steverson on 500px

    Photograph Crab Steam ! by Mardy Suong Photography on 500px

    Crab Steam ! by Mardy Suong Photography on 500px

    Photograph Ducky by Michael Steverson on 500px
    Ducky by Michael Steverson on 500px

    Photograph Date Seller by William Selviz on 500px

    Date Seller by William Selviz on 500px

    Photograph Scottish Cheeseshop /Monger by Benedikt D-rner on 500px
    Scottish Cheeseshop /Monger by Benedikt D-rner on 500px

    Photograph Morning time by Dikye Darling on 500px

    Morning time by Dikye Darling on 500px

    Photograph market by Omid Farrokh on 500px
    market by Omid Farrokh on 500px

    Photograph Taladromhub , Samutsongkham , Thailand by Atipan Khantalee (Thailand) on 500px

    Taladromhub , Samutsongkham , Thailand by Atipan Khantalee (Thailand) on 500px

    Photograph A Piece of Lokbaintan by Fauzan Maududdin on 500px
    A Piece of Lokbaintan by Fauzan Maududdin on 500px

    Buskers or musicians

    Photograph sax player by Daniel Antunes on 500px

    sax player by Daniel Antunes on 500px

    Photograph The Accordionist by Joanna Lemanska on 500px
    The Accordionist by Joanna Lemanska on 500px

    Photograph Musicians  by Gazali © on 500px

    Musicians by Gazali © on 500px

    Photograph The street musician by Alina Voitkov? on 500px
    The street musician by Alina Voitkov? on 500px

    Photograph Clarinetist by Hai Hua on 500px

    Clarinetist by Hai Hua on 500px

    Photograph The Moroccan Street Crooner by Blindman shooting on 500px
    The Moroccan Street Crooner by Blindman shooting on 500px

    Photograph Prague by Eduardo González on 500px

    Prague by Eduardo González on 500px

    Photograph Busker by Marc Apers on 500px
    Busker by Marc Apers on 500px

    Photograph Street Musician in Cienfuegos by Nevzat Gökmen on 500px

    Street Musician in Cienfuegos by Nevzat Gökmen on 500px

    googletag.cmd.push(function() {
    tablet_slots.push( googletag.defineSlot( “/1005424/_dPSv4_tab-all-article-bottom_(300×250)”, [300, 250], “pb-ad-78623” ).addService( googletag.pubads() ) ); } );

    googletag.cmd.push(function() {
    mobile_slots.push( googletag.defineSlot( “/1005424/_dPSv4_mob-all-article-bottom_(300×250)”, [300, 250], “pb-ad-78158” ).addService( googletag.pubads() ) ); } );

    The post 39 Street Photography Images That Have Common Threads by Darlene Hildebrandt appeared first on Digital Photography School.


    Digital Photography School

  • 7 Steps to Create Street Photography Silhouettes

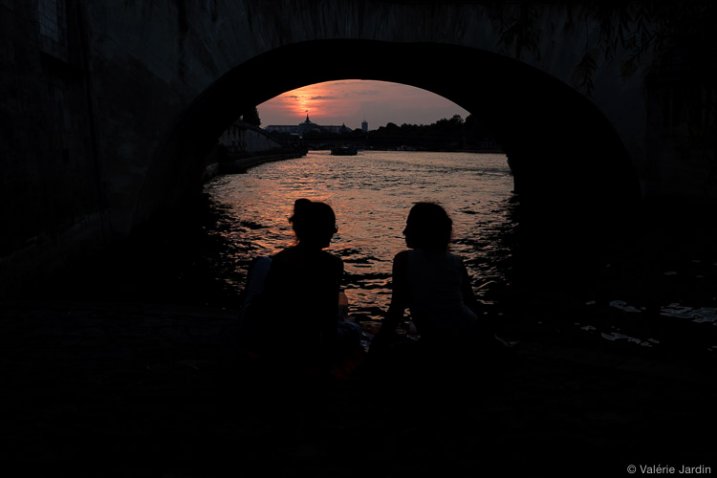
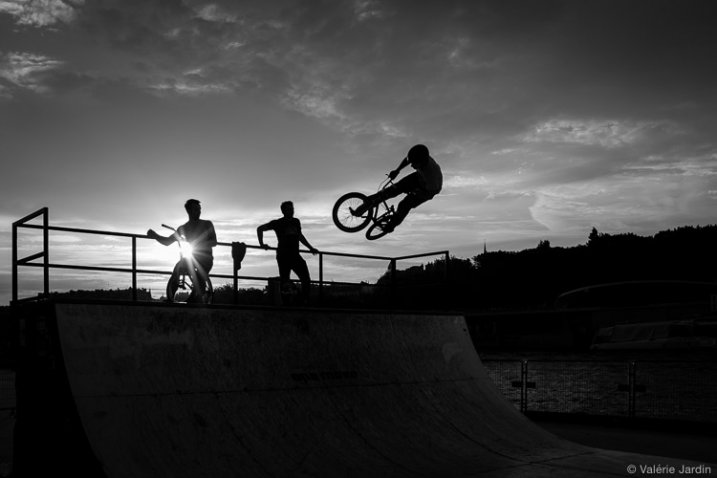
    For the street photographer, shooting a perfect silhouette is a very gratifying moment. Just like anything else in street photography, not every subject makes for an interesting silhouette photograph. Here are a few tips to help you capture an interesting silhouette on your next photo walk.

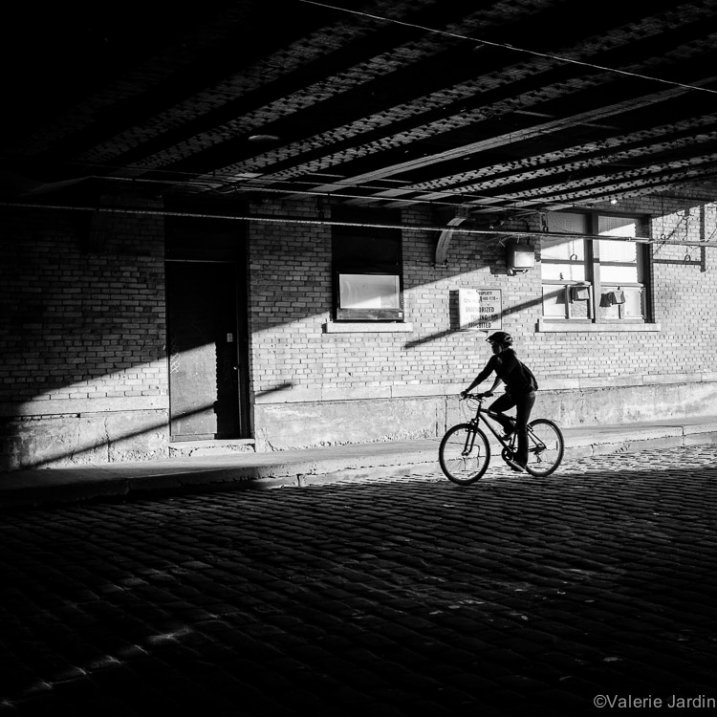
    Some elements, such as bicycles, make for more interesting silhouettes.

    Some elements, such as bicycles, make for more interesting silhouettes.

    1. Set your camera for success

    To shoot a silhouette you have to take control of your camera first. Your flash needs to be turned off. Ideally your exposure is set for the highlights (background). If you set your exposure on your subject, your camera will try to expose your subject properly. The result would reveal too much detail in the subject and blow out the highlights in the background. Exposing for the highlights is easily done if your camera is set to spot metering. You can also use average metering and trick your camera by stopping down your exposure compensation so that your subject remains dark.

    Focussing can be tricky. You can spot meter for the highlights and manually focus on your subject. Or, if you shoot in Aperture Priority, set your aperture to a large number (small aperture) to allow for most of the scene to be in focus (large depth of field)

    It is important not to blow out the highlights in sunrise and sunset silhouettes.

    It is important not to blow out the highlights in sunrise and sunset silhouettes.

    2. Don’t be afraid to blow out the highlights

    Okay, I just told you to expose properly to avoid blowing out the highlights. That is certainly a good thing to keep in mind if you are shooting against the sunset, sunrise or the moon light for example. The rest of the time, unless the details in the background add to your story, you’re better off blowing out the highlights and going for a more dramatic effect. Your silhouette will stand out more on a white and unobtrusive background.

    Details in the background should not distract from your silhouette.

    Details in the background should not distract from your silhouette.

    3. Learn to recognize a good silhouette

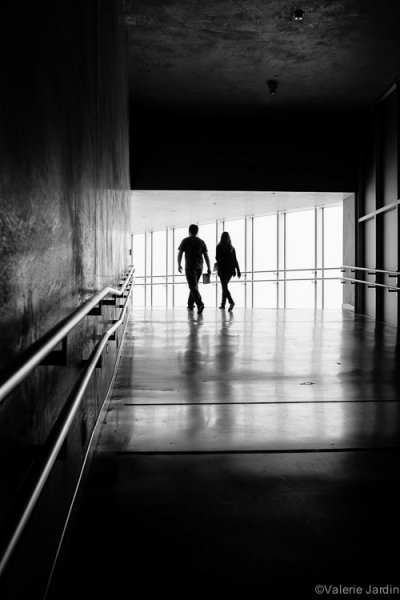
    Now you know the basic technique to shoot a silhouette, that was the easy part. The most important piece is to be able to see a potentially strong subject, so be discerning!  Many elements come into play. The body being well defined is important, you should be able to recognize the shape right away. If the subject is facing you or his/her back is turned to you, there should be space between the arms and the body, the legs should be well defined as well. If you are photographing a person looking sideways, the features of their face should be quite clear.

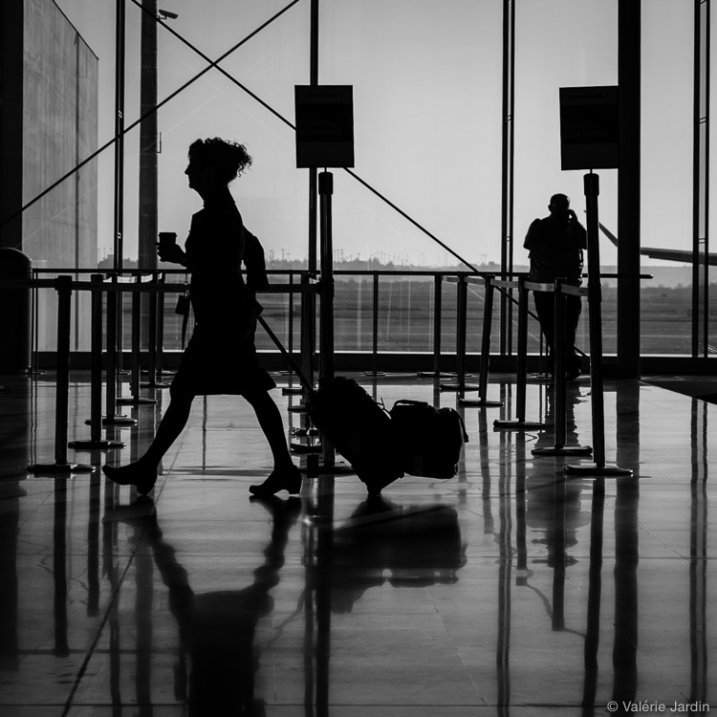
    Capturing the right gesture or step is a key element in a successful silhouette in street photography.

    Capturing the right gesture or step is a key element for a successful silhouette in street photography.

    4. Avoid obstructions

    Avoid obstructions in front of, and behind your subject. Timing is important. Silhouettes of posts or other obstructions can ruin the shot. Position yourself accordingly for the best possible shot.

    Timing is everything, especially in a cluttered environment.

    Timing is everything, especially in a cluttered environment.

    5. Try some added effects

    A sunburst can be an added bonus to a silhouette photograph, and a welcome added challenge for you, the photographer.

    Add to the challenge with a sunburst effect.

    Add to the challenge with a sunburst effect.

    6. Try a minimalist approach

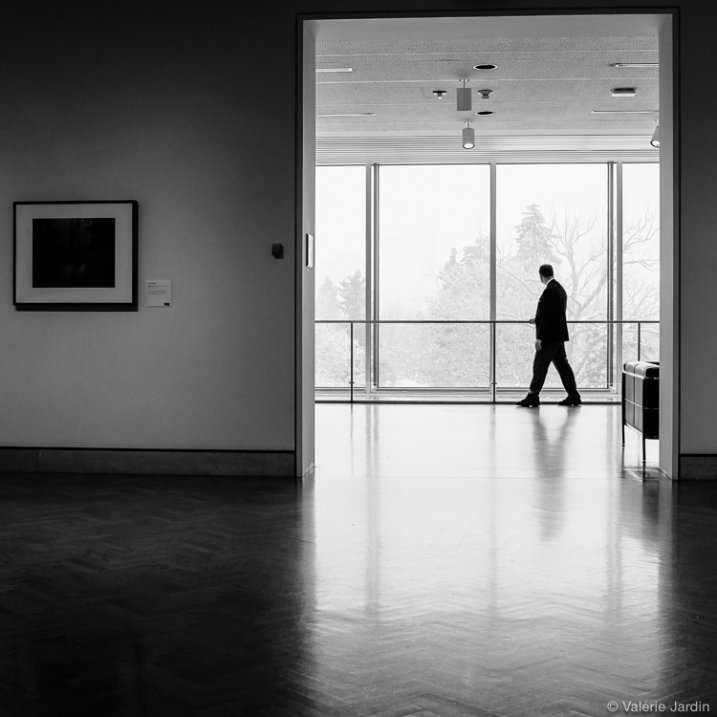
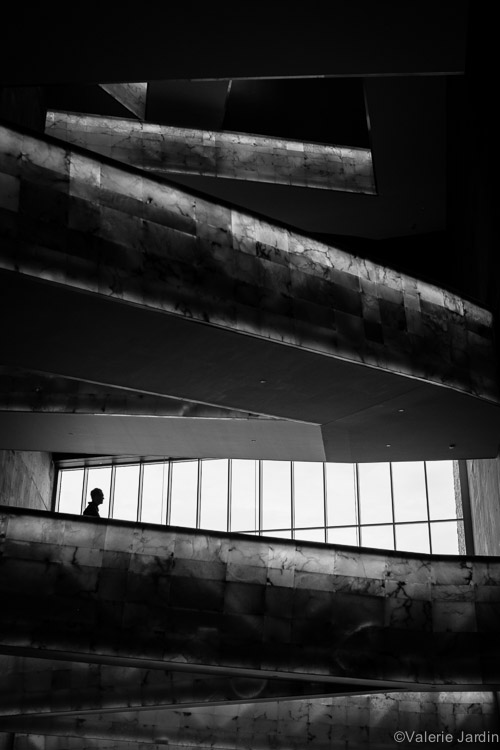
    Find an interesting architecture or urban landscape and wait for someone to enter your frame. Even small, the human element becomes the focal point.

    A minimalist approach to photographing a silhouette can make for a strong image.

    A minimalist approach to photographing a silhouette can make for a strong image.

    7. Tweak in post-processing

    If you use Lightroom, you can easily tweak your photograph by using the contrast, highlights, shadows and black sliders for the final touches and the look you envision.

    Now grab your camera and hit the streets!

    googletag.cmd.push(function() {
    tablet_slots.push( googletag.defineSlot( “/1005424/_dPSv4_tab-all-article-bottom_(300×250)”, [300, 250], “pb-ad-78623” ).addService( googletag.pubads() ) ); } );

    googletag.cmd.push(function() {
    mobile_slots.push( googletag.defineSlot( “/1005424/_dPSv4_mob-all-article-bottom_(300×250)”, [300, 250], “pb-ad-78158” ).addService( googletag.pubads() ) ); } );

    The post 7 Steps to Create Street Photography Silhouettes by Valerie Jardin appeared first on Digital Photography School.

    Digital Photography School

  • Urban Melodies: Multiple-Exposure Street Scenes Remix Cities

    [ By WebUrbanist in Art & Photography & Video. ]

    urban paris metro

    Capturing the cacophony of urban life, this series of superimposed photographs renders local phenomena, regional monuments and international architecture in a strangely compelling style.

    urban berlin street

    urban times square

    urban central park

    Alessio Trerotoli‘s work has taken him to Rome, Paris, Berlin, Buenos Aires, New York and other world cities, sometimes shooting in subways or side streets and other times photographing iconic settings.

    urban abstract berlin

    urban subway system

    urban side street

    Each image is comprised of multiple exposures in the same location, creating a layered effect that reflects a sense of movement despite the images themselves remaining technically static.

    Next Page – Click Below to Read More:
    Urban Melodies Multiple Exposure Street Scenes Remix Cities

    Share on Facebook


    [ By WebUrbanist in Art & Photography & Video. ]

    [ WebUrbanist | Archives | Galleries | Privacy | TOS ]


    WebUrbanist

  • Senior Citizen Street Art: Young Graffiti Artists Teach Elders

    [ By WebUrbanist in Art & Street Art & Graffiti. ]

    elderly street art stencil

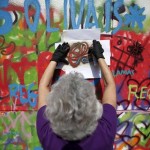
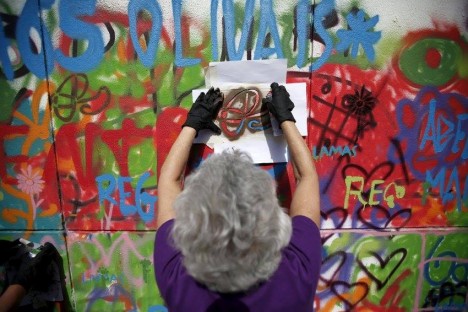
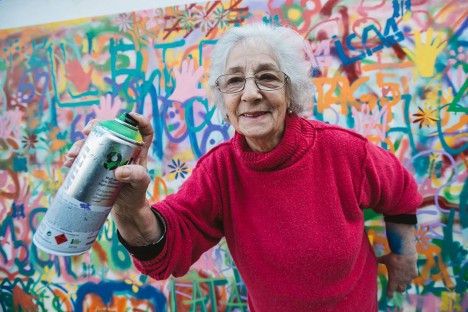
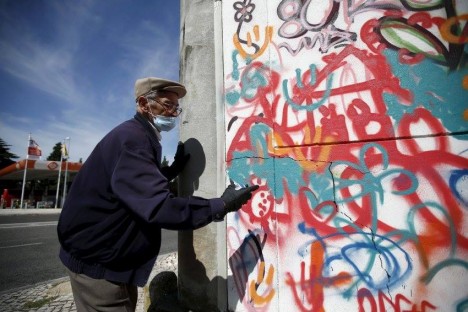
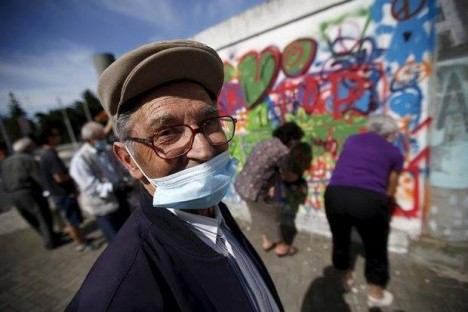
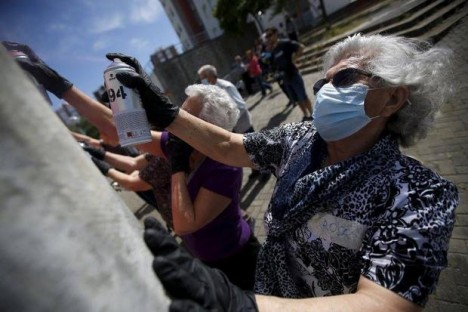
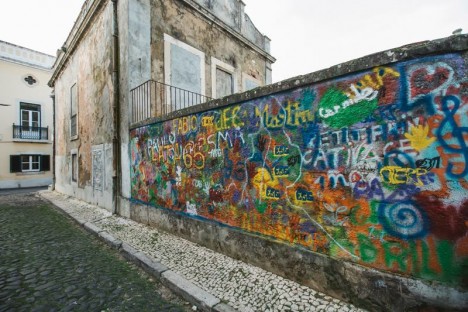
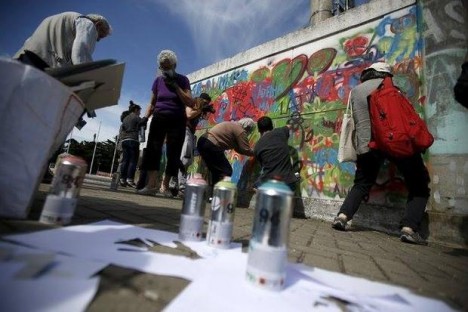
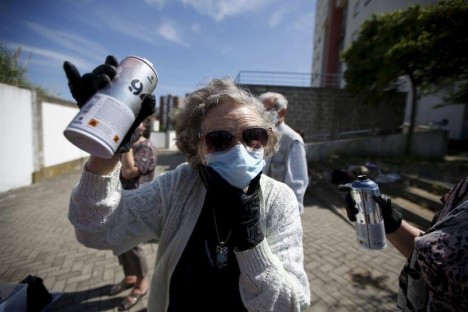
    In an effort to democratize both the creation and appreciation of urban graffiti, a group of young street artists in Lisbon, Portugal, is teaching retirees how to create their own stencils and tags.

    elderly spray paint woman

    street art mural artist

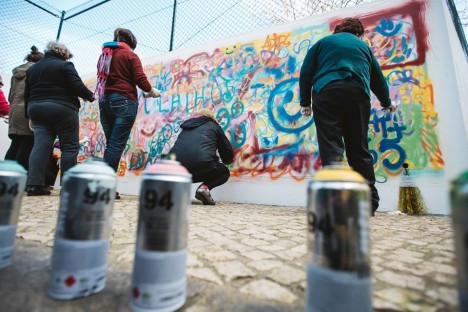
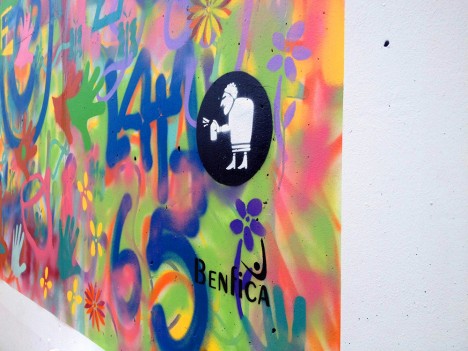
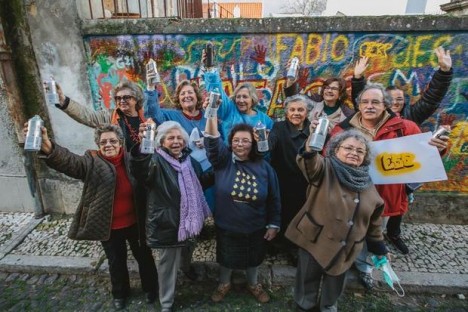
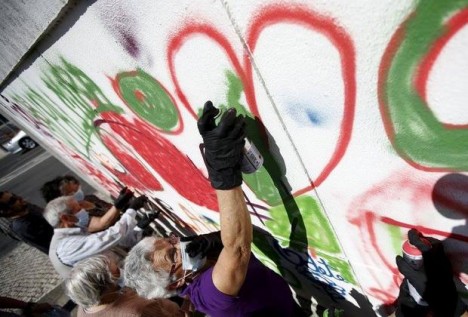
    LATA 65 (lata meaning ‘can’ in Portugese) has so far introduced 100 aging participants to the art of spray painting and student work is already popping up in the form of tags and murals brightening up buildings and walls around town.

    street artist student group

    street artist working happy

    street art aging artists

    Led by veteran street artists, this gang of older students is learning not just how to create art but also about the history of the form, providing them not just with tools and techniques but cultural context for their studies as well.

    street art teaching students

    street artist group gang

    street art bright mural

    Their efforts are primarily being put toward enlivening dilapidated areas in need of fresh interventions and additional attention. Underlying the artwork itself, however, is a philosophy of bridging generational gaps and bringing new perspectives to a mode of expression typically associated with youth culture.

    street art on wall

    street artists in lisbon

    street artist wall painting

    While the elderly students are so far following the footsteps of their younger instructors, one has to wonder if their approaches may eventually develop in new and different directions, in turn providing novel sources of inspiration and innovation not yet thought of by their more youthful compatriots.

    Share on Facebook


    [ By WebUrbanist in Art & Street Art & Graffiti. ]

    [ WebUrbanist | Archives | Galleries | Privacy | TOS ]


    WebUrbanist