RSS
 

Posts Tagged ‘Steps’

Make 3D Wiggle GifsIn 3 Simple Steps!

04 Jun

Worms wiggle. Your toes wiggle. And hey, gifs wiggle, too!

Or at least they can. And when they do, they look three-dimensional. How cool is that?

Now that Facebook is allowing gifs (whee!), we wanna use that new found power to post lots of 3D photos in the form of fun wiggle gifs! And we’re gonna show you how easy it to make ‘em in just three steps.

This fun spin on the classic stereograph will have you fondly remembering the old days of photography, while also marveling at just how far we’ve come!

Give Your Gifs the Gift of Dance 
(…)
Read the rest of Make 3D Wiggle Gifs
In 3 Simple Steps! (702 words)


© Taylor for Photojojo, 2015. |
Permalink |
No comment |
Add to
In 3 Simple Steps!”>del.icio.us

Post tags:


Photojojo

 
Comments Off on Make 3D Wiggle GifsIn 3 Simple Steps!

Posted in Equipment


12 Steps to Successly Promote your Photography on Instagram

19 May

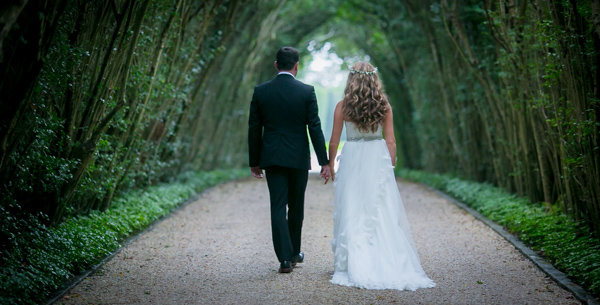
If you’re reading this and are interested in digital photography, chances are you’re a user of Instagram, the current goliath of social media in photography. Instagram has become home to over 300 million users in the four years it’s been around, and it seems ready to only get bigger.

post 1 image

300 million is a big, big number. It can seem overwhelming, but it’s a great tool to not only create community, but also to become a better photographer. So how do you create a presence for yourself in all that noise? There are a lot of websites claiming to offer you the fastest way to Instagram success, but most of them offer terrible advice that will get you nowhere. Here are a number of strategies to get better exposure for your photography, build a community, and grow as a photographer through Instagram.

1) Great artists only show great work

The difference between a good artist and a great artist is that great artists only show great work. While nobody is expecting you to rival National Geographic photographers right off the bat, you should pay close attention to what you’re sharing. It only takes one uninteresting photo to for people to lose interest in your work. If a photo doesn’t make you say “OH yeah!” when you see it, don’t post it.

Also, don’t post too often. Unless you have a really good reason for spamming my feed, don’t. I recommend sharing one or two images a week, which is a safe number to keep people interested without getting annoying.

2) Find your niche.

This is as important to your growth as a photographer, as it is in defining your brand: what makes you different from everyone else? The amazing thing with Instagram is that it is composed of people from across the world who each have something in which they’re interested. I’ve seen fantastic accounts focused just on street food in Vietnam, rock climbing in Utah, or architecture in Turkey. What the best accounts have in common is a focus around a central theme that captures their audience’s attention and keeps it.

point 2 image

Exploring the ancient #forests of Vancouver island, @kaitross and I found that even these giants succumb to time and the winds. Afterlife for these trees means giving life to a new world of creatures, from insects and animals to moss and a new generation of trees. When time calls, what will you leave behind? What will I? Will it be enough?

Don’t forget: the only person who should define your niche is you. Do you love paper maché and dinosaurs? Then become the best photographer in the world working on seaside portraits of paper maché Velociraptors. For me, I love to travel and explore nature, so my account reflects that, and only that. You will not find photos of my food, my dog, or my nieces. If you want to share snapshots from your daily life, get a private account for your friends and your mother to follow, because they’re the only ones who (might) want to see that stuff.

3) Use a real camera.

Yes, your shiny new smartphone may take gorgeous snapshots, but relying on it is like trying to perform a piano recital on a kid’s electronic keyboard. Not only does using a dSRL (or a serious mirrorless) give you far more choices of focal length to play with, your opportunities for manipulating depth of field will result in way better photographs than anything coming out of your smartphone. As if that’s not enough, using a dSLR will let you shoot in RAW, allowing you to make those photos really pop in the editing process.

Point 3 image

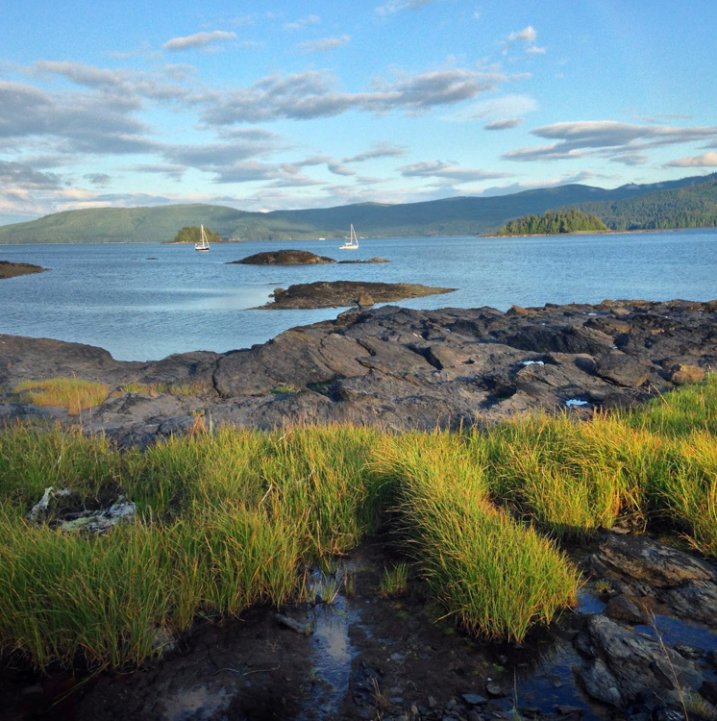
Turning off the Yellowhead Highway and heading north to Alaska, you’ll quickly find yourself in Kitwanga, traditional lands of the Gitksan and Wetsuwet’en peoples. The massive Skeena River nearby has nurtured civilization and trade routes for over 7,000 years and today is a beloved fishing ground for all people. I stopped in this small reserve community early one morning when there was more dark than light, and a fresh snowfall cast a tranquility over the village.

4) Take the editing process seriously.

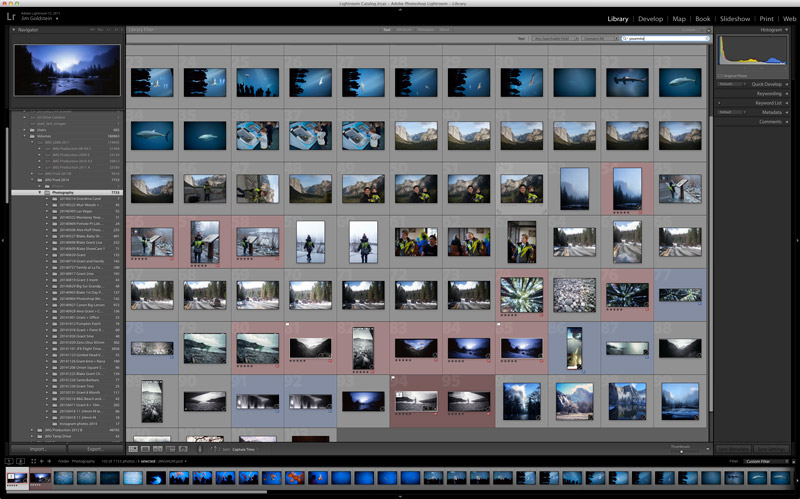
Instagram may lend itself to a snap-and-post style of photography, but producing excellent photographs doesn’t. Great photographs aren’t taken – they’re created. This means working in your favourite image editing program (I recommend Adobe Lightroom) to learn how to manipulate light, shadows, and clarity until your final product is something to be proud of. The Instagram app just isn’t built for this level of sophistication, so ditch all those cheesy filters and effects and do your work on the computer.

Point 4 image

Think your Monday is challenging? These porters in Huangshan, China haul 150-200lbs of materials up 2500m vertically each day, supplying the tourism infrastructure of this popular destination with daily necessities like food, toiletries, and building materials. While there is a gondola for tourists to ascend and descend the mountain, this is the raw manpower that runs Huangshan.

5) Share a story with your photo.

Great photography leaves an impression. So do well-written stories. But when you combine strong images with powerful words, you’ll evoke an emotional response in your viewer, and lead them to make a personal connection to your work. It wasn’t until I realized this and started sharing the story behind my photos that my account started getting real interaction – people speaking about how the image or words affected them, their own experiences, and their appreciation for it. Nobody expects the next Hemingway to come out of Instagram, but some carefully-chosen words in a thought-provoking caption will do wonders for connecting you to your fans.

Point 5 image

After the frenzied atmosphere of Shanghai’s urban jungle, the fresh air of Huangshan’s Yellow Mountains was exhilarating. Still in the low-season, March snow clung to the boughs of trees while distant clouds made it feel like the horizon could go forever. One of China’s better-developed tourist attractions, Huangshan has a long history: first recognized in 747 AD, it was said to be the place from which the Yellow Emperor ascended to heaven. This year, over 1.5 million visitors (mostly Chinese) will wander its paths. I caught it on a quiet day, and these peaceful memories linger with me still.

6) Ask questions in your captions!

The difference between a story and a caption is that a story builds an emotional connection between the viewer and the image; a question builds a personal connection between your viewer and you. Your questions should be open-ended and create a space for your fans to contribute some of their own story to the community. Never forget, many Instagram users are new to digital photography and are looking for people to connect with, and this gives them the opportunity.

Point 6 image

“I mean… All I really need is a pair of wings. Anyone else get the insatiable urge to jump when they get to the edge of something really high? I tried it once when I was little after watching Mary Poppins off the second story of a building with an umbrella.” – Image and caption by @minayounglee

7) Use hashtags effectively.

I never understood the value of effective hashtagging until I started using them interwoven in my posts. You should be hashtagging important nouns and verbs – stuff people will be searching for. The effectiveness of using #fishing compared to #instagood is huge for obvious reasons: people who might be interested in your photo are much more likely to be searching for their favourite hobby or location than some meaningless term.

point 7 image

The seed from which the Haida Nation sprang, Haida Gwaii now works to redefine itself from a timber economy into an eco-tourism powerhouse. For an outstanding introduction to the history of these islands known as Canada’s Galapagos, pick up Vaillant’s “The Golden Spruce”. I’ll be exploring the rugged coasts and remote, old growth forests of these islands for the next ten days.

Speaking of hashtagging, do a bit of digging around to see what effective hashtags you might be missing. It wasn’t until I came across the hashtag #explorebc that I began connecting with a ton of great local photographers who eventually featured my work on their account, resulting in a huge boost of exposure for my work.

8) Wake up and post.

Mornings are when most Instagram users login and check their feed, so cater to this. I live on the west coast, so I know I’m already posting late for my east coast followers when I share a photo at 8 a.m. Aim to get your posts out early in the day for whatever time zone you’re targeting (if your followers are worldwide, this is less useful).

Is there a best day of the week to post? Studies are showing that Sundays have the greatest number of interactions, which makes sense given that many of you are trying to crawl out of your hangovers through long hours of cuddling with your phones. Otherwise, stick to weekday mornings.

9) Build a community

Build a community by actively finding photographers you respect and developing relationships with them. I won’t lie – this is a long process, but it’s necessary and worthwhile. Find a hashtag that speaks to you and your work, then check in with it whenever you can to see who’s posting what. When you find work you like, leave a thoughtful compliment and follow them. Chances are, they’ll check out your account and will reciprocate if they like what you’re posting. Whatever you do, don’t ask people to check out your account or follow you back. It’s tacky and makes you look desperate.

point 9 image

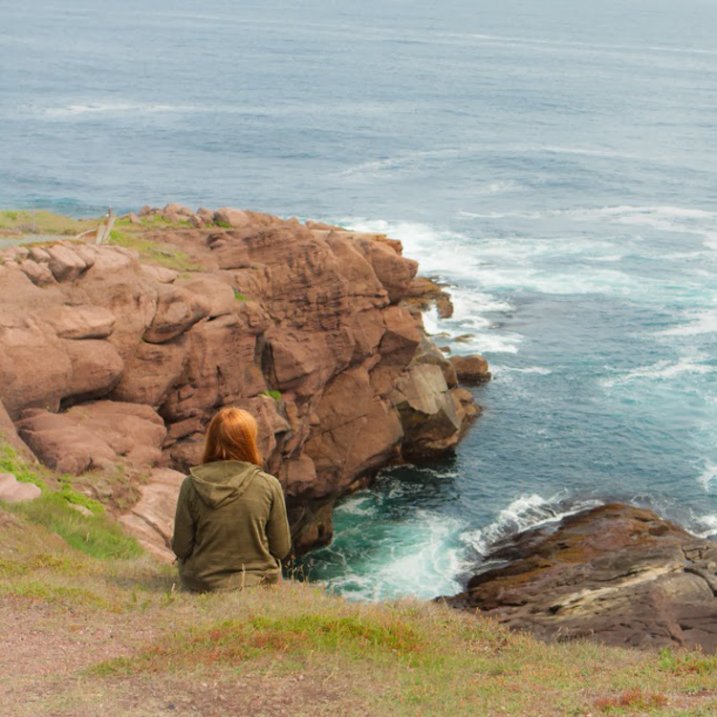
We all know where the roads we walk take us, but do we pause to realize how with the journey we are changed? This is why I love travelling by land… it gives me time to sit and meditate on how the things I’ve done, the people I’ve loved and who have loved me, the hurts I’ve caused and have been caused to me, all of which paint a complex life. At the end of each journey remains one lesson that can always be learned better: to #love with an open and humble heart and to let go of whatever pain has tied one to memories that belong in the past. After days of planes, ferries, hikes, and hitchhiking with the finest people of Newfoundland, @maggiewhoa and I sat at the edge of the Atlantic Ocean and breathed in the salty breeze that was so hard-won.

10) Cultivate champions

Cultivate champions by fostering relationships with other users. Easier said than done, right? If users are leaving you thoughtful comments (as opposed to the ubiquitous thumbs-up nonsense), return the favour and respond with something more meaningful than “thanks!” If someone cares enough about your work to awkwardly type out praise on their smartphone, they’re worth their weight in followers. These are the people who are going to follow along through your adventures and refer their friends and followers, which really is one of the goals of this social network. Do enough of this, and these delightful unicorns will be out there promoting your work for you.

11) Bring other into the conversation

Bring others into the conversation by shooting with them or referencing them in your posts. Two amazing girls from Vancouver kicked off @localwanderer a year ago, in which they travel around North America visiting the hidden gems in communities. Where they really excel (besides their photography and writing skills) is in their ability to constantly bring local shops, restaurants, and people into the discussion. By doing this, they introduce their community to someone new, who in turn will introduce their community to @localwanderer.

Point 11 image

“Hellloooo, San Diego! We are soooo happy to be back in the sunshine state as we make our way around the California coast. Our first stop was the @moderntimesbeer tasting room (a.k.a. the “flavordome”) which combines two of our favourite things: coffee + beer! Also, be sure to check out their wall mural made out of floppy disks!” – Image and quote by @localwanderer

Hellloooo, San Diego! We are soooo happy to be back in the sunshine state as we make our way around the California coast. Our first stop was the @moderntimesbeer tasting room (a.k.a. the “flavordome”) which combines two of our favourite things: coffee + beer! Also, be sure to check out their wall mural made out of floppy disks!

12) Don’t confuse followers with community

I’d rather have 100 fans who interact with my work than 1,000 followers who couldn’t be bothered. Your goal should never be the quantity of followers, but the quality of your community. Speaking of numbers, you’ll find a random assortment of Russian princesses begging for you to come cuddle with them – report them and block them if they add you. The last thing you need is a bunch of zombie accounts clogging up your Instagram. Also, one danger of having lots of inactive followers is that your account is less likely to be recommended to other users of Instagram.

There you have it – the 12 steps to success with Instagram. What are yours? Let’s hear them in the comments section.

See Robin’s Instagram account for more of his images and examples of putting these tips into practice.


googletag.cmd.push(function() {
tablet_slots.push( googletag.defineSlot( “/1005424/_dPSv4_tab-all-article-bottom_(300×250)”, [300, 250], “pb-ad-78623” ).addService( googletag.pubads() ) ); } );

googletag.cmd.push(function() {
mobile_slots.push( googletag.defineSlot( “/1005424/_dPSv4_mob-all-article-bottom_(300×250)”, [300, 250], “pb-ad-78158” ).addService( googletag.pubads() ) ); } );

The post 12 Steps to Successly Promote your Photography on Instagram by Robin Ryan appeared first on Digital Photography School.


Digital Photography School

 
Comments Off on 12 Steps to Successly Promote your Photography on Instagram

Posted in Photography


6 Steps to Save Your Ass With Lightroom Catalog Changes

22 Apr

Avoid downtime with these 6 steps to keep your Lightroom Catalog in tip top shape:

1. Know Where Your Catalog Resides

Lightroom saves catalogs in the following folders:

  • Windows: \Users\[user name]\Pictures\Lightroom
  • Mac OS: /Users/[user name]/Pictures/Lightroom

When in doubt check here:

(Mac OS) Lightroom > Catalog Settings

(Windows) Edit > Catalog Settings


Know Where Your Lightroom Catalog Resides

2. Save Metadata to Your Files

To save metadata to your files highlight your images and hit Command-S on Mac or Control-S on Windows. This will save author’s name, resolution, color space, copyright, and keywords to a sidecar file for proprietary RAW files or directly to the file if JPEG, TIFF, PSD, and DNG. This is a great precursor step that builds in redundancy in case there are any catastrophic failures in your future.

Why you should use DNG:  DNG, RAW and JPEG: What I Use & Why

More on Metadata: Metadata Basics and Actions via Adobe


Save Metadata to Your Files

3.  Back Up Your Catalog Regularly

There is one key prompt you should never ignore in Lightroom and it is the “Back Up Catalog” prompt.  Always take the time to regularly backup your catalog in the event your hard drive fails, you suffer file corruption or a meteor crashes into your home destroying your computer. Well for the last point see step 4 below.


Back Up Your Lightroom Catalog Regularly

4. Save Your Back Up Catalog to the Cloud

Redundancy is the name of the game in case you suffer a catastrophic data corruption or loss of equipment at home. By having your most recent catalog saved to the cloud (Dropbox for example) you can restore the organization (color coding, stars, edits, etc.) of your entire catalog assuming you have an off site backup of your image files.

The quick and dirty of how I back up my image files in case you’re wondering…

I have a hard drive enclosure that mirrors 2 drives (RAID 1). As I work on my files they’re saved to 2 drives simultaneously. At regular intervals I back up these mirrored drives to a 3rd drive that I keep offsite. In the event of a catastrophic event I always have 1 copy of my image files at an outside location. This combined with my Lightroom Catalog being saved to the cloud means that I can restore my Adobe Lightroom environment at any time.


Save Your Back Up Catalog to the Cloud

5. Before You Upgrade Lightroom Make A New Catalog Back Up

Lightroom will prompt you to upgrade your catalog when you upgrade your copy of Lightroom to the latest version.  To avoid any risk of a fluke corruption when you upgrade your Lightroom Catalog always make sure you have a very recent back up copy of your catalog. Before any upgrade my first step is to make sure I have a recent catalog backup.

Before You Upgrade Lightroom Make A New Catalog Back Up


6. Regularly Optimize Your Catalog

If you’re experiencing performance issues or you want to make sure that your catalog is in optimal condition then be sure to optimize your catalog from time to time. To do this go to Lightroom > Optimize Catalog

Regularly Optimize Your Lightroom Catalog


Recommended Reading: Lightroom Catalog FAQ and Lightroom Help / Optimize performance

Did I miss any precautions you take? If so add them to the comments.


Copyright Jim M. Goldstein, All Rights Reserved

6 Steps to Save Your Ass With Lightroom Catalog Changes

The post 6 Steps to Save Your Ass With Lightroom Catalog Changes appeared first on JMG-Galleries – Landscape, Nature & Travel Photography.


Related Stories

  • 6 Steps to Save Your Ass With Lightroom Catalog Changes – Enclosure
  • Talking Lightroom & Photography
  • Talking Lightroom & Photography – Enclosure


JMG-Galleries

 
Comments Off on 6 Steps to Save Your Ass With Lightroom Catalog Changes

Posted in Equipment


6 Steps to Edit and Deliver Wedding Photographs in One Day

23 Mar

This is exactly how I process every wedding that I photograph. I am now on my fifth year of shooting weddings and have shot roughly 70 of them. I am a big fan of working smart and not hard. Every step of my workflow is thought out, and belongs for very specific reasons. Most of the time I am finishing and delivering my wedding photos within four to five days. If it wasn’t for attention span and the internet, I should be able to finish wedding photographs in 24 hours every time.

digitalphotographyschool-1-31

1/100, f/5.0, ISO 2000, 15mm fisheye

 Step #1 – Import and backup (1-3 hours)

I first import all images (1500-2000) via Lightroom into a folder (titled bride’s name and groom’s name, in alphabetical order) on my 1TB portable Lacie Porsche drive.

I work on the go a lot, and I am often editing in a coffee shop, friend’s place or co-working space, so I have my 13 inch Macbook Pro (retina display) and portable drive to work from. The drive currently holds about six months of images, or 80,000 photos.

I have a big gripe about people who organize their photos by date. In my opinion, it’s a terrible system when it comes to finding photos at a later date. When your bride Tiffany asks for a change in a photo from color to black and white, how do you find that folder with her wedding? On my drive it would be under “Weddings,” and in a subfolder titled “Jeremy & Tiffany.”

digitalphotographyschool-1-12

1/400, f/6.3, ISO 2500, on a Canon 135mm f/2

While my images are uploading I will be posting a Facebook album of the same day slideshow that I produced at the wedding, and tagging the bride and groom in it. This is usually 30-50 images that I’ve edited during dinner or during any sort of down time, like the end of cocktail hour.

Note: This means I have already added the bride and/or groom on Facebook, which is standard practice for me. Being friends with my clients is probably one of the greatest perks of my job, and it also guarantees tons of referrals. I have a competitive side that always wants to post the pictures faster and better than any friend, uncle or cousin at the wedding. Whoever posts first on Facebook will get the most attention. 

digitalphotographyschool-1-36

1/50, f/2.8, ISO 2500, 24mm with the Canon 24-70 2.8

I then plug in my backup 3TB drive, go to sleep and let my computer backup via Time Machine overnight.

Losing photos is the greatest fear of most photographers, and for that reason alone many professionals have multiple backup systems in place. I don’t usually format my memory cards until the wedding has been delivered or backed up, if I can help it. I also use Backblaze, a cloud-based backup system that constantly backs up files whenever I am online.

digitalphotographyschool-1-23

1/400, f/2.5, ISO 400 with the Canon 135mm f/2

Step #2 – Culling (30 min an hour)

In Lightroom I go through all 1500-2000 photos and select every photo that looks good, unique, and usable. I use the star rating system in Lightroom, by pressing the “1” key on the photos I like. I usually end up with about 800 photos after this. If you focus and know what you are looking for, this should only take about 30 minutes to an hour, maximum. No agonizing over which photo is best between two very similar ones. Just trust your gut and go.

One “trick” I’ve unconsciously been doing is usually selecting the last photo in a series of similar photos. If you’re like me, you take two or three photos of each thing you are photographing. I move on when I think I’ve got it, and that means the second or third photo in a series should be my selection.

digitalphotographyschool-1-17

To get photos like these, I usually have the guys grouped together in a friendly way, and then I tell them to “harass the groom.”

Next I go through and do my two-star selects. These are the best photos from the day that tell a clear story from beginning to end. They are images that would likely end up in a photo album (besides family photos). I almost always end up with 100 photos, give or take a few. This should take about 10-15 minutes, since you are selecting from a much narrower field of photos. Also, you really have to trust your gut on which photos are winners here.

Step #3 – Editing and retouching (three hours)

After I’ve selected my favorites, I edit them first. I actually enjoy editing these ones, because I am proudest of them, and they are all different. I edit everything in Lightroom. I never open photoshop unless I’m making a diptych or doing heavy changes to a photo. Sometimes I start with a base preset in Lightroom, one I called “Typical Phil.” I hand edit all of these photos. This should take about an hour or two tops. These are then exported at 2500px, 300dpi, 88 quality, (and also renamed Highlights-0001.jpg, Highlights-0002.jpg, etc.), into a folder called Highlights which has been created inside the the main folder of images. I upload the Highlights into a PASS gallery, and deliver this immediately, so the clients don’t have to wait any longer to see some of their wedding images.

Never spend more than 30 seconds on a photo. If you do, you are editing for yourself and other photographers, not the client. Most clients won’t be able to tell the difference between good, great, and perfect. Aim for great.

My export settings make each of my images only about one or two megabytes in size, but they are able to be printed up to 11×14″. Anything larger and I’m happy to provide a specific file to my client directly. I do this in the interest of hard drive and cloud storage space. Also, clients are usually only printing at most one or two photos extra large, so I don’t see the need to make every photo 30 inches on the long edge.

PASS is a phenomenal application that is incredibly intuitive and easy to use for delivering digital photos to clients. Pixieset is another popular competitor. PASS charges per album of photos; Pixieset charges for bandwith/storage.

digitalphotographyschool-1-13

This next part is the secret to my rapid editing and turnaround of images. Take each of the favorite images that you’ve edited (two-star images), and copy each edit onto surrounding photos with a similar light source. If your exposure is consistent in this range of photos, the edit you do for one image should look great for every other image in that scene. This should take about two hours straight through.

Lightroom speed tip

Here is a Lightroom secret to make the copying and deselecting of images extra fast. With your main image selected, hold down Command and select all the other images you want to copy the edit to. In Develop mode, hold down the option key and press sync. This automatically copies the edit onto all the other photos (to make sure you are copying the appropriate edits across all photos, you can simply press sync and a dialogue box will pop up showing which edits are going to be copied).

Now that the edits are synced, you can deselect each image and check for consistency by pressing “/” which is the shortcut for deselecting the current image. I do this to make sure I’ve seen and checked each image for perfect exposure.

digitalphotographyschool-2-3

Remember, you’re not retouching every face, every sky, every element of a picture. You can spend a little more time doing that on the favorites, but chances are your couple isn’t going to be printing every single photo from their wedding, so why are you retouching random shots from the reception?

Step #4 – Exporting (45 minutes)

Export all images from each section of the wedding into their own folders. Folders and images can be named according to which part of the wedding they belong to (Getting Ready or Pre-Ceremony, Ceremony, Family, etc.). These can all be exported with these settings: 88 Quality, 2500 px long edge, 300dpi. This should take about ten minutes to start doing, and maybe an hour for the computer to finish (depending on number of images and your computer’s power and speed).

digitalphotographyschool-3-6

Step #5 – Uploading (one hour)

Upload all your files to your photo sharing service of choice (PASS, Pixieset, Zenfolio, Pixifi, etc.). Ideally, the first gallery that a viewer will see is the Favorites, or Highlights gallery. No need to overwhelm them with every photo from the Getting Ready series. Your top 50-100 photos makes for an excellent opener in an online wedding gallery, like this.

That should take about 10-30 minutes (up to an hour or so), depending on how fast your internet connection is.

digitalphotographyschool-1-15

Step #6 – Delivery (10 minutes)

Email the bride/groom the following:

“Hi! How is everything going? I know I said it would be a couple of weeks until the photos are finished, but I have good news for you! I’ve finished and edited ALL the photos and they are ready for you to see and download in this gallery here.

Simply click on the download button to create a zip file with all of the high resolution images to your computer. This will save you time having to wait for me to mail you a disk or thumb drive, which would have all the exact same files in it.

As a special surprise, I am gifting you $ 50 of print credit! Simply put in “bridegroomname” in the checkout section of ordering prints under coupon code. This should buy you up to X amount of 8×10’s, or X amount of 5×7’s.

Let me know if you have any questions about anything! Enjoy the photos :)

-Phil”

digitalphotographyschool-1-34
I recognize this doesn’t involve an in-person sales meeting, delivery of albums, or anything of that nature. This is simply the fastest way you can do business and work smart, not hard. I regularly book weddings between $ 3000-4000 doing exactly this. I have sold wedding albums, and that’s room for more profit, but also more headache and work. Write to me and I’ll let you know how to make album making a painless, quick process as well. It’s all about guiding your clients’ expectations.

digitalphotographyschool-5-2

Do you have any other workflow tips for weddings?

googletag.cmd.push(function() {
tablet_slots.push( googletag.defineSlot( “/1005424/_dPSv4_tab-all-article-bottom_(300×250)”, [300, 250], “pb-ad-78623” ).addService( googletag.pubads() ) ); } );

googletag.cmd.push(function() {
mobile_slots.push( googletag.defineSlot( “/1005424/_dPSv4_mob-all-article-bottom_(300×250)”, [300, 250], “pb-ad-78158” ).addService( googletag.pubads() ) ); } );

The post 6 Steps to Edit and Deliver Wedding Photographs in One Day by Phillip Van Nostrand appeared first on Digital Photography School.


Digital Photography School

 
Comments Off on 6 Steps to Edit and Deliver Wedding Photographs in One Day

Posted in Photography


How to Make a Photoshop Collage in 9 Simple Steps

10 Feb

We all aim to tell a story through one single image. For many occasions, though, a well-assembled collage is an excellent way to pull the viewer in for a full experience. Consider this method for sharing photos from an event, a real estate shoot, or even a family photo session!

Collage4

Collages are easy to put together in Photoshop, so let’s walk through the steps. Note that I am working on a Mac with Photoshop CS3, so your system may have slight variations in the key commands needed.

Photo selection is crucial. You want to select a mix of scales that will span the entire event. That means you pick some wide shots that show the entire scene, and some detail photos that show lots of texture and personality. Without one or the other the story will not be complete, and won’t carry the same emotion that it could.

Step 1. Open the selected images in Photoshop

Open all selected photos in Photoshop. You’ll want to pick a minimum of three, but avoid getting cluttered with too many also. Typically, I limit my photo selection to no more than eight. Keep in mind that the more photos you select, the tougher it will be to see details of each one.

Step 2. Create a new file

Create a new file (File -> New). Be sure to make it a bit larger than the size you want in the end. I always make it 20×30″ at 150ppi.

Collage1

Step 3. Add your images one at a time

Go to one of the open photos and, using the marquee tool, select all (or press command+A). Press Command+C to copy. Click into the new document and press Command+V to paste. This will bring the photo into the new document on its own layer. Depending on the size and resolution of the photo you brought in, you may need to adjust the size. To do this, press Command+T to transform. Use the corner node and, while pressing Shift, adjust the scale of the photo until it is small enough to comfortably move around on the new document canvas.

Note: if you convert the image layer to a Smart Object first it will maintain integrity of the image quality as you size up and down.

Step 4. Create your layout

After you have added all images that you want in the collage, it’s time to lay out the photos! This is where you will shift the photos around until you feel they tell your story best. You’ll discover a style of your own after doing several collages. I generally like to either have symmetry in layouts, or make it look like an interlocking puzzle. That being said, each story has slightly different needs.

Collage2

Step 5. Add image spacing

When you have the layout figured out and the photos are all sized as they should be, you can create a thin white border between images to give a bit of visual space. This step is optional, and the amount of white space you put between photos is a personal preference.

To do this, select the image layer that you want to move then use the arrow keys to shift it in the direction you want. Using the arrow keys rather than shifting with the mouse will help keep track of distance so that the spacing in between photos is even.

Alternatively you can butt them up against one another and using a Layer Style (select Stroke > Inner) add a white or black border around each image. See screen capture below.

Screen Shot 2015 02 06 at 3 01 27 PM

Step 6. Merge all layers

Once you have your collage laid out and the photos are spaced as you want them, you are ready to merge all layers. To do this, press Command+Shift+E.

Step 7. Crop the final image

Once your collage is merged into one layer, crop any extra white space around edges so that it’s even. This outside white border is typically very narrow on my collages, so I don’t bother measuring. Be sure that it looks even all around.

Collage3

Step 8. Resize for online usage

To make sure your collage fits your social media needs, you may want to resize it once complete. I recommend saving your original flattened collage as a JPEG for possible future re-use.

To resize your collage and bring it down to social media friendly dimensions, press Opt+Command+I. Sizing varies per social media platforms, but I typically save it at 1000 pixels on the short edge and 150ppi.

Step 9. Add a watermark if desired

If you want to put a watermark on your masterpiece, now is the time. Bring in your watermark and be sure to merge all layers once more to save as a JPEG. You are now ready to share it with the world.

Collage4

Have you made any collages? Have any additional tips? Please share in the comments below.

googletag.cmd.push(function() {
tablet_slots.push( googletag.defineSlot( “/1005424/_dPSv4_tab-all-article-bottom_(300×250)”, [300, 250], “pb-ad-78623” ).addService( googletag.pubads() ) ); } );

googletag.cmd.push(function() {
mobile_slots.push( googletag.defineSlot( “/1005424/_dPSv4_mob-all-article-bottom_(300×250)”, [300, 250], “pb-ad-78158” ).addService( googletag.pubads() ) ); } );

The post How to Make a Photoshop Collage in 9 Simple Steps by Natalia Robert appeared first on Digital Photography School.


Digital Photography School

 
Comments Off on How to Make a Photoshop Collage in 9 Simple Steps

Posted in Photography


Natural Looking HDR in Photoshop and Lightroom in 5 Easy Steps

06 Feb

HDR (High Dynamic Range) photography was developed out of necessity to overcome limitations of photography equipment, mostly in digital cameras’ sensors. From the beginning, the technology was intended to make photographs as close as possible to human experience by bridging the gap between what the human eye perceives, and what the digital camera can actually capture.

NaturalLookingHDR Photo 1

Montreal, Canada – HDR processed, five exposures, tripod.

Think of HDR as a sophisticated, software based, ND (Neutral Density) filter. Instead of placing it in front of the lens at the moment of capturing photos, HDR allows you to accomplish it in post-processing. It sounds practical and convenient, right? There is no need for extra equipment and you can work on extending the dynamic range of the scene without rush, at your own pace, in the comfort of your home.

NaturalLookingHDR Photo 2

Montreal, Canada – HDR processed, three exposures, hand-held.

Why is HDR photography getting such bad press lately?

I believe that the main reason for this is the misconception in defining what HDR actually is. Somehow, there is a notion, that HDR is a new style in photography, which is completely false. HDR is not a style or genre; it is a technique of post-processing. It is a tool. The way the final photo looks is absolutely up to you, as you have full control over the entire process.

There are many different tools and techniques for creating HDR photographs and each one has its own advantages and limitations. If you are going for a surrealistic, edgy look in your images, Photomatix is your best friend.

But, if you are like me and your main goal is to achieve images that are as natural as possible and reflect the best aspects of the original scene, I definitely have a solution for you – one that I’ve successfully used for years and love.

On my blog, dedicated to travel and landscape photography (see my bio below for a link), you can find a detailed breakdown of my shooting and processing techniques for almost every photograph. In most cases where I used this technique, it is not easy to tell if the photo was processed as HDR unless you read the description. They look that natural.

NaturalLookingHDR Photo 3

Big Sur, California – HDR processed, three exposures, tripod.

The technique is somewhat underappreciated, but it is very powerful and easy to master. The beauty of it is that you do not have to learn additional software and there is no learning curve. You use familiar and powerful Adobe tools, Lightroom and Photoshop, and nothing else.

NaturalLookingHDR Photo 4

Cayo Coco beach, Cuba – HDR processed, three exposures, tripod.

This technique leverages the power of 32-bit processing in Photoshop HDR Pro, the module of Photoshop that was established in version CS3.

Below is the infographic that illustrates the schematic view of the entire process, from the time you take the photo to the moment you are ready to save the final image.

NaturalLookingHDR Photo 5

The Technique

1. Bracketing Photographs

Before you can start processing photos for HDR you need to take a series of bracketed shots with different exposure values. Normally, you take between three and five shots in each series but, in extreme lighting conditions (example: shooting directly into the sun), you might need to take anywhere from seven to even nine shots.

Ideally, you take multiple shots on a tripod but, since Photoshop has an extremely effective alignment tool, it is possible to take hand-held photos and let Photoshop align them.

2. Lightroom: Preprocessing

This is very simple step that should not take longer than one to two minutes. Import photos into Lightroom and only apply the following adjustments in the LENS CORRECTIONS panel:

  • Enable Profile Corrections. Lightroom detects the model of your lens and applies corrections to fix any type of distortions.
  • Remove Chromatic Aberration. Lightroom automatically cleans the edges in your photographs.

3. Photoshop: Tone Mapping

This is an almost completely automated process and should not take longer than two minutes.

In Lightroom, select the bracketed photos that you want to merge to HDR. Right click (option click on Mac) and go to Edit In > Merge to HDR Pro in Photoshop.

NaturalLookingHDR Photo 6

Your bracketed photos will open in Photoshop and will be placed on separate layers. Immediately, the complex algorithm will be applied in order to align the layers. This comes in handy if you took the photos hand-held, without a tripod.

Next, the HDR Pro interface is triggered. All you have to do here is select the tone mapping mode. Opt for the 32-bit option to ensure that you preserve as much information as possible from the original images. Click OK.

NaturalLookingHDR Photo 7
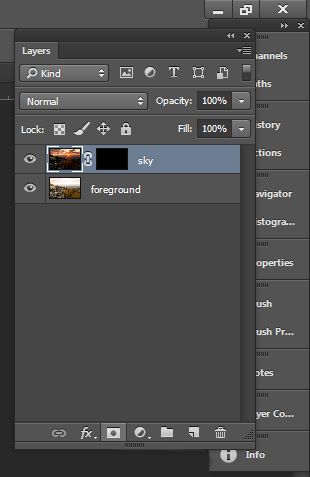
HDR Pro will merge the bracketed photos into a new 32-bit image and open it in Photoshop’s main interface. The tone mapping is complete. All you have to do now is save the document (File > Save). The new HDR image will be saved and automatically imported back into Lightroom. You can find it next to the original bracketed photos.

4. Lightroom: Main Processing

This is the most exciting step. You edit the newly tone mapped HDR image with enormous bit depth (32-bit) to give it the desired look and feel you want. Use standard Lightroom workflow to achieve your artistic vision.

Here is the photograph I took in Cuba and processed using this technique. Below the photograph, you can find a screenshot of the Lightroom interface with all of the adjustments I performed in order to achieve the final look.

NaturalLookingHDR Photo 8

Cayo Santa Maria, Cuba – HDR processed, three exposures, tripod.

NaturalLookingHDR Photo 9

At this point, HDR processing is done. If you are happy with the way your photo looks, you can save it as a JPEG directly from Lightroom (“Export” in Lightroom).

5. Photoshop: Final Touches (Optional Step)

In some cases, HDR photos require additional edits, such as selective sharpening, noise reduction and HDR artifacts cleaning. Photoshop is your best friend for selective editing.

Select the HDR photo in Lightroom, right click and select Edit > Edit in Adobe Photoshop. In Photoshop, do what is necessary to improve your final photo. In the majority of cases, all you will need is to reduce noise and nothing else.

That is it. This is how you achieve natural looking HDR images in five easy steps or less.

NaturalLookingHDR Photo 10

Manhattan, New York – HDR processed, three exposures, hand-held.

PROS of 32-bit HDR processing in Photoshop HDR Pro

  • It does not require stand-alone HDR software
  • The learning curve is minimal
  • Tone mapping and editing are completely two separate processes and it is easy to achieve a natural look
  • This technique takes advantage of 32-bit editing

CONS of 32-bit HDR processing in Photoshop HDR Pro

  • In some cases when there are multiple moving objects in the scene (trees, leaves, water), it can cause artifacts that require additional cleaning.

Have you tried this method before? How do you process your HDR images? Please share in the comments below.

googletag.cmd.push(function() {
tablet_slots.push( googletag.defineSlot( “/1005424/_dPSv4_tab-all-article-bottom_(300×250)”, [300, 250], “pb-ad-78623” ).addService( googletag.pubads() ) ); } );

googletag.cmd.push(function() {
mobile_slots.push( googletag.defineSlot( “/1005424/_dPSv4_mob-all-article-bottom_(300×250)”, [300, 250], “pb-ad-78158” ).addService( googletag.pubads() ) ); } );

The post Natural Looking HDR in Photoshop and Lightroom in 5 Easy Steps by Viktor Elizarov appeared first on Digital Photography School.


Digital Photography School

 
Comments Off on Natural Looking HDR in Photoshop and Lightroom in 5 Easy Steps

Posted in Photography


Geotagging Photos in Lightroom in 4 Easy Steps

04 Feb

For travel photography, geotagging your photos has become fundamental. By geotagging your images, you’ll not only be able to remember the locations once you are back home, but also it will help on searches. If you intend to sell your photos at any time, adding the metadata pertaining to the location into the file is going to improve searches and make your photograph easier to find on the web.

Geotagging is a rather simple process and there are a couple different ways to do it. At the simplest level, you simply attach a GPS data-logger to your camera and the location will be recorded into the EXIF of the photo at the time you take it. That’s it. Now if you own multiple bodies, then you’ll need a different GPS device for each of them.

Bad_ElF_Geo_Tracker

The other option you have is to get an independent GPS tracker to record the data and then pair it with the photos. As I always carry at least two camera bodies, this is option I utilize. I have tried a couple of loggers and ended up with the Bad Elf 2200 GPS Pro. It is small, convenient and pro-rated, and it can be paired with up to five devices at the same time via Bluetooth. Of course there are other options on the market; all you need is to be sure that you’ll be able to obtain and export the recorded tracks from the device.

Working with Lightroom

Something that’s important before you start: to avoid headaches, is to always wise to check your camera clock. It should be set to the actual local time zone in which you are shooting, as once you import the data, Lightroom will try to synchronize the time of the EXIF data from the camera with the time of the recorded data from the GPS logger. If you forget to do this, there is a way to correct it later, but it will be much more seamless if you do it beforehand.

Once you do that, the process is fairly simple and can be done with the following steps.

1) Obtain your GPS file

Export the GPS data from your logger in the format .gpx. This is the standard for these type of files; save them as they can be useful for other applications as well in the future. As an example, in this recent post I have included a detailed map of my trek to illustrate a day in the field.

2) Import your files into Lightroom

Import your files into Lightroom as you normally do and then go to the Map Module.

Import_Photos

Go_to_Map_Module

3) Load your tracklog file

Select all the photos you want to add the GPS information to. This one is a bit tricky – you need to click on a menu down at the bottom close to the icon with the lock. From there, select “Load Tracklog” and navigate to the menu where you saved the file previously.

Load_Tracklog

Select_your_Track

4) Tag the photos with the GPS information

As soon as you import the file, you’ll see the track loaded into the map. Go to the same menu and select “Auto-Tag XXX Selected Photos.” That’s it – that should do it, and now you’ll also see a bubble over the track that indicates where the photos were taken. At this point the GPS coordinates have already been recorded in Lightroom.

Track_Loaded

Auto_Tag_Photos

GPS_Icon_Added

If for any reason you forgot to put the correct time on the camera, you can now adjust it by going to  “Set Time Zone Offset” from the same menu you were working.

Set_Time_Offset

You can take a look at the photos’ meta data and you’ll find the exact GPS coordinates along with location information. As you can see, this process takes only a minute or two to complete and it is fairly easy.

GPS_Data_LR

If you are not already tagging your photos, I hope you can incorporate the process into your workflow soon. I believe it will be important in the long run and you’ll never forget again where that photo was taken, especially in unfamiliar places.

googletag.cmd.push(function() {
tablet_slots.push( googletag.defineSlot( “/1005424/_dPSv4_tab-all-article-bottom_(300×250)”, [300, 250], “pb-ad-78623” ).addService( googletag.pubads() ) ); } );

googletag.cmd.push(function() {
mobile_slots.push( googletag.defineSlot( “/1005424/_dPSv4_mob-all-article-bottom_(300×250)”, [300, 250], “pb-ad-78158” ).addService( googletag.pubads() ) ); } );

The post Geotagging Photos in Lightroom in 4 Easy Steps by Daniel Korzeniewski appeared first on Digital Photography School.


Digital Photography School

 
Comments Off on Geotagging Photos in Lightroom in 4 Easy Steps

Posted in Photography


6 Steps to Growing Your Photography Business Using a Recommended Vendors List

26 Jan

In this article I talk about a technique used in all types of business, but of course will relate it to photography. To make it easy to understand, I am going to discuss the technique specifically for wedding photographers. But it is important to know that the technique you will learn in this article can work for any type of photography niche or genre.

Wedding cake

Utilizing a business partner vendor list to grow your business

How so? By creating something of value to offer website visitors, which will in turn get them to give you their name and email address. When someone offers you contact information in exchange for something of value, they are now considered a lead. From there you have the potential to convert that lead into a paying customer.

Let’s break it down piece by piece. I’ll start with a list and then talk about each individually:

  1. Create a PDF document that is attractive to your potential customers. This PDF is intended to act as a conversion tool – a free offer.
  2. The offer utilizes a business partner vendor list by recommending preferred and partner vendors. This helps add more value to the download and also improves the relationship between you and the vendor.
  3. Create a way for site visitors to enter their contact information on a landing page, a magnetic spot like blog sidebars, or a pop-up box.
  4. Capture emails of website visitors, which then turn into quality leads (because they downloaded something specifically for their intention of hiring a photographer).
  5. The vendors included in the document are also likely to further promote the document.
  6. You now have huge potential of converting those leads into customers, via phone calls and email marketing.

Now let’s get into the nitty-gritty of each of those points. As mentioned earlier, this is geared to wedding photography. So if you are not a wedding photographer, take all I am saying and relate it to the type of photography you do.

Step one – create a PDF

The first step is to come up with a PDF document which you can offer for free on your website. Ideally it will contain everything that your potential customer would need to know about planning a wedding. It’s important that the document is branded to your business, and has an attractive design overall. You can use your letterhead (with logo of course), or a pre-made design for the task at hand (which I have made available) or templates from Keynote or PowerPoint. The important part is that your branding is in the design and that it won’t turn people away by looking unprofessional.

Photographer free pdf

Step two – utilize your list

Inside the PDF categorize it for different types of vendors. You may have a page of florists, and another for wedding venues that you recommend. Ideally make each a two-page spread if possible. One page would provide the information on the vendors, and the other page would contain your photography examples related to the vendor. Think of it like a portfolio of your best work combined with your recommended vendor list.

The beauty of this is that you are getting your photographs in front of couples planning their wedding. Your brand is there as well vendors, which the couple might also hire.

Step three – create the opt-in

Next up is creating a way convert website visitors into leads. This is a bigger section due to the complexity. By this point you will have already created the PDF, which leads will download. But the process of gathering the email addresses confuses many people.

The first step is to use an email marketing service like Mailchimp or Aweber. Both are fantastic. I personally use Mailchimp for its ease of use and pricing.

Both services offer a feature, which can automatically send emails based on certain actions. In Mailchimp it is called Automation, in Aweber it’s called Follow Up Series. There you will set up an automated email, which will be sent to anyone who signs up for the “Free PDF” list that you will have created. Definitely name the list something you will recognize immediately when logging into your account.

These services allow you to attach a PDF to an email, which is what I recommend. But if you are using a service that does not allow attachments then create a Dropbox or Google Drive link and include that in the email.

This is where the fun part starts. There are many places where you can place what’s called an opt-in form. That means, a form which asks a website visitors for a name and email address, or any other information you want to request like a phone number.
Note that the less information you request the higher your conversion rate will be – meaning, the more people will fill it out. So I typically ask for email addresses only (you will see why later).

The first place you want to place the opt-in form is on a landing page specific to the free PDF. The benefit of having a unique page for the document is connected to SEO (search engine optimization). A dedicated page can be filled with additional text and image content optimized to rank well on search engines. It can also increase the conversion rate (percentage of people who sign up compared to number of page visits) for the opt-in because there are no distractions from blog articles or other content available only your website. Services like Mailchimp and Aweber offer embed codes for your opt-in forms. You use it like you were copying and pasting HTML from YouTube, Vimeo or 500px.

The second place you can have the opt-in form is on your blog’s sidebar, or in a pop-up form. These are called magnetic areas because they draw the attention of a visitor’s eye directly to them. There are a few ways you can do the magnetic opt-ins. For sidebars you can use the standard embed code. Some services offer pop-up codes as well. For WordPress sites I recommend services like OptinMonster or Pippity, which come with many design options as well as timing and split testing so you can see what converts the best. I have helped a many photographers with this method.

Optinmonster

Step four – leads versus quality leads

Now that you have the PDF done, and everything set up for visitors to convert into leads – it is important to note the difference between a lead and a quality lead.

A lead is anyone who contacts you about anything. An example of a standard lead is a couple who contacts you for a price list. They might be interested in your services, but there is no way of knowing how interested they really are, how far along they are in their wedding planning, or how serious they are about you.

A quality lead is someone who has taken specific actions to do research and wants valuable information. For example, a quality lead would be a couple downloading your free PDF because it contains information specific to their needs. They understand that it will contain every vendor they need to know about to plan their wedding.

Quality leads have a much higher chance of converting into paying customers over standard leads. That’s because a quality lead is already more interested in your services than a standard lead.

Step five – inform your vendors

If the couple books a venue listed on your PDF, then it is highly possible they will mention you as a referral. Your vendor partners will appreciate that. So, be sure to send a copy to your partners so they know what you are offering potential customers. Then they are also more likely to promote it, and promote you.

Your best sales people are your brand advocates. Those are your customers and your business partners.

Biz partners

Step six – converting to customers

You have your free PDF and are converting site visitors into leads. You are utilizing an email marketing service as recommended. Next is where it really comes into play.

I mentioned earlier that I typically only ask for email addresses. That is because with email marketing you can learn more about your leads, so names and phone numbers are NOT essential. In fact, you may find that through nurturing those leads via email marketing that you will have more people contacting you than you contacting them.

After doing some testing, I came to the conclusion that sending one email a week to my list is most effective. You may find yourself in a different situation. But having an email marketing service that tracks statistics will help you identify the optimal sending scenario – days and times.

One effective trick I find for converting leads into paying customers is to ask a question, which warrants a reply. Whatever the question might be, you will find people replying. That is where the conversation really takes off. Something like this perhaps:

As a wedding photographer I am always so curious what types of gowns brides pick.  Please reply with the type of dress you will be wearing at your wedding.  Or if you already picked it out, I’d love to see a photo!

What have you learned

To wrap-up this article, I want to restate what you learned here and what your first step should be.

Your business partner vendors are more important than ever to your business. You can foster those relationships online, and offline, by creating a free PDF as described here. That PDF will be used as leverage for converting website visitors into quality leads. Using email-marketing you can nurture those leads and convert them into paying customers. All with a little help from a simple PDF that includes super valuable information.

New family

Once again, I used wedding photography as an example, so if you are not a wedding photographer then be sure to think hard about your vendor list and what your clients would need. Then start creating that document.

Hop to it!

Disclaimer: dPS does not agree or disagree with any recommendations made by the author. The author receives no extra compensation for these referrals and benefits in no way. He only recommends them because these are the services he uses – do your own due diligence when selecting any service for your business.

googletag.cmd.push(function() {
tablet_slots.push( googletag.defineSlot( “/1005424/_dPSv4_tab-all-article-bottom_(300×250)”, [300, 250], “pb-ad-78623” ).addService( googletag.pubads() ) ); } );

googletag.cmd.push(function() {
mobile_slots.push( googletag.defineSlot( “/1005424/_dPSv4_mob-all-article-bottom_(300×250)”, [300, 250], “pb-ad-78158” ).addService( googletag.pubads() ) ); } );

The post 6 Steps to Growing Your Photography Business Using a Recommended Vendors List by Scott Wyden Kivowitz appeared first on Digital Photography School.


Digital Photography School

 
Comments Off on 6 Steps to Growing Your Photography Business Using a Recommended Vendors List

Posted in Photography


5 Easy Steps to Exposure Blending for High Contrast Landscapes

27 Oct
Final Image  Bear Rock, Dolly Sod Wilderness Area, West Virginia

Final Image: Bear Rock, Dolly Sod Wilderness Area, West Virginia. Sunrise and Sunsets can be extremely contrasting and very challenging to capture the wide exposure range.

Here’s a problem I am sure you have encountered, instances where you try to photograph an image that has a greater range of light and dark than your camera can accurately capture. In the example above, when we set our exposure to expose the sky correctly, the foreground objects are severely under-exposed. Likewise, if we set our exposure to correctly expose the foreground, the sky is blown out and loses almost all detail. One solution to this dilemma might be to use HDR software to combine several bracketed exposures into one image. However, this method can be overwhelming and time-consuming to do correctly for a pleasing result. Another solution to this problem could be to use graduated neutral density filters. Unfortunately, a good set of filters can be quite expensive and a cheap set can harm the quality of your image.

A simple solution to this problem scenario may be as easy as taking two exposures, one correctly exposed for the dark areas (in this case the foreground) and the other correctly exposed for the lighter area (in this case the sky). Place your camera on a tripod so that both images will be composed exactly the same.

image correctly exposed for the sky 1/10 of a second @ f/10. ISO 100

Image exposed for the sky: 1/10th of a second @ f/10, ISO 100

Image exposed for the foreground: 1 second @ f/10, ISO 100

Image exposed for the foreground: 1 second @ f/10, ISO 100

Now, let’s look at a simple five step exposure blending process, performed in Photoshop, to resolve this contrast issue.

Step 1: Open your images

Open the two exposures in Photoshop as layers. This can be simply done with the following script. In Photoshop, select: File/Scripts/Load files into stacks (if you use Lightroom just select both thumbnails, right click and choose “Edit in>Open as Layers in PS). Then select your two exposure files. Label the layers for identification. (In this case we label one layer “Sky” and the other “Foreground”). Drag the Sky to the top layer if not already in that position.

Step 2: Add a layer mask

Add layer mask filled with black to top layer.

Add layer mask filled with black to the top layer.

Add a layer mask, as shown below, to the highlighted Sky layer. While holding down the ALT (opt) key, select the Add layer mask button located at the bottom of the layer palette. This will add a layer mask to the Sky layer and automatically fill it with black. The black-filled layer will mask out all of the Sky layer and reveal all of the Foreground layer.

Step 3: Paint over sky

Click on the black layer mask and select the paintbrush tool. Set your paintbrush to paint with white, and set the size of your brush as needed. Set the hardness of your brush to a low number to give it a soft edge while you paint. Paint over the sky area of the image, which will reveal the Sky layer. By adjusting the opacity, size and hardness of the brush as you paint, blend the two exposures together.

Paint with white on your layer mask to reveal the sky in the top image. use different opacities and hardness to make the blending look natural.

Paint with white on your layer mask to reveal the sky in the top image. Use different opacities and brush hardness to make the blending look natural. This is what the mask might look like.

Step 4: Add finishing touches

Add adjustment layers (see below) as needed to adjust colors and contrast of the layers to make the image look natural.

Final layer palette

Final layer palette

Step 5: Save your file

Save your file as a Photoshop document (.PSD). This will preserve your image with layers which you can return to if you need to make further adjustments to improve the image.  You can now can flatten the layers (Layer/ Flatten Image) and Save As a single layer file such as a JPG.

This image was created from three files using Exposure blending. Exposure #1 was exposed for the light green area above the falls and exposure #2 was exposed for the shadow area below the falls. The light was hitting the rock on the left  very hard so a third exposure was need just for that rock.

This image was created from three files using exposure blending. Exposure #1 was exposed for the light green area above the falls and exposure #2 was for the shadow area below the falls. The light was hitting the rock on the left very hard so exposure #3 was needed just for just that rock.

So next time you are faced with an extremely contrasting scene, try this easy exposure blending process to extend the exposure range of your image. Do you have any exposure blending tricks that you use? Post samples of your images.

The post 5 Easy Steps to Exposure Blending for High Contrast Landscapes by Bruce Wunderlich appeared first on Digital Photography School.


Digital Photography School

 
Comments Off on 5 Easy Steps to Exposure Blending for High Contrast Landscapes

Posted in Photography


How to Clean Your Camera Sensor in 3 Easy Steps

04 Sep

There is really nothing more frustrating for photographers than a camera sensor that is full of dust and specks. Dust on the sensor happens, it’s just a fact of digital photographic life. If you’re an outdoor photographer with a zoom lens, or one who changes lenses in the field, dust and particles will find a way onto your sensor on an almost regular basis. But even studio photographers experience the distress of a dirty sensor.

_2DS3368Wjpg

The world’s dirtiest camera sensor. Yuck.

A few weeks ago I was on a mountain photo tour, and was constantly changing lenses in the windy and dusty alpine weather. This is a photo taken to show you my sensor dust. All those black specks are fragments of airborne stuff that either gets sucked into your sensor when you use a zoom lens, or when you change your lens outdoors. The image above is the result.

There’s not too much you can do about it if you’re out on a shoot, other than know that there will be many hours spent on your computer editing out those miserable spots from your otherwise beautiful photos. However, you needn’t stress once you get back to your home base, where you can easily take care of cleaning the sensor and removing the smudges in three easy steps.

Is Your Sensor Dirty?

Check to make sure your sensor needs cleaning. It’s quite possible that it does, but you may not know it. If you shoot wide open, or at larger apertures (smaller f-stop number, such as f/2.8) you may not really see any sensor gunk on your images unless you view them at 100% on your monitor. But one day you’ll want, or need, to set your aperture to f/8, or f/16; then sensor dust will become visible, almost as if from nowhere, to torment you, frame by frame.

To see if you have sensor dust right now, so you won’t be surprised when you’re out in the field shooting, stop down to the smallest aperture on your lens (the largest f-stop number, f/32 for example) and take a photo of a white or light colored wall. What I do then, is open the image in Photoshop and click on Auto Tone (under the Images Menu item). Horrors! Do you see it? Hopefully your sensor dust won’t look as bad as mine, above. But if you see the dreaded black specs, read on.

Step 1) Using the Auto Clean Function

Many newer DSLRs have a special function for automatically cleaning the sensor.  Look for it in the Tools menu on your camera. When you use this tool, the camera gives the sensor a series of micro-vibrations that “shake” the dust loose, in theory anyway. You may have to repeat this process several times. But with some patience, and providing your sensor is not as bad as the example in my image above, you’ll be relatively free of most of your sensor dirt in a few minutes.

sensorclean-menu

If you don’t have this feature on your camera, don’t worry, there is a way to manually clean your sensor. Sooner or later, even those photographers with auto-clean cameras will have to wash their sensors using this manual method, Step 2 below.

Step 2) Using Sensor Swabs and Eclipse Fluid

Sensor swabs are specially designed cleaning pads for camera sensors. Used with a few drops of Eclipse cleaning fluid they will wipe you sensor clean. Think of it as a tiny Swiffer for your sensor. You can get the swabs in exactly the right size for your sensor, so one swipe in each direction could be all you need.

comboW

The procedure is easy. You’ll simply put 2 drops of the fluid on a pad, and then gently wide the swab across your sensor ONCE, ONE WAY. Then change directions and swipe the other way. Throw that swab away. If you need to repeat the process, use a new swab.

Step 3) Power up, Mirror Up

To use the swabs you’ll need to keep your mirror up to give you access to your sensor. This is the tricky part – you don’t want your mirror to come down while the swab is still inside your camera.

If you don’t have a setting for Lock Mirror Up for Cleaning, make sure your battery is fully charged, and set your camera exposure on Bulb. The Bulb setting will allow you to keep the mirror up until you release the shutter (use a locking shutter release to hold it not your finger). This way you can access the sensor, and do the quick sensor two-step, swipe left, swipe right.

sensor1W

Check your results: take another shot at the same stopped down aperture and take a look at the difference.

_2DS3392w

Image of sensor dust after using Sensor Swabs. The main culprits are gone.

There are still three spots but all the big blobs, and large dust particles are gone. Depending on your preferences, you may be happy with this knowing that it’s a few easy clicks of the clone tool to remove these small faint marks. Or you may want to give the sensor another round of swabbing. Either way the sensor is super clean compared to the initial test image.

Cleaning your sensor is not difficult, you do need to be careful but it’s very worth the effort. Your photographs will love you for it.

I’d love to see your sensor dust horror stories – post your before and after cleaning shots here.

Editor’s note of warning: if you are terrified of damaging your sensor (it is delicate) you can usually find a local camera store that offers this service. You will pay a lot more for it than doing it yourself, but if they damage it, they have to replace it for you. The camera that is! If you damage your sensor there is no going back. So do follow the directions exactly, and do be cautious. Perform this procedure in as dust-free, windless room as possible. And remember to NEVER, EVER touch your sensor with your fingers. The oil from your fingers will do more damage and is much harder to remove (i.e. you’ll likely be sending it to the manufacturer to get that off).

The post How to Clean Your Camera Sensor in 3 Easy Steps by Alex Morrison appeared first on Digital Photography School.


Digital Photography School

 
Comments Off on How to Clean Your Camera Sensor in 3 Easy Steps

Posted in Photography