RSS
 

Posts Tagged ‘Started’

6 Tips to Get Started with Portraits

23 Sep

591

People fascinate me. I love the diversity in personality and expressions, and I love using my camera to capture all those personalities! People are by far my favorite subject to have in front of my camera.

If you are new to photography and getting frustrated that you aren’t creating portraits like you hoped, I’m here to help! Let’s go through six tips to get started with portraits. You’ll be a pro before you know it.

183

1. Get yourself a 50mm lens

Are there better lenses out there for portraits? Yes. But the 50mm is inexpensive, versatile and great to get started! Once you’ve gotten the hang of this lens, you’ll know what other lenses to invest in later and you’ll never regret having a 50mm prime lens in your bag. Your camera probably came with a kit lens that zooms in and out. The drawback of this lens is that you can’t open the aperture very wide.

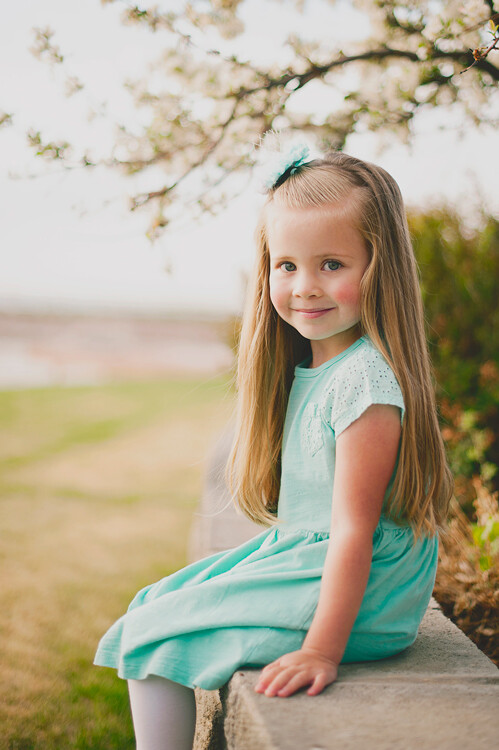
Have you noticed portraits that have a creamy blurred background, and the subject just pops? This is achieved by setting the aperture on a very low number, usually between f/1.8 and f/2.8. Look at your kit lens. It probably can only go down to f/3.5, and if you zoom in your lowest aperture number is probably f/5.0. You could get the 50mm 1.4 or, if you’re really unsure about what you want, give the 50mm 1.8 a try. It’s the least expensive lens out there, but it will still give you a lot of bang for your buck. Trust me on this one! If I could only choose one lens to have in my bag for the rest of my life, it would be this one.

187

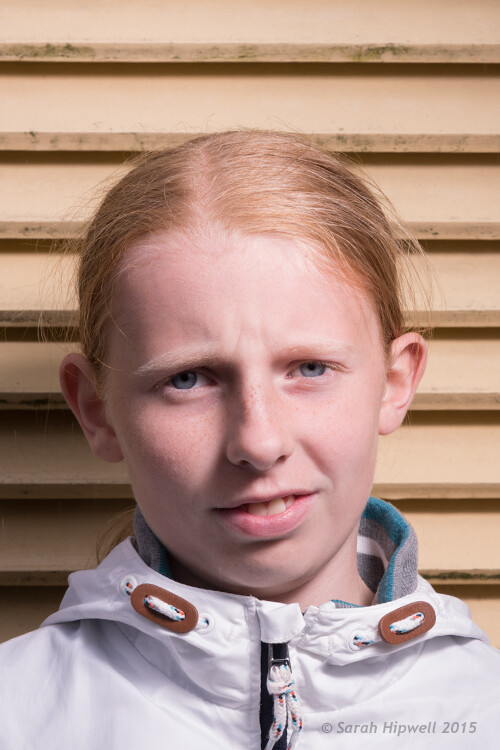
2. Focus on the Eyes

Toggle your focus point of your camera until it’s right on the eyes; if your subject is close to you, put the focus point on one eye (if one eye is closer to you than the other, focus on that one). If you are still letting your camera automatically choose where to focus, change that in your settings now! Pull out that manual you hid away and put it to good use.

If your subject’s eyes are in focus, it will be a much more compelling portrait. After all, the eyes are the window to the soul! If possible, try to position your subject so they have some catchlights (or sparkle) in their eyes.

f164

Be cautious when you are shooting really close portraits. You want to make sure that you have your aperture number high enough that everything you want to be in focus will be in focus. If you are really close to your subject and your aperture number is really low, like f/1.8, you may notice that the eyes are in focus, but the nose is not. Just bump up the aperture a little at a time until you get the look you are going for. When you are learning and experimenting, it’s helpful to zoom in on the preview on the back of your camera after you have taken the photo. Sometimes it may look like everything is in focus, but later when you upload it to your computer, you realize that it definitely was not in focus. If you can find this out WHILE you are shooting, you have a chance to correct things and learn at a faster rate.

143

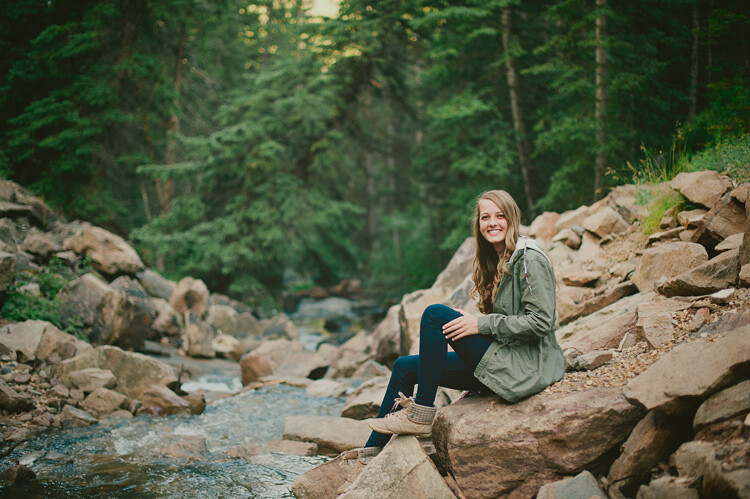
3. Experiment with Distance and Orientation

Sometimes as beginners we might get stuck doing things always the same way, like needing to put the subject’s whole body into a portrait, or having the face fill up the frame. Neither is right nor wrong. The important thing is not to produce the exact same photo over and over.

Try stepping back a bit and include the surroundings in your portrait. It might tell a great story about the person you are photographing. Then try getting really close. Now get even closer. Don’t worry about what grandma is going to say – it’s okay to cut off the top of someone’s head in a photo.

You might notice that you almost always shoot vertically (portrait), or maybe you’re stuck shooting horizontally (landscape) all of the time. Don’t let yourself get in a rut! Try close-up portraits horizontally and try vertical portraits that take in lots of the surroundings (and vice versa).

167

4. Create a True Portrait

We can stick anyone in front of a paint splattered backdrop, sit them on a stool, turn their shoulders at an angle, tell them to smile and call it a portrait. Or we can use our skills to make a portrait that truly shows who your subject is, and what they are about. I love the portraits that tell a true story about my subject because I know that I have captured something worth keeping.

Try to get to know your subject a little bit and use that knowledge to create a portrait that anyone could look at and know a little bit about who that person is. You could do this with props, expression or posing. If they’re passionate about something, they may want it included in the photo with them. If he’s a person who smiles all the time, a serious portrait may not capture who he really is.

Your job as the photographer is to make a portrait that will be treasured by everyone who knows your subject. They will know that you really caught who he is. It’s also your job to create a portrait that will be compelling to those who don’t know your subject. It should make them want to get to know him and let them know a little bit about who he is, even if they’ve never met.

131

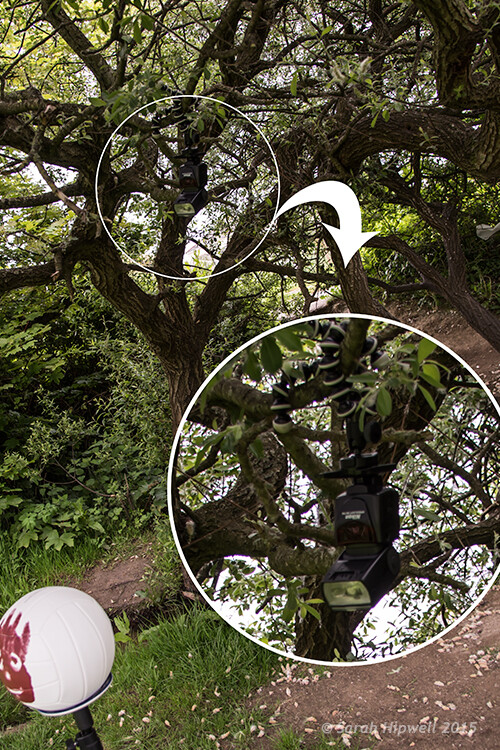
5. Lighting First, Background Second

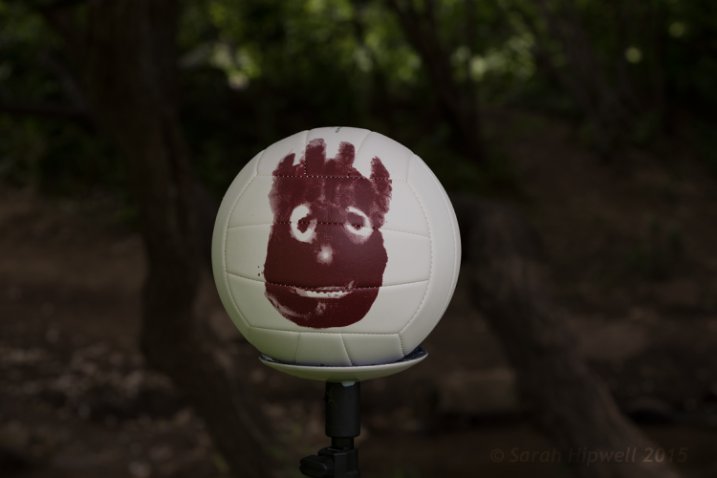
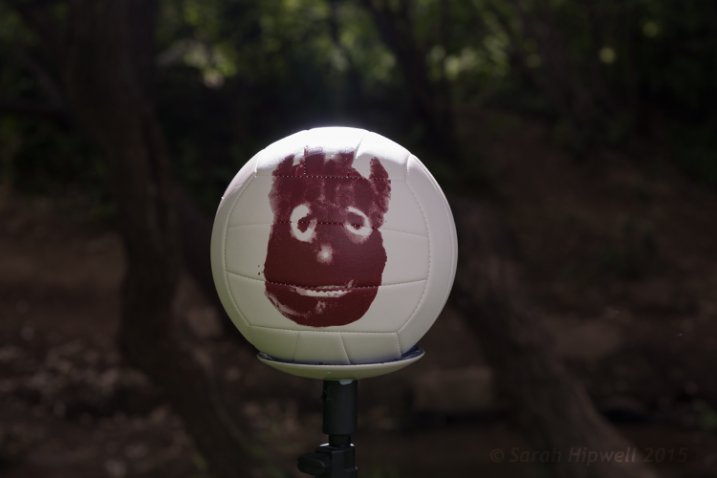
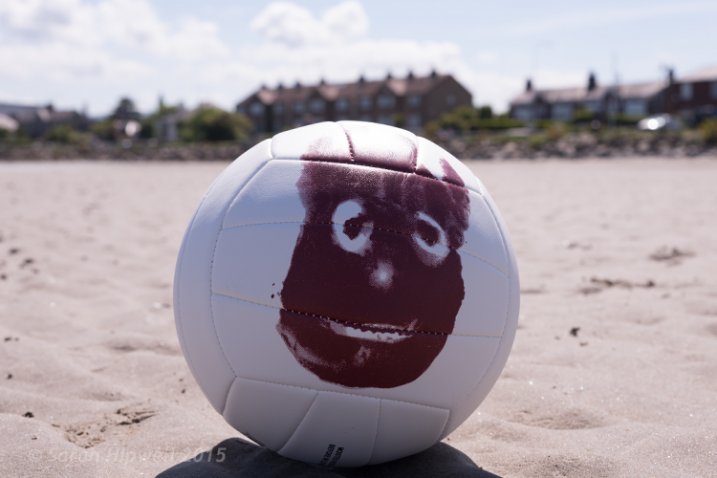
Good light on your subject’s face is most important in a portrait. I look for good lighting before I look for a good background. The easiest lighting to work with for beginners is an overcast day (if that’s the way the cards fall that day) or shade. On an overcast day, try having your subject facing toward the light source. Even if it’s cloudy, often the direction you have your subject face will either illuminate their eyes or put their face in shadow. If you’re not sure which direction to have him face, just rotate until you have that aha! moment when the light is just right.

You might find shade on the shady side of a building (subject facing out towards the light) or in the shade of trees, but if the light is patchy in the trees have your subject put her back towards the sun. You don’t want to have dappled light on her face, or half-shadow and half-sun. Try to have the light as even on her face as possible. Also, avoid having full sun on your subject’s face. This can cause harsh shadows and make it almost impossible for some not to squint their eyes.

Expose for the face for portraits, even if it causes your background to not be exposed correctly. In a portrait, the person is obviously the most important part, so this makes sense.

175


6. Don’t Worry About the “Rules”

It’s important to learn all you can about the rules of photography. Learn them, practice them, use them. Then be creative and have some fun without worrying too much about the rules. If you’re making a portrait, the eyes don’t have to be looking at the camera. The photo doesn’t always have to be divided into the rule of thirds. You don’t have to do what everyone else is doing, either. Be true to yourself and have fun with it! When you create a portrait of someone, it can be truly unique. Nobody else will be able to take that same photo in that same light with that same expression. Make sure it represents who you want to be as a photographer and make sure it represents the person you are creating a portrait for.

Do you have questions about taking portraits? I’d be happy to answer everything I can in the comments. I’d also love to see your favorite portraits you’ve taken!

156


googletag.cmd.push(function() {
tablet_slots.push( googletag.defineSlot( “/1005424/_dPSv4_tab-all-article-bottom_(300×250)”, [300, 250], “pb-ad-78623” ).addService( googletag.pubads() ) ); } );

googletag.cmd.push(function() {
mobile_slots.push( googletag.defineSlot( “/1005424/_dPSv4_mob-all-article-bottom_(300×250)”, [300, 250], “pb-ad-78158” ).addService( googletag.pubads() ) ); } );

The post 6 Tips to Get Started with Portraits by Melinda Smith appeared first on Digital Photography School.


Digital Photography School

 
Comments Off on 6 Tips to Get Started with Portraits

Posted in Photography


Tips for Getting Started with Urban Landscape Photography

08 Sep

2-for-1 special

As part of Landscape Photography Week here on dPS, we’re offering TWO for the price of ONE on our best-selling Living & Loving Landscape Photography ebooks!

Click here to take advantage of this offer.


Memorable Jaunts Urban Photography Article for Digital Photography School Downtown Chicago Skyline as seen from Museum campus

My friends always joke that if I had my way I would pack my belongings, load up the family car, and head to the mountains to live out the rest of my days away from all the chaos of city life. What a happy dream, and one that someday I hope to make a reality, but for now I live in a urban city as far away from mountains as you can get. Urban living does have some benefits, in that it presents some wonderful photographic opportunities, if you know where to look and how to go about it.

There is some confusion among photographers between the terms: urban photography and street photography. Technically they are quite similar, and it is very easy to overlap the two, but here’s how I look at them. To me, urban photography portrays the urban landscape (e.g. buildings, bridges, structures, monuments, etc.) and does not necessarily include people where as street photography often features people or other human elements living in an urban setting. Now keep in mind, urban in itself has different meanings for different people. Wikipedia says, urban is anything related to a city. I like to think of urban as anything that is not rural (e.g. no corn fields, agricultural lands or remote mountain areas). This opens up a whole gamut of photographic opportunities for every pallet.

In general, here are some of the rules or tips I like to follow while on an urban photo expedition.

Preparation

Memorable Jaunts Urban Photography Article for Digital Photography School Dharamsala Monastery Photo

A little prep work paid off as I was able to photograph inside one of the monastery temples in Dharmsala, India

Before going on an urban photography excursion it is very important to be prepared. That not only means packing your gear the night before, and making sure all the cards are formatted and all batteries are charged (although you should do that too), but it is also beneficial to understand where you are going, and how are you going to get there.

What are the traffic patterns? Are there any parking restrictions? Do you need any special permits to photography there? Is photography even allowed? The Art Institute of Chicago is a perfect example. While photography is permitted, they don’t allow large camera bags or roller bags. So a small purse/backpack with a single camera and lens setup is your best bet. Do some research, and ask around if other photographers have experienced any issues in the location you want to explore.

Gear choice

I touched on this briefly already, but most urban photography expeditions are best done on foot where you are free to explore alleyways, buildings and street corners. I don’t know about you, but walking with about 30lbs of gear on my back is not my idea of fun, unless I am backpacking in the mountains! Pack light and carry at most two lenses.

My camera of choice is the Canon 5D MKIII and my go to lenses are Canon EF 24-70mmL zoom and Canon 100mm macro. Sometimes if I am brave, and in the mood for a good upper body workout, I will ditch the 100mm macro and carry my Canon EF 70-200mm. I carry an extra battery for my camera and one extra 32GB memory card. All of these fit comfortably in my backpack.

Shoot smart

Memorable Jaunts Urban Photography Article for Digital Photography School Willis Tower Image Downtown Chicago

A really wide shot of Willis tower with other buildings around it, provides a sense of scale and grandeur of one of the tallest buildings in the world.

Often we tend to photograph first and think later. The mindset of, “I have a limited amount of time so I will take pictures of everything and anything and cull my images later” is one that is very easy to adapt. I am guilty of this as well, and have to consciously remind myself to think first, and photograph later. But challenge yourself to stop being a lazy photographer (I fall into this trap too) and start photographing smart. Especially with urban photography, there is only so much you can portray about a building or a monument. Limit yourself to

  • One horizontal photo of said object/building/monument
  • One vertical photo
  • One zoomed in detail if there is anything particularly appealing
  • One wide angle shot to give a sense of place and space


Memorable Jaunts Urban Photography Article for Digital Photography School Mumbai Sea Link Photo

However a zoomed out, wider view of the entire bridge in the early morning hours with the sea, gives the viewer a true sense of its beauty

Memorable Jaunts Urban Photography Article for Digital Photography School Mumbai Sea Link Photo

A zoomed in view of Mumbai’s famous Sea Link does NO justice what so ever to this engineering marvel.

Angles and Framing

Memorable Jaunts Urban Photography Article for Digital Photography School Pfister Hotel Downtown Milwaukee

Adding the name of this historic hotel in downtown Milwaukee in the frame makes it easy to find, and completes this story.

This tip goes hand in hand with the shoot smart strategy above. Try and get everything correct in-camera so you spend less time in front of the computer, and more time out exploring. I find that when I am out photographing urban scenes, I am shooting in conditions where I don’t have much control – think harsh midday sun, far away subjects, etc. Hence, I pay particular attention to the technical aspects I can control.

When I am framing my subject and composing the image, I try to convey a story. There is no right or wrong way to do it, remember it’s your story, so as long as you can convey your message, go for it. When photographing a really tall building, go wide. If you cannot go wide, then try to either get the top half or the bottom half. Is it a historic site? Are there some special markers or markings? Something that will help explain why you have taken that particular shot?

Experiment with various angles as well – get down low or shoot from high above. I am not a big fan of tilted angles, particularly on urban landscapes. They make me dizzy and I always wonder which way am I supposed to tilt my head to see the image. Unless the building has a natural slant like the Leaning Tower of Pisa, I don’t get the image! Of course, this is just my personal preference. If tilting is your thing, your forte – then go for it. Experiment and see what works for you.

Memorable Jaunts Urban Photography Article for Digital Photography School Chennai Train Station

The name of the train line at the front of the train gives this image a sense of place (and yes, I included people in this urban photo).

Memorable Jaunts Urban Photography Article for Digital Photography School Downtown Milwaukee Photo

An apartment community with boat parking docks is aptly called Harbor Front in Downtown Milwaukee, Wisconsin

End goal

Always have an end goal for any photographic exercise. Goals can vary. Maybe you want to try out new gear, explore modern architecture, or maybe you just want to explore a new city or an old favorite neighborhood though your view finder. No matter what the goal, be clear and set your own expectations.

Memorable Jaunts Urban Photography Article for Digital Photography School Taj Hotel Mumbai Photo

The majestic Taj hotel in Mumbai taken from a roof top building several miles away.

Memorable Jaunts Urban Photography Article for Digital Photography School Downtown Chicago Fountain Photo

A fountain in Downtown Chicago comes alive as the sunlight hits the water flowing out of it (my personal perspective, my story).

Memorable Jaunts Urban Photography Article for Digital Photography School Downtown Milwaukee Photo

I wanted to show the beautiful bridge that acts as an entryway to downtown Milwaukee, and decided to live with the glass refection very obvious against the blue sky (this was taken from the sky deck of the Pfister Hotel).

At the end, when all is said and done, if there is one tip I can give you, this is it – remember to have a good time exploring, and don’t get too caught up in getting the perfect shot. It is okay to put down the camera at times, engage in conversation with others, and also experience the space and place you are in with your mind’s eye! So get out there and explore.


Here on dPS this is landscape week – here is list of what we’ve covered so far. Watch for a new article (or two) on landscape photography daily for the next day or so.

  • 6 Tips for Better Low-Light Landscape Photography
  • Landscape Photography and the Human Element
  • 5 Ways a Telephoto Lens Can Improve Your Landscape Photography
  • Landscape Photography from the Side of the Road
  • 32 Majestic Landscape Photos to Inspire Your Wanderlust
  • Weekly Photography Challenge – Landscape
  • Landscape Photography – Shooting the Same Location Through the Seasons
  • How to Solve 5 Composition Conundrums Faced by Landscape Photographers
  • 6 Tips for Creating More Captivating Landscape Photographs

googletag.cmd.push(function() {
tablet_slots.push( googletag.defineSlot( “/1005424/_dPSv4_tab-all-article-bottom_(300×250)”, [300, 250], “pb-ad-78623” ).addService( googletag.pubads() ) ); } );

googletag.cmd.push(function() {
mobile_slots.push( googletag.defineSlot( “/1005424/_dPSv4_mob-all-article-bottom_(300×250)”, [300, 250], “pb-ad-78158” ).addService( googletag.pubads() ) ); } );

The post Tips for Getting Started with Urban Landscape Photography by Karthika Gupta appeared first on Digital Photography School.


Digital Photography School

 
Comments Off on Tips for Getting Started with Urban Landscape Photography

Posted in Photography


How to Get Started with Off-Camera Flash Photography – Start With One!

16 Jul

I was prompted to write this article in the hope of answering the many questions I get asked about flash photography: “I find flash photography very confusing…What do all those numbers mean at the back of the flash…What does TTL mean…What does flash-sync mean?”

This article isn’t about explaining all the technical ins and outs of flash photography, far from it. Instead, I hope to show you how to get started using off-camera flash, by using ONE flash essentially. Okay, you will need a few other items but I’ll get to that shortly.

Emmet-on-car-bonnet-with-flash

Emmet sitting on the hood of a car. Background created using one speed light attached to the steering wheel inside the car.

I like using speedlights because of their portability. When I use these small flashes, particularly outdoors, I am able to scope and think more on my feet. I am physically moving about and placing the flash, that’s on a light stand, in different positions relative to my subject or object. This allows me to visualise the type of shot I want to achieve. For the purpose of this article, I will use the same gear for all the techniques.

Camera Settings

In order to keep things simple, and not get bogged down in too much technicality, your camera settings can only use ONE aperture setting and ONE shutter speed. The flash can only use ONE power level. Flash level is stated in fractions of full power, such as on my flash: 1/128. 1/64, 1/32, 1/16, 1/8, 1/4, 1/2, up to full power, or 1/1. The camera and the flash are going to be set to manual mode.

When shooting outside, the ambient exposure, which is the available light (sun) is controlled by the shutter speed (and technically the aperture too). Just remember that the ambient light isn’t fixed (like in a studio setup with continuous lighting) so it’s constantly changing.

The flash, being instantaneous, is controlled by the aperture. I’m going to ignore ISO here. Well, I’m not quite ignoring ISO but I’m going to leave it at 100 for quality. Set your flash sync-speed to its maximum, usually 1/200th or 1/250th depending on the camera you are using (check in the manual for your camera if you aren’t sure). This will allow you to use the widest possible aperture.

Exposure

You will need to have a good understanding of exposure and how to change aperture, shutter speeds and ISO settings. See Darren Rowse’s article, Learning about Exposure – The Exposure Triangle for a refresher. Bear in mind that this article isn’t aimed at photographers who are new to photography but photographer’s who are new to off-camera flash.

What gear will you need?

  • A camera and a lens: For the following shots, I used a Nikon D750 with a 24 – 120mm f/4 lens.
  • A stand-alone flash unit that can be adjusted manually.
  • Wireless flash triggers: Nikon has the CLS system, which can fire an external flash remotely.
  • A light stand: I also used a Joby Gorilla tripod as a light stand.
  • A diffuser, or light modifer of your choice: I used a white shoot through umbrella.

Low-light conditions

Amy-no-flash

My daughter taken in low-light.

I literally grabbed my daughter and went outside our house to take the following shots. The first shot, as you can see, was taken with no flash. This was about 5:20pm in the evening.

Amy-with-flash-no-diffuser

The flash is on a light stand, 2-3 feet away on the subject’s left side. The angle is about 35 degrees set to flash level 1/8 power.

For the second shot, I set my flash to 1/8th power, which is where I generally start. I had the flash on a lightstand 2-3 feet away to the left of my model, roughly at 35 degrees angle, with no diffuser on the flash. As you can see, the shadows are too harsh. I wanted to take another shot and move the light stand further back. Unfortunately, the weather changed and it started to rain!

Amy-with-flash-umbrella

I added a shoot-through white umbrella to the flash. Umbrellas are a great modifier to create a much softer light.

This shot was taken the following day, same time and setup. But I added a white shoot-through umbrella on to the flash, to illustrate how effective this modifier is. Umbrellas are so inexpensive, and work really well to create a soft light. You can see that the shadows have become softer but they are still too strong (dark). However, my daughter’s patience ran out and no amount of bribes would make her stay for more shots!

So I took the advantage of the rain and the low light conditions. Instead of a real model, I improvised with Emmet and put him on top of the hood of the car. I attached my flash to the steering wheel inside of the car with a Joby Gorilla tripod. That way, I wasn’t concerned if it started to rain while I was shooting. I had the flash power set to ¼, as I knew the hood of the car would provide a nice bounce. I had never tried this before so it was an experiment for fun; I was happy with the end result.

Emmet-on-car-bonnet-no-flash

Emmet on the hood of a car – no flash fired in this shot.

Emmet-on-car-flash-on-wheel

Flash attached to the steering wheel on the inside of the car.

Title-Emmet-on-car-bonnet-with-flash

Overcast dull days

When days are overcast and dull, it is a good opportunity to get out and start using off-camera flash. The light is even and it acts like a big diffuser. This helps you to concentrate on balancing the ambient light with the flash.

Wilson-overcast-day-no-flash

Wilson shot on an overcast, dull day – background overexposed, sky detail is lost. No flash fired.

I placed the flash (on a Joby tripod) to the left of Wilson, roughly 4-5 feet away with an opaque plastic diffuser on. I wanted the light from the flash to be directed at the same level as Wilson. By adjusting the shutter speed, I was able to expose the background better. I had the flash set to 1/8th power, I wanted just enough fill light from the flash to give Wilson more depth.

Wilson-overcast-day-with-flash

I increased the aperture to bring back some detail in the sky. The flash acted as a nice fill-in or balance against the ambient light.

I moved to a different location but it was the same overcast conditions. This time, I wanted to change the direction of the flash and create a different shot. So I put the flash, still attached to the Joby Gorilla tripod, high up on a branch of a tree.

flash-in-tree

I still had my flash attached to the Joby Gorilla tripod from the previous shot. I then hung it upside-down and wrapped it around the branch of a tree.

Wilson-sun-dapple-no-flash

Wilson set against a backdrop of a woodland. No flash fired.

I wanted to appear as if the sun was shining down through the trees on Willson. By placing the flash high above, and behind Wilson, I was able to achieve this effect. I had the flash power set to ½ and took off the plastic opaque diffuser. I had to take a few shots before I was happy with this one. That’s the fun in this type of shooting, you are experimenting and learning as you go.

Wilson-sun-dapple-with-flash

By hanging the flash high up in the tree, it created a sun-dapple effect on Wilson.

Bright Sunny Days

I love the sun. Especially when there are blue skies and only a tiny whisper of a white cloud. However, in photography terms, this light is too harsh. In the middle of the day, the sun shines directly overhead and usually casts strong shadows on your subject (usually the face). If you face your subject looking into the sun to eliminate these strong shadows, your subject has to squint from the glare of the sun! So, by placing your subject with the sun behind them, your camera metering exposes the background correctly and your subject is too dark. Hence, you meter your subject for a correct exposure and then your background is overexposed.

This is where your external flash comes in handy. I brought Wilson to the beach. The day was sunny and it was late afternoon. I placed Wilson on the sand with the sun behind him.

Wilson-on-beach-no-flash

Wilson at the beach with the sun high and slightly behind him. No flash fired.

The flash was placed to the right of Wilson about four feet away. I had the diffusion plastic dome on the flash.

I didn’t achieve the shot I wanted when I reviewed my photos later on the computer. I noticed a slight hotspot on Wilson which is always a dead giveaway that you have used a flash. I wanted a nice balance between the ambient and the fill-in light from the flash. In hindsight, I should have experimented more by taking shots with the flash moved back or changed the direction slightly. As the day was very bright, I had set the flash power to ½, so I could have dialled it down! A good tip here, would be to take notes of your setup, so that you have a benchmark for similar future setups.

Wilson-on-beach-with-flash

Flash was to the right of Wilson, four feet away with a transparent dome diffuser on. Flash power set to 1/4.

Wilson-on-beach-rushes-no-flash

Another shot of Wilson on the beach. No flash fired.

Wilson-on-beach-rushes-with-flash

I placed the flash to the right of Wilson and the flash had to fire through the grass.

Tips:

  • Experiment with the distance of your flash relative to your subject as well as the direction.
  • If you are using an umbrella, get lots of sand bags to weigh the stand down firmly, or preferably get somebody to hold it. This is especially important on a breezy, or windy day. The light stand will take off like a kite with the umbrella attached. This happened to me. The umbrella broke but thankfully my speedlight suffered no damage. After all, umbrellas are way cheaper to replace than flashes.
  • Start with a low power level on your flash, such as 1/16 or 1/8th.
  • Put the flash sync-speed to the maximum to give you more latitude with your aperture.
  • Keep practicing before you’re ready to move on.

Conclusion

I hope that I’ve convinced you that off-camera isn’t as daunting as it may seem. However, it isn’t a one-click effect. It does take a bit of mastering. Don’t be afraid of not getting it right first time. If you can’t get a willing subject or model, go get yourself a Wilson! I chose a ball as it’s round and is a good substitute for a face. (Plus you don’t need to bribe a ball).

Do you use off-camera flash? Have any other tips for beginners? If so please share in the comments below.

googletag.cmd.push(function() {
tablet_slots.push( googletag.defineSlot( “/1005424/_dPSv4_tab-all-article-bottom_(300×250)”, [300, 250], “pb-ad-78623” ).addService( googletag.pubads() ) ); } );

googletag.cmd.push(function() {
mobile_slots.push( googletag.defineSlot( “/1005424/_dPSv4_mob-all-article-bottom_(300×250)”, [300, 250], “pb-ad-78158” ).addService( googletag.pubads() ) ); } );

The post How to Get Started with Off-Camera Flash Photography – Start With One! by Sarah Hipwell appeared first on Digital Photography School.


Digital Photography School

 
Comments Off on How to Get Started with Off-Camera Flash Photography – Start With One!

Posted in Photography


DIY 101: How to Get Started with Product Photography

23 Jun

My role as a stay-at-home parent, along with my work as a blogger, means I’m stuck in the house more often than not. I love what I do, both as a writer and parent, but I do find myself lacking for photographic subjects. Everyone in my home, including the cats and dogs, seems to be camera shy. So I began Continue Reading

The post DIY 101: How to Get Started with Product Photography appeared first on Photodoto.


Photodoto

 
Comments Off on DIY 101: How to Get Started with Product Photography

Posted in Photography


Getting Started with Abstract Macro Photography

26 May

Editor’s Note: This is part a series on macro photography this week. Look for a new one each day. The next newsletter will have them all if you miss any!

Lines and light can emphasise your subject

Lines and light can emphasize your subject

Macro photography truly is a unique genre of photography. In most of the other types of photography (landscape, portrait, sport, etc.) you want to get the context of your scene in the image. In macro photography, you can literally focus in on what’s important and remove any distractions by simply getting closer. One of the best things about macro photography is that you can do it anywhere, all you need is something to photograph. In my previous article: Getting Started Guide to Macro or Close-Up Photography, I went into some details about what you will need to get started in macro photography. Take a look at that article to be sure that you understand more about the genre of macro photography.

In this article we are going to be looking at getting great abstract images using macro photography.

Look for shape and colour

Look for shape and colour

What is abstract macro photography?

Abstract photography in general is about representing a subject in a non-literal way. The focus of abstract photography is more about colour, shape, and texture as opposed to the literal representation of the subject. Abstract macro photography, takes this to the next level by enabling you to get even closer to your subject, and therefore also able to be more abstract in a sense.

The same guidelines around composition apply, you can use the rule of thirds, curves, and lines to draw the viewer into the image. The difference is, the subject may not be immediately recognizable, your centre of interest might be a colour or a curve of a flower. So for abstract macro photography, you will need to think a little differently.

Abstract close up of a lily

Abstract close up of a lily

What will I need?

You will need a macro lens if you want to get in really close. You can use a prime lens like a 50mm, or even an 85mm lens, but for this type of work, a macro lens will work best. The reason is that you want be able to get in close enough to remove all distractions; in other words, you want to fill the frame with your subject. With a macro lens, you can do this. Most macro lenses have the ability to focus on subjects that are really close to the lens. The prime lenses can focus on subjects that are reasonably close, but you may not be able to get in close enough to remove the background.

You will also need to use a tripod. The close focusing ability of the macro lens means that it is very easy for your subject to become out of focus with the slightest movement. Ideally, you will want to have you camera set up with your macro lens mounted, then get that in as close as possible to your subject. Next, you will want to set your aperture to f/8, or higher, and then click onto manual focus to get your subject good and sharp in the frame.

Frayed rope abstract

Frayed rope abstract

What can I photograph?

For abstract macro photography, I find that organic items work best. By organic I mean flowers, wood, fruit, vegetables, and so on. That does not mean you can’t photograph an abstract macro image of a computer keyboard or a coffee cup, but sometimes, these well known shapes are difficult to transform into abstract images. If you are going to photograph a product like a computer or another manufactured product, try shooting it from a different angle or get in very close so that any telltale signs of what it is, will be lost. Ultimately, you can photograph anything that you think will work, but start out with some easy subjects first,  then move on to the trickier ones.

Buds about to bloom

Buds about to bloom

Try this…

Set up your subject and get your camera in position. Look through the viewfinder and start working on your composition. Try some of these pointers to get started and work from there:

  • Work on building your composition – are there any curves, lines, shapes ,or colours that you want to emphasize?
  • Use manual focus to bring even a small part of your image into sharp focus, this will be your centre of interest.
  • Make sure your centre of interest is obvious. In other words it should be in focus, it can be a different colour to the rest of the frame, or it can even be a well defined line or shape in the image
  • Check the exposure to make sure that you are exposing your scene correctly.
  • You can even overexpose slightly. In abstract macro photography, some slight overexposure is okay, as long as it does not distract from the rest of the image
  • Capture the shot
  • Try shooting the same image from a different angle and maybe even a different centre of interest.
  • Take as many images as possible, from different angles, with different focal points.
  • Choose the best three images and edit them in your chosen image editing software.

This is a great indoor project, but you can try this outside too. Shooting macro images outside can be more challenging as the subject may be affected by changes in lighting. If it is a flower or a plant, there may be a slight breeze which can move the flower as you are trying to photograph it. The most important thing is to try this type of photography if you can. It will cause you to think creatively and to look for different things in your image setup. Give it a try and load up your results below – let’s see what you get.

Abstract of a lily leaf

Abstract of a lily leaf


macro-coverWant to learn more about macro photography? Check out Ed Versosky’s Introduction to Close-Up & Macro Photography ebook – just $ 10 (over 30% off) this week with coupon code: DPS. You will need to enter the code to apply the discount.

googletag.cmd.push(function() {
tablet_slots.push( googletag.defineSlot( “/1005424/_dPSv4_tab-all-article-bottom_(300×250)”, [300, 250], “pb-ad-78623” ).addService( googletag.pubads() ) ); } );

googletag.cmd.push(function() {
mobile_slots.push( googletag.defineSlot( “/1005424/_dPSv4_mob-all-article-bottom_(300×250)”, [300, 250], “pb-ad-78158” ).addService( googletag.pubads() ) ); } );

The post Getting Started with Abstract Macro Photography by Barry J Brady appeared first on Digital Photography School.


Digital Photography School

 
Comments Off on Getting Started with Abstract Macro Photography

Posted in Photography


POLL: What do you wish you understood better when you started photography?

23 Feb

Let’s get a discussion going on what you wish you understood better when you first got in to photography. Please fill in the poll below, you can check off up to three choices, and add your comments below.

If it’s not listed check off “other” and add a comment.

What was your biggest obstacle? What did you struggle most to understand?

Note: There is a poll embedded within this post, please visit the site to participate in this post’s poll.

googletag.cmd.push(function() {
tablet_slots.push( googletag.defineSlot( “/1005424/_dPSv4_tab-all-article-bottom_(300×250)”, [300, 250], “pb-ad-78623” ).addService( googletag.pubads() ) ); } );

googletag.cmd.push(function() {
mobile_slots.push( googletag.defineSlot( “/1005424/_dPSv4_mob-all-article-bottom_(300×250)”, [300, 250], “pb-ad-78158” ).addService( googletag.pubads() ) ); } );

The post POLL: What do you wish you understood better when you started photography? by Darlene Hildebrandt appeared first on Digital Photography School.


Digital Photography School

 
Comments Off on POLL: What do you wish you understood better when you started photography?

Posted in Photography


Getting Started with Off-Camera Flash

10 Feb

Does the thought of attempting off-camera flash sound intimidating? If so, you’re not alone! Many photographers gravitate toward natural light or simple flash setups when tackling photo projects, but the truth is that mastering off-camera flash is one way to really make your work stand out from the rest. Best of all, it isn’t as complicated as it might seem. For this demonstration, forget about strobes, soft boxes, beauty dishes, umbrellas, and all of those gadgets. We’re going very basic with a simple speedlight – no light modifiers needed!

Basic off camera flash product photography

Basic Off-Camera Flash Equipment

To get started with off-camera flash, you need a lighting source. Arguably the most portable and convenient flash is a speedlight. When choosing a speedlight, be sure to consider features such as an articulating head that allows you to angle the direction of your flash, and connection ports for external battery packs and pc sync cables. Most flashes require four AA batteries to function and the power of the flash can suck up batteries really quickly; ports to external battery packs offer options to keep the flash powered longer and reduce recycling times. The pc sync port is also important as many trigger options will require this to connect your camera to the flash. Be sure that your flash includes these aforementioned ports. My Canon 430 EXII backup flash, while cheaper and smaller than the 580 EXII, fails in this sense since it lacks the battery port AND pc sync port.

Next, you need a way to sync the flash with the camera. The easiest way to do this is by using an inexpensive sync cord, although depending on your flash and camera models, you may need to purchase adapters such as the universal translator. Another more expensive, yet arguably more convenient option, is to use wireless flash transceivers. PocketWizard is probably the most well known in this department. One transceiver connects to your camera via the hot shoe mount and another connects to your speedlights via the pc sync port. These triggers are very dependable and durable, but they are pricey, costing as much as $ 149 each for the newest PocketWizard Plus III models.

For those on a budget, there are many cheaper, and just as high quality, transceivers out there. While I’ve been using PocketWizards for a couple of years, I recently invested in four Yongnuo RF-603 II wireless transceivers. Costing just $ 31 for two triggers, they connect to both the camera AND the speedlight via the hot shoe mount; this makes it much easier to sync flashes without the pc sync port, such as the cheaper 430 EXII. As an added bonus, the Yongnuo transceivers can also double as remote triggers by activating the shutter on your camera. If you’re on a budget or just getting started with flash, the Yongnuo transceivers are a great low-cost investment.

The final piece of gear that you should have is a light stand to support your speedlight. Light stands are lightweight and pretty cheap, but you’ll want to make sure that they include an adapter to hold your flash.

Off-Camera Flash in Action

The following demonstration uses the basic tools mentioned above – a Canon 6D, 580 EXII flash, two PocketWizard Plus III transceivers, and a light stand with a swivel umbrella adapter. The photography subject is a wooden sculpture procured during a vacation in Mexico, sitting on a bamboo mat, with a colorful quilt as a background. The bare flash with no modifier is situated camera left, and there is some natural window light coming from camera right.

Off Camera Flash setup

With the camera set at 1/160 for shutter speed, f/2.8 aperture and ISO 250, the natural light shot as seen below isn’t half bad, but the left side of the product is a bit shadowed.

Basic off camera flash product photography

Enter the speedlight! If you aren’t familiar with a speedlight, all of the buttons and controls on the back can look intimidating, but the first button to be familiar with (besides the “on” switch) is the “Mode” button. This is what you hit to get from ETTL (automatic) to M (Manual) to Multi (for firing repeated flashes during a single long exposure). Leaving the flash on ETTL is fine when the flash is connected to your camera’s hot shoe mount, but it can produce disastrous, blown-out photos when the flash is moved off-camera. I won’t waste a photo showing you the result, but the resulting image is completely blown out and unsalvageable.

In order to adjust the off-camera flash’s output to better sync with your camera settings, it’s time to switch the flash onto Manual mode. Simply press the Mode button until M shows up on the flash LCD. Then, start playing around with the flash’s output. On the bottom portion of the flash, press the middle button that reads SEL/SET that is surrounded by the Select Dial. Numbered fractions will appear blinking in the LCD. Turn the Select Dial clockwise to change the numbers, going from 1/1 down as far as 1/128. The result below is shot at the same camera settings, but the off-camera flash firing at camera left at 1/16 power. The resulting image below is still blown out, but not nearly as bad as when the flash fires on ETTL mode.

Basic off camera flash product photography

Flash power set at 1/16


To continue balancing out the overpowering flash, dial the power down to 1/64. The result is much more balanced.

Basic off camera flash product photography

Flash power set at 1/64


Take the flash power down even lower to 1/128, and the photo subject is a bit more shadowy, adding more edge to it and really separating it from the background.

Basic off camera flash product photography

Flash power set to 1/128


This is just the start to experimenting with off-camera flash; many other variables such as camera settings, modifiers, and multiple light sources can produce similar and superior effects. However, the first thing to realize is how dramatic effects can be by just playing around with a single speedlight flash and its the manual settings.

googletag.cmd.push(function() {
tablet_slots.push( googletag.defineSlot( “/1005424/_dPSv4_tab-all-article-bottom_(300×250)”, [300, 250], “pb-ad-78623” ).addService( googletag.pubads() ) ); } );

googletag.cmd.push(function() {
mobile_slots.push( googletag.defineSlot( “/1005424/_dPSv4_mob-all-article-bottom_(300×250)”, [300, 250], “pb-ad-78158” ).addService( googletag.pubads() ) ); } );

The post Getting Started with Off-Camera Flash by Suzi Pratt appeared first on Digital Photography School.


Digital Photography School

 
Comments Off on Getting Started with Off-Camera Flash

Posted in Photography


Mastering Family Photography: What You Need to Get Started

29 Sep

One thing that I shoot my fair share of is family pictures. I love the family dynamic so much… the “over primpers”, the “get me out of here’s”, the “I’ll be in the picture, but I’m going to ruin every single shot”, the “smile or I’ll beat the snot out of you later’s” and the “gee, we’ve known that we Continue Reading

The post Mastering Family Photography: What You Need to Get Started appeared first on Photodoto.


Photodoto

 
Comments Off on Mastering Family Photography: What You Need to Get Started

Posted in Photography


Getting Started Guide to Macro or Close-Up Photography

22 Aug
Close up photos of flowers can make for interesting colours and shapes

Close-up photos of flowers can make for interesting colours and shapes

There is something magical about seeing a subject up close and personal. This opens up a whole new world of options for you as a photographer. Close-up photography, or macro photography, can be a very rewarding form of photographic expression. The great thing about it is that you can do this from your basement at home, if necessary. Of course you can, and should, go outdoors too and setup shots in a forest or at the sea, but you can also setup shots of everyday subjects and shoot them up close.

Think of an old watch, a flower or even some food items that could be shot on your kitchen table. The shapes, textures and colours come to life in the world of macro photography, but it can be tricky and fidgety. Sometimes beginners are put off by this aspect and assume they need specialist skills to make close-up images. This is not necessarily true. Like any other aspect of photography, you need to understand how your camera works, and work within the limits of the equipment you have. Do you NEED to have a macro lens? In short, no. There are a few other cheaper options that you can experiment with before investing in a macro lens. Let’s take a look at how you can get going in close-up photography. This is really an introduction article, and I will be putting together some more detailed articles on the various aspects of macro photography, but first, let’s start with the basics.

Sometimes overexposing or underexposing can add to the image

Sometimes overexposing or underexposing can add to the image

1. Get as close as you can

This sounds obvious, but try it. Set your camera up on a tripod, choose a subject (anything will do really) and get your camera up close to the subject. Switch your camera to Manual focus. You can try autofocus, but generally you will be able to focus a little closer on manual focus. If you are using manual focus, the tripod will be important. There is nothing worse than trying to get your subject in focus when you are off balance, or you keep moving, so use the tripod. Once you have your subject in clear focus, look at the composition, just as you would with any other image. Use the various composition guidelines to put your image together and take the shot.

This is just the beginning, you will find that you will make minor adjustments and shoot another shot and so on. I find that when I do close-up or macro photography I get lost in this small world of intimate details. When you look through the viewfinder, try and visualize it as a small world or a small landscape scene. Pretty soon you will find that you will be totally swept up in it and that is the fun part.

Getting in close will help to isolate the subject and throw the background out of focus

Getting in close will help to isolate the subject and throw the background out of focus

2. Do I need a macro lens?

To do some great close-up shots, you won’t need a macro lens. You can use almost any lens to make close-up images. Bear in mind that each lens has a minimum focusing distance. This can range from a few centimetres (1-3″) to half a meter (20″) depending on the lens. Telephoto lenses will have a longer minimum focusing distance, while medium range lenses (24-70mm) will have a closer focusing distance. The difference between macro lenses and non-macro lenses is that a macro lens has a much shorter focusing distance (30cm/1 foot or closer) in most cases.

Also, a macro lens has a magnification ratio of 1:1. What that means is that the lens can reproduce the subject onto the sensor at it’s actual life size. So if your subject is 20mm in size and it is captured as 20mm on the sensor, that means it has a 1 :1 ratio.  Some lenses can only reproduce a 1:2, or 1:3, ratio which means that the subject will be half the size or less, on the sensor, relative to the size of the subject. I would suggest that you try close-up photography with the range of lenses you have. See which one works best. Prime lenses are usually a good place to start as they have great clarity and sharpness. I used my 50mm f/1.8 for a long time before I invested in a macro lens. Once you feel that you are limited by your lenses or that you think macro photography is a genre you want to expand on, only then consider buying a macro lens.

This image was shot with an old 70-300mm lens at F4

This image was shot with an old 70-300mm lens at f/4

3. What can I photograph?

The beauty of close-up photography is that – when one properly, a shot of a cup of coffee can be fascinating.  Suddenly the pattern in the latte cream looks amazing, the bubbles and cup shape become very intriguing. We very rarely look at everyday subjects up close and when we do, they can be really interesting. The same is true for flowers, an aged piece of wood, electronic goods, even a knife and fork, just about anything can become a subject for macro photography.

Some of the more challenging subjects are those that move. Subjects like insects, flowers, leaves, grasses and any other subject that is outdoors. For these, you will need more patience and better timing. Photographing a close up of a flower on a windy day will be really tough. If you want to do macro photography outdoors, maybe start off doing it on a windless day or in a sheltered area. Alternatively, you could go and buy some cut flowers and set them up in a vase, setup the shot and take a few images. The controlled environment of the flowers in a vase will make things much easier. Insects are even more challenging. They sit still for very short periods and move very quickly.

The name of the game to get good insect macro shots, is to be patient. To get some honeybee images in the past, I have set up my camera on a flower and attached my cable release. I then manually focused the lens to the flower and simply waited until a bee or another insect was in the right place and snapped off a few shots. Generally one in ten shots were usable and I was pretty happy with that, but they take time and patience.

Be patient and set up your shot beforehand when shooting insects

Be patient and setup your shot beforehand when photographing insects

4. Where to from here?

I found that I really enjoyed close-up photography. Once I got into it, I spent many hours trying to get some unusual images of flowers or insects. You may find this too. Get your tripod, cable release, choice of lens and set up a scene either indoors or outdoors. Get in a close as you can and start working with the scene. Change your depth of field until you are happy with what is in focus and what is out of focus. If you are using a macro lens, be careful about shooting with a very shallow depth of field. F/2.8 will mean that a VERY thin sliver of your scene is in focus, and that can be difficult to work with at first. Start at f/8 and work from there.

Experiment with different exposures, sometimes a slightly overexposed macro scene can look good, so play around with that. Above all, have some fun. Use it as an exercise in learning more about photography, and try and get some dynamic images too! In a future article, I will go into more details about settings and exposure modes. In the mean time, start shooting some close up images and let’s see how things look.

A close up of a poppy flower, the details are what is mesmerising!

A close-up of a poppy flower, the details are what is mesmerising!

For more information on macro or close-up photography check out these dPS article:

  • Equipment for Macro Photography – Video Tips
  • 6 Tips for Near-Macro Photography with a Telephoto Lens
  • How to Focus-Stack Macro Images using Photoshop
  • The Wonderful World of Macro Lenses: Close-Up Photography Lesson #4
  • Reverse Lens Macro: Close Up Photography Lesson #3
  • Extension Tubes: Close Up Photography Lesson #2
  • Getting Up Close with Close-Up Lenses

The post Getting Started Guide to Macro or Close-Up Photography by Barry J Brady appeared first on Digital Photography School.


Digital Photography School

 
Comments Off on Getting Started Guide to Macro or Close-Up Photography

Posted in Photography


How To Finish the Photography Project You Started

28 May

It’s inevitable that, at some point, your motivation will lag on that photography project you started. Whether you’re working on a popular photography project, such as taking a photo every day for a year (the 365-day project), walking the streets shooting strangers (the 100-strangers project), or working on a custom project you dreamt up…no matter what, one day you can Continue Reading

The post How To Finish the Photography Project You Started appeared first on Photodoto.


Photodoto

 
Comments Off on How To Finish the Photography Project You Started

Posted in Photography