As a landscape photographer, it can be easy to find stunning subject matter to photograph during the day. At night, things become more difficult as the sun goes down, but there is still plenty to photograph. With some patience, you can create stunning images featuring the stars as your backdrop, or even your subject.
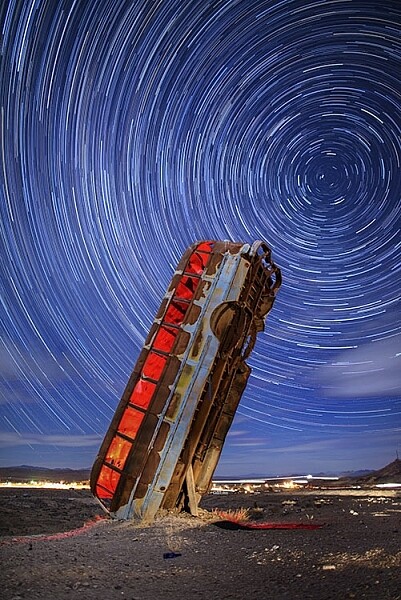
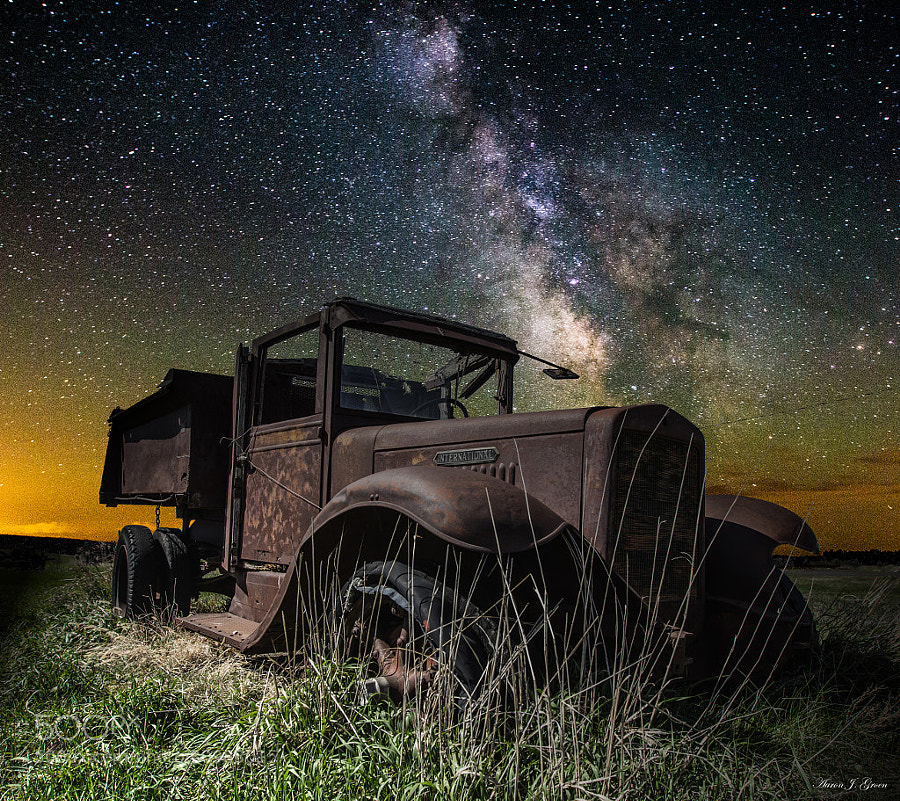
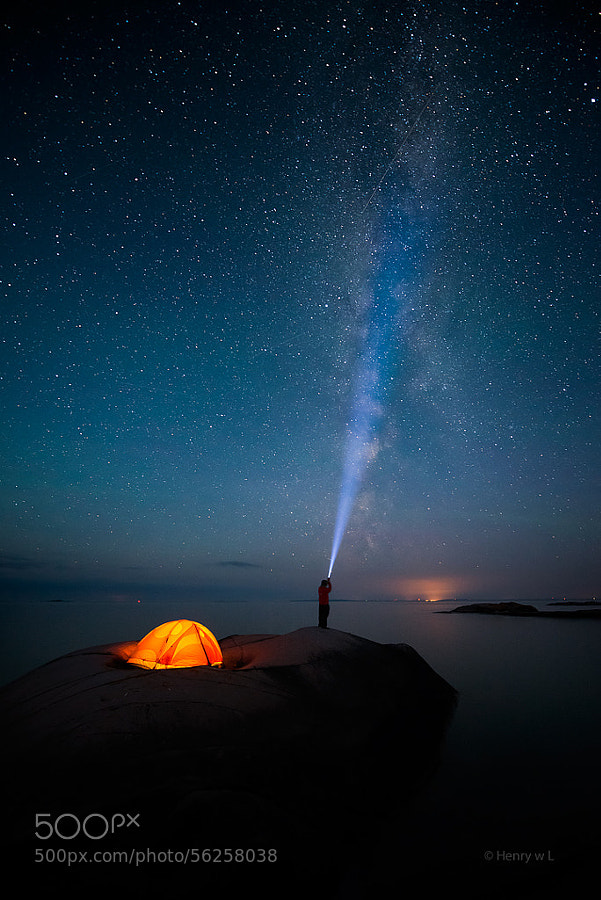
This image is a composite of 156 separate exposures, merged using StarStax software. Each exposure was ISO 400, f/2.8, 30 seconds. The red glow inside the bus was done by shining a red LED flashlight inside the bus from the other side, during one of the exposures.
Equipment list
Before you get started, you’re going to need a few things:
- A good sturdy tripod is absolutely essential, I’m using an Induro GTT204M2.
- A wired remote for your camera is also a necessity. Which model you use will depend on the camera you have.
- A fully charged battery is a must. The vertical grips that are available for some cameras, allowing you to use two batteries at once for longer life, can also be helpful.
- A flashlight can come in handy, both for finding your way to the location, and for light painting in the foreground.
- Finally, a large memory card, or two if your camera has dual slots, will be needed.
#1 – The One-Shot Method
There are two ways to photograph star trails. The first is the old-fashioned way, using a single exposure.
For this method, exposures can range anywhere from several minutes, to several hours. This method was the only way to photograph star trails in the days before digital cameras. When using the single exposure method, your camera needs to be in manual mode, with the shutter speed set to Bulb. Some cameras have a separate mode for Bulb. It is like manual mode, but the shutter stays open for as long as the release button is depressed. A time controller such as the Nikon MC-36A, or Canon TC-80N3 can make things easier by allowing you to lock the shutter button down, or program a set amount of time for the exposure.
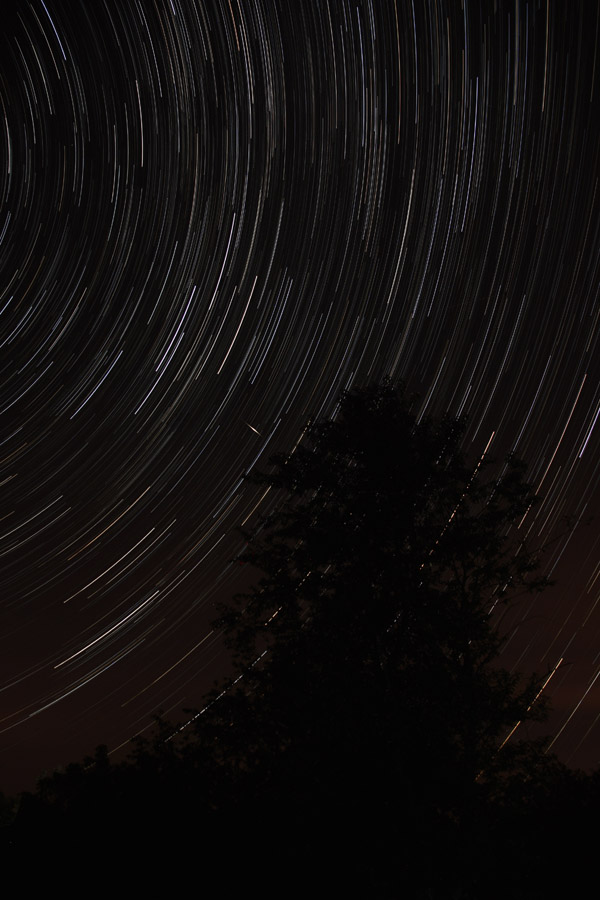
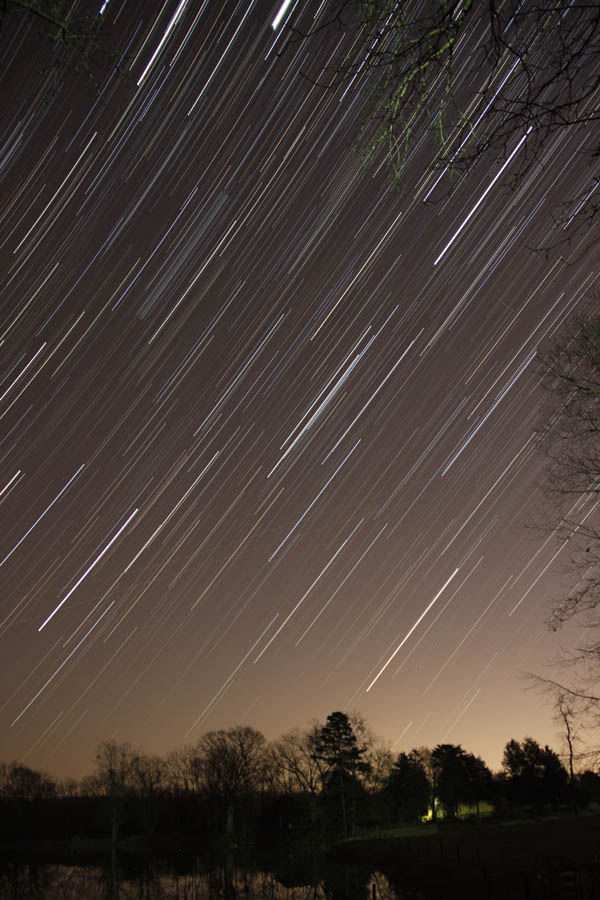
ISO should be set to 400. You’ll want to set your aperture somewhere around f/4. The wider the aperture is open, the brighter the star trails will be. If you are photographing in a completely dark setting, with no moonlight, the stars will likely be the brightest object in your scene. Once you’ve set your aperture, you need to decide how long a star trail you want. The longer the exposure, the longer the trails. The image below was a 30 minute exposure.
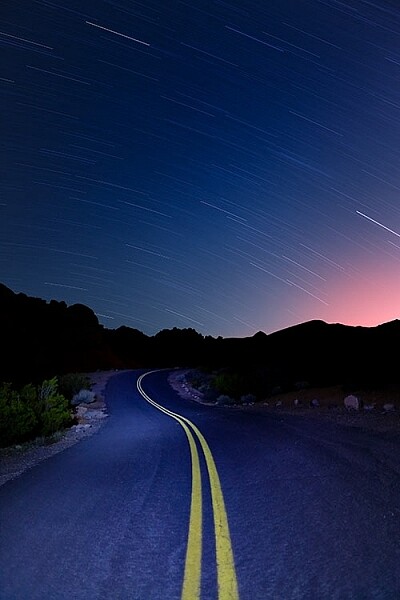
This image was created as a single exposure. Exposure time was 30 minutes, ISO 100, f/5.6. The star trails are dimmer due to the smaller aperture, the fact that the moon was still in the sky, and light pollution from the city in the distance, seen as the glow to the right. The street in the foreground was painted with an LED flashlight for several seconds during the exposure.
One thing you need to be concerned with when using a single long exposure is Long Exposure Noise Reduction. If you choose to photograph star trails using a single exposure, the heat generated on the imaging sensor adds noise to the image. Turning on Long Exposure Noise Reduction reduces that noise by using a method known as dark frame subtraction. I previously discussed dark frame subtraction in the article The Night Sky In Landscape Photography. Long Exposure Noise Reduction doubles the length of time needed to make an image. The camera first takes the exposure. In this case, let’s say the exposure is one minute.Long Exposure Noise Reduction then requires another minute to reduce the noise created by the long exposure. That means if you make a star trail exposure for 15 minutes, your camera will be unavailable to take another picture for 30 minutes. You’ll need to make sure you have enough battery to keep the camera powered while it carries out Long Exposure Noise Reduction.
This is a single exposure of 10 minutes, ISO 400, f/5.6.
In addition to Long Exposure Noise Reduction, another consideration is the length of the exposure itself. There is nothing worse than standing next to your camera while it makes a 30 or 45 minute exposure, and two-thirds of the way through the exposure, a car goes past, shining its headlights across the scene and ruining the exposure. It’s happened to the best of us.
#2 – Merging Multiple Exposures
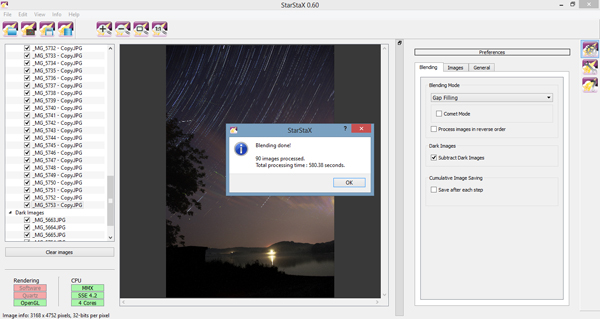
This is where the second method for photographing star trails comes in. With the advancement of digital imaging, stacking multiple exposures has become possible, and has made creating star trail images easier than ever. By taking a series of drastically shorter exposures, then stacking them in software such as StarStaX, you can increase your flexibility as a photographer, because there are two benefits to this method. The first is that since the exposure are shorter, you can turn off Long Exposure Noise Reduction. The second benefit is that even if a car drives by to ruin the exposure, it’s only one small piece of the sequence, so you can just delete the one frame that was ruined.
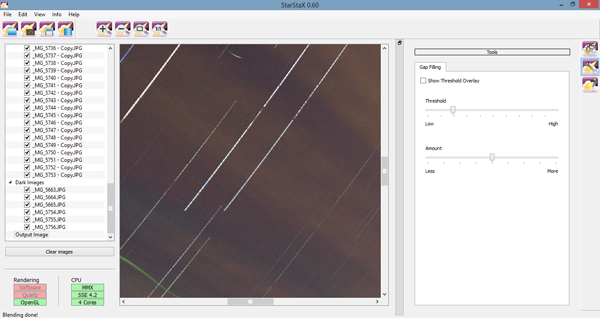
StarStaX works by blending a series of images, allowing you to capture the motion of stars in the sky, similar to a single exposure. The one drawback to using software like StarStaX is if clouds are also moving across the sky, it has a tendency to create a stepped shape with them that doesn’t look natural. Better Star Trails Photographs with StarStax is an excellent tutorial for using StarStaX.
Camera settings
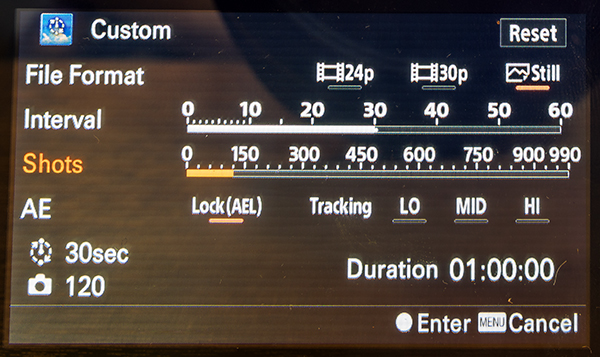
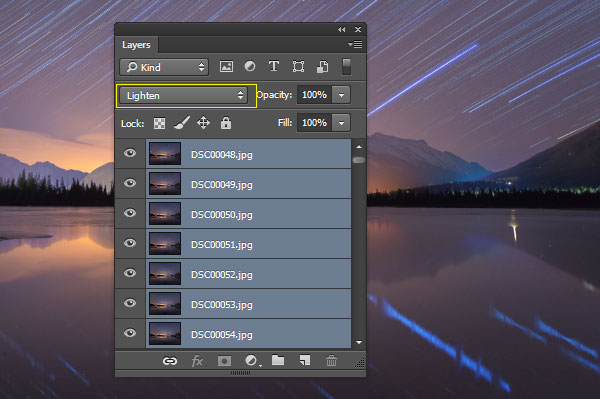
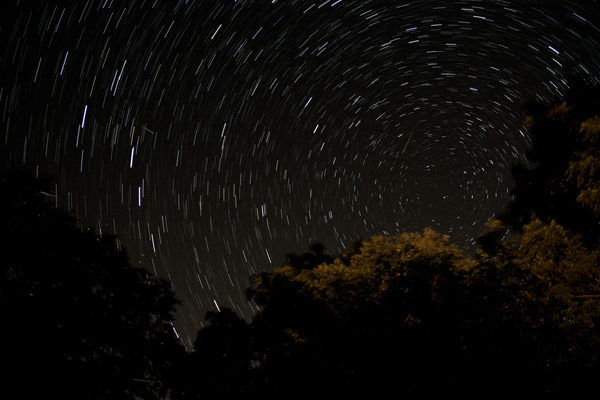
To use the stacking method for shooting star trails, set your camera to Manual mode and your camera’s drive to Continuous. Start with your aperture set to f/4. This setting can be adjusted, but the wider the aperture, the brighter the trails. However, be careful to ensure you have enough depth of field, and aren’t overexposing the stars. Shutter speed will be 30 seconds. ISO should be set to 400. Using the time controller or remote for your camera, release the shutter, and use the locking mechanism to keep the shutter button on the remote depressed. With the camera in continuous drive mode, as each exposure ends, another will begin until you stop it. This also minimizes the pause between each exposure, which can cause small breaks in the star trails when the exposures are merged. Alternatively you can use an intervalometer feature if you camera has that, or similar type of remote.
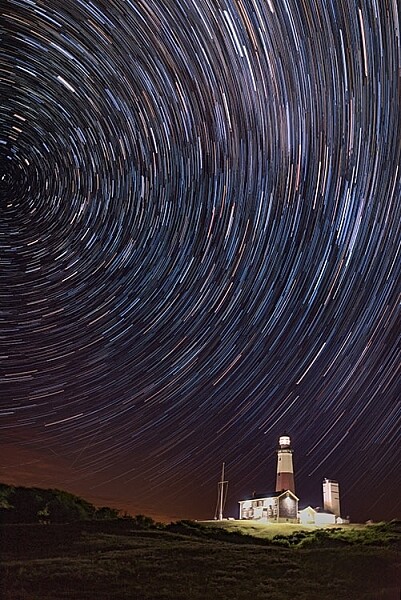
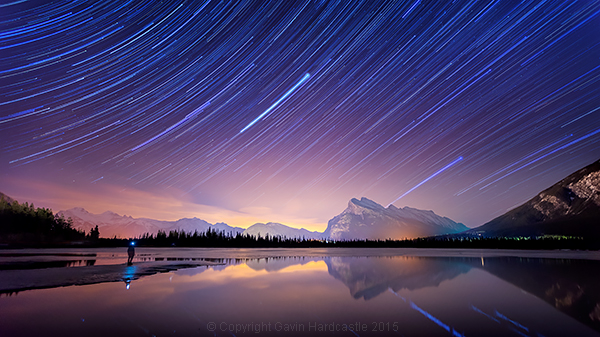
This image is a combination of 121 exposures merged in StarStaX. Each exposure was 15 seconds, ISO 400, f/1.4. To keep the lighthouse from being so bright that it would overpower the star trails, a 3-stop soft-edged graduated neutral density filter was used.
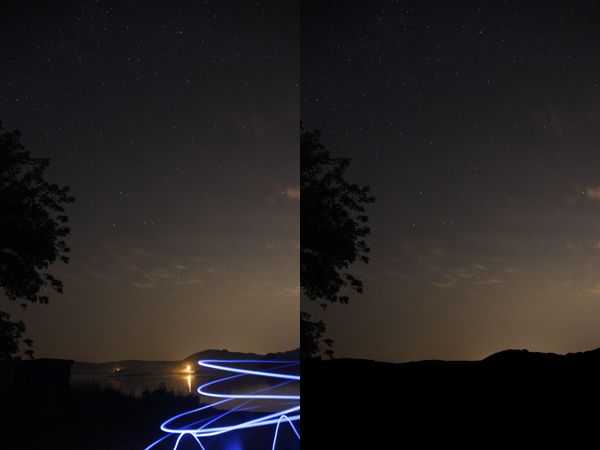
It can be easy to forget the rules of composition when photographing star trails, so don’t get so fixated on the stars that you forget to look at the foreground as well. Chances are your foreground will be shrouded in darkness. A flashlight can come in handy for painting the foreground object with light to make it stand out in the darkness. Colored gels can allow you to get creative with the light painting. When stacking images, you’ll only need to illuminate your foreground for a single frame, as StarStax will use the illuminated exposure for that foreground object.
By the same token, there may be a time where your foreground object is brightly illuminated, as with the lighthouse image above. So I carry a set of graduated neutral density filters, even when shooting at night. For the lighthouse image, I mounted a Vü filters 3-stop soft-edged ND grad on my lens, so that the dark side of the filter was over the bottom half of the frame. This allowed me to keep the lighthouse exposure dim enough to still allow the stars to register in the exposure as well.
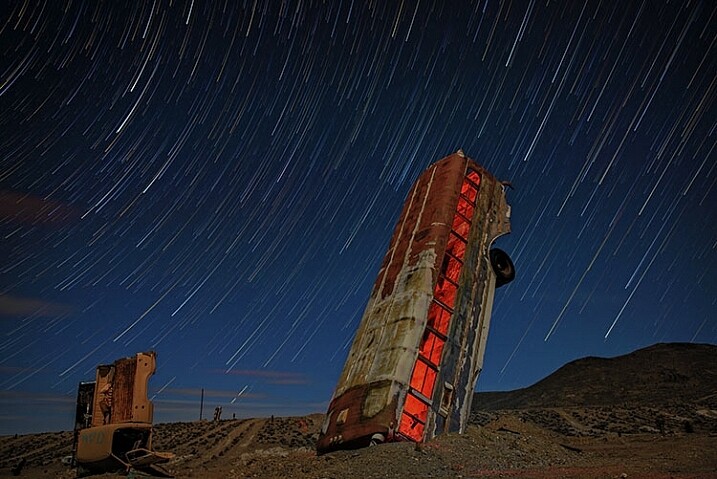
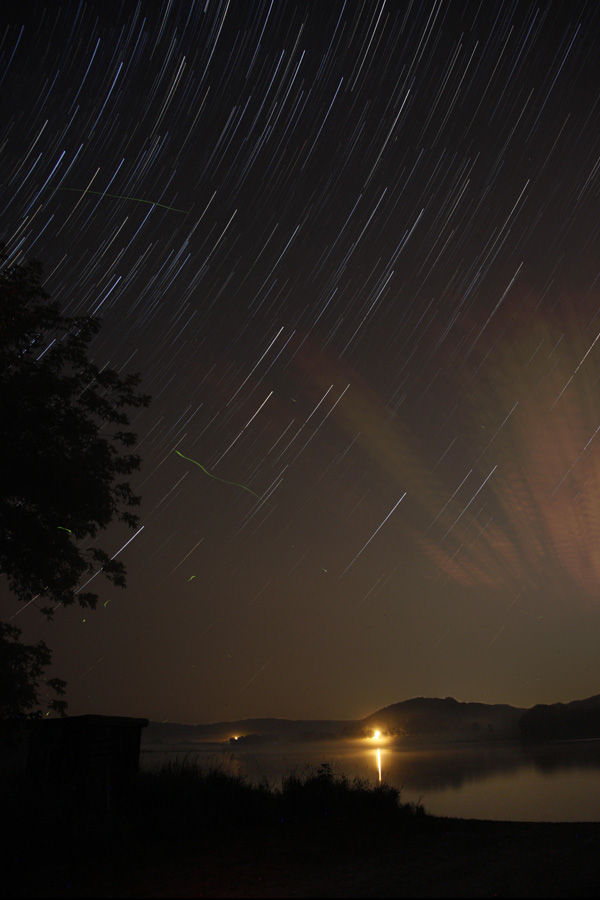
This image was created by merging 116 separate exposures in StarStax software in comet mode. Each exposure was 30 seconds, ISO 400 at f/2.8. A red LED flashlight was shone inside the bus for the first exposure.
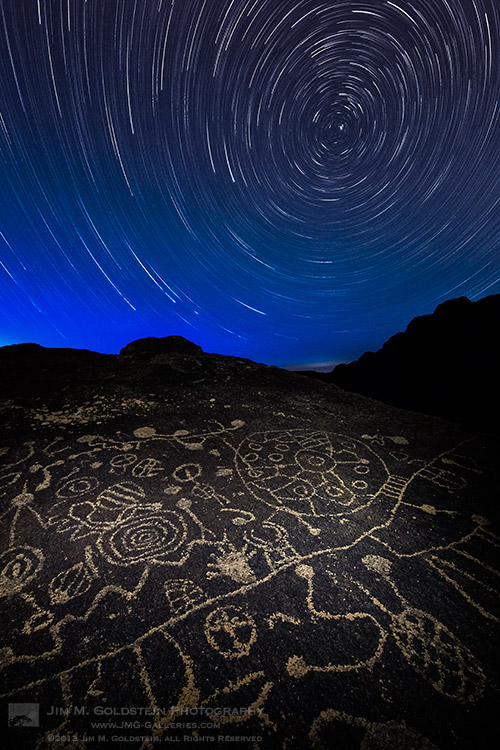
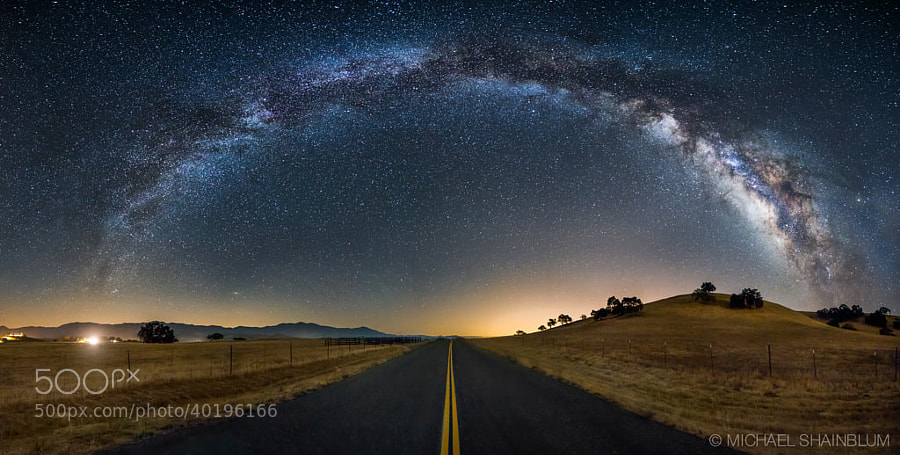
Once you’ve found your foreground, think about the direction you are facing. When facing north, star trails will form concentric circles. When facing away from the north, star trails will simply be slanted lines or arcs in the sky. Both can create interesting and awe-inspiring images.
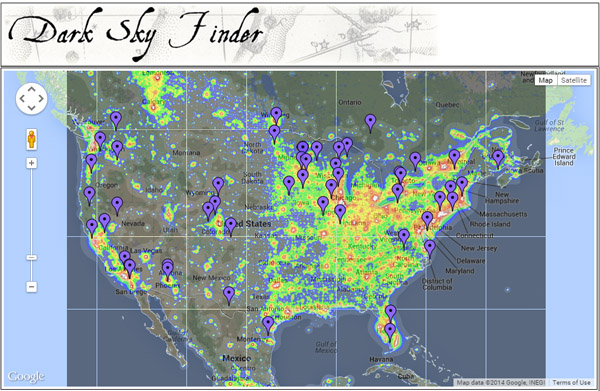
Now that you know you don’t have to put your camera away when the sun goes down, you need to find some dark sky to get the best results with star trails. The International Dark Sky Association has a great tool on their website to help you find the best places for night sky photography.
Show some of your best star trail images below!
googletag.cmd.push(function() {
tablet_slots.push( googletag.defineSlot( “/1005424/_dPSv4_tab-all-article-bottom_(300×250)”, [300, 250], “pb-ad-78623” ).addService( googletag.pubads() ) ); } );
googletag.cmd.push(function() {
mobile_slots.push( googletag.defineSlot( “/1005424/_dPSv4_mob-all-article-bottom_(300×250)”, [300, 250], “pb-ad-78158” ).addService( googletag.pubads() ) ); } );
The post Two Methods for Shooting Star Trails Made Easy by Rick Berk appeared first on Digital Photography School.


 What are Star Trails?


You must be logged in to post a comment.