I hate digital noise. I’ve been a stickler about keeping it out of my images for years and have tried just about everything under the sun to aid in that process. So when Macphun offered to send over their new Noiseless Pro app I jumped at the opportunity (especially after seeing the promo video for it).
Before we get started, let’s go over the basics of noise for those who are just dipping their toes in this area of post-processing. Noise is basically an unwanted side effect of shooting at high ISO levels or super long shutter speeds (long exposures). Without getting into photodiode leakage currents and other super-techy jargon, just know that noise is the little salt and pepper type specs that show up in your low light images.
Noise reduction is a give-and-take process, just like anything else in photography. It comes at a cost most of the time, and the cost is some amount of detail. Because of the way the noise reduction algorithms work, and because of the nature of high noise images, you just can’t remove noise without losing some of the sharpness in your photo. So the task at hand for software companies who want to tackle noise is to eliminate as much as possible, without screwing up the image and making it unusable.
Enter Macphun
 Macphun came onto the photography scene fairly recently; although only for the Macintosh users as evidenced by the first three letters of their name. Each app they have created comes in two versions: A simple, easy to use version that usually goes for around $ 20, and a pro version with more features that goes for around $ 60. With any software that has the word “pro” in it, I am going to expect it to perform at a pro level. So with that said, let’s go over some of the key features that I personally expect to see in a brand new noise reduction program, as well as how Noiseless Pro measured up.
Video Review
For those who prefer video content over reading, here’s a walkthrough of Noiseless Pro and how it stacked up to DeNoise from Topaz Labs with a couple different images. For those who prefer reading, or can’t watch the video at the moment, read on below!
Differences Between Noiseless and Noiseless Pro
Each product that Macphun offers comes in a basic version as well as a pro version. The base version of Noiseless is $ 17.99 and the pro version is $ 49.99. So what does the extra $ 32 get you?
Each version comes with all the algorithms that were created to reduce noise in your images, as well as advanced algorithms for smart phones and GoPro cameras. The pro version comes with a few extra noise reduction presets, Adobe RGB/ProPhoto color space support, a navigator view to easily peruse the image when zoomed in, more advanced controls in the Adjust panel, as well as the ability to use the app as a plugin with programs like Adobe Lightroom and Photoshop (this is how I use it).
So, in my opinion, it’s well worth the extra bit of cash to go with the pro version. Photo editing software has come down in price by leaps and bounds over the past several years, so $ 49.99 seems like a great deal to me.
Ease of Use/User Interface
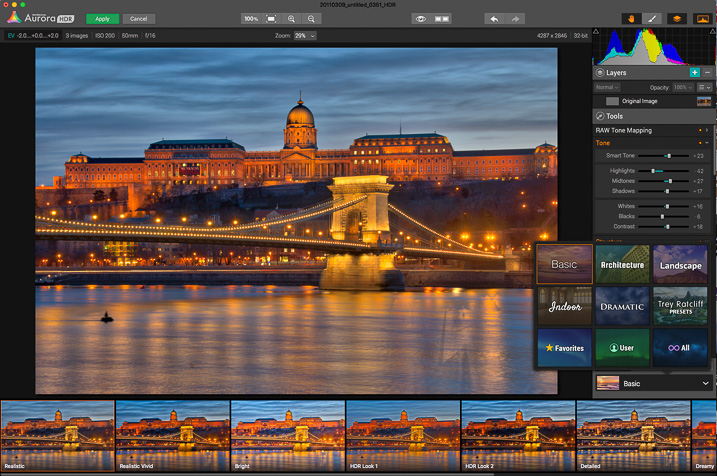
This is where all of Macphun’s programs shine. By targeting a Mac-specific audience, they had to kill it in the UI department, and they have with each product I’ve seen. The program is both incredibly fast and incredibly clean in its layout.
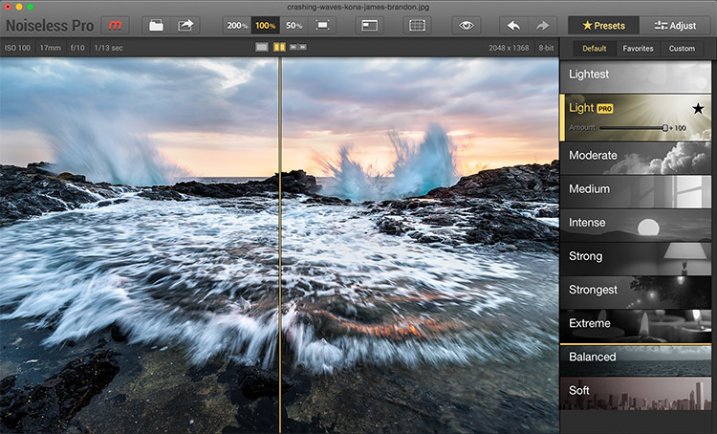
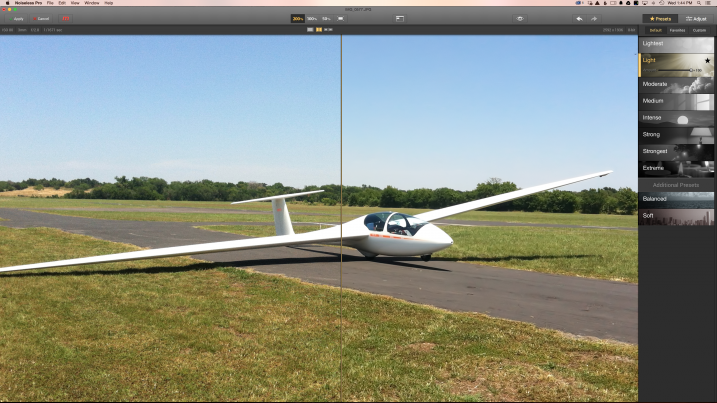
You can either drag an image right into Noiseless Pro, or you can use the program as a plug-in with Photoshop or Lightroom. The program opens immediately, and by default, opens up with the image zoomed in to 200%. This works well because it really lets you see what the noise looks like in the image, so you can see what needs to be done to combat it. It does throw you off a bit at first, but I think I like it.
From there, all you have to do is choose a preset on the right hand side (which couldn’t be easier). Just select the strength level that your image needs and make fine adjustments if needed. Each preset you select will have an “amount” slider appear once it’s been selected. Just use that to dial back the noise reduction strength if needed.
If you need to make even finer adjustments, just click the “Adjust” button up in the top right corner. Here you can adjust color noise, luminance noise, structure, details, etc.
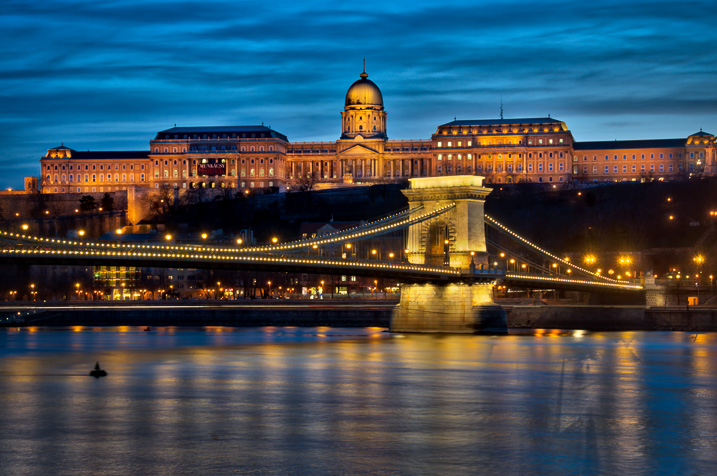
Clouds and Skies
This is where Noiseless Pro exceeded my expectations. It really does a great job at reducing noise while still managing to maintain some detail in your clouds. Skies are the main thing I use noise reduction on and this is an important tip to those who are new to the idea of reducing noise in your images: Never do it globally! This is the problem with noise reduction in programs like Lightroom. They apply the reduction to the entire image, sacrificing detail in every single pixel of your image. Sure, they have some sort of intelligence built-in to preserve some details, but you’re still make a global change to the image.
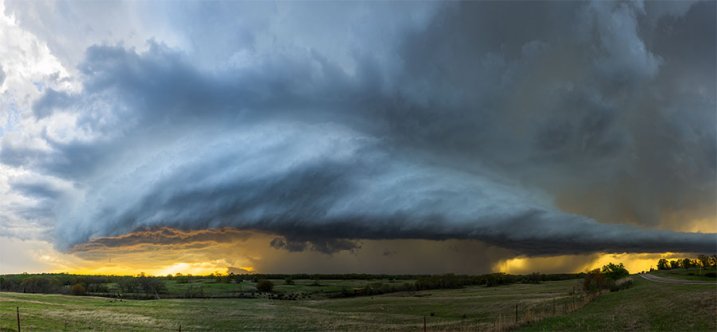
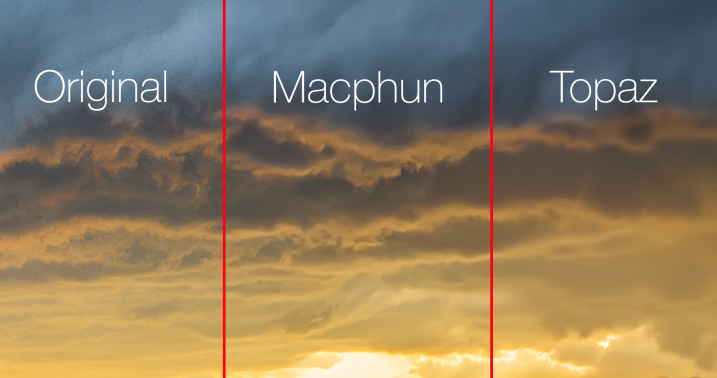
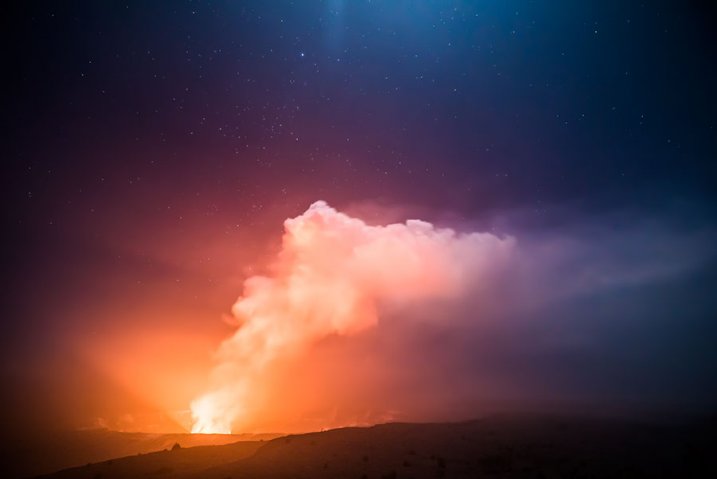
Using Noiseless Pro side by side against Topaz Labs DeNoise was pretty impressive. I’ve been using DeNoise exclusively for years now really wasn’t expecting Noiseless Pro to outperform it, or even come close. After all, Topaz has been in this game for years. However, after running the minimal amount of noise reduction necessary to get rid of the noise with both programs, I was stunned to see how much more detail Macphun retained in the clouds beneath the storm.
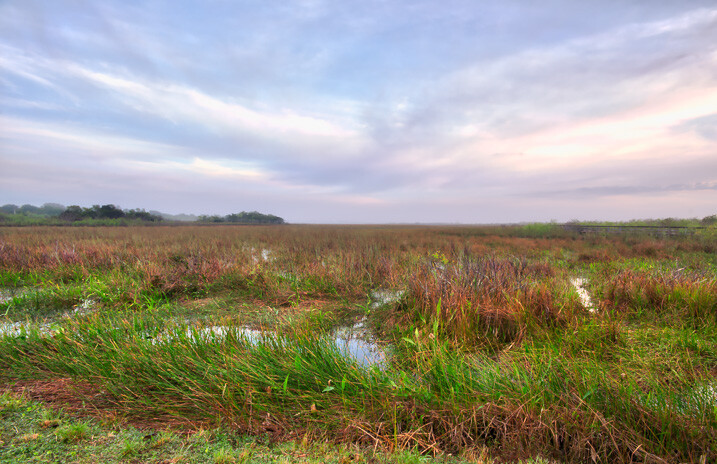
Landscapes
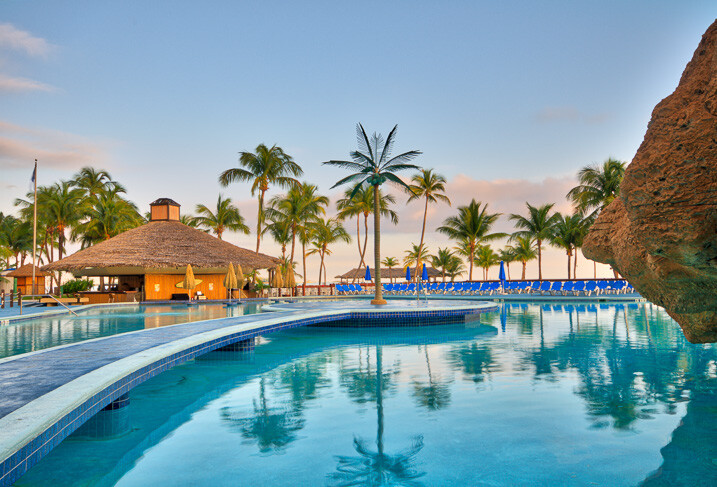
This is one of the less common areas where I apply noise reduction. It really just depends on the image, but if I’m going to reduce noise in a foreground area, it’s usually going to be a body of water, windows on a building, the finish on a car or some other kind of flat surface that should be smooth.
Noiseless did a great job in this area, and again, it’s so fast and easy to use. It literally just works like a breeze right out of the box.
Mobile Photography
One of the pro features mentioned in the marketing materials for Noiseless is “advanced algorithms for mobile photography.” I ran a few of my random mobile images through the program and it did seem to do pretty well. I think the biggest question here is, “Why?” I mean, it’s a nice feature and all but I doubt that personally will ever care enough about a mobile photo to reduce noise in it. That could of course change in the future, as our phones will likely continue to get closer to being capable of what our SLR’s do, but that’s not going to truly be the case any time soon (no, not even with the new LG phone that shoots RAW and offers manual controls). Of course, this is just my opinion.
Astro Images
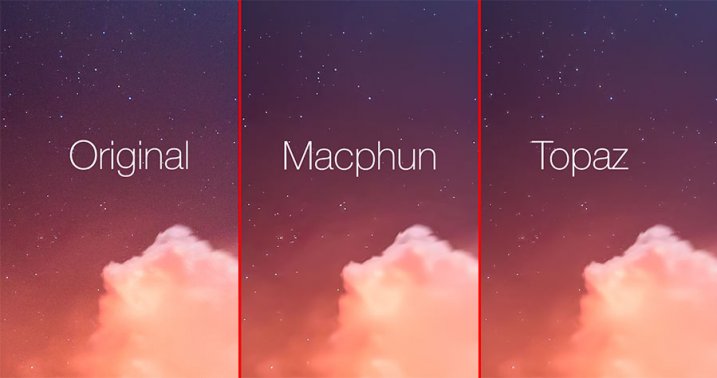
Well, every fairy tale has its villain and astro photography, unfortunately, seems to be the enemy of Noiseless at this point in the game. I was really bummed to see this, but it’s true. Here’s one of the high ISO images containing stars that I used.
Using Noiseless side by side with Topaz Labs DeNoise was pretty telling to say the least. But then again, Noiseless also did surprisingly better with clouds and skies. DeNoise seems to have something built into their software that detects the stars in an astro/night sky image and masks around them. Noiseless, on the other hand, just completely degraded the stars in every night sky image I threw at it. The good news is this is a known issue and one that has already been brought up to the team at Macphun by several other photographers/beta testers. Macphun seems to be a solid company with solid people running it, so I am pretty confident they will address this and create something for the astro photography community in a future iteration. Fingers crossed.
Conclusion
While Noiseless may not perform as well as I’d like with astro/night sky images, it has still found a home in my post-processing workflow, especially for images containing clouds (which tends to happen quite often with landscapes). I’m certainly looking forward to where this program goes in the future, and really hope they will incorporate some better algorithms to handle stars.
googletag.cmd.push(function() {
tablet_slots.push( googletag.defineSlot( “/1005424/_dPSv4_tab-all-article-bottom_(300×250)”, [300, 250], “pb-ad-78623” ).addService( googletag.pubads() ) ); } );
googletag.cmd.push(function() {
mobile_slots.push( googletag.defineSlot( “/1005424/_dPSv4_mob-all-article-bottom_(300×250)”, [300, 250], “pb-ad-78158” ).addService( googletag.pubads() ) ); } );
The post Macphun Noiseless Pro Software Review by James Brandon appeared first on Digital Photography School.

Digital Photography School


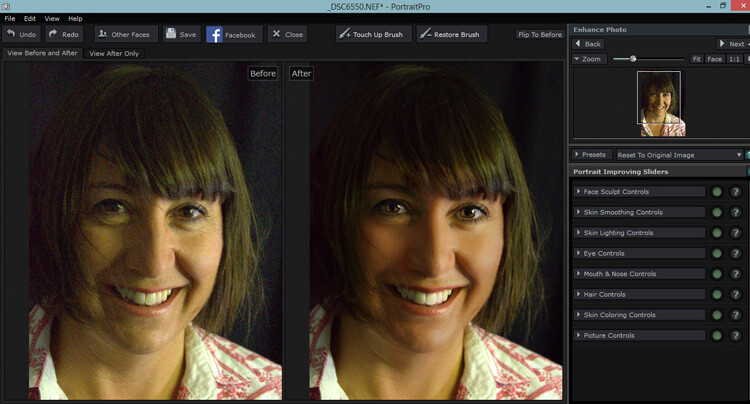
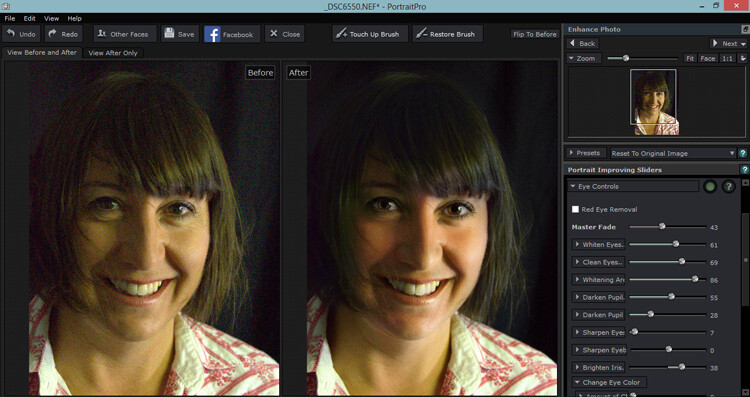
 Working mostly in fine art portraits I’ve never felt the need to try a retouching program. I like to keep a natural look, using Photoshop only for any minor retouching needed. I had looked into a retouching program briefly, but after clicking on a few sites I never got further than looking at the before and after samples. I always preferred the natural before image to the over processed, plastic looking after images. I want my subjects to look like themselves, in their best light of course, but not like some barbie doll cyborg with lifeless eyes.
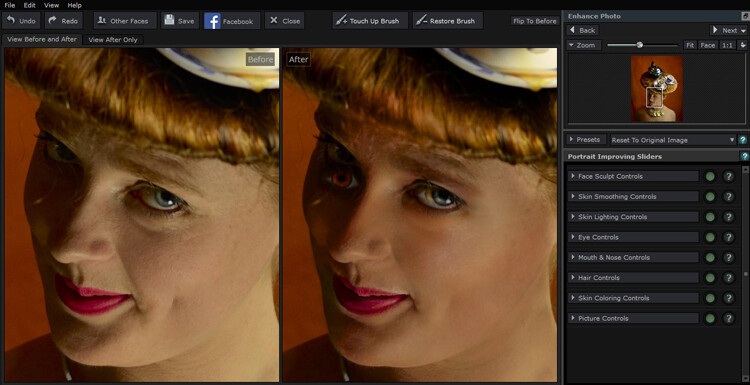
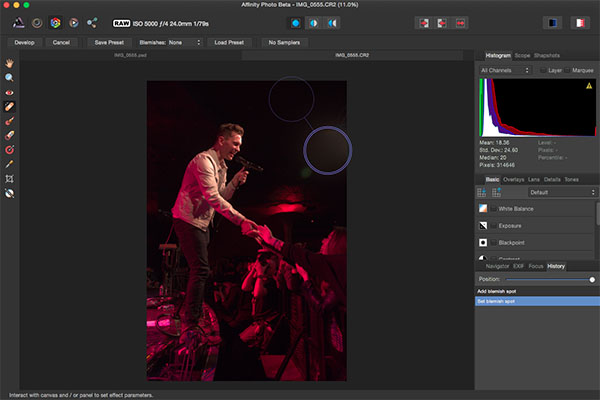
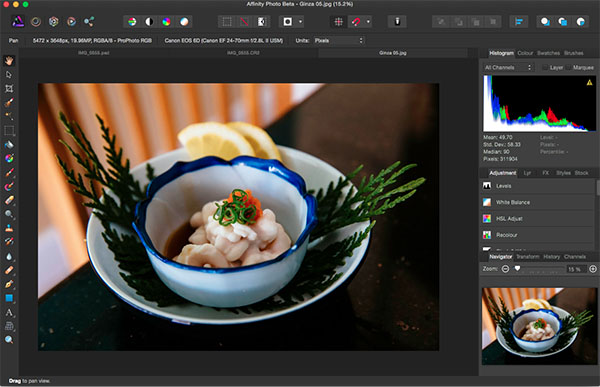
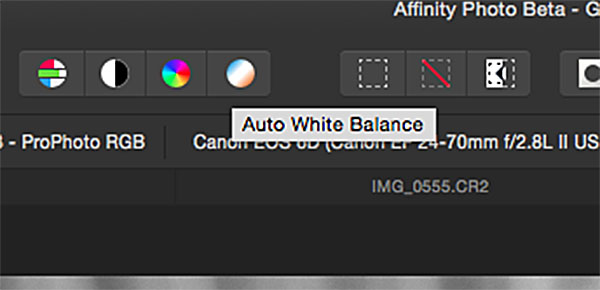
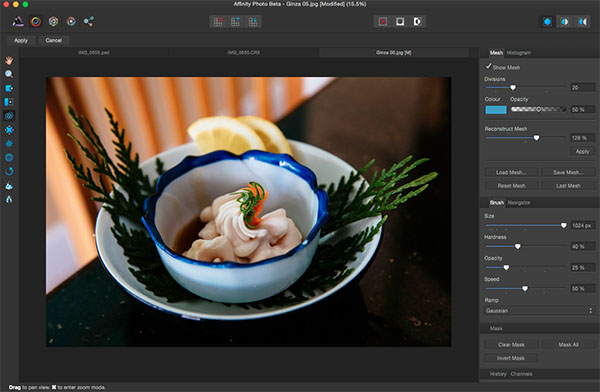
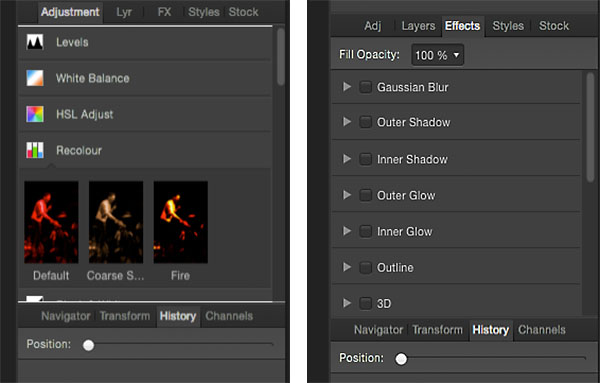
 At the moment, Affinity Photo beta is available as a free online download and is compatible with Apple OSX Lion 10.7.5, and up. Some key features that move Affinity up in the ranks include support for CMYK color, RAW file processing, 16-bit editing, 64-bit Photoshop plug-in compatibility, ICC color management, and LAB color. A few other noteworthy tools include Affinity Photo’s Inpainting feature, which is essentially the equivalent of Adobe content-aware fill, and real-time editing that will apply edits instantly without the need to render a preview.
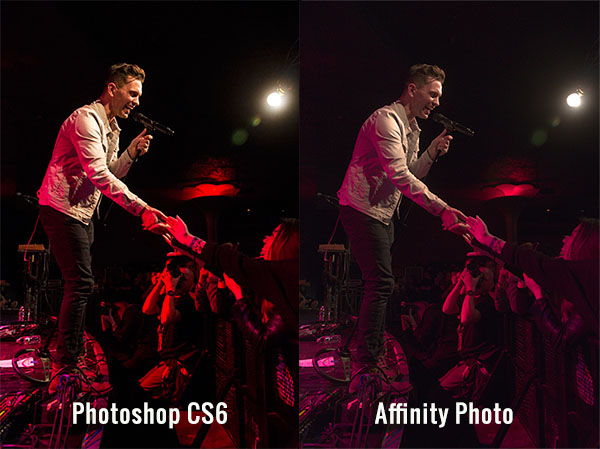
You must be logged in to post a comment.