When we are asked to think of popular subjects for landscape photography, images of beautiful sunsets immediately come to mind. What outdoor photographer worth his or her salt doesn’t have at least a couple of images of the sun dipping below the horizon? In most people’s minds, it is an easy thing to capture; the beauty and scale of the event itself should carry the photo, with minimal interaction from the photographer.
But is this really the case?
Unfortunately, it’s not. Unless you’re relying on luck alone, you’ll need to possess a few seeds of knowledge (eight in this case) to get you started in capturing that epic sunrise or sunset. None of these guidelines are difficult to comprehend, and can vastly improve your chances of properly capturing one of mother nature’s most incredible events.
1. Scout the Location
As tempting as it is to just show up at a convenient location and start shooting, you greatly increase your chances of success by planning the shoot in advance. The first thing you’ll want to determine is the best location from which to shoot.
Pick a location that is out of the way of road and foot traffic, where you’re unlikely to be disturbed. Go to the location in broad daylight before the shoot, and ensure your view of the horizon will be unobstructed and free of any hazards.
The most important factor after the location is time of the day. Obviously, this will vary depending on whether you’re capturing a sunrise or a sunset. Is there a storm coming? If your shooting time coincides with an approaching or recently-ended storm, the results can be staggering. Rain and storm clouds can add a dramatic layer of dimension to the scene.
Lastly, you can pinpoint the perfect time to shoot by using an online tool or smartphone app to determine precise sunrise and sunset times for your exact location. Many low-cost (and sometimes free) solutions are out there, including SunSeeker, Daylight Free, and the excellent Photographers Ephemeris to name a few.
2. Sunrise, or Sunset?
If you’re familiar with color temperature, you’ll know that there is a slight difference in the appearance of light at sunset versus what you’ll see at sunrise. Early morning light tends to be cooler (higher blue) than light in the late evening, which leans toward more warm color castings consisting of orange and red.
Since we know there are differing color temperatures at work here, you might need to adjust for this, depending on what feel you’re going for, either through warming or cooling filters, or adjustments in post-production to add or remove warmth into the color profile of the final photograph.
Be aware that physical filters used on your camera will degrade image quality slightly, due to the addition of another obstacle for light to pass through between your subject and your camera’s sensor
3. Plan your Shots
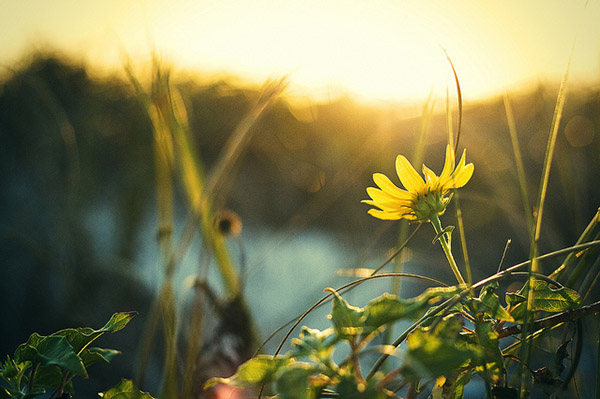
Another important step to accomplish before heading out is to plan out what you hope to achieve in the photo. What look are you going for? Is there a definitive subject lit by the sunlight, or will the sunset itself be the star of the show?
This is also a great time to determine any other special considerations, such as the possibility of shooting an HDR (High Dynamic Range) photo. If that’s the case, you’ll need to prepare your camera for bracketed exposures to capture the full range of tones in the scene. Since these type of scenes normally consist of bright spots and shadows, this is a great way to produce some truly dramatic images.
4. Gather the Proper Gear
Obviously you can’t capture the right shot without the right gear; so make sure you have it all ready to go before you head out. First and foremost, you’ll want to bring your tripod. Sunrises and sunsets are potentially low-light situations (depending on what part of the sunset you’re trying to capture), so you want a steady base for your camera.
Secondly, you’ll want to determine what lens to use for the shot. Even though beautiful landscapes can be captured using a 35mm or 50mm focal length (for sensors with a 1.6 crop factor – 56 to 80mm on a full frame system), a wide angle lens is preferred, including any zoom lenses that can capture a length of 25mm and below (40mm on a full frame system). If you have a prime lens at these lengths, you will have a better chance of catching an even sharper image. Using a wide angle lens will allow you to capture a more vast, sweeping portion of the scene.
Do you own and use screw-on filters for your camera?
Although using filters can degrade image quality a bit, due to the addition of another obstacle for light to pass through between your subject and your camera’s sensor, there are some that could be useful here, such as a GND (graduated neutral density) filter, to darken the upper portion of the sky a bit. Filters such as UV (ultraviolet) or polarizing filters may actually be a hinderance in these situations, and should be avoided. These filters reduce the amount of light coming in to the sensor, further increasing the required exposure time, which may not be idea if you’re trying to freeze any motion in the shot.
5. Use the Right Settings
Another item that can be set up before you arrive to your shoot is the settings on the camera itself.
Since you’re shooting landscape, you’ll want to use a smaller aperture such as f/8, f/11 or even higher to maximize the depth of field and capture a sharp image throughout. If you’re using a tripod, this isn’t a problem.
Although shooting in manual mode is the norm here, to allow for minor changes in exposure compensation, I prefer to shoot almost everything in A/Av (aperture priority mode). This way I can lock in my aperture and let the camera choose a proper shutter speed. Since low-light situations like this can confuse the camera and you run the risk of overexposure, you can use your camera’s exposure compensation settings to fine-tune the exposure a bit lower.
A low ISO should also be used such as 100 or 200, to ensure there isn’t a lot of noise in the final shot. Again, with a tripod this isn’t an issue, but if you’re hand-holding for the shot, you will need to bump the ISO up to get a shutter speed that’s fast enough to avoid a disappointingly blurry photo.
Another useful trick to increase warmth in your final shot is to set WB (white balance) to the “sunny” or “cloudy” setting instead of “auto”. Although you can certainly add warmth in post-processing, your initial image from the camera will be warmer if you make this adjustment now.
And of course, ALWAYS shoot in RAW! To a certain extent, shadows and highlights that are lost in a shot can be recovered in post-processing later.
6. Compose for Interest
Alright, the preparation is over, now we get to the fun part! Once you’re on location, and are ready to take the shot, you’ll want to make considerations for composition.
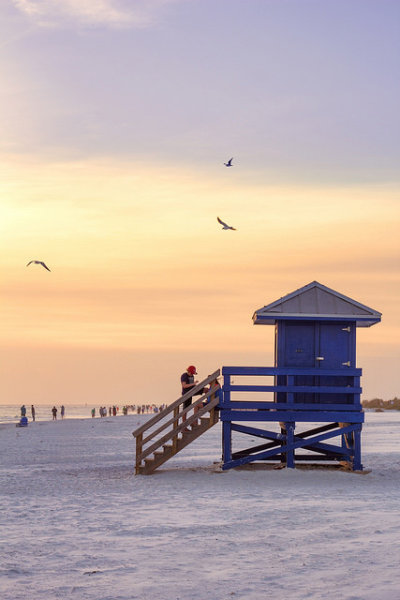
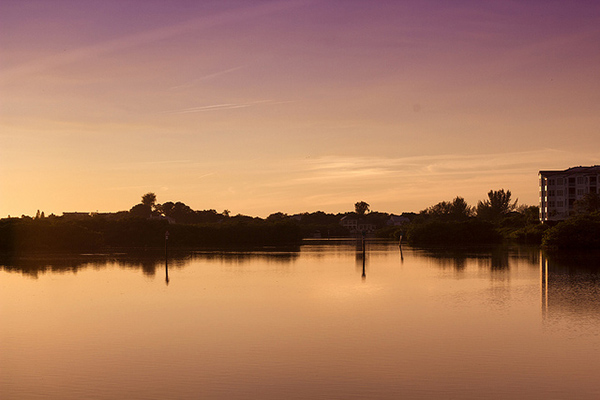
The most common error in shooting sunsets or sunrises is composing the horizon exactly in the middle of the photo. While this can work in some cases, it normally causes a bit too much symmetry and can make the picture uninteresting.
Take a moment to look the scene over; what part is the most dramatic? Are there any parts that aren’t as interesting of a focus?
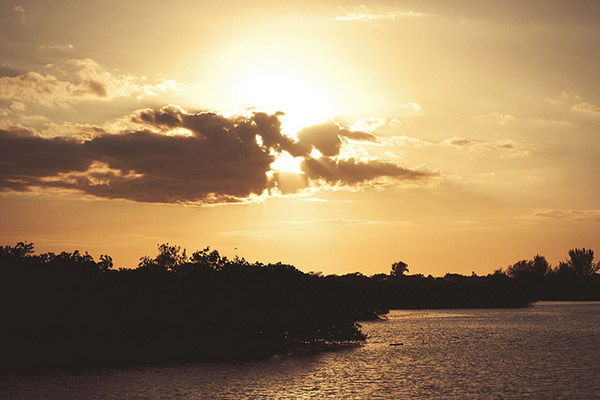
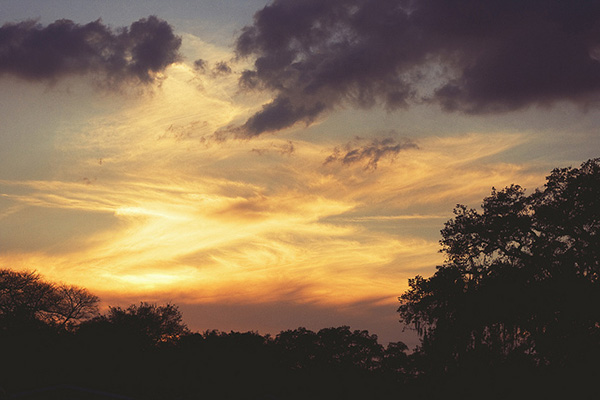
Once you have identified that, simply compose the shot to include more of the most dramatic scenery. If you have an angry, cloudy sky that accentuates the sunlight, let that occupy the upper 2/3 of the scene. If you have an interesting foreground or landscape below the sun, and a less-intriguing sky, let that occupy the bottom 2/3 of the image. You want to draw the viewer into the horizon, and then let their eyes drift to the most dramatic part of the image.
7. Waiting for the Right Shot
If you already have experience shooting landscapes, you know that sometimes waiting is the name of the game. Because of the dynamics of natural lighting, a scene can completely change from one hour to the next, and sometimes even one minute to the next.
Now is the time to be creative! Try different exposure times, play with your exposure compensation settings for different tones. Let the clouds and sun change positions, and reshoot, or try a slightly different angle.
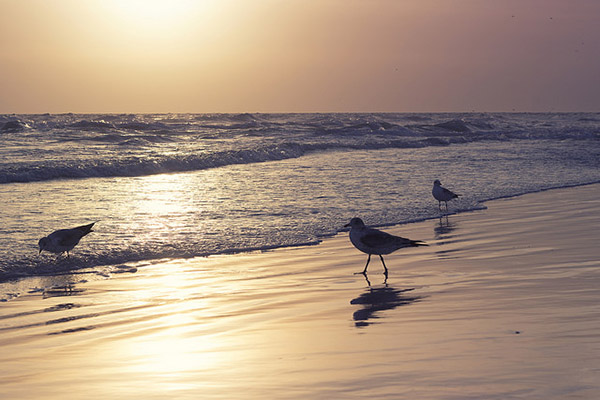
Maybe even allow different subjects to come in and out of frame, and shoot them in the foreground against the sunrise or sunset. The longer you’re at the location shooting, the more variety of shots you’ll end up with.

8. Don’t Leave Too Early
Lastly, one of the most common things you’ll hear about capturing sunsets, in particular, is to stick around after the sun dips below the horizon. This is certainly true, as the entire dynamic of a scene changes at this point.
Tones, colors and hues in the sky usually become more saturated and dramatic. You’ll need to allow for the loss of your main source of light, but it’s hard to deny some of the most beautiful images can be shot right after the sun is out of sight.
The post 8 Simple Guidelines for Capturing Spectacular Sunrise and Sunset Images by Tim Gilbreath appeared first on Digital Photography School.


You must be logged in to post a comment.