RSS
 

Posts Tagged ‘Shooting’

Mountain Magic: Shooting in the Lofoten Islands

14 Jul

Way up in Norway’s arctic northwest lies a small, yet incredibly beautiful and diverse archipelago, home to some of that country’s most magical landscapes and a truly wonderful winter atmosphere. Photographer Erez Marom shares his experience of shooting in the Lofoten Islands in Arctic Norway, from a traditional fishing village to mountains and ice-covered lakes. Learn more

Articles: Digital Photography Review (dpreview.com)

 
Comments Off on Mountain Magic: Shooting in the Lofoten Islands

Posted in Uncategorized


Android L to feature Raw shooting and added manual camera controls

09 Jul

Details were thin from Google I/O last week about Android’s plans for camera updates in its next OS release. Now with a developer preview of the new OS available, more information has emerged about what we can expect from Android’s camera capabilities. Raw image capture is on the way, along with additional manual exposure controls. Read more

Articles: Digital Photography Review (dpreview.com)

 
Comments Off on Android L to feature Raw shooting and added manual camera controls

Posted in Uncategorized


Shooting Experience: Panasonic Lumix DMC-FZ1000

09 Jul

Panasonic’s latest superzoom camera, the Lumix DMC-FZ1000 offers a highly attractive feature set. Based around a 25-400mm equivalent zoom and a large 1″-type CMOS sensor the FZ1000 combines a very useful zoom range with excellent image quality in stills and video mode. We’re working our way through a full review right now, and we’ve just added a shooting experience page to our detailed first-impressions review. Read more

Articles: Digital Photography Review (dpreview.com)

 
Comments Off on Shooting Experience: Panasonic Lumix DMC-FZ1000

Posted in Uncategorized


Android L to feature Raw shooting and added manual camera controls

02 Jul

Details were thin from Google I/O last week about Android’s plans for camera updates in its next OS release. Now with a developer preview of the new OS available, more information has emerged about what we can expect from Android’s camera capabilities. Raw image capture is on the way, along with additional manual exposure controls. Read more

related news: Digital Photography Review (dpreview.com)

 
Comments Off on Android L to feature Raw shooting and added manual camera controls

Posted in Uncategorized


Sony Cyber-shot DSC-RX100 III shooting experience

09 Jun

RX100-III_Right-1200.png

Our first impressions review of the Sony Cyber-shot RX100 III just keeps growing. The latest aims to answer one of the most important questions potential owners ask about a camera – ‘What’s it like to use?’ With promising specifications like a 20 megapixel 1″-type sensor, a fast 24-70mm equiv F1.8-2.8 Zeiss-branded lens and a pop-up EVF, the RX100 III looks excellent on paper. Does that hold up in real-world use? Read more

News: Digital Photography Review (dpreview.com)

 
Comments Off on Sony Cyber-shot DSC-RX100 III shooting experience

Posted in Uncategorized


Tips for Shooting and Processing Better Black and White Photographs

01 Jun

Photography, as you know, is fundamentally the capturing of light; you are not taking pictures of objects as much as you are recording the light that is bouncing off of them. In the early days of photography, the only medium available to capture this light was monochromatic film, commonly known as black and white. In the 1930s, the invention of Kodachrome, the first successfully mass-produced color film, ushered in an age of color to the art form.

Bw article3 NEW

Instead of fading away, however, black and white photography remained throughout the birth of color, and even increased in popularity in the following decades, due to its simplicity and ability to display tones more dramatically than color usually can.

What makes black and white photography retain its timelessness? A compelling picture is always based on the same fundamentals; lighting, tonal range, shapes, patterns and textures. A black and white photo breaks these fundamentals down to their basics, and is not hindered by the distraction and complexity that color can sometimes contribute. It is truly an art form. The reality of a scene depicted in color is transformed into an artistic interpretation when shown in shades of grey.

So what do you need to understand in order to produce a great monochrome photo?

Visualize in Black and White

One of the most helpful things you can do is something that takes place before you even click the shutter button. Training yourself to envision a scene in black and white will help determine if it will work in that state, or if it would be better left to color. Since you won’t have color in the final shot, you’ll need to visualize the core of the scene instead:

  • How is the light behaving on the objects in the scene?
  • What forms are involved?
  • Are there lights, darks, and shades in between, giving you a good tonal range?

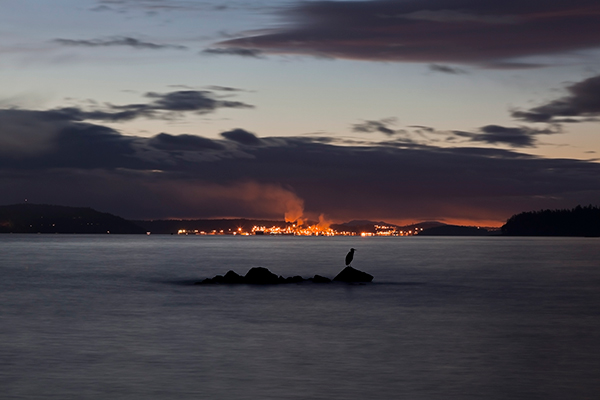
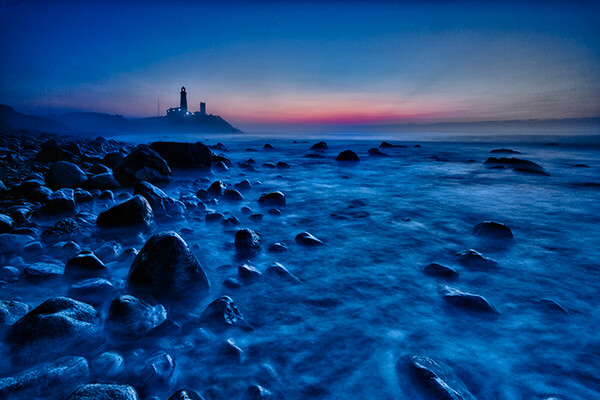
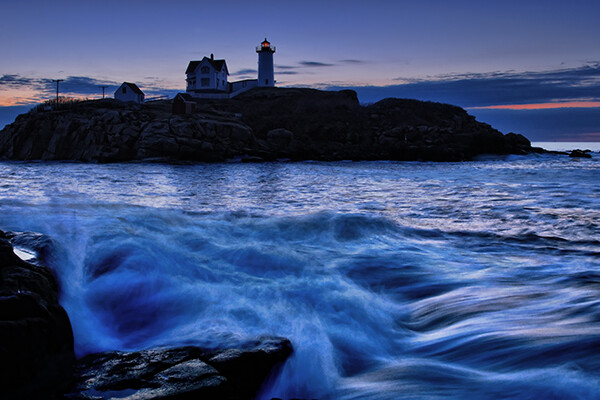
Scenes that contain contrast and texture will usually provide a good end result when converted to black and white. Fortunately, you can apply monochrome to almost any type of photography, including landscape, portrait, and street photography. The resulting feel of the image depends on the subject; landscape shots of the ocean will have more highlighted textures of the waves, and street portraits done in black and white can have a grittier, more dramatic feel.

031814 siestaguarshack2 sized

Taking the Shot

Many of the basic principles of photography apply when shooting for black and white as well. You’ll need to compose the scene properly, utilizing the rule of thirds where applicable, and properly expose the shot. As always, you’ll want to shoot in RAW, so that any necessary adjustments can be made such as exposure and levels before you begin post-processing.

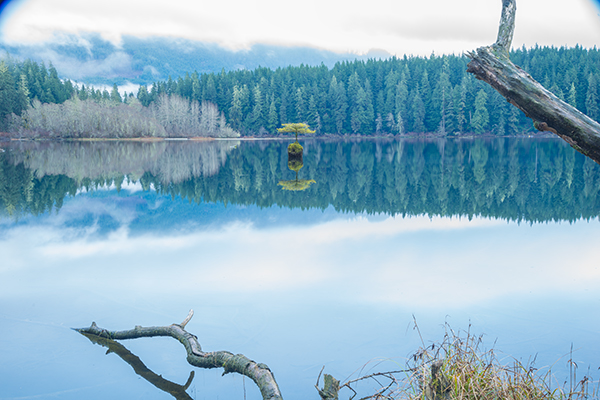
When composing, pay special attention to the lines and shapes in the image. These components are even more important when the photo is desaturated.

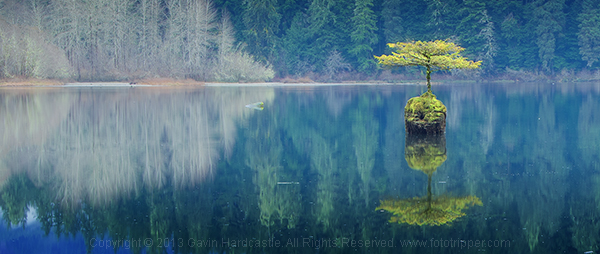
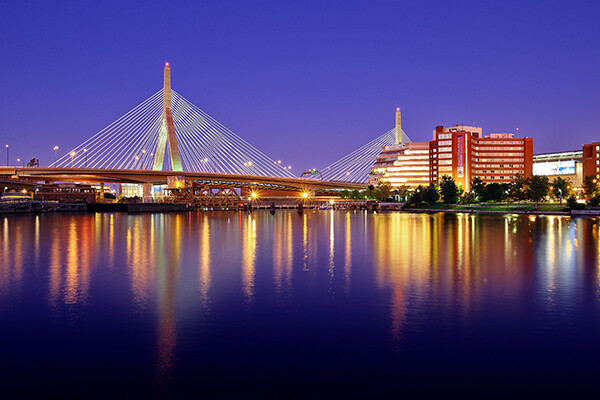
Finally, you may benefit from using a polarizing filter. This lens attachment will reduce, or remove, reflections that may be apparent in water or other shiny surfaces. Since these reflections could take away focus from your subject matter, it’s best to do this during the shooting process rather than post-production.

040613 siesta feet sized

Post-production

The most important step in this process is actually converting the shot into black and white. While almost all DSLRs have the ability to shoot in black and white initially, you’re losing an important advantage; the photo will permanently be monochrome. Photographers sometimes think that a poor image can somehow be “saved” by being converted into black and white; this is not always the case. If you shoot in JPG format and the black and white (monochrome) setting on your camera, you’ll be producing a black and white JPG image, and lose the ability to convert to color or take advantage of RAW adjustments. BUT if you shoot in RAW in this mode you will still have all the colour data but have the advantage of seeing a black and white preview on the camera screen.

Black and white conversions in an image editor such as Photoshop can usually be categorized in two ways; destructive, and non-destructive. Obviously, destructive methods actually modify pixels and cannot be easily adjusted. Converting directly to greyscale is a long-used example of this method. Preferably, you want to use a non-destructive method that will allow you to make continued adjustments to the image until you have the tone and shading desired.

The easiest method (and the one that I prefer) is to use the Hue/Saturation/Luminosity tab in the RAW importer in Photoshop (the HSL panel in Lightroom also does the same thing). Alternatively, you can accomplish the same thing (albeit with a bit less control) by using a Channel Mixer adjustment layer after you’ve imported the RAW file into Photoshop.

Converting to Black and White with the RAW HSL Controls

Not only does this method offer more control than simply desaturating the image, it keeps the color profile loaded into the RAW (.CR2) file, allowing you to reopen and adjust it as you see fit. To convert using this method follow these steps:

  • Select the RAW file you wish to convert and open it. The file will open within Adobe’s RAW import dialog.

Bw article ps1 FINAL

  • Click the HSL/Greyscale tab on the right side of the dialog box (this should be the 4th tab).

Bw article ps2 FINAL

  • Tick the “Convert to Greyscale” box.

Bw article ps3 FINAL

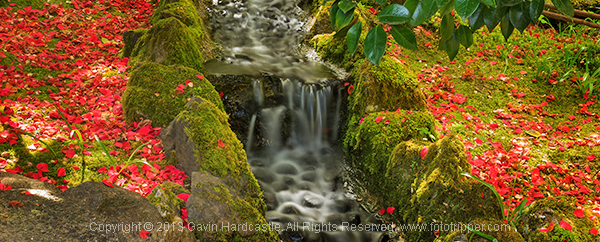
  • You will be presented with eight color sliders. Adjust these sliders individually (ensure the “Preview” checkbox is ticked near the top) to see real-time changes in those color channels, and how those changes impact your desaturated image. With a color image, moving the “yellow” slider would modify the yellow in your image, but here, it will make the portions of the image that were yellow change in shading, either lighter or darker depending on which direction the slider is moved.

Bw article ps4 FINAL2

That’s it, you’re all done. Few accomplishments in photography are as satisfying as producing a well-done black and white image. You have discarded color, and envisioned your story instead with shapes, lines, shadows, and textures. You’ve opened up a new world of imagery to yourself, and exponentially expanded your repertoire.

Now…what will you do with it? Share in the comments below if you have anything to add or would like to show us your new black and white images.

The post Tips for Shooting and Processing Better Black and White Photographs by Tim Gilbreath appeared first on Digital Photography School.


Digital Photography School

 
Comments Off on Tips for Shooting and Processing Better Black and White Photographs

Posted in Photography


Freewheeling: Shooting roller derby with Micro Four Thirds

31 May

P2150779-2.jpg

Roller derby is a bit of an unconventional sport, so it’s fitting that James McDaniel uses a somewhat unconventional system to photograph the action. He’s been shooting roller derby with Micro Four Thirds cameras and lenses for the past couple of years. With no formal training in sports photography, he found himself with some exciting new equipment and an opportunity to photograph a fast-paced sport up close. He hasn’t looked back since – see his work and read our Q&A. Read more

News: Digital Photography Review (dpreview.com)

 
Comments Off on Freewheeling: Shooting roller derby with Micro Four Thirds

Posted in Uncategorized


No Telephoto Lens No Problem – Tips on Shooting for the Crop

22 May

shoot-for-the-crop

Maybe your photos are better than you think. Perhaps all you need to transform your images into keepers is to simply cut out the dead wood and get ruthless with the crop tool. While I’m not against getting your shot perfect ‘in camera’, I do believe that cropping like a boss during post-production can turn a ‘meh’ shot into a ‘whoa’ shot just by carefully placing those marching ants in Adobe Camera Raw and hitting ‘crop’.

Why limit yourself to a mediocre image when there’s a little hidden gem inside your average shot, waiting to be teased out like a gleaming pearl?

Get closer after the fact

Here’s an example of a cropped shot with the full frame shot below it. During the shoot I was happy with the original composition (below), but after studying the shot at home I decided that the scene needed to be more intimate, so in I went with the scissors of brutality.

Vancouver Island Waterfall Landscape Image Crop - Gavin Hardcastle

Cropped version

How to Shoot for the Crop

Full image uncropped

Tell the story

When your image has an obvious story, it’s often wise to cut out any non-essential space to ignite a more immediate reaction in your audience. By discarding all distractions, you’ll direct their attention to what matters most. With the image below, I wanted to portray the resilience of nature under the menacing specter of toxic pollution. I knew I had the shot but the story had much more impact after I’d cropped out all of the wasted space in my image. Ideally I would have used a longer lens to achieve the same result but all I was carrying at the time was a 24-105mm and there was no way I was going to let that stop me. Shoot, crop, done, breakfast.

'Held To Ransom' by Gavin Hardcastle

held-to-ransom-full-gavin-hardcastle

Use your megapixels

You’ve doubtless heard grumpy old fossils whine on about why big megapixels are pointless unless you’re printing wall sized prints. I’m here to tell you that’s a load of old codswallop. Try cropping out a small section of a 16 megapixel image and let me know good it looks at the full size of your computer screen. Lacking in resolution, hmm? Well I guess it depends on the size of your crop, but chances are things are starting to look a little crusty if you’re not packing some heat in the megapixel department. Size, as they say, does matter.

Here’s another example of using my megapixels to get closer to my subject. As you can see from the full frame image below the crop, I made no attempt at composing a foreground because I knew I’d be cropping out everything but my main subject – the magic tree of Fairy Lake on Vancouver Island. You can even see a hideous vignette in the full frame shot caused by the polarizer rig. Crop, done, lunch.

gavin-hardcastle-fairy-lake-port-renfrew-vancouver-island-crop

gavin-hardcastle-fairy-lake-port-renfrew-vancouver-island-full

If you can’t afford a big telephoto lens but have a good quality wide-angle lens and a decent megapixel count, it’s still worth taking that shot of the bird on the other side of the lake. You can crop it later and possibly come away with a keeper. Sometimes it’s not even the cost of long lenses that puts people off using them, it’s the chiropractors bills that come from dragging them around. That being said, a top notch telephoto lens creates a specific look and for serious wildlife shooters it’s a must-have lens. This isn’t an anti-telephoto article so don’t be leaving angry comments.

A second chance at composition

When you’re familiar with a location and you’ve shot there many times before, it’s easy to plan your compositions long in advance. But what if it’s your first time and you’re shooting under pressure? Sometimes you get lucky, but sometimes you won’t spot the perfect composition until you review your images back at home on a full size computer screen.  That’s when cropping will give you that second chance at getting the perfect shot.

Butchart Gardens Vancouve Island Gavin Hardcastle

Teach yourself composition

I’m always telling my students that you can learn a huge amount about composition simply by reviewing and editing your images. Try and find two or more new compositions that are hiding in plain site right there in your existing images. This simple process teaches you a lot about balance, symmetry, framing, leading lines and whatever other compositional elements are right there in your images. Spend enough time doing this and you’ll become a better photographer when you’re out shooting. When cropping, you can start by asking yourself a few essential questions:

  • What is the main subject of my image?
  • What parts of the image do I love?
  • What parts of the image do I not like?
  • How can I focus the viewers attention?
  • What can I exclude?

By answering these five simple questions you’ll quickly identify the strongest parts of your image and transform them from stale, forgotten megabytes, into beautiful memories you can share with the world. I hope you found this article helpful and please, get cropping and then share your best cropped images with me, I’d love to see your results.

grand-canyon-crop

The post No Telephoto Lens No Problem – Tips on Shooting for the Crop by Gavin Hardcastle appeared first on Digital Photography School.


Digital Photography School

 
Comments Off on No Telephoto Lens No Problem – Tips on Shooting for the Crop

Posted in Photography


Wildlife photographer Florian Schulz offers shooting tips

12 May

Screen_Shot_2014-05-09_at_12.16.48_PM.png

Known for his conservation projects such as Freedom to Roam, a photographic project designed to encourage the creation of wildlife corridors, photographer Florian Schulz offers some tips and advice for shooting landscapes and wildlife in this six minute video. Learn more

News: Digital Photography Review (dpreview.com)

 
Comments Off on Wildlife photographer Florian Schulz offers shooting tips

Posted in Uncategorized


Sweeten Your Photos by Shooting During the Blue Hour

09 May
Montauk Point, NY. EOS 5D Mark II with EF 17-40 f/4L. 15 seconds at f/11, ISO 800.

Montauk Point, NY. EOS 5D Mark II with EF 17-40 f/4L. 15 seconds at f/11, ISO 800.

There is a period of time each day, just before sunrise and just after sunset, when the sun is below the horizon, when the light is known as “sweet light.” This period of time is known as “The Blue Hour.” This is a period of time each morning and evening when there is neither full daylight, nor full darkness. The light is almost ethereal, with a soft blue glow bathing the scene. The Blue Hour happens in tandem with the Golden Hour, making the beginning and end of the day exceptional for photography, providing two very different types of light within a single time span.

Equipment and settings

The Blue Hour is a prime time for landscape photography. Subjects that have their own lighting, such as city buildings or lighthouses, tend to look especially good, as the yellow glow of their lights cuts through the blue.  A tripod will be necessary to capture these scenes, unless you’re willing to raise your ISO to the point you can hand hold your exposures.  Setting a proper white balance is one of the keys to Blue Hour photography.  When set to AWB (auto white balance), the camera will try to correct for the blue tone the light has, which can result in flattening your image. If you shoot RAW, you can correct for this in pos- processing, to get just the right white balance for your taste. If you’re a JPEG shooter, you may want to try setting a custom white balance, or you can use your camera’s Live View setting to preview what different white balance settings will do to the scene.

Boston's Zakim Bridge. EOS-1D Mark III with EF 24-105 f/4L IS. 30 seconds, f/11, ISO 100.

Boston’s Zakim Bridge. EOS-1D Mark III with EF 24-105 f/4L IS. 30 seconds, f/11, ISO 100.

I prefer the time during the Blue Hour when the sun is close enough to the horizon that there is a soft orange glow along the horizon. This adds an extra quality to the image, especially when you consider that orange is blue’s complementary color.  You may want to bracket your exposures, as this will vary the intensity of any light in the image, be it the orange glow remaining from the sun, or artificial lighting on buildings.  Blending exposures for HDR images may not be necessary, but it will be possible if you use a tripod and decide to try some HDR.

Cannon Beach, Oregon. EOS 5D Mark III with EF 24-70 f/2.8L II. !20 seconds, f/11, ISO 640.

Cannon Beach, Oregon. EOS 5D Mark III with EF 24-70 f/2.8L II. !20 seconds, f/11, ISO 640.

The window of opportunity for Blue Hour shooting is small, and probably much shorter than during the Golden Hour. You’ll want to be at your spot ready to go well in advance of the Blue Hour. To plan your time, you can visit The Blue Hour Site to find out when the Blue Hour starts and ends at your location.  If you don’t have access to the internet, a good rule of thumb is that the Blue Hour starts about 15 minutes after sunset, and ends around an hour after sunset.  For sunrise, it will start roughly an hour before sunrise and end 15 minutes before sunrise.  When I plan to shoot landscapes, be it at sunrise or sunset, I always plan to shoot both the Golden Hour and the Blue Hour.  I tend to get a lot of variety due to the change in light, and it makes the time spent that much more worthwhile.

Pemaquid Point, Maine. EOS 5D Mark II with TS-E 17mm f/4L. 8 seconds, f/11, ISO 400.

Pemaquid Point, Maine. EOS 5D Mark II with TS-E 17mm f/4L. 8 seconds, f/11, ISO 400.

Boston Skyline. EOS 5D Mark II with EF 24-105 f/4L IS. 1 second, f/11, ISO 100.

Boston Skyline. EOS 5D Mark II with EF 24-105 f/4L IS. 1 second, f/11, ISO 100.

Cape Neddick, Maine. EOS-1D Mark III with EF 17-40 f/4L. 0.4 seconds, f/8, ISO 400.

Cape Neddick, Maine. EOS-1D Mark III with EF 17-40 f/4L. 0.4 seconds, f/8, ISO 400.

_MG_0306

Please share your Blue Hour photos and comments below.

The post Sweeten Your Photos by Shooting During the Blue Hour by Rick Berk appeared first on Digital Photography School.


Digital Photography School

 
Comments Off on Sweeten Your Photos by Shooting During the Blue Hour

Posted in Photography